
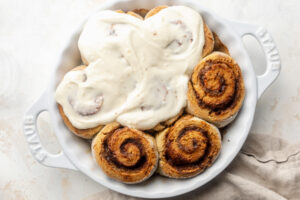
These homemade gluten-free cinnamon rolls creates deliciously sweet and fluffy buns with pull-apart edges and a soft cinnamon sugar center. With a perfectly tender texture, these cinnamon rolls are sure to be a hit, great for Christmas brunch or any special occasion and can also be made dairy-free!
Maybe I just have a sweet tooth, but I don’t know if there’s anything better than homemade freshly baked cinnamon rolls fresh out of the oven! These gluten-free cinnamon rolls are tender, soft, sweet, fluffy and taste absolutely incredible. Perfect for your holiday mornings, brunch, or any occasion!
Why You’ll Love These Gluten-Free Cinnamon Rolls
- Soft & Fluffy Texture: These gluten-free cinnamon rolls straight out of the oven will leave you wanting more!
- Sweet & Warm Filling: Who doesn’t love a good cinnamon flavor? These cinnamon rolls combined with the spice of cinnamon & the sweetness of brown sugar creates the perfect filling!
- Great For Sharing: This is the perfect gluten-free dessert to share with your families and friends!

What You’ll Need To Make Gluten-Free Cinnamon Rolls
- Gluten-Free Bread Flour: I recommend using King Arthur Gluten-Free Bread Flour (I buy it on Amazon). If you can’t find gluten-free bread flour, then you can use gluten-free all purpose baking flour in its place. However, bread flour yields fluffier and softer rolls!
- Yeast: You’ll need to get your hands on some active dry yeast which will give a beautiful rise to these cinnamon rolls.
- Eggs: Eggs will hold the batter together and ensure the perfect texture.
- Milk & butter: I used non-dairy but if you don’t want dairy-free rolls, just use regular milk and butter!
- Sugar & Powdered Sugar: I used regular white sugar, but see “Tips” section for alternatives.
- Cinnamon: What’s a cinnamon roll without the cinnamon? This will be key for the filling!
- Baking Powder: This will help along with the yeast to give a beautiful rise to the gluten-free cinnamon rolls!
- Vanilla Extract: Along with the sugar, this will enhance the sweet flavor that will make these cinnamon rolls so good!
How To Make Homemade Gluten-Free Cinnamon Rolls
- Make The Dough: Start by warming your milk to about 110° Fahrenheit in a medium bowl. With the electric mixer running on medium speed, slowly add the milk mixture into the flour mixture. Add the eggs once the wet and dry ingredients are almost completely combined. Continue mixing to incorporate the eggs into the dough.
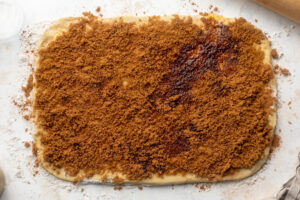
- Make The Filling: Combine your filling ingredients and add the filling to the dough first by spreading the softened butter over the dough in an even layer. Then, evenly sprinkle the brown sugar on top of the butter and the cinnamon on top of the brown sugar.
- Bake The Cinnamon Rolls: Once the oven is hot, bake the cinnamon rolls for 25-30 minutes or until they’re golden brown on top.


Tips & Adjustments When Making These Gluten-Free Cinnamon Rolls
- Sugar Substitutions: If you want to make these homemade gluten-free cinnamon rolls lower in sugar, you can sub the white sugar & powdered sugar with Lankanto.
- Egg Replacements: Want to make these cinnamon rolls vegan? You can try using silken tofu, flax eggs or powdered egg replacers instead of regular eggs!
- Room Temperature Butter: The secret to super tender homemade cinnamon rolls is room-temperature butter beaten into the dough. This technique works best if the butter is very soft.
- Storage: These rolls will stay good at room-temperature for up to 2 days, in the fridge for up to a week, and in the freezer for up to 2 months.
FAQ’S
- Can I Make These Vegan?: Yes! Feel free to replace the eggs with silken tofu, flax eggs, or your favorite egg replacer instead!
- Do I Need To Start Over If My Yeast & Milk Mixture Do Not Become Frothy?: Yes, the mixture frothing ensures that the cinnamon rolls will rise properly before baking and once completed ensures that your cinnamon rolls have that soft and fluffy texture.
- Can I Add Extra Mix-Ins?: Yes! Feel free to add any of your favorite nuts or spices to the filling!

Gluten-Free Cinnamon Rolls
This gluten-free cinnamon rolls recipe creates deliciously sweet and fluffy buns with pull-apart edges and a soft cinnamon sugar center. With a perfectly tender texture, these cinnamon rolls can also be made dairy-free!
Print
Pin
Rate
Servings: 9 servings
Ingredients
For the dough:
- 1 cup warm milk 110 degrees Fahrenheit
- 2 1/4 teaspoons active dry yeast
- 1/4 cup sugar
- 1/4 cup butter melted
- 2 eggs at room temperature
- 3 cups gluten-free bread flour plus more for rolling
- 2 teaspoons baking powder
- 1/2 teaspoon baking soda
- 1/4 teaspoon salt
For the filling:
- 1/4 cup butter softened
- 3/4 cup brown sugar
- 2 tablespoons cinnamon
For the cream cheese frosting:
- 1/2 cup cream cheese softened
- 2 tablespoons butter softened
- 3/4 cup powdered sugar
- 1 teaspoon vanilla extract or vanilla bean paste
Instructions
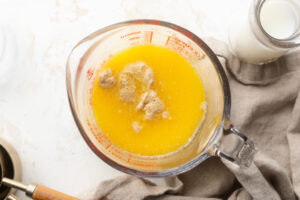
- Start by warming your milk in a medium bowl to about 110° Fahrenheit. Do this in either the microwave for about 30-40 seconds, or over low heat on the stove for 2 minutes.
- Once milk is warm, add the active dry yeast, sugar, and melted butter. Give it a gently whisk to combine, then let that sit for a couple minutes while you continue on with the recipe.

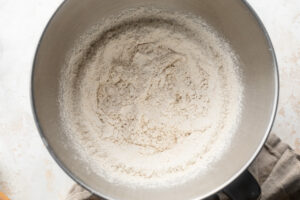
- To the bowl of an electric mixer fitted with the dough hook attachment, add the gluten-free bread flour, baking powder, baking soda, and salt. Turn the mixer on low until the dry ingredients are combined.
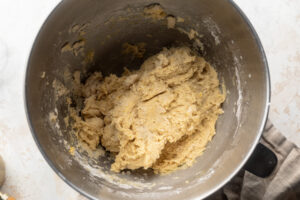
- With the electric mixer running on medium speed, slowly add the milk mixture into the flour mixture. Once the wet and dry ingredients are almost completely combined, add in one egg at a time. Continue mixing to incorporate the eggs into the dough.
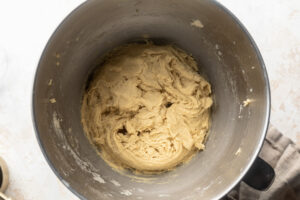
- Once the eggs are incorporated, turn the mixer on high speed and mix the dough for 5 minutes, until the dough is smooth and comes together in a ball.
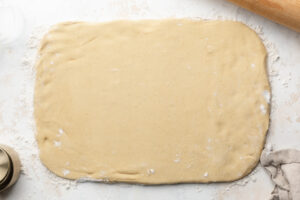
- Generously flour a work surface with the gluten-free bread flour, then press the dough on top of the flour and press/roll into a 9×13-inch rectangle.
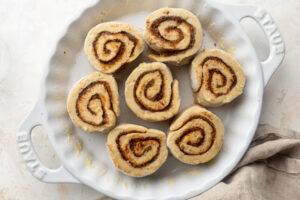
- Add the filling by spreading the softened butter over the dough in an even layer. Then, evenly sprinkle the brown sugar on top of the butter and the cinnamon on top of the brown sugar. Carefully take the long end and roll the dough up into a tight log. Slice the log into 7-8 cinnamon rolls, each about 2 inches thick.
- Then, place the cinnamon rolls in a greased 9×9-inch baking dish and tightly cover the dish with plastic wrap. Place the rolls in a warm place (by a window, in a proving drawer, in the oven with the light on, etc) to rise for about 1 hour.
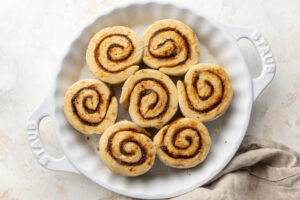
- After the hour is up, remove the plastic wrap from the baking dish and preheat your oven to 350° Fahrenheit. Once the oven is hot, bake the cinnamon rolls for 25-30 minutes or until they’re golden brown on top. Remove the rolls from the oven and let them cool while you make the icing.
- To make the cream cheese frosting, add the cream cheese, butter, powdered sugar, and vanilla extract to the bowl of an electric mixer and beat until it’s smooth and fluffy. Spread the frosting on top of your cinnamon rolls and ENJOY!
Video
Notes
Storage: These rolls will stay good at room-temperature for up to 2 days, in the fridge for up to a week, and in the freezer for up to 2 months.
*Nutrition facts reflect that of one plain cinnamon roll, without cream cheese frosting.
Nutrition
Serving: 1serving | Calories: 280kcal | Carbohydrates: 37g | Protein: 3.6g | Fat: 14g | Sugar: 23g


")


")

