Tag

chocolate chips

Browsing

These cookie dough ice cream sandwiches are everything you love about the classic kind, but made with just 6 wholesome ingredients and NO baking required! They’re gluten-free, refined sugar-free, endlessly impressive, and genuinely one of the most delicious treats I’ve… maybe ever made?!

What makes these different from every other cookie dough ice cream sandwich recipe out there? The cookie dough is made with almond flour instead of regular flour – which means it’s completely gluten and grain-free, plus higher in protein and fiber. It’s also naturally sweetened with maple syrup instead of refined sugar, and uses nut butter instead of butter for a satisfying, nutrient-dense base. If you love no-bake desserts that look impressive but are actually super easy to make, you’ll also love my Healthy Peanut Butter Cup Bars and 5-Ingredient No-Bake Cookies – both freezer staples in my house!

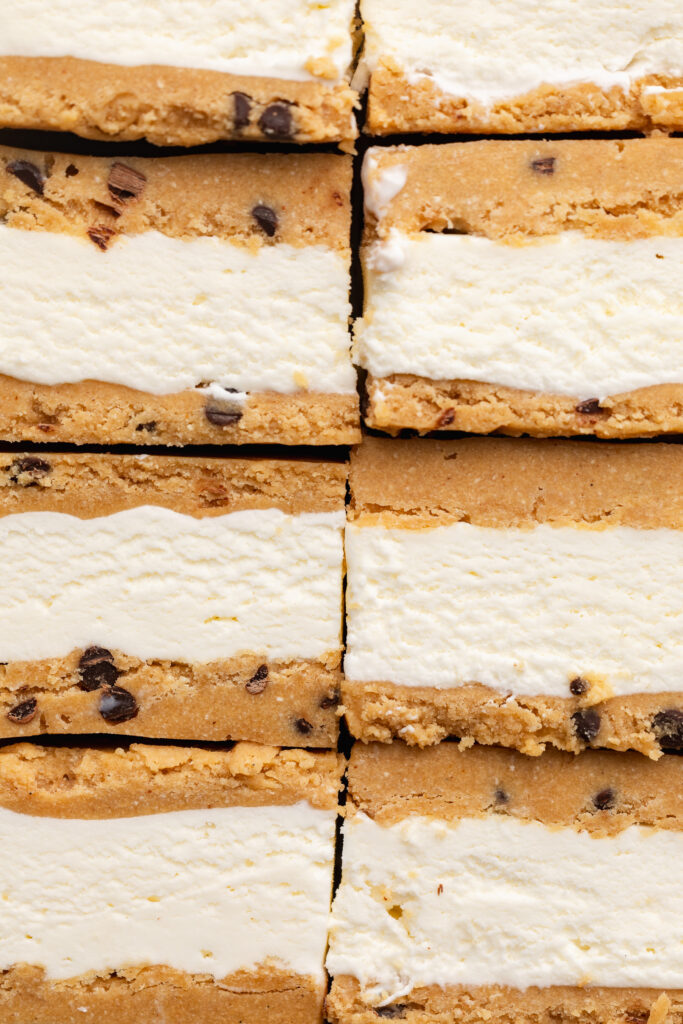
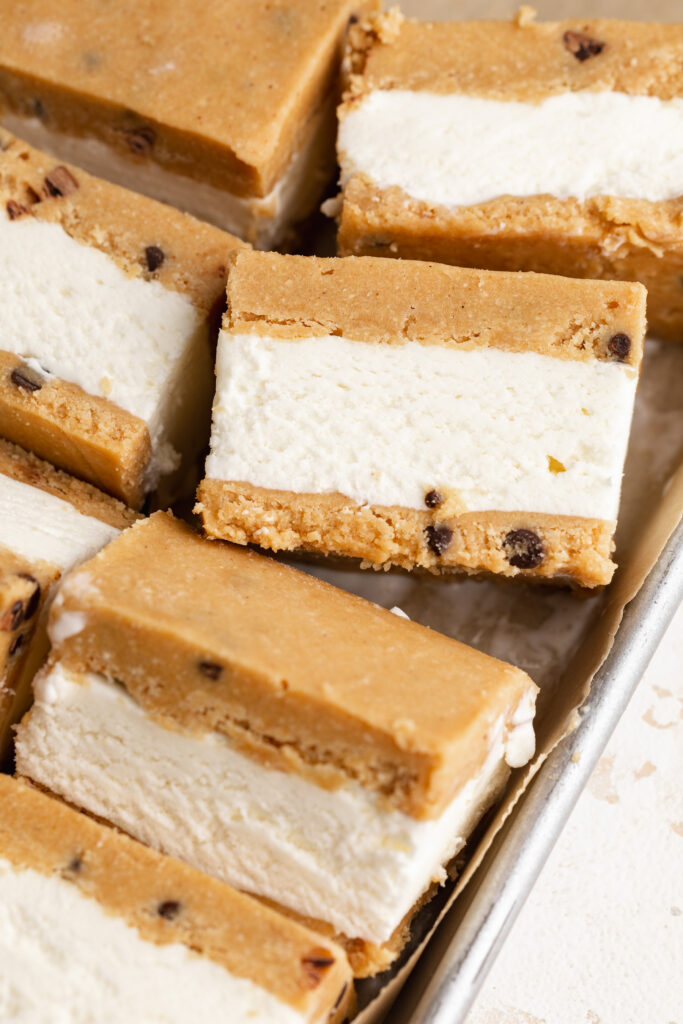
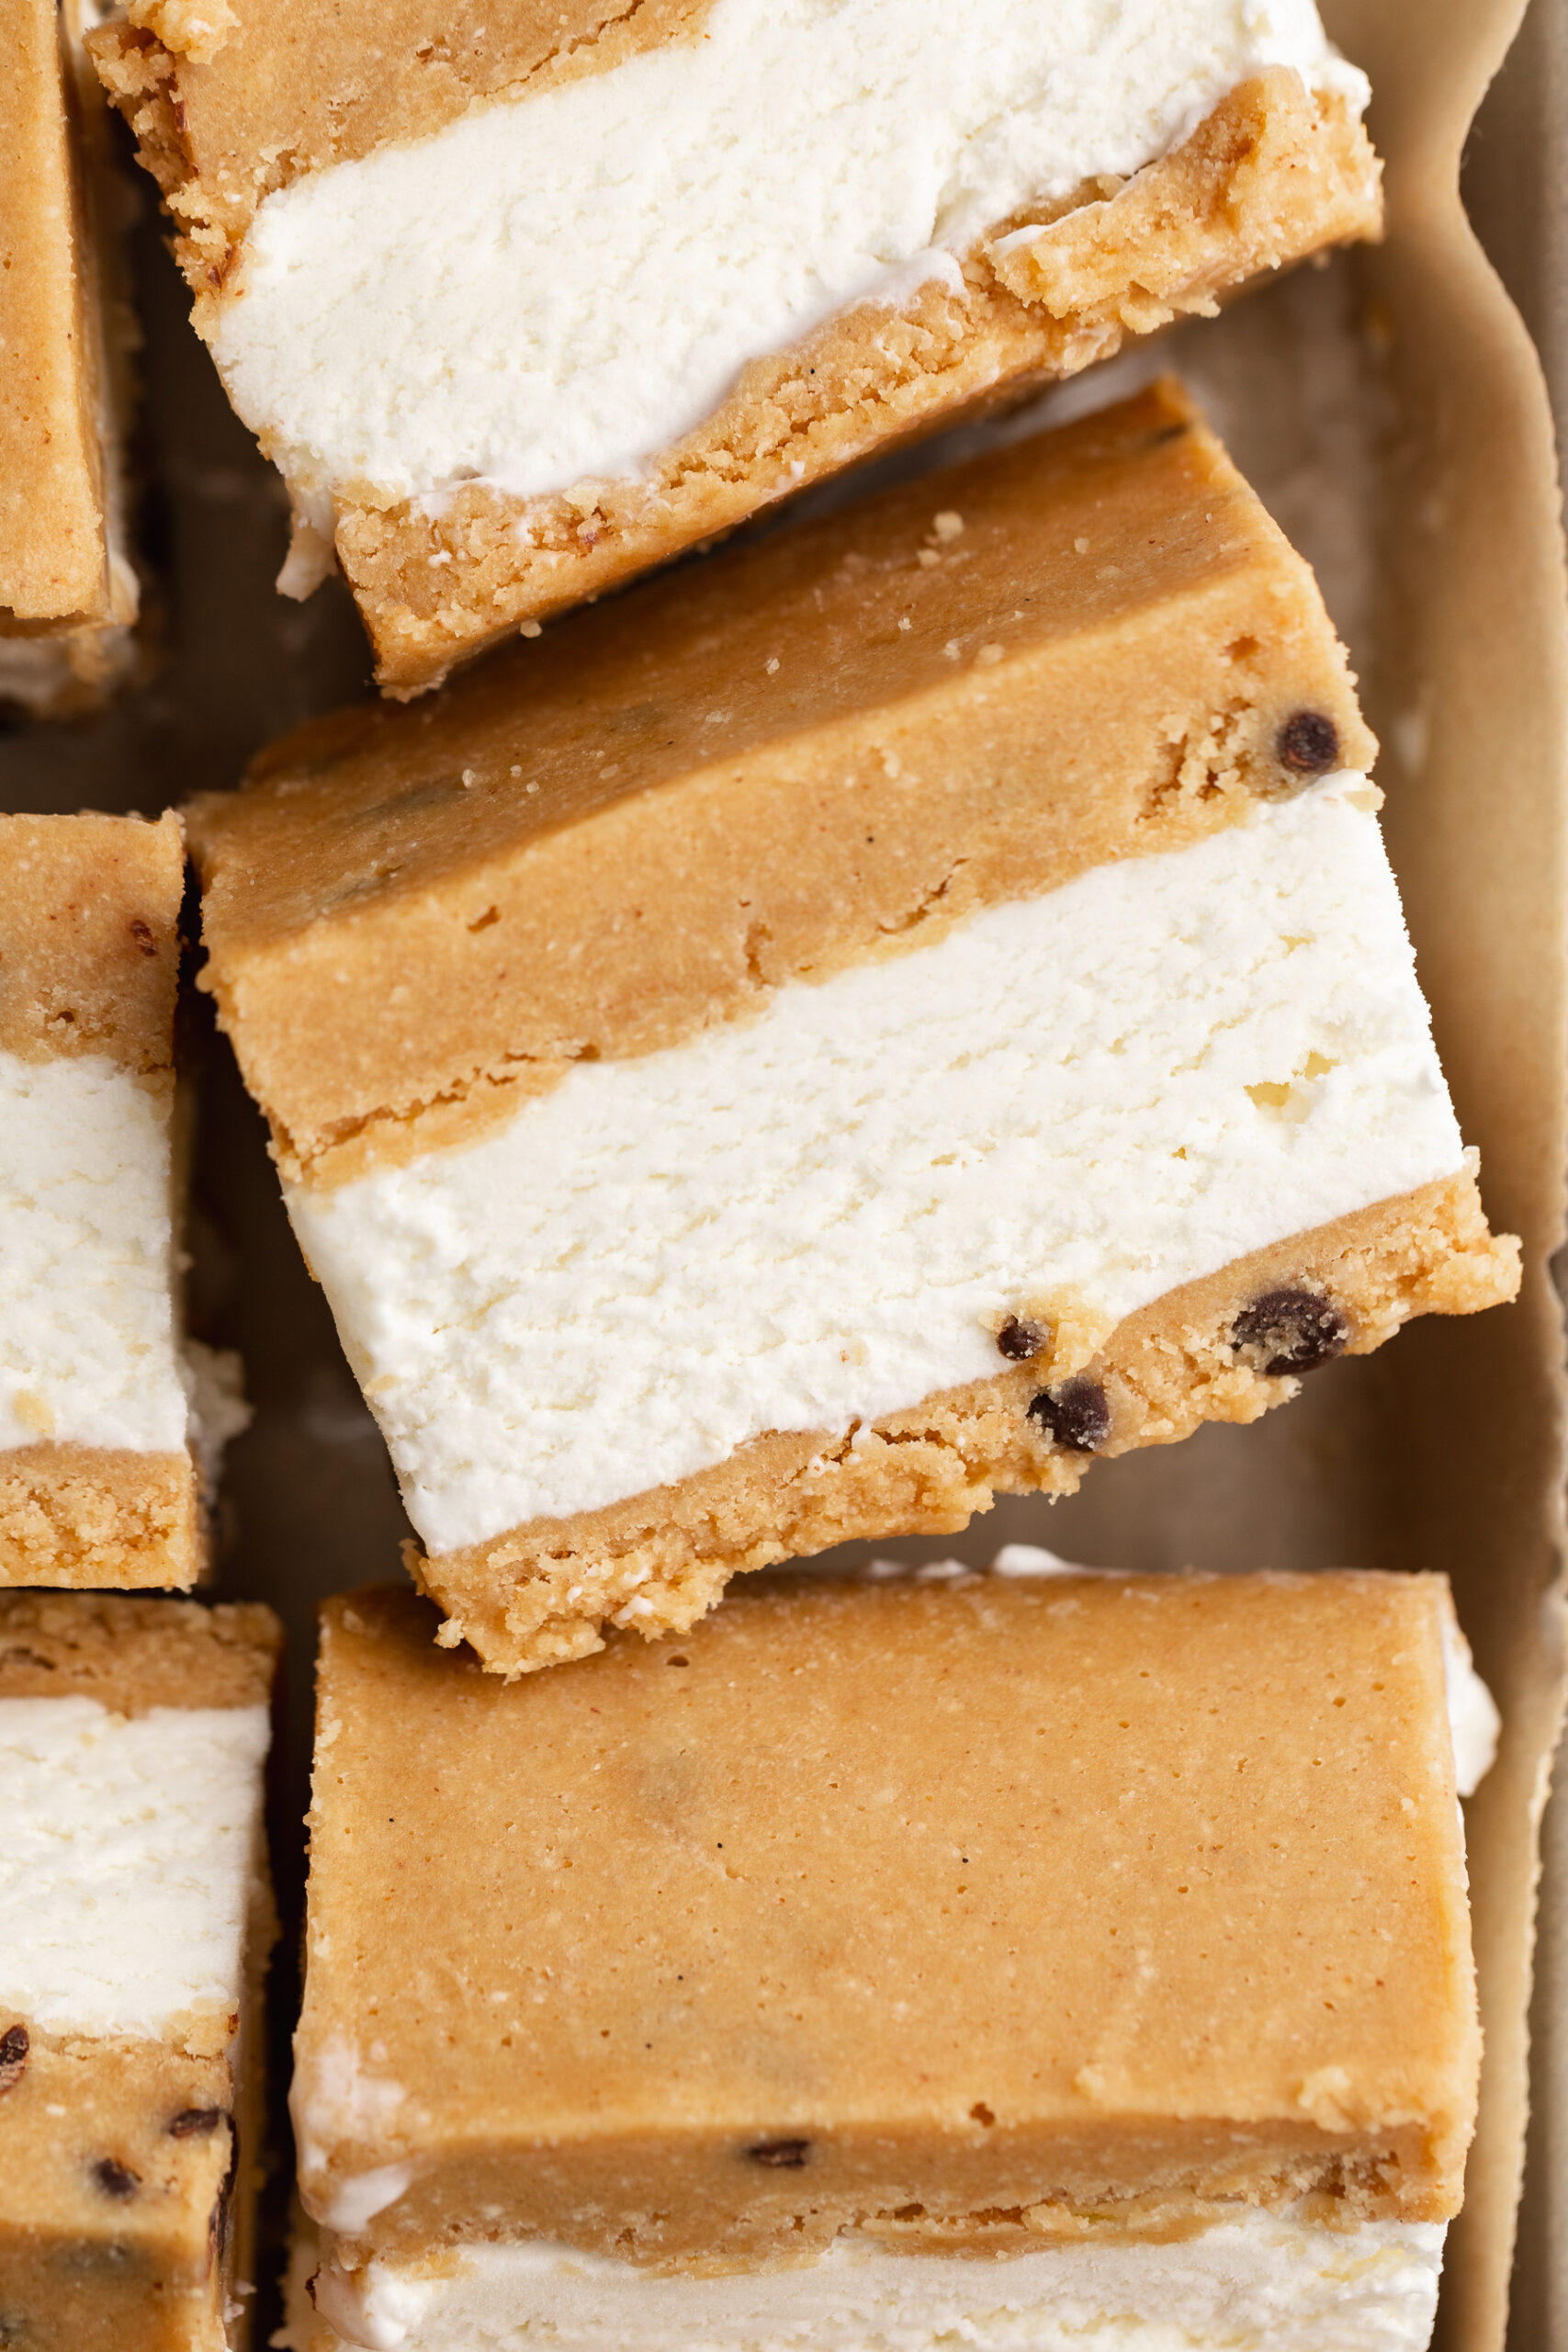
overhead close up image of healthier cookie dough ice cream sandwiches.

Why You’ll Love These Cookie Dough Ice Cream Sandwiches

  • Seriously impressive, shockingly easy. Two thick layers of chewy, chocolate-chipcookie dough sandwiching creamy vanilla ice cream, sliced into beautiful bars that look like they came from a gourmet ice cream shop. Nobody needs to know it took you just 15 minutes to prep!
  • No-bake, no refined sugar, and gluten-free!
  • Keep a batch in the freezer all summer. These bars keep beautifully in the freezer for weeks, which means you’re always just a few minutes away from a delicious frozen dessert. Make a batch on Sunday and you’re set for the week!

What Makes These Cookie Dough Ice Cream Sandwiches Healthier?

  • Almond flour instead of all-purpose flour – Almond flour is naturally gluten-free, lower in carbohydrates, and higher in protein, healthy fats, and fiber than regular flour. It also doesn’t need to be heat-treated before eating raw, making it the perfect flour for no-bake cookie dough.
  • Maple syrup instead of refined sugar – A natural liquid sweetener that provides the same sweetness as refined sugar without the blood sugar spike. Maple syrup also contains trace minerals and antioxidants that white sugar simply doesn’t have.
  • Nut butter instead of butter – Peanut or cashew butter replaces the traditional butter, adding healthy fats, protein, and a rich, slightly nutty flavor that makes these cookie dough bars completely irresistible.
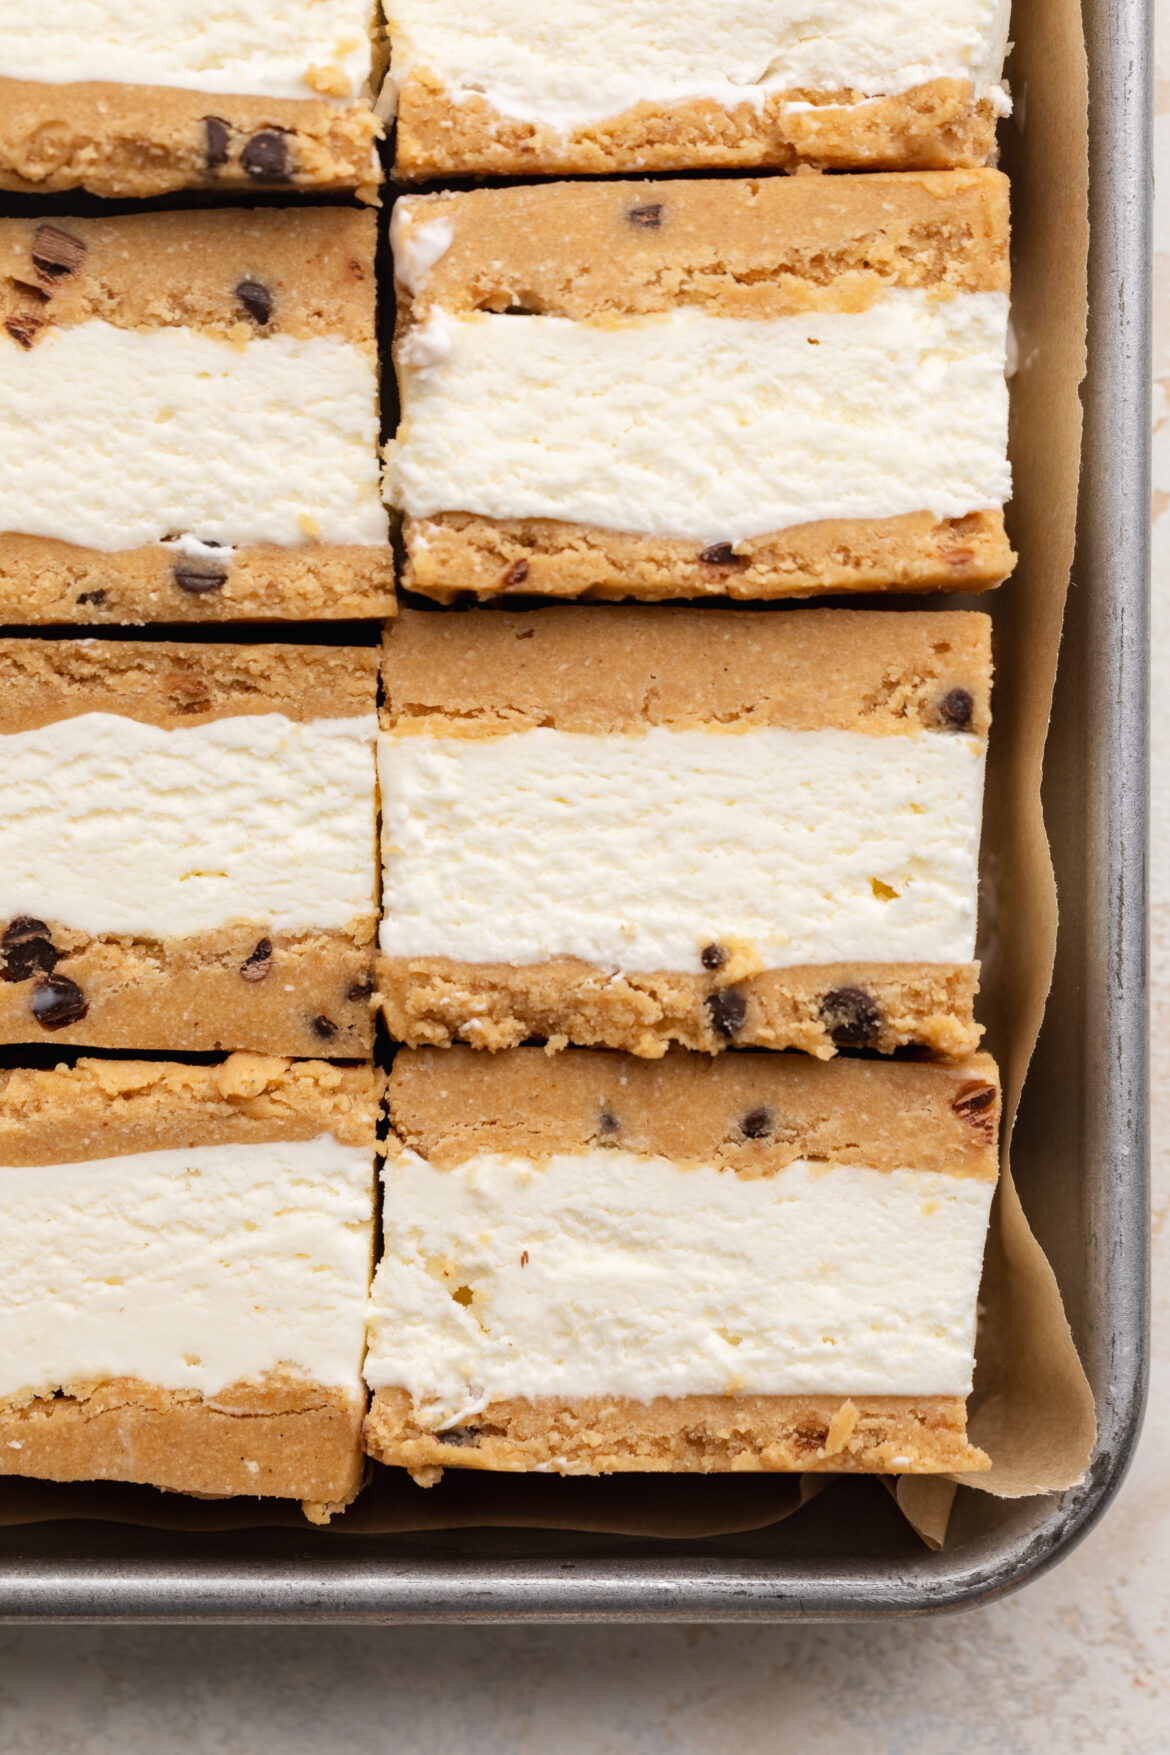
healthier cookie dough ice cream sandwiches in a sheet pan.

Adjust This Recipe to Your Dietary Needs

Make it dairy-free: Simply swap the vanilla ice cream for your favorite dairy-free ice cream. Coconut milk ice cream, oat milk ice cream, and cashew milk ice cream all work beautifully here. The cookie dough layer itself is already completely dairy-free!

Make it vegan: Use a dairy-free vanilla ice cream as above, and swap the honey (if using) for maple syrup. Every other ingredient in this recipe is already plant-based, making this an easy vegan adaptation.

Make it refined sugar-free: The cookie dough layer is already refined sugar-free thanks to the maple syrup sweetener. To keep the entire recipe refined sugar-free, choose chocolate chips sweetened with dates or coconut sugar, a vanilla ice cream sweetened with dates or honey, or make your own no-churn vanilla ice cream sweetened with maple syrup.

overhead close up image of healthier cookie dough ice cream sandwiches.
No ratings yet

6-Ingredient Healthier Cookie Dough Ice Cream Sandwiches

These cookie dough ice cream sandwiches are made with two thick layers of no-bake, gluten-free cookie dough sandwiching a generous layer of creamy vanilla ice cream – sliced into bars and pulled straight from the freezer for the ultimate summer treat! Made with just 6 wholesome ingredients, they're refined sugar-free, gluten-free, healthier, but just as delicious as the store-bought kind.
Print Pin Rate
Prep Time: 15 minutes
Freeze Time: 3 hours
Total Time: 3 hours 15 minutes
Servings: 15 servings

Equipment

  • 1 8×8-inch baking pan
  • 1 large bowl

Ingredients

  • 2 1/2 cups almond flour
  • 1 cup creamy peanut butter or cashew butter unsweetened
  • 1/2 cup maple syrup
  • 1/2 cup coconut oil melted
  • 1/2 cup mini chocolate chips
  • 1 quart vanilla ice cream

Instructions

  • Mix together almond flour, nut butter, maple syrup, melted coconut oil, and vanilla extract until fully combined. Fold in chocolate chips.
  • Press half the cookie dough into a parchment-lined 8×8-inch pan. Add a new sheet of parchment and press the second half of cookie dough on top. Freeze for 30 minutes.
  • Remove ice cream from freezer to soften while the cookie dough firms up.
  • Remove cookie dough from freezer. Lift out the top layer and peel off the parchment. (If the cookie dough breaks, simple press it back together with your fingers.) Spread softened ice cream over the bottom cookie dough layer, then place the top layer back on.
  • Freeze for at least 3 hours. Lift out, slice into bars, and enjoy!

Notes

  • Use cashew butter for a more neutral, classic cookie dough flavor; peanut butter for a bolder taste.
  • Let the melted coconut oil cool slightly before mixing so it doesn’t cause the nut butter to seize up.
  • If the top cookie dough layer breaks when separating, just press it back together – the dough is very forgiving!
  • For dairy-free, use your favorite dairy-free vanilla ice cream.
  • Store in an airtight container in the freezer for up to 1 month.
  • Dip a sharp knife in hot water and wipe dry between slices for the cleanest cuts.

Nutrition

Serving: 1serving | Calories: 290kcal | Carbohydrates: 23g | Protein: 6g | Fat: 20g | Fiber: 2g | Sugar: 14g

I’ve been making a version of no-bake cookies my whole life, but this healthier twist is my new fave! They’re super easy to make, beginner-friendly, and come together in basically no time at all. Keep a batch in the fridge all week for an easy healthy snack, or in the freezer for whenever that chocolate-peanut butter craving hits. If you love easy no-bake treats, you’ll also love my Healthy Peanut Butter Cup Bars and Healthy Almond Joy Bars!

Why You’ll Love These No-Bake Cookies

  • Just 5 ingredients! Peanut butter, coconut oil, honey or maple syrup, cocoa powder, and rolled oats. No refined sugar, no butter, no dairy, no flour. Just healthier ingredients that come together into something genuinely delicious.
  • No oven required. These cookies are made entirely on the stovetop and set in the fridge — perfect for hot summer days when you want something sweet but absolutely cannot bring yourself to turn on the oven.
  • Healthy, gluten-free, dairy-free, and refined sugar-free. Naturally sweetened with honey or maple syrup, made with gluten-free rolled oats, and completely free of dairy!
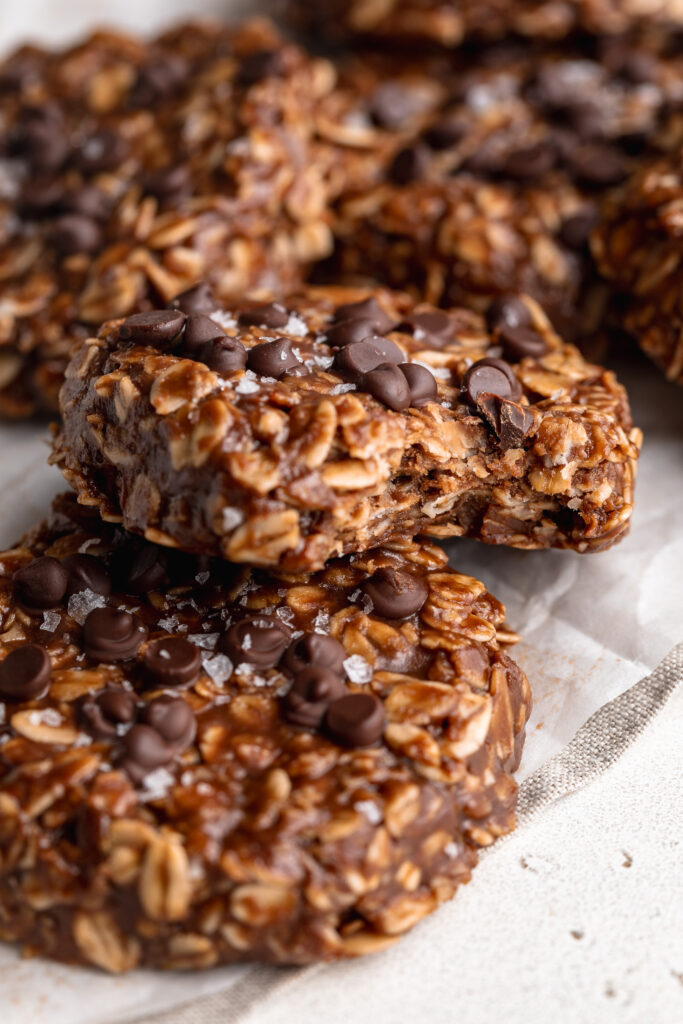
no bake cookies with a bite taken out.

Frequently Asked Questions

What can I use instead of peanut butter?

Any creamy nut or seed butter works as a 1:1 swap! Almond butter gives a slightly milder, nuttier flavor. Cashew butter is lovely and subtly sweet. Sunflower seed butter keeps these completely nut-free and is a great option for school-safe snacks. Just make sure whichever butter you use is natural and unsweetened for the best results and flavor.

How can I make these gluten-free?

They’re very easy to make completely gluten-free! Simply use certified gluten-free rolled oats in place of regular oats. I buy these gluten-free rolled oats in bulk on Amazon! All other ingredients in this recipe are naturally gluten-free, so that one swap is all you need. Look for oats labeled “certified gluten-free” to ensure there’s no cross-contamination during processing.

What can I use instead of coconut oil?

If you don’t have coconut oil or prefer not to use it, vegan butter (like Miyoko’s or Earth Balance) works as a great dairy-free substitute and will give the cookies a richer, more buttery flavor. Regular unsalted butter also works if you’re not keeping this dairy-free. The texture may vary very slightly depending on which fat you use, but all three options will produce a delicious cookie.

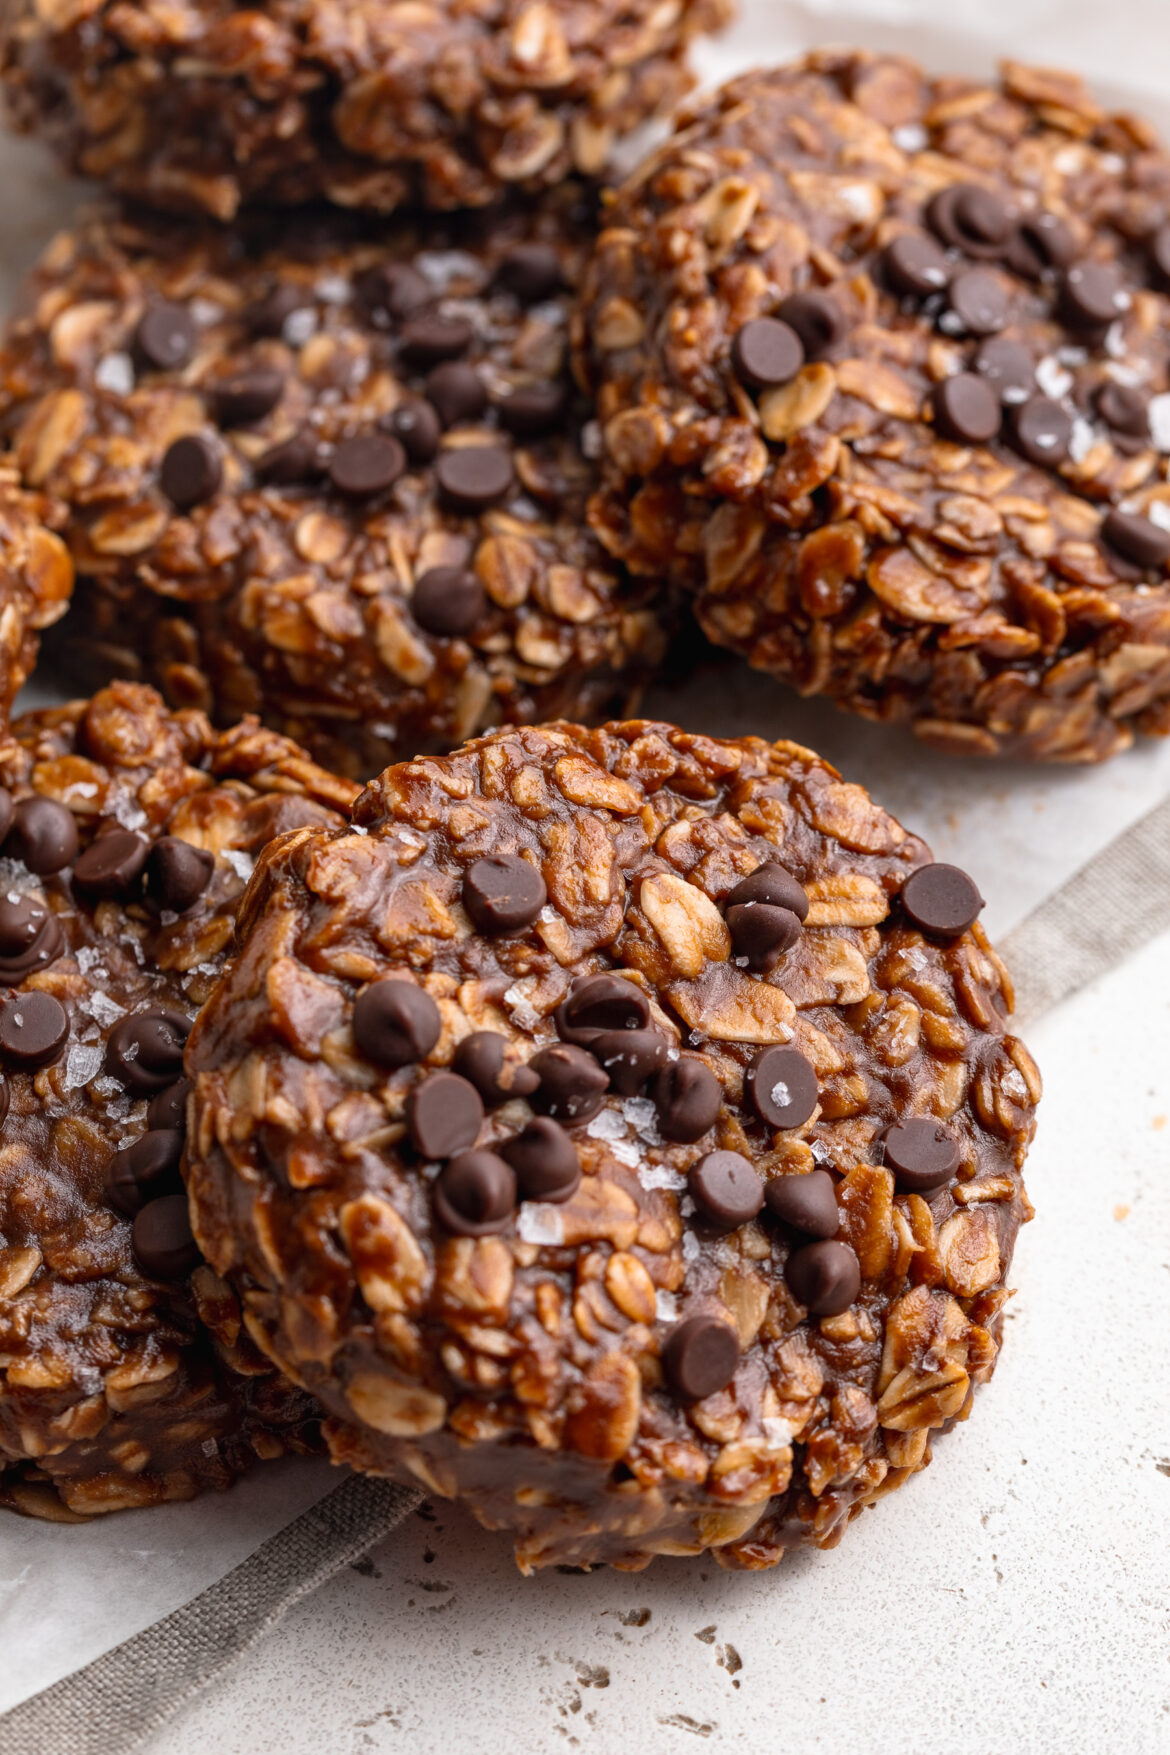
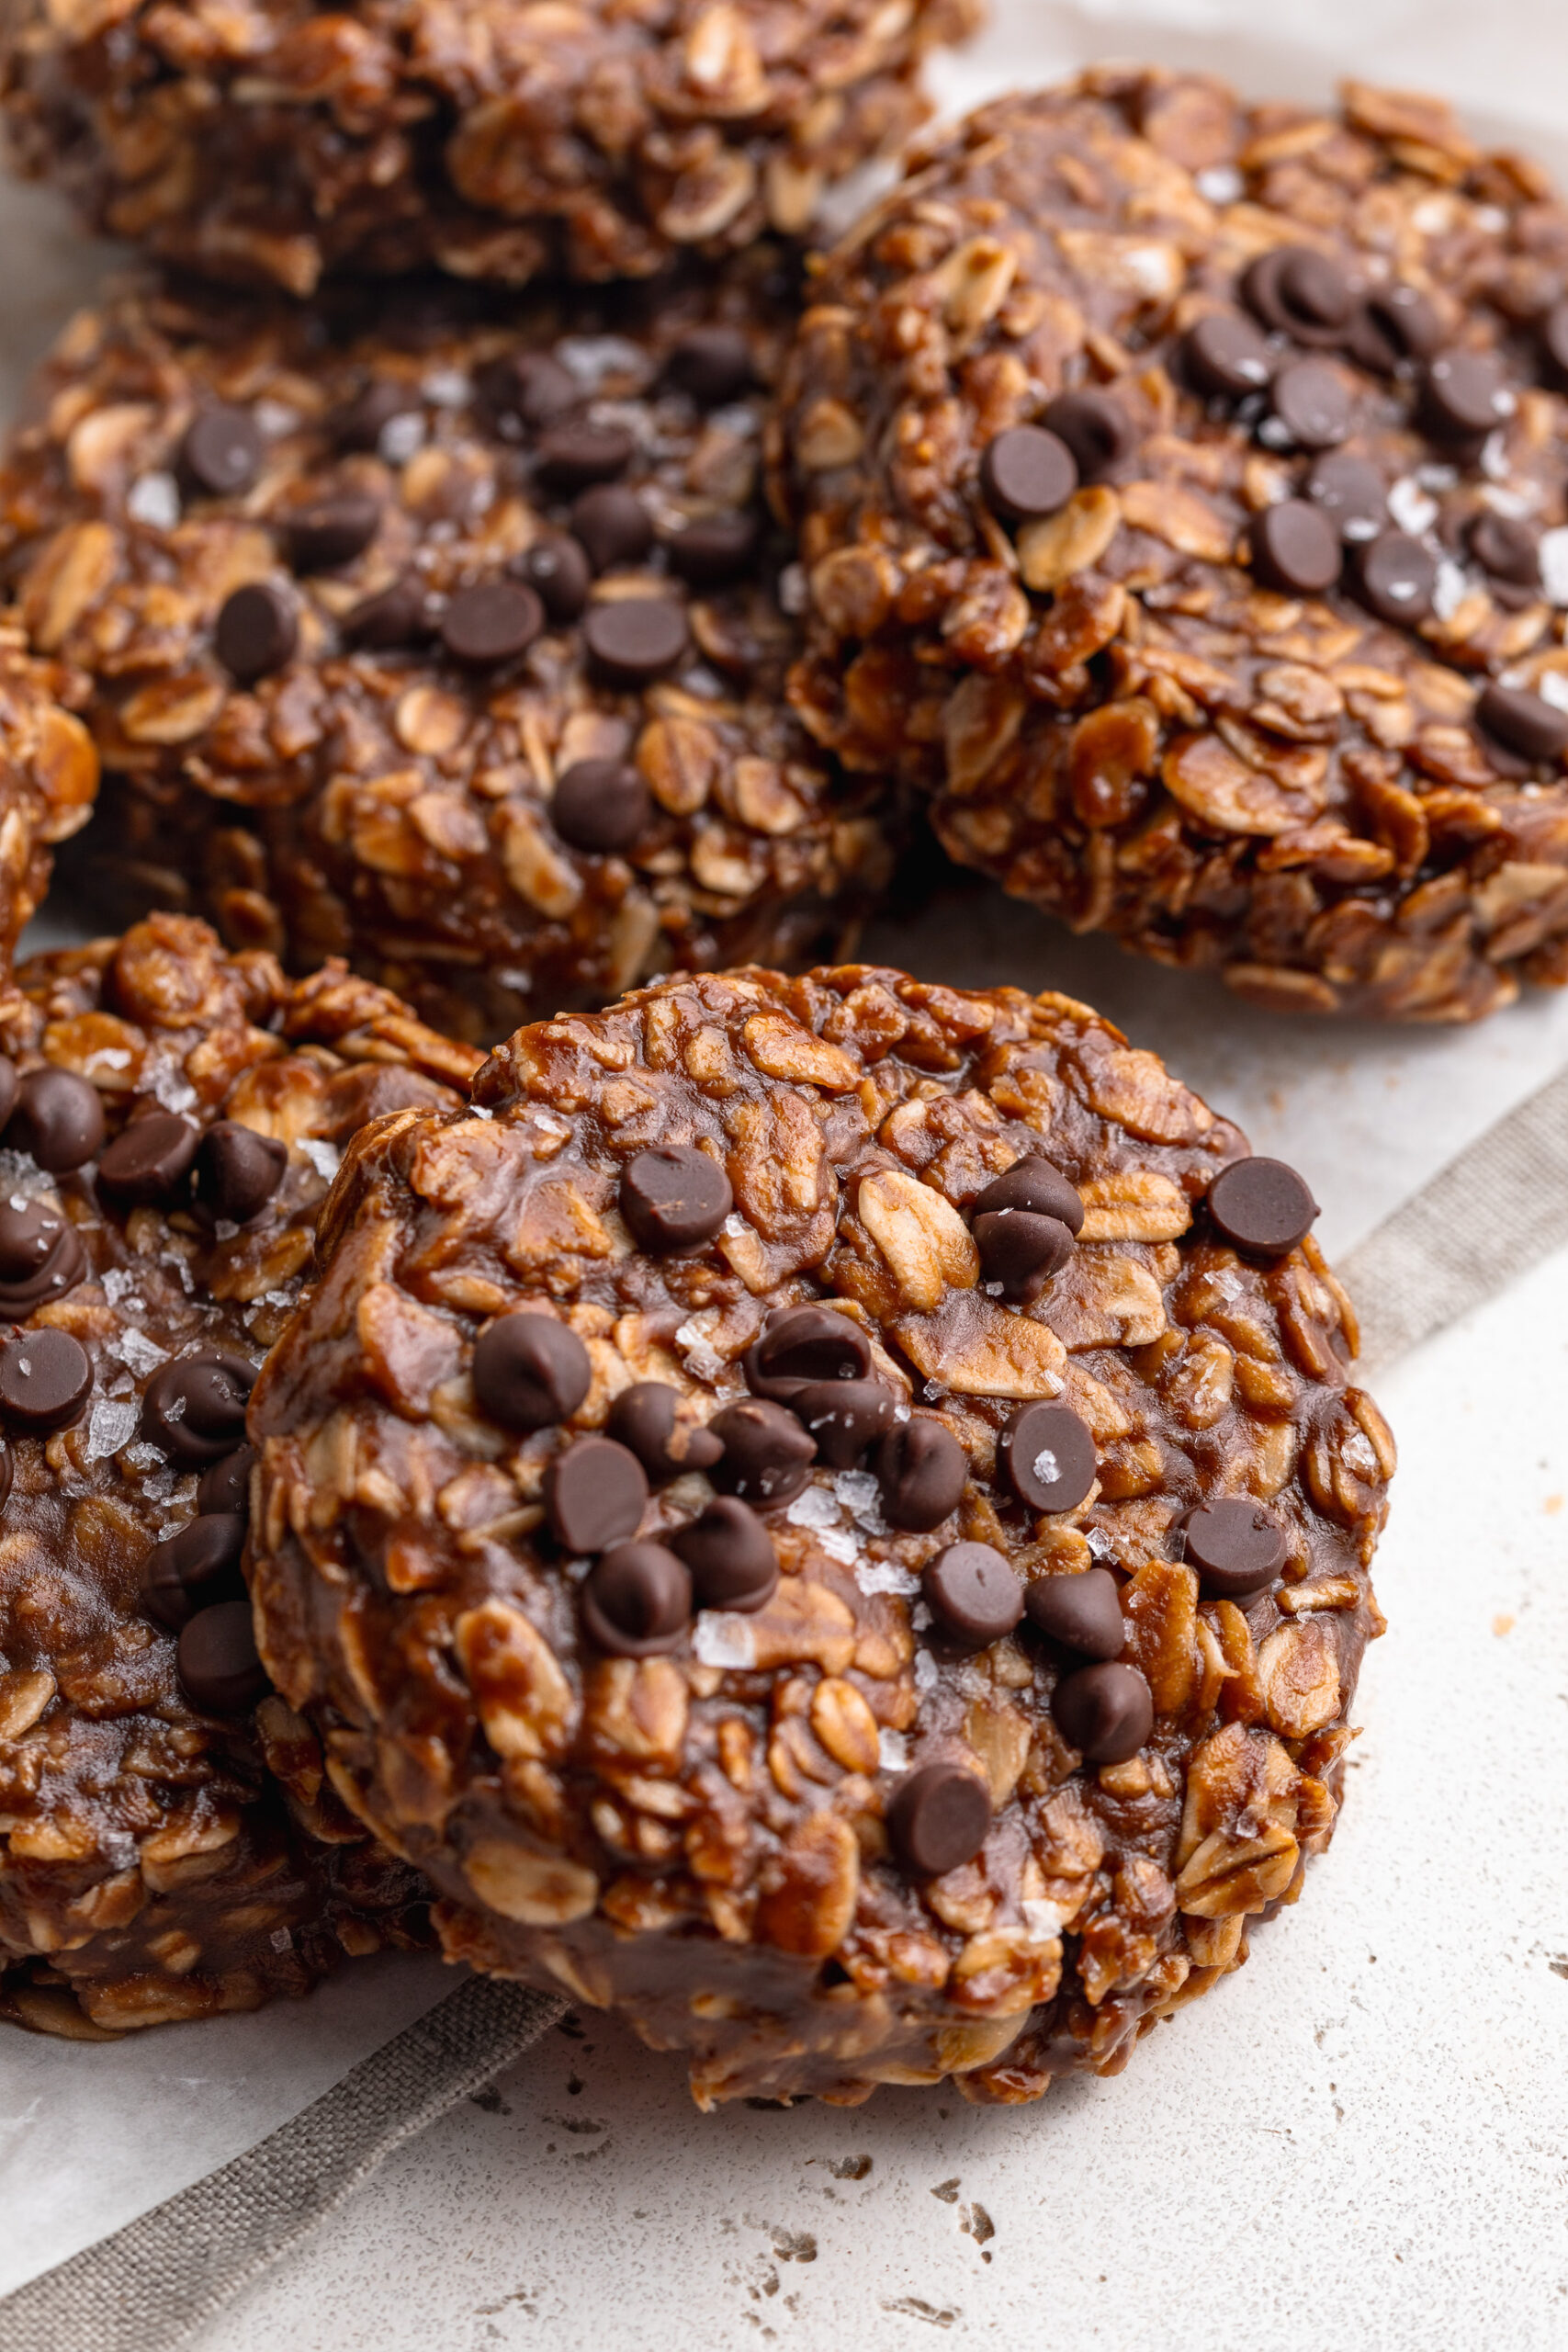
overhead image of no bake cookies on a table with mini chocolate chips and sea salt on top.

Sam’s Recipe Tips

  • Work quickly when scooping. Once the mixture comes off the heat, it starts to firm up fast. Have your parchment-lined plate or sheet ready to go before you start cooking, and scoop the cookies as soon as the mixture is ready. If it starts to harden in the pan before you’ve finished scooping, pop it back over very low heat and stir until it loosens up again.
  • Don’t skip the fridge time. These cookies need the chill time to set up firm and hold their shape. 30 minutes is the minimum – if you’re in a warmer kitchen, give them a full hour. They’re also delicious eaten straight from the freezer if you love a firmer, fudgier cookie!
  • Use a cookie scoop for uniform cookies. A 2-tablespoon cookie scoop makes it easy to portion the cookies quickly and evenly so they all set at the same rate. Slightly flatten each cookie with the back of the spoon right after scooping for a more traditional cookie shape.

Made this recipe? I’d love to see it! Tag me on Instagram @samdoesherbest or TikTok @samdoesherbest – I repost my favorites! And if you loved it, please leave a ⭐⭐⭐⭐⭐ rating and written review below. It means the world and helps other readers find this recipe!
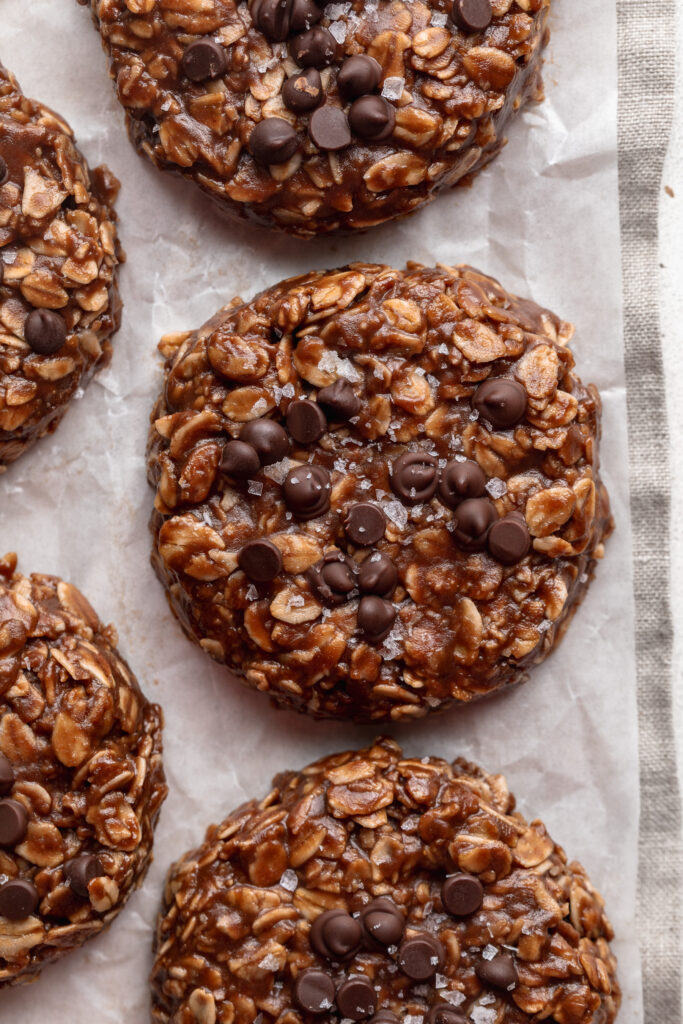
no bake cookies piled on top of each other on a table.
No ratings yet

5-Ingredient No-Bake Cookies

These no-bake cookies are a healthier twist on the classic cookie! Made with just 5 wholesome ingredients, naturally sweetened with honey or maple syrup, and completely gluten-free and dairy-free. They're the easiest, most satisfying treat and there's NO baking required!
Print Pin Rate
Prep Time: 5 minutes
Cook Time: 5 minutes
Chill Time: 30 minutes
Total Time: 40 minutes
Servings: 16 cookies

Equipment

  • 1 medium saucepan
  • 1 cookie sheet

Ingredients

  • 1/2 cup creamy peanut butter unsweetened
  • 1/4 cup coconut oil
  • 1/4 cup honey or maple syrup
  • 2 tablespoons unsweetened cocoa powder
  • 1 1/2 cups rolled oats

Instructions

  • Add the peanut butter, coconut oil, and honey or maple syrup to a medium saucepan over medium-low heat. Stir continuously until melted and completely smooth.
  • Stir in the cocoa powder and rolled oats until fully combined. Cook and stir for another 2–3 minutes.
  • Remove from heat and quickly scoop 2-tablespoon portions onto a parchment-lined plate or baking sheet.
  • Refrigerate for 30 minutes or until firm. Enjoy or store in an airtight container!

Notes

  • Work quickly when scooping – the mixture firms up fast once off the heat!
  • Use certified gluten-free oats to keep this recipe completely gluten-free.
  • Any nut or seed butter works as a peanut butter substitute.
  • Store in an airtight container in the fridge for up to 1 week or in the freezer for up to 3 months.
  • These are also delicious eaten straight from the freezer!

Nutrition

Serving: 1serving | Calories: 115kcal | Carbohydrates: 10g | Protein: 3g | Fat: 8g | Fiber: 1g | Sugar: 5g

Don’t know it ’til ya try it! A sweet, chewy Medjool date stuffed with a cold piece of butter and a whole crunchy pecan, drizzled in chocolate and finished with a pinch of flaky sea salt. The combination sounds simple, but the flavor is absolutely delicious! It’s giving butter pecan ice cream meets chocolate truffle, in a completely wholesome, no-bake, 5-ingredient package.

The best part? These take about 10 minutes to put together and they live in your fridge or freezer, ready to grab whenever that post-dinner sweet craving hits. Dates are one of nature’s most perfect foods — naturally sweet, packed with fiber, and deeply satisfying — and when you pair them with butter, pecan, chocolate, and sea salt, you get something that feels wildly indulgent but is actually pretty nourishing. If you love easy no-bake treats, you’ll want these right alongside my Healthy Peanut Butter Cup Bars and 6-Ingredient Healthy Snickers in your freezer at all times.

Why You’ll Love These Butter Pecan Stuffed Dates

  • Shockingly delicious! I cannot stress this enough – the combination of sweet, chewy date + cold butter + crunchy pecan + chocolate + flaky sea salt is one of those flavor combinations that genuinely stops you in your tracks. It sounds simple, but the taste is extraordinary.
  • Healthy and high in fiber. Medjool dates are packed with fiber, natural energy, potassium, and antioxidants. They’re essentially nature’s candy – and when stuffed and drizzled with dark chocolate, they taste like it too.
  • Gluten-free and no-bake. No oven, no flour, no complicated steps. Just a few simple ingredients, a plate lined with parchment paper, and your refrigerator.
  • Ready in 10 minutes. Slice, stuff, drizzle, chill. The active prep time on these is genuinely under 10 minutes – the fridge does the rest.
  • Perfect for entertaining or everyday snacking. Set these out at a dinner party and watch them disappear! Or keep a batch in the fridge all week for a healthy sweet treat whenever the craving strikes. Either way, they always impress.
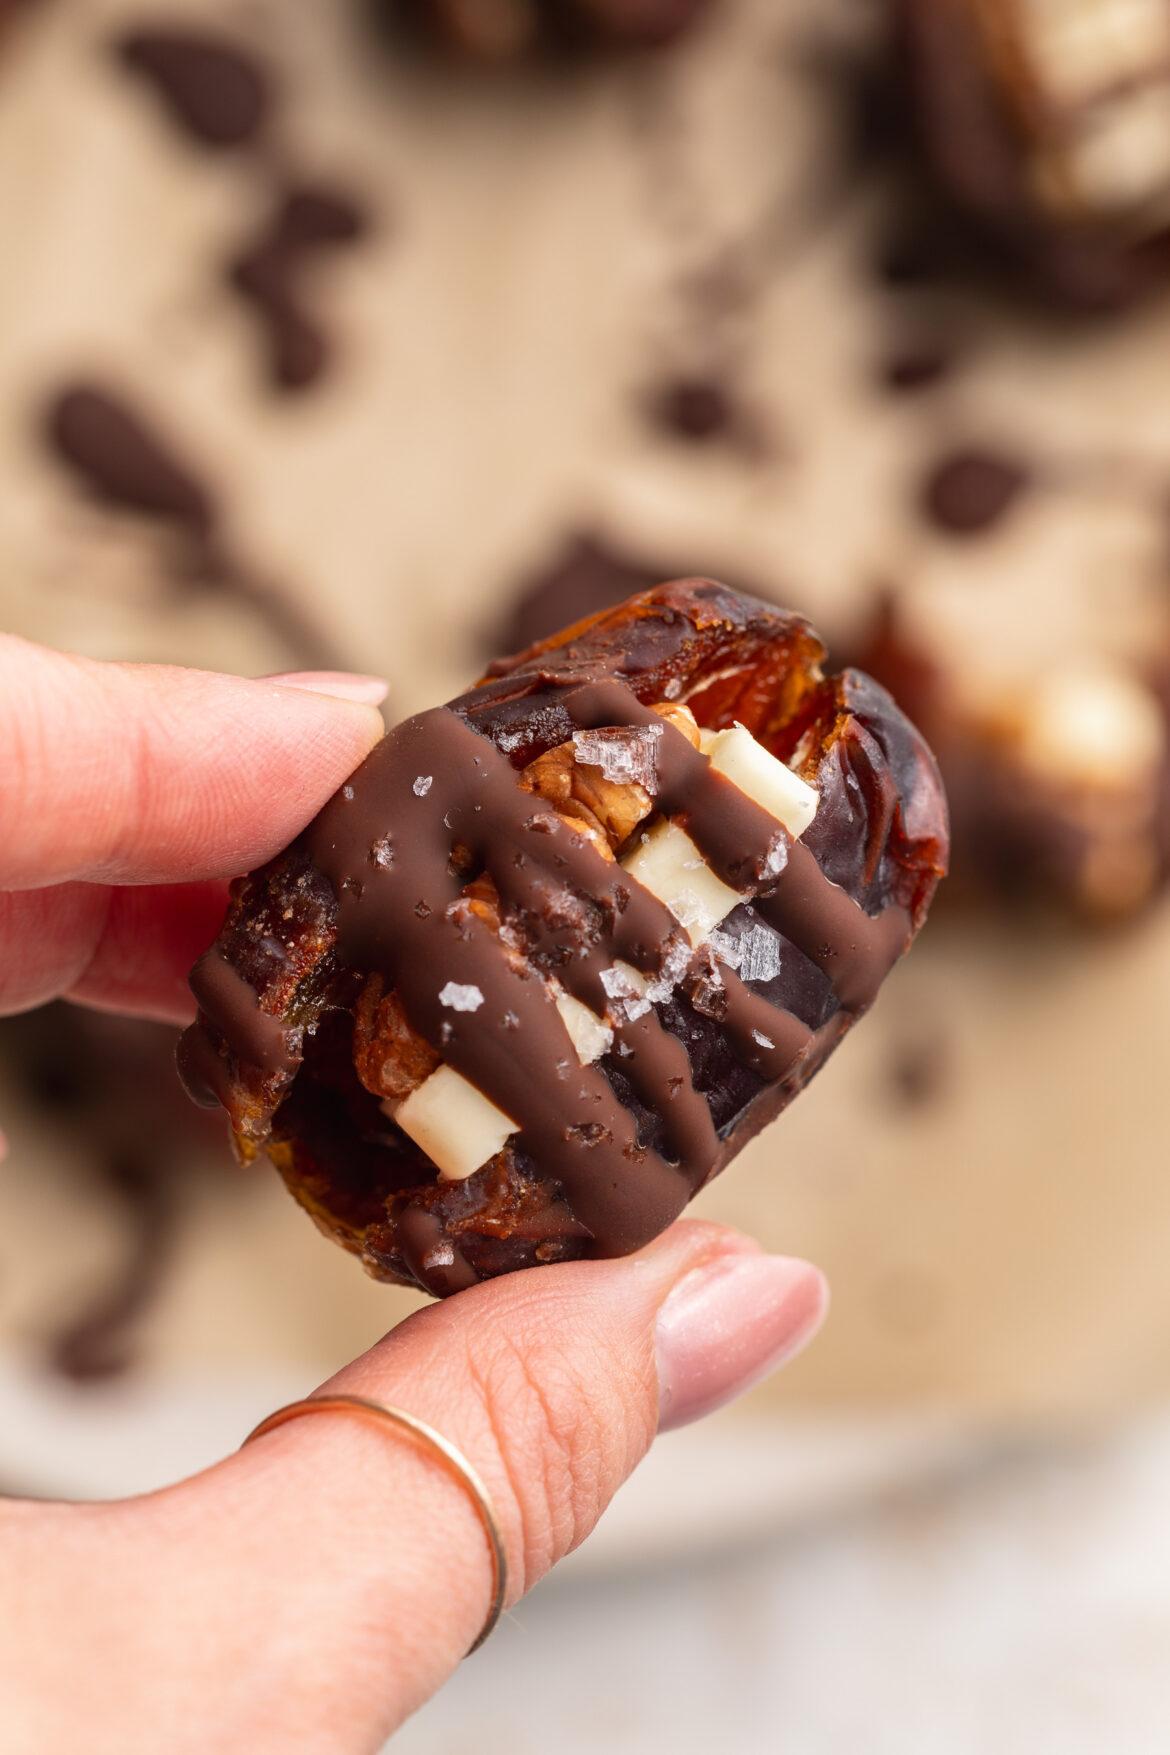
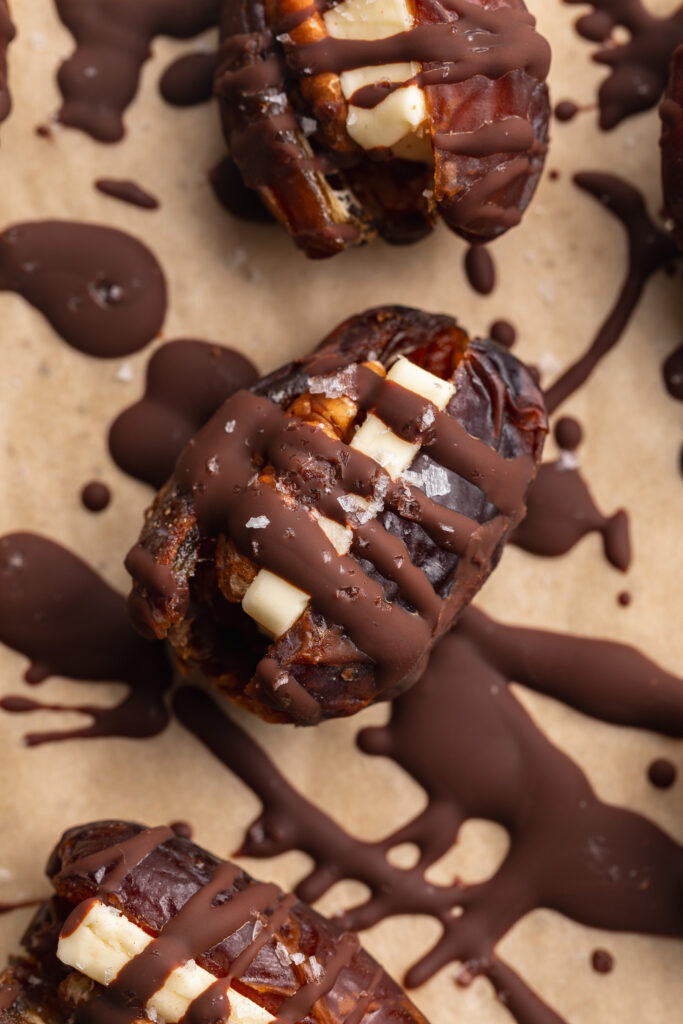
close up image of butter pecan stuffed dates on a plate.

Recipe Variations and Topping Options

The butter pecan chocolate combination is truly one of the best – but stuffed dates are endlessly customizable. Here are some of my favorite ways to switch things up:

🥜 Peanut Butter Chocolate Swap the butter and pecan for 1 teaspoon of natural peanut butter per date. Drizzle with chocolate and flaky sea salt as directed. Tastes like a peanut butter cup in date form.

🧀 Cream Cheese & Walnut Fill each date with a small spoonful of softened cream cheese and a walnut half. Drizzle with honey instead of chocolate. This is a beautiful sweet-and-tangy appetizer option.

🥥 Almond Butter & Coconut Fill with a teaspoon of almond butter, top with toasted shredded coconut, and drizzle with white chocolate for a tropical twist.

🌰 Tahini & Sesame Fill with a teaspoon of tahini and top with toasted sesame seeds and a drizzle of honey. This sweet-nutty combination is deeply satisfying and a little more unexpected.

🍫 Dark Chocolate & Pistachio Fill with a small chunk of dark chocolate (it will slightly soften from the warmth of the date), top with crushed pistachios and a drizzle of honey. Stunning for a dinner party dessert plate.

Extra topping ideas:

  • Crushed graham crackers on top for a s’mores vibe
  • A sprinkle of cinnamon mixed into the melted chocolate
  • Freeze-dried raspberry pieces for a fruity pop
  • Drizzle of tahini over the chocolate
  • Chopped candied pecans instead of whole
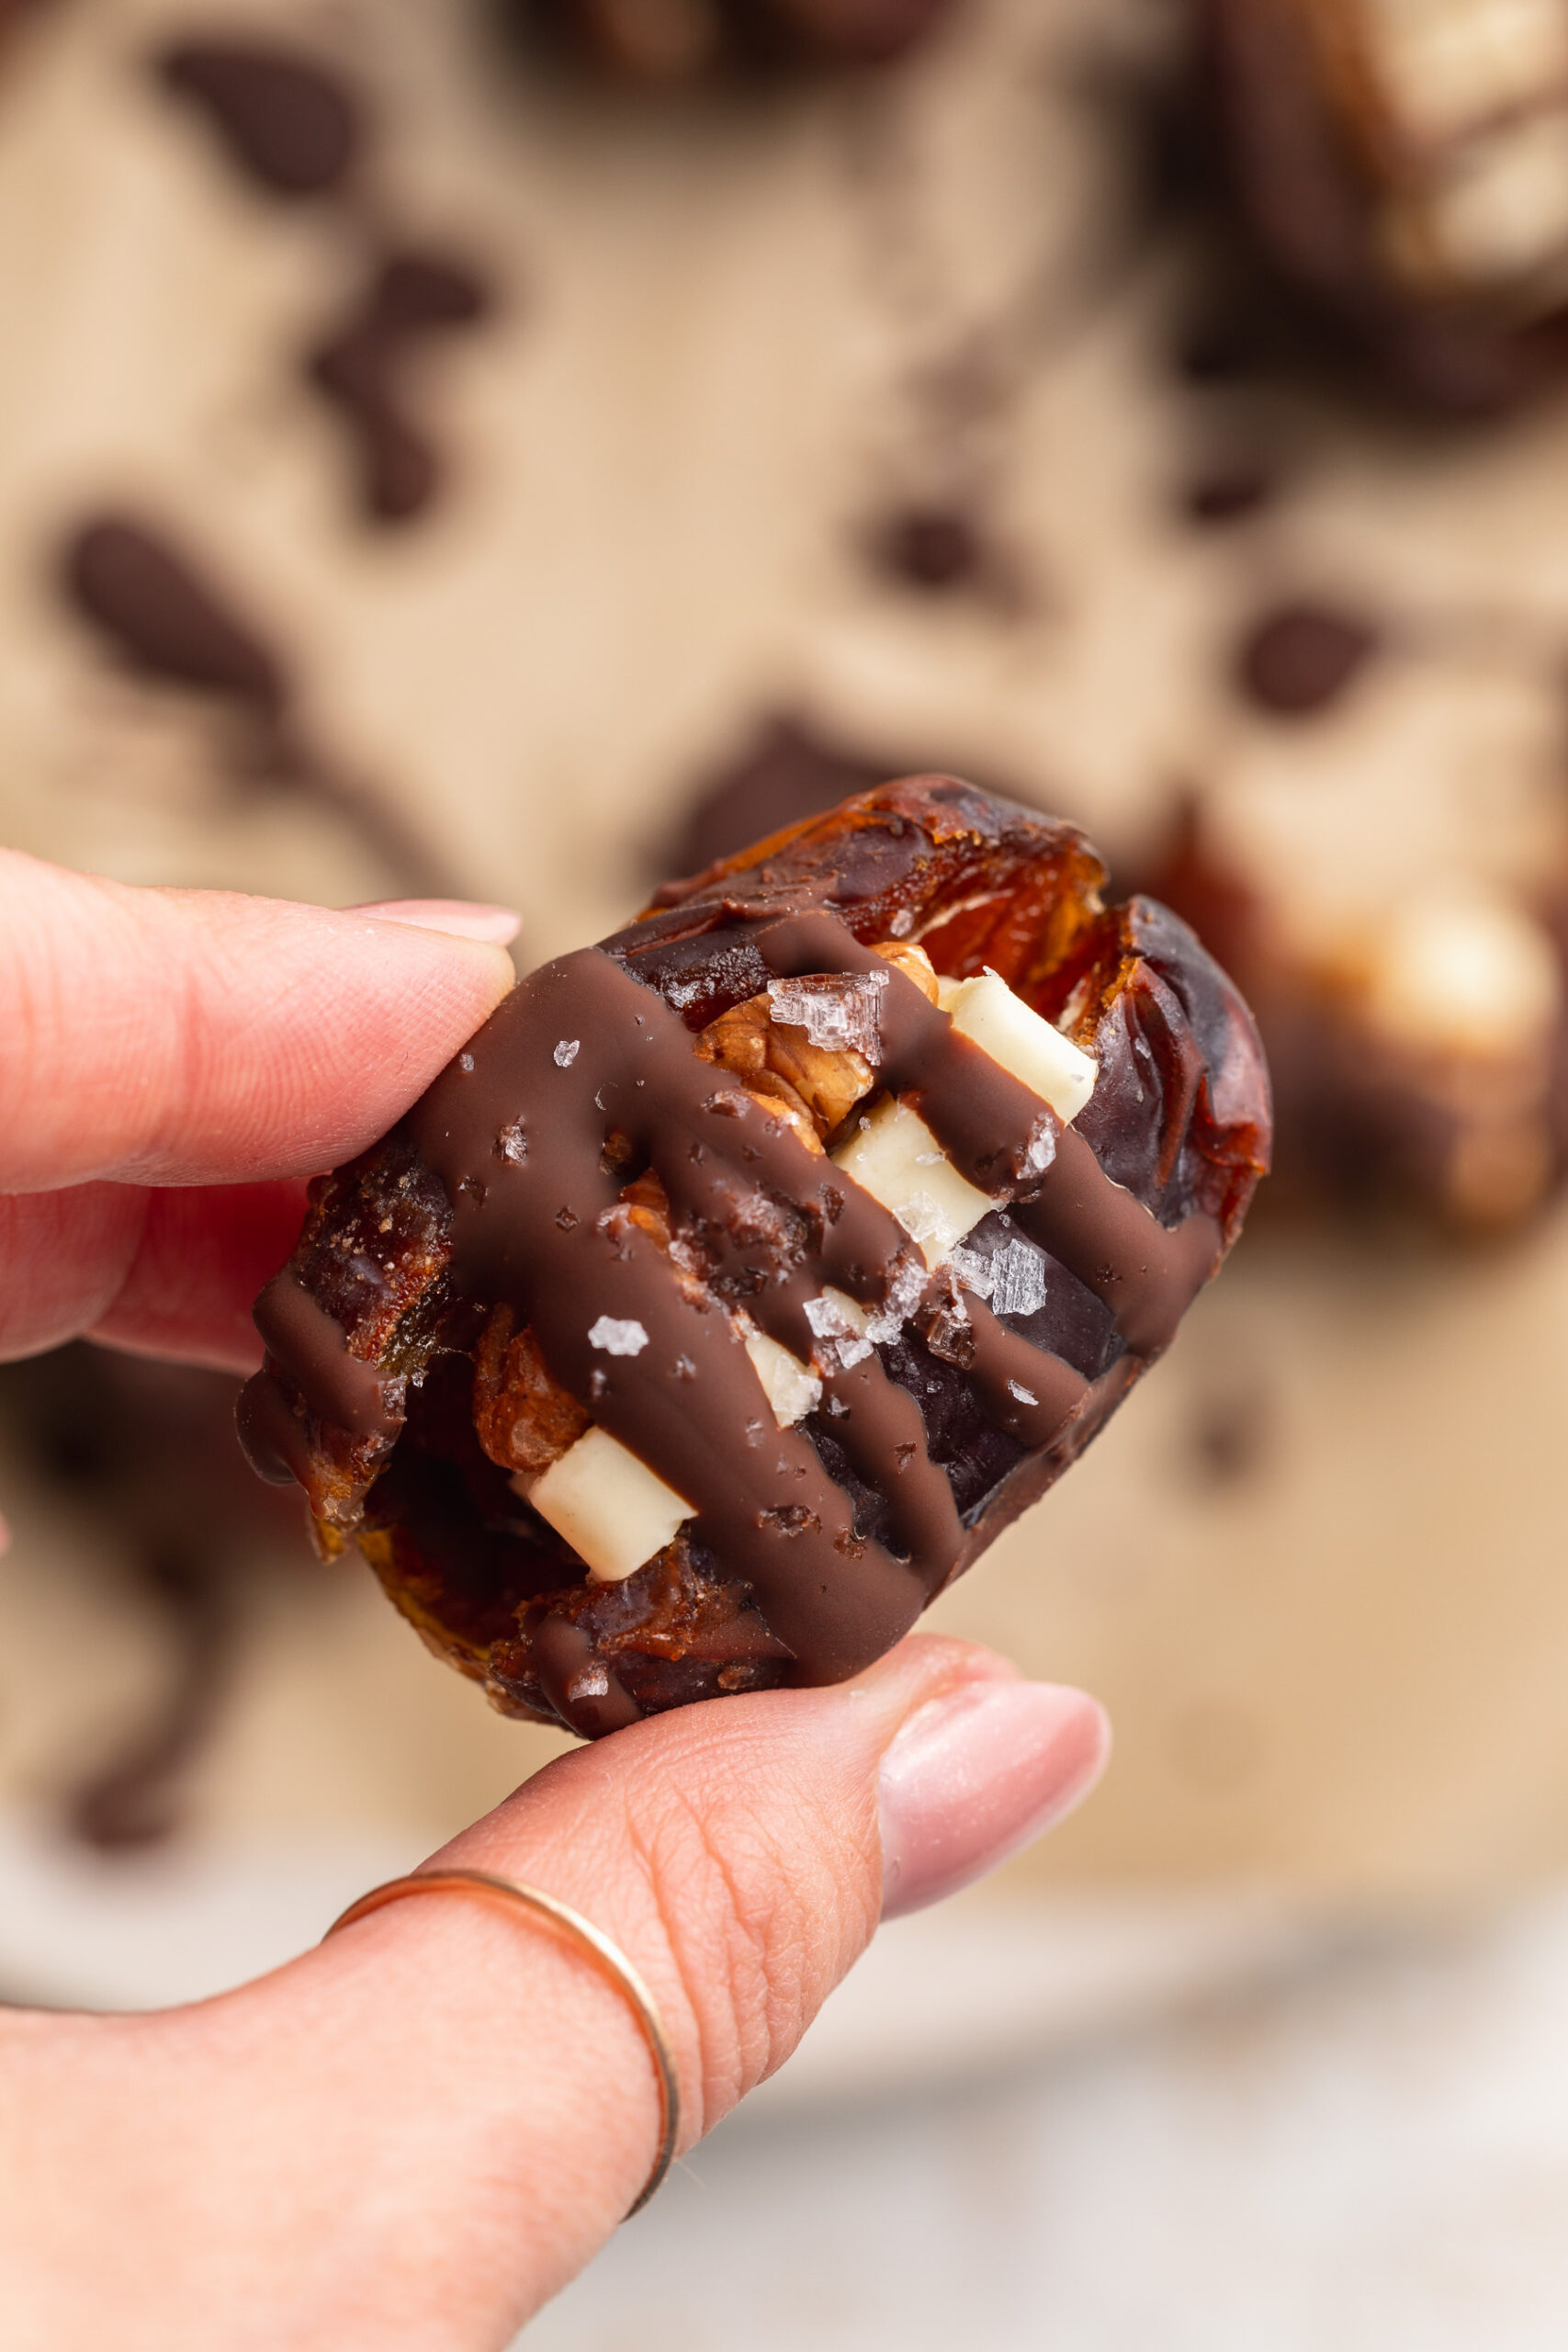
hand holding a butter pecan stuffed date.
No ratings yet

Butter Pecan Stuffed Dates

These butter pecan stuffed dates are a sweet, chewy Medjool date stuffed with cold butter and a crunchy whole pecan, drizzled in chocolate and finished with flaky sea salt – and the flavor combination is shockingly, ridiculously DELICIOUS! They're no-bake, gluten-free, high in fiber, and come together in just 10 minutes with 4 simple ingredients.
Print Pin Rate
Prep Time: 5 minutes
Chill Time: 5 minutes
Total Time: 10 minutes
Servings: 6 servings

Equipment

  • 1 plate

Ingredients

  • 6 medjool dates pitted
  • 4 tablespoons butter sliced into 6 chunks
  • 6 whole pecans
  • 1/2 cup chocolate chips melted
  • flaky sea salt for topping

Instructions

  • Slice each medjool date open, then place a chunk of butter and a whole pecan inside each date. Gently close the date back up, then place them on a plate lined with parchment paper.
  • Transfer the stuffed dates to the fridge while you melt the chocolate. Then, once the chocolate is melted, drizzle it over the stuffed dates and top each date with a pinch of flaky salt.
  • Place the dates in the refrigerator one last time until the chocolate has hardened, then either enjoy right away or store in an airtight container for up to 5 days!

Nutrition

Serving: 1serving | Calories: 200kcal | Carbohydrates: 28g | Protein: 2g | Fat: 12g | Fiber: 5g | Sugar: 20g

Chewy coconut filling, crunchy whole almonds, and a smooth chocolate shell — these healthy Almond Joy bars are the homemade version of your favorite candy bar, and are soooo much better than anything you’d find at the store! Made with just 5 simple ingredients, completely no-bake, gluten-free, and dairy-free, they’re just as delicious as the real thing, but NO corn syrup or refined sugar. I make a batch every couple of weeks and keep them in the fridge for whenever a chocolate craving strikes – which, if I’m being honest, is daily.

If you’re already obsessed with my 6-Ingredient Healthy Snickers and 4-Ingredient Date Caramels, these Almond Joy bars are the next addition to your healthy candy collection. One bite and you’ll never reach for the store-bought version again!

Why You’ll Love These Healthy Almond Joy Bars

  • Just 5 ingredients! Shredded coconut, coconut oil, honey, chocolate chips, and almonds. No condensed milk, no corn syrup, no refined sugar – just simple, healthier ingredients that come together into something truly incredible.
  • No-bake and super easy. Food processor, loaf pan, freezer. That’s all the equipment you need. The most “difficult” part of this recipe is waiting for the chocolate to set – and trust me, the wait is so worth it.
  • Gluten-free and dairy-free. Naturally free of both gluten and dairy, making these bars accessible for almost everyone. Just use your favorite dairy-free chocolate chips and you’re all set.
  • Tastes just like the real thing – but WAY healthier. The chewy coconut filling, the crunch of the whole almonds, the snap of the chocolate shell – it’s all here!
  • Great for meal prep and gifting. Make a batch and keep them in the fridge all week for a ready-to-grab sweet treat. They also make the most impressive homemade gift – nobody needs to know how easy they were to make!
overhead image of healthy almond joy bars.

Sam’s Recipe Tips

  • Don’t over-blend the coconut filling. This is the most important tip in the whole recipe. Pulse – don’t blend continuously – and stop as soon as the mixture sticks together when pressed. Over-blending will turn it into a greasy coconut paste that won’t hold its shape as a bar.
  • Press the coconut layer firmly into the pan. The more firmly you press the filling into an even layer, the cleaner and more uniform your bars will look once cut. Use the bottom of a flat measuring cup to really pack it in.
  • Freeze the coconut base before dipping. The filling needs to be completely firm and cold before you dip it in chocolate. If it’s too soft, the bars will fall apart in the chocolate. 20–30 minutes in the freezer is the minimum – longer is even better.
  • Use a fork for dipping. A fork gives you the most control when coating the bars in chocolate and lets the excess drip off cleanly. A dipping tool also works great if you have one.
  • Add a pinch of flaky sea salt on top. Completely optional, but highly recommended! A little flaky sea salt on top of the almonds takes these bars to an entirely different level.

Storage Instructions

In the fridge: Store in an airtight container in the refrigerator for up to 2 weeks. These bars are best served cold straight from the fridge – the coconut filling stays firm and the chocolate shell has the perfect snap.

In the freezer: These Almond Joy bars freeze beautifully! Store in an airtight container or zip-lock freezer bag for up to 2 months. Layer between sheets of parchment paper so they don’t stick together. Let sit at room temperature for 5 minutes before eating for the best texture, or enjoy them straight from the freezer if you like them extra firm and cold.

Note: These bars will soften and the chocolate may get a little melty at room temperature, so always store them cold. Do not leave out on the counter for extended periods!

healthy almond joys bars, one cut in half to show the inside.
5 from 1 vote

5-Ingredient Healthy Almond Joy Bars

These healthy Almond Joy bars are a 5-ingredient, no-bake copycat of the classic candy bar – chewy coconut filling, crunchy whole almonds, and a smooth chocolate shell. They're gluten-free, dairy-free, naturally sweetened with honey or maple syrup, and come together in under 45 minutes with NO baking required! f you're looking for a healthy Almond Joy recipe that actually tastes like the real thing but is made with healthier ingredients, this is it!
Print Pin Rate
Prep Time: 15 minutes
Chill Time: 10 minutes
Servings: 12 servings

Equipment

  • 1 food processor
  • 1 9×4-inch loaf pan
  • 1 small bowl

Ingredients

For the coconut filling:

  • 2 cups unsweetened shredded coconut
  • 1/4 cup coconut oil melted
  • 1/4 cup honey or maple syrup

For the chocolate layer:

  • 1 cup chocolate chips
  • 2 teaspoons coconut oil

For topping:

  • 1/2 cup whole almonds

Instructions

  • Line a 9×4-inch loaf pan with parchment paper.
  • Add all of the coconut filling ingredients in a food processor and pulse until the coconut is finely chopped, and the mixture sticks when pressed together (be very careful not to blend the mixture too much!).
  • Transfer the coconut mixture to your prepared loaf pan and press it into an even layer. Transfer it to the freezer for about 20-30 minutes.
  • While the coconut filling is in the freezer, prepare the chocolate layer by melting the chocolate chips and coconut oil together in either the microwave or over a double boiler until completely smooth.
  • Remove the coconut bars from the freezer, and cut them into 12 squares. Dip each square into melted chocolate, then transfer them to a plate line with parchment paper. While the chocolate is still wet, place one or two almonds on top of each bar.
  • Once all bars are coated in chocolate and topped with almonds, transfer them back to the freezer to set for about 10 minutes, or until the chocolate has hardened.Either enjoy the almond joy bars right away, or store in an airtight container in the fridge for up to two weeks!

Nutrition

Serving: 1serving | Calories: 200kcal | Carbohydrates: 16g | Protein: 3g | Fat: 17g | Fiber: 3g | Sugar: 11g

A warm, rich, deeply chocolatey brownie *in a mug* in 90 seconds! This protein mug cake is the recipe I turn to every single time I want something sweet but don’t want to wait, bake, or really work too hard. It’s made with just 5 simple ingredients, packs a serious protein boost, and tastes truly indulgent – even though it’s completely healthy, gluten-free, and refined sugar-free!

What makes this one different from other protein mug cake recipes? Two things: Greek yogurt and cocoa powder. The Greek yogurt makes the cake incredibly moist and fudgy – no dry, chalky protein cake here. The cocoa powder doubles down on the chocolate flavor for a true brownie experience. If you like my Single Serve Protein Cookie or my 4-Ingredient Protein Brownies, then you’re going to LOVE this one!

Why You’ll Love This Protein Mug Cake

  • Ready in just 90 seconds. 90 seconds in the microwave and you’ve got a warm, freshly baked brownie. It doesn’t get faster than that. (No microwave? Bake it at 350°F for 25 minutes — equally delicious!)
  • High in protein. With both Greek yogurt and chocolate protein powder in the batter, this mug cake delivers a genuinely impressive amount of protein per serving — no sad, barely-there protein content here.
  • Gluten-free and healthy. No flour, no butter, no refined sugar — just clean, wholesome ingredients that come together in the most satisfying single-serve dessert.
  • Perfectly moist and fudgy. The Greek yogurt is the secret weapon here. It keeps this mug cake soft, rich, and brownie-like — not dry, not rubbery, not chalky. Just perfect.
  • 5 ingredients, one bowl. Mix it all in the mug you’re going to eat it from and call it a day. Minimal cleanup, maximum satisfaction.
overhead image of a protein brownie mug cake with a spoon in it.

Frequently Asked Questions

How much protein does this protein mug cake have?

This mug cake contains approximately 28–36 grams of protein per serving, depending on the brand of protein powder you use. The protein comes from two sources: the chocolate protein powder (typically 20–30g per scoop) and the Greek yogurt (approximately 6g per ¼ cup). That’s more protein than most store-bought protein bars — in something that tastes like a warm brownie!

What protein powder did you use?

I used Be Well By Kelly Chocolate Protein Powder, and it’s genuinely my favorite for baking. It has a delicious, natural chocolate flavor that makes this mug cake taste like the real thing — not like a protein shake. It also bakes up moist and soft, not dry or rubbery. That said, any chocolate protein powder you love will work in this recipe! Just keep in mind that different brands absorb liquid differently, so your batter consistency may vary slightly.

Can I make this dairy-free?

Yes! Swap the Greek yogurt for a thick, plain dairy-free yogurt — coconut yogurt or a thick oat milk yogurt both work great. The texture may be very slightly different depending on which dairy-free yogurt you use, but it will still be delicious. Make sure your protein powder is also dairy-free (most plant-based protein powders are) and you’re all set.

Sam’s Recipe Tips

  • Stir it VERY well. I mean it – stir until there are zero dry spots, NO lumps, and the batter looks completely smooth and uniform. Protein powder and cocoa powder can be stubborn and clump together, and any unincorporated pockets will result in a dry, uneven texture once cooked. Take the extra 30 seconds to really mix it thoroughly – it makes a huge difference!
  • Don’t overcook it. The number one mistake with mug cakes is overcooking. Start at 90 seconds and check it – the edges should look set, but the center can look slightly underdone. It will continue to cook and firm up as it rests. Every microwave is different, so if yours runs hot, start checking at 75 seconds.
  • Let it rest before eating. Give it a full minute to rest after microwaving. Not only will it be dangerously hot straight out of the microwave, but resting allows the center to finish setting into that perfect fudgy brownie texture.
  • Use a large mug. Make sure your mug is at least 12 ounces – the batter will bubble and rise as it cooks. A mug that’s too small can overflow in the microwave. A wide, short mug or a ramekin gives the most even cooking.
  • Top it generously. A drizzle of peanut butter, a dollop of Greek yogurt, or a handful of chocolate chips on top takes this from great to absolutely incredible. Don’t skip the toppings!
  • Oven method tip: If baking in the oven, use a greased 6-ounce ramekin and bake at 350°F for 25 minutes. The result is slightly more cake-like and less fudgy than the microwave version – equally delicious, just a different texture.
freshly baked protein brownie mug cake with chocolate chips and flaky salt on top.
4.67 from 3 votes

5-Ingredient Protein Brownie Mug Cake

This protein brownie mug cake is a warm, rich, deeply chocolatey single-serve dessert made with just 5 simple ingredients! It's gluten-free, refined sugar-free, and packs over 30 grams of protein per serving, making it the ultimate healthy treat that actually tastes indulgent. For a protein mug cake that's moist, fudgy, and genuinely delicious – THIS is it!
Print Pin Rate
Prep Time: 2 minutes
Cook Time: 2 minutes
Total Time: 4 minutes
Servings: 1 serving

Equipment

  • 1 microwave-safe mug

Ingredients

Instructions

  • Add all ingredients to a large microwave-safe mug and stir VERY well until completely smooth with no lumps or dry spots.
  • Microwave: Cook on high for 90 seconds. Let rest 1 minute before eating.
  • Oven: Pour into a greased ramekin and bake at 350°F for 25 minutes.
  • Top with peanut butter, Greek yogurt, chocolate chips, or your favorite toppings. Enjoy immediately!

Nutrition

Serving: 1serving | Calories: 280kcal | Carbohydrates: 16g | Protein: 36g | Fat: 9g | Fiber: 2g | Sugar: 10g