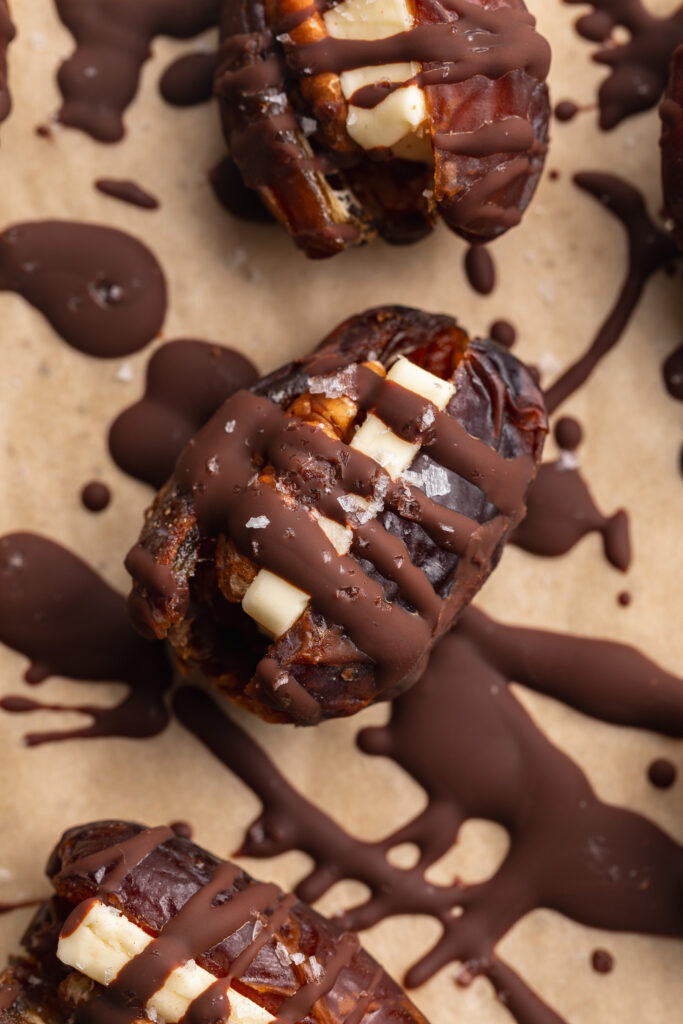
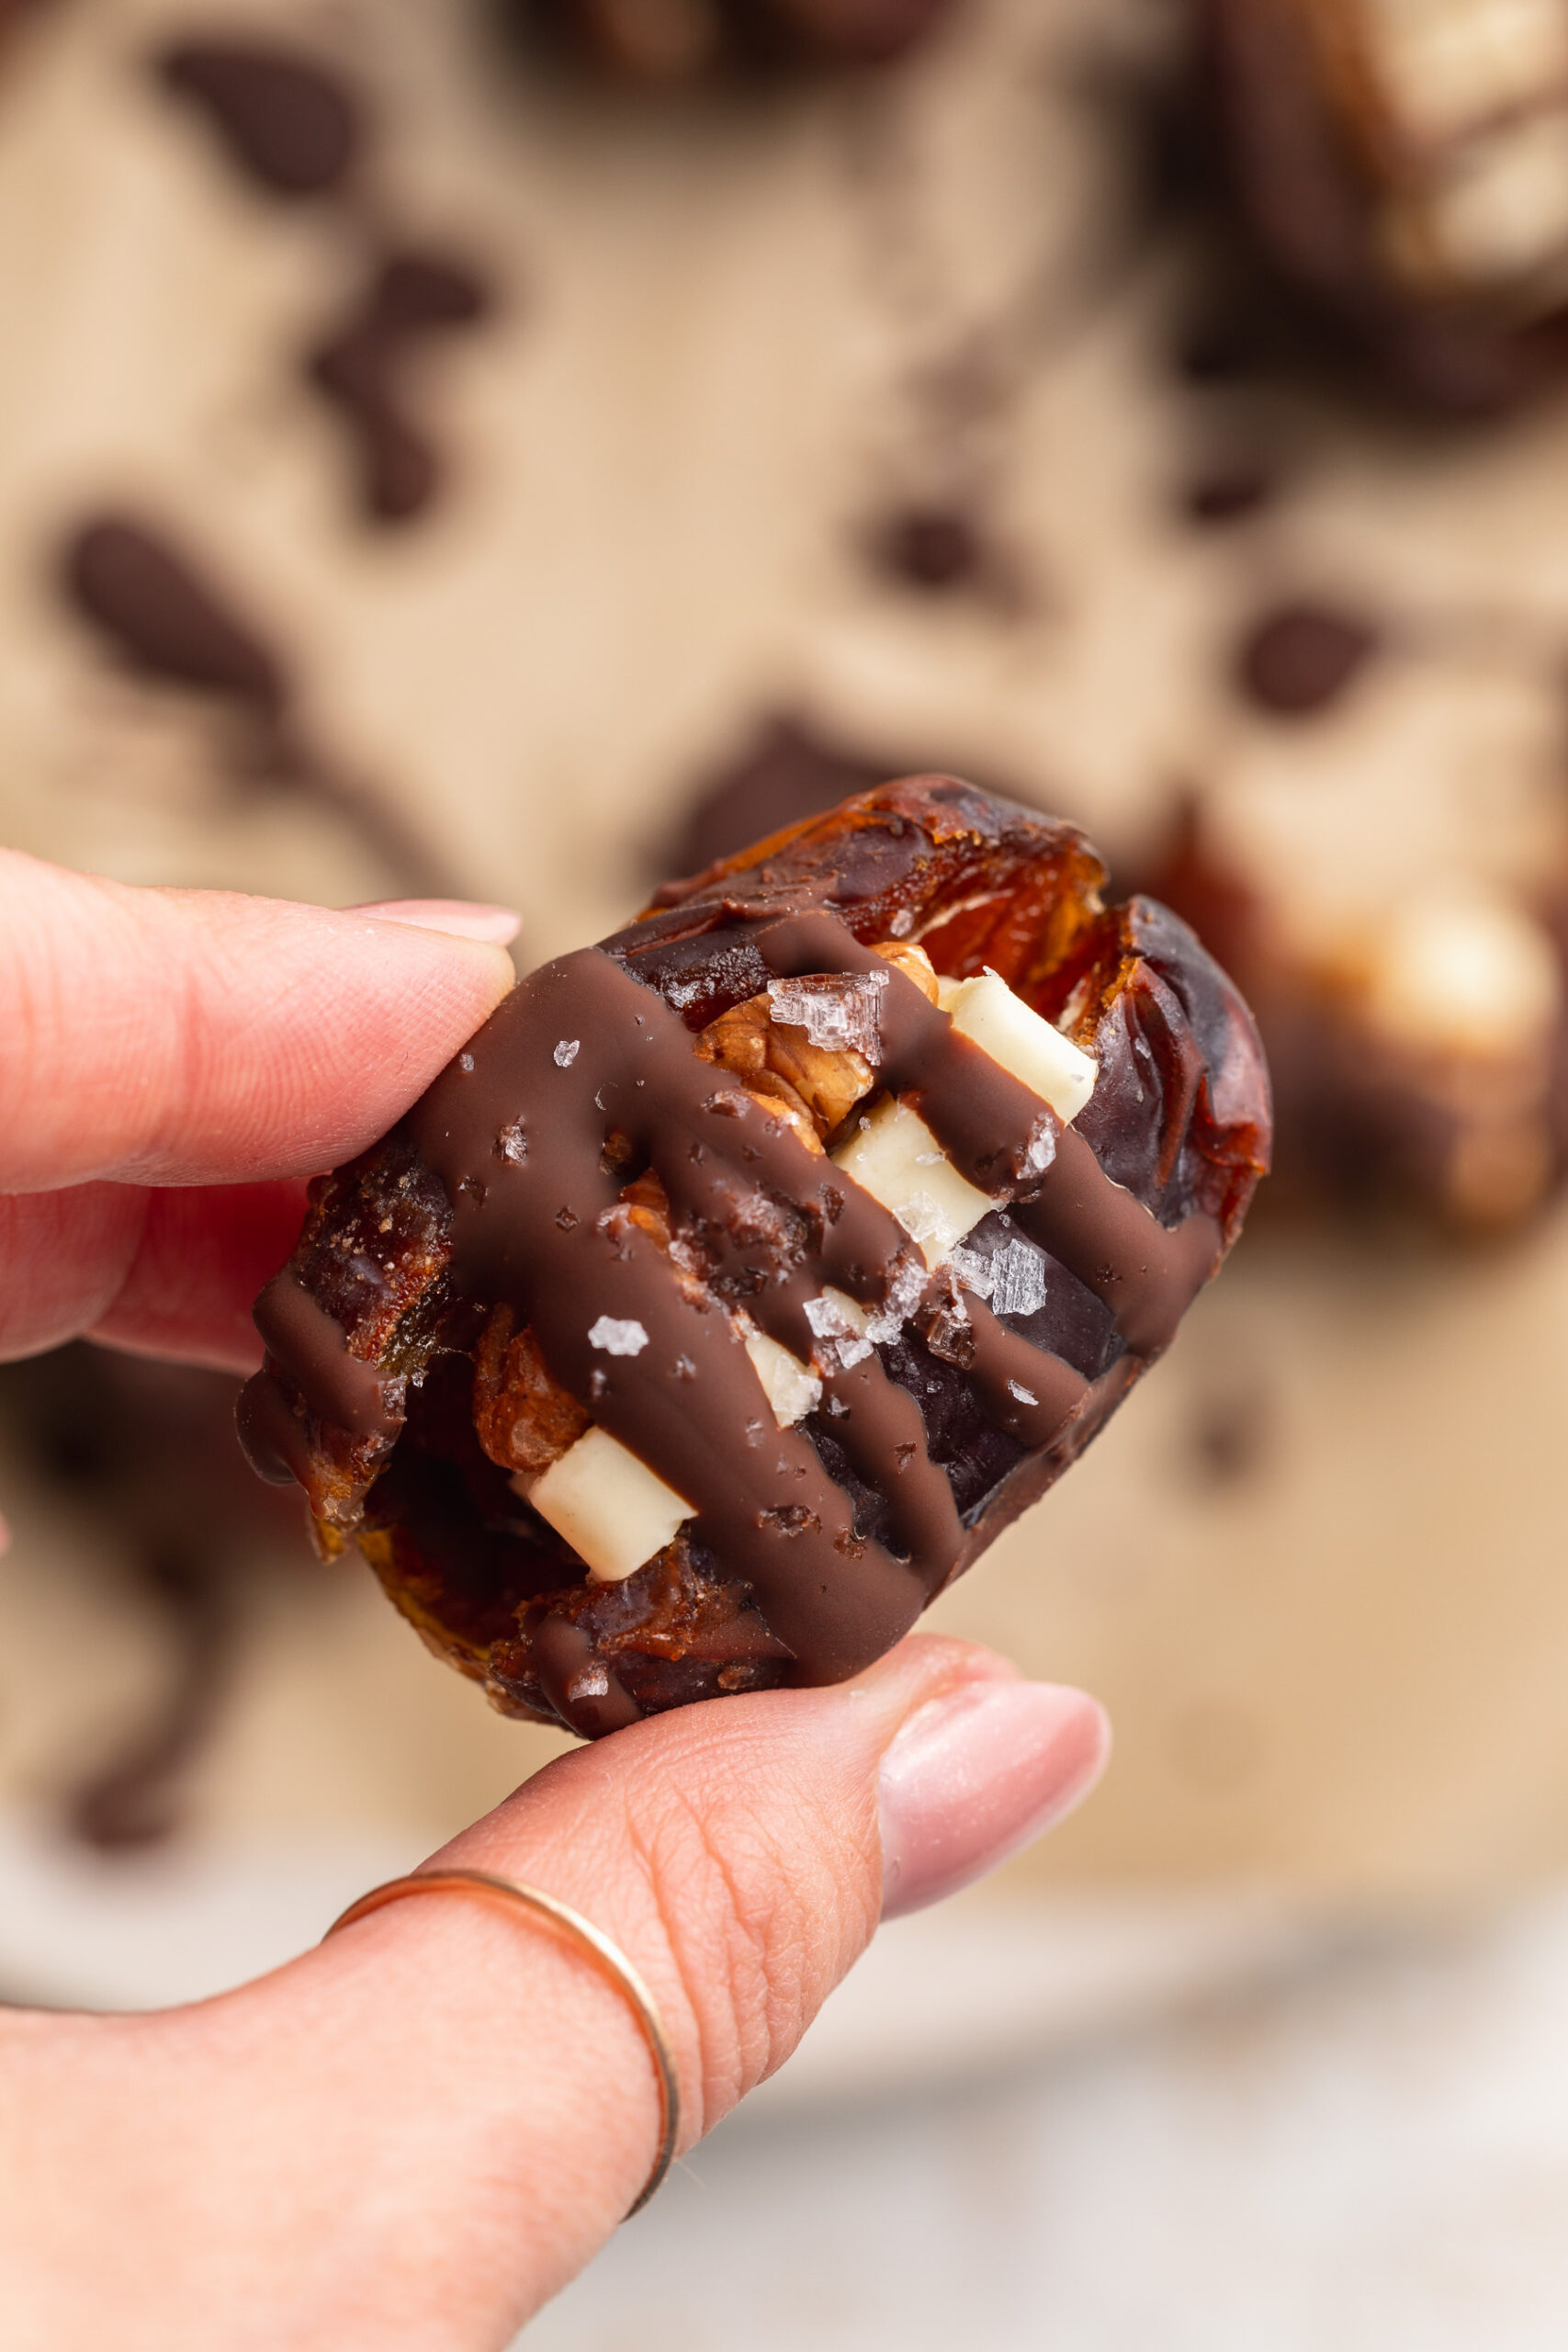
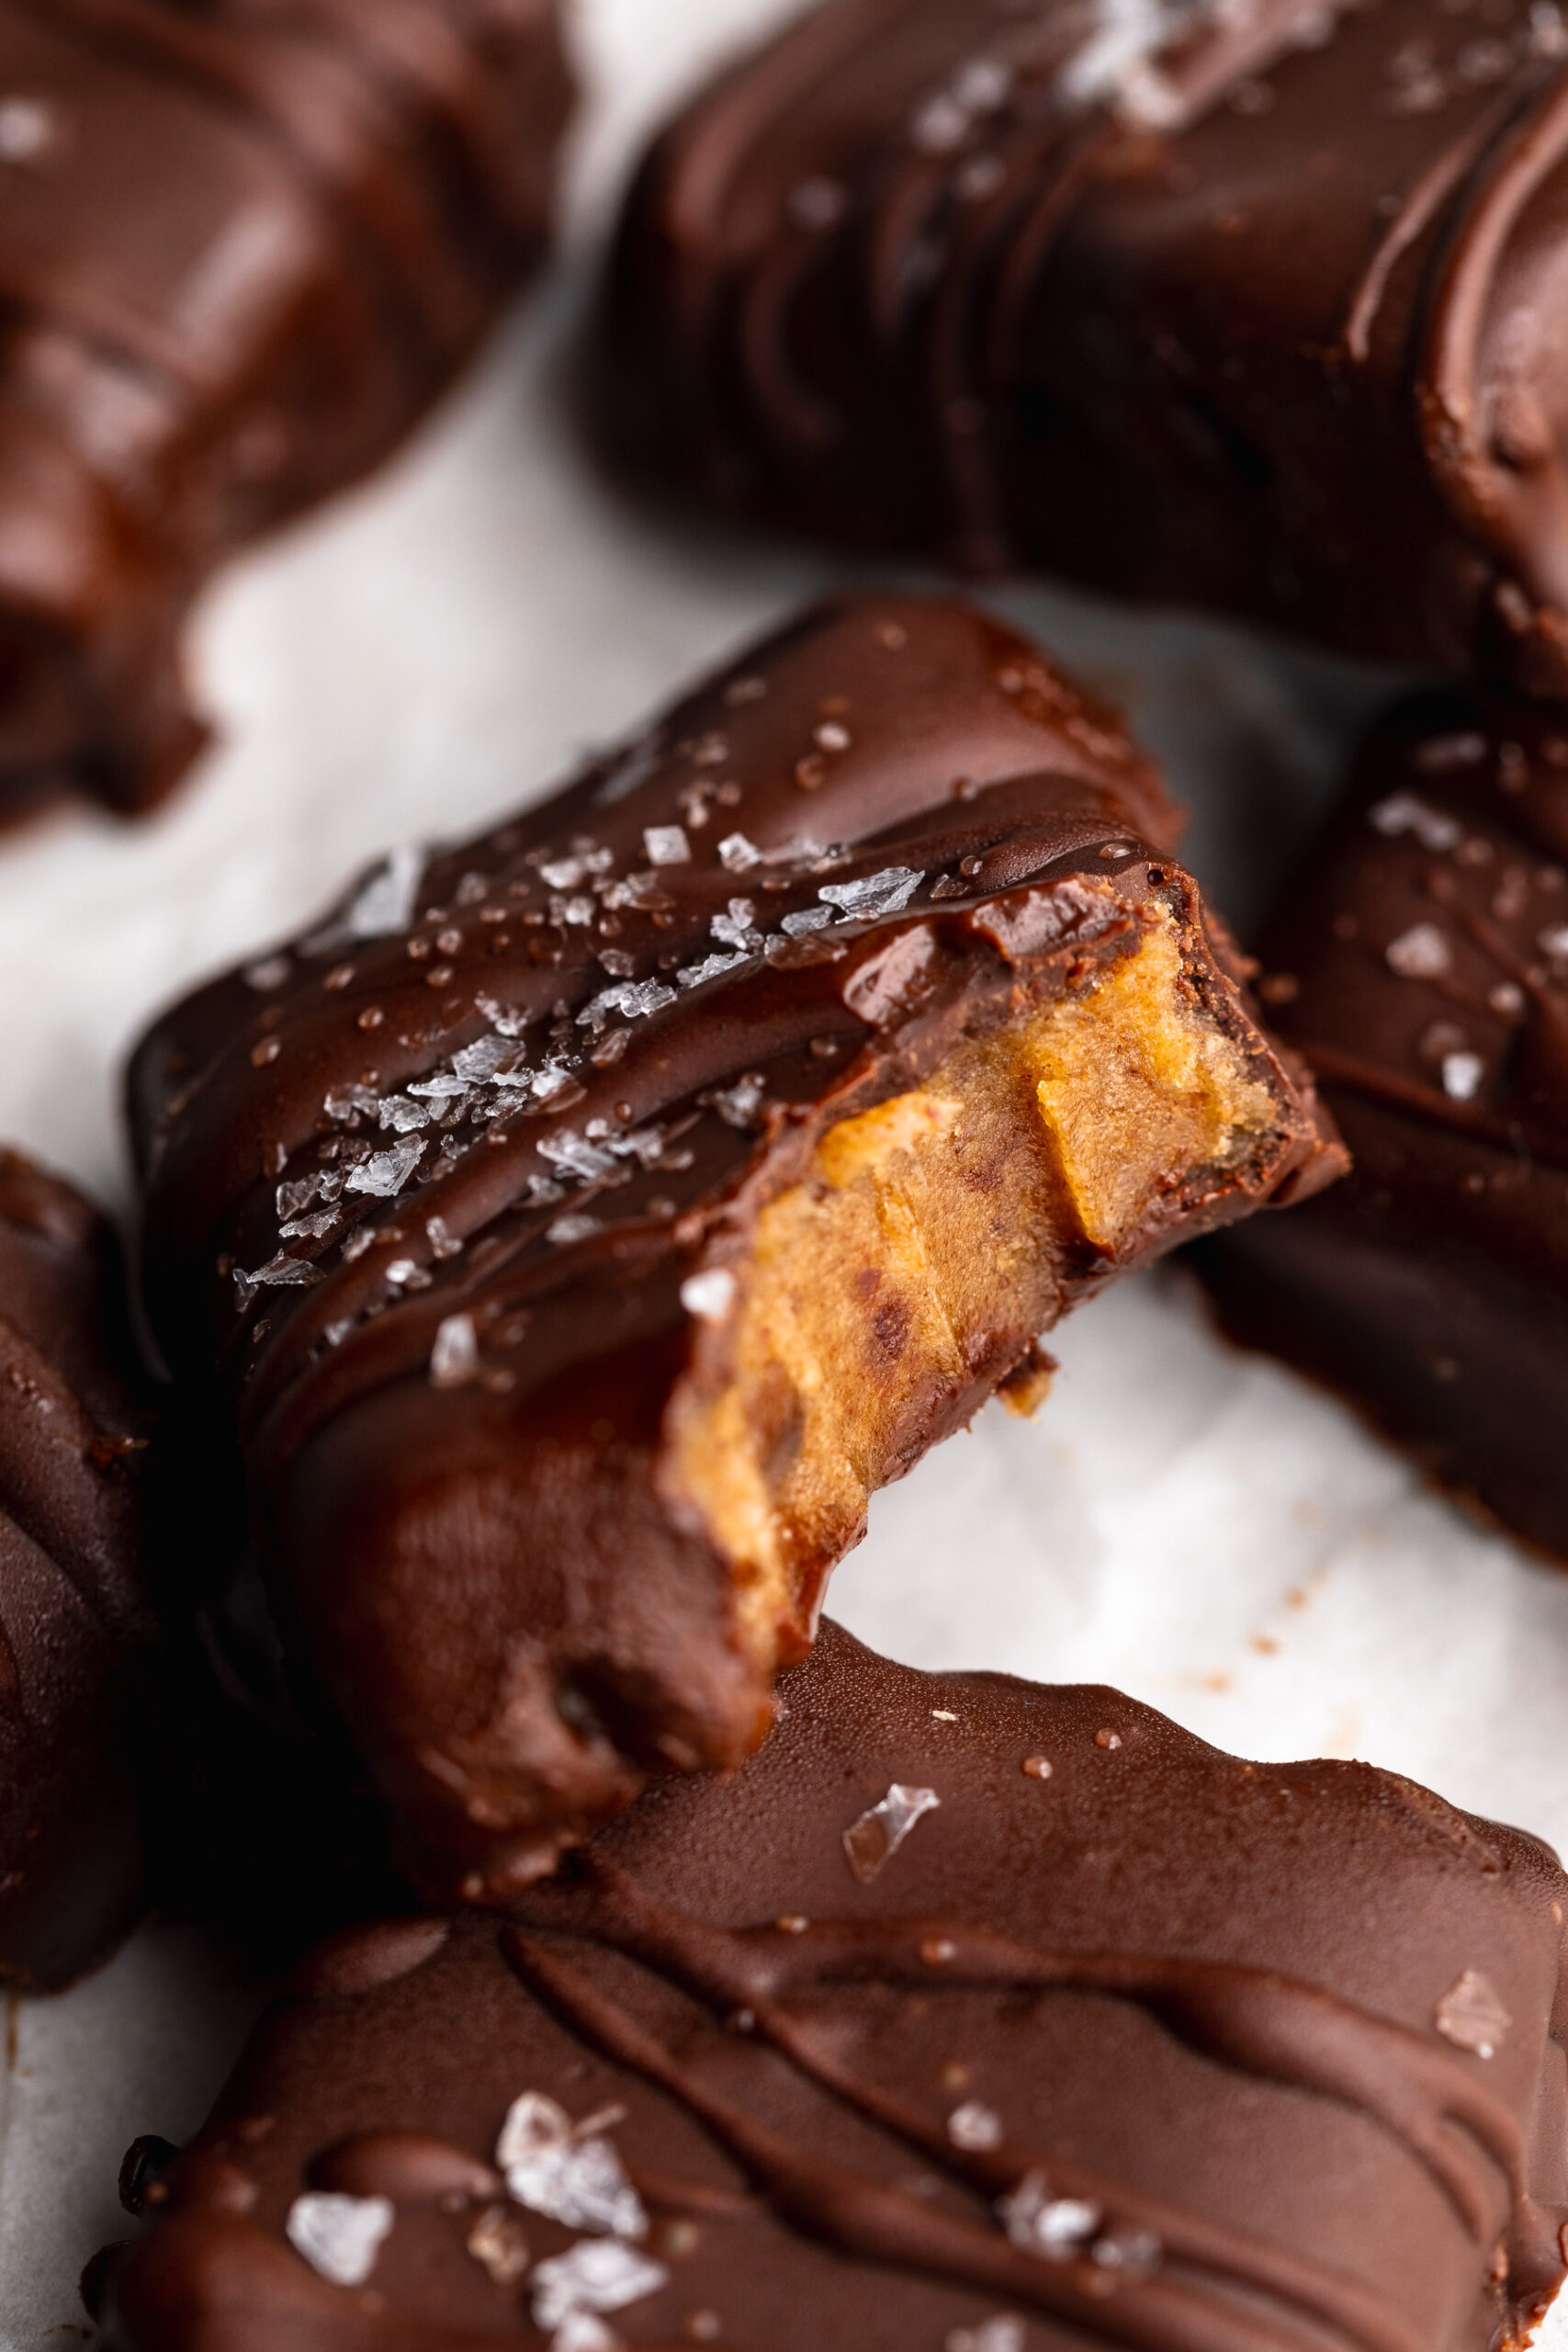
Tag

chocolate

Browsing

If you love Reese’s peanut butter cups (and honestly, who doesn’t?!) these healthy peanut butter bars are about to become your new favorite treat! A thick peanut butter base topped with a smooth chocolate-peanut butter layer, sliced into individual bars. They taste like a giant peanut butter cup, but made with just 4 better-for-you ingredients. Entirely no-bake, and even gluten-free, dairy-free, and refined sugar-free!

I keep a batch of these in my freezer at all times – right alongside my 4-Ingredient Healthy Date Caramels and 6-Ingredient Healthy Snickers – perfect for when I’m craving a little something sweet. These bars take about 10 minutes to make, and then the freezer does the rest!

healthy peanut butter cup bars sliced with flaky salt on top.

Why You’ll Love These Healthy Peanut Butter Cup Bars

  • Just 4 ingredients. Peanut butter, almond or oat flour, maple syrup, and chocolate chips. That’s the whole list – no powdered sugar, no butter, no overly processed ingredients!
  • No-bake and incredibly easy. Mix, press, pour, chill. There’s no oven involved, no special equipment, and no complicated steps.
  • Gluten-free and dairy-free. Made with almond or oat flour and dairy-free chocolate chips, these bars work for almost every diet.
  • Refined sugar-free. Naturally sweetened with maple syrup – just enough to bring out the best in that peanut butter flavor without going overboard.
  • A healthy sweet treat everyone loves! Kids, adults, healthy-dessert-skeptics, chocolate-lovers – these bars are everyone’s favorite. They taste like dessert but are made with real, healthier ingredients.
  • Great for meal prep. Make a batch on Sunday, slice into bars, and store in the fridge or freezer for a ready-to-grab treat all week long.

Frequently Asked Questions

Can I freeze these peanut butter bars?

Absolutely – and I highly recommend it! These bars freeze beautifully and are honestly even better straight from the freezer. Freeze in the pan until completely set, then slice and store in an airtight freezer-safe container or zip-lock bag for up to 3 months. When you’re ready to eat one, let it sit at room temperature for 5 minutes or enjoy it cold — both are delicious. For easy grab-and-go portions, layer the bars between sheets of parchment paper so they don’t stick together.

What can I use instead of almond flour?

Oat flour is the best swap – use the same amount (1 cup) and the bars will come out just as thick and fudgy. You can make your own oat flour by blending rolled oats in a food processor until fine. Coconut flour is another option, but it absorbs more moisture than almond or oat flour, so you’ll want to use less — start with ¼ cup and adjust from there. If the mixture feels too dry, add an extra tablespoon or two of peanut butter to bring it together.

How much protein does each bar contain?

Each bar contains approximately 6–7 grams of protein, primarily from the natural peanut butter and almond flour. For an extra protein boost, you can stir a scoop of vanilla protein powder into the peanut butter base — just reduce the almond flour slightly so the texture stays right. My 4-Ingredient Protein Reese’s Eggs use a similar method if you want an even higher-protein peanut butter chocolate treat!

close up image of a bite taken out of a healthy peanut butter cup bars.
No ratings yet

Healthy Peanut Butter Cup Bars

These healthy peanut butter bars are a no-bake, 4-ingredient treat that tastes exactly like a giant peanut butter cup! With a thick, fudgy peanut butter base and a smooth chocolate-peanut butter layer on top – they're gluten-free, dairy-free, refined sugar-free, and come together in just 10 minutes. If you're looking for an easy healthy peanut butter bar recipe that's as delicious as it is healthy, this is it!
Print Pin Rate
Prep Time: 10 minutes
Freeze Time: 1 hour
Total Time: 1 hour 10 minutes
Servings: 12 servings

Equipment

  • 1 9×4-inch loaf pan
  • 1 large bowl
  • 1 small bowl

Ingredients

For the peanut butter layer:

  • 1 cup creamy peanut butter unsweetend
  • 1 cup almond flour or oat flour
  • 1/4 cup maple syrup
  • 1 teaspoon vanilla extract optional

For the chocolate layer:

  • 1 cup chocolate chips
  • 1/4 cup creamy peanut butter unsweetened

Instructions

  • Line a 9×4-inch baking pan with parchment paper.
  • Make the peanut butter layer by mixing together the peanut butter, almond or oat flour, maple syrup, and vanilla extract (if using) in a large bowl.
  • Transfer the peanut butter mixture to your prepared baking pan and press it into an even layer in the pan.
  • Make the chocolate layer by melting the chocolate chips and peanut butter in either the microwave or over a double boiler until completely smooth. Pour the melted chocolate mixture on top of the peanut butter layer and spread until it’s smooth and even.
  • Chill the bars in the freezer for one hour, then remove and slice into small bars.

Nutrition

Serving: 1serving | Calories: 265kcal | Carbohydrates: 18g | Protein: 4g | Fat: 19g | Fiber: 2g | Sugar: 10g

Ok, we need to talk about this healthy cookie pie for a second… because it might just be my new favorite thing I’ve ever made! Imagine a giant, warm, ooey gooey chocolate chip cookie that comes out of the oven with crispy edges, a fudgy center, and melty pools of chocolate in every single bite. Now imagine it’s made with just 6 wholesome ingredients, no refined sugar, and is totally gluten-free. That is exactly what this recipe is, and I am not exaggerating when I say that even healthy dessert skeptics will be going back for seconds (and thirds!!!).

This is the kind of recipe that proves that healthy eating doesn’t have to mean boring eating. It’s indulgent, deeply satisfying, and looks way more impressive than the effort it takes to make. If you like my 6-Ingredient Healthy Snickers or my 4-Ingredient Protein Brownies, then you’re going to LOVE this cookie pie!

Why You’ll Love This Healthy Cookie Pie

  • Only 6 ingredients! Almond butter, maple syrup, eggs, almond flour, baking soda, and chocolate chips. That’s the whole list – no pie crust, mixer, or complicated steps.
  • Ooey gooey and totally indulgent. 😍 This cookie pie bakes up with perfectly crispy edges and a soft, fudgy, pull-apart center that is genuinely irresistible. No one will believe it’s healthy.
  • Even healthy dessert skeptics will love it. I’ve made this for people who are convinced that healthy desserts are never as good as the real thing, and let me tell ya – they’ve eaten their words (see what I did there?? 😉).
  • Super easy to make! One bowl, one pie dish, 15 minutes in the oven. You can go from craving to eating in under 30 minutes.
  • Naturally gluten-free and dairy-free. Made with almond flour and naturally sweetened with maple syrup – no refined sugar, no gluten, no dairy.
  • Perfect for sharing. This cookie pie is the ultimate crowd-pleasing dessert. Serve it warm straight from the dish with a scoop of vanilla ice cream on top – YUM!
close up image of healthy cookie pie being scooped out of a skillet.

Recipe Variations and Substitutions

  • Almond Butter: Any creamy nut or seed butter works in this recipe. Peanut butter gives it a more classic cookie flavor, cashew butter is milder and slightly sweeter, and sunflower seed butter keeps it completely nut-free.
  • Maple Syrup: Honey is a perfect 1:1 swap. You can also use agave nectar or any other liquid sweetener you love.
  • Almond Flour: Oat flour works well as a substitute! Use the same amount. Just note that the texture will be slightly less dense and more cake-like.
  • Chocolate Chips: Swap for peanut butter chips, white chocolate chips, or cacao nibs for a different flavor twist. A mix of chocolate chips and chopped nuts is also incredible.
  • Add-Ins: Want to take it to the next level? Stir in ¼ cup of chopped walnuts or pecans for a nutty crunch, or swirl in a tablespoon of peanut butter over the top before baking.

Sam’s Recipe Tips

  • Don’t overbake it. I cannot stress this enough – the secret to the perfect ooey gooey cookie pie is pulling it from the oven when the center still looks slightly underdone. It will firm up as it cools, and you’ll be left with that dreamy soft, fudgy middle. If you bake until the center looks fully set, it’ll come out dry.
  • Use an oven-safe skillet for extra-crispy edges. A cast-iron skillet holds heat beautifully and gives you those perfect crispy, golden-brown edges with an extra gooey center. A standard 9-inch pie dish works great too!
  • Serve it warm. Cookie pie is 100% best served warm, straight from the dish. The chocolate chips stay melty and the center is soft and pull-apart perfect. Reheat individual slices in the microwave for 20–30 seconds if needed.
  • Storing leftovers: Store any leftover cookie pie covered at room temperature for up to 2 days, or in the fridge in an airtight container for up to 5 days. When you’re ready to eat, I recommend warming it back up in the oven for a minute or two!
overhead image of healthy cookie pie in a pie dish with ice cream on top.
4.50 from 2 votes

6-Ingredient Healthy Cookie Pie

This healthy cookie pie is a 6-ingredient, gluten-free dessert that bakes up with perfectly crispy edges, a soft fudgy center, and melty chocolate chips in every bite! Made with almond butter, maple syrup, and almond flour, it comes together in one bowl in under 30 minutes with barely any effort. If you're looking for an indulgent, crowd-pleasing dessert recipe that's actually healthy, this is it!
Print Pin Rate
Prep Time: 5 minutes
Cook Time: 12 minutes
Total Time: 17 minutes
Servings: 6 servings

Equipment

  • 1 9-inch pie dish
  • 1 large bowl

Ingredients

  • 1 cup creamy unsweetened almond butter or any nut/seed butter
  • 1/2 cup maple syrup or honey
  • 2 eggs
  • 1 cup almond flour
  • 1/2 teaspoon baking soda
  • 1/2 cup chocolate chips

Instructions

  • Preheat oven to 350°F and lightly grease a 9-inch pie dish or oven-safe skillet.
  • Whisk together the almond butter, maple syrup, and eggs in a large bowl until smooth and combined.
  • Stir in the almond flour and baking soda until a thick batter forms.
  • Fold in the chocolate chips, then pour into the prepared pie dish and spread evenly.
  • Bake for 12–15 minutes, until the edges are set and golden but the center still looks slightly underdone.
  • Let cool for at least 10 minutes before slicing. Serve warm with ice cream or whipped cream!

Notes

  • Don’t overbake! Pull from the oven when the center looks slightly underdone for the best gooey texture.
  • Store covered at room temperature for up to 2 days, or refrigerated for up to 5 days.
  • Freeze individual slices for up to 2 months.

Nutrition

Serving: 1serving | Calories: 320kcal | Carbohydrates: 24g | Protein: 9g | Fat: 22g | Fiber: 3g | Sugar: 16g

If you loved my Cottage Cheese Cookie Dough, get ready — because this cottage cheese brownie batter is about to be your new obsession. Same concept, same creamy no-bake magic, but make it chocolate. We’re blending cottage cheese until it’s completely smooth (so you’d never know it’s in there!), then mixing in almond flour and chocolate protein powder for a thick, fudgy, brownie batter-like treat that’s packed with protein and ready in just 5 minutes!

And yes — it really does taste like brownie batter. Rich, chocolatey, and superrrr satisfying! Whether you eat it straight from the bowl with a spoon (trust me, I don’t judge), or use it as a dip for strawberries and pretzels, I promise you’re going to be making this on repeat. For more no-bake chocolate treats, you’ll also love my 4-Ingredient Protein Brownies and 3-Ingredient Protein Cookies!

Why You’ll Love This Recipe

  • High-Protein & Satisfying: Packed with protein from cottage cheese and chocolate protein powder, this brownie batter keeps you full and fueled — not just for a minute, but for real.
  • Quick & Easy: No baking, no cooking, no fuss. Just blend, mix, and dig in. Start to finish in 5 minutes.
  • Wholesome Ingredients: Made with simple, real-food ingredients that you can feel great about eating. No refined sugar – simply delicious!
  • Two Ways to Make It: Use chocolate protein powder for a protein boost, or swap in unsweetened cocoa powder if you prefer to keep it protein powder-free. Both versions are incredible!
overhead image of cottage cheese brownie batter in a small dish with a spoon.

What Makes This Cottage Cheese Brownie Batter Healthy?

This brownie batter is a genuinely nourishing treat, not just a “better than nothing” swap. Cottage cheese is the star ingredient, delivering a creamy texture along with a solid dose of protein and calcium — all without any of the heavy cream, butter, or eggs you’d find in traditional brownie batter. Maple syrup keeps the sweetness natural and free of refined sugar, while almond flour adds healthy fats, fiber, and a subtle nuttiness that perfectly complements the chocolate. Fold in some chocolate chips at the end and you’ve got something that feels indulgent but is actually doing something good for your body.

Recipe Substitutions

  • Almond Flour: Swap with oat flour or coconut flour if needed. If using coconut flour, start with just ¼ cup — it absorbs a lot more moisture than almond flour.
  • Maple Syrup: Honey, agave nectar, or any other liquid sweetener you love all work great here.
  • Chocolate Protein Powder: No protein powder? No problem! Use 2 tablespoons of unsweetened cocoa powder instead. The batter will be slightly less thick but just as chocolatey and delicious.
  • Chocolate Chips: Cacao nibs or dairy-free chocolate chips work perfectly if you need a dairy-free version.

Adjust This Recipe to Your Dietary Needs

  • Dairy-Free: Swap the cottage cheese for a thick, plain dairy-free yogurt (like coconut or cashew-based) and use dairy-free chocolate chips.
  • Nut-Free: Replace the almond flour with oat flour and make sure your chocolate chips are processed in a nut-free facility.
  • Keto-Friendly: Use a sugar-free liquid sweetener like monk fruit syrup in place of maple syrup, opt for low-carb chocolate chips, and swap almond flour for coconut flour.
  • Extra Protein: Use a high-quality chocolate protein powder instead of cocoa powder to bump the protein content up even further!
cottage cheese brownie batter scooped into a small cup.
No ratings yet

Cottage Cheese Brownie Batter

This cottage cheese brownie batter is a high-protein, no-bake treat that tastes just like the real thing – rich, fudgy, and deeply chocolatey but made with wholesome ingredients! Ready in just 5 minutes with 5 simple ingredients, it's the easiest healthy dessert you'll ever make. If you're looking for a healthier way to satisfy your chocolate cravings, this is the recipe you've been waiting for!
Print Pin Rate
Prep Time: 5 minutes
Total Time: 5 minutes
Servings: 6 servings

Equipment

  • 1 food processor or high speed blender
  • 1 small bowl

Ingredients

  • 1 cup cottage cheese
  • 1/4 cup maple syrup
  • 1 teaspoon vanilla extract optional
  • 1 cup almond flour
  • 1 scoop chocolate protein powder or 2 tablespoons cocoa powder
  • 1/2 cup chocolate chips

Instructions

  • Add the cottage cheese, maple syrup, and vanilla extract to a blender or food processor and blend until completely smooth.
  • Transfer the cottage cheese mixture to a bowl and mix in the almond flour and chocolate protein powder, then fold in the chocolate chips.
  • Serve immediately or store in an airtight container in the fridge for up to 5 days.

Nutrition

Serving: 1serving | Calories: 250kcal | Carbohydrates: 21g | Protein: 12g | Fat: 14g | Fiber: 3g | Sugar: 13g

The iconic spring time candy just got a major protein upgrade! Now I LOVE a Reese’s egg. Yes, even more than a peanut butter cup – the ratio of peanut butter to chocolate is simply so much better. But I don’t love the ingredients in a Reese’s egg. Which is exactly why I developed these protein Reese’s eggs. Just 4 ingredients, NO baking, high in protein, and super easy to make. And if you like this recipe, then you gotta give my healthy strawberry peanut butter cups a try this summer! Just as delicious and easy to make. 🙂

Why You’ll Love These Protein Reese’s Eggs

  • Just 4 ingredients. Peanut butter, vanilla protein powder, chocolate chips, and coconut oil. That’s the whole list — no powdered sugar, no fillers, no ingredients you can’t pronounce!
  • 8 grams of protein per egg. Every single egg pulls its weight. That’s more protein than most protein bars, in something that tastes like candy.
  • WAY healthier than the real thing. Store-bought Reese’s Eggs are packed with refined sugar, hydrogenated oils, and a long list of additives. These are made with real, wholesome ingredients you can actually feel good about eating.
  • No bake and SO easy. Mix, shape, freeze, dip. That’s the entire process. Prep time is under 10 minutes.
  • Perfect for Easter — or any time of year. Yes, these are egg-shaped and perfect for Easter baskets, but honestly I keep a batch in my freezer year-round. They’re that good.
  • Completely customizable. Use whatever chocolate you love — dark, semi-sweet, or sugar-free. Swap peanut butter for almond butter. Have fun and make them your own!
overhead image of protein reese's eggs with flaky salt on top.

Frequently Asked Questions

How much protein does each Reese’s Egg contain?

Each egg contains approximately 8 grams of protein, primarily from the vanilla protein powder and natural peanut butter. That’s a significant upgrade from store-bought Reese’s Eggs, which contain less than 3 grams of protein per egg. It also means these make a genuinely satisfying snack — not just a treat — that will actually keep you full!

Can I make these sugar-free?

Yes! This recipe is already very low in added sugar since the only sweetener comes from the protein powder and whatever is naturally present in your chocolate chips. To make them completely sugar-free, simply swap the chocolate chips for a sugar-free variety like Lily’s (sweetened with stevia) or Hu Kitchen chocolate (sweetened with coconut sugar, which is lower on the glycemic index). The peanut butter filling itself contains zero added sugar as long as you’re using an unsweetened, natural peanut butter.

What can I use instead of protein powder?

If you don’t have protein powder or prefer not to use it, there are a few great swaps. Coconut flour is the most popular alternative — use 2–3 tablespoons (it absorbs more moisture than protein powder, so use less). Almond flour also works well; use about 3–4 tablespoons for a similar texture. Keep in mind that skipping the protein powder will lower the protein content per egg significantly, but the flavor will still be delicious!

Tips for the Best Protein Reese’s Eggs

  • Use natural, drippy peanut butter. The kind where the oil separates at the top is ideal. Avoid thick, sugar-added peanut butters – they make the filling too stiff and overly sweet.
  • Don’t skip the freeze before dipping. Cold eggs = fast chocolate set = a cleaner, smoother shell. If the eggs aren’t frozen solid when you dip them, the chocolate will slide right off and pool on the parchment.
  • Add flaky sea salt on top. I know I already said it, but it genuinely takes these to another level. The saltiness against the sweet chocolate is everythingggg!
  • Use a fork for dipping. It gives you control and lets the excess chocolate drip off cleanly. If you have dipping tools, even better!
  • Make a double batch. These store in the freezer for up to 3 months in an airtight container. Future you will thank you!

More High-Protein Treats You’ll Love

Made these? I want to see them! Tag me on Instagram @samdoesherbest or TikTok @samdoesherbest — chocolate-covered creations always get a reshare. And if you loved this recipe, please leave a ⭐⭐⭐⭐⭐ rating below. It helps so much!

three protein reese's eggs stacked on top of each other.
5 from 1 vote

4-Ingredient Protein Reese’s Eggs

These 4-Ingredient Protein Reese's Eggs taste just like the classic Easter candy – but with 8 grams of protein per egg! Made with natural peanut butter, vanilla protein powder, chocolate chips, and coconut oil, they come together in just a few minutes with NO baking required. If you're looking for a healthy Reese's Eggs recipe that actually satisfies your chocolate-peanut butter craving, this is the one!
Print Pin Rate
Prep Time: 10 minutes
Freeze Time: 28 minutes
Total Time: 38 minutes
Servings: 10 eggs

Equipment

  • 2 small bowls
  • 1 small baking sheet

Ingredients

Peanut butter filling:

  • 1/2 cup creamy peanut butter unsweetened
  • 1/3 cup vanilla protein powder

Chocolate coating:

  • 1 cup chocolate chips
  • 1 tablespoon coconut oil

Instructions

  • Mix together the peanut butter and protein powder in a small bowl until a thick dough forms.
  • Scoop about 2 tablespoons of mixture per egg, shape into egg forms and place on a parchment-lined baking sheet. Freeze the eggs for about 10 minutes, or while you make the chocolate coating.
  • Melt the chocolate chips and coconut oil together in either the microwave or over a double boiler until completely smooth.
  • Dip each frozen egg in melted chocolate, coat fully, tap off excess, and return to the parchment-lined baking sheet.
  • Freeze for 10 minutes, or until the chocolate has set. Then, enjoy right away or store in the fridge for later!

Notes

  • Use natural, unsweetened peanut butter for best texture and flavor.
  • Sub coconut flour (2–3 tbsp) or almond flour (3–4 tbsp) in place of protein powder if needed.
  • Store in an airtight container in the fridge for up to 1 week or the freezer for up to 3 months.

Nutrition

Serving: 1egg | Calories: 180kcal | Carbohydrates: 11g | Protein: 8g | Fat: 13g | Fiber: 2g | Sugar: 4g

With a sweet tooth like mine, it’s no surprise I love a candy bar! And I’ve certainly made it my mission to make healthier versions of all of my favorites. It started with healthy twix bars, then healthy butterfingers, healthy peanut butter cups, date caramels, and now healthy snickers! These homemade candy bars are made with just 6 simple ingredients, lightly sweetened with maple syrup, and shockingly easy to make. They’re perfect to store in the fridge or freezer whenever your sweet cravings strike (which… if you’re anything like me, they strike daily)!

the inside of a healthy snickers bar.

What Makes This Recipe Healthy?

  • Naturally sweetened with maple syrup
  • Made with nutrient-dense almond flour
  • No refined sugar
  • Gluten-free, dairy-free, and vegan
  • Healthier fats from nuts and coconut oil
  • Homemade alternative to processed candy

These bars give you the same layered texture and flavor as a traditional snickers, but with better ingredients!

a close up bite shot of a healthy snickers bar.

Why You’ll Love These Healthy Snickers

These healthy snickers bars have everything you want in a dessert: sweet, salty, crunchy, and chocolatey layers that taste nostalgic but are made with better-for-you ingredients! They’re surprisingly easy to make, require no complicated baking skills, and are perfect for prepping ahead so you always have a sweet treat in the fridge or freezer. With just 6 simple ingredients, they deliver the classic candy bar experience while being gluten-free, dairy-free, vegan, and healthier than store-bought versions!

Storage Tips

Store the bars in an airtight container in the refrigerator for up to 1 week. For longer storage, freeze for up to 2 months. These bars taste amazing straight from the fridge or slightly thawed from frozen!

overhead image of healthy snickers bars on a table with flaky salt on top.
No ratings yet

6-Ingredient Healthy Snickers

These healthy Snickers bars are a homemade twist on the classic candy, made with just 6 simple ingredients! They’re gluten-free, dairy-free, vegan, and layered with shortbread, caramel, peanuts, and chocolate. Perfect for a healthier dessert, these homemade healthy snickers are easy to make and totally delicious!
Print Pin Rate
Prep Time: 10 minutes
Cook Time: 10 minutes
Chill Time: 29 minutes
Total Time: 49 minutes
Servings: 16 servings

Equipment

  • 1 large bowl
  • 1 9×9-inch baking pan
  • 1 small saucepan

Ingredients

For the shortbread layer:

  • 2 cups almond flour
  • 1/4 cup melted coconut oil
  • 1/4 cup maple syrup
  • 1 teaspoon vanilla extract optional

For the caramel layer:

  • 3/4 cup creamy peanut butter unsweetened (cashew butter or almond butter work too!)
  • 1/4 cup coconut oil
  • 1/4 cup maple syrup
  • 1 teaspoon vanilla extract optional

For the filling:

  • 1/2 cup roasted peanuts

For the chocolate layer:

  • 1 cup chocolate chips
  • 1 tablespoon coconut oil
  • flaky salt for topping (optional)

Instructions

  • Preheat oven to 350° Fahrenheit and line a 9×9-inch baking pan with parchment paper.
  • Add all shortbread ingredients to a large bowl and mix to combine. Then, transfer the crust to your prepared baking pan and press the crust down into an even layer over the base of the pan. Bake for 10minutes or until lightly golden brown around the edges. Leave the shortbread to cool for at least 10 minutes before adding the caramel.
  • Make the caramel layer by adding all caramel ingredients to a small saucepan over medium-low heat. Whisk the mixture together, and continue whisking as it heats up and starts to gently bubble.After 2 minutes, remove the caramel from the heat and pour over the cooled shortbread crust, then evenly sprinkle the peanuts over the caramel.
  • Transfer the baking pan to the fridge to allow the caramel to set for at least 30 minutes and up to one hour. Once the caramel is completely set and firm to the touch, make the chocolate layer.
  • To make the chocolate layer, melt together the chocolate chips and coconut oil in either the microwave or over a double boiler until completely smooth. Pour the melted chocolate over the caramel and gently spread into an even layer.
  • Transfer the pan back to the fridge to set one last time for about 30 minutes or until the chocolate has hardened. Remove the snickers bars from the fridge, then remove them from the pan and cut into 16 “full size”bars or 32 “mini” bars.

Nutrition

Serving: 1serving | Calories: 340kcal | Carbohydrates: 19g | Protein: 6.5g | Fat: 28g | Fiber: 4g | Sugar: 10g