Tag

sugar free

Browsing

Meet your new favorite summer dessert: nice cream! One ingredient, a blender, and about 90 seconds of blending is all that stands between you and the creamiest, most refreshing frozen treat you’ve ever made at home. No ice cream maker. No heavy cream. No added sugar. Just frozen bananas – blended until they magically transform into the silkiest, smoothest soft serve you’ve ever tasted. If you haven’t tried this yet, prepare to be completely amazed!

I’ve been making nice cream for yearsss, and the fact that it’s this easy AND delicious still gets me every single time. It’s one of those recipes that sounds too good to be true, but I promise – the magic is real. And if you love easy, healthy frozen treats, you’ll also want to check out my 4-Ingredient Frozen Peanut Butter Banana Bites and Frozen Yogurt Bark!

What is Nice Cream?

Nice cream is essentially dairy-free banana ice cream made by blending frozen bananas into a creamy, smooth, soft-serve texture — no ice cream maker required. The name is a play on “ice cream,” because it’s a healthier, “nicer” version of the classic frozen treat. It’s often called nice cream because it’s a healthier alternative to regular ice cream since it’s free from artificial ingredients, preservatives and added sugar.

step by step photos of nice cream recipe.

How to Make This Nice Cream Recipe

The magic behind nice cream is actually food science: bananas have a high pectin content that, when frozen and blended, creates an incredibly creamy, custard-like texture that closely mimics real ice cream. As the last bits of banana smooth out, you’ll see the mixture shift from blended banana to creamy, soft-serve ice cream texture. It’s genuinely one of the coolest kitchen tricks out there, and once you know it, you’ll always keep frozen bananas in your freezer!

Making nice cream is genuinely one of the simplest things you can do in a kitchen. Here’s everything you need to know:

Step 1: Freeze your bananas. Peel ripe bananas, slice into 1-inch rounds (more on why this matters in Sam’s Tips!), and freeze in a single layer on a parchment-lined baking sheet for at least 2 hours, or overnight. Once frozen, transfer to a zip-top freezer bag for easy storage. This step can be done days or even weeks ahead of time — which is why keeping a bag of frozen banana slices in your freezer at all times is a game-changer.

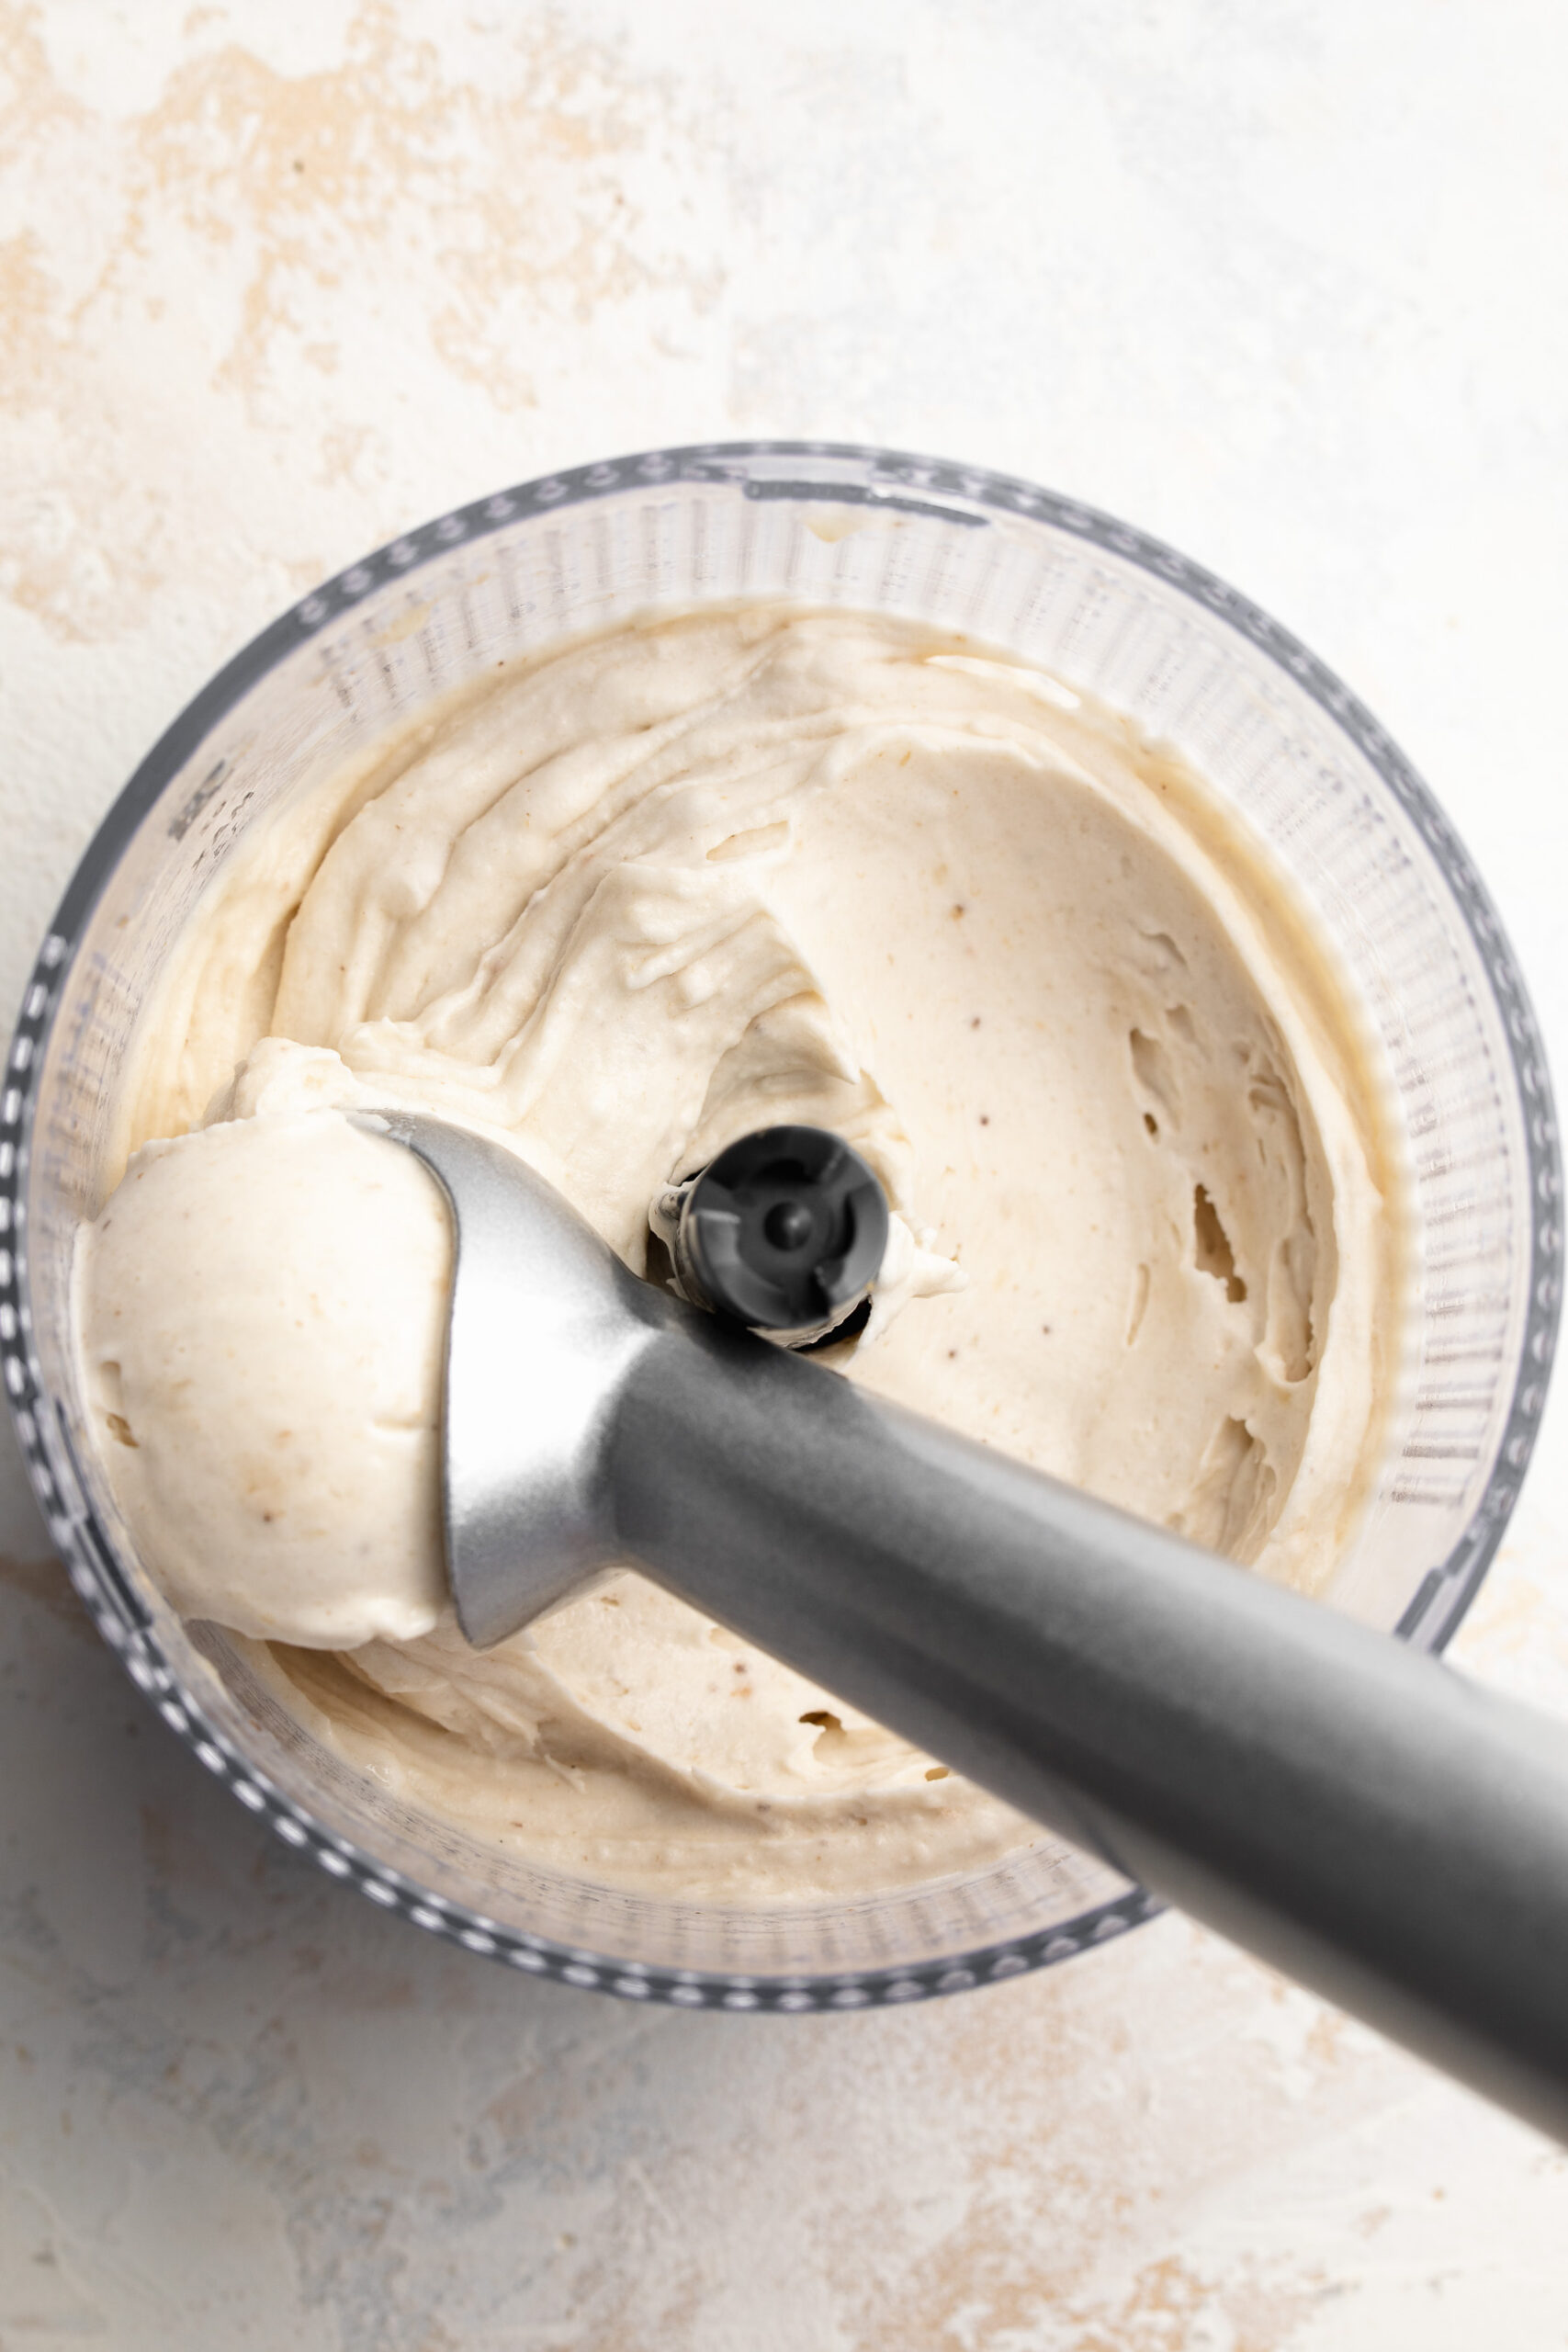
Step 2: Blend. Place the frozen banana pieces into a high-speed blender or food processor. Blend on high, scraping down the sides as needed. Add milk (any kind — dairy or non-dairy) one tablespoon at a time, only if needed to get things moving. Blend until completely silky and creamy — about 60–90 seconds total. Be patient and keep scraping! It will come together.

Step 3: Add your flavor variation. Once the base is smooth, add your chosen flavor add-ins (see the 5 flavors below!) and pulse or blend briefly to combine. Taste and adjust sweetness or intensity as you like.

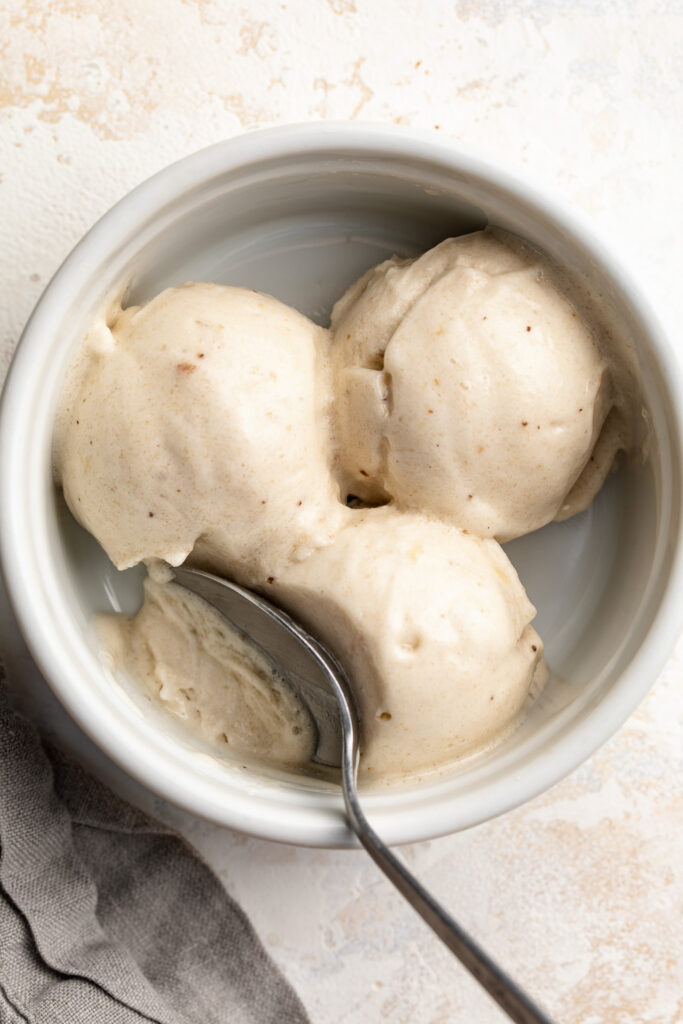
Step 4: Serve or freeze. Serve immediately for a soft-serve consistency — it’s ready to eat right out of the blender! For a scoopable, more traditional ice cream texture, transfer to a freezer-safe container, smooth the top, cover, and freeze for 1–2 hours. Let it sit at room temperature for 5 minutes before scooping.

overhead image of nice cream scooped in a bowl with a spoon.

Sam’s Recipe Tips

  • Slice the bananas into 1-inch rounds BEFORE freezing. This is the single most important tip for creamy nice cream. Smaller pieces give your blender or food processor more surface area to work with, which means a faster, smoother blend — and a creamier final result! Freezing whole bananas works, but you’ll spend twice as long blending and will likely need more milk, which can make the texture icier.
  • Use ripe bananas. The riper the banana, the sweeter and more flavorful your nice cream will be. Look for bananas that are speckled with brown spots — that’s when the natural sugars are at their peak. If your bananas aren’t ripe, the banana ice cream won’t be sweet. Underripe bananas will give your nice cream a starchy, slightly bitter taste.
  • Be patient during blending. Nice cream takes a minute to come together. It will look crumbly and chunky at first — just keep scraping down the sides and blending. Within 60–90 seconds, it will suddenly transform into silky, smooth soft serve. Don’t add too much milk too soon, or you’ll end up with a smoothie instead of ice cream!
  • Add milk sparingly! Only add milk if absolutely needed to get the blender moving. Too much liquid will make your nice cream thin and icy rather than thick and creamy. Start with just 1 tablespoon at a time.
  • For scoopable ice cream, freeze for 1–2 hours. Straight from the blender, nice cream has a soft-serve consistency. If you want it firm enough to scoop into balls like traditional ice cream, transfer it to a freezer-safe container and freeze for 1–2 hours. Let it sit at room temperature for 5 minutes before scooping.
  • Store smartly. Store nice cream in an airtight container in the freezer for up to 2 months. If it freezes solid, let it thaw at room temperature for 5–10 minutes before scooping or eating.
1 ingredient nice cream recipe in a food processor with an ice cream scoop.
5 from 1 vote

1-Ingredient Nice Cream Recipe (+5 flavors!)

This nice cream is a 1-ingredient, dairy-free frozen treat made entirely from blended frozen bananas – no ice cream maker, no heavy cream, and no added sugar required! It blends up in just 90 seconds into the silkiest, creamiest soft serve you've ever tasted, and with 5 different flavor variations (cookies & cream, vanilla bean, chocolate, strawberry, and peanut butter), there's a flavor for everyone. If you're looking for an easy, healthy nice cream recipe that actually tastes like the real thing, this is it!
Print Pin Rate
Prep Time: 5 minutes
Total Time: 5 minutes
Servings: 2 servings

Equipment

  • 1 food processor or high speed blender

Ingredients

Base:

  • 3-4 ripe bananas peeled and sliced into 1-inch rounds, then frozen
  • milk (any kind) as needed

Cookies & Cream add-ins:

  • 6-8 chocolate cookies I used Simple Mills Chocolate Sweet Thins
  • 1 teaspoon vanilla extract

Vanilla Bean add-ins:

  • 1/2 teaspoon vanilla bean paste or seeds from half a vanilla pod

Chocolate add-ins:

  • 3 tablespoons unsweetened cocoa powder
  • 1-2 tablespoons maple syrup or 2 pitted medjool dates
  • 2 tablespoons chocolate chips

Strawberry add-ins:

  • 1/2 cup fresh or frozen strawberries

Peanut Butter add-ins:

  • 3 tablespoons natural peanut butter
  • small pinch of salt

Instructions

  • Peel ripe bananas, slice into 1-inch rounds, and freeze in a single layer on a parchment-lined baking sheet for at least 2 hours or overnight. Transfer to a zip-top bag once frozen.
  • Add frozen banana pieces to a high-speed blender or food processor. Blend on high, scraping down the sides as needed. Add milk 1 tablespoon at a time only if needed. Blend until completely silky and smooth – about 60–90 seconds.
  • Add your chosen flavor add-ins and pulse briefly to combine. Taste and adjust as desired.
  • Serve immediately for soft-serve, or transfer to a container and freeze for 1–2 hours for a scoopable texture. Let sit at room temperature for 5 minutes before scooping.

Nutrition

Serving: 1serving | Calories: 120kcal | Carbohydrates: 30g | Protein: 2g | Fiber: 4g | Sugar: 17g

The self-proclaimed protein cookie queen (hi, it’s me!) is at it again with yet another quick, easy, and ttoally delicious protein cookie recipe! My single serve protein cookie was such a big hit, I received soooo many requests to make a full batch version. Well, I present to you – a rich, chewy, slightly fudgy, protein-packed cookie made with just 3 ingredients! Honestly, if I hadn’t tried them myself, I’d think these 3 ingredient protein cookies were too good to be true. They’re just as delicious as any other cookie, but pack in a whopping 20 grams of protein each!

Why You’ll Love These 3-Ingredient Protein Cookies

  • Ridiculously simple – only three main ingredients and 10 minutes in the oven!
  • Naturally healthy – made with real food, no refined sugars and totally gluten-free.
  • High-protein & satisfying – perfect for post-workout snack or quick breakfast treat.
  • Totally customizable – add your favorite mix-ins like chocolate chips, nuts, or dried fruit.

Frequently Asked Questions

What protein powder did you use?
I used the Be Well By Kelly vanilla protein powder, which mixes in perfectly and keeps these cookies soft and chewy.

Can I use almond butter instead of peanut butter?
Yes! Almond butter, cashew butter, or sunflower seed butter all work beautifully – just use the same amount.

How much protein is in each cookie?
Each cookie contains around 20 grams of protein, depending on your protein powder brand and mix-ins.

close up of 3 ingredient protein cookies with a bite taken out.

Recipe Variations and Substitutions

  • Chocolate Lovers: Fold in ¼ cup dark chocolate chips or cacao nibs.
  • Nut-Free/Vegan: Use sunflower seed butter and dairy-free protein powder.
  • Low-Sugar: Swap chocolate chips for chopped nuts or unsweetened shredded coconut.
  • Spice It Up: Add a pinch of cinnamon, nutmeg, or pumpkin spice for seasonal flavor!

Sam’s Recipe Tips

  • Mash the banana very well for an even and smooth batter!
  • If the dough is too dry, add 1–2 teaspoons of non-dairy milk.
  • For crispier edges, flatten the cookies a little more before baking.
  • Store leftovers in an airtight container for up to 3 days or freeze for up to 3 months.
overhead image of 3 ingredient protein cookies with a bite taken out.
5 from 1 vote

3-Ingredient Protein Cookies (20g protein each!)

These 3 ingredient protein cookies are soft, chewy, naturally sweet, and packed with protein for the perfect healthy snack or post-workout treat! Made with banana, peanut butter, and protein powder, they’re quick to make, totally customizable, and naturally gluten-free and dairy-free. If you’re looking for an easy high-protein cookie recipe that tastes amazing and comes together in minutes, this is it!
Print Pin Rate
Prep Time: 5 minutes
Cook Time: 10 minutes
Servings: 5 cookies

Equipment

  • 1 large bowl

Ingredients

  • 1 ripe banana
  • 1/2 cup peanut butter or any nut/seed butter
  • 1/2 cup protein powder

Optional:

  • 1/4 cup chocolate chips or any mix-ins you'd like!

Instructions

  • Preheat oven to 350° Fahrenheit and line a baking sheet with parchment paper.
  • Mash the banana in a bowl until mostly smooth, then mix in the peanut butter and protein powder.
  • Fold in the chocolate chips or any mix-in you’d like, then scoop 2 tablespoon-sized mounds of cookie dough onto the parchment paper. Slightly wet your hands, then use them to gently press and flatten each cookie slightly.
  • Bake the cookies for 10 minutes, or until lightly golden brown around the edges, then remove from the oven and transfer to a wire cooling rack before serving or storing.

Nutrition

Serving: 1cookie | Calories: 190kcal | Carbohydrates: 10g | Protein: 20g | Fat: 13g | Fiber: 2g | Sugar: 5g

Everyone loved my 3-ingredient healthy watermelon gummies so much, I knew I had to make a new flavor! Though, in the spirit of fall, I decided to go with apple this time. And let me tell you – these healthy sour apple gummies might be even better than the watermelon kind! They’re perfectly sweetened, made with NO added sugar, and rolled in a sour coating that will make your mouth water. Surprisingly easy to make in just a few simple steps, with five ingredients!

What Makes This Recipe Healthy?

  • Collagen boost: Grass-fed gelatin provides natural collagen and supports skin, hair, and joint health.
  • No refined sugars: Sweetened with monk fruit, a zero-calorie natural sweetener option.
  • Real fruit base: Apple juice + lemon add natural flavor and a dose of vitamin C.
  • Customizable & clean: No artificial dyes or preservatives—food coloring is optional and minimal.
close up image of healthy sour apple collagen gummies

Why You’ll Love These Healthy Sour Apple Collagen Gummies

  • You get chewy, flavorful candy with health benefits – NO sugar crash!
  • They’re fun for both adults and kids, and make cute additions to lunchboxes.
  • These gummies are shelf-stable (when refrigerated), portable, and great for custom flavors.
  • The sour coating adds a kick without overwhelming sweetness.

Frequently Asked Questions

What can I substitute for monk fruit sweetener?
You can use erythritol, stevia blends, or allulose. Just note that some sweeteners may affect texture or shelf life slightly.

How do I prevent the sour coating from dissolving?
Toss the gummies just before serving, and store them chilled. High humidity or warmth may cause the coating to dissolve.

Can I change the flavor of this recipe?
Absolutely! Swap the apple juice for pomegranate, orange, cranberry, or other juices. Use food coloring or natural powders to adjust the color.

monk fruit sweetener for healthy sour apple collagen gummies.

I highly recommend using granulated monk fruit sweetener in this recipe for the best taste and results!

Sam’s Recipe Tips

  • Use low heat when dissolving the gelatin so it doesn’t clump or bubble.
  • Use silicone molds for easy removal – here’s a link to the ones I used!
  • For firmer gummies, let them chill a bit longer than 30 minutes.
  • Store gummies in the fridge in an airtight container to maintain shape and texture!
No ratings yet

Healthy Sour Apple Collagen Gummies

These healthy sour apple collagen gummies are a fun and nourishing twist on classic gummy candy! Made with real fruit juice, collagen-rich gelatin, and no refined sugar. Each bite is sweet, sour, and packed with skin-supporting nutrients. They’re quick to make, easy to customize, and the perfect healthy snack or post-workout bite!
Print Pin Rate
Prep Time: 5 minutes
Chilling Time: 30 minutes
Total Time: 35 minutes
Servings: 6 servings

Equipment

  • 1 small saucepan
  • 2 gummy molds

Ingredients

  • 1 cup apple juice
  • 2 tablespoons lemon juice
  • 2 teaspoons granulated monk fruit sweetener
  • 1/4 cup grass-fed gelatin
  • 2-3 drops green food coloring

For the sour coating:

  • 1/4 cup granulated monk fruit sweetener
  • 1/2 teaspoon citric acid optional, but will make them extra sour!

Instructions

  • Add the apple juice, lemon juice, monk fruit sweetener, grass-fed gelatin, and food coloring (if using) to a small saucepan over low heat. Whisk the mixture together until the gelatin powder has fully dissolved, about 2 minutes, then remove it from the heat.
  • Transfer the gelatin mixture to the molds, then refrigerate 30 minutes, or until the gummies are fully set. Pop the gummies out of the molds then serve/store as-is, or move on to the next step for the sour coating.
  • Mix together the monk fruit sweetener and citric acid in a bowl, then toss the gummies in the sour coating. Enjoy right away!

Nutrition

Serving: 1serving | Calories: 35kcal | Carbohydrates: 5g | Protein: 4g | Sugar: 4g

I’ve been on a hunt for more dairy-free and gluten-free protein snacks. And you’d be shocked at just how difficult they are to find! Even the gluten-free protein snacks are never non-dairy. Aside from my single serve protein cookie (which is both gluten-free, dairy-free, and contains over 30 grams of protein!) and my high-protein snack boxes – my protein snack options feel very limited. *Enter these 6-ingredient gluten-free and dairy-free protein muffins.*

These protein muffins are entirely gluten-free, dairy-free, made in just one bowl, with 6 very simple ingredients! They’re also just as light, fluffy, and completely delicious as any other muffin. I love adding chocolate chips to mine, but feel free to keep ’em plain or add whatever mix-in you’d like. Also, this recipe makes 6 muffins, so you might want to consider a double batch… 😉

protein muffins with a bite taken out.

Why You’ll Love These Protein Muffins

  • Gluten-Free & Grain-Free: Made with almond flour, these muffins are naturally gluten-free.
  • Dairy-Free: No dairy ingredients, suitable for lactose-intolerant individuals.
  • No Added Sugar: Sweetened naturally with applesauce.
  • High Protein: Packed with protein from eggs, peanut butter, and protein powder.
  • One-Bowl Recipe: Minimal cleanup required.
  • Customizable: Add your favorite mix-ins like nuts, seeds, or dried fruit.

Frequently Asked Questions

What kind of protein powder do you recommend?
For best results, use a plant-based protein powder or a whey protein blend. Avoid using pure whey isolate, as it may result in a dense texture.

How do I make these low carb/keto?
To reduce the carb content, replace applesauce with mashed avocado or pumpkin puree, and use a low-carb sweetener if desired.

What can I use instead of almond flour?
Coconut flour can be used as a substitute, but it absorbs more moisture. Use ¼ cup of coconut flour in place of 1 cup almond flour and consider adding an extra egg to maintain moisture.

How should I store these protein muffins?
Store the muffins in an airtight container at room temperature for up to 3 days, or refrigerate for up to a week. They can also be frozen for up to 3 months.

protein muffins with chocolate chips on a table.

Different Mix-Ins

  • Fresh or Dried Fruit: Blueberries, raspberries, or chopped dried apricots.
  • Nuts & Seeds: Chopped walnuts, pecans, or chia seeds.
  • Spices: Cinnamon, nutmeg, or pumpkin spice for added flavor.
  • Zest: Lemon or orange zest for a citrusy twist.
protein muffins on a table with chocolate chips on top.
5 from 5 votes

6-Ingredient Protein Muffins (20g protein!)

These easy protein muffins are made with just 6 simple ingredients in one bowl – perfect for a healthy, high-protein snack or breakfast. They’re gluten-free, dairy-free, and naturally sweetened with applesauce, making them a nutritious option the whole family will love. With added vanilla protein powder and optional chocolate chips, these muffins are as delicious as they are nourishing!
Print Pin Rate
Prep Time: 5 minutes
Cook Time: 20 minutes
Total Time: 25 minutes
Servings: 6 muffins

Equipment

  • 1 large bowl
  • 1 muffin pan

Ingredients

  • 1 cup applesauce
  • 2 eggs
  • 1/4 cup creamy peanut butter unsweetened (or any nut/seed butter)
  • 1 cup almond flour
  • 1/2 cup vanilla protein powder
  • 1 teaspoon baking powder
  • 1/2 cup chocolate chips optional

Instructions

  • Preheat oven to 350° Fahrenheit and line a muffin tin with muffin liners.
  • Mix together the applesauce, eggs, and peanut butter in a large bowl. Add in the almond flour, protein powder, and baking powder then mix until everything is fully combined.
  • Fold in the chocolate chips (or any other mix-in you’d like!), then scoop ¼ cup of muffin batter into each muffin liner. Bake the muffins for 20-25 minutes, or until a toothpick inserted down the center of a muffin comes out clean.
  • Remove the muffins from the oven and let cool completely before storing or enjoying!

Nutrition

Serving: 1muffin | Calories: 240kcal | Carbohydrates: 11g | Protein: 20g | Fat: 16g | Sugar: 5g

These watermelon margaritas will be your new favorite summertime cocktail! With just three ingredients and a blender, you’ll have the most delicious and refreshing frozen drink. Frozen watermelon, lime juice, and a splash (or two) of good quality tequila come together to make this best-ever, easy summer cocktail!

two frozen watermelon margaritas with limes on the side.

I’m a BIG margarita girl, we know this by now. I absolutely gushed over my love for margaritas in my Skinny Blackberry Margarita post, so I’ll spare you from all of that this time around. Though what I will say is that this particular margarita recipe includes my all-time favorite summer fruit – WATERMELON. I’ve honestly never met anyone who ever had a bad thing to say about watermelon. It’s naturally oh-so sweet, crazy refreshing, and is really only available in the warmer months, making it all the more special. I plan on enjoying a lot, and I mean A LOT of this coveted fruit over the next few months. And there’s nothing anyone can do to stop me! You know what I also plan on enjoying a lot of this summer? These watermelon margaritas.

Your typical margarita has its fair share of added sugars. Though thanks to watermelons natural sweetness, this refreshing cocktail has NO added sugar! And like I mentioned before it only requires three ingredients (plus ice). Which means it’s the easiest and healthiest alcoholic beverage of all time. That’s right – of. all. time. I highly recommend you blend up a batch of these watermelon margaritas for your next summer barbecue or party. Maybe even for the 4th of July, perhaps?! This recipe yields about 4 margaritas, but can easily be doubled or even tripled if you’d like. Cheers to SUMMER and cheers to WATERMELON MARGARITAS!

overhead image of two frozen watermelon margaritas

What You Need To Make Watermelon Margaritas

Frozen Watermelon – To freeze watermelon, start by slicing it into 1 to 2-inch chunks. Need help slicing your watermelon? Check our my How to Cut a Watermelon blog post! Then, transfer the chunks to a parchment lined baking sheet, in a single layer, and place in the freezer. Freeze the watermelon for at least 2 hours or until frozen solid. Once frozen, you can go straight into using it in this recipe, or transfer to an airtight container in the freezer for up to three months!

Now, let’s backtrack for a second. There are a few things you want to look for when picking out your watermelon. A perfectly ripe and ready to slice watermelon will have a decently-sized yellow spot where it once laid on the ground right before it was picked. If that spot is more white than yellow, it’s not ripe – the more yellow it is, the better. Another thing to check for when looking for a ripe watermelon is the sound. Pick up the watermelon and give it a few taps. If it sounds deeply hollow that means it’s exploding with juicy flavor and is ready to enjoy!

Tequila – A good quality tequila will make all the difference in the enjoyment and smoothness of these watermelon margaritas. I highly recommend a blanco silver tequila, which is most often used in margarita recipes. I use and love Don Julio tequila for its smoother taste, without being outrageously priced.

Lime Juice – Fresh is always best, though bottled lime juice would also work in this recipe! The lime juice gives this cocktail its signature taste while also bringing out the freshness of the watermelon. If you’re feeling fancy, save a few lime slices to garnish your drinks with!

Make it a Mocktail

  • Replace the tequila with 1/4 cup of water for an alcohol-free, refreshing watermelon margarita mocktail!
frozen watermelon margaritas in two glasses with a watermelon slice on the rim.
5 from 1 vote

Watermelon Margaritas (just THREE ingredients!)

These watermelon margaritas will be your new favorite summertime cocktail! With just three ingredients and a blender, you’ll have the most delicious and refreshing frozen drink. Frozen watermelon, lime juice, and a splash (or two) of good quality tequila come together to make this best-ever, easy summer cocktail!
Print Pin Rate
Prep Time: 30 minutes
Cook Time: 40 minutes
Total Time: 5 minutes
Servings: 4 servings

Ingredients

  • 4 cups frozen watermelon, see Notes
  • 1/2 cup tequila
  • 1/2 cup lime juice
  • 1 cup ice

Instructions

  • Add all ingredients to a blender and blend until no chunks of watermelon or ice remain.

Notes

  • Frozen Watermelon: To freeze watermelon, cut a fresh watermelon into chunks and then spread into an even layer on a baking sheet lined with parchment paper. Transfer baking sheet to the freezer for 2-3 hours or until watermelon is frozen solid.
  • Nutrition

    Calories: 300kcal

    Other Healthier Cocktail Recipes