Tag

sugar

Browsing

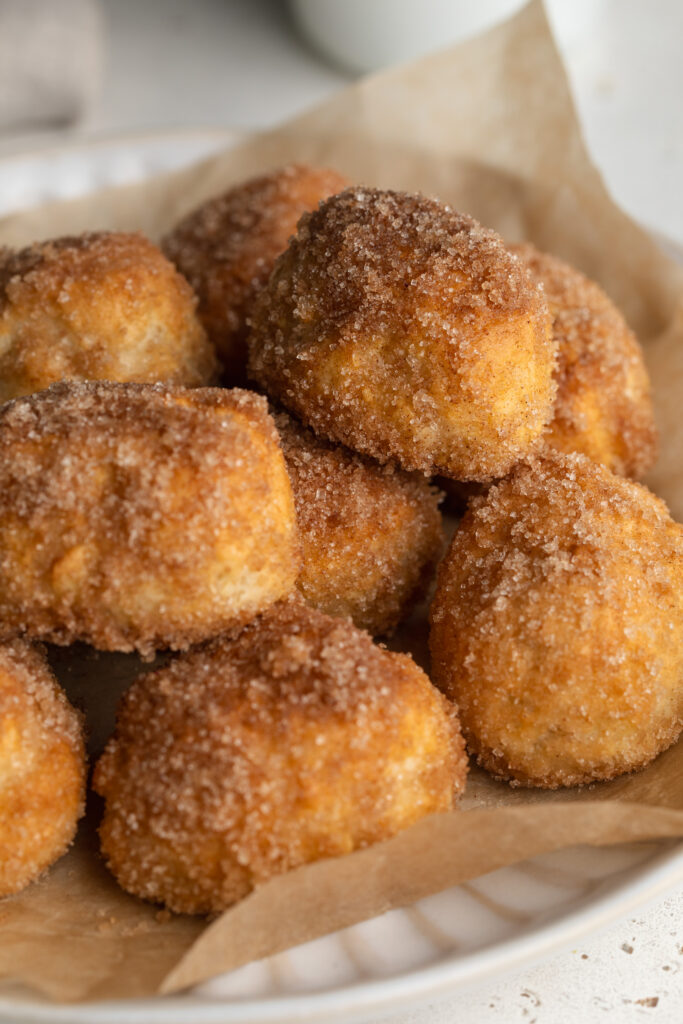
Like most of my recipes, this cinnamon sugar pretzel bites recipe started with a craving. Specifically a craving for a cup of warm cinnamon sugar pretzel bites from the mall… yup, you know the kind. The pretzels you smell as soon as you enter the mall and crave the entire time you shop. (No but really, they should seriously make a candle out of them because they smell so good!) Unfortunately though, those mall pretzel bites are made with regular flour and I’m sure a bunch of other ingredients that aren’t great for us. So I figured, why not make them myself?! Though if you look up pretzel bite recipes, you’ll find a bunch of very complicated ones that require kneading, rising, and a ton of steps I simply don’t have the time for. So, I came up with this 6 ingredient pretzels bites recipe that requires just 6 ingredients (!!!) and there’s no kneading, rising, or confusing steps required. Simply mix the dough, roll them into balls, quickly boil, then bake! And if cinnamon sugar really isn’t your thing, you can sprinkle these with salt instead. Either way, I just know you’re gonna love ’em!

And if you love these 6-ingredient cinnamon sugar pretzel bites, you’ll also go crazy for my 5-ingredient single serve cinnamon roll and 3-ingredient gluten-free bagel bites. They even all use the same set of ingredients!

cinnamon sugar pretzel bites on a plate.

Why You’ll Love These Cinnamon Sugar Pretzel Bites

  • Gluten-free & 6 ingredients – just one bowl, no yeast required!
  • Quick prep + deep flavor – From mixing the dough to baking and coating, you’ll be done in about 30 minutes.
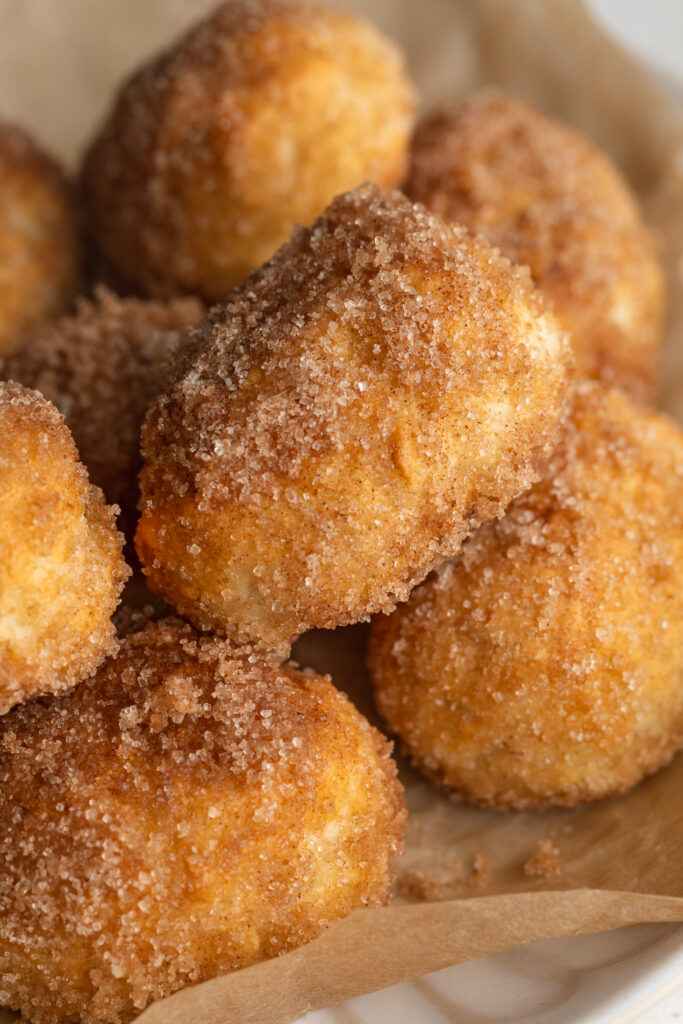
  • Versatile & crowd-friendly – Enjoy plain, with dips, or coated in cinnamon sugar for a delicious sweet treat!

Frequently Asked Questions

Can I make this recipe vegan?
Yes – use dairy-free yogurt (for the dough) and replace melted butter with a plant-based butter or coconut oil for the topping.

How do I store these pretzel bites?
Store in an airtight container at room temperature for up to 2 days. Reheat briefly in the oven or air fryer to restore texture.

Recipe variations?
Try topping with chocolate drizzle, sea salt instead of sugar, or adding shredded coconut. You could even roll in pumpkin spice for a seasonal twist.

close up image of cinnamon sugar pretzel bites on a plate.

Sam’s Recipe Tips

  • Dust your work surface generously with gluten-free flour to prevent sticking – gluten-free dough tends to be a bit softer.
  • After brushing or dipping in the baking soda wash, place the bites on parchment to avoid sticking and allow the coating to set properly.
  • Shake the warm finished bites in a large bowl with melted butter and cinnamon sugar to ensure even coating.
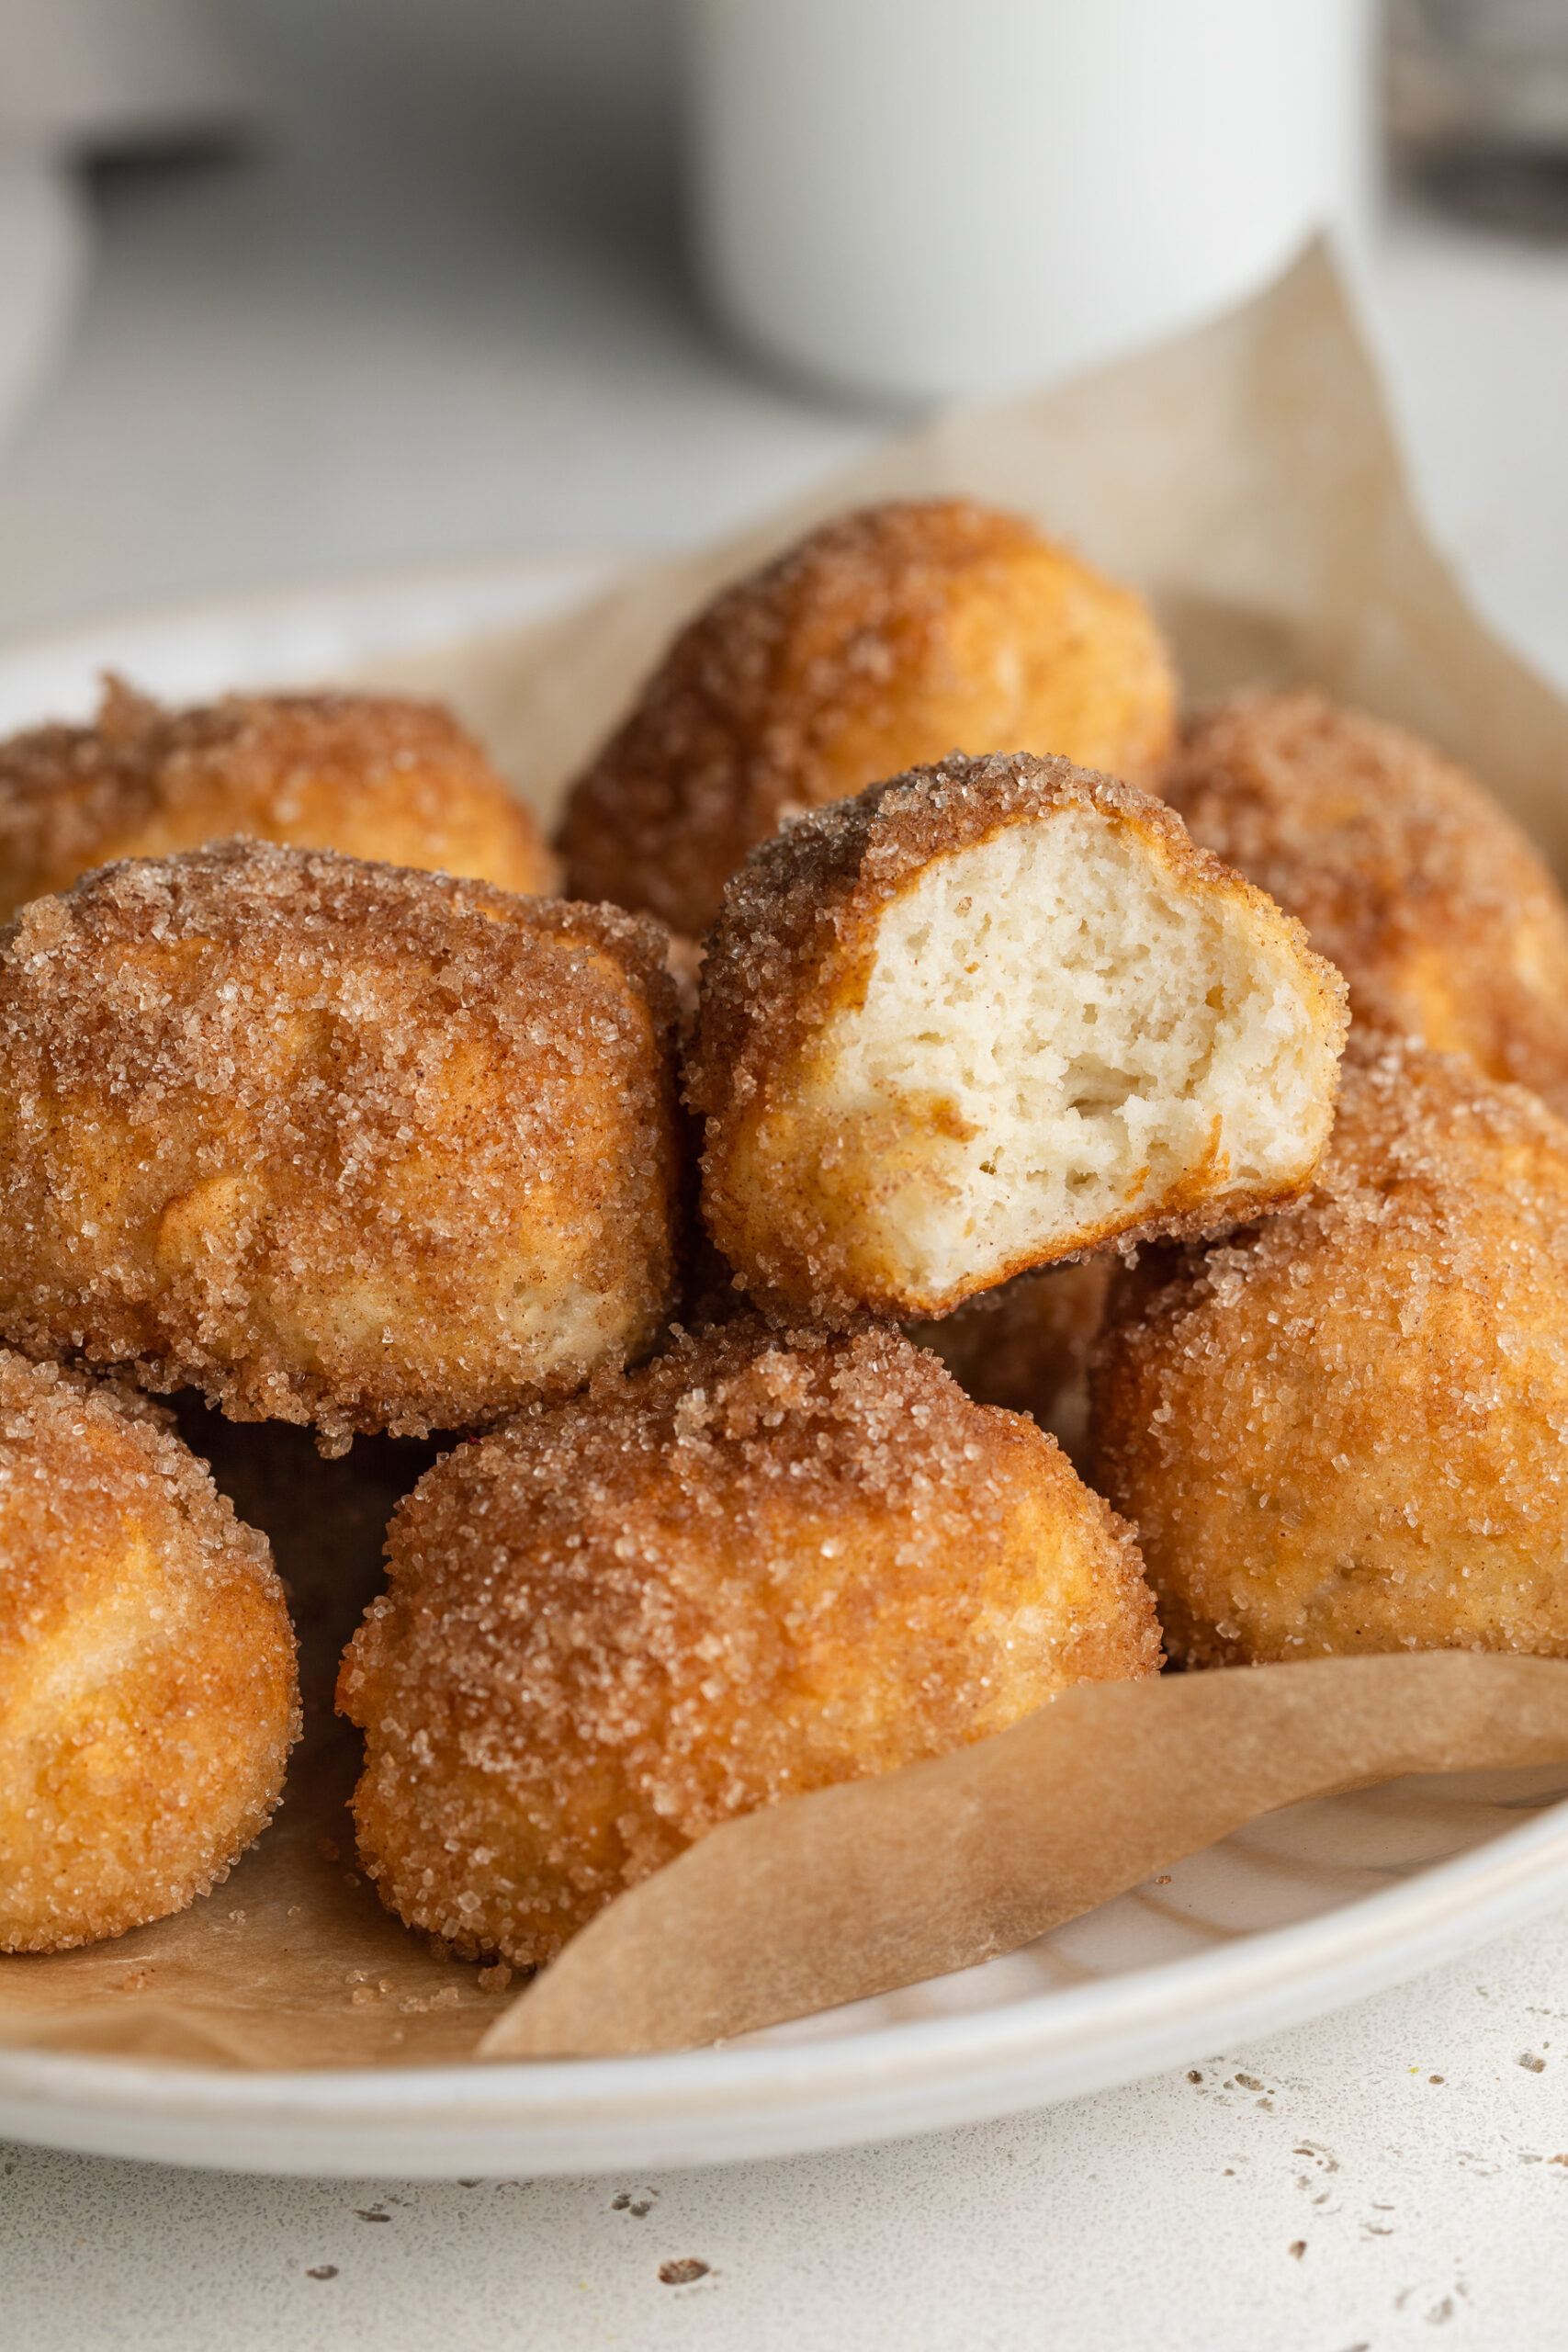
  • Serve warm for the best texture – if they cool down, pop them into a warm oven (350°F) for 2-3 minutes.
cinnamon sugar pretzel bites on a plate, one with a bite taken out.
No ratings yet

6-Ingredient Cinnamon Sugar Pretzel Bites (gluten-free!)

These 6-ingredient Cinnamon Sugar Pretzel Bites are soft, chewy, and coated in delicious cinnamon sugar! Made with gluten-free flour and Greek yogurt, this no-knead recipe comes together in just 30 minutes for a quick and easy treat. You’ll love how easy these pretzel bites are to make – no yeast, no rising, just mix, bake, and enjoy!
Print Pin Rate
Prep Time: 10 minutes
Cook Time: 20 minutes
Total Time: 30 minutes
Servings: 4 servings

Equipment

  • 1 large bowl
  • 1 small bowl
  • 1 large baking sheet

Ingredients

  • 1 cup gluten-free all purpose flour
  • 1 teaspoon baking powder
  • 1 cup plain Greek yogurt

For the baking soda wash:

  • 1 cup water
  • 1 tablespoon baking soda

For topping:

  • 3 tablespoons melted butter
  • 1/3 cup sugar
  • 1 teaspoon cinnamon

Instructions

  • Preheat oven to 425° Fahrenheit and line a baking sheet with parchment paper.
  • Mix together the gluten-free all purpose flour and baking powder in a large bowl. Then, add in the plain Greek yogurt and mix until a dough comes together (you may need to use your hands to help bring the dough together). If the dough seems dry and won’t come together in a ball, try adding an additional 1-3 tablespoons of Greek yogurt to the dough.
  • Scoop about 1 tablespoon of dough and roll it between the palms of your hands to form it into an oval nugget shape. Place each pretzel bite onto your prepared baking sheet.
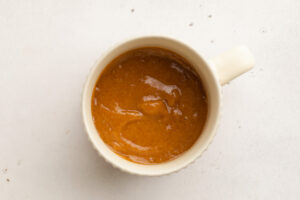
  • Make the baking soda wash by whisking together the water and baking soda in a small bowl, then either brush or dip each pretzel bite into the wash.
  • Bake the pretzel bites for 15-20 minutes, or until deep golden brown. While the pretzel bites bake, make your cinnamon-sugar coating by mixing together the sugar and cinnamon in a small bowl.
  • Remove the pretzel bites from the oven and while they’re still warm, toss them in the melted butter then either toss or sprinkle them with the cinnamon sugar.

Nutrition

Serving: 1serving | Calories: 240kcal | Carbohydrates: 30g | Protein: 9g | Fat: 10g | Fiber: 1g | Sugar: 10g

We all need a solid vanilla cupcake recipe in our back pocket when the occasion arises. For me, this occasion my son’s upcoming 2nd birthday party (time flies!). But for you, this could be a birthday party, baby shower, holiday party, or a simple Tuesday night when you’re craving something sweet.

Now you might be wondering, what makes these gluten-free cupcakes the best ever?? Well, for one very simple reason. They taste identical to their non gluten-free counterparts. Meaning, those with celiac disease or a gluten allergy/intolerance can enjoy these perfect vanilla cupcakes with everyone else. So no one will feel left out or dissatisfied!

Why You’ll Love This Recipe

  • Pantry Staples: This recipe’s ingredients are all items you may have right on hand in your pantry which will make this a super easy vanilla cupcake recipe to put together!
  • Classic Vanilla Cupcake Taste: This gluten-free cupcake tastes exactly like a classic vanilla cupcake so no need to worry about anyone missing out on this sweet treat!
  • Versatile and Customizable: Feel free to use dairy-free milk and dairy-free butter for these cupcakes! You can also use egg replacement to make these vegan! If taking this option, I recommend the Earth Balance Vegan Buttery Sticks and Elmhurst Almond Milk. You can also add any cupcake toppings like sprinkles, cupcake jams or toppers to make them special for any birthday or holiday event!
gluten-free vanilla cupcakes on a table with vanilla frosting and rainbow sprinkles on top.

What You’ll Need

All Purpose Gluten-Free Flour: I swear by the Bob’s Red Mill Gluten-Free 1-to-1 Baking Flour for all my gluten-free baking needs. It does a perfect job at keeping your bakes together, and mimicking the taste and texture of regular all purpose flour. Though you can definitely use whatever brand of all purpose gluten-free flour you prefer! I’ve also tried King Arthur and Nature’s Promise gluten-free flour blends, and they work great as well. Make sure your gluten-free flour contains xanthan gum. If not, add 1/2 teaspoon of xanthan gum to the dry ingredients.

Butter: I used non-dairy butter, but any butter will work in this recipe. Salted or unsalted butter won’t make much of a difference either, so use whichever you have on-hand! Just remember to bring it to room temperature first, so that it’s soft.

Sugar: White sugar or cane sugar both work well in these gluten-free vanilla cupcakes. You can try using either coconut sugar or maple sugar in its place for a slightly healthier recipe, though I haven’t had the chance to test these options myself yet.

Eggs: These eggs will be the binder that holds the batter together for these cupcakes. Make sure that they’re room temperature. Room-temperature eggs are important because they’ll ensure that your cupcakes rise and have a nice fluffy texture!

Vanilla Extract: this will add the perfect balance of sweetness and warm vanilla flavor these vanilla cupcakes need.

Milk: Feel free to use your favorite non-dairy milk if you’d like! The milk will also help to make sure your cupcakes have a nice fluffy texture!

a bite taken out of a gluten-free vanilla cupcake with vanilla frosting and rainbow sprinkles.

How to Make The Best Gluten-Free Vanilla Cupcakes

  1. Prepare your dry and wet ingredients: Whisk together the gluten-free flour, baking powder, baking soda, and salt. In a separate bowl, beat together the butter and sugar with either a hand or stand mixer until fluffy. Beat in one egg at a time, then add the vanilla extract.
  2. Bake Your Cupcakes: Once you’ve slowly combined your wet and dry ingredients into a batter, fill your cupcake liners and bake cupcakes for 18-20 minutes or until a toothpick inserted into the center of a cupcake comes out clean.
  3. Frost Your Cupcakes: Make the frosting by adding all of the frosting ingredients to a large bowl and beating with either a hand or stand mixer until light and fluffy. Once they’ve cooled, decorate with frosting and sprinkles if you’d like!
  4. Pack & Store: Store cupcakes in an airtight container at room temperature for up to 3 days.

Top Tips

  • Beat the butter and sugar together really well in the third step of this recipe. The goal is to introduce as much air to the mixture as possible. This will result in a lighter and fluffier gluten-free vanilla cupcakes!
  • Use an ice cream scoop or large cookie scoop to fill your cupcake molds. This simple trick makes filling your vanilla cupcake tin much quicker and easier. This also guarantees even-sized cupcakes that will bake at the exact same rate!
  • Sub the vanilla frosting for a cream cheese frosting instead! To do this, replace the butter with 1/4 cup butter plus 1/2 cup softened cream cheese. Whip all ingredients together just as you would the vanilla frosting, then spread over your cooled gluten-free vanilla cupcakes.

Adjust This Recipe To Your Dietary Needs

Make it Dairy-Free: Use dairy-free butter and non-dairy milk to make these gluten-free and dairy-free vanilla cupcakes! If taking this option, I recommend the Earth Balance Vegan Buttery Sticks and Elmhurst Almond Milk.

Make it Vegan: For vegan vanilla cupcakes, follow the same modifications as you would for the dairy-free version above. Then, use your favorite vegan egg replacement in place of the eggs – I recommend this one from Bob’s Red Mill.

close up image of a gluten-free vanilla cupcake with vanilla frosting and rainbow sprinkles.
5 from 3 votes

Best Ever Gluten-Free Vanilla Cupcakes

I don't mean to brag, but these gluten-free vanilla cupcakes are truly the best ever! Perfectly soft, fluffy, sweet, and moist (sorry if that word makes you cringe!). Whip up a batch of these gluten-free cupcakes for your next party as a fun treat even gluten-eaters will love.
Print Pin Rate
Prep Time: 15 minutes
Cook Time: 20 minutes
Total Time: 35 minutes
Servings: 12 servings

Equipment

  • 1 large bowl
  • 1 medium bowl
  • 1 hand or stand mixer
  • 1 cupcake tin

Ingredients

  • 1 1/2 cups all purpose gluten-free flour see Notes
  • 1 teaspoon baking powder
  • 1/2 teaspoon baking soda
  • 1/4 teaspoon salt
  • 1/2 cup butter softened
  • 2/3 cup sugar
  • 2 large eggs at room temperature
  • 1 1/2 teaspoons vanilla extract
  • 3/4 cup milk

For the vanilla frosting:

  • 2 1/2 cups powdered sugar
  • 1/2 cup butter softened
  • 1-2 tablespoons milk
  • 1/2 teaspoon vanilla extract

Instructions

  • Preheat oven to 350° Fahrenheit and line a cupcake pan with cupcake liners.
  • In a medium bowl, whisk together the gluten-free flour baking powder, baking soda, and salt.
  • In a large bowl, beat together the butter and sugar with either a hand or stand mixer until fluffy. Beat in one egg at a time, then add in the vanilla extract.
  • With your mixer on low speed, add 1/3 of the flour mixture into the butter mixture, then about half of the milk. Then, add in another 1/3 of the flour mixture, then the remaining milk, then the remaining flour mixture.
  • Once batter is fully combined, transfer ¼ cup of batter into each cupcake mold. Bake cupcakes for 18-20 minutes or until a toothpick inserted into the center of a cupcake comes out clean.
  • Remove cupcakes from oven and transfer to a wire rack to cool completely before frosting.
  • Make the frosting by adding all frosting ingredients to a large bowl and beating with either a hand or stand mixer until light and fluffy.
  • Once cupcakes have cooled, decorate with frosting and sprinkles if you’d like.

Notes

Make sure your gluten-free flour contains xanthan gum. If not, add 1/2 teaspoon of xanthan gum to the dry ingredients.
Store cupcakes in an airtight container at room temperature for up to 3 days.

Nutrition

Serving: 1cupcake | Calories: 346kcal | Carbohydrates: 48g | Protein: 2.3g | Fat: 15g | Sugar: 37g

Why You’ll Love This Recipe

This almond flour cake is light, moist, and easy to make. It’s gluten-free, dairy-free, grain-free, and made with wholesome ingredients. You only need one bowl and a few pantry staples to create this delicious, crowd-pleasing dessert!

Can You Use Almond Flour For Cakes?

Yes, absolutely! Almond flour adds texture and flavor, and is loved by those following a paleo diet. Almond flour can be beneficial to someone looking to reduce their carbs, grains and sugar intake. Unlike wheat or rice flour blends, almond flour contains no grains so it won’t lead to a spike blood sugar. And after you make this cake, I highly recommend you use any leftover almond flour to make almond flour chocolate cookies and almond flour brownies – YUM!

gluten-free almond flour cake sliced on a plate.

What You’ll Need To Make Almond Flour Cake

Eggs – Bring your eggs to room temperature before using them in this recipe. Then, crack them into your bowl and beat them until super light and airy. The goal here is to introduce as much air to the eggs as possible, which will result in a lighter and fluffier cake!

Sugar: Adds sweetness and helps create a tender crumb. Feel free to substitute with coconut sugar for a refined sugar-free option.

Almond Flour – I recommend the Bob’s Red Mill Super Fine Almond Flour for this grain-free recipe. The more finely ground the almond flour is, the lighter your cake will be. However, if you can’t find an almond flour labeled “super fine,” don’t worry – many are ground finely enough to work in this recipe. Also, avoid using almond meal, it’s heavier and will result in a more dense cake.

Baking Powder: Helps the cake rise and adds fluffiness!

Lemon Zest – Let’s call is the secret ingredient! A pinch of lemon zest gives this almond flour cake a hint of tangy, citrus-y freshness. Without out, the cake tastes great, but with it, the cake tastes incredible. So if you’re looking to take this gluten-free dessert recipe up a notch, don’t forget the lemon zest.

overhead image of almond flour cake on a plate.

How to Make Almond Flour Cake

  1. Preheat your oven to 350°F and grease an 8-inch cake pan.Beat eggs and sugar until pale and thick (about 5 minutes).
  2. Add almond flour, baking powder, and lemon zest. Beat until just combined.
  3. Pour batter into the pan and top with sliced almonds if using.
  4. Bake for 30-35 minutes or until a toothpick inserted into the center comes out clean.
  5. Let cool completely before serving.

Sam’s Recipe Tips

  • Beat the eggs for a full 5 minutes, no less! Beating the eggs until pale and thick is hands-down the most important part of this recipe. No matter how tempting it may be, don’t cut this step short!
  • For easy removal, I recommend baking this almond flour cake in a spring-form pan. Once done baking, gently run a butter knife along the inside edge of the pan to unstick it from the sides. Then, release the sides of the spring-form pan and list away the sides revealing your perfect cake!
  • Top this gluten-free cake however you’d like! I finished mine off with a generous dollop of coconut white cream and some fresh berries. This cake would also taste great with your favorite frosting, or a simple sprinkling of powdered sugar!
  • If you like cinnamon, try adding a teaspoon of cinnamon to the batter.

Storage Instructions

Store any leftover cake in an airtight container at room temperature for up to 2 days, or in the refrigerator for up to 5 days. You can also freeze the cake for up to 3 months—just thaw it at room temperature before serving.

gluten-free almond flour cake sliced on a plate with powdered sugar on top.
4 from 6 votes

Perfect Almond Flour Cake

Perfectly light and fluffy almond flour cake! A totally irresistible dessert that’s grain-free, gluten-free, and dairy-free. This simple cake comes together in one bowl, with only a handful of simple ingredients.
Print Pin Rate
Prep Time: 30 minutes
Cook Time: 40 minutes
Total Time: 1 hour 10 minutes
Servings: 8 servings

Ingredients

  • 4 large eggs, at room temperature
  • 1/2 cup sugar
  • 1 1/2 cups almond flour
  • 1 teaspoon baking powder
  • 2 teaspoons lemon zest optional, but recommended
  • 1/4 cup sliced almonds optional, for topping

Instructions

  • Preheat oven to 350° Fahrenheit and grease an 8-inch cake pan.
  • Beat together the eggs and sugar with either a hand or stand mixer on high speed until pale and thick, about 5 minutes.
  • Add in the almond flour, lemon zest (if using) and baking powder. Beat for another 30 seconds to one minute, until batter is just combined.
  • Transfer the batter to your prepared cake pan and if you'd like, top with an even layer of sliced almonds (for extra crunch and decoration). Bake the cake 30-35 minutes, or until a toothpick inserted down the center of the cake comes out clean.
  • Remove cake from the pan and let cool completely before garnishing and serving.

Nutrition

Serving: 1serving | Calories: 200kcal | Carbohydrates: 17g | Protein: 7.5g | Fat: 13g | Sugar: 13g

I LOVE a single serve dessert! My go-to is usually either my single serve gluten-free cinnamon roll, or if I need some extra protein I’ll quickly throw together a single serve protein cookie. But lately, I’ve been alllll about this 3-ingredient peanut butter mug cake. I love that I can take it straight out of the microwave and onto the couch with me, and enjoy it warm (!!!) while I binge whatever show I’m watching that week. I typically enjoy it all on its own, but if I’m feeling crazy I’ll add a scoop of vanilla ice cream, a drizzle of chocolate, or even a handful of sprinkles! Please, have fun with this recipe, and most importantly – ENJOY!

Why You’ll Love This Recipe

  • Fast and Easy: Ready in under 5 minutes, this mug cake is perfect for a quick snack or dessert.
  • Simple Ingredients: Only 3 pantry staples are needed, making it budget-friendly and accessible.
  • Customizable: Add mix-ins or toppings to make it your own while still keeping it simple.

What You’ll Need to Make Peanut Butter Mug Cake

Egg: The egg acts as a binder, giving the mug cake its structure and fluffy texture. I wouldn’t recommend trying to replace the egg with something else, since it’s vital to holding this mug cake together.

Peanut Butter: Adds richness, a nutty flavor, and protein to the cake. Use creamy or natural peanut butter for best results. However, if you can’t have peanut butter use any nut, seed, or granola butter in its place!

Sugar: Sweetens the mug cake. Adjust the quantity based on your taste preference or use alternatives like coconut sugar for a refined sugar-free option!

3 ingredient peanut butter mug cake on a tea towel.

Here’s a link to the microwave-safe mug I used – on Amazon!

How to Make Peanut Butter Mug Cake

  1. Start by cracking an egg into a microwave-safe mug.
  2. Add the peanut butter and sugar, then mix well until smooth and lump-free.
  3. Microwave for 1 minute. Check the texture; if it’s undercooked, microwave for an additional 10 seconds.
  4. Allow to cool slightly, then enjoy it straight from the mug!

Topping/Mix-In Options

  • Chocolate Chips: Sprinkle a few on top before microwaving for a melty chocolate finish.
  • Banana Slices: Add a natural sweetness and pair perfectly with peanut butter.
  • Crushed Nuts: For extra crunch, sprinkle chopped peanuts or almonds on top.
  • Drizzles: Drizzle with honey, maple syrup, or melted chocolate after cooking.

Sam’s Recipe Tips

  • Microwave Timing: All microwaves vary in power. Start with 1 minute, then check and add time in 10-second increments if needed.
  • Texture: For a gooier center, slightly undercook the cake by a few seconds.
  • Peanut Butter: Natural peanut butter may result in a slightly denser texture but works perfectly. Stir well before using to incorporate the oils.
close up image of 3 ingredient peanut butter mug cake with a spoon.

Why This Recipe Stands Out

This mug cake is:

It’s a perfect quick dessert or snack that’s as easy as it is delicious!

3 ingredient peanut butter mug cake with extra peanut butter on top.
5 from 2 votes

3-Ingredient Peanut Butter Mug Cake

This 3-ingredient peanut butter mug cake is the ultimate quick and easy dessert, ready in just 5 minutes! Made with simple pantry staples, it’s naturally gluten-free, dairy-free, and customizable with your favorite toppings – perfect for satisfying your sweet tooth anytime.
Print Pin Rate
Prep Time: 3 minutes
Cook Time: 1 minute
Total Time: 4 minutes
Servings: 1 serving

Equipment

  • 1 microwave-safe mug

Ingredients

  • 1 large egg
  • 3 tablespoons creamy peanut butter unsweetened
  • 1-2 tablespoons sugar depending on how sweet you'd like it

Instructions

  • Add all ingredients to a microwave-safe mug and mix together until fully combined and smooth.
    3-Ingredient-Peanut-Butter-Mug-Cake-Step-1
  • Microwave the mug cake for 1 minute, then remove from the microwave and let cool for at least a few minutes before eating (it will be VERY hot!).
    3-Ingredient-Peanut-Butter-Mug-Cake-Step-2

Nutrition

Serving: 1mug cake | Calories: 400kcal | Carbohydrates: 24g | Protein: 18g | Fat: 29g | Sugar: 16g

Yup, I’m one of those people that need a sweet treat at the end of EVERY day. And if I don’t have an already-made dessert on hand, like my healthy brownie batter bark or 4-ingredient date caramels, I have no choice but to run to my kitchen to quickly throw together a single serve dessert recipe. Ones I’ve been loving lately are my gluten-free mug cake (especially with my birthday right around the corner!), or when I want a little extra protein I’ll make my single serve vegan and gluten-free protein cookie. Well, today, I’m thrilled to add this single serve cinnamon roll to my list of favorites!

The thing I love most about this recipe? It requires just 5 ingredients that I almost always have on-hand. It’s also gluten-free, and easily made dairy-free with a couple simple swaps. This single serve cinnamon roll is truly one of those recipes you’ll come back to time and time again. Because.. let’s face it, we’re always craving cinnamon rolls, but never have the time to bake a whole batch!

overhead image of a single serve gluten-free cinnamon roll in a ramekin.

What You’ll Need to Make This Recipe

  • Gluten-Free Flour: Use self-rising gluten-free flour or a mix of all-purpose gluten-free flour and baking powder to achieve the perfect rise and fluffy texture. This keeps the cinnamon roll gluten-free without compromising on taste. Or, if you’re not gluten-free, you can use any self-rising all purpose flour to make your cinnamon roll.
  • Yogurt: Yogurt adds moisture and helps bind the dough, creating a soft and tender cinnamon roll. Feel free to use non-dairy yogurt to make this recipe vegan!
  • Butter: Softened butter adds richness and that classic buttery cinnamon roll flavor. You can substitute with vegan butter to keep the recipe dairy-free.
  • Sugar: Divided into the dough and filling, sugar sweetens the cinnamon roll and caramelizes slightly when baked, creating a deliciously gooey center. YUM!
  • Cinnamon: A must-have for cinnamon rolls, cinnamon adds that warm, spicy kick to the filling, making each bite irresistible.

How to Make a Single Serve Cinnamon Roll

  1. Preheat and Prepare: Start by preheating your oven to 350°F and lightly grease a small ramekin. This helps ensure your cinnamon roll bakes evenly and doesn’t stick.
  2. Make the Dough: In a small mixing bowl, combine the flour, yogurt, and a bit of sugar until a sticky dough forms. If it’s too dry, add a bit more yogurt. Roll the dough out on a floured surface to form a small rectangle.
  3. Add the Filling: Spread softened butter over the dough and sprinkle with the remaining sugar and cinnamon. Roll up the dough tightly, starting from the short end, and place it into your prepared ramekin.
  4. Bake: Bake in the oven for 15-18 minutes until lightly golden. Let it cool for a few minutes before serving with a glaze or enjoy it plain for a quick and easy treat.
single serve gluten-free cinnamon roll in a ramekin.

Can I Make This in The Microwave?

Yes, you can! If you’re short on time, make this single-serve cinnamon roll in the microwave. Simply place the rolled-up dough in a microwave-safe mug or ramekin and microwave on high for about 1-1.5 minutes. Be sure to watch it closely, as microwaves can vary.

Make a Vegan Cinnamon Roll

To make this cinnamon roll vegan, use a non-dairy yogurt and plant-based butter. The rest of the ingredients are already plant-based, making it a simple swap without sacrificing flavor or texture!

4.34 from 9 votes

Single Serve Cinnamon Roll (gluten-free!)

This single serve cinnamon roll is the perfect quick dessert or snack, made with just five simple ingredients you likely already have on-hand. It’s gluten-free, can be made vegan, and comes together in under 20 minutes. Indulge in a warm, gooey, and totally delicious cinnamon roll without the fuss of making a whole batch!
Print Pin Rate
Prep Time: 3 minutes
Cook Time: 15 minutes
Total Time: 18 minutes
Servings: 1 serving

Ingredients

  • 1/2 cup self-rising (gluten-free) flour, or 1/2 cup all purpose flour PLUS 1/2 teaspoon baking powder
  • 1/4 cup Greek yogurt (feel free to use non-dairy yogurt)
  • 1 tablespoon butter, softened (or vegan butter)
  • 3 tablespoons sugar, divided
  • 1 teaspoon cinnamon

Instructions

  • Preheat oven to 350° Fahrenheit and lightly grease a small ramekin.
  • Add the ½ cup of self-rising flour, ¼ cup of yogurt, and 1 tablespoon sugar to a small mixing bowl. Mix together until a dough forms. If the dough seems too dry, add an additional 1 tablespoon of yogurt. The dough should be sticky, but not too sticky to form into a ball.
  • Lightly flour a kitchen surface and flatten the dough out into a 3×6-inch rectangle on the surface.
  • Spread the 1 tablespoon of butter over the dough, then sprinkle evenly with the remaining 2 tablespoons of sugar then the 1 teaspoon of cinnamon.
  • Roll the dough up, starting from the short end until you’ve formed a cinnamon roll. Transfer the cinnamon roll to your prepared ramekin and gently press down on the top of the cinnamon roll to better fit into the ramekin. Bake for 15-18 minutes, or until lightly golden brown on top.
  • Remove from the oven, let cool for a few minutes then top with either a powdered sugar glaze, maple syrup, or enjoy as-is!