Tag

caramel

Browsing

Someone asked me recently what my favorite ingredient to bake with is and while it’s tough to choose just one, I’d say medjool dates are in my top three. They’re naturally sweet, super versatile, and great for no-bake sweet treats! Some of my most popular recipes actually feature dates as the main ingredient – like my smashed dates with peanut butter, healthy date snickers, and 5 ingredient chocolate chip date cake. When it comes to dates, the possibilities really are endless! So when I set out to create a new healthy dessert recipe, these healthy date caramel cups were a no-brainer. They’re quick and easy, made with just 3 ingredients, and there’s absolutely no baking required. I also love having a batch of these in my freezer at all times for when I’m craving a little something treat!

hand holding a healthy date caramel cup with a bite taken out.

Why You’ll LOVE These Healthy Date Caramel Cups

  • Made with only 3 clean, whole-food ingredients
  • Naturally sweetened with dates (no added sugar!)
  • Gluten-free, dairy-free, and vegan
  • No baking required
  • Rich, chocolatey, and deeply satisfying

What Makes This Recipe Healthy

These date caramel cups skip the refined sugars and processed fillings you’d find in store-bought candies. Medjool dates provide natural sweetness and fiber, while dark chocolate adds antioxidants. With no dairy, gluten, or unnecessary additives, they’re a more wholesome option for indulging your sweet tooth!

healthy date caramel cup with flaky sea salt on top.

Frequently Asked Questions

Can I use a regular muffin tin?

Yes! You can absolutely use a standard muffin tin, just note that the caramel cups will be larger and yield fewer total cups. You may want to increase the chocolate and date caramel amounts accordingly.

What kind of chocolate should I use?

Any chocolate chips will work—dark, semi-sweet, or dairy-free depending on your dietary needs. We recommend at least 60% cacao for a richer flavor and lower sugar content.

What if my dates are too hard?

Make sure to soak them in hot water for at least 10 minutes. If they’re still tough, let them soak a bit longer or try chopping them up before blending for smoother caramel.

Storage Tips

Store your caramel cups in an airtight container in the fridge for up to 1 week, or in the freezer for up to 2 months. Let frozen cups thaw for 5–10 minutes before enjoying for the best texture.

3 healthy date caramel cups stacked on top of each other.
No ratings yet

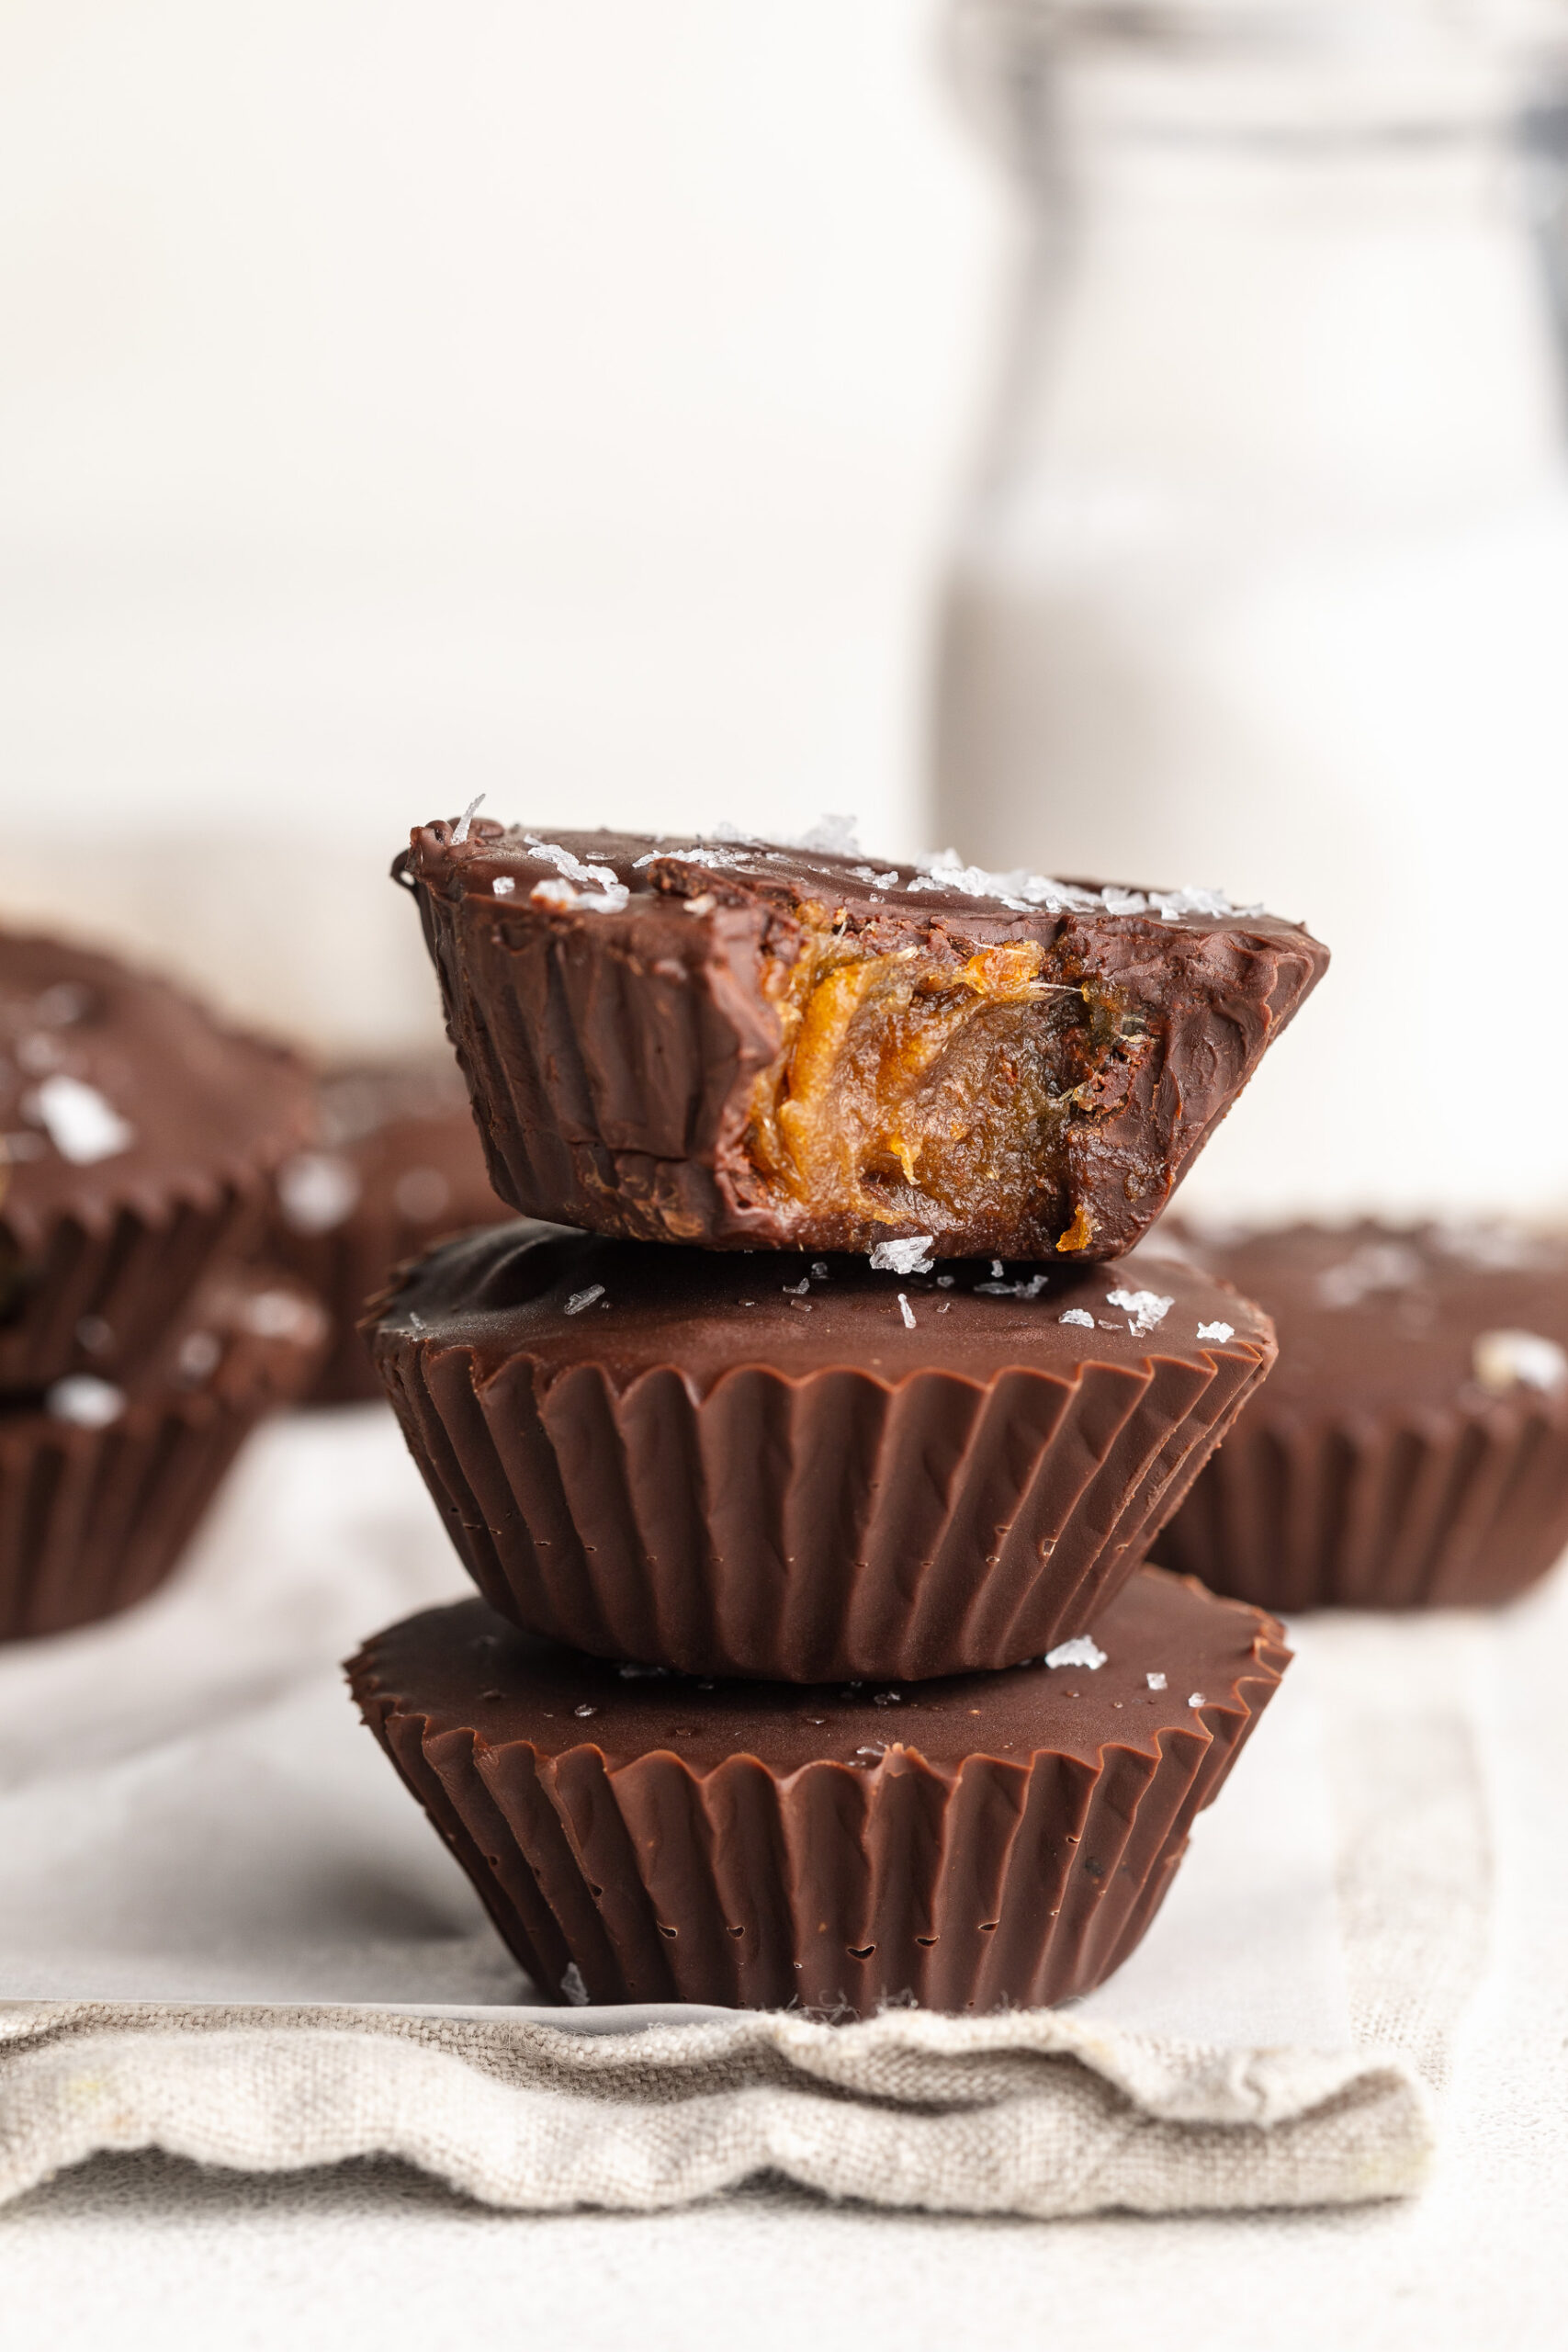
3-Ingredient Healthy Date Caramel Cups

These 3-ingredient healthy date caramel cups are the perfect no-bake treat – rich, chocolatey, and naturally sweetened with Medjool dates! They're vegan, gluten-free, dairy-free, and made with just chocolate chips, coconut oil, and dates. Whether you're craving a wholesome dessert or a midday snack, these caramel cups are healthy yet indulgent!
Print Pin Rate
Prep Time: 10 minutes
Chilling Time: 20 minutes
Total Time: 30 minutes
Servings: 12 date caramel cups

Equipment

  • 1 mini muffin pan
  • 1 small bowl
  • 1 food processor or high speed blender

Ingredients

  • 1 cup Medjool dates pitted
  • 1 1/2 cups chocolate chips I used extra dark chocolate chips
  • 2 teaspoons coconut oil

Instructions

  • Soak the Medjool dates in a bowl of very hot water for 10 minutes, then line a mini muffin pan with mini liners.
  • Melt together the chocolate chips and coconut oil in either the microwave or over a double boiler until completely melted and smooth.
  • Once the chocolate is melted, pour about 1 teaspoon of melted chocolate into the bottom of each mini muffin liner and use a spoon to spread the chocolate around to cover the entire bottom of the liner. Once all liners are lined with chocolate, transfer your muffin pan to the freezer to set and place the remaining melted chocolate aside for now.
  • Once the dates are very soft, drain them from the water and transfer the soaked dates to a food processor or high-speed blender and blend until they are mostly smooth, scraping down the sides of the food processor or blender as needed.
  • Spoon about 1-2 teaspoons of date caramel into each cup lined with chocolate. Repeat this process until all cups have been filled with date caramel.
  • Pour 1-2 teaspoons of melted chocolate over each date caramel cup, making sure you completely cover the date caramel inside. Once all cups are filled with chocolate, transfer the pan back into the freezer for 10-15 minutes or until the chocolate is completely set. Remove date caramel cups from the freezer, transfer to an airtight container and store in the fridge or enjoy right away!

Nutrition

Serving: 1date caramel cup | Calories: 145kcal | Carbohydrates: 15g | Protein: 1g | Fat: 8g | Sugar: 10g

Why You’ll Love This Recipe

  • Sweet and Salty Perfection: The combination of salty pretzels, rich toffee, and creamy chocolate creates the ultimate flavor balance.
  • Simple Ingredients: With only 5 pantry staples, this recipe is both accessible and fuss-free.
  • Customizable: Switch up the toppings or pretzel shapes to match your preferences or dietary needs.
a piece of chocolate toffee pretzel bark with flaky sea salt on top.

What You’ll Need to Make Chocolate Toffee Pretzel Bark

Here’s a breakdown of the ingredients and why they shine in this recipe:

  • Mini Pretzels: Provide a salty, crunchy base for the bark. Use gluten-free pretzels to make the recipe gluten-free friendly. I used the Snyder’s Gluten-Free Mini Pretzels and they worked perfectly in this recipe!
  • Coconut Sugar: A natural sweetener that adds deep caramel notes to the toffee while being a healthier alternative to white sugar. I buy my coconut sugar in bulk on Amazon because I use it in so many of my recipes!
  • Butter (or Non-Dairy Butter): The fat needed to create the toffee layer. Use vegan butter for a dairy-free option. I recommend Miyoko’s vegan butter in this recipe.
  • Chocolate Chips: Melted chocolate ties everything together. Opt for dairy-free chocolate chips to keep the recipe vegan. I used Guittard’s Extra Dark Chocolate Chips for a more intense chocolate flavor. YUM!
  • Flaky Salt (optional): A sprinkle of flaky salt enhances the sweet-and-salty flavor profile and adds a touch of elegance.

How to Make Pretzel Bark

  1. Prepare the Base: Preheat your oven to 400°F and line a baking sheet with aluminum foil. Arrange pretzels in a single, even layer across the baking sheet.
  2. Make the Toffee: In a small saucepan, melt the butter and coconut sugar over medium heat, stirring often. Once melted, continue to cook for 4-5 minutes until the mixture is dark brown and bubbling. Remove from heat and whisk in vanilla extract.
  3. Pour Over Pretzels: Slowly pour the toffee over the pretzels, ensuring an even coating. Bake for 5 minutes until the toffee sets.
  4. Add Chocolate Layer: Melt the chocolate chips in the microwave or over a double boiler. Remove the pretzels from the oven, let cool for 1-2 minutes, then spread the melted chocolate over the toffee layer.
  5. Cool and Set: Allow the bark to cool at room temperature for 30 minutes, then transfer to the fridge for 6 hours or freezer for 3 hours. Once fully set, remove the bark from the pan, peel away the foil, and break into pieces.
chocolate toffee pretzel bark on a baking sheet.

Adjust This Recipe to Your Dietary Needs

Make it Vegan: Use dairy-free butter and vegan chocolate chips.

Make it Gluten-Free: Use gluten-free pretzels.

Make it Dairy-Free: Substitute non-dairy butter and chocolate chips.

Storage Tips

  • Store the bark in an airtight container in the fridge for up to 2 weeks or the freezer for up to 2 months.
  • Keep the pieces layered with parchment paper to prevent them from sticking together.
a stack of chocolate toffee pretzel bark on a plate.
No ratings yet

Chocolate Toffee Pretzel Bark (gluten-free & dairy-free!)

This chocolate toffee pretzel bark combines crunchy pretzels, rich caramelized toffee, and smooth chocolate for a sweet-and-salty treat that’s impossible to resist. This recipe is gluten-free, dairy-free, and vegan-friendly, sweetened with coconut sugar, and made with just five simple ingredients. Whether you’re making it for the holidays, gifting it to a friend, or enjoying it yourself, this quick and easy bark is sure to impress!
Print Pin Rate
Prep Time: 5 minutes
Cook Time: 10 minutes
Chilling Time: 4 hours
Total Time: 4 hours 15 minutes
Servings: 24 servings

Equipment

  • 1 9×13-inch baking sheet
  • 1 small saucepan

Ingredients

  • 3 cups mini pretzels I used gluten-free pretzels
  • 1 cup butter I used non-dairy butter
  • 1 cup coconut sugar or brown sugar
  • 1 teaspoon vanilla extract optional, but recommended
  • 2 cups chocolate chips
  • Flaky salt for topping

Instructions

  • Preheat oven to 400° Fahrenheit and line a large baking sheet with aluminum foil. Arrange the pretzels in an even layer on the baking sheet.
  • Melt butter and sugar in a small saucepan over medium heat, stirring frequently. Once the butter has melted, cook the toffee for another 4-5 minutes, stirring constantly until dark brown and bubbling.
  • Remove from the heat, whisk in the vanilla extract then immediately slowly and evenly pour the toffee over the pretzels. Place the pretzels and toffee in the oven and bake for 5 minutes.
  • While the bark bakes, melt the chocolate in the microwave or over a double boiler until completely smooth. Remove the pretzels and caramel from the oven, let them cool for 1-2 minutes or until no longer bubbling, then slowly pour the melted chocolate over top of the toffee and gently spread into an even layer.
  • Leave the chocolate toffee pretzels bark to cool at room temperature for about 30 minutes, then transfer to either the fridge for 6 hours or the freezer for 3 hours. Remove the bark from the pan, peel away the foil, and break into large chunks.

Notes

The nutritional info for this recipe was calculated using gluten-free pretzels, non-dairy butter, coconut sugar, and extra dark chocolate chips.

Nutrition

Serving: 1serving | Calories: 230kcal | Carbohydrates: 29g | Protein: 1.8g | Fat: 10.3g | Sugar: 17.3g

A healthier take on the classic caramel brulée latte! Made with non-dairy milk and sweetened with coconut sugar, this warming latte rivals Starbucks’ version. Super easy to make in the comfort of your own home, with a handful of ingredients you likely already have on-hand.

two mugs of caramel brulée latte with milk on the side.

What You’ll Need to Make This Healthy Caramel Brulée Latte

Butter – I used Miyoko’s vegan butter to keep this latte recipe vegan-friendly! It melts beautifully into the caramel sauce, giving it that smooth, buttery flavor. However, you can certainly use regular butter if you’d like!

Coconut Sugar – This natural sweetener is unrefined and lower on the glycemic index (meaning less of a spike in blood sugar). It also has a slightly deeper flavor, which only adds to the flavor of our caramel sauce! Though if you don’t have any coconut sugar, feel free to use regular sugar or even brown sugar instead.

Milk – I used non-dairy cashew milk in my healthy caramel brulée latte, and it was perfectly creamy and delicious! But really any milk will work, so go ahead and use whatever you have at home.

Espresso – Either one shot of espresso, or 1/4 cup of strong coffee will do the trick. Or, if you’re like me and can’t get enough caffeine in your life, make it a double and add an extra shot of espresso!

Tips and Tricks

  • Keep a close eye on your caramel sauce while it cooks! The sugar can burn quickly, and needs to be stirred frequently. So I recommend tending to it the entire 5 minutes it cooks – trust me, it’ll be worth it!
  • For a salted caramel brulée latte, top yours off with a tiny pinch of flaky salt! I go crazy for a good salty/sweet combo, and that little pinch of salt goes a long way.
  • Turn this recipe into an iced latte by serving it over ice! To do this, I recommend letting your hot caramel milk come to room temperature first, as well as your espresso.

Adjust This Recipe to Your Dietary Needs

Make it Vegan: That’s easy – just use all the vegan swaps I outlined above!

Make it Decaf: For a caffeine-free version, use your favorite decaf espresso or decaf coffee in your latte.

Healthy (& vegan!) Caramel Brulée Latte

4 from 2 votes
Recipe by Samantha Course: DrinksDifficulty: Easy
Servings

1

serving
Prep time

0

minutes
Cooking time

5

minutes
Total time

5

minutes

A healthier take on the classic caramel brulée latte! Made with non-dairy milk and sweetened with coconut sugar, this warming latte rivals Starbucks’ version. Super easy to make in the comfort of your own home, with a handful of ingredients you likely already have on-hand.

Ingredients

  • For the caramel sauce:
  • 1/2 cup butter, I used vegan butter

  • 1/2 cup coconut sugar, or regular sugar

  • For the latte:
  • 1 cup milk, I used non-dairy milk

  • 2 tablespoons caramel sauce

  • 1/2 teaspoon vanilla extract

  • 1 shot espresso, or 1/4 cup strong coffee

Directions

  • Make the caramel sauce by melting butter and sugar in a small saucepan over medium heat, stirring frequently. Once butter has melted, cook for an additional 4-5 minutes, stirring constantly until dark brown and bubbling.
  • Combine milk, 2 tablespoons of caramel sauce, and vanilla extract in a small saucepan over low heat. Bring to a simmer, then whisk until frothy.
  • Add espresso or strong coffee to a mug, then pour milk mixture over the top. Top with whipped cream an extra drizzle of caramel sauce.

Recipe Video

Did you make this recipe?

Share it and tag @samdoesherbest on Instagram!

Like this recipe?

Follow us @samdoesherbest on Pinterest