Tag

gluten-free

Browsing

These peanut butter and jelly baked oats are the most delicious way to start your morning! Creamy peanut butter, your favorite jelly, and just a touch of maple syrup are what make this recipe special. Whip up these peanut butter and jelly baked oats on mornings when you want something that’s perfectly sweet, comforting, and oh-so-satisfying.

overhead image of peanut butter and jelly baked oats with milk and blueberries on the side.

The baked oats life chose me. The carrot cake baked oats recipe I shared a few months back literally blew UP! Everyone was going crazy over that recipe, and tbh I don’t totally blame them. Though while the carrot cake version is delicious, I wanted to give you guys options. So I brainstormed some classic favorite flavor combos and ultimately landed on peanut butter and jelly. There is nothing more iconically wholesome than peanut butter and jelly. And when added to baked oats, the results is truly comfort food made HEALTHY.

What You Need To Make Peanut Butter and Jelly Baked Oats

Rolled Oats – Oats are an ideal breakfast, with plenty of vitamins, mineral, and health benefits! Feel free to use either rolled oats or quick oats in this recipe – both will work. I almost always have a bag of rolled oats in my house as an easy and versatile gluten-free grain.

Banana – You can use either a mashed banana or half a cup of apple sauce in this recipe. The mashed fruit act as a fort of egg-replacer in this vegan breakfast recipe.

Peanut Butter – I’d recommend opting for smooth peanut butter if you have it, but if not crunchy will work too. Though keep in mind that the peanut butter will be blended with all ingredients in the second step. Therefore, if you use crunchy, there’s a good chance it will be no longer crunchy by the end of this recipe.

Jam – Go crazy with this one! Literally use whatever jam or jelly your heart desires. I had some homemade blueberry jam lying around, so I used that. But i’m sure any jam or jelly flavor will taste incredible in these peanut butter and jelly baked oats!

Adjust This Recipe To Your Dietary Needs

Add Protein: Feel free to add a tablespoon of your favorite protein powder to increase the protein in these baked oats. If you end up adding protein powder, I’d recommend increasing the almond milk amount to 1/2 cup instead of 1/3 cup.

Make it Grain-Free: To make these peanut butter and jelly baked oats grain-free, use coconut flour in place of the rolled oats.

Peanut Butter and Jelly Baked Oats (Vegan, Gluten-Free)

0 from 0 votes
Recipe by Samantha Russo Course: BreakfastCuisine: AmericanDifficulty: Easy
Servings

1

serving
Prep time

5

minutes
Cooking time

20

minutes
Total time

25

minutes

These peanut butter and jelly baked oats are the most delicious way to start your morning! Creamy peanut butter, your favorite jelly, and just a touch of maple syrup are what make this recipe special. Whip up these peanut butter and jelly baked oats on mornings when you want something that’s perfectly sweet, comforting, and oh-so-satisfying.

Ingredients

  • 1/2 cup rolled oats

  • 1 banana, mashed

  • 1/3 cup almond milk, see Notes

  • 1 tablespoon maple syrup

  • 1 tablespoon peanut butter

  • 1/2 teaspoon baking powder

  • pinch of salt

  • 1/2 teaspoon cinnamon

  • 1/4 teaspoon vanilla extract

  • 1 tablespoon jam of choice

Directions

  • Preheat your oven to 350° Fahrenheit and lightly grease a ramekin.
  • Add all ingredients except the jam to a blender and blend until smooth.
  • Pour into ramekin, then swirl in the jam. Bake for 20-25 minutes.

Recipe Video

Notes

  • Almond Milk: Feel free to use any dairy-free milk you’d like instead of almond milk.

Did you make this recipe?

Share it and tag @samdoesherbest on Instagram!

Like this recipe?

Follow us @samdoesherbest on Pinterest

Other Delicious Breakfast Recipes

This easy one pan breakfast recipe has everything you need to start your day off right! Savory bacon, crispy potatoes, and fluffy scrambled eggs are all cooked in the same pan. Whip this one pan breakfast up on mornings when you need something quick, yet satisfying and delicious!

All ingredients for one pan breakfast arranged on a plate with a cup of coffee on the side.

I’ve been making this exact breakfast for my boyfriend and I for a couple of months now. Well actually, I started with only cooking the eggs and bacon in the same pan while the potatoes baked in the oven. Then one day, I was short on time (and energy) so I decided to try cooking the potatoes in the same pan too. And voila! The world’s easiest/best one pan breakfast was born.

I actually have no good reason as to why I haven’t shared this breakfast hack earlier. It just became such a common part of my cooking routine that I failed to realize it was worth sharing. Which is crazy because it is by far one of the smartest, if not THE smartest recipe I’ve ever created. The entire breakfast-making process could literally not get any more efficient than this. I promise this one pan breakfast will change your breakfast game forever! Just like it changed mine.

What You Need To Make This One Pan Breakfast

Bacon – Ahhh beautiful, beautiful bacon – I just love you. No breakfast is complete without bacon or sausage. In my opinion, bacon reigns supreme, though sausage is OK too. Though the main reason I’d recommend you stick to bacon in this recipe, is because the fat rendered from the bacon will become the “cooking oil” we use for the rest of the recipe. If you find that your bacon renders too much fat, simply remove some from the pan before cooking the rest of your one pan breakfast.

Baby Potatoes – Any kind of white potato will work here. My recommendation is baby potatoes for their creamy, almost buttery interior. When pan-fried in this recipe, the outside gets deliciously crispy while the inside stays pleasantly soft. If you opt for using a different kind of white potato in this recipe, just make sure that it is chopped into similarly sized pieces.

Eggs – Another breakfast staple, eggs are the last item cooked for this one pan breakfast. I scrambled my eggs in this recipe, though you can cook your eggs however you’d like. I can image that fried eggs would also taste and work great here! However, if you do choose to scramble your eggs, do not forget to lower the heat of your pan, as scrambled eggs require a much lower temperature to cook.

Delicious Additions

Below are a few ideas of what you can serve with this one pan breakfast…

  • Avocado
  • Gluten-Free Toast
  • Fresh Fruit
  • Arugula/Lettuce
  • Fresh Tomatoes
  • Crunchy Carrots
  • Sweet Peppers
  • Fresh Herbs
  • Dairy-Free (or regular) Cheese
  • & Coffee (DUH!)

Tips and Tricks for This One Pan Breakfast

  • Choose a pan large enough to fit all potatoes in a single layer. If you overcrowd the potatoes in the pan, they’ll have less contact with the pan resulting in less crispy potatoes!
  • If you find that your bacon rendered a little too much fat, feel free to remove some bacon fat from the pan before cooking the potatoes! And if cooking this one pan breakfast in bacon fat isn’t your thing, simply remove all of the fat and use avocado oil instead.
  • Add as much salt, pepper, or any other spices you’d like! A dash of garlic powder and/or smoked paprika over the crispy potatoes is delicious.

One Pan Breakfast

3 from 7 votes
Recipe by Samantha Russo Course: BreakfastCuisine: AmericanDifficulty: Easy
Servings

2

servings
Prep time

5

minutes
Cooking time

25

minutes
Total time

30

minutes

This easy one pan breakfast recipe has everything you need to start your day off right! Savory bacon, crispy potatoes, and fluffy scrambled eggs are all cooked in the same pan. Whip this one pan breakfast up on mornings when you need something quick, yet satisfying and delicious!

Ingredients

  • 4 bacon slices

  • 1/2 pound baby potatoes, quartered

  • 6 eggs, whisked

  • salt and pepper, to taste

Directions

  • Cook bacon in a large pan over medium heat for 4-5 minutes per side, then set aside on a paper towel-lined plate.
  • Increase the heat to medium-high and add in the potatoes in a single layer, sprinkle with salt and pepper, cover with a lid and cook undisturbed for 5-8 minutes.
  • Flip potatoes, cover again and cook undisturbed for 10 minutes, or until crispy. Remove potatoes from the pan, then reduce the heat to medium-low.
  • Pour in the whisked eggs, season with salt and pepper, and cook for 4-5 minutes sturring frequently. Serve eggs with bacon, potatoes, and whatever else you’d like!

Recipe Video

Notes

  • If you’re concerned about the bacon and potatoes getting cold while the eggs cook, I’d recommend leaving them in the oven on warm. Though I found that the eggs cook so quickly, the bacon and potatoes are still at an ideal temperate when served.

Did you make this recipe?

Share it and tag @samdoesherbest on Instagram!

Like this recipe?

Follow us @samdoesherbest on Pinterest

Super Easy Recipes You’ll Want To Make Next

Pour this kale pesto over your favorite pasta for an easy, healthy meal! Loaded with fresh kale, this is the ultimate way to sneak extra veggies into your diet. With a few simple ingredients, you’ll have a fresh and delicious kale pesto in under 5 minutes!

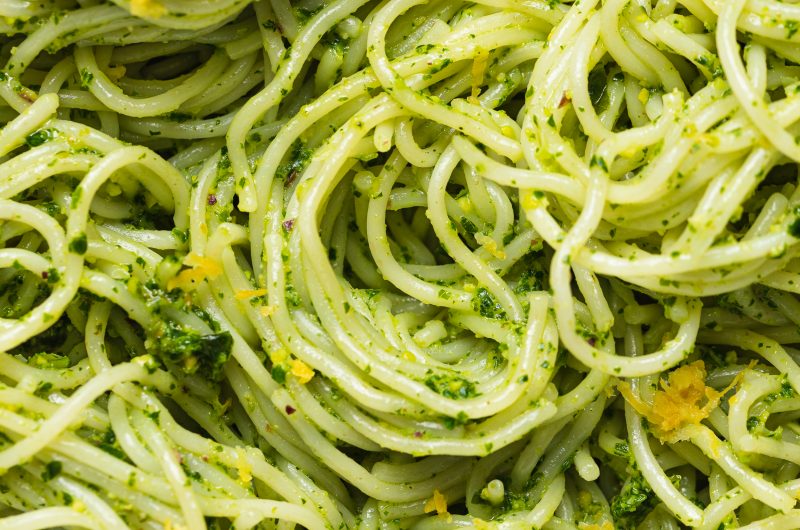
Kale pesto in spaghetti being twirled with a fork.

The Story Behind This Recipe

We’re major pesto people around here. I make a killer basil pesto (be on the lookout for a recipe this summer!). There’s just something so fresh, yet satisfying about a good pesto. I was skeptical attempting a kale version of a favorite. But WOW, I had absolutely nothing to worry about. This kale pesto is savory, bright, almost refreshing and completely hides how healthy it is. As some of you know, most pestos are made with some type of cheese. But because we’re a cheese-free zone, I developed this recipe without cheese. And honestly – you won’t even know it’s missing anything!

What You Need To Make Kale Pesto

Kale – I used green curly kale, though any kale will work in this recipe. Be sure to remove as much of the stems from your kale leaves as possible before blending. And when I say “roughly chopped,” I mean it. Simply run your knife through the kale a couple of times and then it’s ready to use in this recipe!

Pistachios – Pistachios add a hearty almost sweet touch to this kale pesto. I’ve tried a few different nuts in this recipe and all work, though pistachios taste best. However, whatever nuts you use, it’s imperative that they are completely unsalted!

Lemon Juice – A touch of acidity brings out the brightness of this recipe! Lemon juice also helps to break down the tough fibers in the kale, making it easier to digest.

Ways To Enjoy This Kale Pesto

  • Perhaps the most obvious way is over pasta. This is how I enjoyed my kale pesto, with Jovial Brown Rice gluten-free pasta. I also added sautéed mushrooms and bell peppers for extra protein/nutrients – and it was delicious!
  • Don’t knock this one ’til you try it – with scrambled eggs! Stir a tablespoon or two of kale pesto in with your eggs right before they’re finished cooking. The end result is creamy scrambled eggs loaded with flavor and veggies.
  • On toast – slather a healthy helping of kale pesto on toasted bread for a quick and delicious snack!

Kale Pesto (Vegan, Gluten-Free)

0 from 0 votes
Recipe by Samantha Russo Course: MainCuisine: ItalianDifficulty: Easy
Servings

6

servings
Prep time

5

minutes
Total time

5

minutes

Pour this kale pesto over your favorite pasta for an easy, healthy meal! Loaded with fresh kale, this is the ultimate way to sneak extra veggies into your diet. With a few simple ingredients, you’ll have a fresh and delicious kale pesto in under 5 minutes!

Ingredients

  • 3 cups packed kale, stems removed and roughly chopped

  • 1/2 cup pistachios, raw and unsalted

  • 2 tablespoons lemon juice

  • 2 garlic cloves, see Notes

  • 1 teaspoon salt

  • 1/4-1/2 cup olive oil

Directions

  • Add all ingredients, except for the olive oil, to a food processor or blender. Pulse until finely chopped, then slowly stream in the olive oil while blending until combined.

Notes

  • Garlic: There’s no need to chop the garlic for this recipe, simply remove the skin then throw the cloves in with the other ingredients!

Did you make this recipe?

Share it and tag @samdoesherbest on Instagram!

Like this recipe?

Follow us @samdoesherbest on Pinterest

More Vegan Recipes You’ll Love

These vegan and gluten-free oreos are BETTER than the real thing! Sweet vanilla frosting is layered between two extra-chocolatey, crumbly cookies. These gluten-free oreos are not only fun, but surprisingly easy to make!

Five gluten-free oreos stacked on top of each other.

I. love. oreos. They’re easily one of my favorite packaged cookies (right next to milanos). Thought as I’m sure we all know, oreos are not gluten-free. *womp womp* But now that’s ok! I made these gluten-free oreos with all my celiacs and gluten-intolerant people in mind. These babies are completely gluten-free, though I’d argue they taste even better than regular oreos.

What You Need to Make Vegan and Gluten-Free Oreos

Vegan Butter – Found in both the cookie and the filling, vegan butter is key to this healthier recipe! A cup of softened vegan butter in the cookie dough makes them irresistibly soft and crumbly. While half a cup of softened vegan butter in the filling makes it light and fluffy. I use and love the Earth Balance Vegan Buttery Baking Sticks in most of my vegan/dairy-free recipes, though feel free to use whatever kind of vegan butter you’d like! Also, if you’re not vegan or dairy-free you can easily swap regular butter in its place.

Gluten-Free Flour – I prefer and recommend Bob’s Red Mill 1:1 Baking Flour, though feel free to use your favorite gluten-free flour in this recipe. When picking out a gluten-free flour for baking, you always want to make sure that it contains xantham gum! If you’re not gluten-free, you can use regular all purpose flour instead.

Cocoa Powder – Any unsweetened cocoa powder will work for these gluten-free oreos! You could even use unsweetened cacao powder for extra vitamins and minerals in your cookies. Cocoa powder is usually pretty lumpy and is the main reason I recommend you sift the dry ingredients in this recipe. Sifting the cocoa powder in particular will ensure that the rich chocolatey flavor is distributed evenly throughout the cookie dough.

Filling gluten-free oreos with vanilla frosting.

Tips and Tricks

  • I know most of us, me included, forget to soften our butter ahead of recipes that call for softened butter. While you can usually get away with quickly microwaving butter to soften it, that trick won’t work for this gluten-free oreos recipe. The dough for these cookies is on the stickier side and if your butter is at all melted going into this mixture, it will make your dough nearly impossible to work with. Therefore, don’t forget to leave the vegan butter out for at least an hour before making this recipe!
  • I didn’t have a cookie cutter small enough for this, so I used the rim of a shot glass to cut out my cookies! If you find yourself in the same boat, take a look around your kitchen for other items you might be able to use. You’ll be surprised by how many round objects can double as a cookie cutter!
  • Any double-stuffed fans out there?? Simply double the filling recipes and pile on that sweet vanilla frosting! You’re free to stuff these gluten-free oreos as much as you want.

Gluten-Free Oreos (vegan)

4 from 2 votes
Recipe by Samantha Russo Course: DessertCuisine: American
Servings

24

oreos
Prep time

15

minutes
Cooking time

30

minutes
Total time

45

minutes

These vegan and gluten-free oreos are BETTER than the real thing! Sweet vanilla frosting is layered between two extra-chocolatey, crumbly cookies. These gluten-free oreos are not only fun, but surprisingly easy to make!

Ingredients

  • For the cookies:
  • 1 cup vegan butter, softened

  • 1 cup sugar, see Notes

  • 2 cups gluten-free flour

  • 1/2 cup cocoa powder

  • 1/2 teaspoon baking soda

  • For the filling:
  • 1/2 cup vegan butter, softened

  • 2 cups powdered sugar

  • 1/2 teaspoon vanilla extract

Directions

  • For the cookies:
  • Beat the butter and sugar on high until light and fluffy.
  • Sift the flour, cocoa powder, and baking soda together in a separate bowl and mix to combine.
  • Add the dry ingredients into the butter and sugar, mix until a dough forms.
  • Transfer dough to a floured surface and roll into 1/4-inch thick disc, then cut out 2-inch round circles.
  • Transfer all circles onto a parchment lined baking sheet and place in the fridge to chill for 20-30 minutes.
  • Preheat oven to 350° Fahrenheit and bake cookies for 10-12 minutes. Let cool on the baking sheet for a few minutes before transferring to a wire rack to cool completely.
  • For the filling:
  • Beat all filling ingredients together until light and fluffy.
  • Place a dollop of filling onto each cookie and top with another cookie – repeat for all remaining cookies!

Recipe Video

Notes

  • Sugar: I used coconut sugar in this recipe and had great results! Though feel free to use white or cane sugar.

Did you make this recipe?

Share it and tag @samdoesherbest on Instagram!

Like this recipe?

Follow us @samdoesherbest on Pinterest
More Delicious Vegan and Gluten-Free Recipes

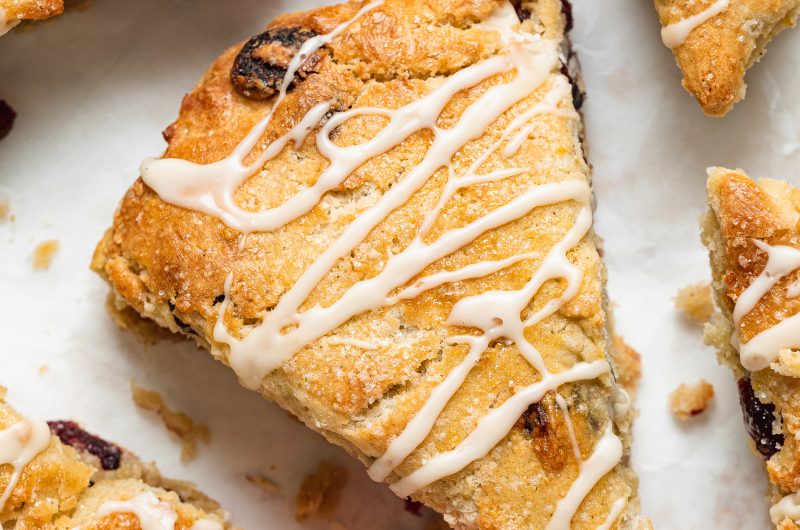
These cranberry orange scones are perfectly flaky and sweet! I took a traditional recipe and turned it gluten and dairy-free with just a few simple swaps. These scones taste incredible with a warm cup of coffee for breakfast or lightly toasted as an afternoon snack.

Cranberry orange scones stacked on top of eachother.

Breakfast in bed was the big thing on Mother’s Day in my house. And because my dad can barely boil an egg, the cooking of breakfast was always my job. I always loved to cook, so I had fun thinking up a breakfast menu for my mom on Mother’s Day. I don’t remember too many menu items from over the years, but I do remember making her cranberry orange scones one year. And the only reason I remember is because I truly couldn’t believe how INCREDIBLE they were! Ever since that Mother’s Day, I’ve thought about those scones frequently. And honestly, I have no good excuse as to why I haven’t remade them sooner?!

Though for this year’s cranberry orange scones, I added my Sam Does Her Best signature gluten-free and dairy-free twist. You know what it is. Not going to lie here either, I was pretty worried these just wouldn’t work sans gluten and dairy. But to my surprise, they definitely did. And not only did they work, but they taste even better than what I remember! So without further ado, I present to you gluten-free and dairy-free cranberry orange scones that will change your Mother’s Day game forever.

What You Need To Make Cranberry Orange Scones

Gluten-Free Flour – I use and recommend Bob’s Red Mill Gluten-Free 1:1 Baking Powder, it’s pretty much an exact dupe to regular all purpose flour. Though feel free to use any gluten-free flour you’d like, my only recommendation would be to make sure that it contains xantham gum. Xantham gum is a stabilizer and a key ingredient in holding your baked goods together.

Dairy-Free Butter – Make sure your butter is ice cold for this recipe! I’d even recommend dicing it into cubes and then sticking it in the freezer for 10 minutes or so. Cold butter is signature to any and all scones because when baked, it gives your scones that irresistible flaky texture.

Dairy-Free Milk – I used almond milk and had great results, but feel free to use whatever unsweetened dairy-free milk you’d like in these cranberry orange scones. You also want to make sure that the milk is cold, in order to ensure the butter in this recipe stays cold.

Tips and Tricks

  • Use a fork to combine the butter into the flour. When mixing, lightly mash the butter cubes with the back of the fork. You’re simply looking to break up the butter into the dry ingredients. You’ll know you’re done with this step when you have a crumbly mixture and your butter is the size of peas.
  • Lightly whisk the eggs before adding them into the cranberry orange scones dough. Crack them in a bowl and give them a quick whisk with a fork to break up the yolks before proceeding with the recipe.
  • Make sure your surface is well-floured before transferring the dough onto it. The dough will be quite sticky, but when introduced to flour on your work surface, will be much easier to handle! Continue sprinkling gluten-free flour on the surface, on your hands, or on the dough itself whenever it feels too sticky to work with.

Cranberry Orange Scones (Gluten-Free, Dairy-Free)

4 from 1 vote
Recipe by Samantha Russo Course: SnacksCuisine: ScottishDifficulty: Intermediate
Servings

8

scones
Prep time

10

minutes
Cooking time

20

minutes
Total time

30

minutes

These cranberry orange scones are perfectly flaky and sweet! I took a traditional recipe and turned it gluten and dairy-free with just a few simple swaps. These scones taste incredible with a warm cup of coffee for breakfast or lightly toasted as an afternoon snack.

Ingredients

  • 2 1/2 cups gluten-free flour

  • 1/4 cup almond flour

  • 1/4 cup sugar

  • 1 tablespoon baking powder

  • 1 tablespoon orange zest

  • 8 tablespoons cold dairy-free butter, cut into 1/4-inch cubes

  • 1 cup cold dairy-free milk

  • 2 large eggs, whisked

  • 1 cup dried cranberries

  • For the egg wash:
  • 1 egg, whisked

  • For the icing:
  • 1/2 cup powdered sugar

  • 3 teaspoons fresh orange juice

Directions

  • Preheat oven to 400° Fahrenheit.
  • Mix together the gluten-free flour, almond flour, sugar, baking powder, and orange zest in a large bowl.
  • Add in the cubed butter and mix with a fork until the butter is the size of peas, then fold in the cranberries.
  • Add in the cold milk and whisked eggs, mix until just combined.
  • Transfer dough to a floured sheet of parchment paper set on a work surface and gently press into a 1-inch thick circle.
  • Slice into six triangles and transfer to a baking sheet, then brush with egg wash and sprinkle with extra sugar.
  • Bake for 15-20 minutes or until golden brown, then remove from oven, gently separate scones, and transfer to a wire rack to cool.
  • Make the icing by whisking the powdered sugar and orange juice together in a small bowl, then drizzle over cooled scones.

Recipe Video

Notes

  • Ingredient Swaps: Feel free to use all purpose flour instead of gluten-free flour, and leave out the almond flour if you’d like. You can also swap regular butter for the dairy-free butter and cow’s milk for the dairy-free milk in this recipe.

Did you make this recipe?

Share it and tag @samdoesherbest on Instagram!

Like this recipe?

Follow us @samdoesherbest on Pinterest

More Delicious Gluten-Free and Dairy-Free Recipes