Tag

grain free

Browsing

Perfectly crispy, yet healthy sweet potato fries! Four ingredients and 15 minutes is all it takes for this addictive appetizer or side dish. Don’t have an air fryer? No worries, I’ve included an oven-baked option that still yields incredibly crispy fries!
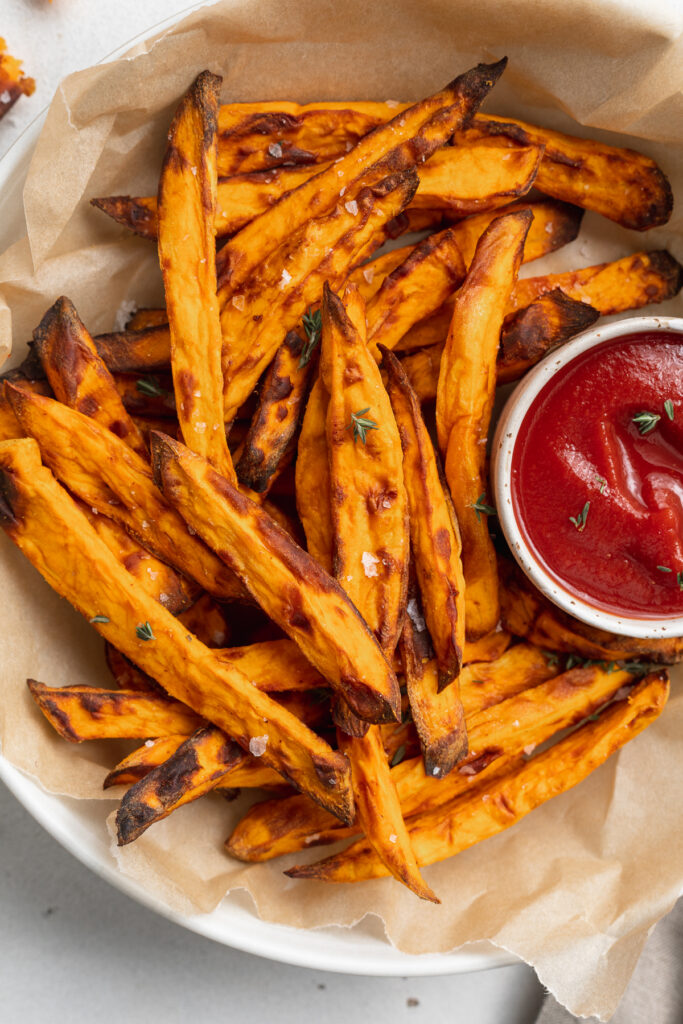
close-up overhead image of air fryer sweet potato fries on a plate with ketchup on the side

The air fryer is truly the kitchen device of the century (ok, well it’s right up there with the Instant Pot). I only just got my hands on about a year ago, and holy moly it changed the homemade fry game for me, forever. After quite a bit of research for the best air fryer out there, I eventually landed on the Cosori Pro Air Fryer. It’s fairly priced and works like a champ, can’t recommend it enough!

What You Need To Make Air Fryer Sweet Potato Fries

Sweet Potatoes – The star of our show! You can use any variety of sweet potatoes you’d like for this recipe. Just remember, peel them and then slice them into thin matchsticks. Thinner = crispier. And try your best to cut them as evenly as possible, so that they “fry” evenly.

Avocado Oil – My oil of choice, but you can use any oil you’d like here. Just one tablespoon is all you’ll need, that’s A LOT less oil than if you deep-fried these!

Salt – Duh! Salt is non-negotiable for fries of any kind. Though start small and add more salt once the fries are done. You can, of course, salt to your preference.

Garlic Powder – This is my little special touch. I love the extra flavor garlic powder gives these fries, and I promise you will too. Though if you’re not a garlic fan (how?!), then you can leave this ingredient out.
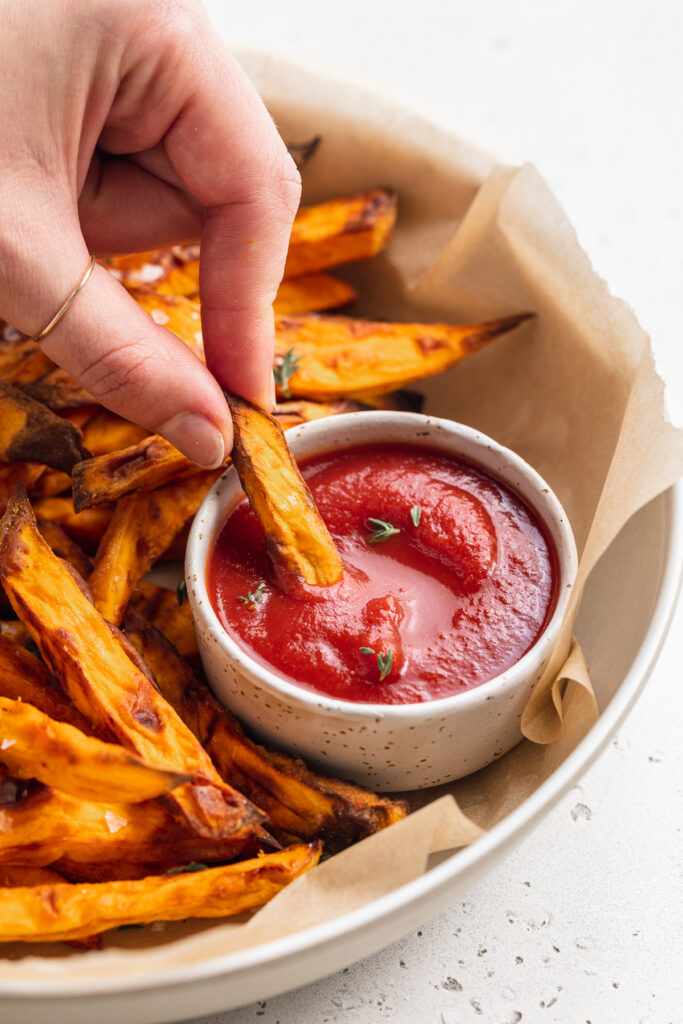
air fryer sweet potato fries being dipped into ketchup

Tips and Tricks

  • The secret to these crispy sweet potato fries is working in batches when you air fry them. Just a single layer at a time, avoiding cramming too many into the air fryer, will give you the crispiest non-deep-fried sweet potato fry of all time.
  • No air fryer? No problem! See below for an oven baked option.
  • If you’re looking for something to pair with these sweet potato fries, I can’t help but recommend these crispy air fryer buffalo chicken wings! The perfect healthy game-day, or any day, appetizer duo.

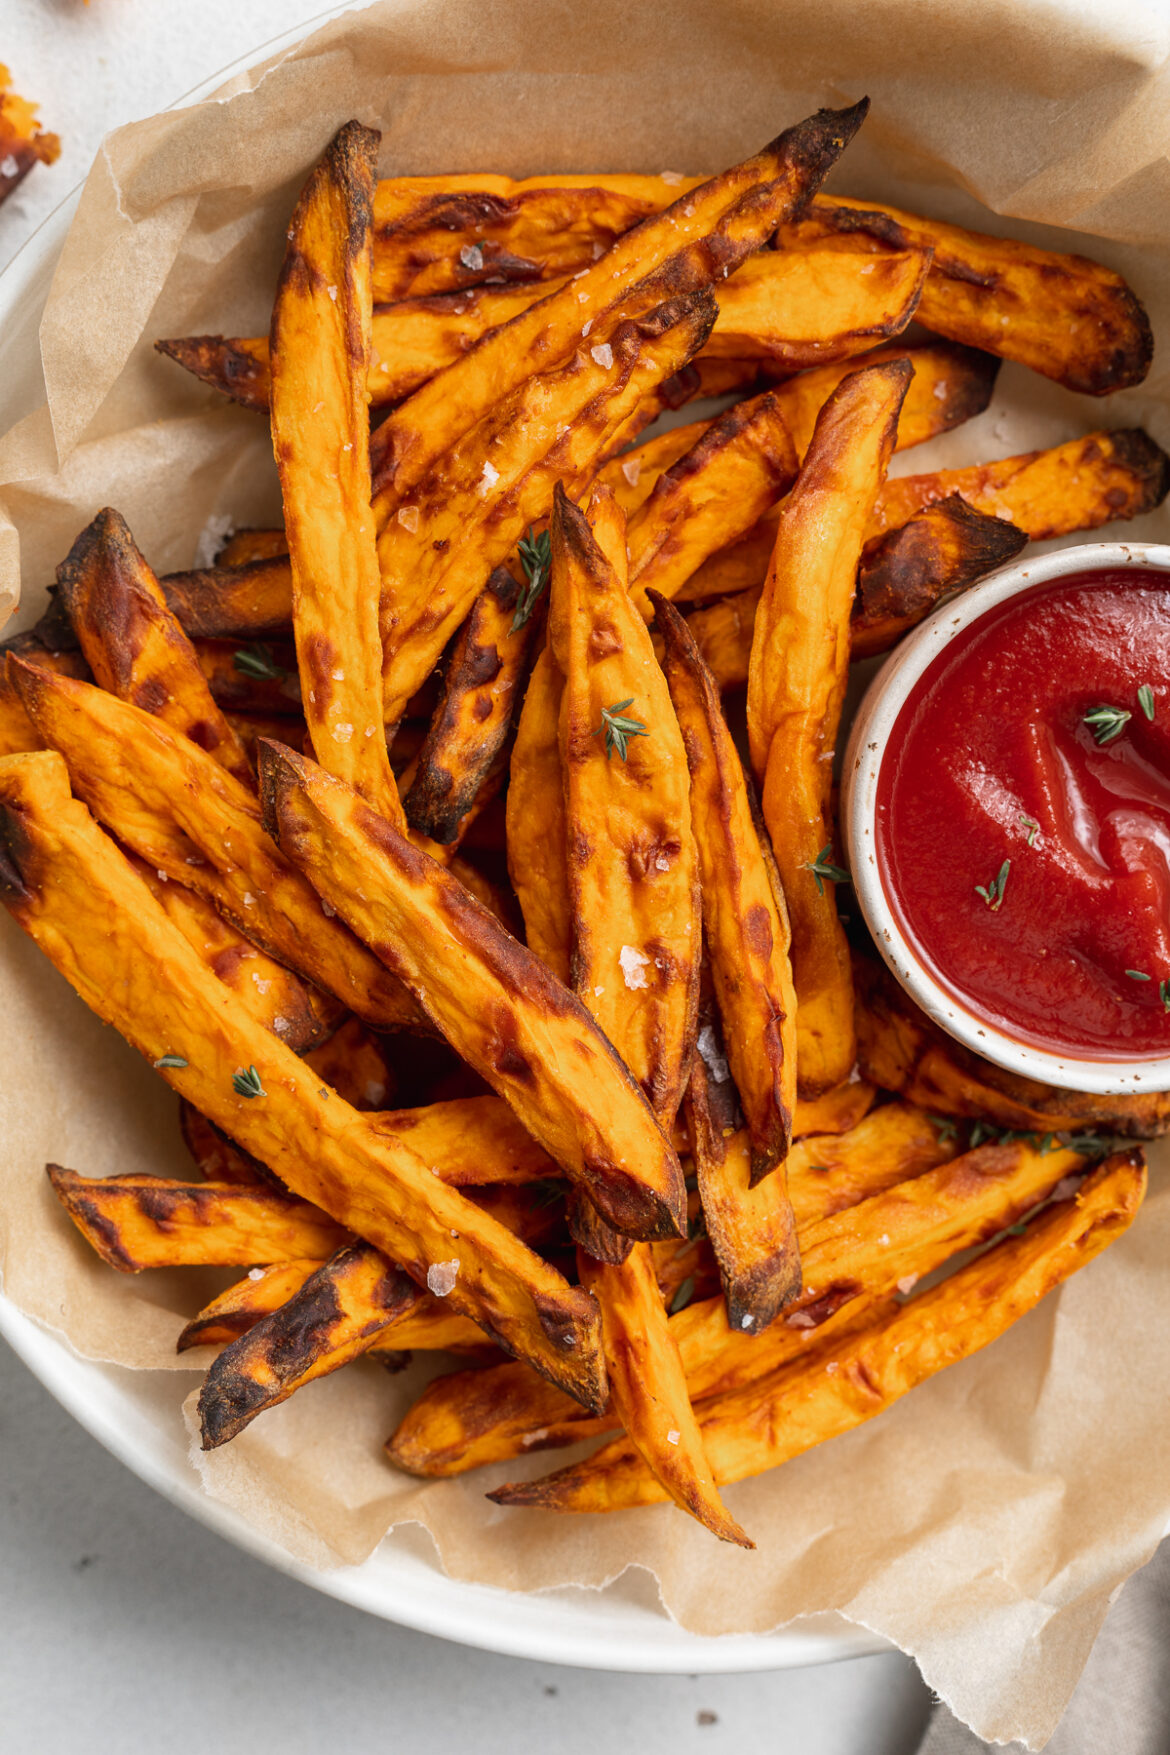
Air Fryer Sweet Potato Fries

0 from 0 votes
Recipe by Samantha Russo Course: SidesDifficulty: Easy
Servings

4

servings
Prep time

5

minutes
Cooking time

15

minutes
Total time

20

minutes

Perfectly crispy, yet healthy sweet potato fries! Four ingredients and 15 minutes is all it takes for this addictive appetizer or side dish. Don’t have an air fryer? No worries, I’ve included an oven-baked option that still yields incredibly crispy fries!

Ingredients

  • 2 large sweet potatoes, see Notes

  • 1 tablespoon avocado oil

  • 1 teaspoon salt

  • 1/2 teaspoon garlic powder

Directions

  • In the air fryer:
  • Preheat air fryer to 380° Fahrenheit. While the air fryer preheats, peel and slice sweet potatoes into 1/4-inch sticks.
  • Toss sweet potatoes in a bowl with olive oil, salt and garlic powder. Make sure each fry is evenly coated in oil and spices.
  • Transfer a third of the potatoes to the air fryer, then spread in an even layer and cook for 15 minutes. Pause air fryer to shake pan halfway through.
  • Remove fries and repeat for remaining batches.
  • In the oven:
  • Preheat oven to 425° Fahrenheit. While the air fryer preheats, peel and slice sweet potatoes into 1/4-inch sticks.
  • Toss sweet potatoes in a bowl with olive oil, salt and garlic powder. Make sure each fry is evenly coated in oil and spices.
  • Spread potatoes in an even layer on a large baking sheet – space fries about 1/8-inch apart.
  • Bake for 20 minutes, flipping halfway through.

Recipe Video

Notes

  • Sweet Potatoes: Use any variety of sweet potatoes you’d like, white sweet potatoes are my favorite!

Did you make this recipe?

Share it and tag @samdoesherbest on Instagram!

Like this recipe?

Follow us @samdoesherbest on Pinterest

These almond flour pancakes are extra fluffy, delicious, and super easy to make! One bowl, a handful of ingredients, and 15 minutes is all you need to throw this simple gluten-free breakfast together. These almond flour pancakes are also the perfect blank canvas to any toppings you’d like (I went with blueberries – yum!).

stacked almond flour pancakes with blueberries, butter, and powdered sugar on top

What You’ll Need

Almond Flour – The star of our show – almond flour! It’s naturally gluten-free, grain-free, and paleo friendly. Almond flour is actually the only flour you’ll need for this healthy breakfast recipe. The most common misconception when it comes to almond flour is that it can be used as a 1:1 substitution for regular all purpose flour. However, that’s definitely not the case! Almond flour is much more dense and creates a heavier bake than regular flour. Though in this recipe we lighten the pancakes up with two whole eggs and a touch of milk.

Eggs – Eggs are crucial to keeping these almond flour pancakes held together! They are our binding agent, and without them the pancakes would simply fall apart. I highly recommend using large or extra large eggs for this recipe, though really any size will work.

Coconut Oil or Butter – Whether you’re using a non-stick pan or not, a touch or butter or oil is very useful to prevent sticking. For a non-stick pan, you may be able to get away with using less oil or butter than the recipe calls for. But for either a stainless steel or cast-iron pan, you’ll need the full tablespoon. And if you ever begin to notice sticking throughout the cooking process, then go ahead and add a bit more butter or oil to your pan!

How to Make Almond Flour Pancakes

Making homemade almond flour pancakes is super easy! Start by adding the almond flour and baking powder to a large bowl. Whisk those dry ingredients together before adding in the eggs, milk, maple syrup, and vanilla extract. Once your pancake batter is completely combined, then you can add in any fillings/toppings you’d like – fresh blueberries and chocolate chips are my personal favorite!

Now that your batter is all prepped, heat a tablespoon of either butter, coconut oil, or any other neutral-tasting oil in a large skillet over medium heat. Once hot, scoop about 1/4 cup of batter into the skillet. The batter will disperse out and form that signature circular pancake shape.

Cook each pancake in the skillet for about 3-5 minutes, or until the bottom is nicely golden brown. Then, use a spatula to carefully flip the pancake and cook the other side. Repeat this cooking process with your remaining better then serve your almond flour pancakes! I recommend finishing them off with a dusting of powdered sugar and a drizzle of maple syrup.

Adjust This Recipe to Your Dietary Needs

Make it Vegan – Make this a vegan almond flour pancake recipe by substituting the two eggs for one flax egg (1 tablespoon of ground flax meal + 3 tablespoons water) and one mashed banana. The flax egg and banana will work together to bind your pancakes and prevent them from falling apart. Also, use your favorite vegan milk in place of the regular milk this recipe calls for.

Make it Dairy-Free – To make this a dairy-free breakfast, simply use almond milk or your favorite non-dairy milk in place of the regular milk in this recipe. Also, be sure to use coconut oil for cooking, instead of butter.

Perfect Almond Flour Pancakes

0 from 0 votes
Recipe by Samantha Course: BreakfastDifficulty: Easy
Servings

2

servings
Prep time

5

minutes
Cooking time

10

minutes
Total time

15

minutes

These almond flour pancakes are extra fluffy, delicious, and super easy to make! One bowl, a handful of ingredients, and 15 minutes is all you need to throw this simple gluten-free breakfast together. These almond flour pancakes are also the perfect blank canvas to any toppings you’d like (I went with blueberries – yum!).

Ingredients

  • 1 cup almond flour, see Notes

  • 1 teaspoon baking powder

  • 2 eggs

  • 1/4 cup milk, I used non-dairy milk

  • 1 tablespoon maple syrup

  • 1 teaspoon vanilla extract

  • 1 tablespoon coconut oil or butter

Directions

  • Whisk together the almond flour and baking powder in a large bowl.
  • Add in eggs, milk, maple syrup, and vanilla extract, whisk to combine.
  • Melt coconut oil or butter in a large skillet over medium low-medium heat and spoon ¼ cup batter into skillet.
  • Cook pancakes for 2-3 minutes per side or until edges are slightly golden brown. Repeat until no more batter remains.

Recipe Video

Notes

  • Almond Flour: Be sure to use blanched almond flour, not almond meal in this recipe.

Did you make this recipe?

Share it and tag @samdoesherbest on Instagram!

Like this recipe?

Follow us @samdoesherbest on Pinterest

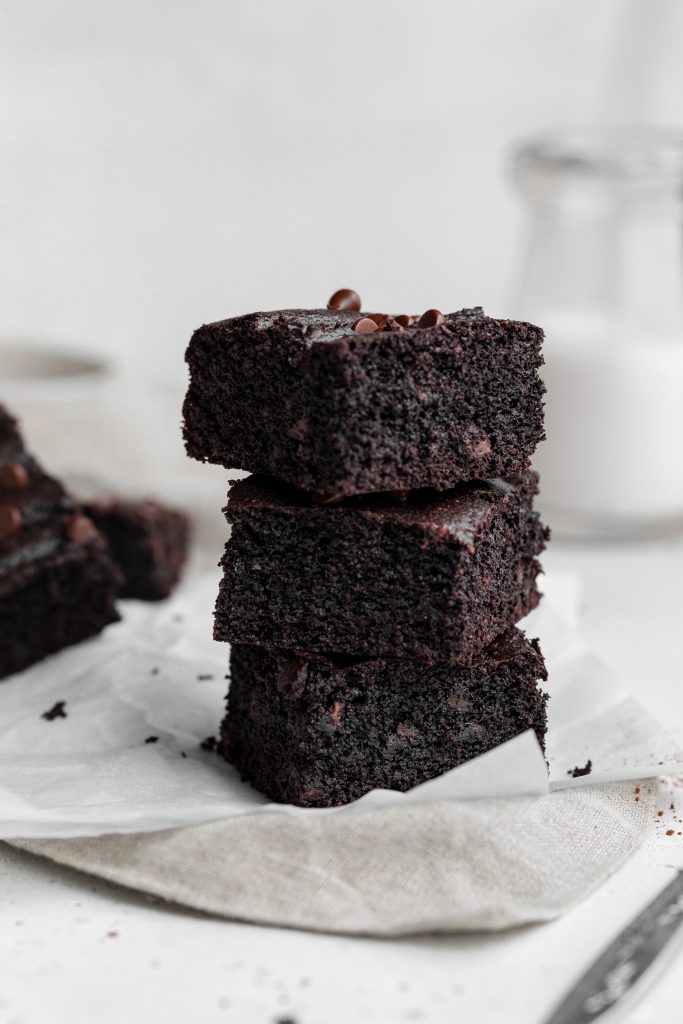
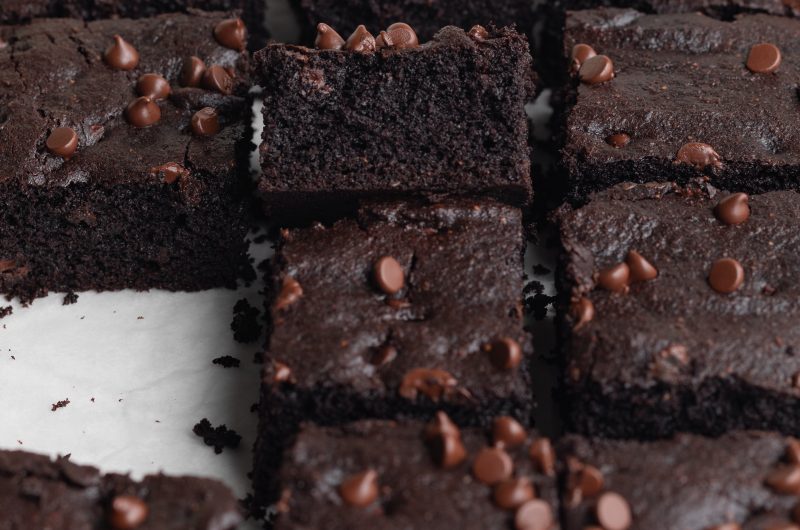
These paleo brownies are total perfection! Extra chocolatey and extremely indulgent, yet are entirely gluten-free, grain-free, dairy-free, and refined sugar-free.

overhead image of paleo brownies with milk and cocoa powder on the side

What You’ll Need

Almond Flour – Be sure to use almond flour, and not almond meal in these paleo brownies! Almond flour is ground much finer than meal, resulting in a lighter and overall better brownie. I’ve tried many different brands of almond flour and truly loved them all. Trader Joe’s makes a great almond flour, as does Costco. Almond flour was once hard to come by, but thankfully, it’s sold in most grocery stores these days!

Almond Butter – Almond butter makes these brownies exceptionally rich and delicious! Don’t worry though, your brownies won’t at all taste like almonds. Almond butter also gives these brownies structure, in the absence of gluten or grains.

Coconut Sugar – This unrefined sugar is a paleo-friendly alternative to regular white sugar. Also, unflike white sugar, coconut sugar contains vitamins, minerals, and even fiber. The fiber in particular aids in slowing down the absorption of sugar in our body, placing it lower on the glycemic index. Basically, what this means is you’re less likely to experience that sugar spike and crash with coconut sugar, than with refined white sugar.

three paleo brownies stacked on top of each other

Top Tips

  • Let the brownies cool slightly before cutting! Trust me, I understand the temptation of wanting to dive straight into a pan of brownies as soon as they’re out of the oven. But try your best to fight those urges and let the paleo brownies cool for at least 10 minutes before slicing. This’ll help them hold their shape!
  • Bring any chilled ingredients to room temperature before getting started. If the eggs, for example, are too cold, they’ll cause the melted coconut oil to seize up and harden in the batter. Therefore, place all ingredients out on the counter about an hour before diving into this recipe!

Adjust This Recipe To Your Dietary Needs

Make it Vegan: Simply swap out the eggs for 2 flax eggs (1 flax egg = 1 tablespoon flaxseed meal + 3 tablespoons water) for vegan paleo brownies!

Make it Nut-Free: I haven’t tested this version myself yet, but you can try using sunflower seed butter in place of the almond butter and 1/4 cup of coconut flour in place of the almond flour. If you give this nut-free version a try, please let me know how it is!

Perfect Paleo Brownies

5 from 1 vote
Recipe by Samantha Course: DessertDifficulty: Easy
Servings

16

servings
Prep time

5

minutes
Cooking time

20

minutes
Total time

25

minutes

These paleo brownies are total perfection! Extra chocolatey and extremely indulgent, yet are entirely gluten-free, grain-free, dairy-free, and refined sugar-free.

Ingredients

  • 2 eggs, at room temperature

  • 1/2 cup almond butter

  • 1/2 cup coconut sugar

  • 1/4 cup maple syrup

  • 1/4 cup coconut oil, melted

  • 1 teaspoon vanilla extract

  • 1/2 cup almond flour

  • 3/4 cup cocoa powder

  • 1 teaspoon baking soda

  • 1/2 teaspoon salt

  • 1/2 cup chocolate chips, optional

Directions

  • Preheat oven to 350° Fahrenheit and line or grease a 9×9-inch baking dish.
  • Add eggs, almond butter, coconut sugar, maple syrup, coconut oil, and vanilla extract to a large bowl and beat together either by hand or with an electric mixer.
  • Add in almond flour, cocoa powder, baking soda, and salt and mix until completely smooth and combined. Fold chocolate chips into brownie batter.
  • Transfer batter to your prepared baking dish and bake for 20-25 minutes. Let cool slightly before slicing and serving.

Recipe Video

Notes

  • Leftover paleo brownies can be stored at room temperature in an airtight container for up to 5 days.

Did you make this recipe?

Share it and tag @samdoesherbest on Instagram!

Like this recipe?

Follow us @samdoesherbest on Pinterest

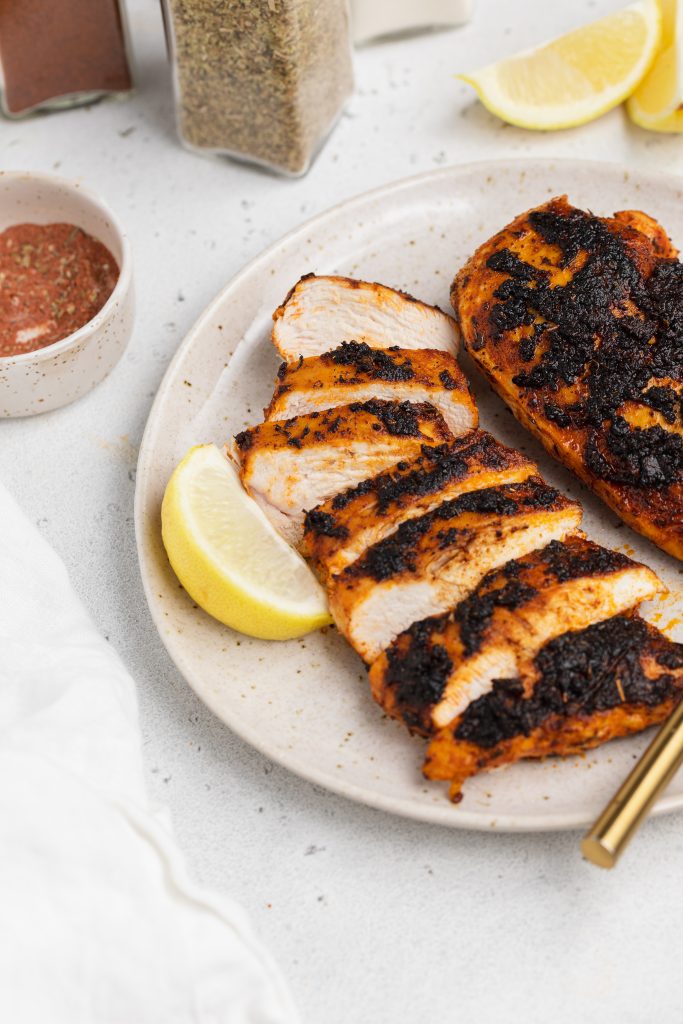
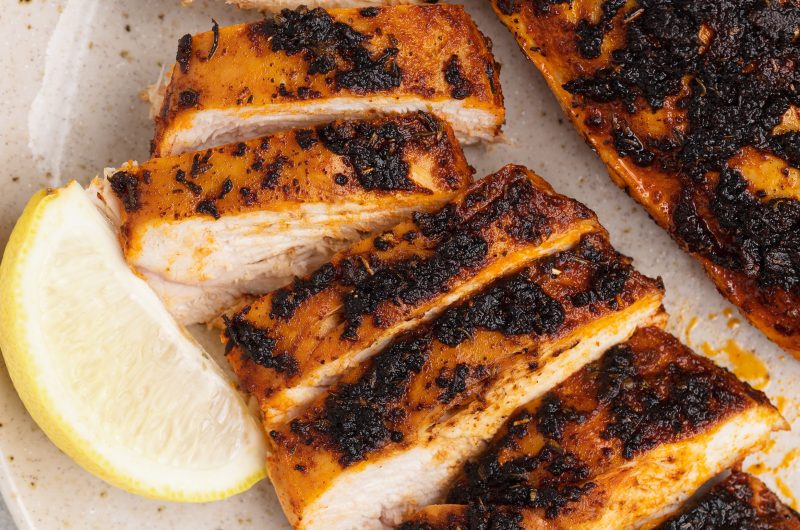
This blackened chicken is incredibly tender and juicy! With a handful of delicious spices, and just one pan, you’ll have an intensely flavorful protein. Enjoy this blackened chicken over a salad, with your favorite veggies, or whatever your heart desires for a quick and healthy meal!

blackened chicken on a plate with lemon wedges on the side and blackened seasoning on the side

What You Need To Make Blackened Chicken

Smoked Paprika – The main spice in our blackened seasoning is the incredible smoked paprika! Unlike regular paprika, smoked paprika has this irresistible smoky flavor that simply can’t be beat. If you don’t already have this delicious spice in your spice cabinet, then I highly recommend you buy some.

Cayenne Pepper – The amount of cayenne pepper you use in this blackened chicken recipe is entirely up to you and your spice preferences. I personally love a bit of spice, so I use almost 1/4 teaspoon in my seasoning. However, if you’re averse to spice, you can simply leave the cayenne pepper out altogether.

Chicken Breasts – Boneless and skinless chicken breasts are the way to go! Without the skin, the spices can better penetrate into the meat. This makes your chicken that much more delicious. And as far as boneless goes, it’s easier to eat – a no brainer if you ask me!

Adjust This Recipe To Your Diet

  • Make it Less Spicy: If you don’t like spice, simply omit the cayenne pepper in this blackened chicken recipe.
  • Make it Vegan: Turn this into a blackened tofu recipe by taking a block of tofu, pressing as much water out of it as possible, then slicing it down the center to create two tofu “steaks.” Then, season the tofu exactly how you would the chicken and cook for 3-5 minutes per side!

Tips For Making Blackened Chicken

  • Cook over medium-high heat, nothing lower! The key to blackened chicken is placing the seasoned breasts into a very hot pan. Then, do not touch the chicken until it’s ready to be flipped. This way, the crust will cook up super crispy and delicious!
  • Don’t forget to let your chicken rest after cooking. Once out of the pan, your chicken is holding on to a ton of its flavorful juices. Therefore, if you slice into it too soon, you risk having all that flavor pour out. So do yourself a favor and leave the chicken alone for at least 5 minutes!
  • Serve this chicken however you’d like! I enjoyed mine over a salad loaded with my favorite fresh vegetables. However, for a heartier meal, I recommend pairing this blackened chicken with a side of rice and/or roasted potatoes – yum!

Blackened Chicken (Gluten-Free, Dairy-Free)

0 from 0 votes
Recipe by Samantha Russo Course: MainDifficulty: Easy
Servings

2

servings
Prep time

5

minutes
Cooking time

10

minutes
Total time

15

minutes

This blackened chicken is incredibly tender and juicy! With a handful of delicious spices, and just one skillet, you’ll have an intensely flavorful protein. Enjoy this blackened chicken over a salad, with your favorite veggies, or whatever your heart desires for a quick and healthy meal!

Ingredients

  • 3 teaspoons smoked paprika

  • 1/2 teaspoon onion powder

  • 1 teaspoon salt

  • 1/2 teaspoon garlic powder

  • 1/2 teaspoon dried thyme

  • 1/2 teaspoon dried oregano

  • 1/4 teaspoon black pepper

  • pinch of cayenne pepper, optional

  • 2 boneless skinless chicken breasts

  • spray cooking oil

  • 2 tablespoons avocado oil

Directions

  • Mix together the smoked paprika, onion powder, salt, garlic powder, dried thyme, dried oregano, black pepper, and cayenne pepper in a small bowl.
  • Coat both chicken breasts with either spray cooking oil or a drizzle of avocado oil, then sprinkle evenly with blackened seasoning.
  • Heat avocado oil in a large skillet over medium-high heat, then transfer chicken to skillet and cook for 5 minutes per side, or until cooked through. Remove chicken from heat, transfer to a plate, and cover with foil then let rest for 5-10 minutes before serving.

Recipe Video

Notes

  • This blackened chicken recipe can be easily doubles or even tripled! Making it the perfect and healthy meal to throw together for friends or family.

Did you make this recipe?

Share it and tag @samdoesherbest on Instagram!

Like this recipe?

Follow us @samdoesherbest on Pinterest

Other One-Pan Recipes You’ll Love

These chicken taquitos are a healthier take on a comforting classic! They’re irresistibly crispy on the outside and loaded with flavorful shredded chicken on the inside. Throw these super easy chicken taquitos together with just three simple ingredients!

chicken taquitos on a plate with two glasses of beer and cilantro on the side

What You Need To Make Chicken Taquitos

Chicken Breast – I ran an instagram poll to see if you guys wanted to see chicken or beef taquitos, and chicken won by a landslide! But I don’t blame you guys. Chicken is a staple in my kitchen and something I always have at least a couple pounds of in my freezer.

Salsa – This is where the recipe gets super easy. A single jar of salsa packs in all the flavor this dish needs! I used a roasted chipotle salsa for these chicken taquitos. Though I’ve also tried regular salsa and even salsa verde – all tasted delicious!

Tortillas – I used and love Siete Foods Cassava Flour Tortillas for my taquitos. I love the cassava ones since they’re grain-free, making this recipe even healthier. They’re an amazing options for all my gluten-free friends out there too! However, any taco-sized tortilla will work here.

Adjust This Recipe To Your Diet

Make it Paleo: Use paleo salsa and grain-free tortillas to make these paleo chicken taquitos.

Gluten-Free Tortilla Options: Like I said above, I used Site Foods Grain-Free Tortillas in this recipe, though corn tortillas are a great gluten-free option as well.

Tips For Making Chicken Taquitos

  • Don’t forget to quickly heat your tortillas in a pan before rolling! Warming them up will make them more pliable, and less likely to break when rolled.
  • Avoid overfilling the tortillas with the shredded chicken. I found about 1/4 cup of chicken to be the perfect amount to fit inside each tortilla. Any more chicken and you run the risk of it either breaking through your tortilla or leaking out the sides!
  • Store leftover chicken taquitos in an airtight container in the fridge for up to 4 days. To reheat, place on a baking sheet in the oven at 400° Fahrenheit. Bake for 3-5 minutes or until heated throughout.

Three-Ingredient Chicken Taquitos (Gluten-Free, Dairy-Free)

0 from 0 votes
Recipe by Samantha Russo Course: MainCuisine: MexicanDifficulty: Easy
Servings

4

servings
Prep time

10

minutes
Cooking time

20

minutes
Total time

30

minutes

These chicken taquitos are a healthier take on a comforting classic! They’re irresistibly crispy on the outside and loaded with flavorful shredded chicken on the inside. Throw these super easy chicken taquitos together with just three simple ingredients!

Ingredients

  • 1 1/2 pounds boneless skinless chicken breast

  • 1 (16-ounce) jar salsa, see Notes

  • 6 tortillas

  • avocado crema, for serving

Directions

  • Place chicken and salsa in a large pot over medium-high heat, bring to a boil.
  • Once boiling, reduce to a simmer, and cook covered for 10-15 minutes or until chicken is cooked through.
  • Remove chicken from pot and shred with two forks then place back into pot and simmer for 1-2 minutes.
  • Place a large pan over medium heat and one by one, quickly warm up the tortillas for 30 seconds per side of until soft and pliable.
  • Place about 1/4 cup of shredded chicken into each tortilla and roll them up to form taquitos. Once all taquitos are prepped, place a couple tablespoons of oil in your pan.
  • Carefully place each taquito in the pan with the seam-side facing down, and lightly fry for 2-3 minutes per side or until golden brown.

Recipe Video

Notes

  • Salsa: Use your favorite salsa in this recipe, I’ve used a whole variety of salsas and they all turned out delicious!

Did you make this recipe?

Share it and tag @samdoesherbest on Instagram!

Like this recipe?

Follow us @samdoesherbest on Pinterest

Other Gluten-Free and Dairy-Free Mexican-Inspired Recipes