Tag

summer

Browsing

Fresh, creamy, and irresistibly delicious pineapple ice cream! Made with just two ingredients, and in under 5 minutes. This non-dairy frozen dessert is the BEST healthy summertime treat.

hand holding a cone of pineapple ice cream

What You’ll Need To Make Pineapple Ice Cream

Frozen Pineapple Chunks – Either cut, then freeze a fresh pineapple yourself, or buy already frozen pineapple chunks. For tips on how to cut a pineapple, check out my step-by-step blog post here. But if you’re looking to save some time, buy two bags of frozen pineapple chunks from the frozen aisle at your local grocery store.

Coconut Milk – Thick and creamy full-fat coconut milk tastes best in this pineapple ice cream! However, you can certainly use a light coconut milk instead, or really any kind of milk you’d like. And if you don’t have milk, use a couple tablespoons of water. The liquid is introduced at the very end of this recipe and should be used sparingly, just until you achieve a thick and creamy consistency.

Food Processor or High-Speed Blender – While food processors work best to make this non-dairy frozen dessert, a high-speed blender will work as well. I made my pineapple ice cream with this (super cheap!) Hamilton Beach food processor. But I’ve also tried this recipe in my Vitamix, and it worked as well – just required more stopping to scrape down the sides of the blender.

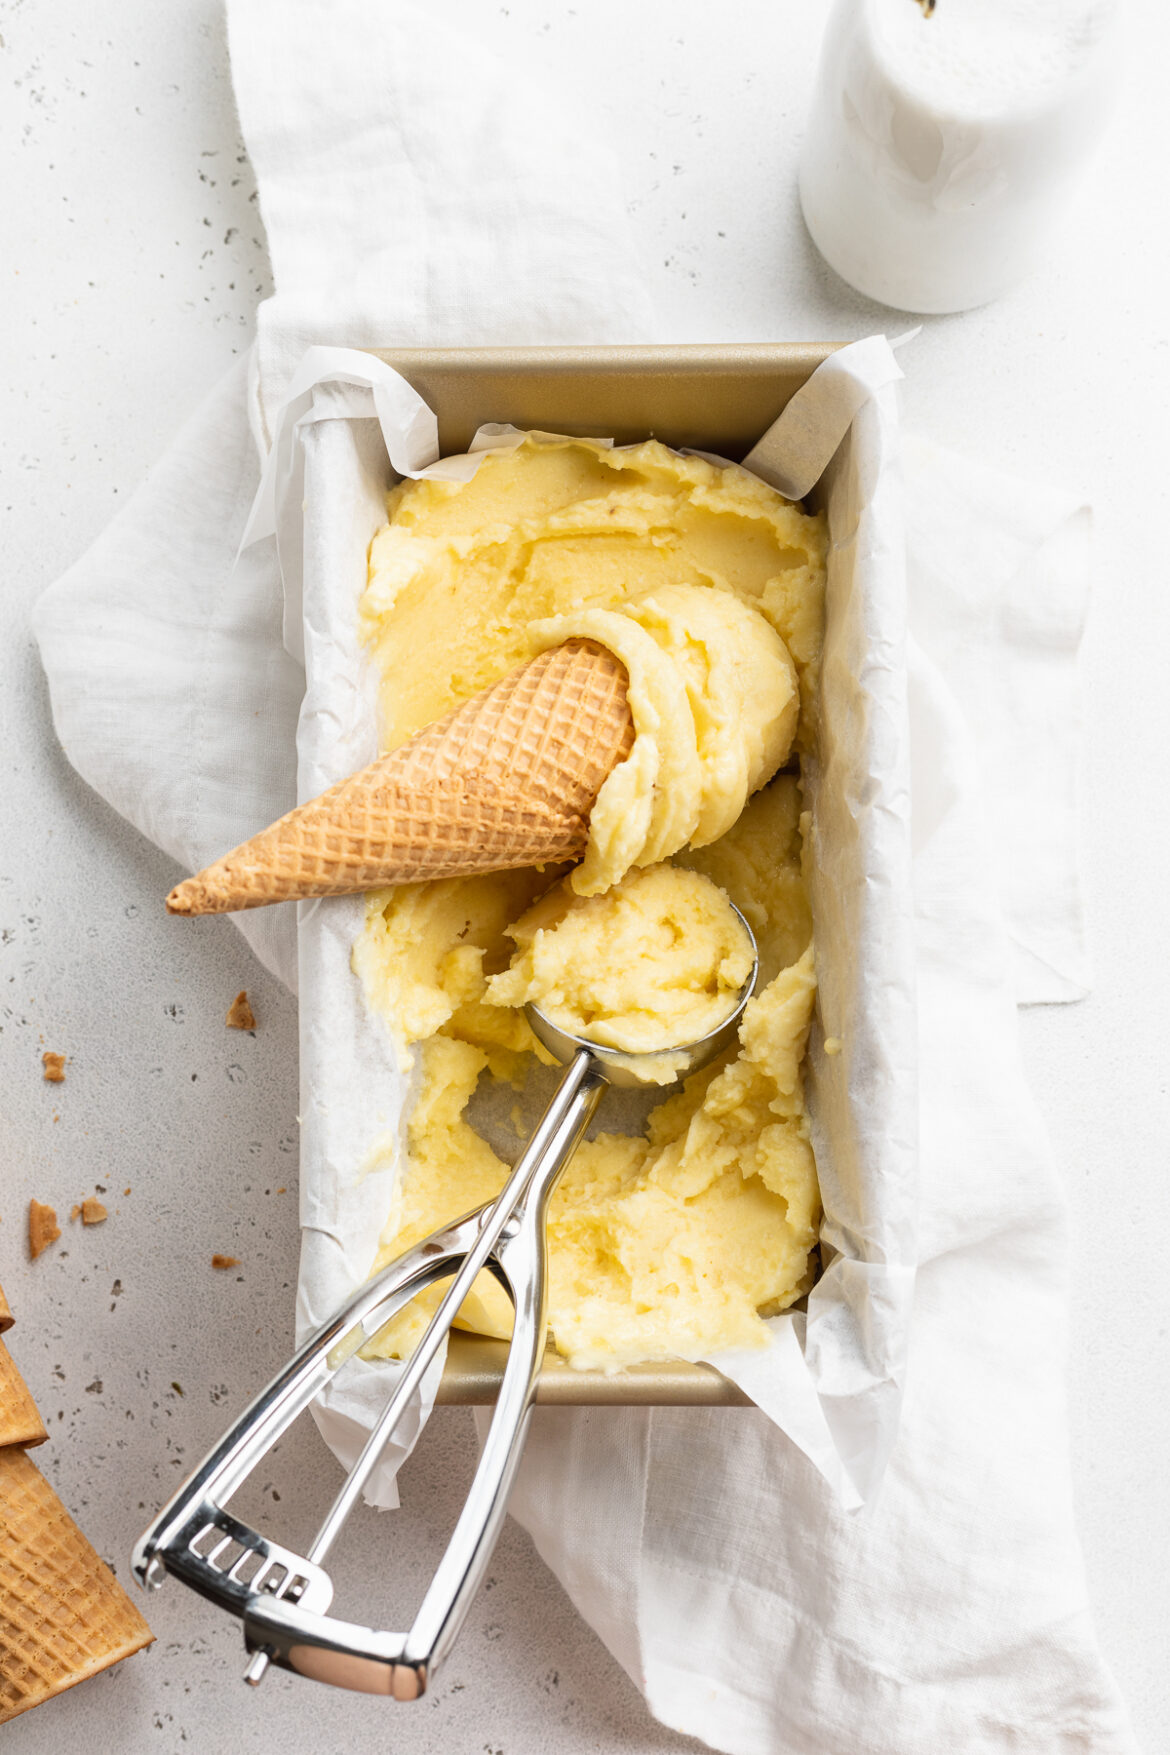
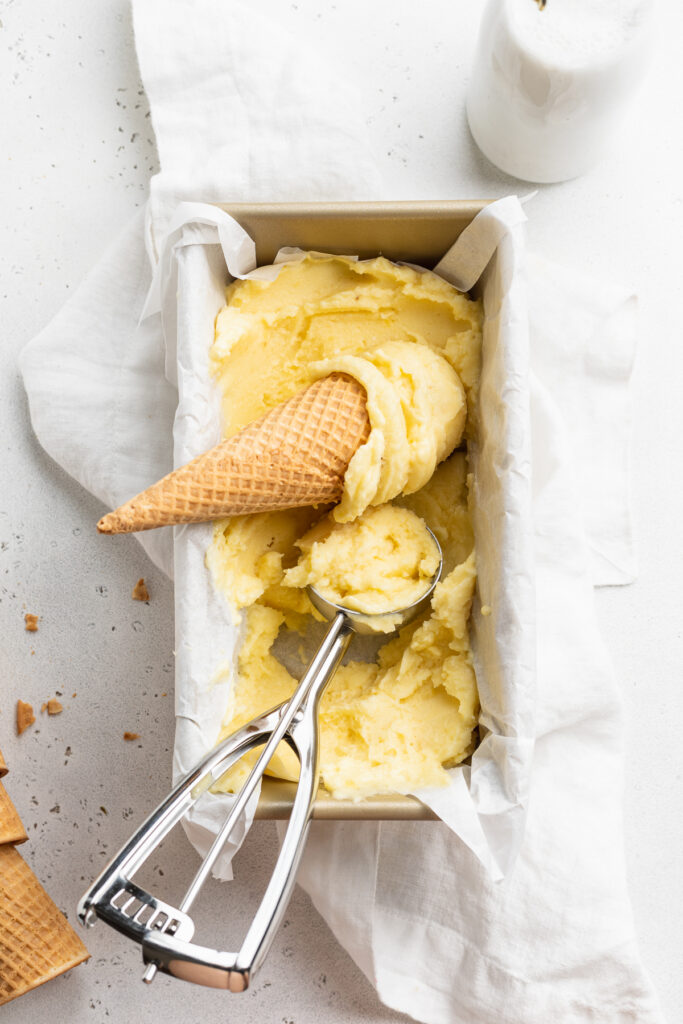
overhead image of pineapple ice cream in a loaf pan

Tips and Tricks

  • Start with 1/4 cup of coconut milk, then slowly add in more to blend. The frozen pineapple mixture will start out icy and crumbly, but slowly turn smooth and creamy as more liquid is introduced. It’s important to start small here, as to not risk “watering down” your ice cream!
  • Swirl in some toasted coconut or fresh pineapple chunks! Right after blending, transfer the pineapple ice cream to an airtight container and stir in any mix-ins you’d like. Or, serve this healthy dessert with your favorite ice cream toppings!
  • Depending on how solid you’d like your ice cream, either serve it right away or freeze for a few hours before eating. How solid it is may also depend on how warm it is outside. During the summer months, I certainly have to freeze this for at least an hour before scooping and serving!

This Pineapple Ice Cream Is…

2 from 8 votes

2-Ingredient Pineapple Ice Cream

Fresh, creamy, and irresistibly delicious pineapple ice cream! Made with just two ingredients, and in under 5 minutes. This pineapple ice cream is the BEST healthy summertime treat.
Print Rate
Prep Time: 5 minutes
Total Time: 5 minutes
Servings: 6 servings

Ingredients

  • 4-5 cups frozen pineapple chunks, about 2 10-ounce bags
  • 1/4-1/2 cup coconut milk

Instructions

  • Add frozen pineapple chunks to food processor and pulse until crumbly.
  • Slowly add in coconut milk, starting with ¼ cup and adding more as necessary, and pulse until smooth.
  • Either serve immediately, or transfer pineapple ice cream to a parchment-lined loaf pan and freeze for 2-3 hours.
  • To serve, remove from freezer and let sit at room temperature for 5 minutes before scooping and enjoying.

Nutrition

Calories: 300kcal

This arnold palmer recipe is the only one you’ll ever need! A simple lemonade meets a home-brewed iced tea for a beverage that is perfectly light and refreshing. Enjoy an arnold palmer on a hot summer day as a slightly sweet and cooling drink!

lemonade being poured into a glass of an arnold palmer drink with lemon slices on the side

Ask me what my favorite non-alcoholic beverage is and I’ll say an arnold palmer every time. I look forward to every summer when the only thing that will refresh and cool me off is one of these half ice tea, half lemonade drinks. While this arnold palmer recipe isn’t limited to just the summertime, it’s just something I’ve associated with very hot days over the years. Let me tell you, the combination of fresh brewed iced tea and a homemade lemonade simply hits different when it’s a billion degrees outside.

The funny thing is, for the longest time I thought of this drink like it was one of those things I could only order while out to eat. But what I didn’t realize for all those years is how freaking EASY it is to make at home. The lemonade for this arnold palmer recipe consists of just three ingredients (one being water) and the iced tea consists of just two ingredients (again, one being water)! I’m talking like stupid easy, ladies and gentleman. And because it’s me who created the recipe – this drink is refined sugar-free, too.

What You Need To Make This Arnold Palmer Drink Recipe

Lemons – Lots and lots of lemons! If you have a lemon juicer, go ahead and whip that baby out for this recipe. In the end, you’ll need an entire cup of lemon juice. Which may sound like a lot, but will actually only end up being about 6 to 8 juicy lemons. My trick for super juicy lemons is to roll them between my palm and the counter before slicing them in half. By rolling them, you’ll soften up the inside making it easier to squeeze as much lemon juice out of them as possible.

Honey – This natural sweetener is the only sweetener you’ll need for this arnold palmer drink recipe! I love honey for its high dose of antioxidants and strong anti-bacterial properties. It’s also perfectly sweet and makes a delicious addition to this refreshing beverage. If you don’t have honey, you can use either maple syrup or simple syrup instead.

Black Tea Bags – Any black tea bags will work! I’ve also used green tea instead of black tea and had great results. Brew your own tea by adding the tea bags to water and leaving it to steep in the fridge for at least 8 hours, or preferably overnight. Homemade iced tea couldn’t be easier to make, and is essential to this simple arnold palmer drink recipe!

Adjust This Recipe To Your Diet

  • Make it Vegan: Substitute maple syrup for the honey to make this a vegan arnold palmer drink recipe.

Arnold Palmer Drink Recipe (Iced Tea Lemonade)

4 from 6 votes
Recipe by Samantha Course: Better Than Takeout, Made Healthy
Servings

4

servings
Prep time

30

minutes
Cooking time

40

minutes
Calories

300

kcal
Total time

1

hour 

10

minutes

This arnold palmer recipe is the only one you’ll ever need! A simple lemonade meets a home-brewed iced tea for a beverage that is perfectly light and refreshing. Enjoy an arnold palmer on a hot summer day as a slightly sweet and cooling drink!

Ingredients

  • For the lemonade:
  • 1 cup lemon juice (about 6-7 lemons)

  • 1/2 cup honey, see Notes

  • 2 cups cold water

  • For the iced tea:
  • 4 black tea bags

  • 4 cups cold water

Directions

  • Make the iced tea by placing the tea bags in 4 cups of water then transfer to the fridge to steep for 8-12 hours.
  • Make the lemonade by adding all lemonade ingredients to a large jar or pitcher and stirring until honey dissolves completely.
  • Fill a cup with ice and fill halfway with iced tea, then the rest of the way with lemonade.

Recipe Video

Notes

  • Honey: Feel free to use maple syrup or simple syrup in place of the honey in this recipe!

Did you make this recipe?

Share it and tag @samdoesherbest on Instagram!

Like this recipe?

Follow us @samdoesherbest on Pinterest

Other Low-Sugar Drink Recipes

This dairy-free clam chowder is irresistibly creamy, without any actual cream! This easy one-pot recipe is loaded with clams and restaurant-quality flavor.

a bowl of dairy-free clam chowder with a spoon in it

Clam chowder was one of those dishes that I quit cold-turkey when I went dairy-free. It was by no means easy, but it had to be done. Dairy-free clam chowder simply doesn’t exist on a menu anywhere (at least that I’m aware of). To me, and all my other non-dairy friends out there, I feel sorry for us!

I grew up in New England, and creamy clam chowders were a major part of my summer diet. Everywhere I went, if clam chowder was on the menu – I was ordering a cup! I was such a big chowder-enthusiast that at one point I participated in a clam chowder contest. I was a taste-tester by the way, as this was looooong before my recipe developer/food blogger days. So I guess, yes, you could say I’m a bit of a clam chowder aficionado of sorts. I don’t mean to brag, but like, you get it. Therefore, I’d say I’m a bit (ok more than a bit *hair flip*) qualified to be providing you with this dairy-free clam chowder recipe today.

Plenty of clams, chunks of tender potatoes, and a handful of fresh herbs are enveloped in a creamy chowder base. This dairy-free clam chowder tastes incredible with a sprinkling of fresh parsley and crushed gluten-free crackers on top – YUM!

What You Need To Make Dairy-Free Clam Chowder

Bacon – Consider this our secret ingredient! Bacon adds the perfect savory, almost smokey flavor to this recipe. You’ll start by crisping up the bacon in your pot. Then, removing the bacon and cooking the rest of the dish in the pot with its delicious rendered fat. You can either enjoy the bacon separately, or crumble it on top of your finished chowder. I personally love the latter and enjoy coming across little pieces of bacon throughout my dairy-free clam chowder.

Clam Juice – If you’ve never made clam chowder before, you’re probably not familiar with clam juice. I mean, clam chowder is the only reason I’ve ever purchased clam juice in my life. Don’t let the sound of this ingredient fool you, it contributes a subtle briny flavor to this recipe. If you can’t find clam juice, you can use an additional cup of chicken stock instead.

Canned Clams – These are surprisingly easy to find at most grocery stores! You can use either chopped or whole clams in this chowder. The kind you’d order at a restaurant most often contain chopped clams. However, I think both taste equally as great in this dairy-free clam chowder recipe.

Adjust This Recipe To Your Diet

  • Make it Paleo: Use arrowroot starch instead of cornstarch for a paleo clam chowder.
  • Make it Whole30: Similar to paleo, use arrowroot starch instead of corn starch and make sure that your dairy-free milk is Whole30 compliant!

Dairy-Free Clam Chowder

0 from 0 votes
Recipe by Samantha Russo Course: MainCuisine: New EnglandDifficulty: Intermediate
Servings

6

servings
Cooking time

30

minutes
Total time

30

minutes

This dairy-free clam chowder is irresistibly creamy, without any actual cream! This easy one-pot recipe is loaded with clams and restaurant-quality flavor.

Ingredients

  • 4 slices bacon

  • 2 celery stalks, chopped

  • 1 yellow onion, chopped

  • 1 garlic clove, minced

  • 4 tablespoons corn starch, see Notes

  • 1 cup chicken stock

  • 1 (8 ounce) bottle clam juice

  • 3 yellow potatoes, peeled and cubed

  • 1 sprig fresh thyme, see Notes

  • 1/2 teaspoon salt

  • 1 bay leaf

  • 3 (6.5 ounce) cans whole or chopped clams

  • 1 cup dairy-free milk

  • Fresh chopped parsley, for serving

Directions

  • Cook bacon in a large pot or dutch oven until crispy, then remove and set aside on a paper towel-lined plate.
  • Add chopped celery and onion to the pot and cook over medium heat until soft, about 5 minutes. Then add in the garlic and cook for just 1 minute.
  • Add in the corn starch and mix until well combined, pour in the chicken stock and clam juice, then add in the potatoes, thyme, salt, and bay leaf. Bring to a boil then reduce to a simmer and cook for 15-20 minutes or until potatoes are easily pierced with a fork.
  • Pour in canned clams (with juice) and dairy-free milk, simmer for 3-5 minutes then taste and adjust seasoning as desired. Served with crumbled bacon and fresh parsley.

Recipe Video

Notes

  • Corn Starch: You can use arrowroot starch instead if you’d like.
  • Fresh Thyme: If you don’t have fresh thyme, you can use 1 teaspoon of dried thyme instead.

Did you make this recipe?

Share it and tag @samdoesherbest on Instagram!

Like this recipe?

Follow us @samdoesherbest on Pinterest

Other Dairy-Free Dinner Recipes

This cherry cordial is perfectly sweet and slightly sour! Drip this easy and delicious fruit syrup over ice cream or add some to a glass of sparkling water for a refreshing summer treat.

cherry cordial in a glass with sparkling water, ice, and a fresh cherry

Never heard of cherry cordial? Well you’re not alone, because neither had I! I’m a BIG fan of cherry season, and I was set on developing a recipe to honor this special time of year. Though I felt like the cherry cobblers, cherry pies, and cherry crumbles have all been sooOooOoOo overdone. So I did a little research for undiscovered cherry recipes and came across the cherry cordial. Now for those of you who don’t know, cherry cordial is a syrup that is most commonly added to sparkling water and served as a refreshing drink. It’s SUPER easy to make, and one of the only cherry recipes that doesn’t require you to painstakingly remove the stems and pits from each and every cherry.

As I learned more about cherry cordials, I noticed that most are loaded with sugar. And to me, that seemed unnecessary. So I set out to create a recipe that is low in sugar and allows as much of that delicious cherry flavor to shine through as possible! This cherry cordial is perfectly *chef’s kiss* sweet, insanely refreshing, and super easy to make.

What You Need To Make Cherry Cordial

Fresh Cherries – Pick up a big bag of whole sweet cherries the next time you’re at the grocery store! Cherry season spans from May through August, giving you plenty of time to enjoy this delicious fruit. I highly advise against using frozen cherries in this recipe as they release too much water when cooked. If you’d like to enjoy this cherry cordial in the winter time, I recommend making the recipe now and freezing it in an airtight container until you’re ready to use it.

Sugar – Any sugar will work, though I use coconut sugar to make this a tiny bit more nutritious! Coconut sugar is less processed and therefore contains more vitamins and mineral than white sugar. However, white sugar and cane sugar would both taste great in this cherry cordial recipe.

Fresh Ginger – You’ll just have to trust me on this one! Fresh ginger adds a slightly spicy bite that contrasts with the sweet cherries and takes this cordial to the next level. Feel free to add even more fresh ginger if you’d like!

Adjust This Recipe To Your Dietary Needs

  • Make it Paleo: Use coconut sugar to make this a paleo cherry cordial!
  • Lemon Substitution: Feel free to use fresh orange juice and zest in place of the lemon juice and zest in this recipe.

Cherry Cordial

0 from 0 votes
Recipe by Samantha Course: Uncategorized
Servings

4

servings
Prep time

30

minutes
Cooking time

40

minutes
Calories

300

kcal
Total time

1

hour 

10

minutes

This cherry cordial is perfectly sweet and slightly sour! Drip this easy and delicious fruit syrup over ice cream or add some to a glass of sparkling water for a refreshing summer treat.

Ingredients

  • 1 1/2 pounds fresh sweet cherries, see Notes

  • 1 cup sugar, I used coconut sugar

  • 1-inch knob fresh ginger, peeled and sliced

  • 2 teaspoons lemon zest

  • 1/4 cup lemon juice

Directions

  • Add all ingredients to a large saucepan over medium-low heat. Bring to a boil then reduce to a simmer for 20-25 minutes.
  • Strain cherry syrup through a fine mesh strainer, let cool at room temperature before storing in the fridge to cool completely.
  • Pour a few tablespoons into the bottom of a glass then fill with ice and top with sparkling water.

Recipe Video

Notes

  • Cherries: No need to remove the pits or stems from your cherries before using them in this recipe! Simply gives them a good rinse them add them to your saucepan.

Did you make this recipe?

Share it and tag @samdoesherbest on Instagram!

Like this recipe?

Follow us @samdoesherbest on Pinterest

Other Summertime Recipes You’ll Love

These zucchini hash browns are perfectly seasoned, easy to make, and incredibly delicious! Serve alongside a fried egg and some fresh herbs for a quick and easy breakfast.

two zucchini hash browns on a plate with a fried egg on top

Hash browns have always been and always will be my favorite part of a breakfast plate. I love my hash browns extra crispy, with just the right amount of flavor. These zucchini hash browns hit the spot while being low-carb and super healthy. And the best part? They require a whopping four ingredients to make! You can catch me throwing together these super easy zucchini hash browns all zucchini-season long. I also plan on prepping a big batch for my freezer to reheat and enjoy in the winter months.

If you’re like me and have difficulty finding time to throw together a complete breakfast for yourself in the morning, then you need this recipe in your life. I highly recommend doubling or even tripling it ahead of a long week and keeping them in the fridge or freezer as a quick grab-and-go breakfast all week or month long.

What You Need To Make Zucchini Hash Browns

Zucchini – Peak zucchini season runs from May through August, but can usually be found at grocery stores year round. If you own a zucchini plant, you know how fruitful these plants are (like zucchini for daysssss). To prepare zucchini for this recipe, start by trimming off one end of the zucchini and running that same end down a medium box grater. Immediately transfer the shredded zucchini to a dish cloth and get started with this recipe!

Egg – The egg not only adds protein to these zucchini hash browns, but holds them together while they cook. Most zucchini hash browns call for all purpose flour or cheese to help bind them together. Though I found that in order to keep them gluten-free and dairy-free you’ll just need one egg to hold these babies together.

Garlic Powder – I kept the seasoning light in this recipe as to not overwhelm this mild veggie. Feel free to add whatever other seasoning you’d like or even leave the garlic powder out altogether!

How To Freeze

  • Let the zucchini hash browns cool completely before transferring to a freezer-safe bag or container.
  • When ready to eat, remove from the freezer and heat in a 400° Fahrenheit oven for 5-8 minutes or until warmed through. Or you can pop them in the microwave for 1 minute – they won’t be as crispy but will still be delicious.
  • Either wrap them in a napkin to take with you and enjoy during your morning commute or top with a fried egg and fresh herbs for a complete breakfast!

Zucchini Hash Browns (Gluten-Free, Dairy-Free)

0 from 0 votes
Recipe by Samantha Russo Course: BreakfastDifficulty: Easy
Servings

3

hash browns
Prep time

30

minutes
Cooking time

25

minutes
Total time

55

minutes

These zucchini hash browns are perfectly seasoned, easy to make, and incredibly delicious! Serve alongside a fried egg and some fresh herbs for a quick and easy breakfast.

Ingredients

  • 2 zucchini, shredded

  • 1 egg

  • 1/2 teaspoon salt, divided

  • 1/2 teaspoon garlic powder

Directions

  • Preheat oven to 400° Fahrenheit and line a baking sheet with parchment paper.
  • Place shredded zucchini on a dish towel in a single layer, then sprinkle with 1/4 teaspoon salt. let sit for 30 minutes to draw out as much moisture as possible.
  • Wrap zucchini in towel and squeeze out as much liquid as possible, then transfer zucchini to a bowl.
  • Add in the remaining ingredients then mix until well combined.
  • Divide into 3 hash browns and transfer to the baking sheet.
  • Bake for 25-30 minutes or until golden brown, remove and let cool slightly before serving.

Recipe Video

Notes

  • Feel free to add or remove any seasoning you’d like, don’t be scared to make this recipe your own!

Did you make this recipe?

Share it and tag @samdoesherbest on Instagram!

Like this recipe?

Follow us @samdoesherbest on Pinterest

More Healthy Recipes You’ll Love