Crisp, fresh, and flavorful Asian-inspired turkey lettuce wraps, topped off with a creamy, savory peanut sauce! Naturally gluten-free, grain-free, dairy-free, and super healthy. These turkey lettuce wraps are the perfect addition to your weekly meal prep, best enjoyed as a quick and easy grab-and-go lunch!

What You’ll Need To Make Turkey Lettuce Wraps with Peanut Sauce
Ground Turkey – Like chicken, ground turkey is a great source of lean protein. It’s a blank canvas to however you season it, and will leave you feeling full until your next meal. Though if you can’t find ground turkey for this recipe, you can easily use ground chicken instead.
Water Chestnuts – Don’t worry, I didn’t know what a water chestnut was until a few months ago. And while I’m still not exactly sure what it is, I do know that it’s some type of crunchy vegetable commonly sold in cans. You’re most likely to find these canned water chestnuts in either the canned produce aisle, or the ethnic food aisle of your local grocery store. However, if you can’t seem to track down any water chestnuts, don’t worry – this recipe will taste just as delicious without them!
Peanut Butter – The two main things your peanut butter should be for this recipe are creamy and unsweetened. Most peanut butters on the market today unfortunately come sweetened, with some kind of sugar added to them. While I never recommend buying sweetened peanut butter (it doesn’t need the added sugar!), I definitely recommend against buying it for this recipe. Any sugar in your peanut butter will definitely throw off the savory balance of flavors in this peanut sauce.
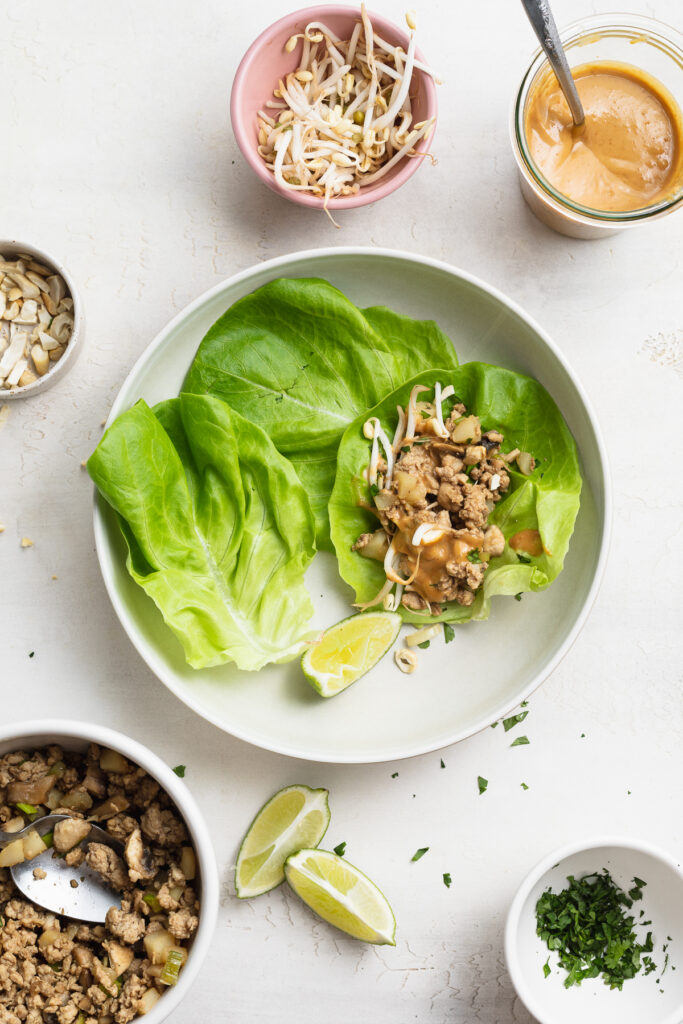
Butter Lettuce Leaves – This particular variety of leaf is perfect for filling, folding, then eating. They’re crisp, mild, and pretty much melt in your mouth. Though if you can’t find butter lettuce leaves, you can use either iceberg lettuce leaves or romaine lettuce leaves in their place. Really, any type of leaf that will cradle your filling will work here!
Tips and Tricks
- I highly recommend prepping a big batch of these turkey lettuce wraps ahead of a busy week! They’re my all-time favorite grab-and-go meal, requiring no time at all to heat up and assemble. If meal prepping, I recommend storing the turkey mixture separate from the peanut sauce, and keeping lettuce and any toppings separate as well. When ready to eat, simply reheat the turkey, then fill your lettuce wraps any way you’d like!
- Feel free to top these wraps however you’d like! I’ve topped mine with everything from kimchi, to shredded carrots, to even simply eating them on their own. It truly doesn’t matter which way you serve these guys, they’re always going to taste delicious.
- If you’re like me and like a little spice, go ahead and spice these babies up with a little sriracha! Add a couple teaspoons of sriracha to either the filling, as a topping, or both.
Adjust This Recipe To Your Dietary Needs
Make it Paleo: For an entirely paleo meal, use creamy almond butter instead of peanut butter in the savory sauce. Otherwise, these lettuce wraps are an entirely paleo recipe!
Make it Nut-Free: Make this recipe nut-free by swapping out the peanut butter for an equal amount of creamy sunflower seed butter (just make sure it’s unsweetened!).
Asian Turkey Lettuce Wraps with Savory Peanut Sauce
Ingredients
For the turkey:
- 1 tablespoon olive oil
- 1 pound ground turkey
- pinch of salt
- 8 ounces mushrooms, chopped
- 1 (8-ounce) can chopped water chestnuts, drained
- 3 scallions, chopped
- 2 garlic cloves, minced
- 1 tablespoon fresh grated ginger
- 1/4 cup coconut aminos, see Notes
- 1 tablespoon rice vinegar
For the peanut sauce:
- 1/2 cup creamy peanut butter, unsweetened
- 2 tablesoons coconut aminos
- 2 tablespoons rice vinegar
- 1 tablespoon toasted sesame oil, optional
- 1 garlic clove, grated
- 1 tablespoon fresh grated ginger
- 2-3 tablespoons warm water, add more to thin sauce
For the lettuce wraps:
- 12 butter lettuce leaves
- shredded carrots
- bean sprouts
- fresh cilantro
Instructions
- Heat olive oil in a large skillet over medium-high heat. Add in ground turkey and a pinch of salt, cook until no longer pink.
- While turkey cooks, whisk together all peanut sauce ingredients in a bowl and set aside.
- Once turkey is cooked through, add in mushrooms, scallions, garlic, ginger, and water chestnuts. Cook 2-3 minutes or until mushrooms are soft.
- Add in coconut aminos and rice vinegar, stir and cook for about 1 minute then remove from heat.
- Fill butter lettuce leaves with ground turkey mixture and top with peanut sauce, shredded carrots, bean sprouts, and fresh cilantro.
")