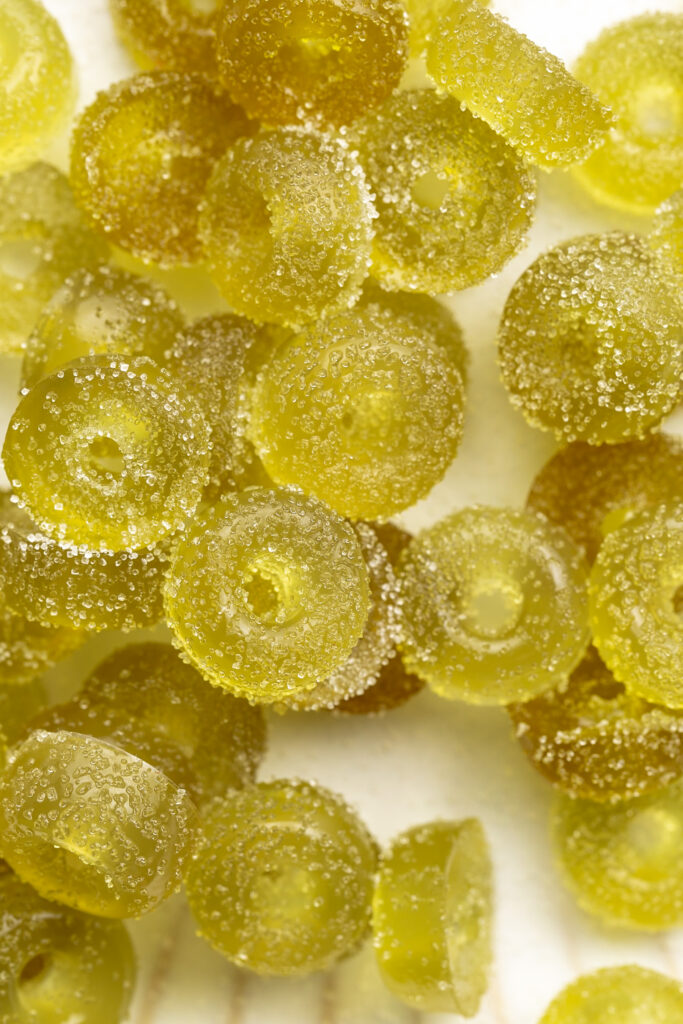
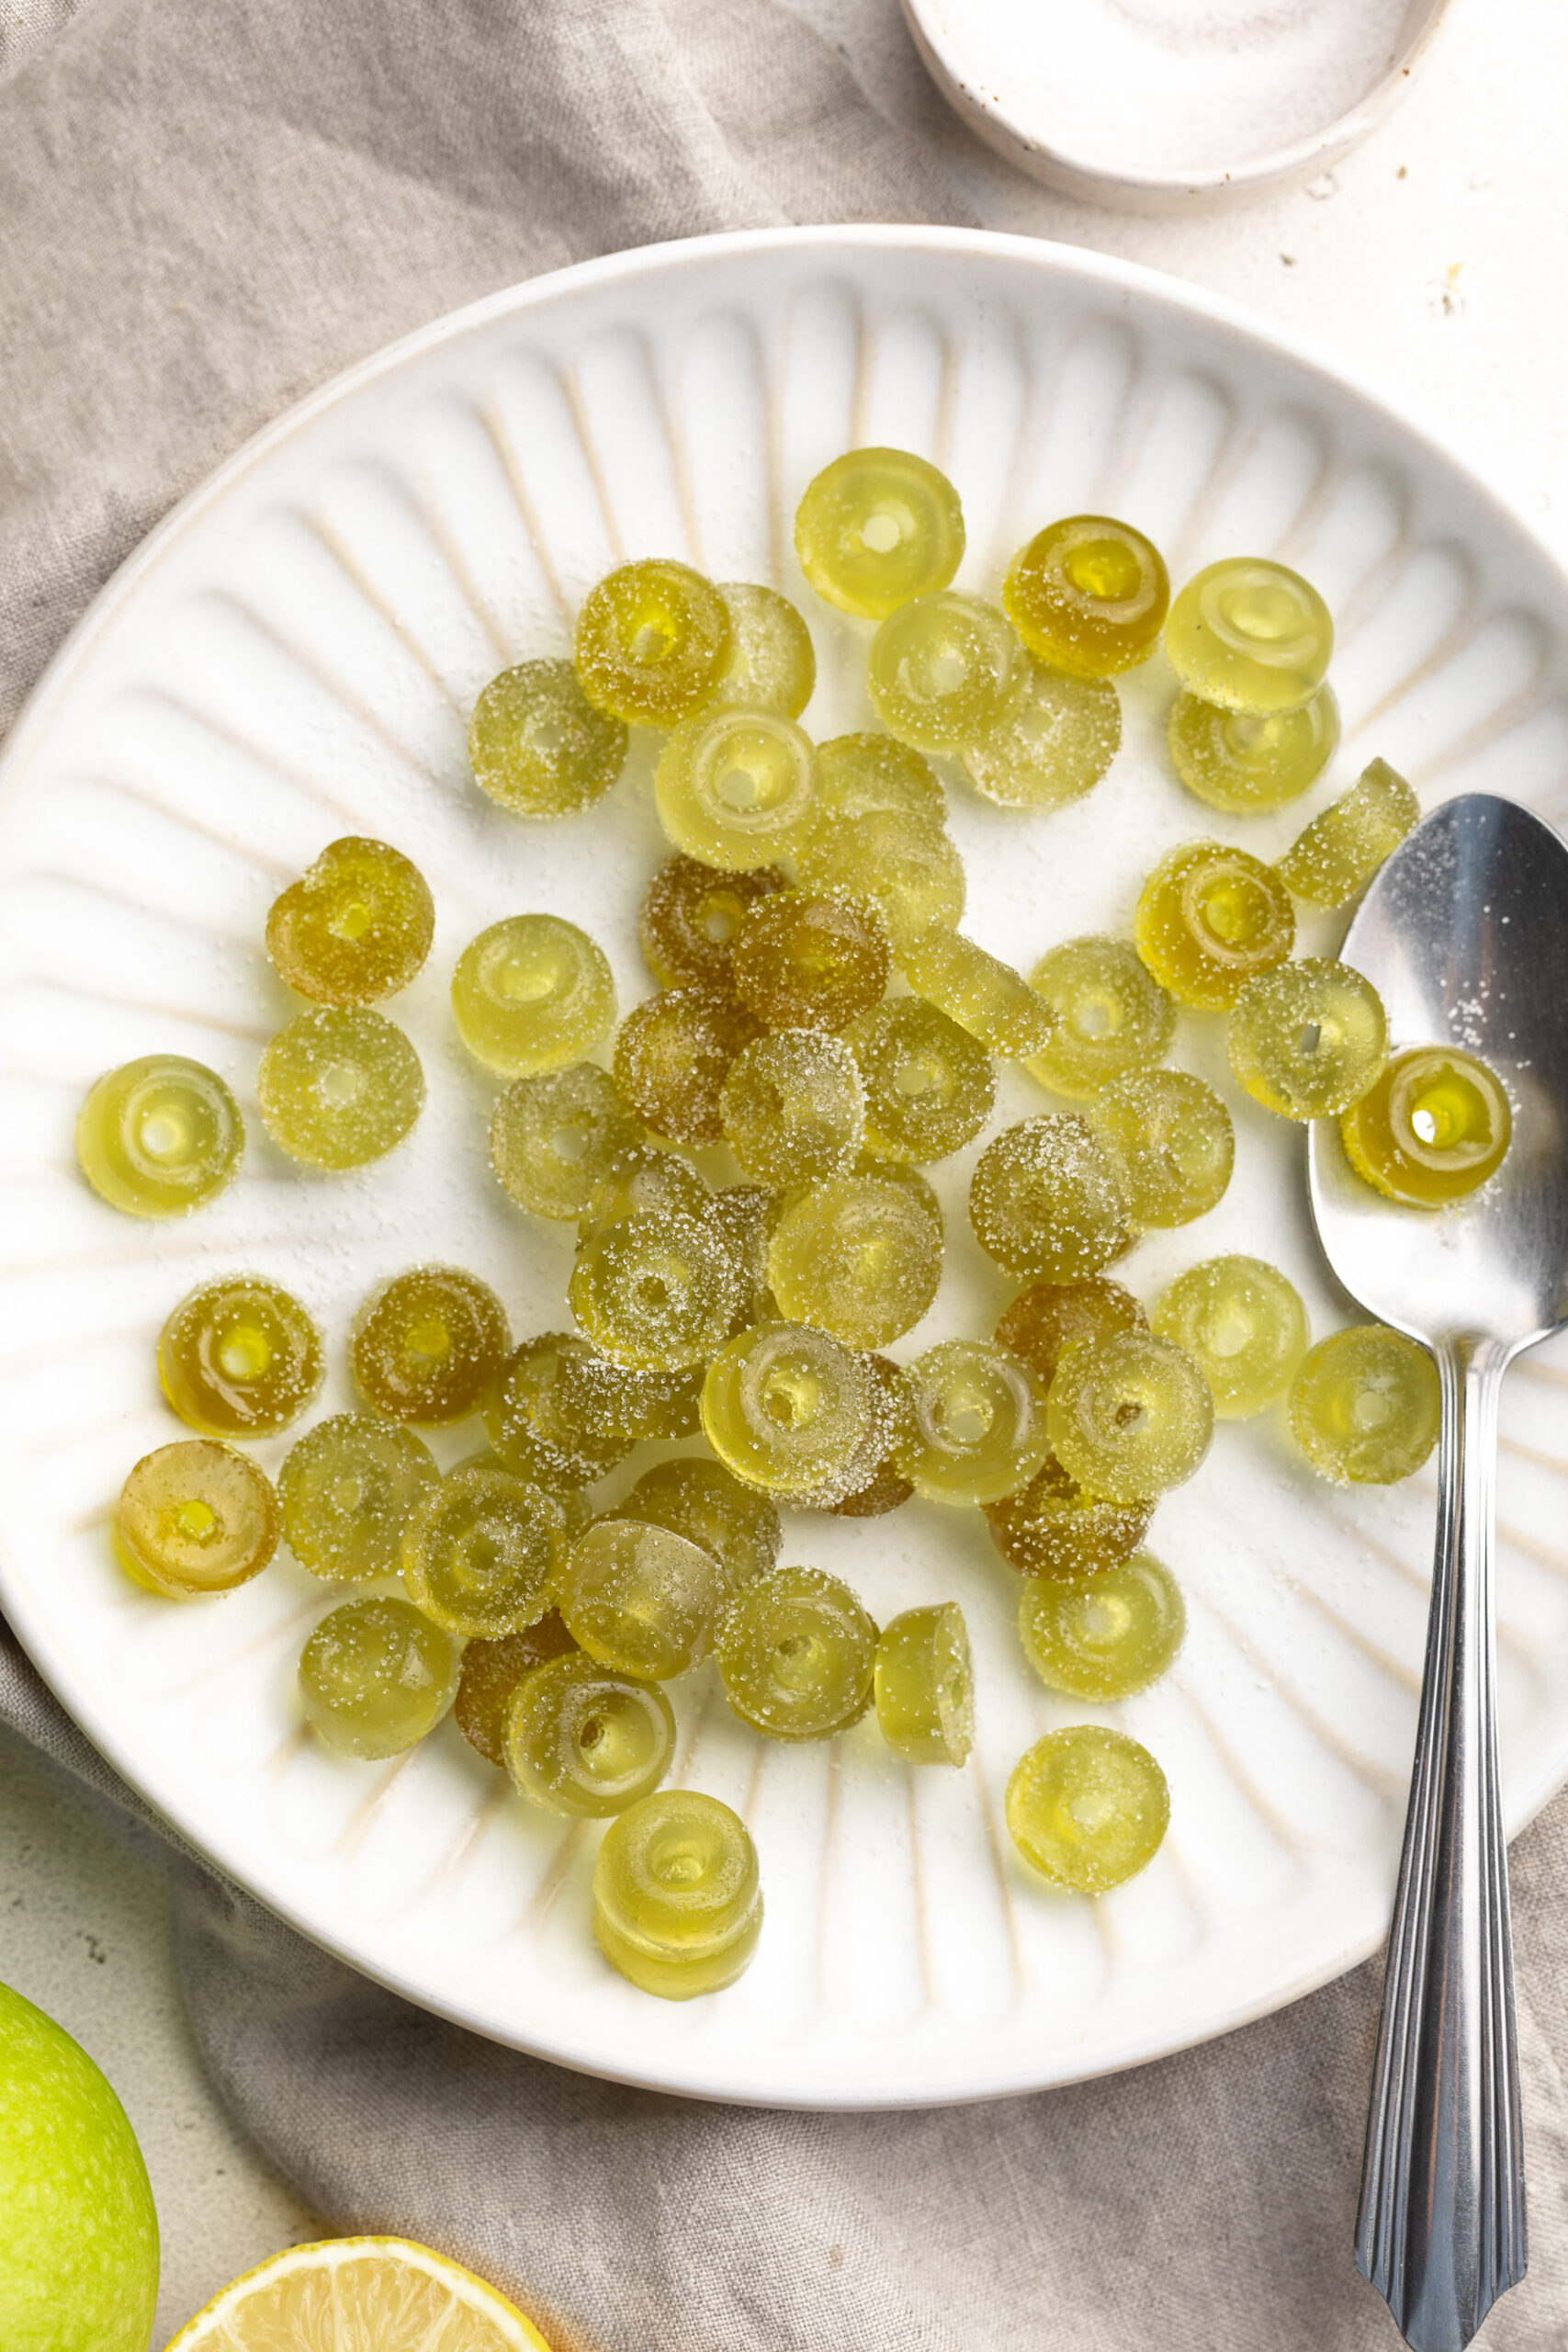
Tag

healthy candy

Browsing

Someone asked me recently what my favorite ingredient to bake with is and while it’s tough to choose just one, I’d say medjool dates are in my top three. They’re naturally sweet, super versatile, and great for no-bake sweet treats! Some of my most popular recipes actually feature dates as the main ingredient – like my smashed dates with peanut butter, healthy date snickers, and 5 ingredient chocolate chip date cake. When it comes to dates, the possibilities really are endless! So when I set out to create a new healthy dessert recipe, these healthy date caramel cups were a no-brainer. They’re quick and easy, made with just 3 ingredients, and there’s absolutely no baking required. I also love having a batch of these in my freezer at all times for when I’m craving a little something treat!

hand holding a healthy date caramel cup with a bite taken out.

Why You’ll LOVE These Healthy Date Caramel Cups

  • Made with only 3 clean, whole-food ingredients
  • Naturally sweetened with dates (no added sugar!)
  • Gluten-free, dairy-free, and vegan
  • No baking required
  • Rich, chocolatey, and deeply satisfying

What Makes This Recipe Healthy

These date caramel cups skip the refined sugars and processed fillings you’d find in store-bought candies. Medjool dates provide natural sweetness and fiber, while dark chocolate adds antioxidants. With no dairy, gluten, or unnecessary additives, they’re a more wholesome option for indulging your sweet tooth!

healthy date caramel cup with flaky sea salt on top.

Frequently Asked Questions

Can I use a regular muffin tin?

Yes! You can absolutely use a standard muffin tin, just note that the caramel cups will be larger and yield fewer total cups. You may want to increase the chocolate and date caramel amounts accordingly.

What kind of chocolate should I use?

Any chocolate chips will work—dark, semi-sweet, or dairy-free depending on your dietary needs. We recommend at least 60% cacao for a richer flavor and lower sugar content.

What if my dates are too hard?

Make sure to soak them in hot water for at least 10 minutes. If they’re still tough, let them soak a bit longer or try chopping them up before blending for smoother caramel.

Storage Tips

Store your caramel cups in an airtight container in the fridge for up to 1 week, or in the freezer for up to 2 months. Let frozen cups thaw for 5–10 minutes before enjoying for the best texture.

3 healthy date caramel cups stacked on top of each other.
No ratings yet

3-Ingredient Healthy Date Caramel Cups

These 3-ingredient healthy date caramel cups are the perfect no-bake treat – rich, chocolatey, and naturally sweetened with Medjool dates! They're vegan, gluten-free, dairy-free, and made with just chocolate chips, coconut oil, and dates. Whether you're craving a wholesome dessert or a midday snack, these caramel cups are healthy yet indulgent!
Print Pin Rate
Prep Time: 10 minutes
Chilling Time: 20 minutes
Total Time: 30 minutes
Servings: 12 date caramel cups

Equipment

  • 1 mini muffin pan
  • 1 small bowl
  • 1 food processor or high speed blender

Ingredients

  • 1 cup Medjool dates pitted
  • 1 1/2 cups chocolate chips I used extra dark chocolate chips
  • 2 teaspoons coconut oil

Instructions

  • Soak the Medjool dates in a bowl of very hot water for 10 minutes, then line a mini muffin pan with mini liners.
  • Melt together the chocolate chips and coconut oil in either the microwave or over a double boiler until completely melted and smooth.
  • Once the chocolate is melted, pour about 1 teaspoon of melted chocolate into the bottom of each mini muffin liner and use a spoon to spread the chocolate around to cover the entire bottom of the liner. Once all liners are lined with chocolate, transfer your muffin pan to the freezer to set and place the remaining melted chocolate aside for now.
  • Once the dates are very soft, drain them from the water and transfer the soaked dates to a food processor or high-speed blender and blend until they are mostly smooth, scraping down the sides of the food processor or blender as needed.
  • Spoon about 1-2 teaspoons of date caramel into each cup lined with chocolate. Repeat this process until all cups have been filled with date caramel.
  • Pour 1-2 teaspoons of melted chocolate over each date caramel cup, making sure you completely cover the date caramel inside. Once all cups are filled with chocolate, transfer the pan back into the freezer for 10-15 minutes or until the chocolate is completely set. Remove date caramel cups from the freezer, transfer to an airtight container and store in the fridge or enjoy right away!

Nutrition

Serving: 1date caramel cup | Calories: 145kcal | Carbohydrates: 15g | Protein: 1g | Fat: 8g | Sugar: 10g

Healthier sweet treats are kinda my thing. I recently set out to recreate as many of my favorite classic candy recipes to make them healthier, gluten-free, and dairy-free. My 4-ingredient healthy snickers have been a huge hit, and so have my 4-ingredient date caramels. I even made a healthy homemade butterfingers recipe for halloween last year and OMG they were gone in three days! These healthy twix bars were the obvious next choice because, well – who doesn’t love a twix?! This healthy twix bars recipe absolutely nail the classic flavors and textures we’re all addicted to when it comes to the traditional candy bar. A buttery shortbread crust, smooth and perfectly sweet caramel, and crispy chocolate shell make the perfect quick and easy sweet candy-inspired treat!

overhead image of healthy twix bars on parchment paper with flaky sea salt on top.

Why You’ll Love This Recipe

  • Made with wholesome ingredients – No refined sugars, artificial flavors, or preservatives.
  • Gluten-free, vegan, and dairy-free – Perfect for various dietary needs.
  • Easy to make – Just a few simple steps, no complicated techniques required.
  • Rich, chewy, and delicious – Just like the classic Twix bars but with a healthier twist!

What You’ll Need to Make Homemade Healthy Twix Bars

  • Almond Flour – Creates a light, buttery shortbread base while keeping the recipe gluten-free. I buy my almond flour in bulk on Amazon!
  • Coconut Oil – Used in all three layers for moisture, structure, and a silky texture.
  • Maple Syrup – Naturally sweetens the bars while adding a subtle caramel-like flavor.
  • Vanilla Extract – Enhances the sweetness and deepens the flavors of both the shortbread and caramel layers.
  • Peanut Butter – Provides a rich, creamy caramel-like texture without any refined sugar. Swap with almond or cashew butter for a different flavor.
  • Chocolate Chips – The perfect finishing touch for that classic Twix-like chocolate layer. Use dark chocolate for a richer taste!
close up image of healthy twix bars with flaky salt on top.

How to Make Healthy Twix Bars

  1. Prepare the Shortbread: Mix almond flour, melted coconut oil, maple syrup, and vanilla extract. Press into a lined 9×9-inch pan and bake at 350°F for 10 minutes. Let cool.
  2. Make the Caramel Layer: Heat peanut butter, coconut oil, maple syrup, and vanilla extract in a saucepan until smooth and bubbly. Pour over the shortbread layer and refrigerate until set.
  3. Melt the Chocolate: Melt chocolate chips with coconut oil, then spread over the caramel layer. Refrigerate again until firm.
  4. Slice & Enjoy! Remove from the fridge, cut into bars, and sprinkle with flaky sea salt if desired.

Frequently Asked Questions

  • Can I use regular flour? – No, almond flour is key to the texture and gluten-free nature of this recipe.
  • Can I make these nut-free? – Yes! Swap almond flour for oat flour and use sunflower seed butter instead of peanut butter.
  • What makes these “healthy”? – These bars use natural sweeteners, healthy fats, and no processed ingredients.
  • How do I store them? – Keep them in an airtight container in the fridge for up to a week or freeze for up to 3 months!
healthy twix bar with a bite taken out.

Sam’s Recipe Tips

  • For a crispier shortbread layer, bake for an extra 2-3 minutes.
  • Want a thicker caramel layer? Add an extra ¼ cup of peanut butter!
  • Use dark chocolate for a richer, more intense chocolate flavor.
healthy twix bars stacked on top of each other with flaky salt on top.
5 from 5 votes

6-Ingredient Healthy Twix Bars

These homemade Healthy Twix Bars are made with just six simple ingredients, featuring a buttery almond flour shortbread, creamy peanut butter caramel, and a rich dark chocolate topping. They’re gluten-free, vegan, dairy-free, and naturally sweetened, making them a better-for-you sweet treat!
Print Pin Rate
Prep Time: 15 minutes
Cook Time: 13 minutes
Total Time: 28 minutes
Servings: 16 servings

Equipment

  • 1 9×9-inch baking pan
  • 1 large bowl
  • 1 small saucepan

Ingredients

For the shortbread layer:

  • 2 cups almond flour
  • 1/4 cup melted coconut oil
  • 1/4 cup maple syrup
  • 1 teaspoon vanilla extract

For the caramel layer:

  • 3/4 cup creamy peanut butter unsweetened
  • 1/4 cup coconut oil
  • 1/4 cup maple syrup
  • 1 teaspoon vanilla extract

For the chocolate layer:

  • 1 cup chocolate chips I used dark chocolate chips
  • 1 tablespoon coconut oil
  • flaky salt for topping (optional)

Instructions

  • Preheat oven to 350° Fahrenheit and line a 9×9-inch baking pan with parchment paper.
  • Add all shortbread ingredients to a large bowl and mix to combine. Then, transfer the crust to your prepared baking pan and press the crust down into an even layer over the base of the pan. Bake for 10 minutes or until lightly golden brown around the edges. Leave the shortbread to cool for at least 10 minutes before adding the caramel.
  • Make the caramel layer by adding all caramel ingredients to a small saucepan over medium-low heat. Whisk the mixture together, and continue whisking as it heats up and starts to gently bubble.After 2 minutes, remove the caramel from the heat and pour over the cooled shortbread crust. Transfer the baking pan to the fridge to allow the peanut butter to set for at least 30 minutes and up to one hour. Once the caramel is completely set and firm to the touch, make the chocolate layer.
  • To make the chocolate layer, melt together the chocolate chips and coconut oil in either the microwave or over a double boiler until completely smooth. Pour the melted chocolate over the caramel and gently spread into an even layer. Transfer the pan back to the fridge to set one last time for about 30 minutes or until the chocolate has hardened. Remove the twix bars from the fridge, then remove them from the pan and cut into 16 “full size” bars or 32 “mini” bars.

Nutrition

Serving: 1bar | Calories: 218kcal | Carbohydrates: 15g | Protein: 4g | Fat: 17g | Sugar: 11g

This healthy homemade butterfingers recipe is made with just 5 simple ingredients! They’re gluten-free, dairy-free, and naturally sweetened for a better-for-your treat. They join my healthy candy lineup, right alongside healthy snickers, 3 ingredient homemade crunch bars, and healthy date caramels. These homemade butterfingers are perfect for anyone looking for a healthier version of a favorite candy bar!

healthy homemade butterfingers on parchment paper.

Why You’ll Love This Recipe

These healthy homemade butterfingers are a delicious and satisfying treat with just 5 simple ingredients. They’re a guilt-free version of the classic candy bar, made gluten-free, dairy-free, and with natural sweeteners like honey or maple syrup. Plus, they’re easy to make and perfect for storing in the freezer for a quick snack or dessert.

What You Need to Make Healthy Butterfingers

  • Peanut Butter: The rich, creamy base that gives these bars their signature nutty flavor. Choose a natural variety with no added sugar for a healthier option.
  • Honey or Maple Syrup: These natural sweeteners bring the perfect touch of sweetness while keeping the recipe refined-sugar free.
  • Corn Flakes: Adds the necessary crunch to replicate the crispy texture found in classic butterfingers. Make sure to choose gluten-free corn flakes if needed. The Real Cereal Organic Corn Flakes are the best ones I’ve found, they’re unsweetened and made with just 2 ingredients!
  • Chocolate Chips: Melting the chocolate for coating gives that irresistible outer layer, while dark chocolate keeps the sugar content lower.
  • Coconut Oil: Helps melt the chocolate smoothly and adds a subtle flavor boost. I use and love Nutiva Organic Coconut Oil in many of my recipes!

How to Make Healthy Homemade Butterfingers

Start by crushing the corn flakes and mixing them with peanut butter and honey to form a crispy, sweet mixture. Press it into a loaf pan to set in the freezer before dipping each bar in melted chocolate. Freeze them again for a crunchy, chocolate-covered treat that’s perfect for a healthier snack or dessert.

healthy homemade butterfingers stacked on top of each other,

Storage Tips

Once made, store your homemade butterfingers in an airtight container in the freezer for up to 3 months. This way, they’ll stay fresh and ready for whenever you need a sweet treat.

Adjust This Recipe to Your Dietary Needs

  • Make it Vegan: Swap the honey for maple syrup and use dairy-free chocolate chips.
  • Low Carb: Choose a sugar-free chocolate alternative and use a low-carb cereal.
  • Make it Nut-Free: Substitute the peanut butter with sunflower seed butter for a nut-free version.
close up image of healthy butterfingers cut in half.
No ratings yet

Healthy Homemade Butterfingers

This healthy homemade butterfingers recipe is made with just 5 simple ingredients. They're gluten-free, dairy-free, and naturally sweetened for a better-for-your treat. These homemade butterfingers are perfect for anyone looking for a healthier version of a favorite candy bar!
Print Pin Rate
Prep Time: 5 minutes
Freezing Time: 1 hour
Total Time: 1 hour 5 minutes
Servings: 12 servings

Equipment

  • 1 large bowl
  • 1 9×4-inch loaf pan
  • 1 small bowl

Ingredients

  • 1 cup peanut butter
  • 1/3 cup maple syrup or honey
  • 2 cups corn flakes
  • 1 cup chocolate chips
  • 2 teaspoons coconut oil

Instructions

  • Add the corn flakes to a large zip-top bag, seal the bag and crush the cereal into small pieces.
  • Add the peanut butter and honey or maple syrup to a large bowl and mix together to combine. Add the crushed corn flakes to the bowl and mix again to fully combine.
  • Transfer the mixture to a loaf pan lined with parchment paper, and press the cereal down into the pan to create an even layer. Place in the freezer to harden for at least 1 hour.
  • Remove the pan from the freezer and carefully lift the corn flake mixture out of the pan. Place on a cutting board and cut into 12 bars.
  • Melt the chocolate chips and coconut oil together, whisk to combine, and then dip each bar into the melted chocolate to completely coat. Remove the bar from the chocolate and set on a parchment-lined plate. Repeat this process with all 12 butterfingers until all are coated in chocolate.
  • Transfer the butterfingers to the freezer for about 10 minutes, or until the chocolate has hardened. Then, enjoy right away or store in an airtight container in the freezer for up to 3 months (if they last that long!).

Nutrition

Serving: 1serving | Calories: 241kcal | Carbohydrates: 22g | Protein: 6g | Fat: 15g | Sugar: 12g

I LOVE dates. I almost always have a bag on-hand. They’re perfect for stuffing with peanut butter, like in my 4-ingredient healthy snickers, or blending with oats to make healthy cookie dough date bites. Or… if you’re like my husband, dates are delicious all on their own!

Dates are the main ingredient in these 4 ingredient date caramels. They’re softened with a little hot water, then blended with almond butter and coconut oil to make a lusciousssss healthy date caramel. And because everything tastes better dipped in chocolate (ok ok, MOST things taste better dipped in chocolate), each date caramel is dunked in melted chocolate, then placed in the freezer until firm. The end result is a perfectly sweet and healthier chocolate-covered caramel candy. YUM!

overhead image of date caramels lined up with flaky sea salt on top.

What You’ll Need to Make This Recipe

  • Medjool Dates: The star ingredient! Medjool dates are naturally sweet and sticky, making them the perfect base for these caramels. If your dates are a bit dry, soaking them in hot water helps soften them up for easy blending. Here’s a link to the medjool dates I purchase on Amazon!
  • Creamy Almond Butter: Adds creaminess and a subtle nutty flavor to the caramels. You can substitute with any nut or seed butter like peanut butter or sunflower seed butter to make the recipe nut-free.
  • Coconut Oil: This helps bind the ingredients together and adds a touch of richness. Use refined coconut oil to avoid any coconut flavor, especially if you want the dates’ natural sweetness to shine through.
  • Chocolate Chips or Bar: Choose a high-quality dark chocolate for a rich coating. If you’re keeping this treat refined sugar-free, look for a chocolate that’s sweetened with coconut sugar or another natural sweetener. The coconut oil added to the chocolate helps it melt smoothly and gives the caramels a beautiful glossy finish.

How to Make Date Caramels

  1. Soak the Dates: Start by soaking the dates in hot water for about 10 minutes to soften them, making them easier to blend.
  2. Blend: After soaking, drain the dates and add them to a food processor along with the almond butter and melted coconut oil. Blend until smooth and creamy.
  3. Shape & Freeze: Spread the date mixture into a parchment-lined loaf pan and freeze for 2-3 hours until firm.
  4. Cut into Squares: Once firm, remove from the freezer and cut into 12 small squares.
  5. Dip in Chocolate: Melt the chocolate with a bit of coconut oil, then dip each caramel square into the chocolate until fully coated. Place the coated caramels on a parchment-lined plate and refrigerate until the chocolate is set.
close up image of a date caramel candy with a bite taken out.

Make Them Nut-Free

If you’re catering to a nut-free crowd, simply swap out the almond butter for sunflower seed butter. The consistency and flavor are just as delicious, making this treat accessible for those with nut allergies!

Tips and Tricks

  • Use Fresh Dates: Fresh, soft dates blend more easily and give you a smoother caramel. If your dates are dry, don’t skip the soaking step.
  • Don’t Overheat the Chocolate: When melting the chocolate, keep the heat low to prevent burning. A double boiler works well, or microwave in short intervals, stirring in between.
  • Storage: These caramels keep best in the fridge or freezer, so you can always have a batch on hand for when the craving hits. They taste great straight from the freezer too!

These caramels are a healthier take on the classic candy, with no need for a candy thermometer or complicated techniques. Perfect for sharing—or keeping all to yourself!

date caramels on a plate with flaky sea salt on top.
4.50 from 6 votes

4 Ingredient Date Caramels

If you’re looking for a vegan, gluten-free, and refined sugar-free treat that’s perfect for gifting or snacking, these 4-ingredient date caramels are your answer! They’re rich, chewy, and coated in decadent chocolate—ideal for satisfying your sweet tooth while sticking to your dietary needs. Plus, they’re easy to make and great for parties!
Print Pin Rate

Ingredients

For the date caramel:

  • 1 cup packed medjool dates, pitted
  • 2 tablespoons creamy almond butter, or any nut/seed butter
  • 1 tablespoon coconut oil, melted

For the chocolate coating:

  • 1 cup chocolate chips, or an 8-ounce chocolate bar
  • 2 teaspoons coconut oil, melted

Instructions

  • Soak the dates in a bowl of very hot water for 10 minutes.
  • Once dates are very soft, drain them from the water and transfer the soaked dates to a food processor or high-speed blender. Add the almond butter and coconut oil to the dates, and pulse until completely smooth.
  • Transfer the date caramel to a 9×5-inch loaf pan lined with parchment paper, then place the pan in the freezer for 2-3 hours, or until date caramel is firm to the touch.
  • Remove the loaf pan from the freezer, and lift the date caramel out of the pan. Place the date caramel on a cutting board and slice into 12 small squares.
  • Melt the chocolate chips and 2 teaspoons coconut oil in a heat-safe bowl in either the microwave or over a double boiler on the stove. Once chocolate is completely smooth and melted, dip each caramel square in the chocolate to fully coat. Carefully lift the caramel out of the chocolate and transfer to a parchment-lined plate.
  • Repeat the dipping process with all caramels, then transfer to the fridge for 1 hour or until chocolate has hardened and is completely set. Once set, enjoy your chocolate covered date caramels, or keep stored in the fridge to enjoy later on!

Notes

  • These date caramels are best stored in the fridge or freezer! If left at room temperature, the chocolate will melt.
  • It’s been a HOT summer so far. So hot in fact, that I’ve been avoiding turning on my oven unless absolutely necessary. But you guys know me by now, even without an oven I still need a little something sweet on-hand at all times. Healthy No-Bake Cookie Doughs Bars have been on repeat lately, and so have 4-Ingredient Healthy Snickers. And while both of those no bake desserts are delicious and ones I’d never get sick of, it was definitely time to switch things up!

    These homemade crunch bars are made with just THREE ingredients. They’re totally vegan and gluten-free, and I’ll even include a paleo and keto option if you want to give those a try. They’re perfectly sweet, extra crunchy, and seriously SO easy to make!

    overhead image of 3 ingredient no bake homemade crunch bars with sea salt on top.

    Why These Are the Best Homemade Crunch Bars

    These bars are not only simple to make but also healthier and more customizable than store-bought versions. By using high-quality ingredients, you avoid artificial flavors and preservatives. The addition of peanut butter gives extra creaminess and flavor, making these bars a delightful treat for all ages!

    Ingredients and Substitutions

    • Chocolate Chips: Opt for dark chocolate for a less sweet version or semi-sweet for a classic candy bar taste. Vegan options like Guittard Extra Dark Baking Chips are perfect for dairy-free needs.
    • Peanut Butter: Can be substituted with any nut or seed butter. Ensure it’s creamy for the best texture.
    • Rice Cakes/Crisp Cereal: Gluten-free rice cakes or cereals ensure the bars are safe for those with gluten intolerances!
    ingredients for healthy homemade crunch bars recipe.

    How to Make Homemade Crunch Bars

    1. Line your pan with parchment paper to prevent sticking.
    2. Melt chocolate and peanut butter in the microwave, stirring every 30 seconds until smooth.
    3. Mix in crumbled rice cakes to combine.
    4. Spread mixture in the prepared pan and freeze until solid.
    5. Cut into squares and enjoy your homemade bars.

    Storage Tips

    Store these homemade crunch bars in an airtight container in the refrigerator for the best texture and shelf life. They can start to soften if left at room temperature for too long. Or, store them in the freezer for up to 3 months!

    3 ingredient no bake healthy homemade crunch bar on a table.

    Adjust This Recipe to Your Dietary Needs

    • Keto Option: Use sugar-free chocolate chips and replace rice cakes with crushed nuts or seeds.
    • Vegan Option: Ensure your chocolate chips are vegan-friendly. Brands like Enjoy Life are great choices.
    • Paleo Option: Use paleo-approved chocolate, like Hu Kitchen Chocolate Gems and replace rice cakes with chopped nuts or seeds for the crunch.

    Tips and Tricks

    1. Microwave Melting: Microwave the chocolate and peanut butter in short bursts to prevent burning, or use a double boiler instead if you’d like.
    2. Layer Thickness: Spread the mixture evenly in the pan to ensure uniform bars.
    3. Add-Ins: Feel free to add a pinch of salt or vanilla extract to enhance the flavor. Or, finish the bars with flaky sea salt like I did – YUM!

    By following these tips and utilizing high-quality ingredients, you’ll have delicious, homemade crunch bars that are perfect for any occasion!

    overhead image of 3 ingredient no bake homemade crunch bars with sea salt on top.
    5 from 8 votes

    3 Ingredient Healthy Homemade Crunch Bars

    This 3 ingredient homemade crunch bars recipe is the perfect vegan and gluten-free sweet treat! They’re no bake, totally delicious, and irresistibly crispy. These homemade candy bars are also much healthier than store-bought!
    Print Pin Rate

    Ingredients

    • 1 1/4 cups chocolate chips
    • 1/2 cup creamy peanut butter, unsweetened
    • 2 rice cakes, crumbled (or 1 cup rice crisp cereal)

    Instructions

    • Line a 9-inch loaf pan with parchment paper.
    • Add the chocolate chips and creamy peanut butter to a bowl, then microwave in 30 second increments (stirring between each increment) until chocolate has melted.
    • Add in the crumbled rice cakes and mix everything together to combine.
    • Transfer the crunch bar mixture to your prepared loaf pan and spread into an even layer. Place the bars in the freezer until solid, about 1 hour, then remove and cut into squares.