
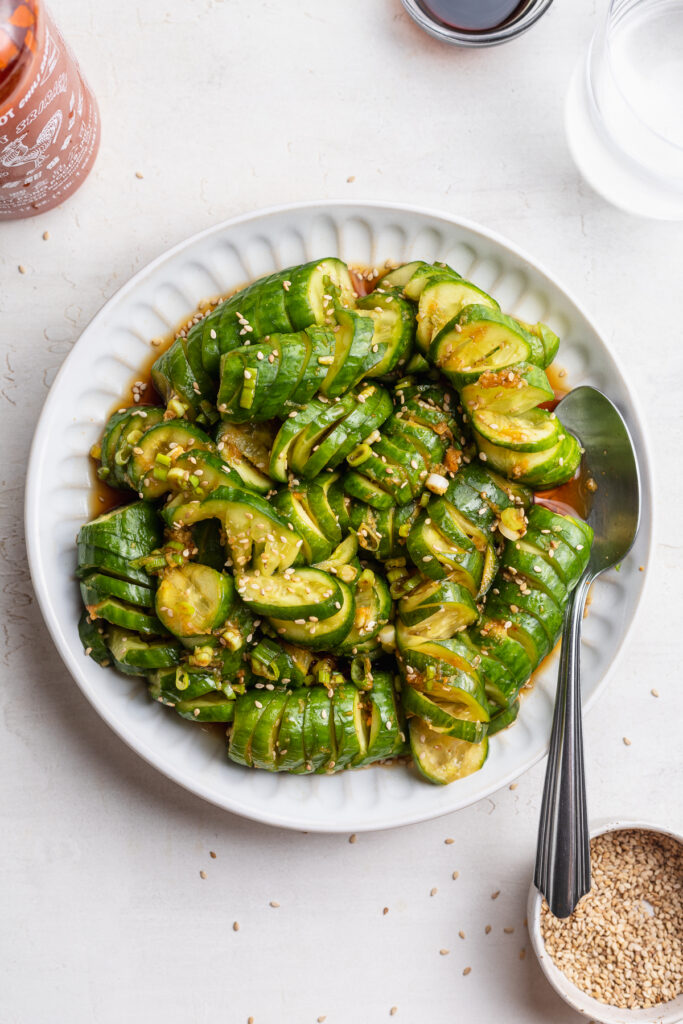
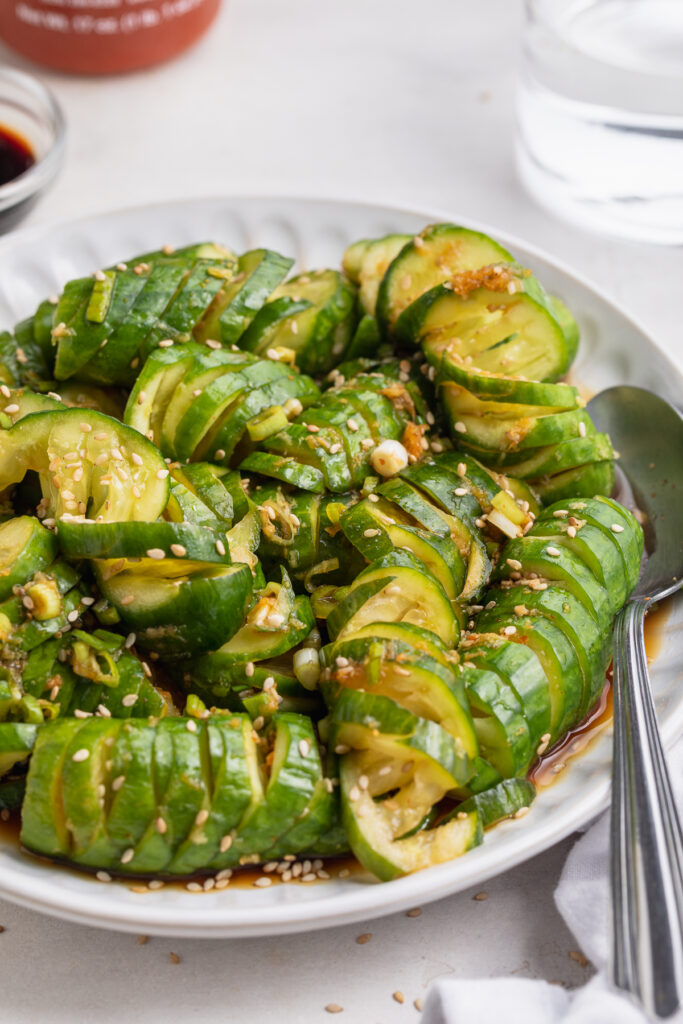
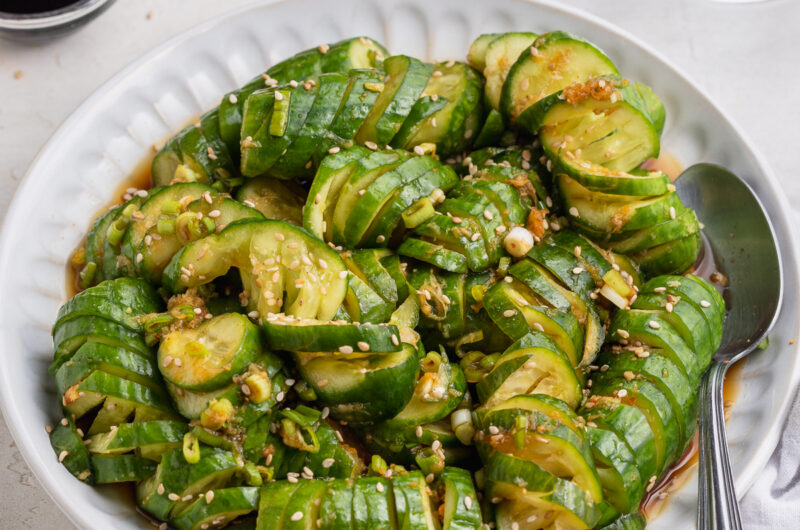
Cool and refreshing Asian cucumber salad! Full of flavor, and easy to throw together in a few simple steps. The perfect side dish or healthy lunch recipe.
What You’ll Need To Make Asian Cucumber Salad
Mini Cucumbers – Six mini seedless cucumbers are the star of this recipe. I cut mine into fun little spirals for my salad, but you can simply slice them instead. If slicing, I recommend a mandolin to help slice the cucumbers as thin as possible.
Fresh Ginger – Fresh ginger goes a long way in this Asian cucumber salad! Start by cutting about a 1-inch piece from a knob of whole ginger. Then, peel your ginger with either a spoon or a vegetable peeler. Once peeled, run the ginger along a microplane or the fine side of a box grater.
Rice Vinegar – For a hint of acidity, rice vinegar tastes best. However, if you don’t have any, feel free to use white wine vinegar or apple cider vinegar in its place.
Sriracha – While optional, I recommend a tiny drop of sriracha to round out the flavors in this recipe. For a mild version, start with just 1/2 teaspoon. Or, for a spicy Asian cucumber salad, add upwards of 1-2 teaspoons.
How to Cut Cucumbers
- Cut 1/4-inch of each end of a mini cucumber.
- Place two chopsticks on either side of the cucumber.
- Then, make thin (about 1/8-inch) diagonal cuts along the cucumber, stopping when your knife hits the chopsticks.
- Flip cucumber over and make the same exact cuts, in the same direction, on the other side.
- Lastly, cut each the cucumber in half, then add them to a bowl for this recipe!
Adjust This Recipe To Your Dietary Needs
Make it Gluten-Free: For a 100% gluten-free Asian cucumber salad, use tamari in place of the soy sauce. Tamari tastes just like soy sauce, but unlike soy sauce, is certified gluten-free!
Make it Vegan: Use maple syrup in place of the honey for a completely vegan side dish.
Asian Cucumber Salad
Course: SidesCuisine: AsianDifficulty: Easy4
servings5
minutes0
minutes5
minutesCool and refreshing Asian cucumber salad! Full of flavor, and easy to throw together in a few simple steps. The perfect side dish or healthy lunch recipe.
Ingredients
6 mini cucumbers, spiralized (see Notes) or thinly sliced
1 teaspoon salt
1-inch piece fresh ginger, peeled and grated
1 garlic clove, peeled and grated
2 tablespoons rice vinegar
1 tablespoon honey or maple syrup
1 tablespoon soy sauce
1 teaspoon sesame oil
1 teaspoon sriracha, optional
3 scallions, thinly sliced
pinch of sesame seeds
Directions
- Place cucumber in a large bowl and sprinkle with salt, then let sit for 10-15 minutes while you make the dressing.
- Whisk together the ginger, garlic, rice vinegar, honey, soy sauce, maple syrup, and sriracha in a small bowl.
- Check on the cucumbers, and drain the water that’s gathered at the bottom of the bowl.
- Add dressing, scallions, and sesame seeds to the cucumbers and toss to coat. Either serve immediately or let marinate in the fridge for a few hours.
Notes
- How to Cut “Spiralized” Cucumber: Cut off each end of a cucumber, then place two chopsticks on either long side of the cucumber. Then, make thin diagonal cuts along the cucumber, stopping when your knife hits the chopsticks. Flip cucumber over and make the same cuts on the other side. Last, slice each cucumber in half, now they’re ready for this recipe!
Did you make this recipe?
Share it and tag @samdoesherbest on Instagram!
Like this recipe?
Follow us @samdoesherbest on Pinterest
")


