Tag

lunch

Browsing

Hey there, lunch lovers! Are you tired of sad desk lunches or last-minute takeout decisions? We’ve got the solution – a scrumptious, healthy Meal Prep Chicken Salad Lunch Box that’ll have your coworkers drooling and your taste buds doing the happy dance. So, dust off those meal prep containers and let’s dive into lunchtime bliss!
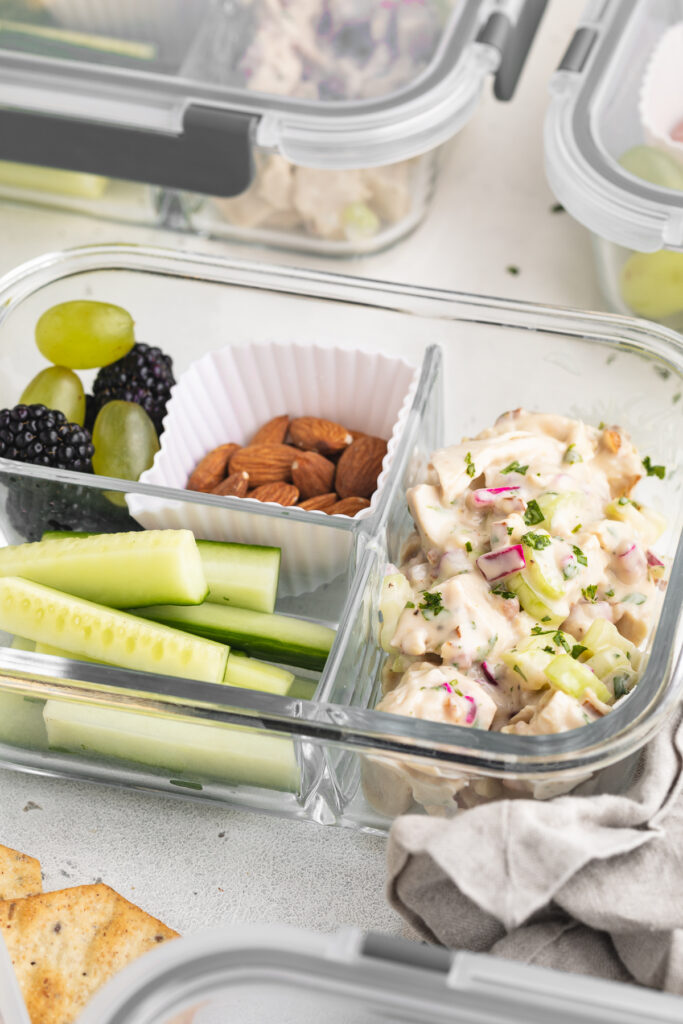
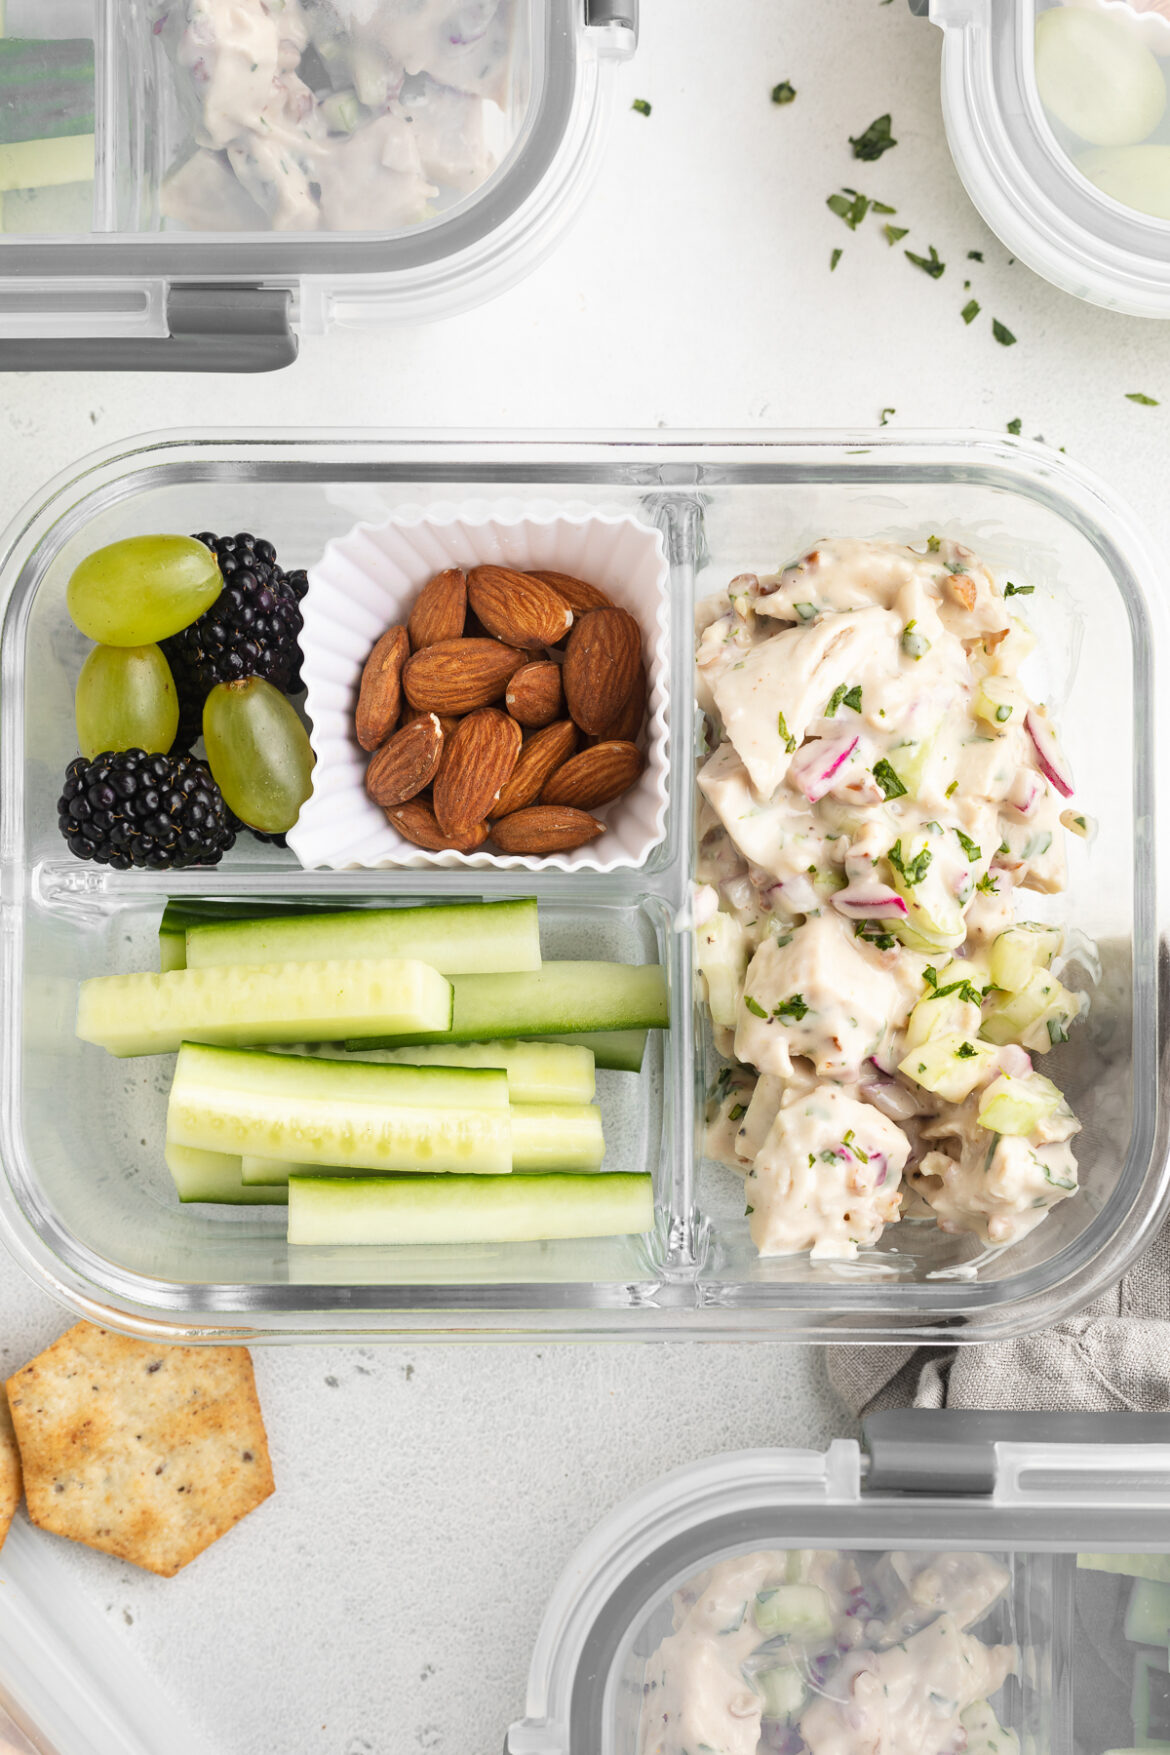
meal prep chicken salad lunch boxes with crackers on the side.

For more meal prep recipes, purchase my ULTIMATE Meal Prep E-Book for just $5 HERE!

What You’ll Need to Make Chicken Salad

Chicken Breast: The star of the show! Opt for boneless, skinless chicken breasts for a lean and protein-packed salad.

Mayonnaise: Go light or use a healthier mayo option if you’re watching your calories. It’s the creamy base that ties everything together. I used Sir Kensington’s Avocado Oil Mayonnaise in my chicken salad.

Pecans or Walnuts: These crunchy nuts add a delightful texture and a hint of nutty flavor to your chicken salad. Choose your favorite!

Fresh Tarragon: Don’t skip this herbaceous gem! Fresh tarragon elevates the flavors to a whole new level.

Lemon Juice: A squeeze of fresh lemon juice provides that zesty kick that makes your taste buds sing.

chicken salad being scooped up with a cracker.

Click HERE for a link to the meal prep lunch boxes I use in this recipe!

Tips and Tricks

  • The Perfect Chicken: Start with perfectly cooked chicken. You can poach it, grill it, or even use rotisserie chicken if you’re short on time. The key is to make sure it’s cooked through but still juicy. Overcooked chicken makes for a dry salad, and we don’t want that!
  • Balance is Key: Play around with the mayo-to-chicken ratio to suit your taste. Some like it creamy, while others prefer a lighter touch. You’re the boss of your lunchbox, so adjust to your heart’s content.
  • Prep for Success: This chicken salad is an MVP in meal prep. Make a big batch on Sunday and portion it into containers for the week. It stays fresh in the fridge, making lunchtime a breeze. Just be sure to keep the nuts separate until you’re ready to dive in to maintain that satisfying crunch.
5 from 1 vote

Meal Prep Chicken Salad Lunch Boxes

Hey there, lunch lovers! Are you tired of sad desk lunches or last-minute takeout decisions? We’ve got the solution – a scrumptious, healthy Meal Prep Chicken Salad Lunch Box that’ll have your coworkers drooling and your taste buds doing the happy dance. So, dust off those meal prep containers and let’s dive into lunchtime bliss!
Print Pin Rate
Prep Time: 15 minutes
Cook Time: 10 minutes
Total Time: 25 minutes
Servings: 4 servings

Ingredients

For the chicken salad:

  • 1 1/2 pounds boneless and skinless chicken breast
  • 1 cup mayonnaise
  • 1 tablespoon Dijon mustard
  • 2 celery stalks, diced
  • 1/2 cup pecans or walnuts, chopped
  • 1/4 cup red onion, finely chopped
  • 2 tablespoons fresh parsley, chopped
  • 1 tablespoon fresh tarragon, chopped
  • 1 lemon, juiced
  • 1 teaspoon salt
  • 1/2 teaspoon black pepper

For the lunch boxes:

  • crackers, I used gluten-free crackers
  • cucumbers or carrots, sliced
  • fruit, such as grapes or berries
  • nuts, such as almonds

Instructions

  • Place chicken breasts in a wide pot or deep skillet, then pour in enough water until chicken is completely submerged in water.
  • Bring pot to a boil, then reduce to a simmer and cover with a lid. Cook for 10-12 minutes, or until chicken is cooked through.
  • Remove chicken from the water, then place on a cutting board and either chop the chicken into cubes or shred the chicken with two forks.
  • Place chopped or shredded chicken into a large bowl and let cool completely.
  • Once cool, add in all remaining chicken salad ingredients. Mix everything together until well combined.

For the lunch boxes:

  • Add the chicken salad to the lunch boxes along with the veggies, fruit, and nuts. Then, store the crackers separately.
  • Store the chicken salad lunch boxes in the fridge for up to 4 days, and store the crackers separately at room temperature.

Notes

  • Nutrition

    Calories: 300kcal

    Say goodbye to boring lunches and hello to lunchtime bliss with our Meal Prep Chicken Salad Lunch Boxes! It’s the perfect blend of protein, flavor, and convenience. Plus, with our handy tips and tricks, you’ll be the lunchtime hero of your office.

    So, go ahead, whip up a batch, and let your taste buds savor the deliciousness. Your coworkers will be envious, and your taste buds will be thanking you. Happy meal prepping!
    Interest In More Meal Prep Recipes? Check These Out!

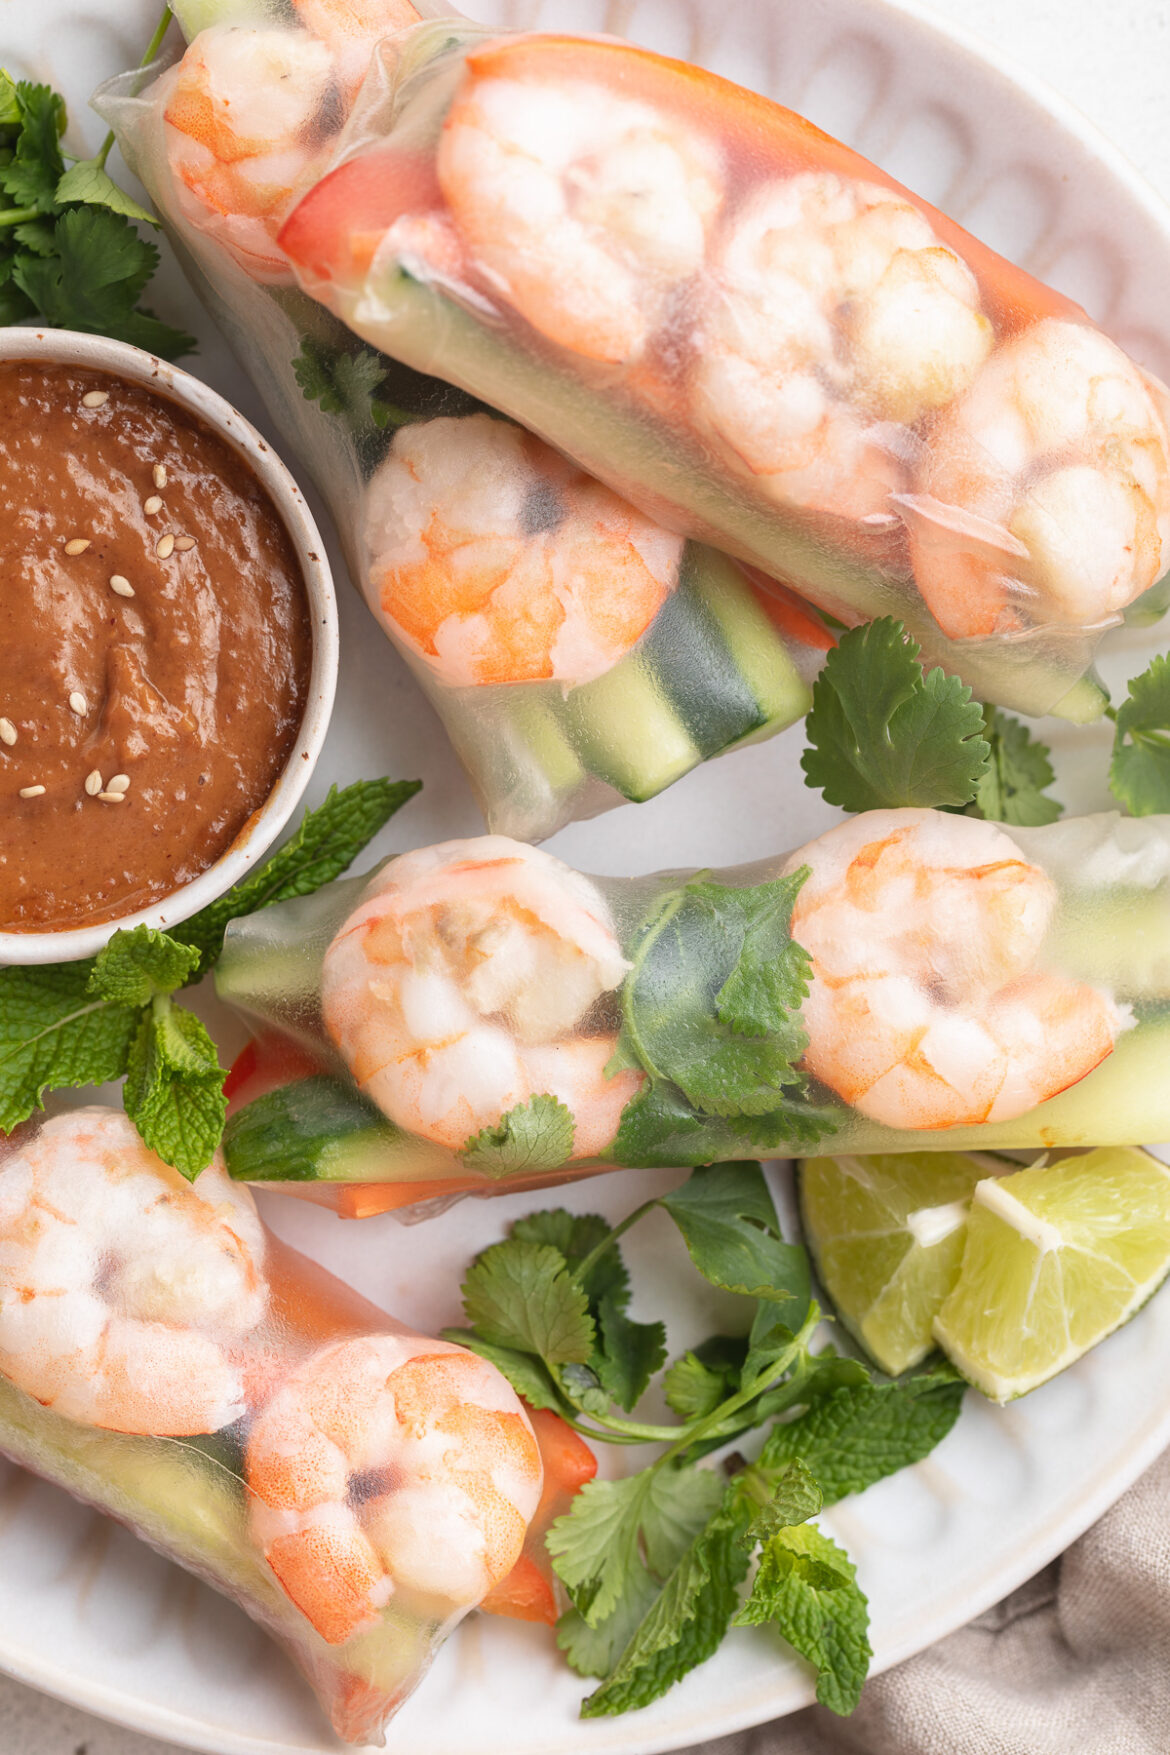
    Fun and delicious shrimp spring rolls with an irresistibly good peanut dipping sauce! These spring rolls are an easy and exciting way to pack veggies into your diet – they’re super healthy and tasty.

    overhead image of shrimp spring rolls on a plate with peanut sauce on the side.

    What You’ll Need to Make Shrimp Spring Rolls with Peanut Sauce

    Spring Rolls Rice Wrappers – These light little rice-based wraps are what hold these spring rolls together! I’ve had lots of luck finding these at my local grocery store, in the ethnic food aisle. However, if you can’t seem to track these thin rice sheets down, I recommend ordering these on Amazon. Leftover rice wrappers? Try making my summer rolls recipe next!

    Cooked Shrimp – Buy pre-cooked shrimp, or quickly boil it yourself before adding to your shrimp spring rolls. The only thing to note here is that you must remove the tails from your shrimp for this recipe! Removing the tails can happen either before or after cooking – it makes no difference.

    Fresh Mint and Cilantro – These Asian-inspired rolls taste extra fresh thanks to a few sprigs of fresh mint and cilantro! I highly recommend adding fresh herbs to your rolls. Though if you don’t like cilantro, or don’t like mint, simply swap it out for a different fresh herb.

    Peanut Butter – Unsweetened creamy peanut butter is the base to our peanut sauce. However, if you don’t like peanut butter, you can use cashew butter instead. Or, for a nut-free version, try tahini!

    Soy Sauce – Found in most Asian recipes, soy sauce adds the perfect savory component to this dish. However, you can certainly swap out the soy sauce for tamari or coconut aminos if that’s more your thing.

    shrimp spring rolls on a plate with peanut sauce and fresh limes on the side.

    Tips on Handling Rice Wrappers

    • Submerge one rice wrapper at a time in the water! If you attempt more than one, they’ll stick together and you won’t be able to separate them.
    • Don’t leave the rice wrapper in the water for too long. Just 5 seconds submerged in a shallow bowl of warm water will do the trick. Leaving the wrapper to soak for too long will make it too soft and difficult to handle.
    • Place each rice wrapper (one at a time) on a damp paper towel or dish cloth before filling and rolling. The wrapper will lift easily off the damp cloth, making rolling a breeze. If you place the rice wrapper on a kitchen counter or cutting board, it’ll stick and be a nightmare to remove!
    shrimp spring rolls being dipped into peanut sauce.

    Adjust This Recipe to Your Dietary Needs

    Make it Vegan: For vegan spring rolls, use extra firm tofu cut into strips in place of the cooked shrimp!

    Make it Gluten-Free: The only non gluten-free ingredient in this recipe is the soy sauce. Therefore, use tamari instead, which tastes just like soy sauce but is 100% gluten-free!

    close-up overhead image of shrimp spring rolls on a plate with peanut sauce.
    No ratings yet

    Shrimp Spring Rolls with Peanut Sauce

    Fun and delicious shrimp spring rolls with an irresistibly good peanut dipping sauce! These spring rolls are an easy and exciting way to pack veggies into your diet – they’re super healthy and tasty.
    Print Pin Rate
    Prep Time: 20 minutes
    Total Time: 20 minutes
    Servings: 4 servings

    Ingredients

    • 12 spring roll rice wrappers
    • 1-2 pounds cooked shrimp, shells and tails removed
    • 3 large carrots, peeled and sliced into matchsticks
    • 2 medium red bell peppers, seeded and sliced into matchsticks
    • 1 English cucumber, sliced into matchsticks
    • 1/2 cup fresh mint leaves
    • 1/2 cup fresh cilantro leaves

    For the peanut sauce:

    • 1/2 cup creamy peanut butter, unsweetened
    • 2 tablespoons soy sauce
    • 2 tablespoons rice vinegar
    • 1 tablespoon toasted sesame oil
    • 1 garlic clove, grated or finely minced
    • 1-inch piece fresh ginger, peeled and grated or finely minced
    • 2-3 tablespoons warm water

    Instructions

    • Fill a shallow bowl with warm water. Submerge one sheet of rice wrapper in water for 5 seconds, then transfer to a clean, damp dish towel.
    • Place 2-3 shrimp, a small handful of vegetables, and a few fresh mint and cilantro leaves in the center of the wrapper. Then, fold the end closest to you over the filling, tuck sides in and towards the center, and finish rolling to create a sealed spring roll. Repeat this process with remaining rice wrappers.
    • Make the sauce by adding all ingredients to a bowl and whisking to combine.
    • Serve shrimp spring rolls with peanut dipping sauce on the side.

    Nutrition

    Calories: 300kcal

    The viral Jennifer Aniston salad is super easy to make! Loaded with fresh ingredients – cucumber, red onion, parsley, mint, and feta – all tossed in simple lemon dressing. It’s not just healthy, but totally delicious too!

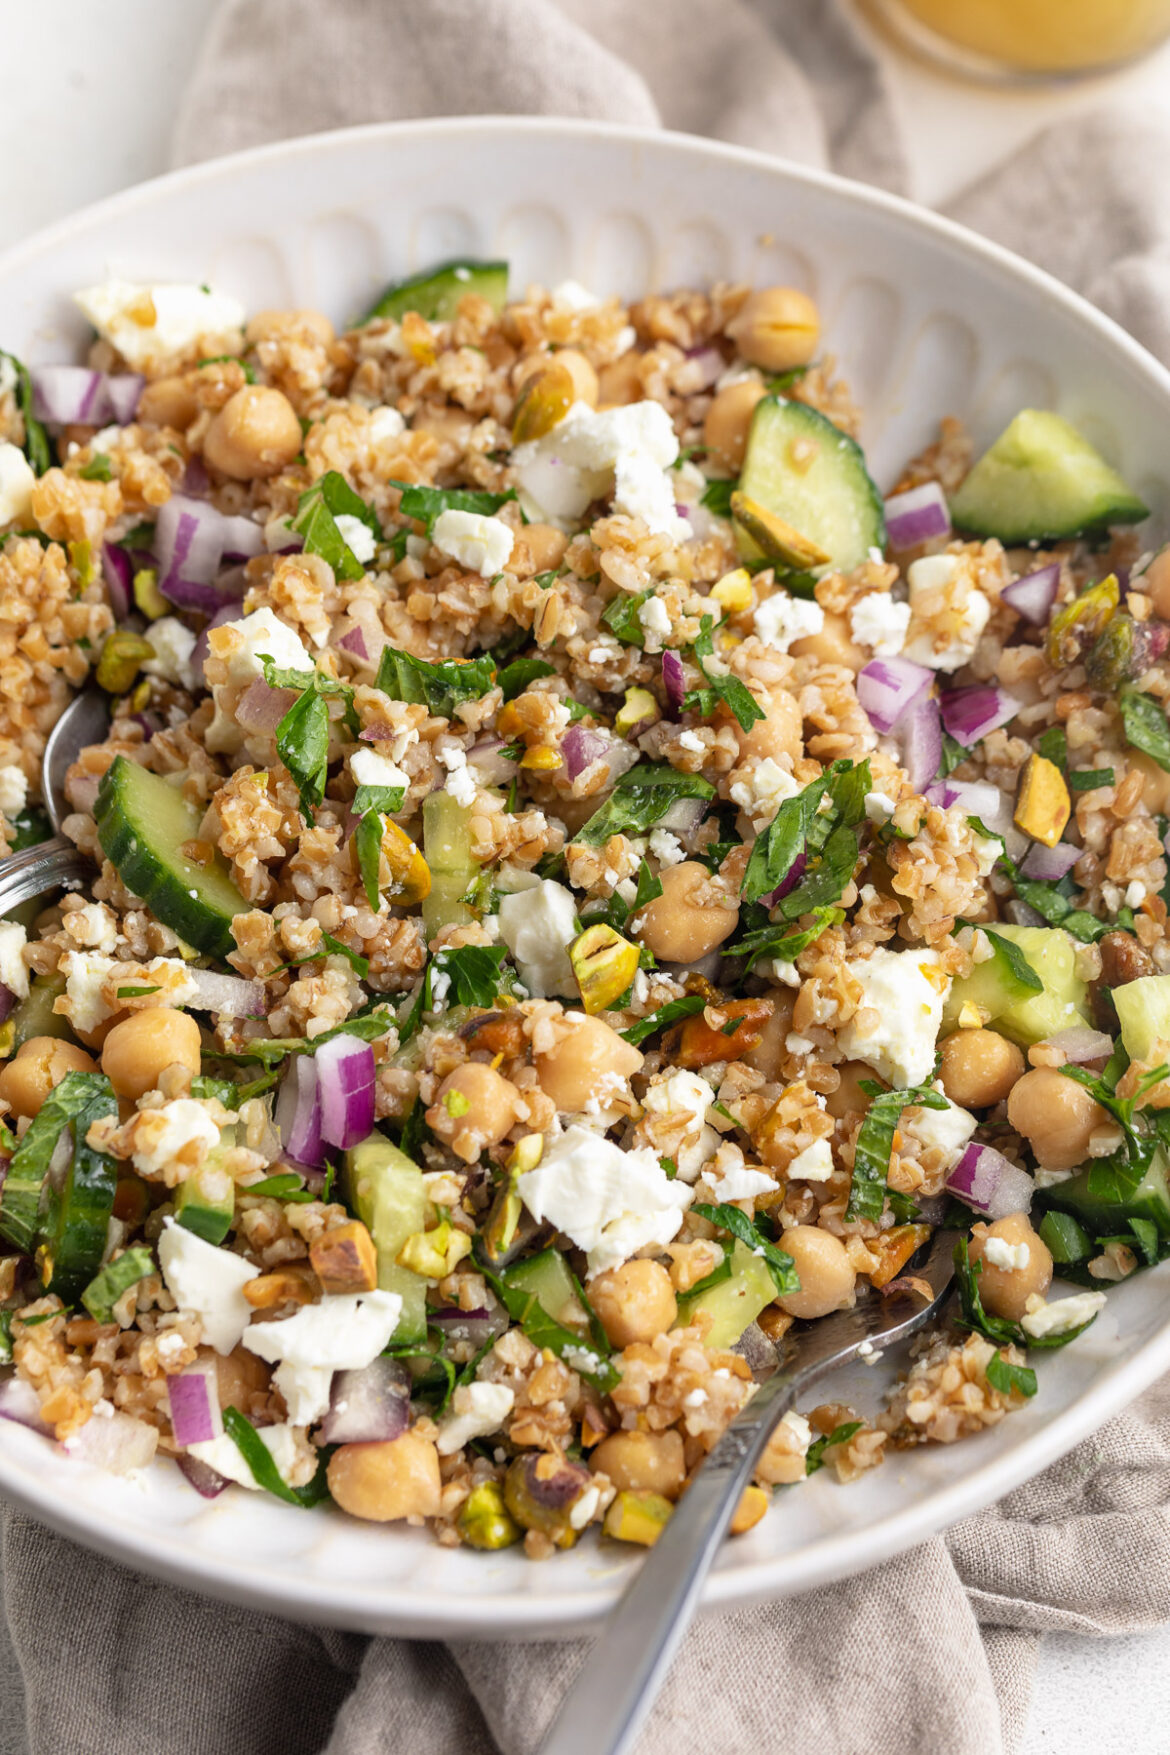
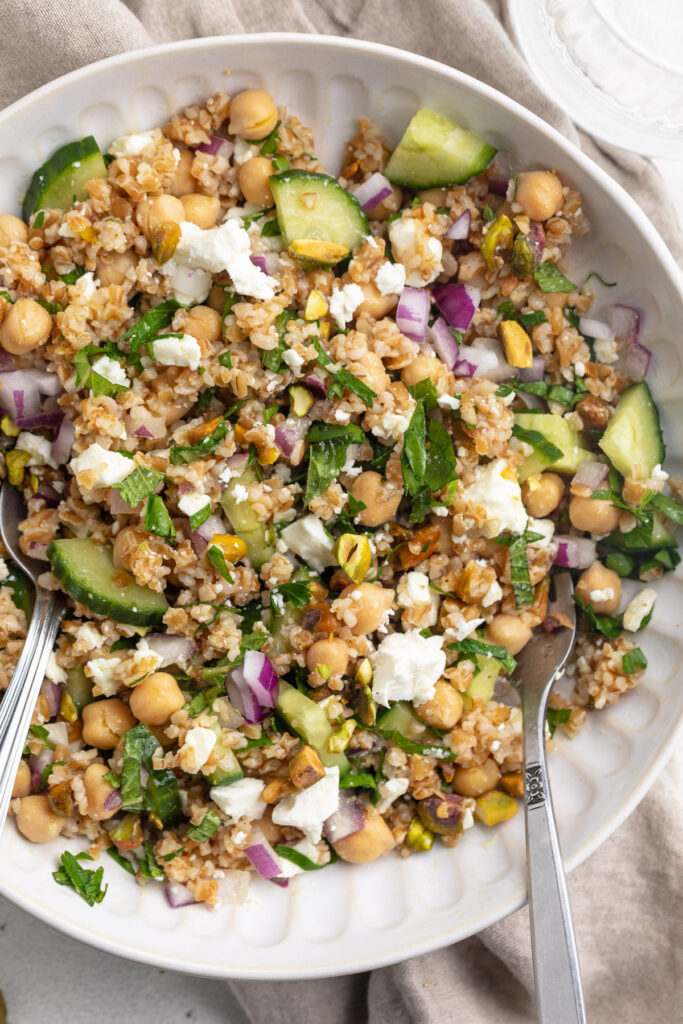
    overhead image of Jennifer Aniston salad with pistachios and dressing on the side.

    Jennifer Aniston recently described her perfect salad as, “bulgur wheat, cucumbers, parsley, mint, red onion, garbanzo beans, feta cheese, and pistachios.” And OMG the internet went CRAZY for it! Recipes similar to the salad the Friends actress described quickly popped up all over TikTok. The Jennifer Aniston salad went viral. So, as a foodie and fellow salad-lover, I had to give it a try for myself.

    My version of the salad contains everything Jennifer described – bulgur wheat, cucumbers, parsley, mint, red onion, garbanzo beans, feta cheese, and pistachios – my only addition is a simple lemon, olive oil, salt, and black pepper dressing. Since Jen didn’t offer up a dressing herself, this is what I envisioned a salad like this being tossed in. And let me tell you, it TOTALLY lived up to the hype!

    Dressing being poured over the Jennifer Aniston salad.

    What You’ll Need to Make the Jennifer Aniston Salad

    Bulgur Wheat or Quinoa – In keeping this super authentic to Jen’s recipe, I used bulgur wheat in my salad. However, bulgur wheat can be hard to come by, so I also offer up the option to use quinoa instead. Both are hearty, protein-rich, super nutritious grains. Never had bulgur wheat? It’s most similar to farro or barley, but smaller grain. Bulgur wheat has a nice nutty flavor, and will keep you full without feeling weighed down.

    Garbanzo Beans/Chickpeas – What’s the difference between garbanzo beans and chickpeas? Literally nothing! They’re two names for the exact same thing. Jennifer Aniston called them “garbanzo beans,” but I call them “chickpeas,” so that’s what we’re sticking with. Chickpeas are an excellent source of protein, especially in this salad recipe!

    Feta Cheese – Greek brined white cheese, made from sheep’s milk. Feta adds the perfect salty bite to this salad! And because it’s made with sheep’s milk, it has a lower lactose content. Meaning, those whoe are lactose intolerant (aka ME!), may have an easier time tolerating feta cheese. I, personally, can enjoy it in small amounts without any issue. However, if you can’t tolerate feta, or simply need a dairy-free option, check out my “make it vegan” section below!

    Parsley and Mint – Don’t skimp on the fresh herbs! Fresh parsley and mint are my favorite parts of this salad. They add a super fresh and vibrant component to this recipe. Therefore, don’t leave ’em out!

    close-up overhead image of Jennifer Aniston salad.

    Adjust This Recipe to Your Dietary Needs

    Make it Gluten-Free: Yes, bulgur wheat contains gluten. Therefore, opt for quinoa instead of bulgur wheat to make this Jennifer Aniston salad entirely gluten-free.

    Make it Vegan/Dairy-Free: For a vegan/dairy-free salad, either leave out the feta cheese, or replace it with your favorite vegan feta. I love the Violife Vegan Feta, it tastes and crumbles just like the real thing!

    close-up image of jennifer aniston salad in a serving bowl
    4.38 from 24 votes

    Jennifer Aniston Salad

    The viral Jennifer Aniston salad is super easy to make! Loaded with fresh ingredients – cucumber, red onion, parsley, mint, and feta – all tossed in simple lemon dressing. It’s not just healthy, but totally delicious too!
    Print Pin Rate
    Prep Time: 10 minutes
    Cook Time: 15 minutes
    Total Time: 25 minutes
    Servings: 4 servings

    Ingredients

    For the bulgur wheat/quinoa:

    • 1 cup bulgur wheat or quinoa, dry
    • 2 cups water or vegetable broth

    For the salad dressing:

    • 1/2 cup olive oil
    • 1/2 cup lemon juice
    • 1/2 teaspoon salt
    • 1/4 teaspoon black pepper

    For the salad:

    • 1 (15 ounce) can chickpeas, drained and rinsed
    • 1 cup English cucumber, chopped
    • 1 cup feta cheese, crumbled
    • 1/2 red onion, diced
    • 1/2 cup roasted salted pistachios, roughly chopped
    • 1/2 cup fresh parsley, chopped
    • 1/4 cup fresh mint, chopped

    Instructions

    • Add either bulgur wheat or quinoa to a small saucepan, along with water or vegetable broth. Bring to a simmer, then cover and cook over low heat for 12-15 minutes. Once bulgur wheat or quinoa has absorbed all liquid, remove from heat and let stand covered for an additional 5 minutes. Then, remove lid and fluff with a fork.
    • While the bulgur wheat or quinoa cooks, make the salad dressing by adding all ingredients to a bowl and whisking to combine.
    • Add cooked bulgur wheat or quinoa to a large bowl, along with the remaining salad ingredients. Pour dressing over salad and toss, then either serve immediately or let chill in the fridge for a few hours before serving.

    Notes

  • Leaving the salad to chill for a few hours before eating will increase the flavor!
  • Leftover salad will stay fresh in an airtight container in the fridge for up to 5 days. No need to store the dressing separately.
  • Nutrition

    Calories: 300kcal

    A fresh, fully loaded taco salad complete with a creamy cilantro-lime dressing. Super quick and easy to make, this healthy lunch or dinner will become a fast-favorite!

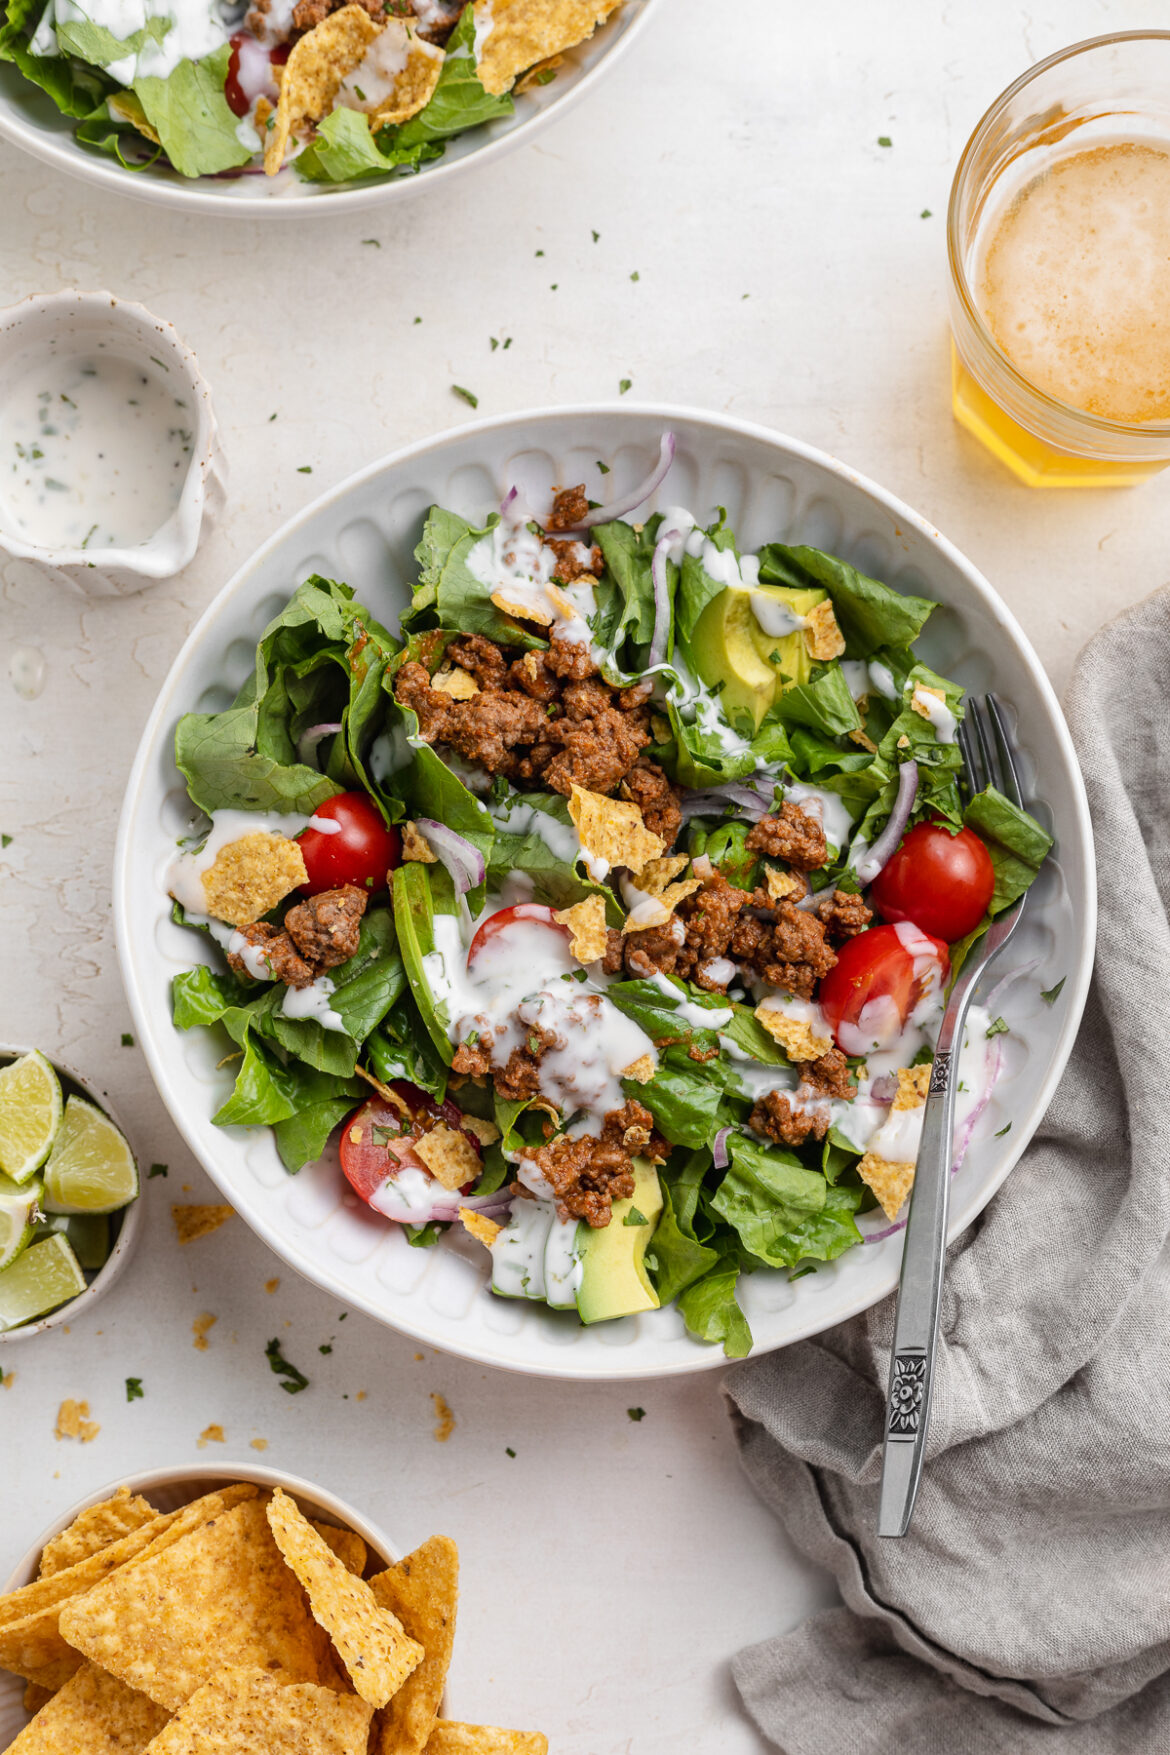
    creamy cilantro lime dressing being poured over a taco salad.

    What You’ll Need to Make Taco Salad

    Ground Beef – Or really any ground meat will do the trick. I’ve made this recipe with ground turkey in place of the beef, and it was just as tasty! For a vegan/vegetarian taco salad, refer to the “make it vegan” section below.

    Taco Seasoning – A packet of taco seasoning will make your life a million times easier! It’s got all that taco flavor, in one convenient packet. It also adds some serious delicious flavor to the seasoned ground beef. I use and love the Siete Mild Taco Seasoning, it’s a total crowd-pleaser!

    Lettuce – I used romaine lettuce, but really any lettuce will work! I love a good, crunchy lettuce for added texture, such as romaine, iceberg, green leaf, or butter lettuce.

    Tortilla Chips – While optional, a small handful of crushed tortilla chips are what make this salad taste JUST like a taco. I recommend gluten-free Siete Tortilla Chips to keep it extra light and healthy.

    Sour Cream – For a dairy-free version, use your favorite dairy-free sour cream to make the cilantro-lime dressing. I used this Forager Dairy-Free Sour Cream and it was delicious! But if not dairy-free, go ahead and use a regular sour cream instead. Or, if you’re in a pinch, plain unsweetened greek yogurt would also work in its place.

    Cilantro – Tons of cilantro bring out the fresh flavors in this easy, healthy salad! Feel free to add more or less cilantro based on your preferences. Or, if not a fan of cilantro, you can totally leave it out of this recipe altogether.

    overhead close-up image of a taco salad with cilantro-lime dressing on top.

    Adjust This Recipe to Your Dietary Needs

    Make it Vegan/Vegetarian: For a healthy vegan salad recipe, use cooked lentils, crumbled tofu, or chopped mushrooms in place of the ground beef. Also, take the dairy-free option below for a vegan cilantro-lime dressing.

    Make it Gluten-Free: Use gluten-free tortilla chips in your salad, most are already gluten-free, but it’s always good to double check!

    Make it Dairy-Free: Replace the sour cream in the dressing with your favorite non-dairy sour cream. I recommend Forager or Kite Hill dairy-free sour cream.

    two bowls of taco salad with cialntro-lime dressing on the side.
    5 from 1 vote

    Easy Healthy Taco Salad with Creamy Cilantro-Lime Dressing

    A fresh, fully loaded taco salad complete with a creamy cilantro-lime dressing. Super quick and easy to make, this healthy lunch or dinner will become a fast-favorite!
    Print Pin Rate
    Prep Time: 10 minutes
    Cook Time: 15 minutes
    Total Time: 25 minutes
    Servings: 4 servings

    Ingredients

    • 1 tablespoon avocado oil
    • 1 pound ground beef
    • pinch of salt
    • 1 packet taco seasoning
    • 1/4 cup water
    • 1 head romaine lettuce, chopped
    • 1 cup grape tomatoes, halved
    • 2 avocados, sliced
    • 1/2 red onion, chopped
    • 1/4 cup fresh cilantro, roughly chopped

    For the creamy cilantro-lime dressing:

    • 1/2 cup sour cream
    • 2 tablespoons lime juice
    • 1 tablespoon fresh cilantro, finely chopped
    • 1/2 teaspoon salt
    • 1/4 teaspoon black pepper
    • pinch of lime zest, optional but recommended

    Instructions

    • Heat avocado oil in a large skillet over medium heat, then add in ground beef and a big pinch of salt.
    • Cook until beef is no longer pink, breaking up the meat as it cooks. Then, add in taco seasoning and water, reduce heat to low and simmer until sauce has thickened.
    • While beef cooks, make the cilantro-lime dressing by adding all ingredients to a bowl and whisking together until smooth.
    • Assemble salad with all ingredients, then top with seasoned ground beef and creamy cilantro-lime dressing.

    Nutrition

    Calories: 300kcal

    Quick, easy, and full of flavor – air fryer salmon patties with a creamy dill sauce! The perfect healthy, gluten-free, and dairy-free dinner recipe. Comes together in a few simple steps, and in just 15 minutes!

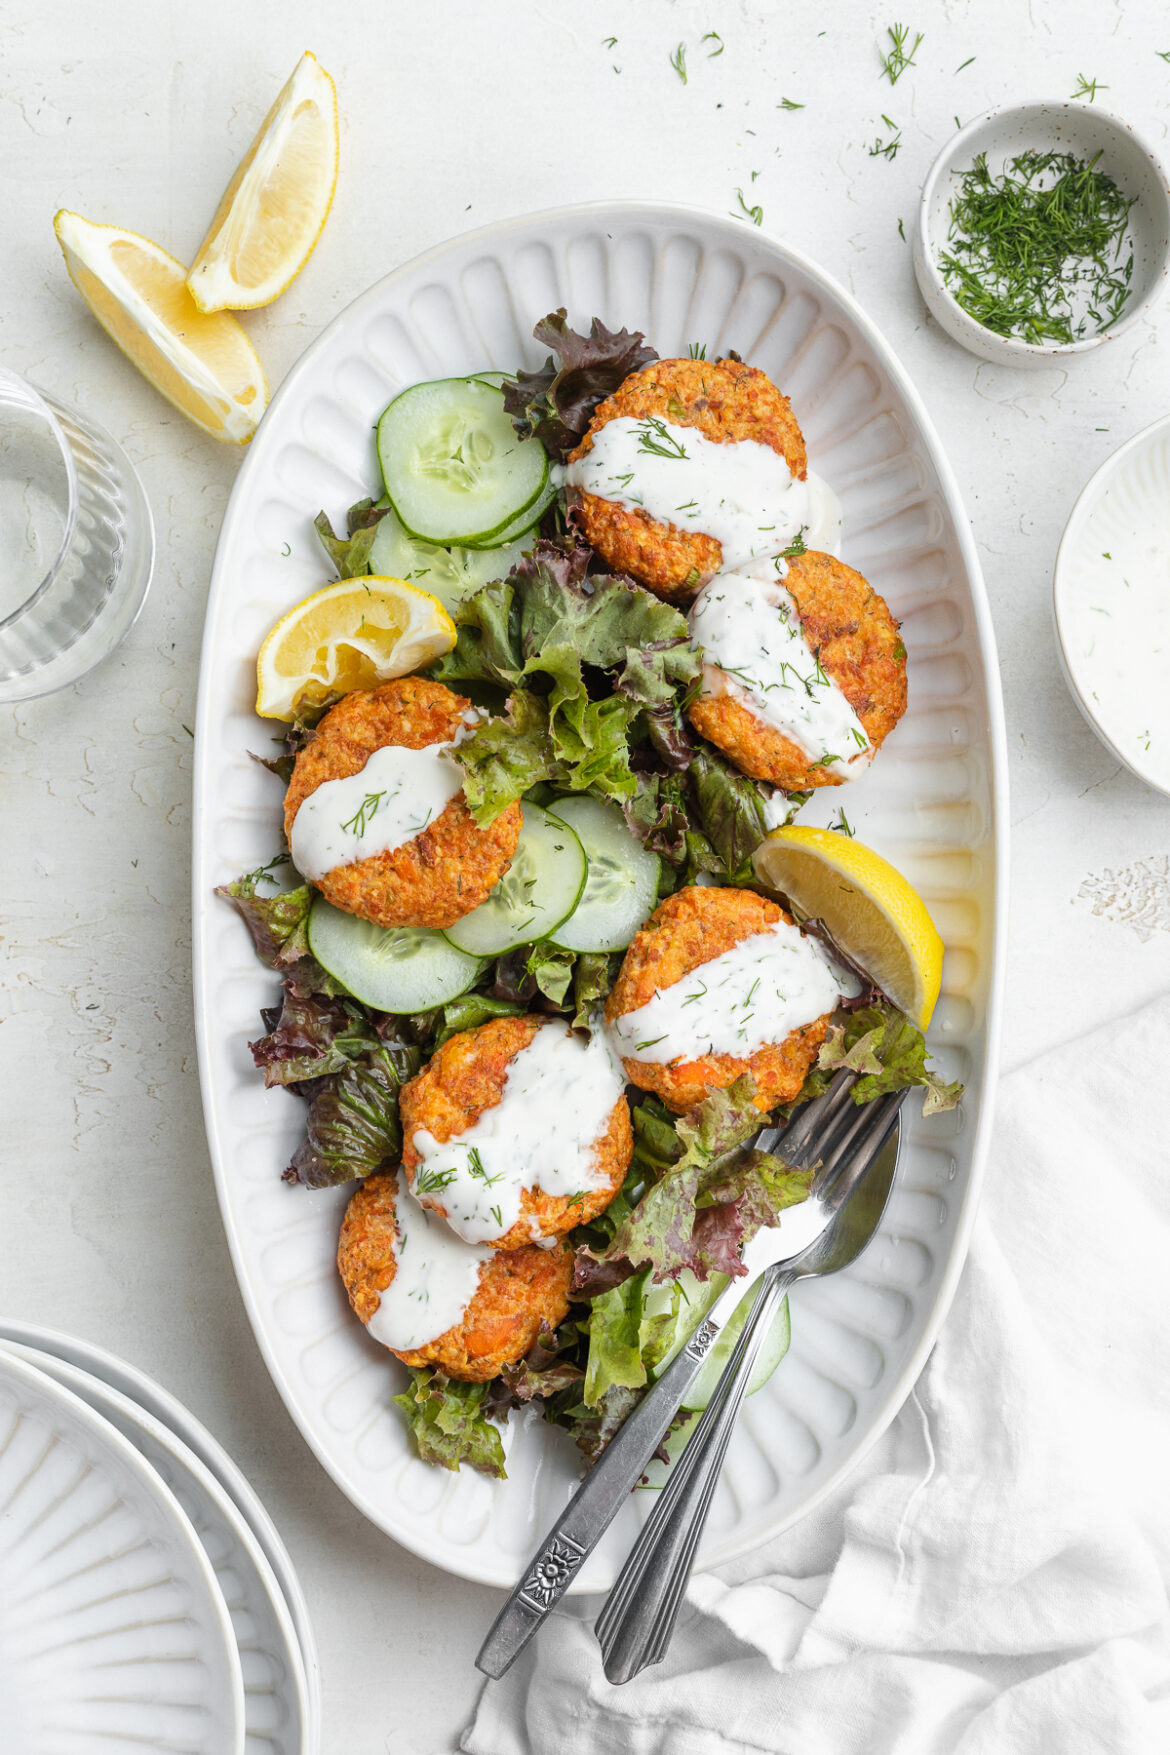
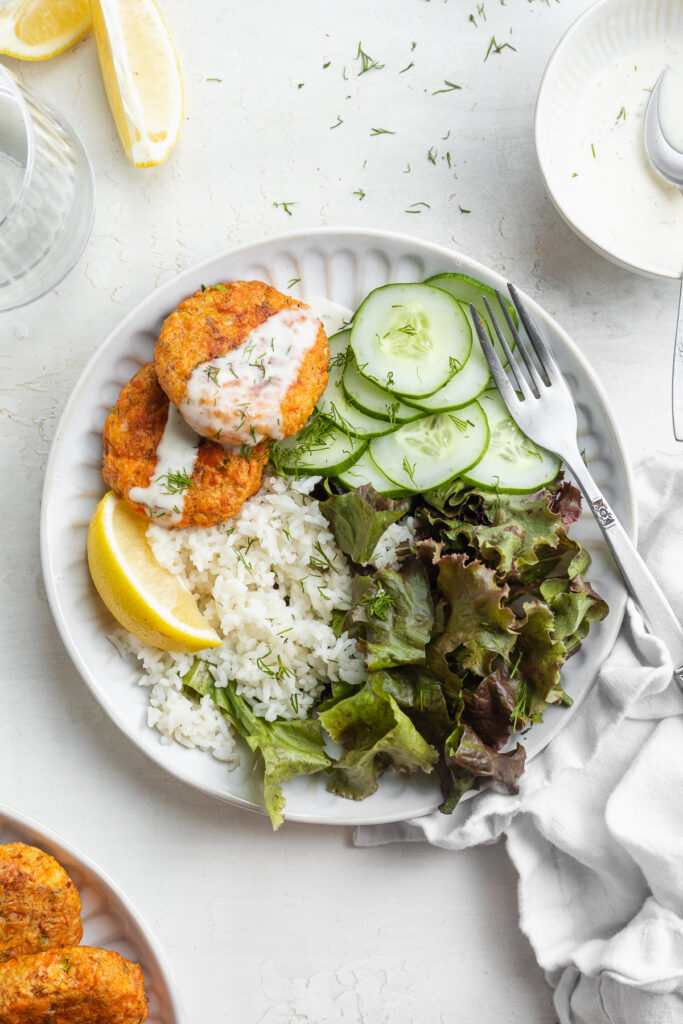
    Overhead image of air fryer salmon patties on a plate over rice and lettuce with creamy dill sauce on top.

    What You’ll Need to Make Air Fryer Salmon Patties

    Canned Salmon – I used two cans of wild sockeye salmon in my patties, but any canned salmon will work. Canned salmon is an easy addition to this already super easy meal. It’s also a great source of lean protein, vitamin B12, iron, potassium, and vitamin D. However, these air fryer salmon patties are so delicious, no one will ever guess how healthy they are!

    Breadcrumbs – I used gluten-free panko breadcrumbs, but any unflavored/unseasoned breadcrumbs will taste great! Panko breadcrumbs are lighter and will yield a crispier patty. Or, if you don’t have breadcrumbs, you can use 1/3 cup of almond flour in its place.

    Mayonnaise – This creamy condiment comes in handy in both the salmon patties and the creamy dill sauce. If not a mayo fan, you can use unsweetened greek yogurt instead!

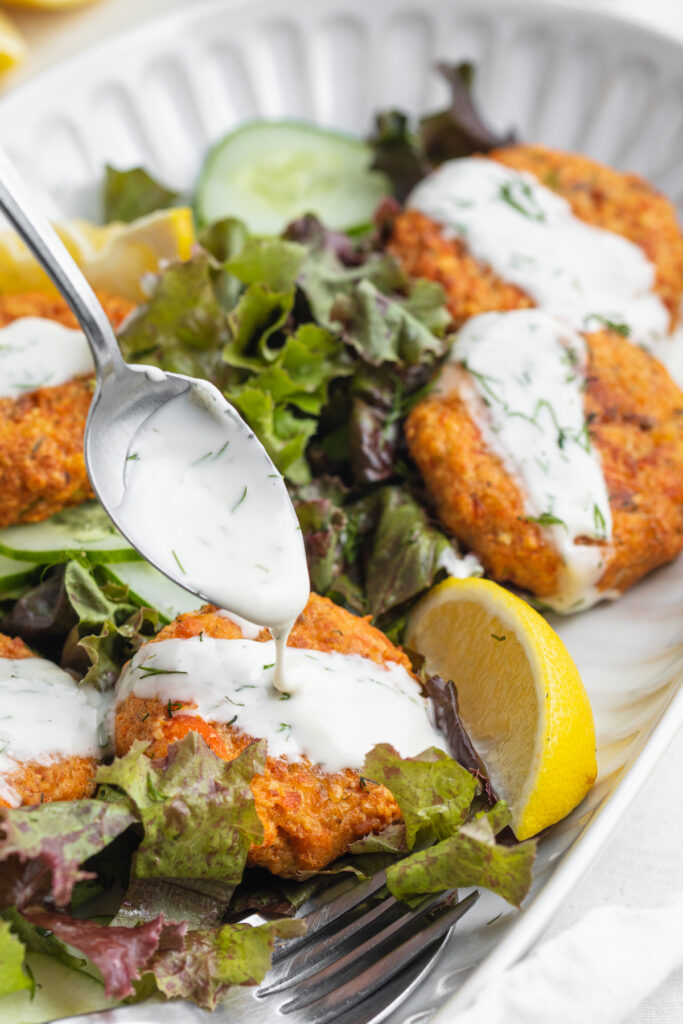
    creamy dill sauce being poured over air fryer salmon patties.

    Tips and Tricks

    • For an even crisper salmon patty, coat the outside in additional breadcrumbs. Then, place in the air fryer and coat with a drizzle of oil before cooking. The end result will be golden brown, soft on the inside, and crispy on the outside air fryer salmon patties!
    • Enjoy this recipe however you’d like. I served mine over lettuce and rice, with a drizzle of that creamy dill sauce. Though these would also taste amazing as a salmon burger between two buns!
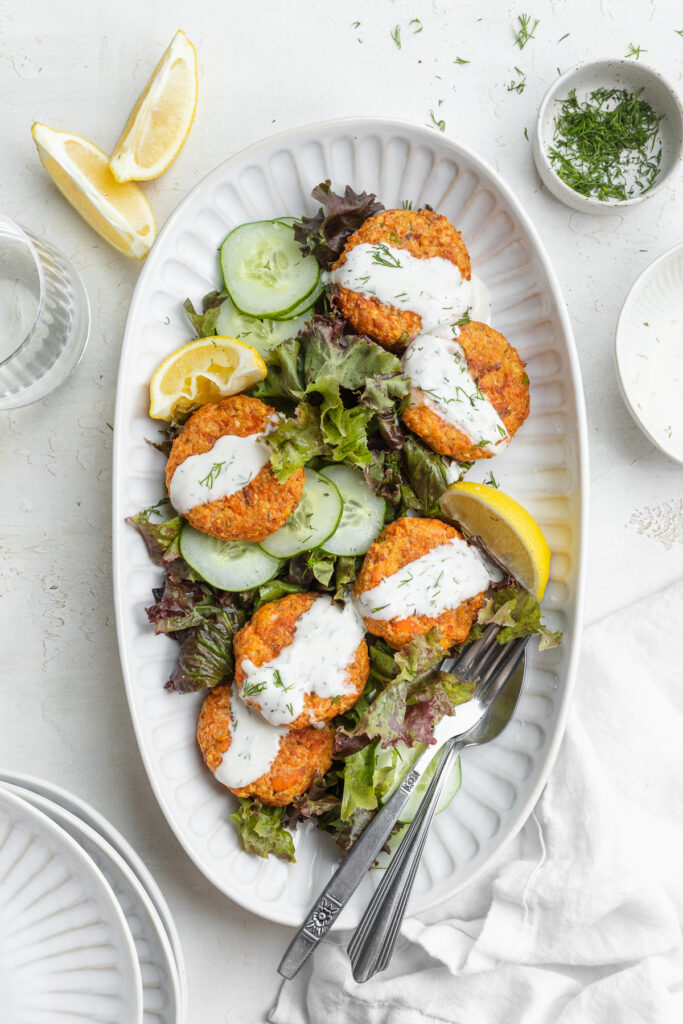
    overhead image of air fryer salmon patties on a platter.

    Adjust This Recipe To Your Dietary Needs

    Make it Egg-Free: While I haven’t tested this option myself, you may be able to replace the eggs in this recipe with flax eggs. Or, try this Bob’s Red Mill Egg Replacer as a substitute. Also, be sure to use an egg-free mayo!

    Make it Gluten-Free: For a gluten-free dinner recipe, use gluten-free breadcrumbs like I did! Then, serve these air fryer salmon patties over a bed of your favorite veggies and rice.

    close-up image of air fryer salmon patties on a plate with rice and cucumbers.
    No ratings yet

    Air Fryer Salmon Patties with Creamy Dill Sauce

    Quick, easy, and full of flavor – air fryer salmon patties with a creamy dill sauce! The perfect healthy, gluten-free, and dairy-free dinner recipe. Comes together in a few simple steps, and in just 15 minutes!
    Print Pin Rate
    Prep Time: 5 minutes
    Cook Time: 8 minutes
    Total Time: 13 minutes
    Servings: 8 salmon patties

    Ingredients

    • 2 (7.5 ounce) cans canned salmon, drained
    • 2 eggs
    • 1/2 cup breadcrumbs, I used gluten-free panko breadcrumbs
    • 2 tablespoons mayonnaise
    • 1 green onion, finely chopped
    • 1 tablespoon fresh dill, chopped
    • 1/2 teaspoon paprika
    • 1/4 teaspoon salt

    For the dill sauce:

    • 1/2 cup mayonnaise
    • 1-2 tablespoons lemon juice
    • 3 tablespoons fresh dill, chopped

    Instructions

    • Mix together all salmon patty ingredients in a large bowl until fully combined.
    • Scoop ¼ cup of the mixture into the palms of your hands and gently form a 1-inch thick patty. Repeat this process with remaining mixture, should form 8 salmon patties.
    • Lightly grease air fryer tray or basket, then place salmon patties into the air fryer and cook at 390° Fahrenheit for 8 minutes, pausing to flip halfway through.
    • Make the dill sauce by adding all ingredients to a small bowl and whisking until smooth, then spoon over salmon patties.

    Nutrition

    Calories: 300kcal