
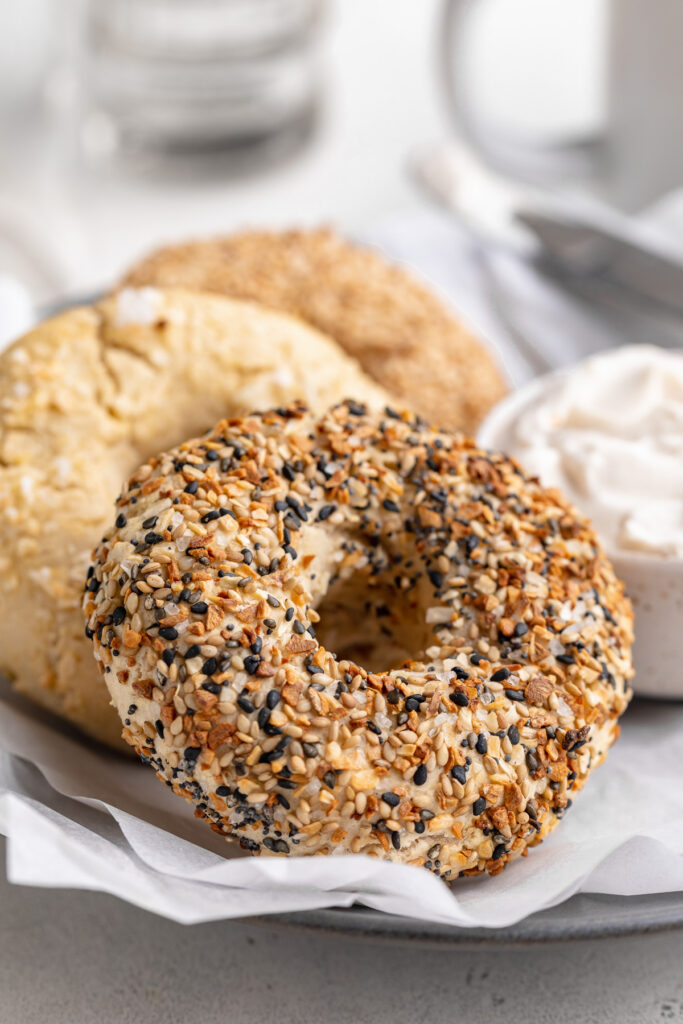
These 3-ingredient gluten-free bagels are truly magic! No yeast, kneading, rising, or boiling in water required. Just three simple ingredients, and these bagels are ready to eat in 30 minutes!
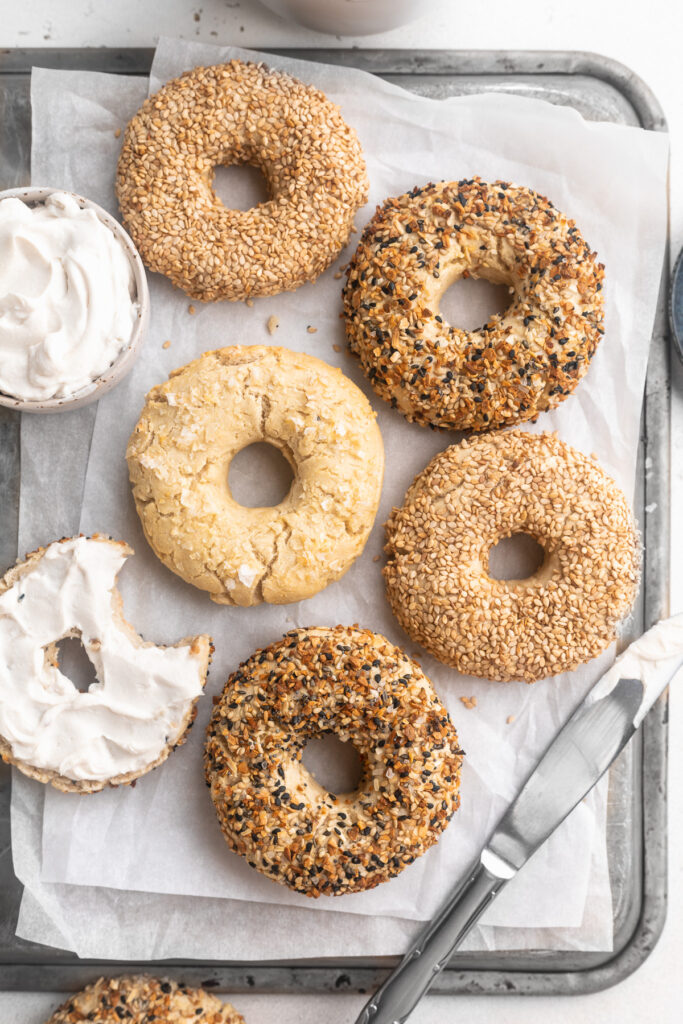
I like to think I know a thing or two about bagels. Not only were they my favorite food growing up, but I currently live in Brooklyn – home of the BEST BAGELS in the WORLD! So ya, I’ve had some really good bagels. A bagel should be toasty on the outside, fluffy on the inside, easy to slice through, and ready for toasting – and these gluten-free bagels are just that.
Now I’m sure you’re wondering – Sam, why bother making your own bagels if you can just buy literally the world’s best bagels from that place down the street. Well, I’ll tell you exactly why – because I can’t find a single good gluten-free bagel! They’re near impossible to track down. And the ones I do find are either too dense or extremely overpriced (or both). So I quickly realized if I wanted a gluten-free bagel, I’d just have to make it myself. And that, friends, is how the magic 3-ingredient gluten-free bagel was born!

What You’ll Need to Make 3-Ingredient Gluten-Free Bagels
Gluten-Free All Purpose Flour – Your gluten-free flour must contain xanthan gum! If it doesn’t, add 1/2 teaspoon of xanthan gum to this recipe. Gluten-free all purpose flours I use and recommend are Bob’s Red Mill Gluten-Free Baking Flour and King Arthur Gluten-Free Flour, both of which contain xanthan gum. I used the King Arthur flour in these bagels and they turned out perfect!
Baking Powder – We replace the yeast found in traditional bagel recipes with baking powder. Baking powder makes it so we don’t have to wait for our bagel dough to rise before baking. Instead, we can simply shape, then bake these bagels right away – super easy!
Greek Yogurt – Any plain and unsweetened Greek yogurt will work in this gluten-free bagels recipe! I even used Kite Hill’s non-dairy Greek yogurt to make my bagels dairy-free.
Adjust This Recipe to Your Dietary Needs
Make it Vegan: To make vegan and gluten-free bagels, use a vegan greek yogurt and leave off the egg wash.

Magic 3-Ingredient Gluten-Free Bagels
Ingredients
- 2 cups gluten-free all purpose flour, see Noted
- 2 teaspoons baking powder
- pinch of salt
- 1-2 cups plain unsweetened Greek yogurt, dairy-free if necessary
For topping:
- 1 large egg
- 1 teaspoon water
- pinch of salt
- everything bagel seasoning, sesame seeds, poppy seeds, etc.
Instructions
- Preheat oven to 400° Fahrenheit and line a baking sheet with parchment paper.
- In a large bowl, whisk together the gluten-free all purpose flour, baking powder, and salt. Then, add in 1 cup of Greek yogurt and stir until a shaggy dough forms.
- Using your hands, mix and form the dough into a smooth ball. If the dough seems too dry and won’t come together in a ball, add in more Greek yogurt – you may have to use an additional 1 cup of yogurt to reach the desired consistency.
- Divide dough into 6 equal parts and shape each part into a ball. Use your thumbs to make a hole in the center of each ball, then gently pull to form a ring resembling a bagel.
- Transfer bagels to the prepared baking sheet. Make the egg wash by whisking together the egg, water, and salt in a small bowl. Brush each bagel with egg wash and top with whatever toppings you’d like (or leave plain).
- Bake bagels for 20-22 minutes, rotating baking sheet halfway through baking, until bagels are uniformly golden brown. Let cool slightly before slicing, topping, and eating.


 Caramel Brulée Latte")


