At nearly 8 months pregnant, there are unfortunately no cocktails in my near future. But that won’t stop me from enjoying the occasional mocktail! My go-to since my last pregnancy was my sunset spritz mocktail, but recently I’ve reallyyyyy been craving a spicy margarita. Spicy margs are my absolute fave in the summer and with summer right around the corner, this craving made total sense. So I didn’t hesitate when it came to finding a way to enjoy my seasonal fave, without the alcohol. This spicy margarita mocktail in perfectly spicy, light, and refreshing – it’s basically everything I love about a spicy marg just without the alcohol (which also means without the hangover 😉)!
Why You’ll Love This Spicy Margarita Mocktail
- Non-Alcoholic: All the flavor of a classic margarita without the alcohol.
- Light & Refreshing: Perfect for hot summer days or as a palate cleanser.
- Simple Ingredients: Made with just 5 easy-to-find ingredients.
- Customizable Heat: Adjust the spice level to your preference.
- Versatile: Great for parties, brunches, or a relaxing evening.
Frequently Asked Questions
Can I add tequila?
Absolutely. To make this a traditional spicy margarita, add 1½ ounces of your preferred tequila before topping with club soda.
How do I make this less spicy or not spicy at all?
For a milder version, use fewer jalapeño slices or remove the seeds before muddling. To eliminate the spice entirely, omit the jalapeño.
What can I use instead of agave syrup?
Honey or simple syrup are great alternatives to agave syrup! Adjust the quantity to taste.

Sam’s Mocktail Tips
- Chill Your Glass: Place your glass in the freezer for a few minutes before preparing the drink for an extra refreshing experience.
- Experiment with Citrus: Try adding a splash of grapefruit juice for a different twist.
- Make Ahead: Prepare the muddled mixture in advance and store it in the refrigerator. Add ice and club soda when ready to serve.
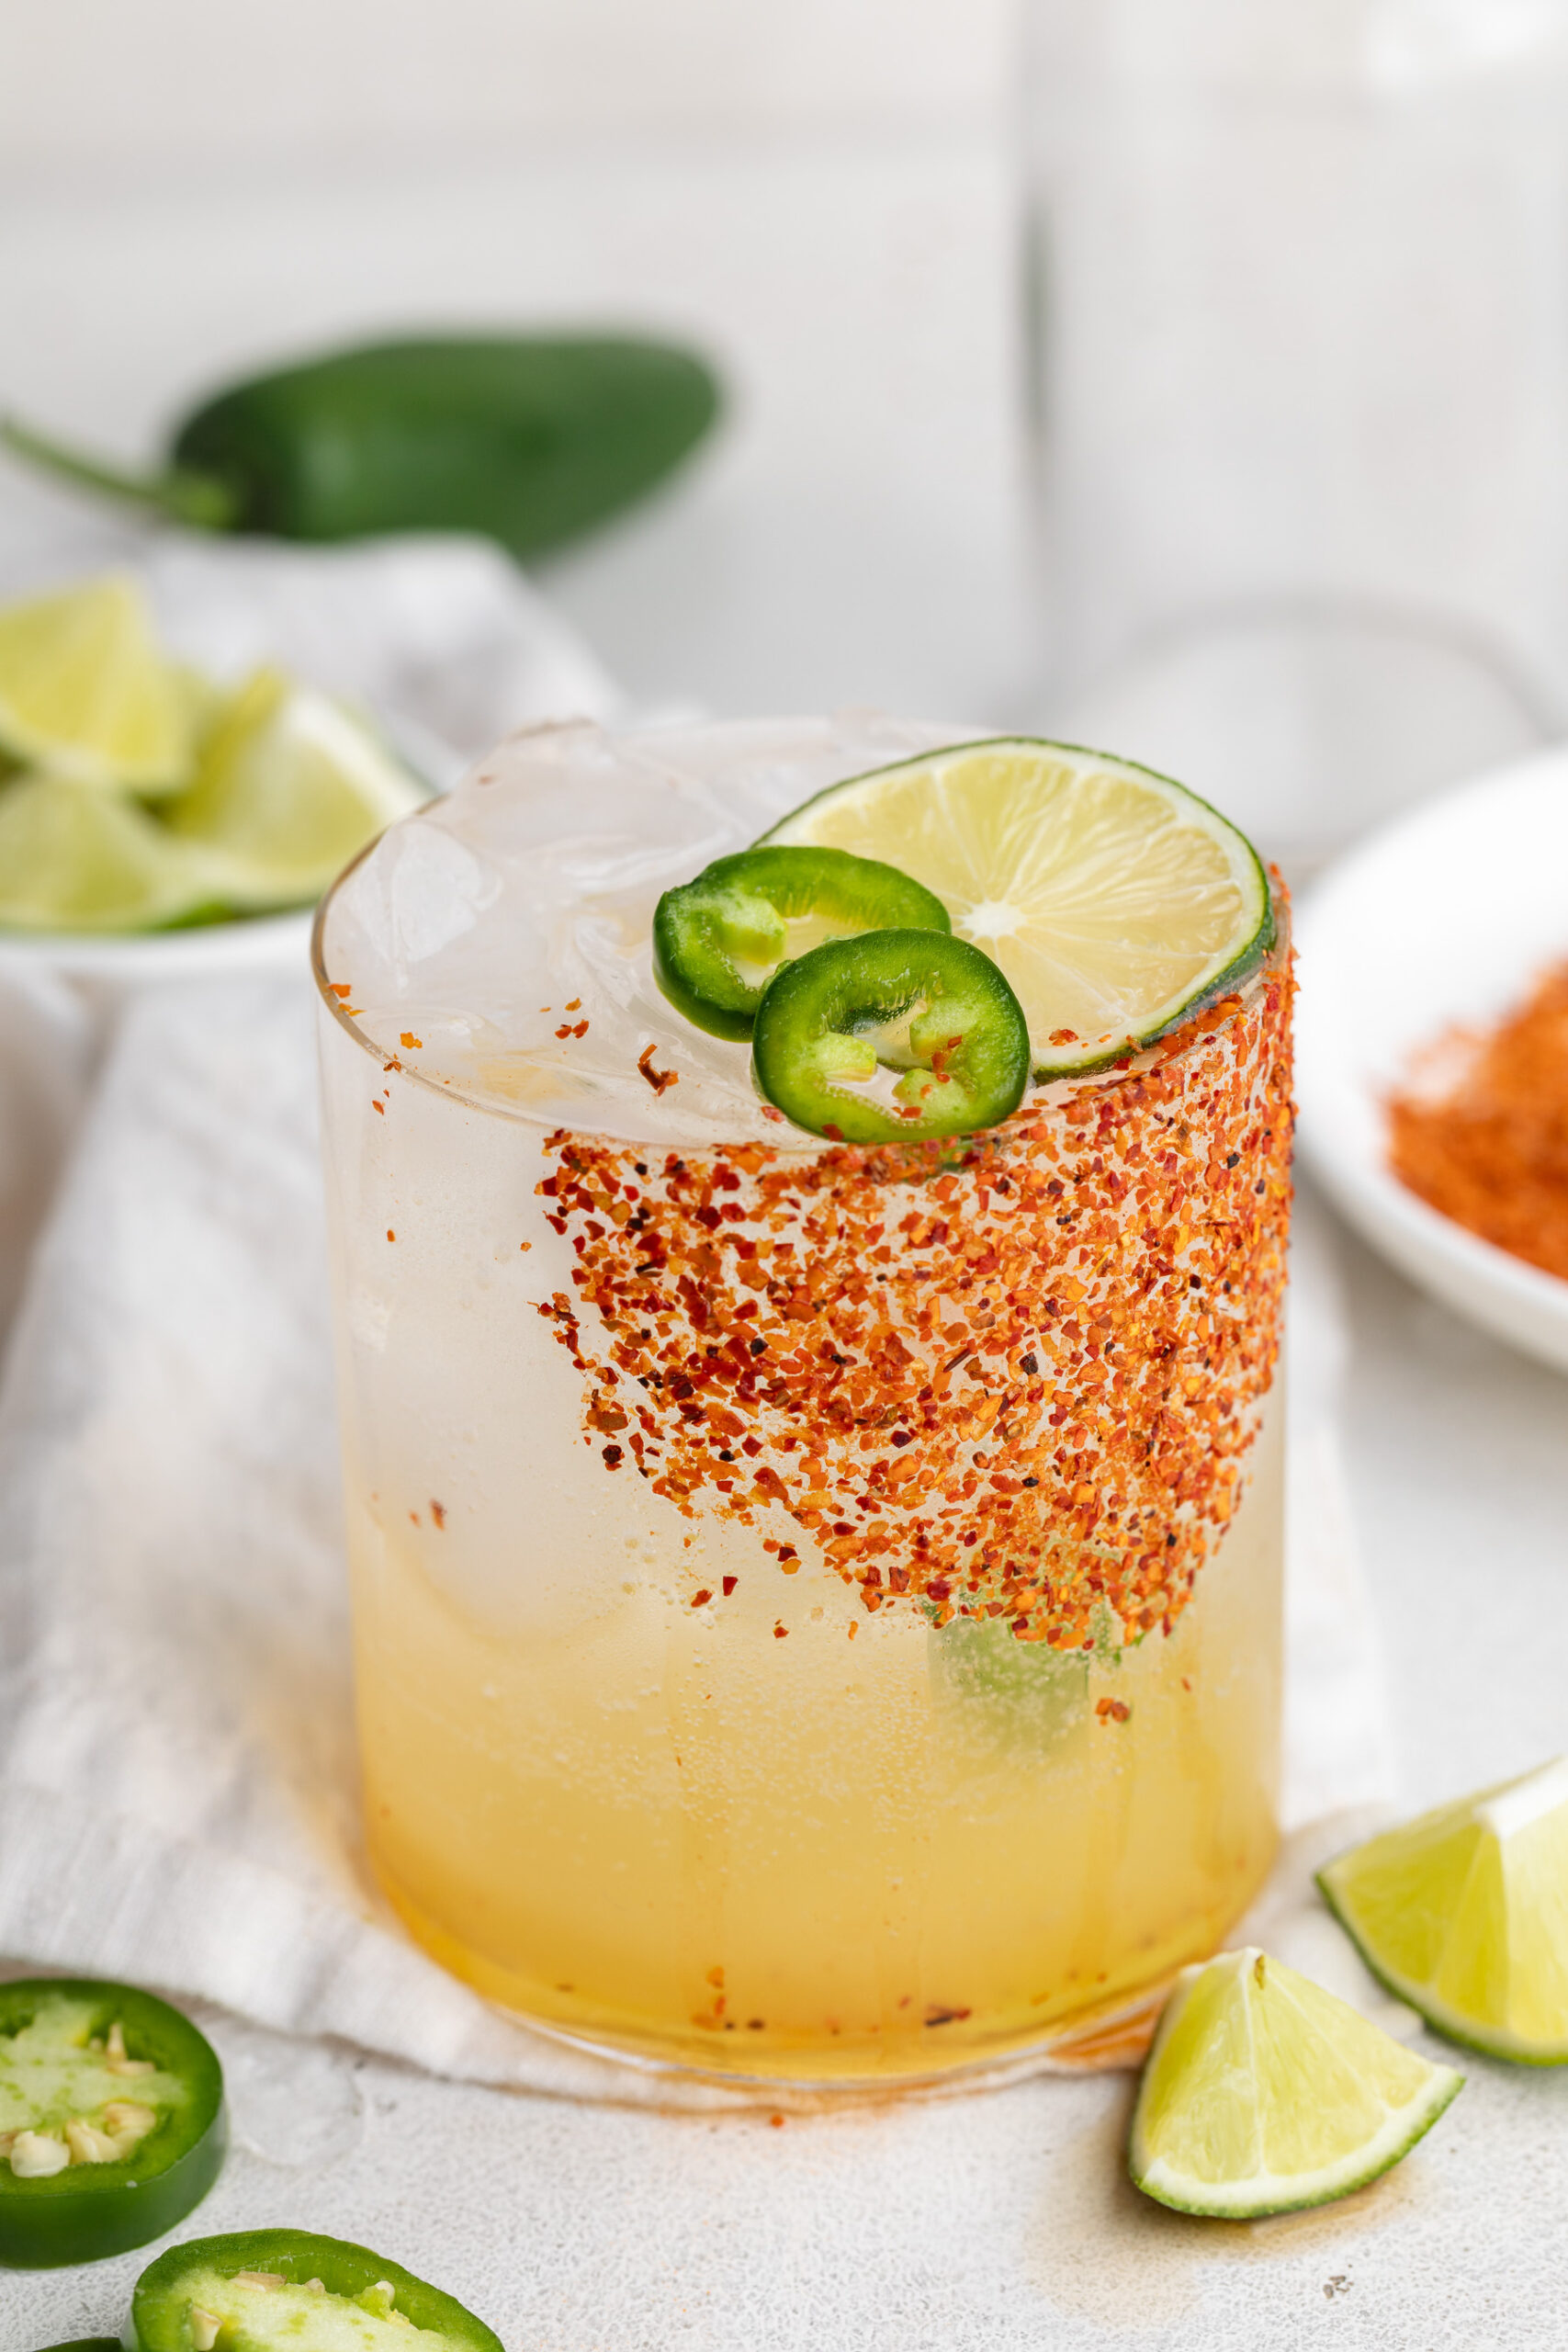
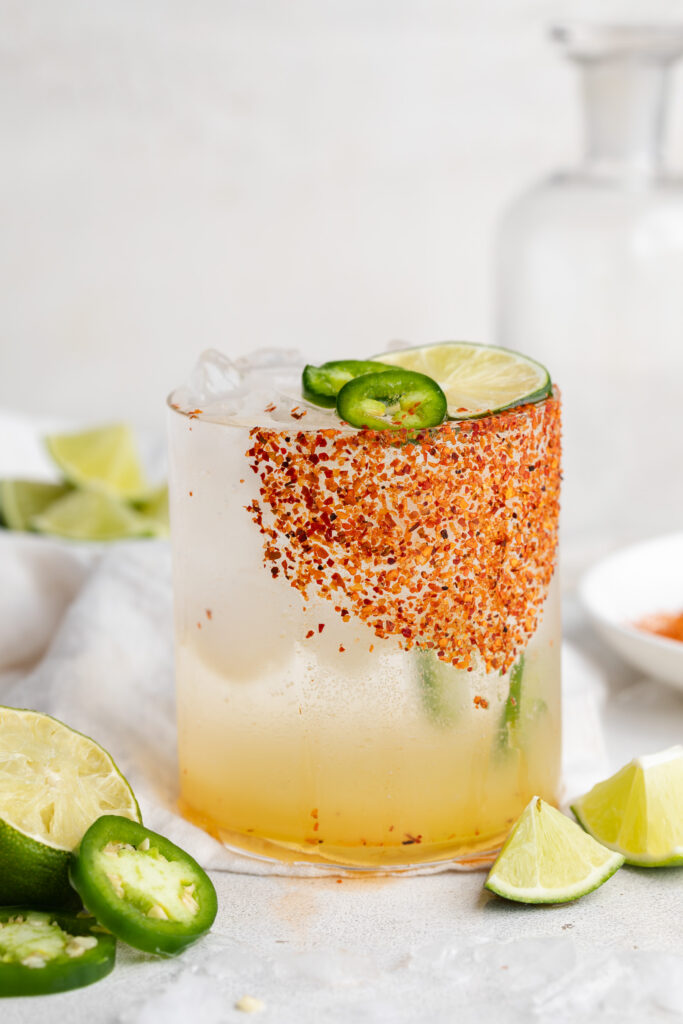
Spicy Margarita Mocktail (Non-Alcoholic)
Equipment
- 1 cocktail glass
Ingredients
- 2-3 slices fresh jalapeño
- 2 tablespoons lime juice (one ounce)
- 1 tablespoon agave syrup (half ounce)
- 1/2 tablespoon orange juice (just a splash!)
- 1 cup club soda or sparkling water (8 ounces)
For the spicy rim:
- lime wedge
- tajin
Instructions
- For a spicy rim, run a lime wedge around the outside of the glass, then dip the glass in the tajin coating the entire rim in the seasoning.
- Add the fresh jalapeño slices, lime juice, agave syrup, and orange juice to the bottom of the glass. Then, using either a muddler or the handle of a wooden spoon, muddle the jalapeño to release some of its flavor.
- Fill the glass with ice, then top off the margarita with the club soda or sparkling water. Cheers!


")