Tag

vegan

Browsing

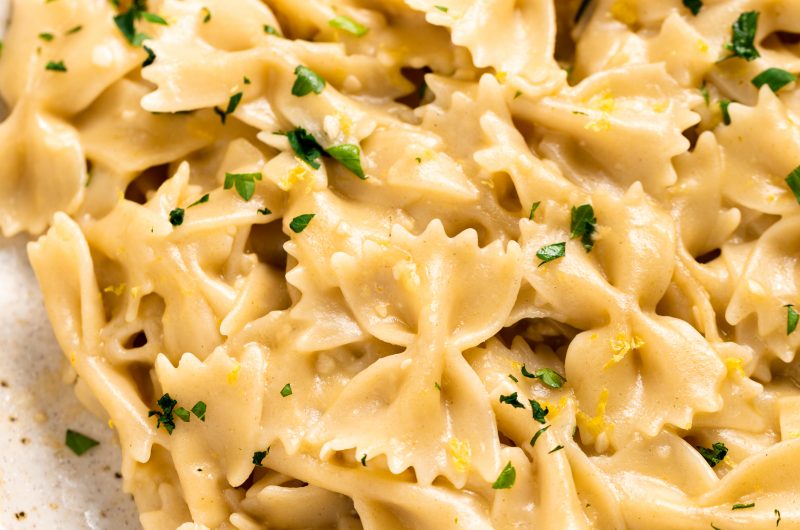
There’s no better way to welcome spring than with this fresh, bright, and flavorful pasta primavera recipe! This 20-minute meal is made with gluten-free pasta and vegan ingredients. It also includes plenty of options to customize it to your dietary needs. Make this pasta primavera when you’re craving something light and healthy, but also super satisfying.

Pasta Primavera

Nothing gets me excited for warmer weather quite like a big ole’ bowl of pasta primavera. What I love most about this dish, is it’s easy to customize with whatever fresh veggies you have on-hand! This recipe is perfectly seasoned with tons of bright lemon juice and a delicious combination of dried and fresh herbs. I really can’t get enough of this stuff in the spring and summer. My favorite thing to do is make a HUGE batch of pasta primavera and enjoy it allllll week long. It’s the perfect quick, easy and healthy lunch or dinner!

What You Need To Make Pasta Primavera

Gluten-Free Pasta – You can of course use whatever pasta you’d like in this recipe. I prefer either a penne or farfalle (bow-ties) in my pasta primavera, but really any shape will work. And for my gluten-free people, Jovial Brown Rice Pasta is, and always will be my number one – but go ahead use your favorite gluten-free pasta!

Dried Italian Herbs – Using dried Italian herbs in your pasta primavera will make your life so much easier. It’s the difference between having to purchase four or five separate bottles of dried herbs at the store, versus just buying one bottle with all four or five herbs mixed in it. Also, if you don’t have dried Italian herbs in your kitchen, do yourself a favor and get some – I cook with these herbs often.

Peas – Both fresh and frozen peas will work in this recipe. I used frozen because it’s easier, but if you can get your hands on fresh peas, go ahead and use those! Regardless of which type you’re using, just throw them straight into the recipe – no need to defrost frozen peas ahead of time.

Lemon Juice – I loooooove the taste of lemon in my pasta primavera. Though if lemon’s not your thing, you can cut the amount in this recipe in half. But if you’re like me, feel free to add an extra tablespoon or two of lemon juice to this recipe.

Fresh Parsley or Basil – I’ve made this recipe using both types of fresh herbs and they were equally as incredible. This comes down to personal preference. Pick whichever herb you like best, and add it to your recipe.

Adjust This Recipe To Your Dietary Needs

  • Make it Low-Carb: Use your favorite high-protein lentil or chickpea pasta in this recipe to make it higher in protein and lower in carbs.
  • Add Dairy: If you’re not dairy-free, sprinkle a little parmesan cheese on top of your finished dish.
  • Make it Paleo: Toss your cooked vegetables with some zucchini noodles for a paleo pasta primavera!

Pasta Primavera (V/GF)

4 from 1 vote
Recipe by Samantha Russo Course: MainCuisine: Italian/AmericanDifficulty: Easy
Servings

6

servings
Prep time

5

minutes
Cooking time

15

minutes
Total time

20

minutes

There’s no better way to welcome spring than with this fresh, bright, and flavorful pasta primavera recipe! This 20-minute meal is made with gluten-free pasta and vegan ingredients. It also includes plenty of options to customize it to your dietary needs. Make this pasta primavera when you’re craving something light and healthy, but also super satisfying.

Ingredients

  • 12 Ounces Gluten-Free Pasta, see NOTES

  • 2 Tablespoons Olive Oil

  • 1 Yellow Onion, chopped

  • 8 Ounces Asparagus, cut into 1 1/2-inch pieces

  • 1 Yellow Bell Pepper, cut into strips

  • 1 Red Bell Pepper, cut into strips

  • 1 Zucchini, chopped

  • 1 Yellow Squash, chopped

  • 1 Cup Peas

  • 3 Garlic Cloves, minced

  • 1 Tablespoon Dried Italian Herbs

  • 1 Teaspoon Salt

  • 1/4 Teaspoon Black Pepper

  • 1 Cup Grape Tomatoes, halved

  • 2 Tablespoons Lemon Juice

  • 1/4 Cup Fresh Parsley or Basil, chopped

Directions

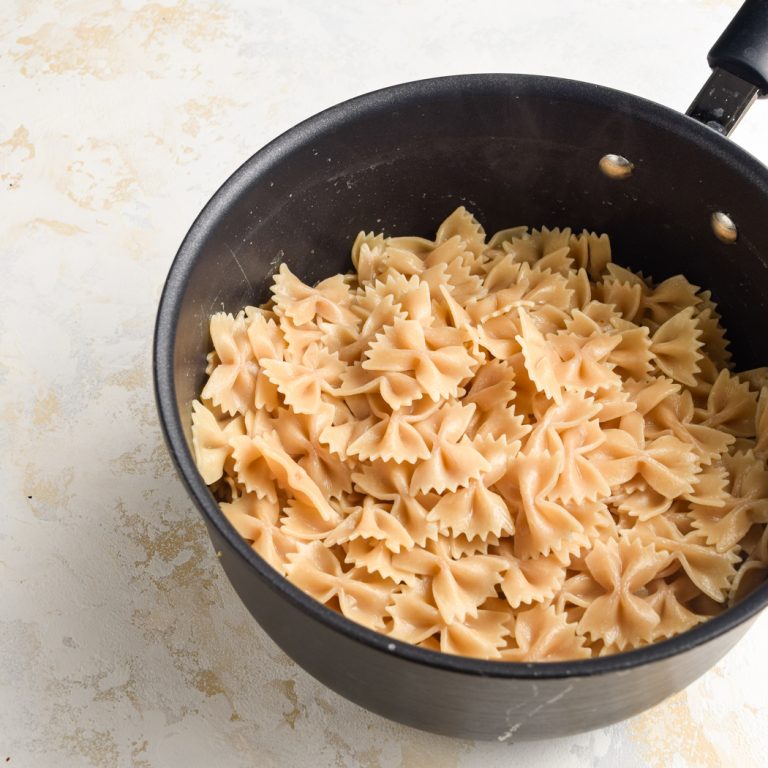
  • Cook pasta according to the package directions (don’t forget to salt your pasta water!).Pasta Primavera Process Photo 1
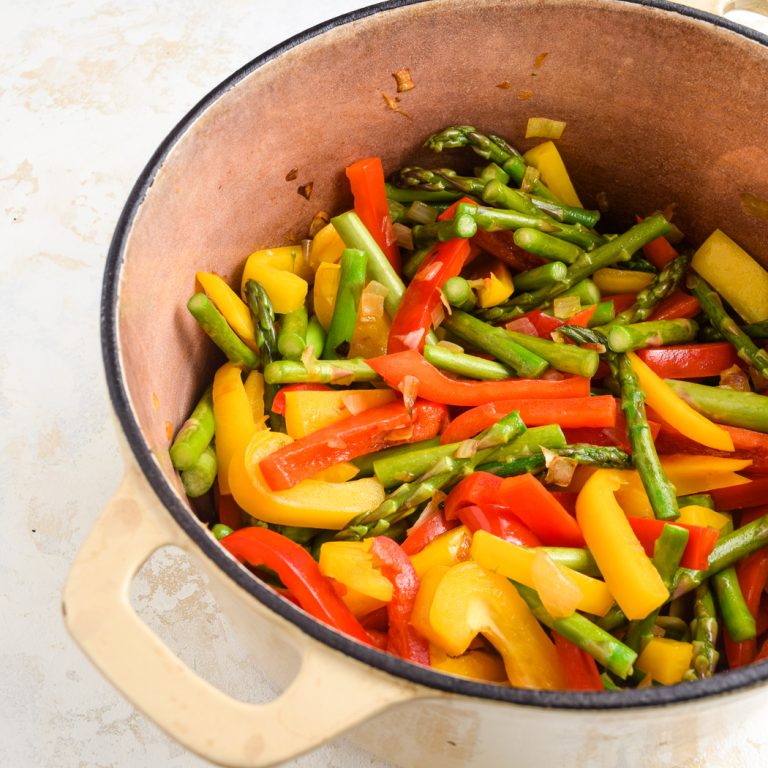
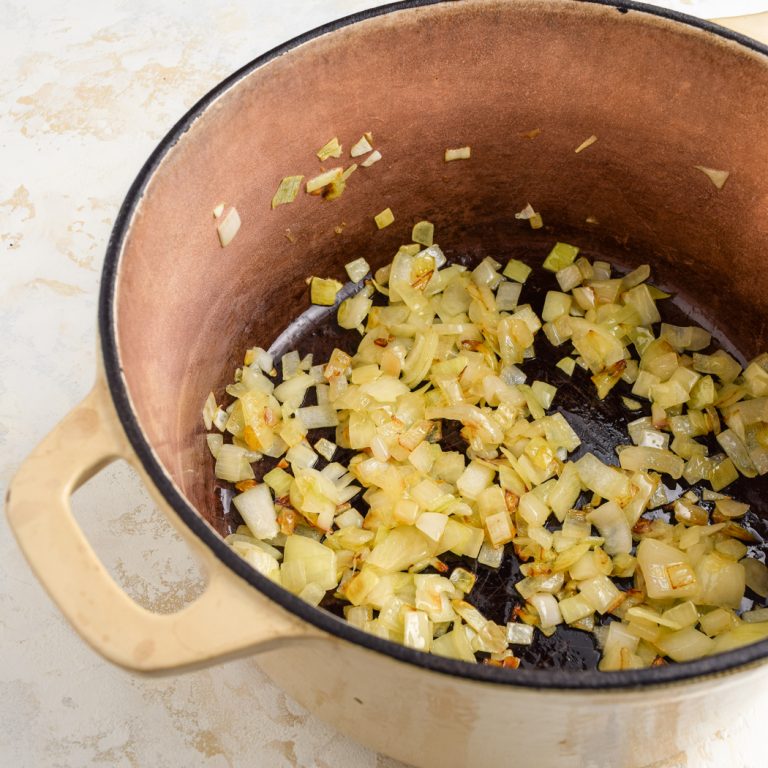
  • While the pasta cooks, heat the olive oil in a large pot or skillet. Add in the onion and cook until soft, about 5 minutes.Pasta Primavera Process Photo 2
  • Add in the asparagus, yellow bell pepper, and red bell pepper – cook for 2-3 more minutes.Pasta Primavera Process Photo 3
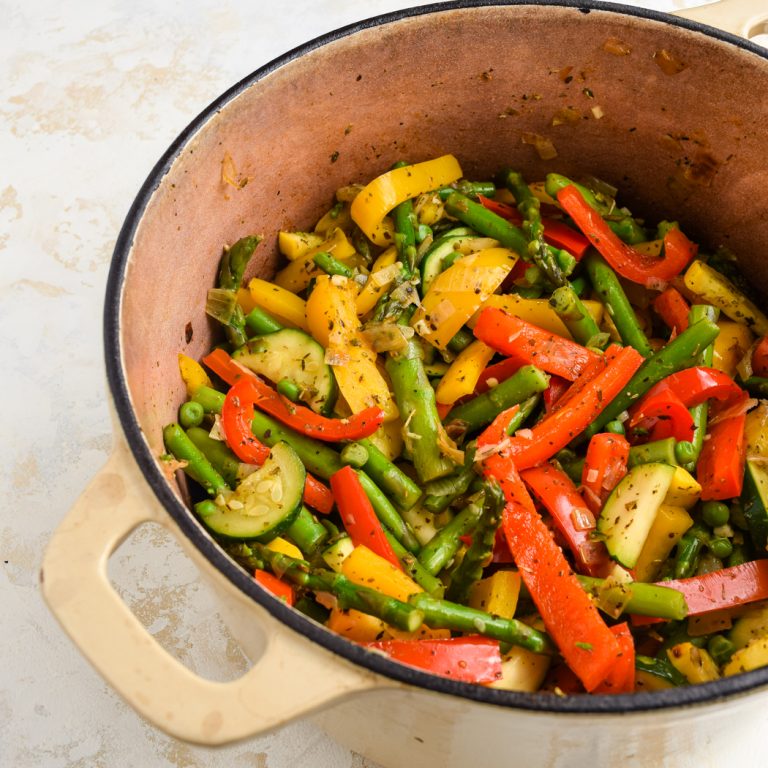
  • Add in the zucchini, squash, peas, garlic, Italian herb, salt, and pepper. Mix to combine and cook for 2-3 minutes.Pasta Primavera Process Photo 4
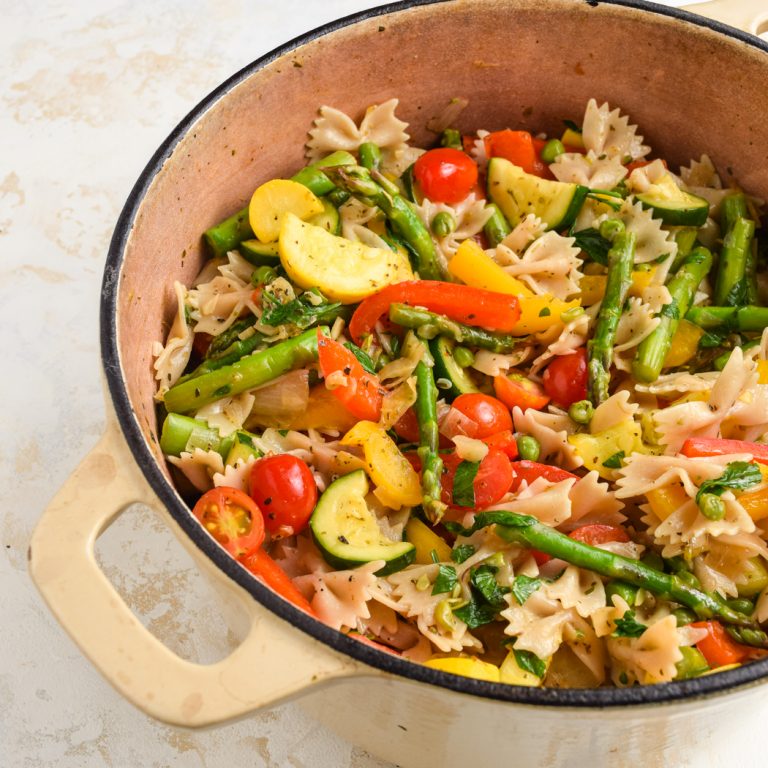
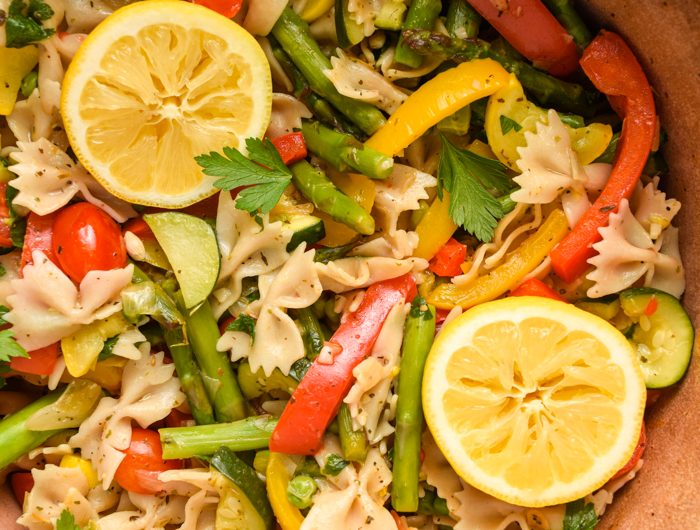
  • Turn off the heat, add in your cooked pasta, grape tomatoes, lemon juice, and parsley.Pasta Primavera Process Photo 5

Notes

  • Gluten-Free Pasta: I use and love Jovial Brown Rice Farfalle Pasta in this recipe, but any gluten-free pasta will work.
  • Feel free to add in or remove any vegetables you’d like. The point of this pasta is to be loaded with your favorite fresh vegetables. Have fun with this recipe and don’t be scared to make it your own!

Did you make this recipe?

Share it and tag @samdoesherbest on Instagram!

Like this recipe?

Follow us @samdoesherbest on Pinterest

More Delicious Pasta Recipes

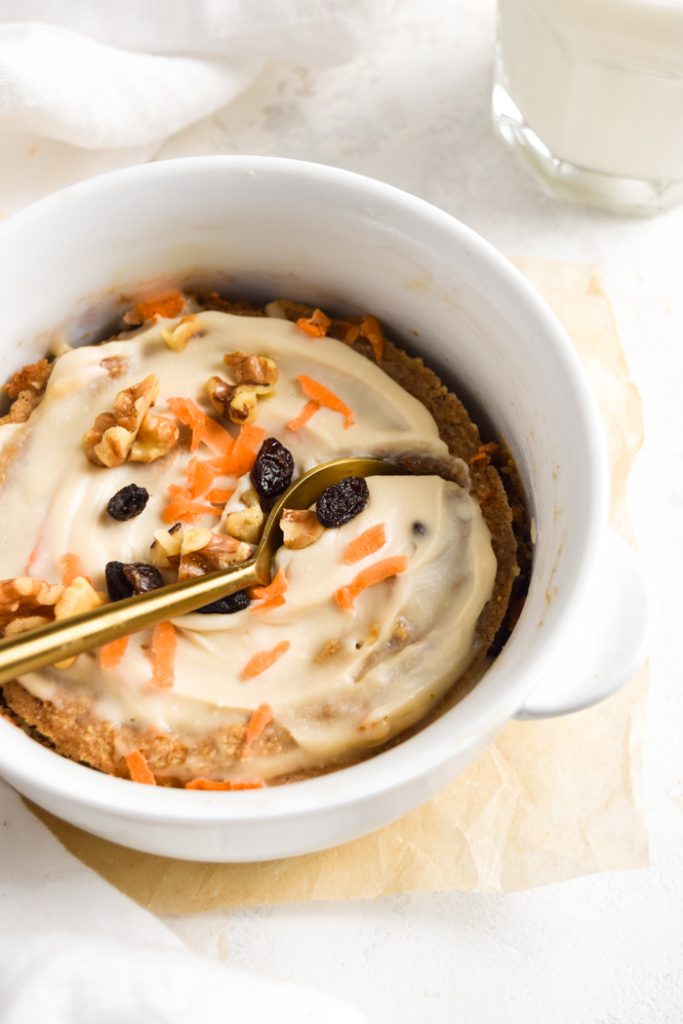
These carrot cake baked oats taste just like eating carrot cake for breakfast! This recipe includes a vegan cream cheese icing and is entirely refined sugar-free. Add a scoop of almond butter and a handful of chopped walnuts for a healthy, well-balanced breakfast.

Carrot Cake Baked Oats

What You Need To Make Carrot Cake Baked Oats

Rolled Oats – You can use either rolled oats or quick oats in this recipe. I like to stock up on oats whenever I’m at the store, they’re so versatile and super satisfying. Oats are one of the best gluten-free grains, loaded with vitamins, minerals, and plenty of health benefits.

Apple Sauce – You can swap mashed banana for the apple sauce in this recipe – use whichever you prefer!

Maple Syrup – I love using maple syrup instead of refined sugar in my recipes. Maple syrup not only tastes delicious but is full of antioxidants and less likely to spike your blood sugar.

Walnuts – Add a much-needed crunch to these carrot cake baked oats. I used raw, unsalted walnuts in my recipe and gave them a quick chop before mixing them in. If you don’t like walnuts, feel free to either swap them with another nut or leave them out!

Dairy-Free Cream Cheese – No carrot cake is complete without the cream cheese frosting. Therefore, I developed a two-ingredient cream cheese icing for these baked oats. My preferred dairy-free cream cheese is Kite Hill’s plain flavor. If you’re not dairy-free, you can definitely use regular cream cheese instead. Just make sure, whatever cream cheese you use, is plain and doesn’t have any added flavors.

Adjust This Recipe To Your Dietary Needs

  • Add Protein: Throw one tablespoon of your favorite vanilla protein powder in with the oats and make the rest of the recipe as directed.
  • Make it Nut-Free: Use soy or coconut milk instead of almond milk and leave out the walnuts. If you’re also making the cream cheese icing, make sure your dairy-free cream cheese is nut-free as well!
  • Add Dairy: Swap out the almond milk for cow’s milk and the dairy-free cream cheese for regular cream cheese.

Carrot Cake Baked Oats (V/GF)

5 from 1 vote
Recipe by Samantha Russo Course: BreakfastDifficulty: Easy
Servings

1

serving
Prep time

5

minutes
Cooking time

20

minutes
Total time

25

minutes

These carrot cake baked oats taste just like eating carrot cake for breakfast! This recipe includes a vegan cream cheese icing and is entirely refined sugar-free. Add a scoop of almond butter and a handful of chopped walnuts for a healthy, well-balanced breakfast.

Ingredients

  • For the baked oats:
  • 1/2 Cup Rolled Oats, see NOTES

  • 1/2 Cup Apple Sauce, see NOTES

  • 1/4 Cup Almond Milk, see NOTES

  • 1 Tablespoon Maple Syrup

  • 1/2 Teaspoon Baking Powder

  • 1/2 Teaspoon Cinnamon

  • 1/8 Teaspoon Ground Ginger

  • 1/8 Teaspoon Nutmeg

  • 1/4 Teaspoon Vanilla Extract

  • 2 Tablespoons Grated Carrots

  • 1 Tablespoon Raisins

  • 1 Tablespoon Walnuts, see NOTES

  • For the cream cheese icing:
  • 1 Tablespoon Dairy-Free Cream Cheese

  • 1/2 Tablespoon Maple Syrup

Directions

  • Preheat your oven to 350° Fahrenheit and lightly grease a oven-safe ramekin.
  • Add the oats, apple sauce, almond milk, maple syrup, baking powder, cinnamon, ground ginger, nutmeg, and vanilla extract to a blender and blend until smooth.
  • Pour into ramekin and mix in the raisins, carrots, and walnuts. Bake for 20-25 minutes.
  • Whisk together the dairy-free cream cheese and maple syrup in a small bowl. Pour icing over your oats and enjoy!

Notes

  • Rolled Oats: You can also use quick oats, if you’d like.
  • Apple Sauce: You can swap the apple sauce for 1/2 cup of mashed banana.
  • Almond Milk: Use any non-dairy milk you’d like!
  • Walnuts: Pecans would also taste great, but use whatever nuts you’d like.

Did you make this recipe?

Share it and tag @samdoesherbest on Instagram!

Like this recipe?

Follow us @samdoesherbest on Pinterest
More Easy Delicious Recipes

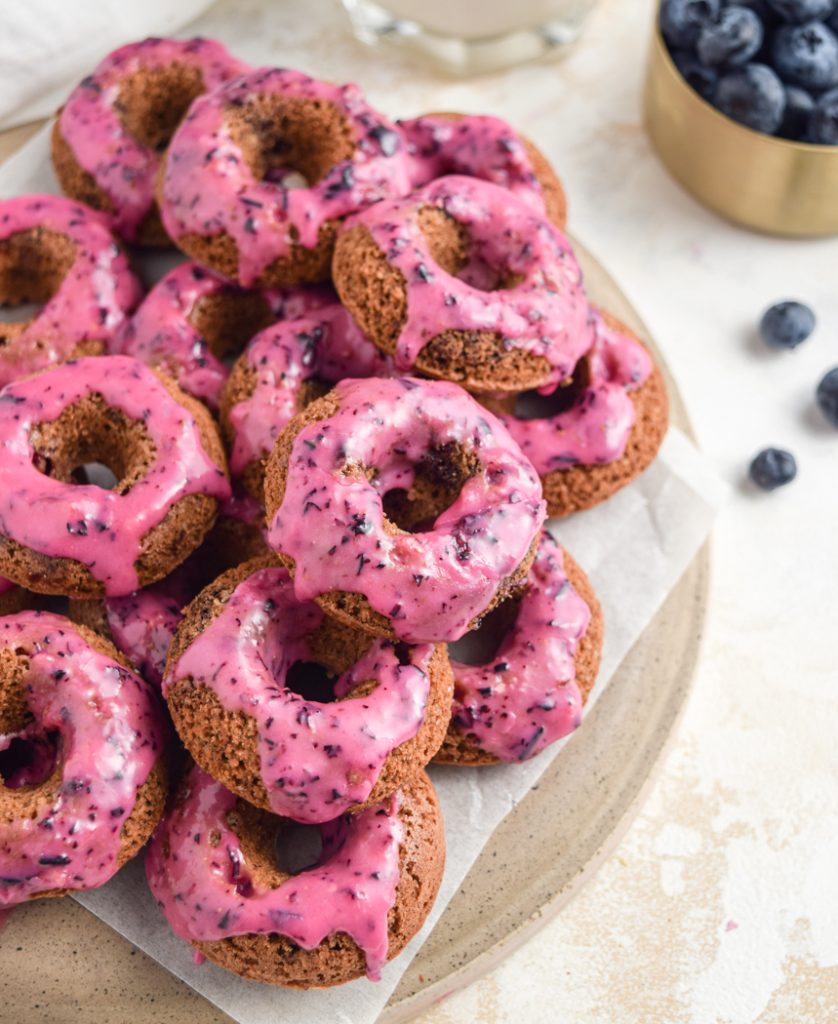
These healthy blueberry donuts are my favorite vegan spring treat! They’re soft, sweet, and bursting with juicy fresh blueberries. These donuts are light and nutritious, but taste just as goods as the ones you’d pick up at your local bakery. Serve these healthy blueberry donuts warm with a drizzle of blueberry glaze – YUM!

Healthy Blueberry Donuts

How Healthy Blueberry Donuts Came To Be

I love all food, but there is a special place in my heart for donuts. It doesn’t matter what time of day it is or how full I already am, I will NEVER turn down a donut. My personal favorite are cake donuts, I love that crispy outside and crumbly inside. Now I can’t ever give up regular deep-fried gluten and dairy-filled donuts, but I will try to supplement a few of my donut cravings (they come often) with a healthier donut version when I can. These healthy baked blueberry donuts are a riff off my apple cider donuts from last fall. I really wanted those apple cider donuts, but I also wanted something that felt and tasted more like spring. That’s how fresh blueberries entered my donuts and a gorgeously bright purple-y/pink blueberry glaze found its way on top.

I should also note that these healthy blueberry donuts are in fact SO healthy, you could eat them for breakfast. This recipe includes healthy grains, healthy fats, and just a touch of sugar. If I plan on enjoying these for breakfast, I’ll leave a couple without icing and top them with almond butter instead. This extra healthy variation also makes for a great afternoon snack!

What You Need To Make Healthy Blueberry Donuts

Oat Flour – You can make oat flour by taking dry rolled oats and blending them until you achieve a flour-like consistency. There is also always the option to buy already ground oat flour at the store, but I find making it myself to be much cheaper and super easy. If you make the oat flour yourself, be sure to blend it until no large oat pieces remain. We don’t want chunks of rolled oats in our donuts, just a nice smooth flour.

Flax Eggs – If you’re not vegan, you can use 1 real egg in place of the flax eggs. Though if you’re looking to make these donuts vegan, combine 2 tablespoons of flaxseed meal with 6 tablespoons of water in a small bowl. Whisk the flaxseed meal and water together, then let it sit for at least 5 minutes or until it thickens. Once the flax “eggs” are thick, you’re free to use them in this recipe.

Non-Dairy Milk – Really any non-dairy milk will work here! I used almond milk which made delicious healthy blueberry donuts. Though you’re free to use any nut, seed, soy, or even cow’s milk you’d like.

Almond Butter – Feel free to use any nut or seed butter you’d like in this recipe. I prefer almond butter because it lends little-to-no almond flavor to these healthy blueberry donuts. Another flavorless nut butter option is cashew butter. Though feel free to use peanut butter, pecan butter, walnut butter, or even sunflower seed butter if you’d like.

Blueberries – I haven’t personally tried this recipe with frozen blueberries. The fresh blueberries bake up perfectly in my opinion, and I just can’t picture the frozen blueberries doing the same. Luckily, blueberry season begins this month so you shouldn’t have any trouble picking up a fresh pint of blueberries next time you’re at the store!

Adjust This Recipe To Your Dietary Needs

  • Add Dairy: Use 1 cup of cow’s milk instead of non-dairy milk in this recipe.
  • Use All-Purpose Flour: Swap out the oat flour for 1 and 1/2 cups of all-purpose flour instead.
  • Not Vegan: Use 1 egg instead of the flax eggs in this recipe.
  • Make it Nut-Free: Use sunflower seed butter instead of almond butter.

Healthy Blueberry Donuts (V/GF)

0 from 0 votes
Recipe by Samantha Russo Course: DessertCuisine: AmericanDifficulty: Easy
Servings

12

donuts
Prep time

10

minutes
Cooking time

20

minutes
Total time

30

minutes

These healthy baked blueberry donuts are my favorite vegan spring treat! They’re soft, sweet, and bursting with juicy fresh blueberries. These donuts are light and nutritious, but taste just as goods as the ones you’d pick up at your local bakery. Serve these healthy blueberry donuts warm with a drizzle of blueberry glaze – YUM!

Ingredients

  • 1 1/2 Cups Oat Flour, see Notes

  • 1/2 Teaspoon Baking Soda

  • 1/2 Teaspoon Baking Powder

  • 1/4 Teaspoon Salt

  • 2 Flax Eggs, see Notes

  • 1 Cup Non-Dairy Milk, see Notes

  • 1/2 Cup Creamy Almond Butter

  • 1/2 Cup Coconut Sugar, see Notes

  • 1 Tablespoons Apple Cider Vinegar

  • 1 Teaspoon Vanilla Extract

  • 1/2 Cup Fresh Blueberries

  • Flor the blueberry glaze:
  • 1/4 Cup Fresh Blueberries

  • 1 1/2 Cups Powdered Sugar

Directions

  • Preheat your oven to 350° Fahrenheit and lightly grease a donut pan.
  • Mix the oat flour, baking soda, baking powder, and salt together in a large bowl.
  • In a separate small bowl, mix together the flax eggs, non-dairy milk, almond butter, coconut sugar, apple cider vinegar, and vanilla extract.
  • Add the wet ingredients into the dry ingredients, then fold in the fresh blueberries
  • Fill your donut pan with batter and bake for 20-25 minutes, then remove from molds and let cool on a wire rack.
  • Add the glaze ingredients to a blender and blend until smooth. Then top cooled donuts with blueberry glaze.

Notes

  • Oat Flour: Make oat flour by grinding rolled oats in a blender until a flour forms.
  • Non-Dairy Milk: I used almond milk, but you can use any non-dairy milk you’d like.
  • Coconut Sugar: You can use white sugar or cane sugar instead.

Did you make this recipe?

Share it and tag @samdoesherbest on Instagram!

Like this recipe?

Follow us @samdoesherbest on Pinterest
More Delicious and Healthy Dessert Recipes

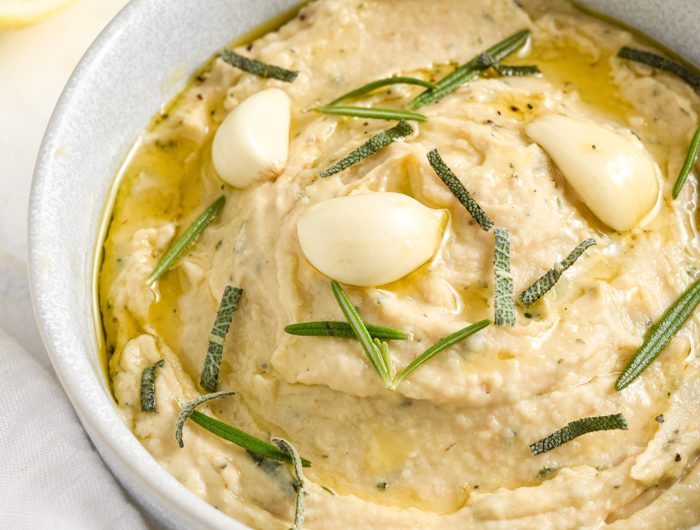
This creamy roasted garlic white bean dip is loaded with flavor! In just a few simple steps, you’ll have a delicious dip. Serve this roasted garlic white bean dip with gluten-free pita bread or veggies for a light and healthy snack!

Roasted Garlic White Bean Dip 2

I honestly just really wanted an excuse to roast an entire head of garlic. Once I roasted it, I wasn’t totally sure what to do with it. So I thought …what do I need more of in my life? And the answer was SNACKS. High-protein snacks, to be specific. That’s where the white beans came in, and of course a few glugs of nutritious olive oil. Then, all this recipe needed was some extra flavor. I settled on lemon for a bit of acidity, and honestly I’m just really obsessed with lemon at the moment. I threw in some fresh rosemary and sage because, well, it couldn’t hurt! Finally, I blended her up until totally smooth and WOW it was delicious. I went straight into eating this roasted garlic white bean dip with a spoon, it was that good.

Though if you’re more into dipping, some crunchy carrots, sliced cucumbers, or even celery are the perfect nutritious pairing to this dip. I also recommend dolloping some on your salads or veggie bowls for an extra boost of protein and flavor!

What You Need To Make Roasted Garlic White Bean Dip

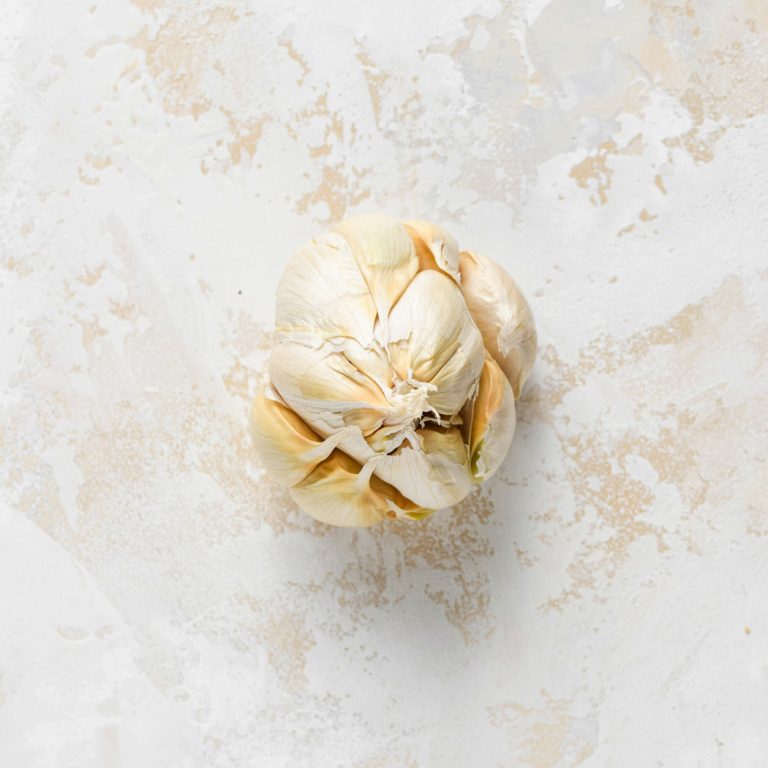
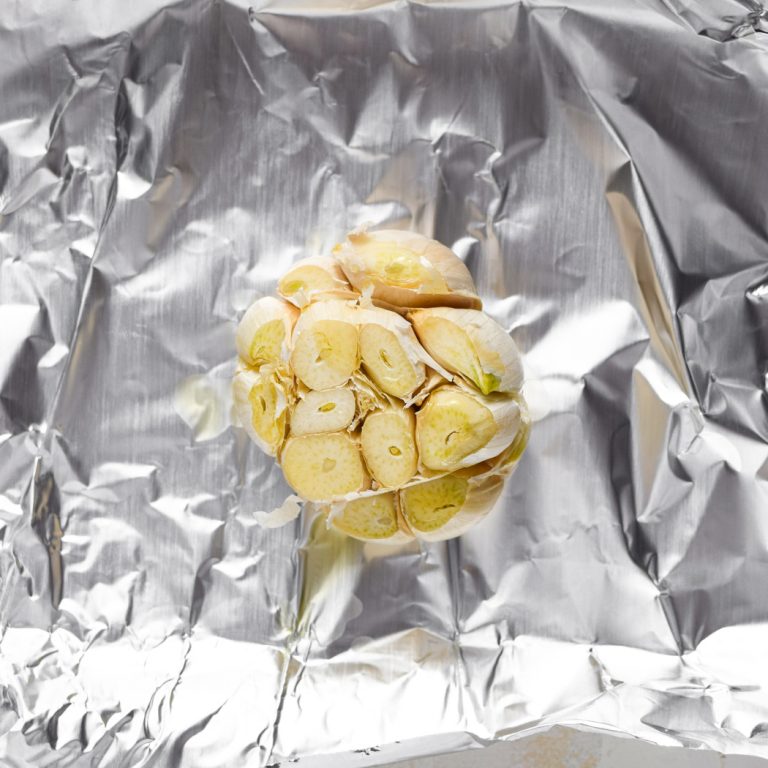
Garlic – Roasted garlic has such an incredible mellow, slightly sweet flavor. Do not try to use raw garlic in this recipe, it will totally overwhelm the taste of your dip. To roast your garlic – slice the top 1/4-inch off, drizzle it with olive oil, wrap it in foil, then roast in a 400° Fahrenheit oven for 30 minutes. Yes, this part of the recipe takes a while. I learned a ton of patience waiting for my garlic to roast. But if you want that truly incredible roasted garlic flavor, you’ll just have to wait!

Rosemary – The perfect herb to compliment the flavors of this dip. In combination with the lemon juice and roasted garlic, rosemary adds a hint of fresh flavor that is just delicious. When using fresh rosemary, you’ll want to remove the small rosemary leaves from its stem and then chop just the leaves. If you don’t have fresh rosemary, you can use 1/2 teaspoon of dried rosemary instead.

Lemon Juice – You can easily play around with the lemon juice in this recipe. Blend your roasted garlic white bean dip, give it a taste, then add as much lemon juice as your hearts desires. My heart desires an extra tablespoon (at least) of lemon juice in this recipe. Though I kept the amount in this recipe rather small, giving you room to customize this dip.

Roasted Garlic White Bean Dip

0 from 0 votes
Recipe by Samantha Russo Course: AppetizersCuisine: ItalianDifficulty: Easy
Servings

6

servings
Prep time

5

minutes
Cooking time

30

minutes
Total time

35

minutes

This creamy roasted garlic white bean dip is loaded with flavor! In just a few simple steps, you’ll have a delicious dip. Serve this roasted garlic white bean dip with gluten-free pita bread or veggies for a light and healthy snack!

Ingredients

  • 1 Garlic Bulb

  • 16 Ounce Can Cannellini Beans, see Notes

  • 1 Teaspoon Fresh Rosemary, chopped

  • 1/2 Teaspoon Fresh Sage, chopped (optional)

  • 1 Tablespoon Lemon Juice, see Notes

  • 1/2 Teaspoon Lemon Zest

  • 1/4 Cup Olive Oil

  • 1 Teaspoon Salt

  • 1/4 Teaspoon Black Pepper

Directions

  • Preheat your oven to 400° Fahrenheit. Peel and discard the outer layer of garlic bulb, leaving the skin around each clove intact.Roasted Garlic White Bean Dip Process Photo 1
  • Slice 1/4-inch to 1/2-inch off the top of the garlic bulb, place on a sheet of aluminum foil, then drizzle with 1 tablespoon of olive oil. Wrap the garlic in foil and bake for 30 minutes.Roasted Garlic White Bean Dip Process Photo 2
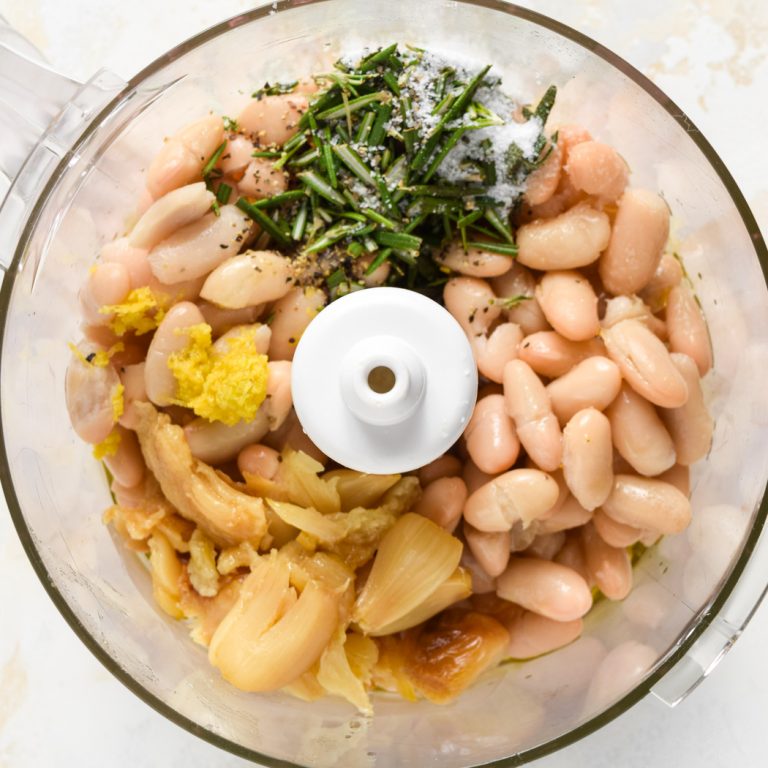
  • Drain and rinse the cannellini beans and add them to a food processor or blender with remaining ingredients. Squeeze the roasted garlic out of its skin and into the food processor. Pulse or blend until smooth.Roasted Garlic White Bean Dip Process Photo 3

Notes

  • Cannellini Beans: Be sure to drain and rinse your cannellini beans very well before using them in this recipe. If you want, you can substitute any other white bean you’d like for the cannellini beans.
  • Lemon Juice: Fresh is always best, but you can use bottled lemon juice if you can’t find fresh lemons.

Did you make this recipe?

Share it and tag @samdoesherbest on Instagram!

Like this recipe?

Follow us @samdoesherbest on Pinterest
Other Delicious Snack Recipes