Tag

white wine vinegar

Browsing

How to make pickles in a matter of minutes! This quick, homemade pickle brine is loaded with flavor, and made to preserve freshness. These pickles are perfectly salty, and extra crunchy!

three jars of pickles line up on a table.

What You’ll Need

Cucumbers – Either pickling cucumbers, Persian cucumbers, or an English cucumber will work! For pickling or Persian cucumbers, I recommend cutting them into spears before pickling. Though for an English cucumber, those are better sliced into 1/4-inch rounds. I use and recommend pickling cucumbers because they maintain their shape and satisfying crunch, even after pickled. However, Persian or an English cucumber still taste just as delicious using this method!

Fresh Dill – You simply can’t make pickles without fresh dill! A few sprigs of this herb help to lock in freshness and pack in tons of delicious flavor.

Garlic – Three whole cloves of garlic truly take this recipe to the next level! The pickling liquid aids in mellowing out that tangy garlic flavor, leaving you with the best essence of garlic throughout your pickles. And if you’re like me (a garlic LOVER), feel free to throw in a few extra cloves!

overhead image of pickles with garlic and fresh dill.

Vinegar – Vinegar plus water is the base of any pickling liquid. I’ve tried this recipe with pretty much every type of vinegar out there. Apple cider vinegar, white wine vinegar, red wine vinegar, white vinegar, rice wine vinegar – you name it, I’ve tried it! And while they all taste delicious, apple cider and white wine vinegars are my personal favorites. Though use whichever you have on-hand and/or whichever you prefer.

Salt – For extra salty pickles, add two whole teaspoons of salt to your brine. Or, for a more mild pickle, add just one teaspoon of salt. I like ultra-savory pickles – you know, the ones that make your mouth water just thinking about them – so two teaspoons did the trick for me!

Yellow Mustard Seed – While optional, a pinch of whole yellow mustard seeds add a hint of spice. A few seeds go a long way, packing in tons of flavor!

a pickle being lifted out of a jar of pickles.

Tips and Tricks on How to Make Pickles

  • Clean/rinse out your mason jars well before adding in your pickles. A clean glass jar will reduce the risk of any unwanted bacteria growing while your pickles, well… pickle. The best way to achieve an extra-clean mason jar is by rinsing it out with boiling hot water – this’ll kill most, if not all bacteria!
  • Homemade pickles will last up to three month in the fridge! And remember, the longer these pickles sit in their brine, the tastier they’ll be. But if you live in my house, you’ll know these don’t last more than ONE WEEK.
  • Feel free to switch up the ingredients in this recipe however you’d like! For spicy pickles, add in a pinch of red pepper flakes. Or, for sweet pickles, sprinkle in a teaspoon of sugar.

*These homemade pickles are gluten-free, dairy-free, vegan, and paleo!

How to Make Pickles

5 from 1 vote
Recipe by Samantha Course: Snacks, SidesDifficulty: Easy
Servings

10

servings
Prep time

3

minutes
Cooking time

2

minutes
Total time

7

minutes

How to make pickles in a matter of minutes! This quick, homemade pickle brine is loaded with flavor, and made to preserve freshness. These pickles are perfectly salty, and extra crunchy!

Ingredients

  • 3-4 small pickling cucumbers, cut into spears (or 1 English cucumbers, cut into 1/4-inch rounds)

  • 4-5 sprigs fresh dill

  • 3 garlic cloves, peeled and smashed

  • 1 cup water

  • 1 cup vinegar, such as white vinegar or apple cider vinegar

  • 1-2 teaspoons salt

  • 1/2 teaspoon whole yellow mustard seeds

Directions

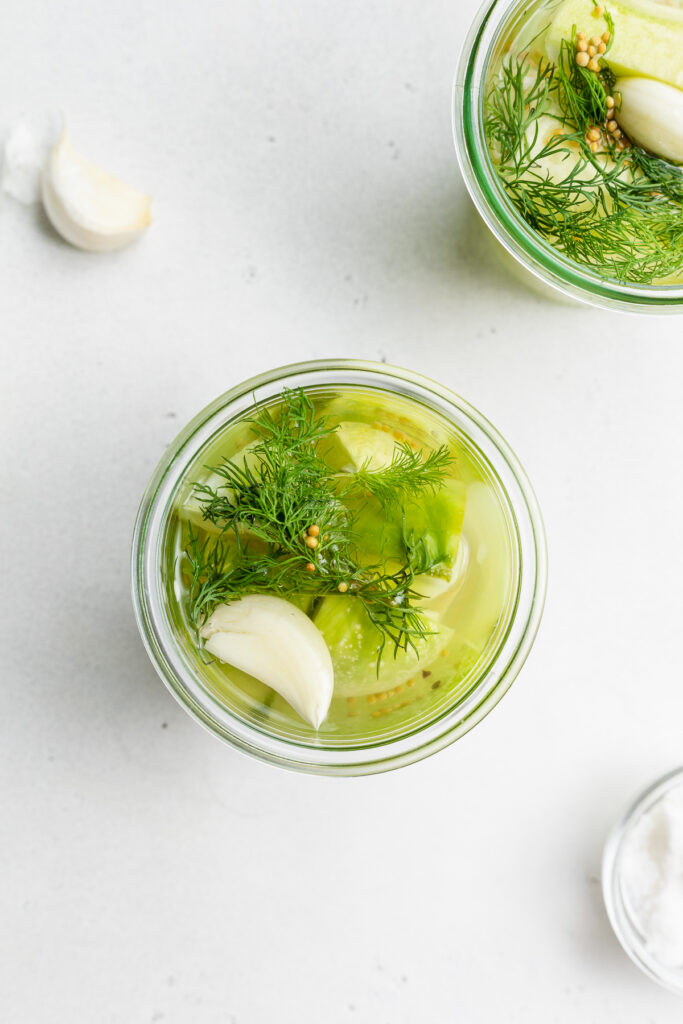
  • Place cut cucumber, fresh dill, garlic cloves, and whole yellow mustard seed into one large glass jar, or separate into 2 smaller glass jars.
  • Heat water, vinegar, and salt in a small saucepan over medium heat until salt has dissolved completely.
  • Pour water mixture into jar(s) until cucumbers are completely covered. Secure jar with lid, then refrigerate for at least 24 hours before eating.

Recipe Video

Did you make this recipe?

Share it and tag @samdoesherbest on Instagram!

Like this recipe?

Follow us @samdoesherbest on Pinterest

This orzo salad is quick, simple, and loaded with flavor! This delicious, naturally vegan dish is easily made gluten-free with the use of your favorite gluten-free orzo or rice. The addition of fresh herbs and vegetables take this orzo salad above and beyond!

Overhead image of a bowl of orzo salad with basil and a fork on the side.

I can’t tell you how happy it makes me to walk into the grocery store these days and see SUCH a variety of fresh spring produce! Like, give me allllllll the spring produce. Just toss it all in my cart, I’ll figure out something to do with it. And that’s pretty much how this orzo salad was created. I needed a way to jam as many fresh vegetables and herbs into a dish as possible, without it tasting too healthy. I mean we’re all about healthy around here, but too healthy ends up tasting like the earth, so we need to avoid that. In this salad – the orzo will keep you satisfied, the chickpeas will keep you full, and the veggies will keep you feeling your best! Now this orzo salad is a well-rounded dish, if I’ve ever heard of one.

Make it Gluten-Free

  • Use Gluten-Free Orzo: There are a handful of gluten-free orzos out there. I’ve personally tried the Jovial Grain Free Cassava Orzo and can couch for its tastiness. Though feel free to use whatever gluten-free orzo you love in this recipe.
  • Use Rice Instead of Orzo: Rice would make a delicious gluten-free substitute in this orzo salad! Simply cook 1 1/2 cups of brown or white rice in 3 cups of vegetable broth and use just as you would the orzo in this recipe.

What You Need To Make Orzo Salad

Chickpeas – Chickpeas give this otherwise light orzo salad a bit of heartiness. This starchy protein is mild in flavor, not at all taking away from the flavors of this dish. Feel free to use your favorite white bean in place of the chickpeas in this recipe, or even add some roasted chicken if you’d like!

Arugula – I love arugula for its peppery, almost spicy taste. Arugula is another layer of both health and flavor in this recipe. Though if you don’t like arugula, you can use fresh spinach instead.

White Wine Vinegar – White wine vinegar is slightly more mild and less acidic than most other vinegars. If you don’t have white wine vinegar, then I suggest picking up a bottle next time you’re at the store. It not only tastes great in this orzo salad recipe, but would make a great addition to most other salads. Though if you can’t find white wine vinegar, you can use apple cider vinegar instead.

Orzo Salad

0 from 0 votes
Recipe by Samantha Russo Course: MainCuisine: ItalianDifficulty: Easy
Servings

6

servings
Prep time

10

minutes
Cooking time

7

minutes
Total time

17

minutes

This orzo salad is quick, simple, and loaded with flavor! This delicious, naturally vegan dish is easily made gluten-free with the use of your favorite gluten-free orzo or rice. The addition of fresh herbs and vegetables take this orzo salad above and beyond!

Ingredients

  • 1 1/2 cups orzo, see Notes

  • 4 cups vegetable broth, see Notes

  • 1 (15-ounce) can chickpeas, drained and rinsed

  • 1/2 cup chopped red onion

  • 1/2 cup cherry tomatoes, halved

  • 1 cup chopped cucumber

  • 1 cup arugula

  • 1/2 cup fresh chopped basil

  • For the dressing:
  • 1/2 cup olive oil

  • 3 tablespoons white wine vinegar

  • 1 tablespoon lemon juice

  • 2 teaspoons dried Italian seasoning

  • 1 teaspoon salt

  • 1 teaspoon honey, use maple syrup if vegan

  • 1/4 teaspoon black pepper

Directions

  • Bring vegetable broth to a boil in a large pot, add in the orzo and cook for about 7 minutes or until al dente.Orzo Salad Process Photo 1
  • Drain orzo then set aside in a large bowl to cool.
  • While orzo cools, make the dressing by adding all dressing ingredients to a bowl and whisking to combine.Orzo Salad Process Photo 2
  • Add remaining ingredients to the orzo along with the dressing, then toss to combine.Orzo Salad Process Photo 3

Notes

  • Orzo: You can easily make this recipe gluten-free by using gluten-free orzo or rice instead. For more information, see the section above titled “Make it Gluten-Free.”
  • Vegetable Broth: Feel free to use chicken broth instead of vegetable broth in this recipe.

Did you make this recipe?

Share it and tag @samdoesherbest on Instagram!

Like this recipe?

Follow us @samdoesherbest on Pinterest

Other 30 Minutes or Less Recipes You’ll Love