Tag

cinnamon

Browsing

Yup, I’m one of those people that need a sweet treat at the end of EVERY day. And if I don’t have an already-made dessert on hand, like my healthy brownie batter bark or 4-ingredient date caramels, I have no choice but to run to my kitchen to quickly throw together a single serve dessert recipe. Ones I’ve been loving lately are my gluten-free mug cake (especially with my birthday right around the corner!), or when I want a little extra protein I’ll make my single serve vegan and gluten-free protein cookie. Well, today, I’m thrilled to add this single serve cinnamon roll to my list of favorites!

The thing I love most about this recipe? It requires just 5 ingredients that I almost always have on-hand. It’s also gluten-free, and easily made dairy-free with a couple simple swaps. This single serve cinnamon roll is truly one of those recipes you’ll come back to time and time again. Because.. let’s face it, we’re always craving cinnamon rolls, but never have the time to bake a whole batch!

overhead image of a single serve gluten-free cinnamon roll in a ramekin.

What You’ll Need to Make This Recipe

  • Gluten-Free Flour: Use self-rising gluten-free flour or a mix of all-purpose gluten-free flour and baking powder to achieve the perfect rise and fluffy texture. This keeps the cinnamon roll gluten-free without compromising on taste. Or, if you’re not gluten-free, you can use any self-rising all purpose flour to make your cinnamon roll.
  • Yogurt: Yogurt adds moisture and helps bind the dough, creating a soft and tender cinnamon roll. Feel free to use non-dairy yogurt to make this recipe vegan!
  • Butter: Softened butter adds richness and that classic buttery cinnamon roll flavor. You can substitute with vegan butter to keep the recipe dairy-free.
  • Sugar: Divided into the dough and filling, sugar sweetens the cinnamon roll and caramelizes slightly when baked, creating a deliciously gooey center. YUM!
  • Cinnamon: A must-have for cinnamon rolls, cinnamon adds that warm, spicy kick to the filling, making each bite irresistible.

How to Make a Single Serve Cinnamon Roll

  1. Preheat and Prepare: Start by preheating your oven to 350°F and lightly grease a small ramekin. This helps ensure your cinnamon roll bakes evenly and doesn’t stick.
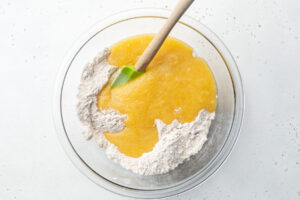
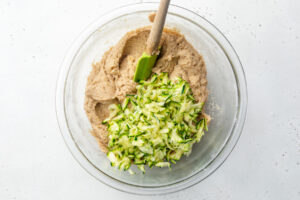
  2. Make the Dough: In a small mixing bowl, combine the flour, yogurt, and a bit of sugar until a sticky dough forms. If it’s too dry, add a bit more yogurt. Roll the dough out on a floured surface to form a small rectangle.
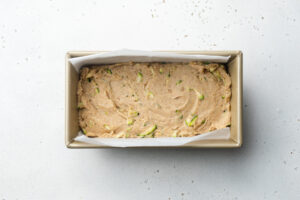
  3. Add the Filling: Spread softened butter over the dough and sprinkle with the remaining sugar and cinnamon. Roll up the dough tightly, starting from the short end, and place it into your prepared ramekin.
  4. Bake: Bake in the oven for 15-18 minutes until lightly golden. Let it cool for a few minutes before serving with a glaze or enjoy it plain for a quick and easy treat.
single serve gluten-free cinnamon roll in a ramekin.

Can I Make This in The Microwave?

Yes, you can! If you’re short on time, make this single-serve cinnamon roll in the microwave. Simply place the rolled-up dough in a microwave-safe mug or ramekin and microwave on high for about 1-1.5 minutes. Be sure to watch it closely, as microwaves can vary.

Make a Vegan Cinnamon Roll

To make this cinnamon roll vegan, use a non-dairy yogurt and plant-based butter. The rest of the ingredients are already plant-based, making it a simple swap without sacrificing flavor or texture!

4.34 from 9 votes

Single Serve Cinnamon Roll (gluten-free!)

This single serve cinnamon roll is the perfect quick dessert or snack, made with just five simple ingredients you likely already have on-hand. It’s gluten-free, can be made vegan, and comes together in under 20 minutes. Indulge in a warm, gooey, and totally delicious cinnamon roll without the fuss of making a whole batch!
Print Pin Rate
Prep Time: 3 minutes
Cook Time: 15 minutes
Total Time: 18 minutes
Servings: 1 serving

Ingredients

  • 1/2 cup self-rising (gluten-free) flour, or 1/2 cup all purpose flour PLUS 1/2 teaspoon baking powder
  • 1/4 cup Greek yogurt (feel free to use non-dairy yogurt)
  • 1 tablespoon butter, softened (or vegan butter)
  • 3 tablespoons sugar, divided
  • 1 teaspoon cinnamon

Instructions

  • Preheat oven to 350° Fahrenheit and lightly grease a small ramekin.
  • Add the ½ cup of self-rising flour, ¼ cup of yogurt, and 1 tablespoon sugar to a small mixing bowl. Mix together until a dough forms. If the dough seems too dry, add an additional 1 tablespoon of yogurt. The dough should be sticky, but not too sticky to form into a ball.
  • Lightly flour a kitchen surface and flatten the dough out into a 3×6-inch rectangle on the surface.
  • Spread the 1 tablespoon of butter over the dough, then sprinkle evenly with the remaining 2 tablespoons of sugar then the 1 teaspoon of cinnamon.
  • Roll the dough up, starting from the short end until you’ve formed a cinnamon roll. Transfer the cinnamon roll to your prepared ramekin and gently press down on the top of the cinnamon roll to better fit into the ramekin. Bake for 15-18 minutes, or until lightly golden brown on top.
  • Remove from the oven, let cool for a few minutes then top with either a powdered sugar glaze, maple syrup, or enjoy as-is!

I’ve been making a variation of this healthy gluten-free apple crisp for the last 6+ years! But it wasn’t until this year that I finally decided to sit down, perfect it, and write out each ingredient.

It’s just one of those staple recipes I come back to every fall/holiday season. It’s that perfect end-of-day treat, best enjoyed warm with a scoop of vanilla ice cream… and maybe even a healthy homemade pumpkin spice latte on the side?? Yup, now we’re talkin’! So head to your local orchard, pick alllll the apples, then run home and bake up this cozy apple crisp.

overhead image of healthy gluten free apple crisp in a baking dish

What Makes This the BEST Gluten-Free Apple Crisp?

  • Quick and Easy: No complicated steps, just mix, sprinkle, and bake!
  • Wholesome Ingredients: Made with healthier alternatives like coconut sugar and almond flour.
  • Perfect Texture: Gooey apples with a crisp, buttery oat topping. YUM!
  • Adaptable for Dietary Needs: Can easily be made vegan and nut-free without sacrificing flavor.
  • Delicious Fall Flavor: The combination of tart apples, cinnamon, and a touch of lemon gives this dessert a warm and comforting taste.

What You’ll Need to Make This Recipe

Apples: Granny Smith apples are recommended because they hold their shape well and provide a nice tartness that balances the sweetness of the topping. Other firm apples like Honeycrisp, Pink Lady, and Fuji are also great options.

Coconut Sugar or Brown Sugar: Adds sweetness without overpowering the dish. Coconut sugar is less refined and has a subtle caramel flavor.

Corn Starch: Helps thicken the apple juices as they bake, preventing the filling from becoming watery.

Lemon Juice (Optional): Brightens the apple filling and enhances the flavors. It also prevents the apples from browning too much before baking.

Cinnamon: Essential for that classic fall flavor. It adds warmth and depth to both the filling and the topping!

Rolled Oats: Provides a crisp, crumbly texture to the topping. Be sure to use certified gluten-free oats if necessary.

Almond Flour: A great gluten-free alternative to regular flour, adding a subtle nutty flavor and additional texture to the topping.

Butter (Non-Dairy Optional): Adds richness and helps create a crispy topping. Non-dairy butter works perfectly if making this vegan. I used Miyoko’s non-dairy butter and it works great in this recipe!

Top 5 Apples For Baking

  1. Granny Smith: Tart and firm, making them perfect for baking as they hold their shape.
  2. Honeycrisp: Sweet, juicy, and crisp, adding great flavor and texture.
  3. Pink Lady: Sweet with a nice tartness, they retain their shape well when baked.
  4. Braeburn: Well-balanced between sweet and tart, perfect for crisps and pies.
  5. Fuji: Sweet and firm, they add a great depth of flavor to any baked dessert.

Adjust This Recipe to Your Dietary Needs

  • Make it Nut-Free: Replace almond flour with oat flour or a gluten-free all-purpose flour blend to make the recipe nut-free.
  • Vegan Option: Use non-dairy butter to keep it fully vegan.
gluten free apple crisp on a plate with a scoop of vanilla ice cream

Can I Make Other Gluten-Free Fruit Crisps?

Absolutely! This versatile crisp recipe can be adapted with various fruits:

Cherry Crisp: Use fresh or frozen cherries in place of apples. Reduce the coconut sugar slightly to account for the cherries’ sweetness.

Pear and Cranberry Crisp: Replace apples with sliced pears and add 1 cup of fresh cranberries for a tart twist.

Peach Blueberry Crisp: Substitute peaches and blueberries, but reduce the sweetener slightly as these fruits can be naturally sweeter.

Why This Recipe is Perfect for Any Occasion This gluten-free apple crisp is not just another dessert; it’s a comforting, warm, and healthier treat that everyone can enjoy. Whether you’re accommodating dietary restrictions or just looking for a delicious fall dessert, this crisp checks all the boxes. Plus, it’s easy to adjust, making it the ideal recipe for any gathering.

gluten free apple crisp in a baking dish with a spoon and two scoops of ice cream on top.
5 from 2 votes

Gluten-Free Apple Crisp

This healthy gluten-free apple crisp is the easiest and best fruit crisp you’ll ever make. It’s perfectly sweet with a crumbly oat topping, and ready in no time! This recipe is not only gluten-free but can be adapted to be dairy-free, vegan, and refined sugar-free.
Print Pin Rate
Prep Time: 5 minutes
Cook Time: 30 minutes
Total Time: 35 minutes
Servings: 8 servings

Ingredients

For the apples:

  • 5-6 apples, peeled and thinly sliced (about 1/8-inch thin)
  • 1/4 cup coconut sugar, or brown sugar
  • 1 tablespoon corn starch
  • 2 tablespoons lemon juice (optional)
  • 1 teaspoon cinnamon

For the crisp:

  • 1 cup rolled oats
  • 3/4 cup almond flour
  • 1/2 cup coconut sugar, or brown sugar
  • 6 ounces butter, cut into 1-inch cubes (I used non-dairy butter)
  • 2 teaspoons cinnamon

Instructions

  • Preheat oven to 350° Fahrenheit.
  • Add all apple ingredients to a 9-inch baking dish and toss together until evenly coated, then spread apples into an even layer around the dish.
  • Add all crisp ingredients to a large bowl. Use a fork to mix together, until a crumbly mixture forms. Sprinkle crisp topping evenly over the apples.
  • Bake for 40-45 minutes or until apples are soft, then let cool slightly before serving.

Fall is in the air, and you know what that means – it’s pumpkin spice season! But don’t worry, we’ve got your back with a scrumptious Gluten-Free Pumpkin Coffee Cake recipe that’s not just gluten-free but also vegan and refined sugar-free. So, grab your apron, a pumpkin spice latte, and let’s dive right into this autumn treat.

gluten-free pumpkin coffee cake on a baking sheet with milk on the side

What You’ll Need to Make Gluten-Free Pumpkin Coffee Cake

Gluten-Free All-Purpose Flour: To keep it gluten-free, we’ll be using a gluten-free all-purpose flour blend. Make sure it’s labeled as such to avoid any unwanted gluten surprises. I use and recommend this Bob’s Red Mill Gluten-Free 1:1 Baking Flour.

Coconut Sugar or Brown Sugar: Sweeten things up with a touch of coconut sugar or brown sugar. These options add that wonderful caramel flavor we all crave in coffee cake.

Pumpkin Puree: Our star ingredient! Go for the canned pumpkin puree or whip up some homemade pumpkin puree for that authentic fall flavor.

Cinnamon: Spice things up with a generous pinch of cinnamon. It’s the secret ingredient that’ll make your kitchen smell like a cozy pumpkin spice haven.

overhead image of gluten-free pumpkin coffee cake on a baking sheet

Tips and Tricks

  • The Perfect Flour Mix: When using gluten-free flour, it’s crucial to get the right texture. Mix your gluten-free flour with a bit of xanthan gum to help with binding and structure. Typically, 1/2 teaspoon per cup of flour should do the trick.
  • Pumpkin Magic: If you want your coffee cake to be extra pumpkin-y, add a touch of pumpkin pie spice in addition to the cinnamon. Nutmeg, cloves, and allspice will give it that unmistakable autumn flavor.
  • Say No to Overbaking: One of the biggest gluten-free baking pitfalls is overbaking. Keep an eye on your coffee cake and use the toothpick test. Insert a toothpick into the center, and if it comes out with just a few moist crumbs, your cake is ready. Overbaking can make it dry.
close-up image of gluten-free pumpkin coffee cake
4.34 from 6 votes

Gluten-Free Pumpkin Coffee Cake (vegan & refined sugar-free!)

Fall is in the air, and you know what that means – it’s pumpkin spice season! But don’t worry, we’ve got your back with a scrumptious Gluten-Free Pumpkin Coffee Cake recipe that’s not just gluten-free but also vegan and refined sugar-free. So, grab your apron, a pumpkin spice latte, and let’s dive right into this autumn treat.
Print Pin Rate
Prep Time: 15 minutes
Cook Time: 45 minutes
Total Time: 1 hour
Servings: 16 servings

Equipment

  • 1 large bowl
  • 1 medium bowl
  • 1 small bowl
  • 1 9×9-inch baking pan

Ingredients

  • 2 1/2 cups gluten-free all purpose flour see Notes
  • 2 teaspoons baking powder
  • 1/2 teaspoon baking soda
  • 1 tablespoon pumpkin pie spice
  • 1/2 teaspoon salt
  • 1 cup coconut sugar or brown sugar
  • 1 cup milk (I used almond milk)
  • 1/3 cup melted coconut oil or melted butter
  • 1 cup pumpkin puree
  • 1 tablespoon vanilla extract

For the filling:

  • 1/4 cup coconut sugar or brown sugar
  • 1 tablespoon gluten-free all purpose flour
  • 1 teaspoon cinnamon

For the streusel topping:

  • 1 cup gluten-free all purpose flour
  • 1 cup coconut sugar, or brown sugar
  • 1/2 cup softened butter (I used vegan butter)
  • 1 teaspoon cinnamon

Instructions

  • Preheat oven to 350° Fahrenheit and line an 8×8-inch baking pan with parchment paper.
  • In a large bowl, mix together the gluten-free all purpose flour, baking powder, baking soda, pumpkin pie spice, and salt.
  • In a separate medium bowl, whisk together the coconut sugar, milk, melted coconut oil, pumpkin puree, and vanilla extract.
  • Slowly pour the wet ingredients into the dry ingredients while stirring, then mix until just combined. Set the cake batter aside.
  • Add all filling ingredients to a small bowl and mix together.
  • Then, add all streusel topping ingredients to a bowl and mix together until it comes together. 
  • Transfer half of the batter to the 8×8-inch baking pan, then evenly pour the filling over the top of the batter.
  • Pour the remaining batter over the filling, then top the whole thing with an even layer on the streusel topping.
  • Bake for 45-50 minutes, or until a toothpick inserted down the center of the cake comes out mostly clean. Remove from pan and cool on a wire cooling rack before slicing and serving.

Notes

  • Gluten-Free All Purpose Flour: Make sure you’re gluten-free flour contains xanthan gum for this recipe! If it doesn’t, then add 1 1/2 teaspoons of xanthan gum in with the dry ingredients.
  • Nutrition

    Serving: 1serving | Calories: 272kcal | Carbohydrates: 44g | Protein: 2.5g | Fat: 10g | Sugar: 26g

    There you have it, folks! A delightful Gluten-Free Pumpkin Coffee Cake recipe that’s not only gluten-free but also vegan and refined sugar-free. With the warmth of cinnamon and the cozy embrace of pumpkin, this coffee cake will have your taste buds doing the autumn dance.

    So, whether you’re gluten-sensitive, vegan, or simply looking for a healthier treat, this coffee cake has got you covered. Happy baking, and enjoy the flavors of fall in every bite!

    This gluten-free zucchini bread is deliciously moist! It’s super easy to make and loaded with fresh zucchini. Enjoy a thick slice of this gluten-free zucchini bread with a little butter for breakfast or as a snack!

    gluten-free zucchini bread on a baking sheet.

    The Story Behind This Gluten-Free Zucchini Bread Recipe

    My parents were those people that built a garden during quarantine. Anyone else?? And while it took a while to enjoy the fruits (literally) of their labor, oh man was it worth all their hard work! They have strawberries, blueberries, lettuce, every herb you can think of, and a whole BUNCH of zucchini. Like A LOT of zucchini. So when they sent me home a couple weeks ago with a massive bag of homegrown zucchini, I knew exactly what I was going to do with it. Though I had never made gluten-free zucchini bread before, so I took a few notes from my gluten-free banana bread recipe, tweaked things a bit, and this incredible recipe was born!

    sliced gluten-free zucchini bread on a baking sheet with milk on the side.

    What You Need To Make Gluten-Free Zucchini Bread

    Zucchini – This dark green veggie is loaded vitamins, minerals, and antioxidants! It’s also high in fiber and has been proven to aid healthy digestion. Good-for-you zucchini also flourishes in the summer months! (A big reason why my parents currently have SO much of it right now).

    To prep zucchini for this recipe, simply slice off one end and run the zucchini down a cheese grater. Continue to grate the zucchini until you have one heaping cup worth of shredded zucchini. Once grated, you’ll wrap the zucchini in a dish towel and squeeze out as much of the liquid from the zucchini as possible. This summer vegetable holds on to a lot of water, and to avoid a soggy zucchini bread, you’ll want to squeeze out as much of that water as you can. Once the water is removed, you’re ready to use your shredded zucchini in this gluten-free zucchini bread recipe!

    Gluten-Free All Purpose Flour – I use and love the King Arthur Measure for Measure Gluten-Free Flour for most of my gluten-free baked goods recipes. It’s a solid gluten-free flour that holds its structure when baked and never fails me. However, you can use your favorite gluten-free all purpose flour for this recipe. My one suggestion is to always make sure that whatever gluten-free all purpose flour you use contains xanthan gum. Xanthan gum is crucial to binding and quite literally keeping everything together.

    gluten-free zucchini bread step 1
    gluten-free zucchini bread step 3
    gluten-free zucchini bread step 4

    Adjust This Recipe to Your Dietary Needs

    • Make it Nut-Free: Omit the almond flour in this recipe and use an additional 1/2 cup of gluten-free all purpose flour instead.
    • Make it Vegan: To make this a gluten-free and vegan zucchini bread, try using either two flax eggs, one ripe mashed banana, or 1 cup of apple sauce in place of the eggs in this recipe.
    • Add Gluten: Use 2 cups of regular all purpose flour in place of the gluten-free all purpose flour and almond flour.
    sliced gluten-free zucchini bread on a baking sheet with a knife.
    5 from 1 vote

    Gluten-Free Zucchini Bread

    This gluten-free zucchini bread is deliciously moist! It’s super easy to make and loaded with fresh zucchini. Enjoy a thick slice of this gluten-free zucchini bread with a little butter for breakfast or as a snack!
    Print Pin Rate
    Prep Time: 10 minutes
    Cook Time: 45 minutes
    Total Time: 55 minutes
    Servings: 8 servings

    Ingredients

    • 1 cup shredded zucchini
    • 1 1/2 cups gluten-free all purpose flour, see Notes
    • 1/2 cup almond flour
    • 1 teaspoon baking soda
    • 1 teaspoon baking powder
    • 1 teaspoon cinnamon
    • 2 eggs
    • 1/2 cup coconut oil or butter, melted
    • 1 cup sugar
    • 1 tablespoon lemon juice
    • 2 teaspoons vanilla extract

    Instructions

    • Preheat oven to 375° Fahrenheit and lightly grease a 9×5 loaf pan.
    • Wrap the shredded zucchini in a dish towel and squeeze over the sink to remove as much water from the zucchini as possible, then set aside.
    • Mix together the gluten-free all purpose flour, almond flour, baking soda, baking powder, and cinnamon in a large bowl.
      gluten-free zucchini bread step 1
    • In a separate bowl, whisk together the eggs, melted coconut oil, sugar, lemon juice, and vanilla extract until combined.
      gluten-free zucchini bread step 2
    • Add the wet ingredients into the dry ingredients and gently fold together until no flour remains.
    • Gently fold in the shredded zucchini until just combined.
    • Transfer batter to prepared loaf pan and bake for 45-50 minutes or until a toothpick inserted in the center comes out clean. Let cool in pan for 10 minutes before transferring to a wire rack to cool completely.
      gluten-free zucchini bread step 5

    Notes

  • Gluten-Free All Purpose Flour: I use and love the King Arthur Measure for Measure Gluten-Free Flour in this recipe, though you can use any all purpose gluten-free flour you’d like as long as it contains xantham gum.
  • Nutrition

    Calories: 300kcal

    Fluffy and perfectly spicy healthy gingerbread muffins! The perfect festive snack, that comes together in the blender. Oats, molasses, and ground ginger make these gingerbread muffins healthy AND delicious!

    glunte-free gingerbread muffins piled on top of a marble board.

    What You’ll Need to Make Gluten-Free Gingerbread Muffins

    Old Fashioned Rolled Oats – It’s super important you use old fashioned/rolled oats in this recipe. Avoid instant, steel-cut, or Irish oats. The first step involves grinding these oats into a flour in your blender. When doing this, try to grind them as fine as possible. Finely ground oats will result in fluffier muffins!

    Apple Sauce – I used apple sauce in these gingerbread muffins, because it yields little to no flavor. However, if you don’t have apple sauce, feel free to substitute it with 1/2 cup mashed banana. Mashed banana will give these muffins a slight banana flavor, which if you like banana, I’m sure you won’t mind.

    Molasses – Any and all gingerbread recipes contain molasses, which is how they get their signature dark-brown color. Don’t skip the molasses, it’s super important for both the flavor and structure of these muffins.

    Ground Ginger – Wouldn’t be gingerbread muffins without some ginger! This recipe packs in tons of that spicy ginger flavor, which I personally LOVE. However, if you want a more subtle ginger flavor, go ahead and use just 1/2 teaspoon ground ginger instead.

    three gluten-free gingerbread muffins stacked on top of each other.

    Tips and Tricks

    • Use a large cookie scoop or 1/4-cup measuring cup to fill your muffin tin. This’ll ensure even-sized muffins, with that beautiful dome on top!
    • For extra sweetness, top your muffins with a simple 2-ingredient powdered sugar glaze. To make it, whisk together 1/2 cup powdered sugar with 2-3 tablespoons milk. Once smooth, use a spoon to drizzle glaze over cooled gluten-free gingerbread muffins.
    • Store these muffins in an airtight container at room temperature for up to 3 days. Or, to make them last longer, pop them in the freezer for up to 3 months!

    Adjust This Recipe to Your Dietary Needs

    Make it Vegan: While I haven’t tested it myself, you can try replacing the eggs with either two flax eggs or by using your favorite vegan egg replacer. I’ve used this Bob’s Red Mill Egg Replacer in a number of other recipes and have always loved it!

    gingerbread muffin with a bite taken out.
    4.03 from 34 votes

    Gluten-Free Gingerbread Muffins

    Fluffy and perfectly spicy gluten-free gingerbread muffins! The perfect festive snack, that comes together in the blender. Oats, molasses, and ground ginger make these gluten-free gingerbread muffins healthy AND delicious!
    Print Pin Rate
    Prep Time: 5 minutes
    Cook Time: 20 minutes
    Total Time: 25 minutes
    Servings: 10 muffins

    Ingredients

    • 2 cups old fashioned rolled oats
    • 1/2 cup apple sauce, unsweetened
    • 1/2 cup maple syrup
    • 1/4 cup molasses
    • 2 eggs
    • 2 teaspoons vanilla extract
    • 2 teaspoons baking powder
    • 2 teaspoons cinnamon
    • 1 1/2 teaspoons ground ginger
    • 1/2 teaspoon nutmeg
    • 1/2 teaspoon salt

    Instructions

    • Preheat oven to 350° Fahrenheit and line a muffin tin with muffin liners.
    • Add oats to a blender and blend until it’s ground into a flour.
    • Add in remaining ingredients, then blend until a smooth batter forms.
    • Transfer ½ cup batter into each muffin mold, then bake for 20-25 minutes or until a toothpick inserted down the center of one muffin comes out clean. Remove from oven and transfer muffins to a wire cooling rack, let cool before eating.

    Nutrition

    Calories: 300kcal