Tag

cinnamon

Browsing

Is there anything that screams Fall more than apple cider donuts?! If you’ve never tried making homemade baked donuts before, these apple cider donuts are a must-make for this Fall season!

close-up image of healthy vegan apple cider donuts stacked on top of each other.

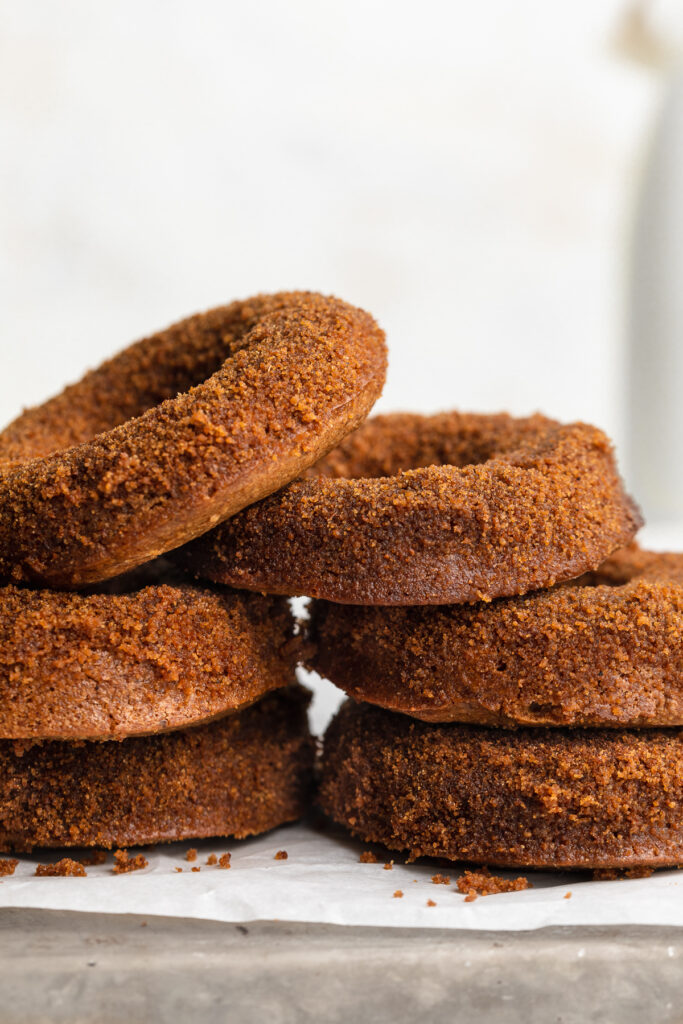
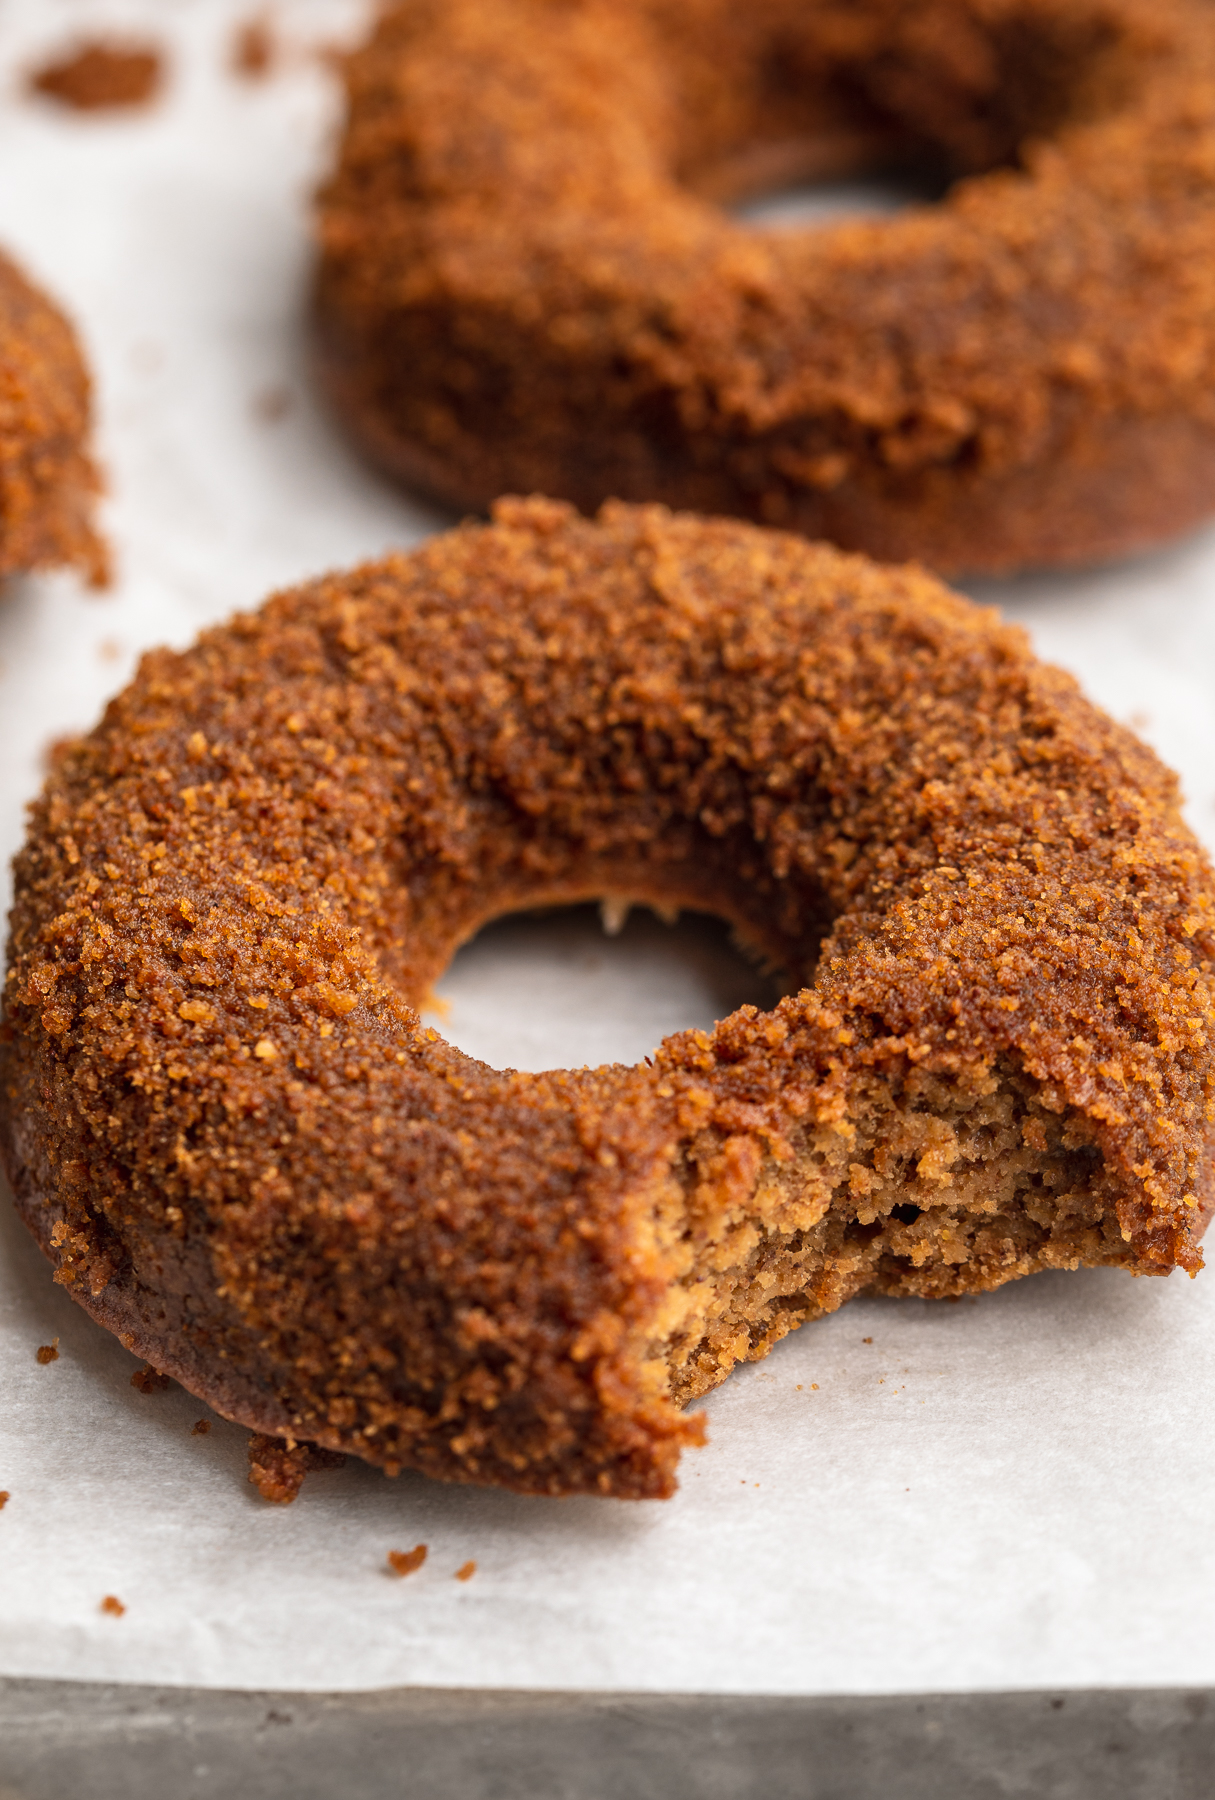
Not only are these apple cider donuts incredibly soft and fluffy, but it contains no dairy or eggs, is baked instead of fried, and is adorned with crunchy and sweet cinnamon sugar topping that is absolutely mouth-watering. Fall isn’t complete without apple picking and a batch of these vegan donuts!

healthy vegan apple cider donuts on parchment paper with a bite taken out.

MAIN INGREDIENTS NEEDED TO MAKE VEGAN APPLE CIDER DONUTS

  • Apple Cider – Apple cider, whether store-bought or homemade, is going to create the delicious apple flavor we’re looking for in this recipe.
  • Rolled Oats – I love baking up my gluten-free treats with oats! Not only is it inexpensive, but they’re super easy to acquire. 
  • Flax Eggs – A flax egg is a vegan egg substitute and helps bind all the ingredients together!
  • Baking Soda & Powder – Baking soda and powder give the batter that quick inflation in the oven that creates the cake-like fluffy donuts we’re looking for.
  • Cinnamon – This ingredient will be used for making not only the donut, but of course, the cinnamon sugar!
  • Nutmeg – Known for its spicy, nutty flavor, nutmeg perfectly complements the sweet & warm cinnamon in this recipe.
  • Vegan Butter – I typically use the Earth Balance Vegan Buttery Sticks in my vegan/dairy-free baked goods. Though any vegan butter will work here, just be sure to melt it completely before adding it to this recipe. 
  • Coconut Sugar – I use coconut sugar when making the cinnamon sugar, but you can opt for organic cane sugar if you prefer.
healthy vegan apple cider donuts stacked on top of each other, with a bottle of milk on the side.

ADJUST THIS APPLE CIDER DONUTS RECIPE TO YOUR DIET

  • Add Dairy: Although I use dairy-free butter, you could substitute it for melted coconut oil or regular butter if you’d like! You can also use regular eggs instead of flax.
  • Add Gluten: You can try using 1 cup of all purpose flour instead of oat flour.

TIPS FOR MAKING BAKED VEGAN APPLE CIDER DONUTS

  • Bring the wet ingredients to room temperature before you combine them with the flour and other dry ingredients.
  • Don’t be alarmed if you see bubbles starting to form after mixing the wet and dry ingredients. It’s just the baking soda and powder reacting the way they’re supposed to. 
close-up image of a healthy vegan apple cider donut with a bite taken out.
No ratings yet

Baked Vegan Apple Cider Donuts (Gluten-Free)

Is there anything that screams Fall more than apple cider donuts?! If you’ve never tried making homemade baked donuts before, these apple cider donuts are a must-make for this Fall season!
Print Pin Rate
Prep Time: 10 minutes
Cook Time: 20 minutes
Total Time: 30 minutes
Servings: 12 servings

Ingredients

For the donuts:

  • 1 1/2 cups rolled oats
  • 1/2 teaspoon baking soda
  • 1/2 teaspoon baking powder
  • 2 teaspoons cinnamon
  • 1/2 teaspoon nutmeg
  • 1/4 teaspoon salt
  • 2 flax eggs, see Notes
  • 1 cup apple cider
  • 1/2 cup creamy almond or peanut butter
  • 1/2 cup coconut sugar
  • 1 tablespoon apple cider vinegar, optional but makes for fluffier donuts
  • 1 teaspoon vanilla extract

For the cinnamon sugar:

  • 1 cup coconut sugar
  • 1 tablespoon cinnamon
  • 6 tablespoons dairy-free butter, melted

Instructions

  • Preheat your oven to 350° Fahrenheit and grease a donut pan.
  • Add the rolled oats, baking soda, baking powder, cinnamon, nutmeg, and salt to a blender. Blend until oats are ground into a flour.
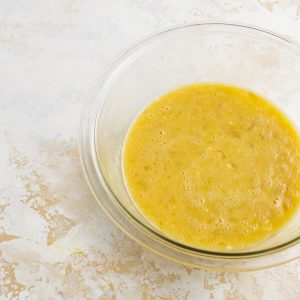
  • Add in the flax eggs, apple cider, almond butter, coconut sugar, apple cider vinegar, and vanilla extract. Blend until a smooth batter forms.
  • Carefully fill your donut molds with the batter, I used a cookie scoop to keep things neat.
  • Bake for 20-25 minutes and pop out of the molds onto a cooling racks, allow to cool completely before proceeding to the next step.
  • Combine the coconut sugar and cinnamon in a small bowl – set up an assembly line with the donuts, bowl of melted butter, bowl of cinnamon sugar, and a cooling rack.
  • Gently dip each donut in the butter before transferring and coating in the cinnamon sugar, place on a cooling rack while you finish up the rest. Once all are coated, store in a sealed container on either the counter for two days or the fridge for up to one week .

Notes

  • Flax Eggs: To make one flax egg, combine 1 tablespoon of ground flax meal with 3 tablespoons of water and let sit on the counter for five minutes to thicken.
  • Storage: store in a closed container at room temperature for 2-3 days, in the fridge for 1 week, or in the freezer for 1 month.
  • Nutrition

    Calories: 300kcal

    OTHER VEGAN AND GLUTEN-FREE DESSERTS

    These hummingbird cupcakes are the perfect spring-time sweet treat! They’re grain-free, dairy-free, and refined sugar-free, topped off with a delicious cream cheese frosting.

    almond flour hummingbird cupcakes on a baking sheet with almond milk on the side.

    It’s funny because I’m literally eating a hummingbird cupcake (and getting cream cheese frosting all over my keyboard) as I write this. I’m full-on addicted to the babies. They’re sweet, but not too sweet. Incredibly versatile – enjoy them as a snack, dessert, or heck you can even eat them for breakfast!

    The first time I ever ate a hummingbird-anything was at this cute little muffin place by my parents house. My mom got me to try one of their hummingbird muffins and I’ve been hooked ever since. I then discovered hummingbird cake and was like – woahhhh, I didn’t know life could get EVEN better! And in case you’re like, Sam WTF is a hummingbird cupcake?! It’s similar to carrot cake, but has crushed pineapple and shredded coconut instead of carrots. It also features a cream cheese frosting, just like carrot cake. If you’re looking for a muffin instead of a cupcake, simply make these without the cream cheese frosting. My suggestion here is – take a plain cupcake, top it with a little crunchy almond butter, and enjoy it as a sweet afternoon snack!

    an almond flour hummingbird cupcake on a baking sheet.

    What You’ll Need To Make Almond Flour Hummingbird Cupcakes

    Almond Flour – I chose almond flour as the base of these cupcakes for two reasons. One – it’s grain-free, making these cupcakes so light and healthy that you could literally eat them for breakfast if you wanted to. And two – it yields a soft, crumbly cupcake that doesn’t fall apart when bitten into, but also isn’t at all dense. I specifically used this Anthony’s Organic Almond Flour, it’s fairly priced and bakes like a charm!

    Coconut Sugar – Just half a cup of coconut sugar is all you need in these cupcakes! This is what I mean by they’re sweet, but not too sweet. Coconut sugar is lower on the glycemic index than usual white sugar. It also contains many more vitamins and minerals than most other sugars. If you don’t have coconut sugar, you can either use brown sugar, cane sugar, or white sugar instead.

    Mashed Bananas – You won’t find a single hummingbird recipe without mashed bananas in it. In conjunction with the pineapple and coconut, a little banana is truly magnificent. It adds a touch of sweetness and incredible flavor. Though if you’re not a banana fan, you can use one cup of apple sauce instead.

    Crushed Pineapple – Like I said earlier, crushed pineapple is a main ingredient in these hummingbird cupcakes. I buy canned crushed pineapple and rinse out the liquid before using in this recipe. Though you can use finely chopped fresh pineapple instead.

    Shredded Coconut – Similar to the crushed pineapple, these wouldn’t be hummingbird cupcakes without a little coconut. My one thing when baking with coconut is to make sure it’s unsweetened. Our cupcakes are sweet enough!

    overhead image of almond flour hummingbird cupcakes on a baking sheet

    Adjust This Recipe To Your Dietary Needs

    • Make it Paleo: Leave out the dairy-free cream cheese frosting and you’ll have delicious little paleo hummingbird muffins!
    • Make it Vegan: Use your favorite egg-substitute in place of the eggs in this recipe. I have not tested this recipe using flax eggs, though I can image that it will yield slightly less-fluffy, but still delicious cupcakes.
    • Sugar-Free Option: Leave out the frosting and sub 1/2 cup of your favorite sugar-free sweetener for the coconut sugar. You can also leave out the coconut sugar altogether, if you’d like!
    No ratings yet

    Almond Flour Hummingbird Cupcakes

    These hummingbird cupcakes are the perfect spring-time sweet treat! They’re grain-free, dairy-free, and refined sugar-free, topped off with a delicious cream cheese frosting.
    Print Rate
    Prep Time: 10 minutes
    Cook Time: 20 minutes
    Total Time: 30 minutes
    Servings: 12 cupcakes

    Ingredients

    • 2 cups almond flour, see Notes
    • 1/2 cup coconut sugar
    • 1 teaspoon baking soda
    • 1/2 teaspoon baking powder
    • 1 teaspoon cinnamon
    • 2 tablespoons coconut oil, melted
    • 1 cup mashed banana (about 2 very ripe bananas)
    • 2 eggs, see Notes
    • 1 teaspoon vanilla extract
    • 1/2 cup crushed pineapple, drained
    • 1/2 cup shredded coconut, unsweetened

    For the cream cheese frosting:

    • 1/2 cup dairy-free cream cheese
    • 1/4 cup dairy-free butter, softened
    • 2 cups powdered sugar
    • 1 teaspoon vanilla extract

    Instructions

    • Preheat oven to 350° Fahrenheit and line a cupcake tin with 12 cupcake liners.
      Hummingbird Cupcakes Process Photo 1
    • In a large bowl, mix together the almond flour, coconut sugar, baking soda, baking powder, and cinnamon.
      Hummingbird Cupcakes Process Photo 2
    • In a small bowl, mix together the coconut oil, mashed bananas, eggs, and vanilla extract.
      Hummingbird Cupcakes Process Photo 3
    • Add the wet ingredients, crushed pineapple, and shredded coconut into the dry ingredients and mix to combine.
      Hummingbird Cupcakes Process Photo 4
    • Fill each cupcake liner with 1/4 cup of batter and bake for 20-25 minutes or until a toothpick inserted into a cupcake comes out clean.
      Hummingbird Cupcakes Process Photo 5
    • Transfer cupcakes to a wire cooling rack to cool completely before frosting.
      Hummingbird Cupcakes Process Photo 6
    • Make the frosting by adding all ingredients to a bowl and beating with either a hand or stand mixer until combined. Dollop frosting onto cooled cupcakes and enjoy!
      Hummingbird Cupcakes Process Photo 7

    Video

    Notes

  • Almond Flour: Be sure to use almond flour, not almond meal.
  • Coconut Oil: You can use 2 tablespoons of vegetable oil or melted butter instead.
  • Eggs: I like to remove my eggs from the fridge a couple hours before baking. If your eggs are too cold when added to the batter, they might cause your coconut oil to re-harden.
  • Nutrition

    Calories: 300kcal

    These carrot cake baked oats taste just like eating carrot cake for breakfast! This recipe includes a vegan cream cheese icing and is entirely refined sugar-free. Add a scoop of almond butter and a handful of chopped walnuts for a healthy, well-balanced breakfast.

    Close-up image of carrot cake baked oats with cream cheese icing and carrots on top.

    What You Need To Make Carrot Cake Baked Oats

    Rolled Oats – You can use either rolled oats or quick oats in this recipe. I like to stock up on oats whenever I’m at the store, they’re so versatile and super satisfying. Oats are one of the best gluten-free grains, loaded with vitamins, minerals, and plenty of health benefits.

    Apple Sauce – You can swap mashed banana for the apple sauce in this recipe – use whichever you prefer!

    Maple Syrup – I love using maple syrup in place of refined sugar in my recipes. Maple syrup not only tastes delicious, but is full of antioxidants and less likely to spike your blood sugar.

    Walnuts – Add a much-needed crunch to these carrot cake baked oats. I used raw, unsalted walnuts in my recipe and gave them a quick chop before mixing them in. If you don’t like walnuts, feel free to either swap them with another nut or leave them out!

    Non-Dairy Cream Cheese – No carrot cake is complete without the cream cheese frosting. Therefore, I developed a two-ingredient cream cheese icing for these baked oats. My preferred non-dairy cream cheese is Kite Hill’s plain flavor. If you’re not dairy-free, you can definitely use regular cream cheese instead. Just make sure, whatever cream cheese you use, is plain and doesn’t have any added flavors.

    Carrot cake baked oats being scooped out of a mug.

    Adjust This Recipe To Your Dietary Needs

    • Add Protein: Throw one tablespoon of your favorite vanilla protein powder in with the oats and make the rest of the recipe as directed.
    • Make it Nut-Free: Use soy or coconut milk instead of almond milk and leave out the walnuts. If you’re also making the cream cheese icing, make sure your dairy-free cream cheese is nut-free as well!
    • Add Dairy: Swap out the almond milk for cow’s milk and the dairy-free cream cheese for regular cream cheese.
    5 from 1 vote

    Carrot Cake Baked Oats

    These carrot cake baked oats taste just like eating carrot cake for breakfast! This recipe includes a vegan cream cheese icing and is entirely refined sugar-free. Add a scoop of almond butter and a handful of chopped walnuts for a healthy, well-balanced breakfast.
    Print Rate
    Prep Time: 5 minutes
    Cook Time: 20 minutes
    Total Time: 25 minutes
    Servings: 1 serving

    Ingredients

    For the baked oats:

    • 1/2 cup rolled oats, see Notes
    • 1/2 cup apple sauce, see Notes
    • 1/4 cup non-dairy milk, see Notes
    • 1 tablespoon maple syrup
    • 1/2 teaspoon baking powder
    • 1/2 teaspoon cinnamon
    • 1/8 teaspoon ground ginger
    • 1/8 teaspoon nutmeg
    • 1/4 teaspoon vanilla extract
    • 2 tablespoons grated carrots
    • 1 tablespoon raisins, optional
    • 1 tablespoon walnuts, optional

    For the cream cheese icing:

    • 1 tablespoon non-dairy cream cheese
    • 1/2 tablespoon maple syrup

    Instructions

    • Preheat your oven to 350° Fahrenheit and lightly grease a oven-safe ramekin.
    • Add the oats, apple sauce, almond milk, maple syrup, baking powder, cinnamon, ground ginger, nutmeg, and vanilla extract to a blender and blend until smooth.
    • Pour into ramekin and mix in the raisins, carrots, and walnuts. Bake for 20-25 minutes.
    • Whisk together the dairy-free cream cheese and maple syrup in a small bowl. Pour icing over your oats and enjoy!

    Video

    Notes

  • Rolled Oats: You can also use quick oats, if you’d like.
  • Apple Sauce: You can swap the apple sauce for 1/2 cup of mashed banana.
  • Almond Milk: Use any non-dairy milk you’d like!
  • Walnuts: Pecans would also taste great, but use whatever nuts you’d like.
  • Nutrition

    Calories: 300kcal

    This dairy-free coffee creamer recipe only requires 3-ingredients: almonds, water and coconut milk. It’s perfect for adding to hot or iced beverages, including coffee, matcha, chai, golden milk, and more!

    Dairy-Free Coffee Creamer

    Only 3 Main Ingredients Needed For This Recipe!

    Only requiring 3-ingredients, this delicious and healthy coffee creamer is perfect to use when you’re avoiding dairy. Although I call it a coffee creamer, you can totally use it with teas and other beverages too. It’s super easy to make, though preparation of soaking the almonds/cashews will take at least 6 hours, so you’ll have to wait a little while before using it.

    • Raw Almonds – Or you can use cashews which is also delicious, though not as complementary to the flavors of coffee. 

    • Water

    • Full-Fat Coconut Milk

    Tips & Tricks When Making Dairy-Free Coffee Creamer

    • Coconut Milk: If you don’t like the taste of coconut, you can simply omit the coconut milk in this recipe. If leaving out the coconut milk, blend nuts with 2 cups of water instead of 1.

    • Optional Add-Ins: Dates, cinnamon, vanilla extract or maple syrup are all perfectly great options to add to this dairy-free coffee creamer for added sweetness.

    • Switch vanilla extract for French vanilla extract if you prefer. You can also add a splash of hazelnut extract along with the vanilla extract for more flavor!
    Dairy-Free Coffee Creamer
    5 from 2 votes

    Dairy-Free Coffee Creamer

    This dairy-free coffee creamer recipe only requires 3-ingredients and is perfect for adding to hot or iced beverages, including coffee, matcha, chai, golden milk, and more!
    Print Pin Rate
    Prep Time: 5 minutes
    Cook Time: 6 hours
    Total Time: 6 hours 5 minutes
    Servings: 8 servings

    Ingredients

    • 1 Cup Raw Almonds or Cashews
    • 1 Cup Filtered Water
    • 1 Can Full-Fat Coconut Milk

    Optional Add-Ins:

    • 2-3 Pitted Dates
    • 1 Pinch Cinnamon
    • 1 Teaspoon Vanilla Extract
    • 1/4 Cup Maple Syrup

    Instructions

    • Soak the almonds and cashews in a bowl of water, at room temperature for at least 6 hours.
    • Strain soaked nuts and place in blender along with 1 cup filtered water, blend until smooth.
    • Strain the nut milk through either a nut milk bag or a fine mesh strainer.
    • Pour strained nut milk back into blender along with coconut milk and any other add-ins you’d like. Pulse a few times to combine then store in an airtight container in the fridge for 4-5 days.

    Nutrition

    Calories: 300kcal

    Other Drink Recipes

    Perfectly fluffy and delicious coffee cake muffins made gluten-free, with a dairy-free option as well! They’re irresistibly soft, sweet, and complete with a cinnamon streusel topping. I especially love enjoying a warm gluten-free muffin with my coffee in the morning – there’s no better way to start the day!

    three gluten-free coffee cake muffins stacked on top of each other

    What You’ll Need For This Recipe

    Gluten-Free All Purpose Baking Flour – I use Bob’s Red Mill Gluten Free 1-1 Baking Flour in most of my gluten-free baking recipes. It bakes up beautifully and can pretty much be used as a 1:1 swap for regular all purpose flour! However, you can use any gluten-free all purpose baking flour you’d like. Though when it comes to gluten-free flours, it’s super important to the integrity of your bake that your flour contains xanthan gum. Xanthan gum creates structure and will essentially hold these muffins together. Therefore, if your gluten-free flour doesn’t have xanthan gum, supplement it with 1 teaspoon of xanthan gum in this gluten-free coffee cake muffins recipe.

    Butter – Any butter you’d like will work here! Salted, unsalted, and non-dairy butter all bake perfectly in this recipe. When it comes to salted butter, I truly don’t believe any butter has enough salt in it to make any difference in a recipe. So, feel free to use whatever butter you have on hand!

    Eggs – Bring your eggs to room temperature before getting started on this delicious breakfast or snack recipe. By doing this, we reduce the risk of the cold eggs re-solidifying the melted butter. It’s also always a great rule-of-thumb to have all ingredients at room temperature before starting on any baked goods recipe!

    Top Tips

    • You can freeze leftover gluten-free muffins for up to 3 months! I currently have half my batch in the freezer right now, ensuring they don’t go bad before I have a chance to eat them. Though for muffins you plan on eating right away, simple store them in an airtight container at room temperature for up to 1 week.
    • Avoid over-mixing the batter, as this could result in tough and chewy muffins! Therefore, when folding the wet ingredients into the dry, simply mix until no more flour pockets remain. Once just combined, put down the spatula and head straight into the next step!
    • These muffins are best enjoyed warm! So to warm them up after baking, I recommend either popping them in the microwave for 10-15 seconds, or into the toaster for a couple of minutes. Once warm, they’re irresistibly soft and flufy!

    Adjust This Recipe To Your Dietary Needs

    Make it Vegan – While I haven’t tried this variation myself yet, you may be able to get away with replacing the eggs in these muffins with a vegan egg substitute. I’ve used the Bob’s Red Mill Vegan Egg Substitute in other recipes, and have almost always found it successful. Flax eggs might work here as well, though expect a slightly more dense gluten-free muffin if going that route.

    Cut the Recipe in Half – This recipe makes 24 gluten-free coffee cake muffins, but if that sounds like too much for you, you can easily cut this recipe in half! That’s right, use half of all ingredients listed for just 12 perfect muffins.

    Use Regular Flour – Feel free to simply swap the gluten free all purpose flour for regular all purpose flour in this recipe.

    Other Delicious Mix-Ins

    Instead of the cinnamon and streusel topping, feel free to add one of the following to your gluten-free muffins:

    • Blueberries
    • Sliced Bananas
    • Chocolate Chips
    • Cranberries and Orange Zest
    • Lemon Juice and Poppyseeds
    • Strawberries
    • Raspberries
    • or simply leave them plain!

    Perfect Gluten-Free Coffee Cake Muffins

    3 from 159 votes
    Recipe by Samantha Course: BreakfastDifficulty: Easy
    Servings

    24

    servings
    Prep time

    10

    minutes
    Cooking time

    20

    minutes
    Total time

    30

    minutes

    Perfectly fluffy and delicious coffee cake muffins made gluten-free, with a dairy-free option as well! They’re irresistibly soft, fluffy, sweet, and complete with a cinnamon streusel topping. I especially love enjoying a warm gluten-free muffin with my coffee in the morning – there’s no better way to start the day!

    Ingredients

    • For the gluten-free muffins:
    • 3 cups gluten-free all purpose baking flour

    • 2 teaspoons baking powder

    • 1 teaspoon cinnamon

    • 1/2 teaspoon salt

    • 1 cup sugar

    • 1 cup butter, melted (I used non-dairy butter)

    • 3/4 cup milk (I used non-dairy almond milk)

    • 3 eggs, at room temperature

    • 1 teaspoon vanilla extract

    • For the crumb topping:
    • 1 cup gluten-free all purpose baking flour

    • 1 cup brown sugar

    • 1/2 cup butter, softened

    • 1 teaspoon cinnamon

    Directions

    • Preheat oven to 350° Fahrenheit and line a muffin tin with cupcake liners.
    • Mix together the flour, baking powder, cinnamon, and salt in a large bowl.
    • In a separate bowl, whisk together the sugar, melted butter, milk, eggs, and vanilla extract.
    • Slowly pour the wet ingredients into the dry ingredients, mix until just combined. Fill each muffin mold with about ¼ cup of batter.
    • Mix together all crumb topping ingredients in a bowl, then sprinkle over each muffin.
    • Bake for 20-25 minutes or until a toothpick inserted down the center of a muffin comes out clean. Let cool in tin for 10 minutes before transferring to a wire cooling rack to cool completely.

    Notes

    • Gluten-Free All Purpose Flour: I used Bob’s Red Mill Gluten Free 1:1 Baking Flour.
    • Butter: I used Earth Balance Vegan Buttery Sticks to make this recipe dairy-free.

    Did you make this recipe?

    Share it and tag @samdoesherbest on Instagram!

    Like this recipe?

    Follow us @samdoesherbest on Pinterest

    Other Delicious Gluten-Free Recipes You Must Try!