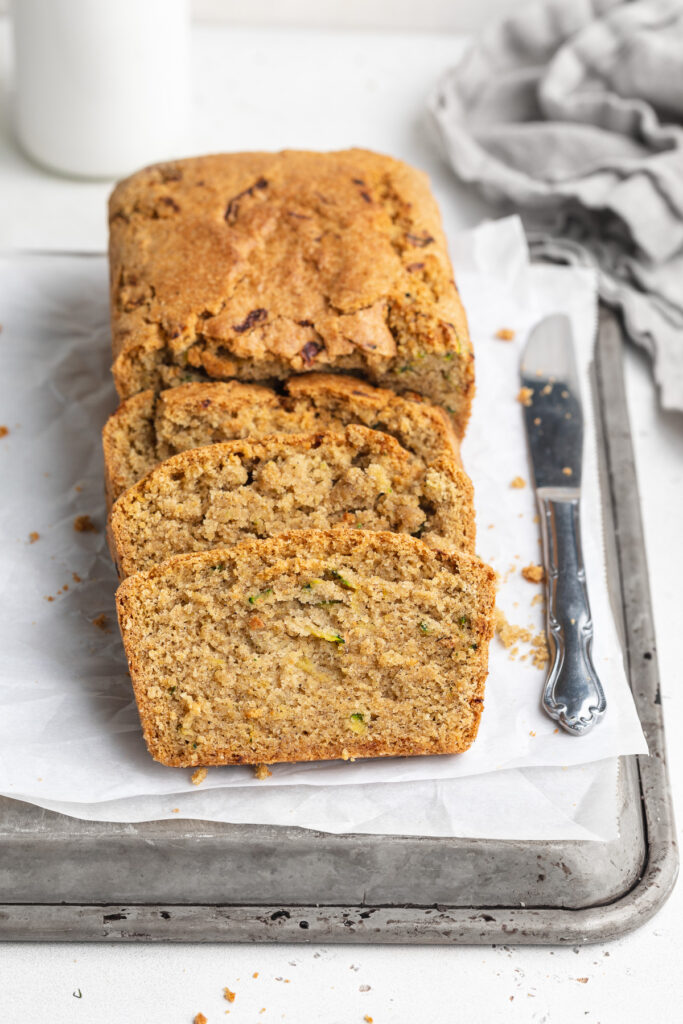
This gluten-free zucchini bread is deliciously moist! It’s super easy to make and loaded with fresh zucchini. Enjoy a thick slice of this gluten-free zucchini bread with a little butter for breakfast or as a snack!

The Story Behind This Gluten-Free Zucchini Bread Recipe
My parents were those people that built a garden during quarantine. Anyone else?? And while it took a while to enjoy the fruits (literally) of their labor, oh man was it worth all their hard work! They have strawberries, blueberries, lettuce, every herb you can think of, and a whole BUNCH of zucchini. Like A LOT of zucchini. So when they sent me home a couple weeks ago with a massive bag of homegrown zucchini, I knew exactly what I was going to do with it. Though I had never made gluten-free zucchini bread before, so I took a few notes from my gluten-free banana bread recipe, tweaked things a bit, and this incredible recipe was born!
What You Need To Make Gluten-Free Zucchini Bread
Zucchini – This dark green veggie is loaded vitamins, minerals, and antioxidants! It’s also high in fiber and has been proven to aid healthy digestion. Good-for-you zucchini also flourishes in the summer months! (A big reason why my parents currently have SO much of it right now).
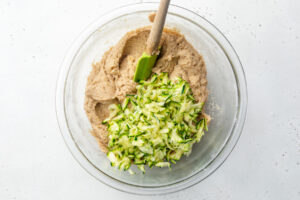
To prep zucchini for this recipe, simply slice off one end and run the zucchini down a cheese grater. Continue to grate the zucchini until you have one heaping cup worth of shredded zucchini. Once grated, you’ll wrap the zucchini in a dish towel and squeeze out as much of the liquid from the zucchini as possible. This summer vegetable holds on to a lot of water, and to avoid a soggy zucchini bread, you’ll want to squeeze out as much of that water as you can. Once the water is removed, you’re ready to use your shredded zucchini in this gluten-free zucchini bread recipe!
Gluten-Free All Purpose Flour – I use and love the King Arthur Measure for Measure Gluten-Free Flour for most of my gluten-free baked goods recipes. It’s a solid gluten-free flour that holds its structure when baked and never fails me. However, you can use your favorite gluten-free all purpose flour for this recipe. My one suggestion is to always make sure that whatever gluten-free all purpose flour you use contains xanthan gum. Xanthan gum is crucial to binding and quite literally keeping everything together.


Adjust This Recipe to Your Dietary Needs
- Make it Nut-Free: Omit the almond flour in this recipe and use an additional 1/2 cup of gluten-free all purpose flour instead.
- Make it Vegan: To make this a gluten-free and vegan zucchini bread, try using either two flax eggs, one ripe mashed banana, or 1 cup of apple sauce in place of the eggs in this recipe.
- Add Gluten: Use 2 cups of regular all purpose flour in place of the gluten-free all purpose flour and almond flour.

Gluten-Free Zucchini Bread
Ingredients
- 1 cup shredded zucchini
- 1 1/2 cups gluten-free all purpose flour, see Notes
- 1/2 cup almond flour
- 1 teaspoon baking soda
- 1 teaspoon baking powder
- 1 teaspoon cinnamon
- 2 eggs
- 1/2 cup coconut oil or butter, melted
- 1 cup sugar
- 1 tablespoon lemon juice
- 2 teaspoons vanilla extract
Instructions
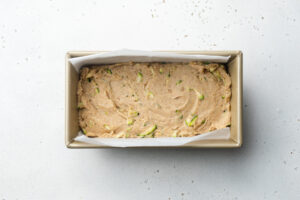
- Preheat oven to 375° Fahrenheit and lightly grease a 9×5 loaf pan.
- Wrap the shredded zucchini in a dish towel and squeeze over the sink to remove as much water from the zucchini as possible, then set aside.
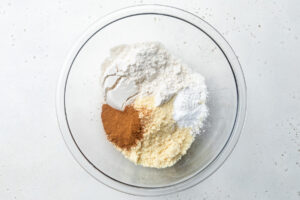
- Mix together the gluten-free all purpose flour, almond flour, baking soda, baking powder, and cinnamon in a large bowl.

- In a separate bowl, whisk together the eggs, melted coconut oil, sugar, lemon juice, and vanilla extract until combined.
- Add the wet ingredients into the dry ingredients and gently fold together until no flour remains.
- Gently fold in the shredded zucchini until just combined.
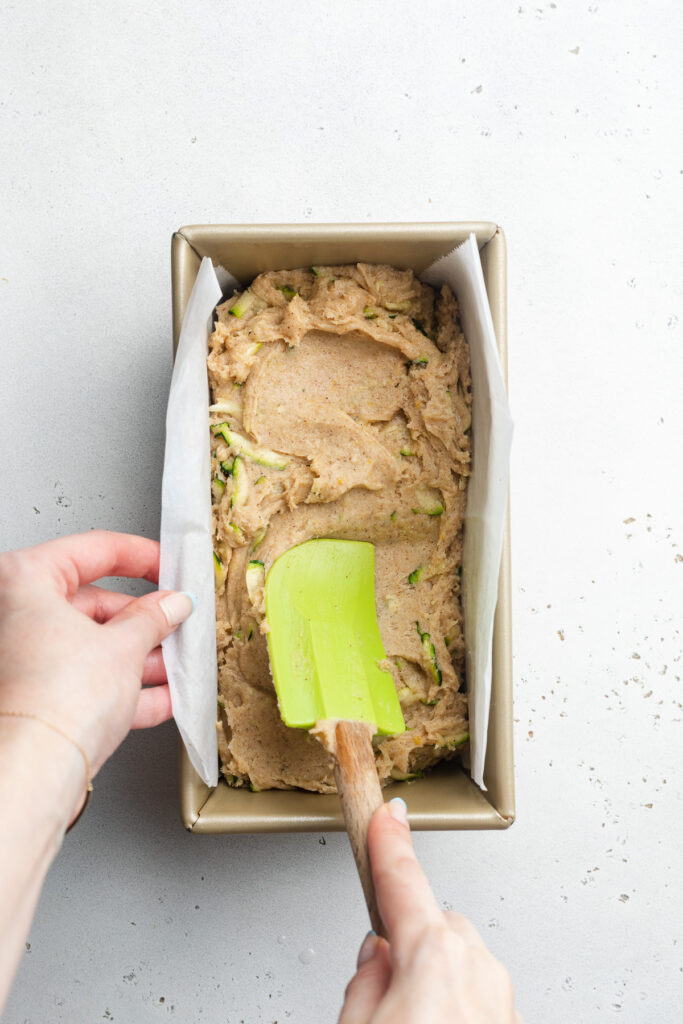
- Transfer batter to prepared loaf pan and bake for 45-50 minutes or until a toothpick inserted in the center comes out clean. Let cool in pan for 10 minutes before transferring to a wire rack to cool completely.