Tag

lunch

Browsing

Why You’ll Love This Recipe

This meal prep turkey club chopped salad is high in protein, full of fresh vegetables, and so satisfying. It’s a healthier twist on a classic club sandwich, without the bread, but with all the same delicious flavors. With just a few minutes of prep, you’ll have lunches ready for the whole week.

 meal prep turkey club chopped salad in a glass container.

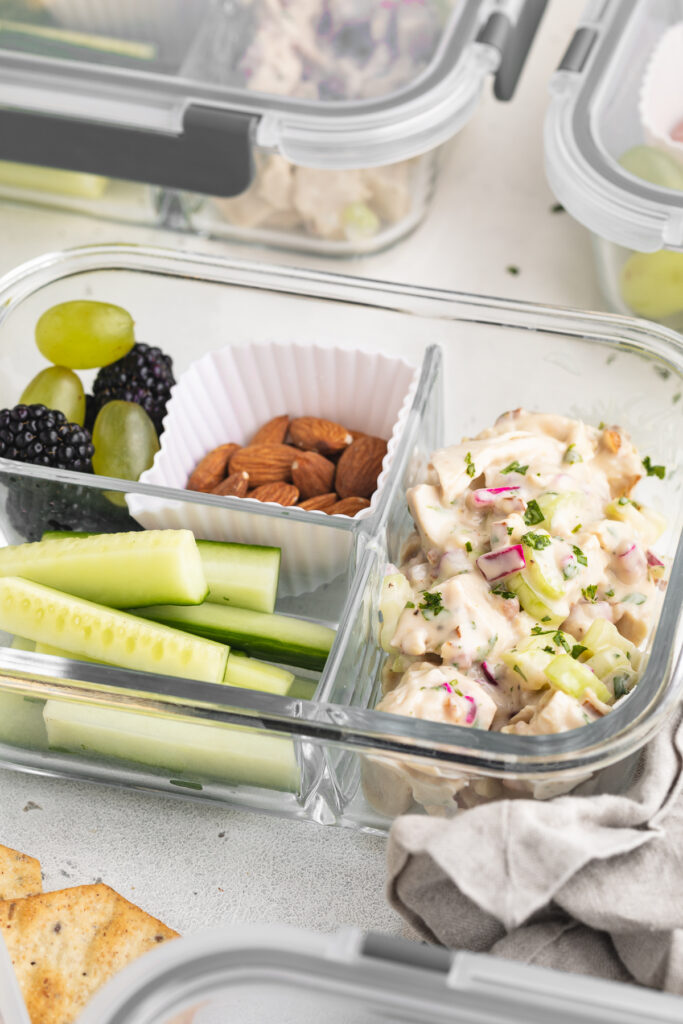
How Do I Meal Prep These Salads?

The key to keeping your salads fresh is layering and storing properly. Place sturdier ingredients like lettuce and tomato on the bottom, and keep softer toppings like avocado separate until you’re ready to eat. Store the salads in airtight containers for up to 4 days in the fridge, and add your favorite dressing just before serving to keep everything crisp.

overhead image of a meal prep turkey club chopped salad.

Recipe Variations and Substitutions

  • Swap the protein: Use grilled chicken, shredded rotisserie chicken, or even tuna for variety.
  • Make it vegetarian: Skip the bacon and turkey and add chickpeas or hard-boiled eggs for plant-based protein.
  • Change up the dressing: Ranch, balsamic vinaigrette, honey mustard, or a light Greek yogurt dressing all pair perfectly.
  • Add extra crunch: Toss in cucumbers, bell peppers, or sunflower seeds.
overhead image of a meal prep turkey club chopped salad.
No ratings yet

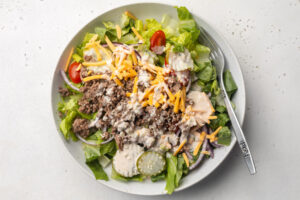
Meal Prep Turkey Club Chopped Salads

This Turkey Club Chopped Salad is the ultimate high-protein meal prep recipe, made with fresh romaine, turkey, bacon, avocado, and tomato. It’s quick, easy, and customizable, so you’ll have healthy lunches ready for the entire week in just minutes. Skip the takeout and enjoy a satisfying, flavor-packed salad that keeps you full and energized!
Print Pin Rate
Prep Time: 10 minutes
Total Time: 10 minutes
Servings: 4 servings

Ingredients

  • romaine lettuce chopped
  • tomato diced
  • green onion thinly sliced
  • avocado chopped
  • bacon cooked and crumbled
  • deli turkey chopped
  • deli ham chopped, optional

Instructions

  • Wash and chop all salad ingredients, keeping avocado separate until ready to eat to prevent browning.
  • Divide the romaine evenly into 4 airtight meal prep containers.
  • Top each with tomato, green onion, turkey, bacon, and ham if using.
  • When ready to serve, add chopped avocado and your favorite dressing. Toss and enjoy!

The cottage cheese craze finally got to me! It started a few months ago with my 5-ingredient cottage cheese cookie dough which shocked me (and many of you!) with just how GOOD it is. Now we’ve moved onto a savory cottage cheese recipe, in the form of pizza! This cottage cheese pizza crust is just as light and crisp as your favorite pizza crust, but packs in a bonus 20 grams (!!!) of protein per serving. It’s also made with just 3 simple ingredients. Homemade pizza dough has truly never been easier (or healthier)!

a slice of cottage cheese pizza crust being lifted up.

Why You’ll Love This Recipe

This 3-ingredient cottage cheese pizza crust is soft, slightly chewy, and packs in extra protein with every slice. Made with just cottage cheese, flour, and baking powder, it’s a simple and satisfying base for your favorite pizza toppings. Whether you’re using a pizza oven or a standard oven, this recipe comes together fast and can be made gluten-free too!

Frequently Asked Questions

What kind of cottage cheese works best in this recipe?
Use full-fat or low-fat cottage cheese for best results—both blend smoothly and add richness. Make sure to blend it well until completely smooth for the ideal dough texture. I’ve used both the good culture cottage cheese and organic valley cottage cheese to make this pizza, and both turned out great!

Can I use Greek yogurt instead of cottage cheese?
Greek yogurt can work in a pinch, but the dough will be slightly more wet and may need additional flour. For best results and structure, stick with cottage cheese.

overhead image of cottage cheese pizza crust ingredients - baking powder, gluten-free all purpose flour, and cottage cheese.

Sam’s Recipe Tips

  • Blend it smooth: Don’t skip blending the cottage cheese. It ensures your dough is cohesive and easier to work with.
  • Grease that surface: Whether using a pizza stone or parchment-lined baking sheet, lightly greasing helps the crust crisp up and prevents sticking.
  • Get creative: Top with your favorite sauces, veggies, or even extra protein like grilled chicken or turkey pepperoni for a balanced meal.
  • Make it gluten-free: Use a high-quality gluten-free 1:1 flour blend to make this recipe gluten-free without compromising texture.
overhead image of cottage cheese pizza crust with sauce and cheese on top.
5 from 1 vote

3-Ingredient Cottage Cheese Pizza Crust

This cottage cheese pizza crust is a higher-protein, healthier alternative to traditional pizza dough! With only three simple ingredients and the option to make it gluten-free, it's the perfect customizable base for your favorite homemade pizza. Whether you're after a quick weeknight dinner or a fun weekend meal, this recipe has everything you need to land in your weekly rotation!
Print Pin Rate
Prep Time: 10 minutes
Cook Time: 12 minutes
Total Time: 22 minutes
Servings: 2 servings

Equipment

  • 1 food processor or high speed blender
  • 1 large bowl
  • 1 large baking sheet

Ingredients

For the cottage cheese pizza crust:

  • 1 cup cottage cheese
  • 1 cup all purpose flour (I used gluten-free all purpose flour)
  • 1 teaspoon baking powder

For topping:

  • 1/4 cup pizza sauce
  • 1/2 cup shredded cheese
  • Whatever toppings you'd like!

Instructions

If using a standard oven:

  • Preheat your oven to 450° Fahrenheit and line a baking sheet with parchment paper, then lightly grease the top of the parchment paper with oil.
  • Add the cottage cheese to a blender or food processor and blend until completely smooth.
  • Mix together the all purpose flour and baking powder in a large bowl, then add in the cottage cheese and mix (you might need to use your hands) until it comes together into a ball of dough.
    Cottage-Cheese-Pizza-Crust-Step-2
  • Transfer the dough to your prepared baking sheet and press/roll it into a 12-inch circle.
    Cottage-Cheese-Pizza-Crust-Step-3
  • Place the pizza crust in the oven and par-bake for 10-12 minutes, then remove it from the oven and add your toppings.
    Cottage-Cheese-Pizza-Crust-Step-4
  • Turn the oven to high broil then pop the pizza back into the oven for an additional 1-2 minutes, or until the cheese is golden brown and bubbly. Remove the pizza from the oven and let it cool slightly before slicing and serving.
    Cottage-Cheese-Pizza-Crust-Step-5

If using a pizza oven:

  • Preheat your pizza oven to New York-style (635°Fahrenheit).
  • Add the cottage cheese to a blender or food processor and blend until completely smooth.
  • Mix together the all purpose flour and baking powder in a large bowl, then add in the cottage cheese and mix (you might need to use your hands) until it comes together into a ball of dough.
  • Lightly grease your pizza stone with oil, then transfer the dough to the stone and press/roll it into a 12-inch circle.
  • Place the pizza crust into the oven and par-bake for 6 minutes, then remove it from the oven and add your toppings.
  • Place the pizza oven on broil, then pop the pizza back into the oven for an additional 1-2 minutes, or until the cheese is golden brown and bubbly. Remove the pizza from the oven and let it cool slightly before slicing and serving.

Notes

Nutrition info does not include pizza sauce, cheese, or toppings.

Nutrition

Serving: 1serving | Calories: 300kcal | Carbohydrates: 50g | Protein: 20g | Fat: 3g | Sugar: 2g

I’m the self-proclaimed salad QUEEN, and am thrilled to add this big mac salad to my resume. File it right under my Jennifer Aniston salad, buffalo chicken salad, and Kardashian salad. I have a high criteria when it comes to salads, they must be three things – filling, easy, and DELICIOUS. And this big mac salad checks all of those boxes!

And I can’t forget my favorite part – it’s perfect for meal prep. Because if there’s one thing I don’t have time for as a busy work from home mom, it’s making lunch. So I make this big mac on Sunday, portion it into 4 containers and store the big mac sauce dressing separately. Then, when I need a quick ready-to-go lunch, I simply add the dressing and dive in!

overhead image of healthy big mac salad in a bowl.

Healthy Big Mac Salad Ingredients

Ground Beef: Ground beef serves as the hearty base of this salad, providing protein and savory flavor. Opt for lean ground beef for a healthier option.

Dill Pickles: Tangy and crisp dill pickles add a burst of flavor and texture to the salad, reminiscent of the classic Big Mac sandwich.

Cheddar Cheese: Sharp cheddar cheese adds richness and creaminess to the salad, complementing the other ingredients perfectly.

Mayo: Mayo is the key ingredient in the Big Mac sauce salad dressing, bringing the whole dish together!

Tips and Tricks

  • Adjust the ingredients in the Big Mac sauce dressing to suit your taste preferences. Add more ketchup for sweetness, extra relish for tanginess, or a dash of vinegar for acidity.
  • Save time by preparing the dressing and cooking the ground beef in advance. Store them in separate airtight containers in the refrigerator until ready to assemble the salad.
  • Feel free to customize your Big Mac salad with additional toppings like diced onions, crumbled bacon, or avocado slices for added flavor and texture.
healthy big mac salad in a bowl with big mac sauce salad dressing on the side.

Adjust This Recipe To Your Dietary Needs

Make it Dairy-Free: To make this recipe dairy-free, simply omit the shredded cheddar cheese or replace it with your favorite dairy-free alternative. I used the Violife vegan cheddar shreds in my salad!

Make it Keto/Low-Carb: For a keto big mac salad, swap out the ketchup in the big mac sauce salad dressing with a sugar-free alternative and adjust the quantity of tomatoes to reduce carb content while still enjoying the classic flavors.

big mac salad in a bowl with sesame seeds on top.
5 from 2 votes

Healthy Big Mac Salad

This big mac salad tastes just like a big mac, without the bun! Ground beef, crisp lettuce, tangy pickles, and creamy cheddar cheese are tossed together with a homemade big mac sauce dressing for a satisfying meal. Enjoy the iconic taste of a big mac in a lighter, healthier salad that’s perfect for lunch or dinner!
Print Pin Rate
Prep Time: 10 minutes
Cook Time: 10 minutes
Total Time: 20 minutes
Servings: 4 servings

Ingredients

  • 1 pound ground beef
  • salt and black pepper, to taste
  • 1 teaspoon garlic powder
  • 6 cups romaine or iceberg lettuce, chopped
  • 1/2 cup shredded cheddar cheese
  • 1/2 red or white onion, peeled and thinly sliced
  • 1 cup tomatoes (any kind), chopped
  • 1/2 cup sliced dill pickles

For the big mac sauce salad dressing:

  • 1/2 cup mayonnaise
  • 2 tablespoons ketchup
  • 1 tablespoon relish, or finely minced pickles
  • 1/2 teaspoon onion powder
  • 1 teaspoon white vinegar, or apple sider vinegar
  • Pinch of salt

Instructions

  • Make the dressing but adding all big mac sauce salad dressing ingredients to a small bowl and whisk together to combine. Taste and adjust any seasoning as desired.
  • Heat a large skillet over medium-high heat. Once pan is hot, add in the ground beef, salt, black pepper, and garlic powder. Break meat up into small pieces and cook until no longer pink, about 8-10 minutes. Remove cooked ground beef from the heat and set aside while you assemble your salad.
  • Add the chopped lettuce, shredded cheddar cheese, sliced onion, chopped tomatoes, chopped dill pickles, and cooked ground beef to a large bowl. Pour dressing over the salad and toss to combine, then enjoy immediately.

Hey there, lunch lovers! Are you tired of sad desk lunches or last-minute takeout decisions? We’ve got the solution – a scrumptious, healthy Meal Prep Chicken Salad Lunch Box that’ll have your coworkers drooling and your taste buds doing the happy dance. So, dust off those meal prep containers and let’s dive into lunchtime bliss!

meal prep chicken salad lunch boxes with crackers on the side.

For more meal prep recipes, purchase my ULTIMATE Meal Prep E-Book for just $5 HERE!

What You’ll Need to Make Chicken Salad

Chicken Breast: The star of the show! Opt for boneless, skinless chicken breasts for a lean and protein-packed salad.

Mayonnaise: Go light or use a healthier mayo option if you’re watching your calories. It’s the creamy base that ties everything together. I used Sir Kensington’s Avocado Oil Mayonnaise in my chicken salad.

Pecans or Walnuts: These crunchy nuts add a delightful texture and a hint of nutty flavor to your chicken salad. Choose your favorite!

Fresh Tarragon: Don’t skip this herbaceous gem! Fresh tarragon elevates the flavors to a whole new level.

Lemon Juice: A squeeze of fresh lemon juice provides that zesty kick that makes your taste buds sing.

chicken salad being scooped up with a cracker.

Click HERE for a link to the meal prep lunch boxes I use in this recipe!

Tips and Tricks

  • The Perfect Chicken: Start with perfectly cooked chicken. You can poach it, grill it, or even use rotisserie chicken if you’re short on time. The key is to make sure it’s cooked through but still juicy. Overcooked chicken makes for a dry salad, and we don’t want that!
  • Balance is Key: Play around with the mayo-to-chicken ratio to suit your taste. Some like it creamy, while others prefer a lighter touch. You’re the boss of your lunchbox, so adjust to your heart’s content.
  • Prep for Success: This chicken salad is an MVP in meal prep. Make a big batch on Sunday and portion it into containers for the week. It stays fresh in the fridge, making lunchtime a breeze. Just be sure to keep the nuts separate until you’re ready to dive in to maintain that satisfying crunch.
5 from 1 vote

Meal Prep Chicken Salad Lunch Boxes

Hey there, lunch lovers! Are you tired of sad desk lunches or last-minute takeout decisions? We’ve got the solution – a scrumptious, healthy Meal Prep Chicken Salad Lunch Box that’ll have your coworkers drooling and your taste buds doing the happy dance. So, dust off those meal prep containers and let’s dive into lunchtime bliss!
Print Pin Rate
Prep Time: 15 minutes
Cook Time: 10 minutes
Total Time: 25 minutes
Servings: 4 servings

Ingredients

For the chicken salad:

  • 1 1/2 pounds boneless and skinless chicken breast
  • 1 cup mayonnaise
  • 1 tablespoon Dijon mustard
  • 2 celery stalks, diced
  • 1/2 cup pecans or walnuts, chopped
  • 1/4 cup red onion, finely chopped
  • 2 tablespoons fresh parsley, chopped
  • 1 tablespoon fresh tarragon, chopped
  • 1 lemon, juiced
  • 1 teaspoon salt
  • 1/2 teaspoon black pepper

For the lunch boxes:

  • crackers, I used gluten-free crackers
  • cucumbers or carrots, sliced
  • fruit, such as grapes or berries
  • nuts, such as almonds

Instructions

  • Place chicken breasts in a wide pot or deep skillet, then pour in enough water until chicken is completely submerged in water.
  • Bring pot to a boil, then reduce to a simmer and cover with a lid. Cook for 10-12 minutes, or until chicken is cooked through.
  • Remove chicken from the water, then place on a cutting board and either chop the chicken into cubes or shred the chicken with two forks.
  • Place chopped or shredded chicken into a large bowl and let cool completely.
  • Once cool, add in all remaining chicken salad ingredients. Mix everything together until well combined.

For the lunch boxes:

  • Add the chicken salad to the lunch boxes along with the veggies, fruit, and nuts. Then, store the crackers separately.
  • Store the chicken salad lunch boxes in the fridge for up to 4 days, and store the crackers separately at room temperature.

Notes

  • Nutrition

    Calories: 300kcal

    Say goodbye to boring lunches and hello to lunchtime bliss with our Meal Prep Chicken Salad Lunch Boxes! It’s the perfect blend of protein, flavor, and convenience. Plus, with our handy tips and tricks, you’ll be the lunchtime hero of your office.

    So, go ahead, whip up a batch, and let your taste buds savor the deliciousness. Your coworkers will be envious, and your taste buds will be thanking you. Happy meal prepping!

    Interest In More Meal Prep Recipes? Check These Out!

    Fun and delicious shrimp spring rolls with an irresistibly good peanut dipping sauce! These spring rolls are an easy and exciting way to pack veggies into your diet – they’re super healthy and tasty.

    overhead image of shrimp spring rolls on a plate with peanut sauce on the side.

    What You’ll Need to Make Shrimp Spring Rolls with Peanut Sauce

    Spring Rolls Rice Wrappers – These light little rice-based wraps are what hold these spring rolls together! I’ve had lots of luck finding these at my local grocery store, in the ethnic food aisle. However, if you can’t seem to track these thin rice sheets down, I recommend ordering these on Amazon. Leftover rice wrappers? Try making my summer rolls recipe next!

    Cooked Shrimp – Buy pre-cooked shrimp, or quickly boil it yourself before adding to your shrimp spring rolls. The only thing to note here is that you must remove the tails from your shrimp for this recipe! Removing the tails can happen either before or after cooking – it makes no difference.

    Fresh Mint and Cilantro – These Asian-inspired rolls taste extra fresh thanks to a few sprigs of fresh mint and cilantro! I highly recommend adding fresh herbs to your rolls. Though if you don’t like cilantro, or don’t like mint, simply swap it out for a different fresh herb.

    Peanut Butter – Unsweetened creamy peanut butter is the base to our peanut sauce. However, if you don’t like peanut butter, you can use cashew butter instead. Or, for a nut-free version, try tahini!

    Soy Sauce – Found in most Asian recipes, soy sauce adds the perfect savory component to this dish. However, you can certainly swap out the soy sauce for tamari or coconut aminos if that’s more your thing.

    shrimp spring rolls on a plate with peanut sauce and fresh limes on the side.

    Tips on Handling Rice Wrappers

    • Submerge one rice wrapper at a time in the water! If you attempt more than one, they’ll stick together and you won’t be able to separate them.
    • Don’t leave the rice wrapper in the water for too long. Just 5 seconds submerged in a shallow bowl of warm water will do the trick. Leaving the wrapper to soak for too long will make it too soft and difficult to handle.
    • Place each rice wrapper (one at a time) on a damp paper towel or dish cloth before filling and rolling. The wrapper will lift easily off the damp cloth, making rolling a breeze. If you place the rice wrapper on a kitchen counter or cutting board, it’ll stick and be a nightmare to remove!
    shrimp spring rolls being dipped into peanut sauce.

    Adjust This Recipe to Your Dietary Needs

    Make it Vegan: For vegan spring rolls, use extra firm tofu cut into strips in place of the cooked shrimp!

    Make it Gluten-Free: The only non gluten-free ingredient in this recipe is the soy sauce. Therefore, use tamari instead, which tastes just like soy sauce but is 100% gluten-free!

    Shrimp Spring Rolls with Peanut Sauce

    0 from 0 votes
    Recipe by Samantha Course: MainDifficulty: Medium
    Servings

    4

    servings
    Prep time

    20

    minutes
    Cooking time

    0

    minutes
    Total time

    20

    minutes

    Fun and delicious shrimp spring rolls with an irresistibly good peanut dipping sauce! These spring rolls are an easy and exciting way to pack veggies into your diet – they’re super healthy and tasty.

    Ingredients

    • 12 spring roll rice wrappers

    • 1-2 pounds cooked shrimp, shells and tails removed

    • 3 large carrots, peeled and sliced into matchsticks

    • 2 medium red bell peppers, seeded and sliced into matchsticks

    • 1 English cucumber, sliced into matchsticks

    • 1/2 cup fresh mint leaves

    • 1/2 cup fresh cilantro leaves

    • For the peanut sauce:
    • 1/2 cup creamy peanut butter, unsweetened

    • 2 tablespoons soy sauce

    • 2 tablespoons rice vinegar

    • 1 tablespoon toasted sesame oil

    • 1 garlic clove, grated or finely minced

    • 1-inch piece fresh ginger, peeled and grated or finely minced

    • 2-3 tablespoons warm water

    Directions

    • Fill a shallow bowl with warm water. Submerge one sheet of rice wrapper in water for 5 seconds, then transfer to a clean, damp dish towel.
    • Place 2-3 shrimp, a small handful of vegetables, and a few fresh mint and cilantro leaves in the center of the wrapper. Then, fold the end closest to you over the filling, tuck sides in and towards the center, and finish rolling to create a sealed spring roll. Repeat this process with remaining rice wrappers.
    • Make the sauce by adding all ingredients to a bowl and whisking to combine.
    • Serve shrimp spring rolls with peanut dipping sauce on the side.

    Recipe Video

    Did you make this recipe?

    Share it and tag @samdoesherbest on Instagram!

    Like this recipe?

    Follow us @samdoesherbest on Pinterest