")
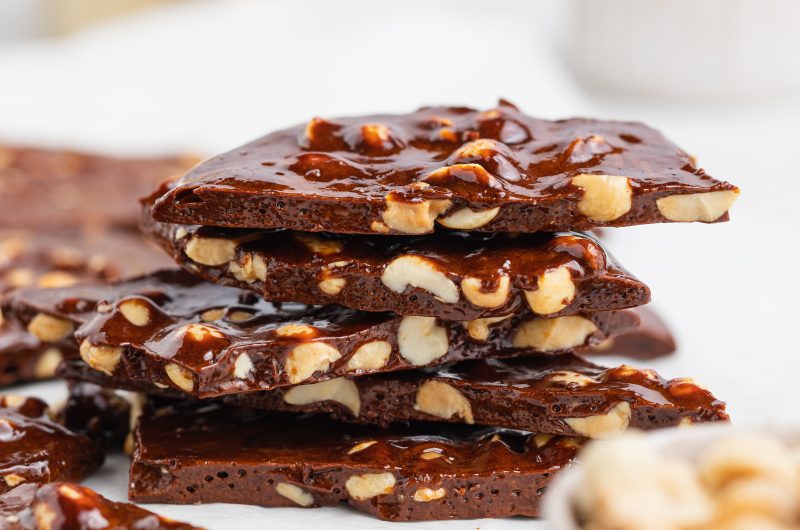
This vegan peanut brittle recipe is a simple ingredient mix of sugar, maple syrup, water, peanuts and baking soda. The result? A deliciously crunchy, sweet, slightly salty, homemade peanut butter flavored candy that is a perfect for an afternoon snack or an after-dinner treat.

In case you’ve never had peanut brittle before, it’s a smooth, flat candy (similar to toffee), with peanuts in it, that is cooked on the stovetop and poured onto a sheet pan to cool. It’s definitely a family favorite during the holidays, but it can be enjoyed any time of year! The thing to keep in mind about making candy is that you need a good thermometer and to have all your ingredients ready ahead of time.
WHAT YOU NEED TO MAKE VEGAN PEANUT BRITTLE
- Roasted Peanuts & Peanut Butter – Not a peanut fan? You can substitute an equal amount of pecans or almonds for the peanuts.
- Maple Syrup – Maple syrup is one of my favorite refined sugar-free sweeteners. It also contains a ton of antioxidant and a good dose of minerals. If you don’t have that, you can use agave nectar instead.
- Baking Soda – This is a key ingredient! Without baking soda, the brittle will be hard and chewy.
- Coconut Sugar – Coconut sugar is lower on the glycemic index than the usual white sugar. It also contains many more vitamins and minerals than most other sugars. If you don’t have coconut sugar, you can either use brown sugar, cane sugar, or white sugar instead.
Tips When Making Vegan Peanut Brittle
- Baking soda causes the brittle to bubble up. Those little bubbles are the key to a lighter, crispy consistency, so you don’t want to touch the mixture when you spread it.
- Be patient when waiting for the mixture to come to temperature. It may seem like it’ll never make it to 290°F, but trust me, it will!
- I recommend checking the temperature of the brittle mixture about every 5 minutes. I like to use this time to wash dishes/cleanup my kitchen, as to not be too far from the stove. Once the thermometer reads 280° Fahrenheit, then stay very close by until the brittle finally reaches its required temperature.
Peanut Brittle Recipe (Vegan, Gluten-Free)
Course: DessertsCuisine: American16
servings5
minutes30
minutes300
kcal35
minutesThis vegan peanut brittle recipe is a simple ingredient mix of sugar, maple syrup, water, peanuts and baking soda. The result? A deliciously crunchy, sweet, slightly salty, homemade peanut butter flavored candy that is a perfect for an afternoon snack or an after-dinner treat.
Ingredients
1 cup coconut sugar
½ cup agave nectar or maple syrup
½ cup water
1 cup roasted salted peanuts
1/4 cup smooth peanut butter
¼ teaspoon baking soda
Directions
- Line a baking sheet with aluminum foil or parchment paper, then grease with a small
amount of oil. - Stir together the coconut sugar, maple syrup, and water in a small saucepan over
medium heat. Bring mixture to a simmer then add the peanuts, stir to combine but do
not stir beyond that. - Use a thermometer to monitor the temperature of the candy mixture until it reaches
290° Fahrenheit, this will take about 30 minutes. - Remove saucepan from heat and stir in the peanut butter and baking soda.
- Quickly transfer the mixture to prepared baking sheet and let cool at room temperature
until hard. Once hard, break apart into pieces and enjoy.
Recipe Video
Notes
- Storage: Wrap tightly and store in an airtight container at room temperature. Proper storage should keep brittle fresh for up to two months!
Did you make this recipe?
Share it and tag @samdoesherbest on Instagram!
Like this recipe?
Follow us @samdoesherbest on Pinterest
")


")

")


")
