Tag

almond flour

Browsing

These pecan pie brownies were entirely my Mom’s idea! She texted me last week and asked if I could make a pecan brownie recipe gluten-free and dairy-free for thanksgiving this year. And I, of course, immediately said YES! It didn’t take me long to realize that all I needed to do was take the sticky pecans from my gluten-free pecan cinnamon rolls recipe and combine them with my famous almond flour brownie recipe to make this seriously unique and decadent dessert. I seriously can’t wait to bake these for thanksgiving this year, I just know everyone’s gonna love ’em!

three sticky pecan pie brownies stacked on top of each other.

Why You’ll Love These Sticky Pecan Pie Brownies

These brownies deliver that perfect bite — chewy, nutty, sweet, and deeply chocolatey — yet totally gluten-free and dairy-free! Made with wholesome ingredients like almond flour, coconut oil, and coconut sugar, they’re a better-for-you take on a beloved Southern dessert. Plus, they’re surprisingly simple: no mixers, no complicated layers, just pure sticky-sweet goodness baked into every square.

What Makes This Recipe Healthy?

Unlike traditional pecan pie brownies loaded with butter, corn syrup, and white flour, this version is made with nutrient-dense swaps:

  • Almond flour for a gluten-free, protein-rich base.
  • Coconut oil in place of butter for healthy fats.
  • Coconut sugar as a natural, lower-glycemic sweetener.
  • Non-dairy milk to keep the recipe 100% dairy-free.

These swaps make each brownie rich and satisfying — with less processed sugar and more whole food ingredients!

close up image of a sticky pecan pie brownie with a bite taken out.

Frequently Asked Questions

Can I use all-purpose flour instead of almond flour?
Yes! You can swap the almond flour for an equal amount of all-purpose flour (regular or gluten-free). The texture will be a bit more cake-like, but still delicious.

What can I use instead of coconut sugar?
Brown sugar or maple sugar both work beautifully in this recipe, if you don’t have coconut sugar on hand. They’ll keep that same caramelized flavor in the pecan layer.

Can I use a different nut other than pecans?
Absolutely — walnuts, hazelnuts, or even cashews would work well here. Pecans give the most traditional flavor, but feel free to mix it up based on what you have!

Sam’s Recipe Tips

  • Don’t skip the parchment paper! It makes flipping the brownies out of the pan so much easier.
  • Use room temperature eggs – it helps them whip up light and fluffy.
  • For extra indulgence, drizzle with melted chocolate or a sprinkle of flaky sea salt before serving.
  • Storage tip: Keep leftovers in an airtight container at room temp for up to 3 days, or refrigerate for up to a week.

These Sticky Pecan Pie Brownies are the perfect healthier dessert to impress guests during the holidays – rich, gooey, and full of delicious flavor!

overhead image of a healthy sticky pecan pie brownie.
5 from 1 vote

Sticky Pecan Pie Brownies

These Sticky Pecan Pie Brownies are the ultimate mashup of gooey pecan pie and rich, fudgy chocolate brownies – all made gluten-free, dairy-free, and refined sugar-free. With a sticky caramel pecan topping and a decadent almond flour brownie base, they’re the perfect healthier dessert for Thanksgiving or any holiday. Easy to make and irresistibly delicious, these brownies will quickly become your new favorite sweet treat!
Print Pin Rate
Prep Time: 10 minutes
Cook Time: 30 minutes
Total Time: 40 minutes
Servings: 16 servings

Equipment

  • 1 small saucepan
  • 1 large bowl
  • 1 small bowl
  • 1 8×8-inch baking pan

Ingredients

For the pecan layer:

  • 2 tablespoons coconut oil or butter
  • 1/2 cup coconut sugar or brown sugar
  • 2 tablespoons non-dairy milk
  • 1 teaspoon vanilla extract
  • 1 1/2 cups unsalted pecans chopped

For the brownie layer:

  • 1 cup coconut sugar or regular sugar
  • 3 large eggs at room temperature
  • 1 1/2 cups almond flour
  • 3 tablespoons unsweetened cocoa powder
  • 1 teaspoon vanilla extract
  • 1/4 teaspoon salt
  • 1 cup chocolate chips
  • 1/2 cup coconut oil

Instructions

  • Preheat the oven to 350° Fahrenheit and line then grease an 8×8-inch baking pan with parchment paper.
  • Prepare the pecan layer by melting the coconut oil in a small saucepan over low-medium heat. Add in the coconut sugar and non-dairy milk, bring to a gentle simmer and stir constantly for about 2 minutes.
  • Remove the saucepan from the heat, add in the vanilla extract and stir in the pecans, then transfer the mixture to your prepared baking pan. Spread the pecans into an even layer to coat the bottom of the pan.
  • Next, make the cake layer by beating the coconut sugar and eggs in a large bowl with either a hand of stand mixer until light and fluffy (about 2 minutes).
  • Add in the almond flour, cocoa powder, vanilla extract, and salt. Stir until everything is just combined, careful not to over-mix.
  • In a separate bowl, add the coconut oil and 1 cup of chocolate chips. Microwave in 30-second intervals, stirring between each interval, until chocolate chips are fully melted.
  • Pour the melted chocolate chips and coconut oil into the cake batter, and stir to combine. Then, pour the cake batter on top of the pecans in your baking dish. Bake for 30-35 minutes, or until a toothpick inserted down the center of the cake comes out mostly clean.
  • Remove the cake from the oven and let it sit at room temperature for about 10 minutes. Then, carefully turn the cake over onto a wire cooling rack and peel away the parchment paper. Let the cake cool completely before slicing and serving!

Nutrition

Serving: 1serving | Calories: 295kcal | Carbohydrates: 17g | Protein: 5g | Fat: 23g | Fiber: 3g | Sugar: 13g

Why You’ll Love These Protein Hostess Cupcakes

These gluten-free, dairy-free cupcakes capture the nostalgic taste of classic Hostess treats but with a healthier twist—packed with about 10 grams of protein per cupcake. Made with almond flour, chocolate protein powder, and a rich ganache topping, they deliver indulgent flavor without compromise. Perfect for a treat that satisfies both your sweet tooth and your macro goals.

protein hostess cupcakes on a table.

Recipe Variations & Sugar-Free Option

Can I make these sugar-free? Yes! Swap the maple syrup for a sugar-free liquid sweetener like monk fruit syrup or stevia-sweetened syrup, and choose sugar-free chocolate chips for the ganache and decoration.
What kind of protein powder should I use? A vanilla or chocolate whey or plant-based protein works well—just make sure it blends smoothly and is not overly thick or gritty.
Other variations: Use a white chocolate or caramel drizzle for the topping, or add shredded coconut or chopped nuts under the ganache for extra texture.

the inside of a protein hostess cupcake.

Sam’s Recipe Tips

  • Cool completely before filling and topping so the ganache or filling doesn’t melt.
  • Use a piping bag with a round tip for neat filling and precise letter decoration.
  • If your batter seems thick, add a tablespoon of extra non-dairy milk to loosen it slightly – especially when using dense protein powders.
  • Store in an airtight container in the fridge – first 24 hours are best for texture; let them sit at room temperature 10 minutes before eating.
overhead image of protein hostess cupcakes.
No ratings yet

Protein Hostess Cupcakes (gluten-free & dairy-free!)

These Protein Hostess Cupcakes are a healthier twist on the nostalgic classic – rich, chocolatey, and totally delicious! Made with almond flour, chocolate protein powder, and a silky chocolate ganache, each cupcake packs 10 grams of protein. It’s the perfect healthier dessert that satisfies your sweet tooth and packs in protein!
Print Pin Rate
Prep Time: 10 minutes
Cook Time: 20 minutes
Total Time: 30 minutes
Servings: 12 cupcakes

Equipment

  • 1 cupcake tin
  • 1 large bowl
  • 1 small bowl

Ingredients

For the cupcakes:

  • 1 cup almond flour
  • 1 cup chocolate protein powder
  • 1 teaspoon baking powder
  • 1/2 cup non-dairy milk
  • 1/2 cup maple syrup
  • 2 eggs at room temperature
  • 3 tablespoons melted coconut oil or any vegetable oil

For the filling

  • Cocowhip, marshmallow creme, or homemade whipped cream

For the chocolate ganache:

  • 1/2 cup chocolate chips
  • 1/4 cup coconut milk

For the decoration:

  • 1/2 cup melted white chocolate chips
  • OR
  • 1/2 cup powdered sugar
  • 2 tablespoons butter softened
  • 1/2 tablespoon milk

Instructions

  • Preheat oven to 350° Fahrenheit and line a cupcake tin with cupcake liners.
  • In a large bowl, mix together the non-dairy milk, maple syrup, eggs, melted coconut oil, and vanilla extract.
  • Add in the almond flour, chocolate protein powder, and baking powder. Mix until everything is just combined.
  • Pour ¼ cup of batter into each individual cupcake tin and bake for 20-25 minutes, or until a toothpick inserted down the center of one cupcake comes out clean.
  • Remove cupcakes from oven and transfer to a wire rack to cool completely.
  • Once the cupcakes are completely cool, make the ganache by melting together the chocolate chips and coconut milk in either the microwave or over a double boiler until completely smooth.
  • Then, place the Cocowhip or marshmallow crème into a piping bag with a medium round tip, press the piping bag into the center of each cupcake and squeeze the filling unto the cupcake.
  • Once all cupcakes are filled, spoon about a tablespoon of the chocolate ganache over each cupcake, spreading it so that it completely covers the top of the cupcake.
  • Leave the ganache to set with you make the white icing by adding all ingredients to a bowl and beating/whisking until completely smooth. Transfer the icing to a piping bag with a small tip and carefully pipe the signature cursive L’s over the top of each cupcake. 

Nutrition

Serving: 1cupcake | Calories: 195kcal | Carbohydrates: 18g | Protein: 10g | Fat: 10g | Fiber: 2g | Sugar: 11g

Single serve recipes really are the best. They make just the right amount, always hit the spot, and are always easier than making a whole batch of something. A few single serve recipes I find myself coming back to time and time again are my 5-ingredient single serve cinnamon roll, single serve protein cookie, healthy gluten-free mug cake, and now (& especially this time of year) this single serve apple crumble. It’s perfectly sweet, super easy to make, and just as delicious as your favorite apple crumble recipe. I even managed to make this recipe with just 5 ingredients. So the next time you’re craving a delicious fall treat, whip up this single serve apple crumble, cozy up on the couch, and enjoy! 🥰

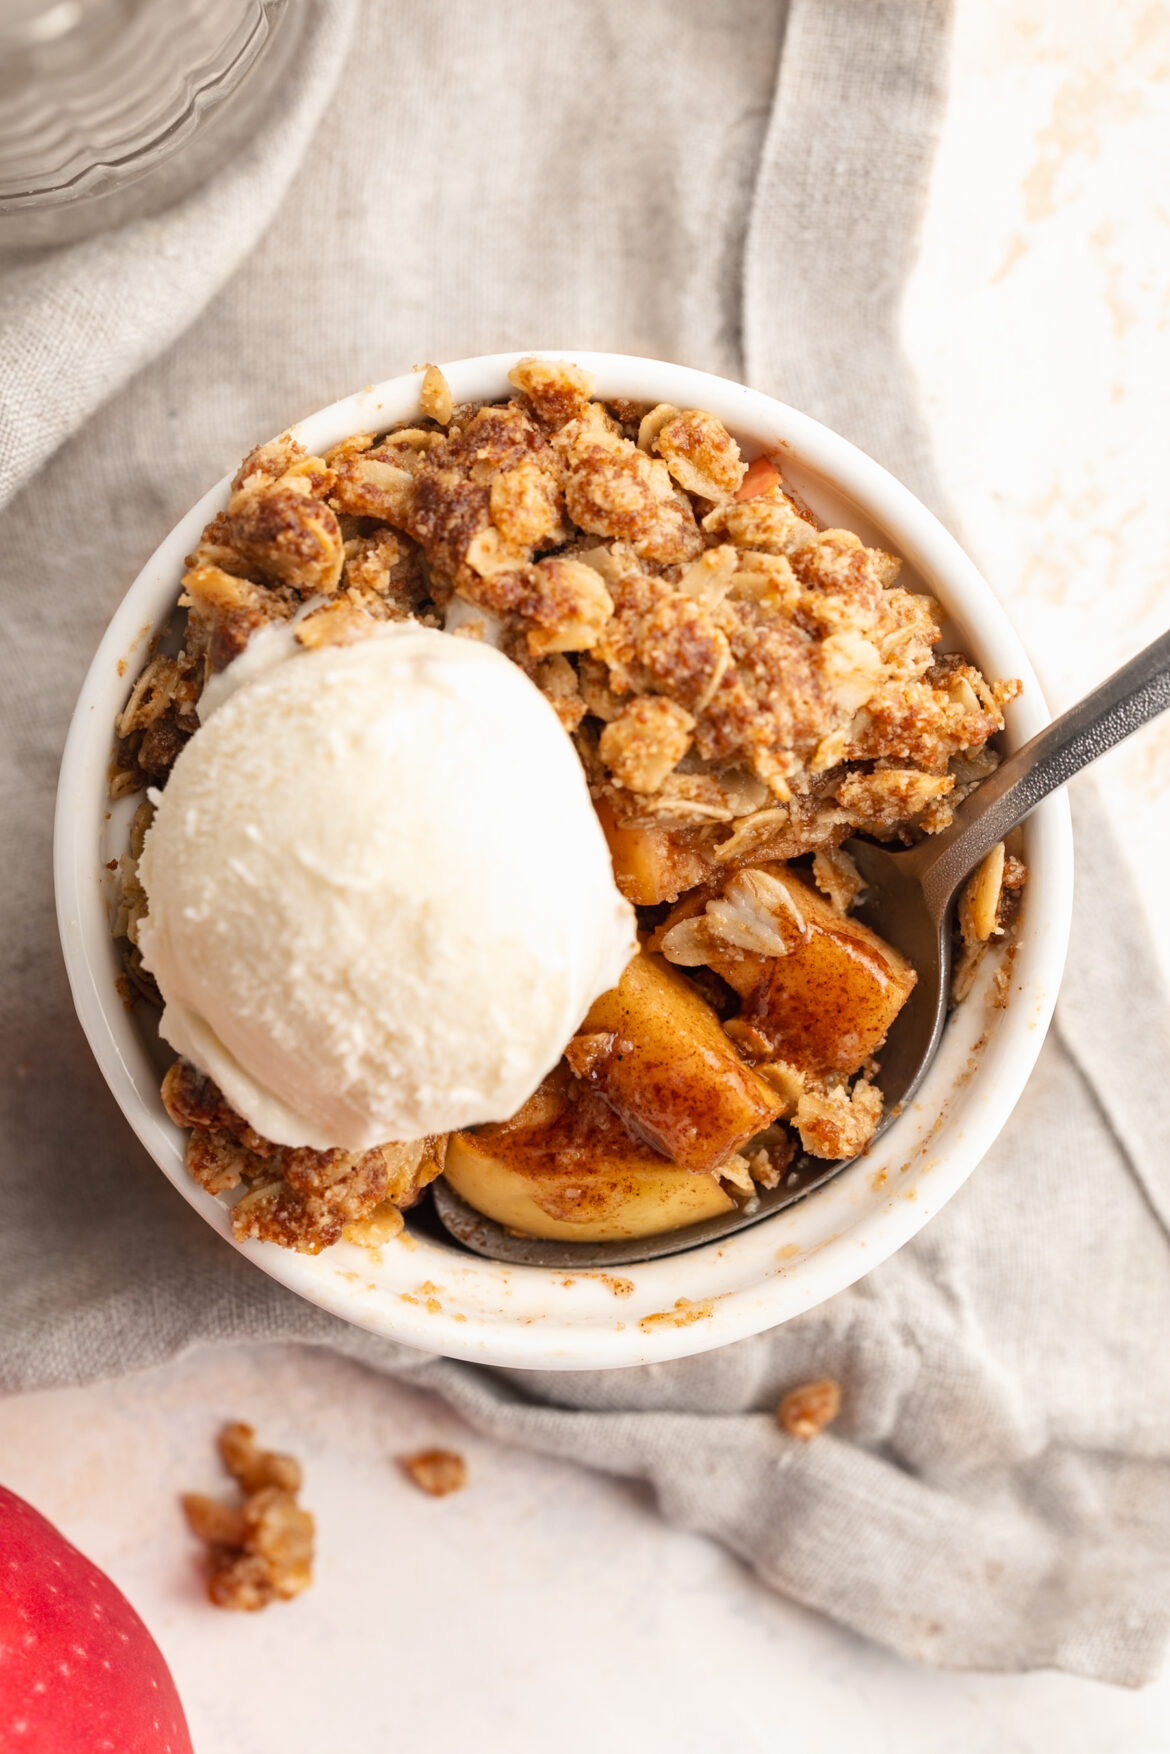
single serve apple crumble with ice cream.

Why You’ll Love This Single Serve Apple Crumble

  • Perfect for one – no sharing needed!
  • Minimal ingredients & fuss – only 5 components and one bowl for prep.
  • Customizable & comforting – cozy, fall flavor, and ready in under 30 minutes!
  • Gluten-Free – naturally gluten-free with rolled oats and almond flour.

Sam’s Recipe Tips

  • Use a firm but juicy apple (e.g. Honeycrisp, Pink Lady) so pieces soften but don’t disappear.
  • Ensure the topping is crumbly, not doughy – mix just until the oat/almond flour mix clumps slightly.
  • Let it cool for a few minutes before digging in – this helps juices settle.
  • For extra depth, stir a pinch of nutmeg or allspice into the apples before topping.
single serve apple crumble with a spoon.

Adjust This Recipe to Your Dietary Needs

  • Make it Vegan / Dairy-Free: Use coconut oil or vegan butter instead of regular butter.
  • Make it Nut-Free: Replace almond flour with extra oats or a seed-based flour (e.g. sunflower seed flour).
  • Optional Flavors: Add a splash of vanilla extract or a teaspoon of maple syrup for extra sweetness.
overhead image of single serve apple crumble with a scoop of ice cream on top.
No ratings yet

5-Ingredient Single Serve Apple Crumble

This single serve apple crumble is a cozy, 5-ingredient dessert that bakes up in just 30 minutes! Made with warm cinnamon apples and a golden oat topping, it’s the perfect healthier fall treat. Easy to make in one bowl, no sharing required!
Print Pin Rate
Prep Time: 5 minutes
Cook Time: 25 minutes
Total Time: 30 minutes
Servings: 1 serving

Equipment

  • 1 small bowl
  • 1 small ramekin

Ingredients

For the apples:

  • 1 apple peeled and chopped
  • 1 tablespoon brown sugar or coconut sugar
  • 1/2 teaspoon cinnamon optional

For the crumble:

  • 1/4 cup rolled oats
  • 2 tablespoons almond flour or all purpose flour
  • 1 tablespoon brown sugar or coconut sugar
  • 2 tablespoons melted butter or coconut oil

Instructions

  • Preheat oven to 350° Fahrenheit.
  • Add the chopped apples, coconut sugar, and cinnamon to a small ramekin and stir until the apples are evenly coated in sugar. Set that aside then make the crumble.
  • Mix together the rolled oats, almond flour, coconut sugar, and melted butter or coconut oil in a small bowl until a crumby mixture forms. Sprinkle the crumble evenly over the top of the apples.
  • Bake the apple crumble for 25-30 minutes, or until the apples are very soft. Let the apple crumble cool slightly before topping with ice cream, yogurt, or whipped cream.

Nutrition

Serving: 1serving | Calories: 400kcal | Carbohydrates: 60g | Protein: 6g | Fat: 20g | Fiber: 7g | Sugar: 40g

Did you know September has more birthdays than any other month of the year?? Which checks out for my because both me and my sister have birthdays this month! So when September rolls around every year, sure I’m all for a gluten-free apple crisp and healthy pumpkin spice latte, but I also can’t help but bring out the birthday recipes. I kicked things off last week with my 5 ingredient birthday cake banana bread (a must bake, wether it’s your birthday or not!), and now I’m keeping the celebrations going with these healthy birthday cake energy bites. They’re packed with protein, fiber, and healthy fats – yet perfectly sweet and excitingly festive! Meal prep a batch of these at the start of your week and enjoy a quick and easy no-bake sweet treat all week long. 🥳

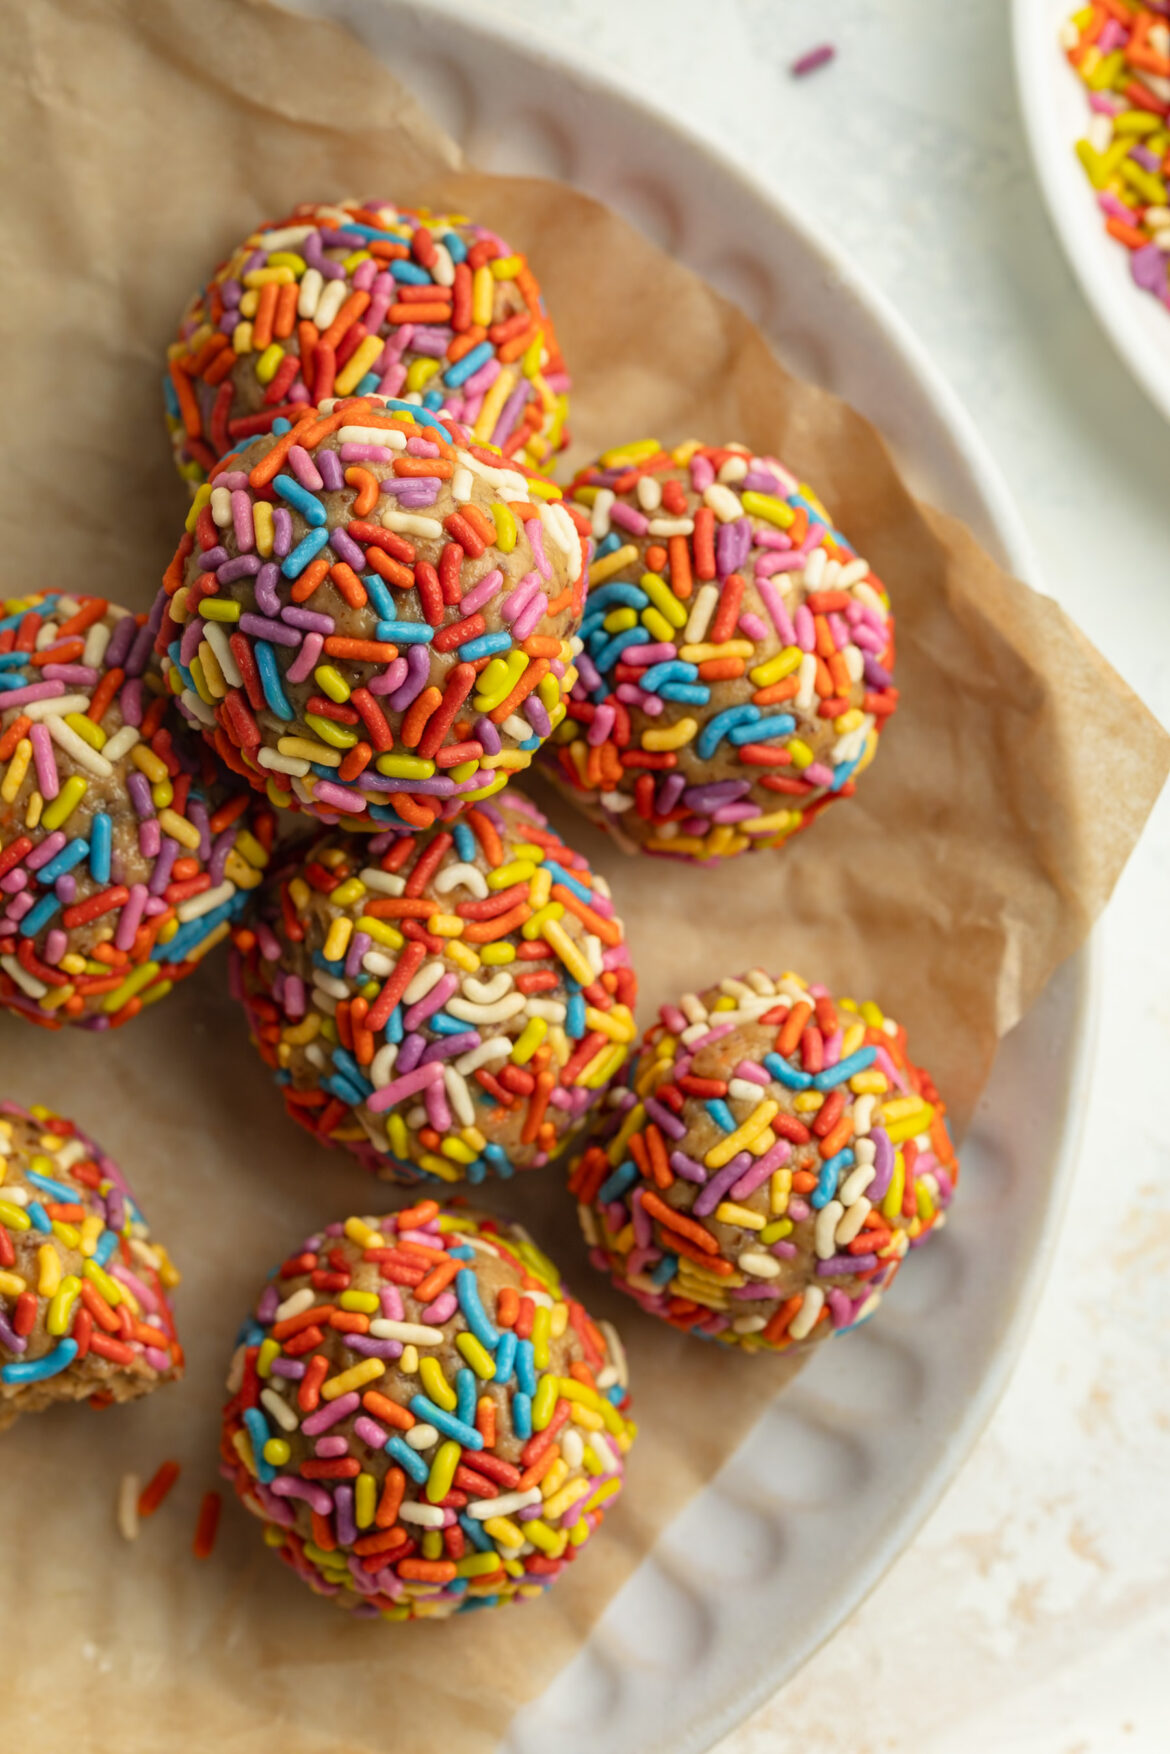
birthday cake energy bite with a bite taken out.

I use and love these dye-free rainbow sprinkles from Amazon!

Why You’ll Love These Birthday Cake Energy Bites

  • Effortless & Fun: These energy bites deliver nostalgic cake-batter flavor with zero baking—just simple mixing and rolling.
  • Balanced Nutrition: With nut butter, almond flour, flaxseed, and honey, each bite offers a nourishing blend of protein, fiber, and healthy fats.
  • Kid- (and inbox-ready) Approved: Sprinkles make them feel celebratory, while the wholesome ingredients keep parents happy.

What Makes This Recipe Healthy

  • Protein & Healthy Fats from almond flour and cashew butter (or any nut/seed butter) for lasting satiety.
  • Fiber Boost from ground flaxseed—your energy bites just got a fiber upgrade!
  • Natural Sweetness via honey (or maple syrup) keeps added sugar in check and skips the refined stuff.
overhead image of birthday cake energy bites being rolled in sprinkles.

Recipe Variations and Substitutions

  • Nut-Free: Use sunflower seed butter instead of cashew butter.
  • Low-Sugar: Swap honey for a stevia syrup or reduce to 3 tbsp.
  • Flavor Kicks: Add a pinch of cinnamon, a swirl of cocoa powder, or roll in toasted coconut.

Storage Tips

  • Store in an airtight container in the fridge for up to 2 weeks.
  • Freeze for up to 3 months; bite-sized and ready for anytime snacking.
overhead image of birthday cake energy bites on a plate.
5 from 2 votes

Birthday Cake Energy Bites

These birthday cake energy bites are the perfect no-bake snack that’s healthy, fun, and full of delicious flavor! Made with almond flour, cashew butter, flaxseed, honey, and rainbow sprinkles, each bite is packed with protein, fiber, and healthy fats. Ready in minutes with just one bowl, they’re a festive and nourishing treat you’ll LOVE!
Print Pin Rate
Prep Time: 5 minutes
Total Time: 5 minutes
Servings: 8 bites

Equipment

  • 1 medium bowl

Ingredients

  • 1 cup almond flour
  • 1/2 cup cashew butter or any nut/seed butter
  • 1/4 cup ground flaxseed
  • 1/4 cup honey or maple syrup
  • 1 teaspoon vanilla extract
  • 1/4 teaspoon almond extract
  • 1/4 cup rainbow sprinkles

Instructions

  • Add all ingredient to a large bowl and mix until thoroughly combined.
  • Roll the mixture into 1-inch balls, then either store in the fridge for up to 3 weeks or enjoy right away!

Nutrition

Serving: 1bite | Calories: 240kcal | Carbohydrates: 23g | Protein: 6.5g | Fat: 15g | Fiber: 3g | Sugar: 15g

If my healthy edible brownie batter and 4-ingredient date caramels had a baby, it’d be these healthy no-bake brownie balls! They’re rich, fudgy, naturally sweetened with dates, and even include some sneaky protein. And the best part? They’re entirely NO bake! Because let’s face it, this summer’s already been too hot to turn the oven on. I honestly keep a batch of these healthier brownie treats in my fridge at all time for when I need just a little something sweet!

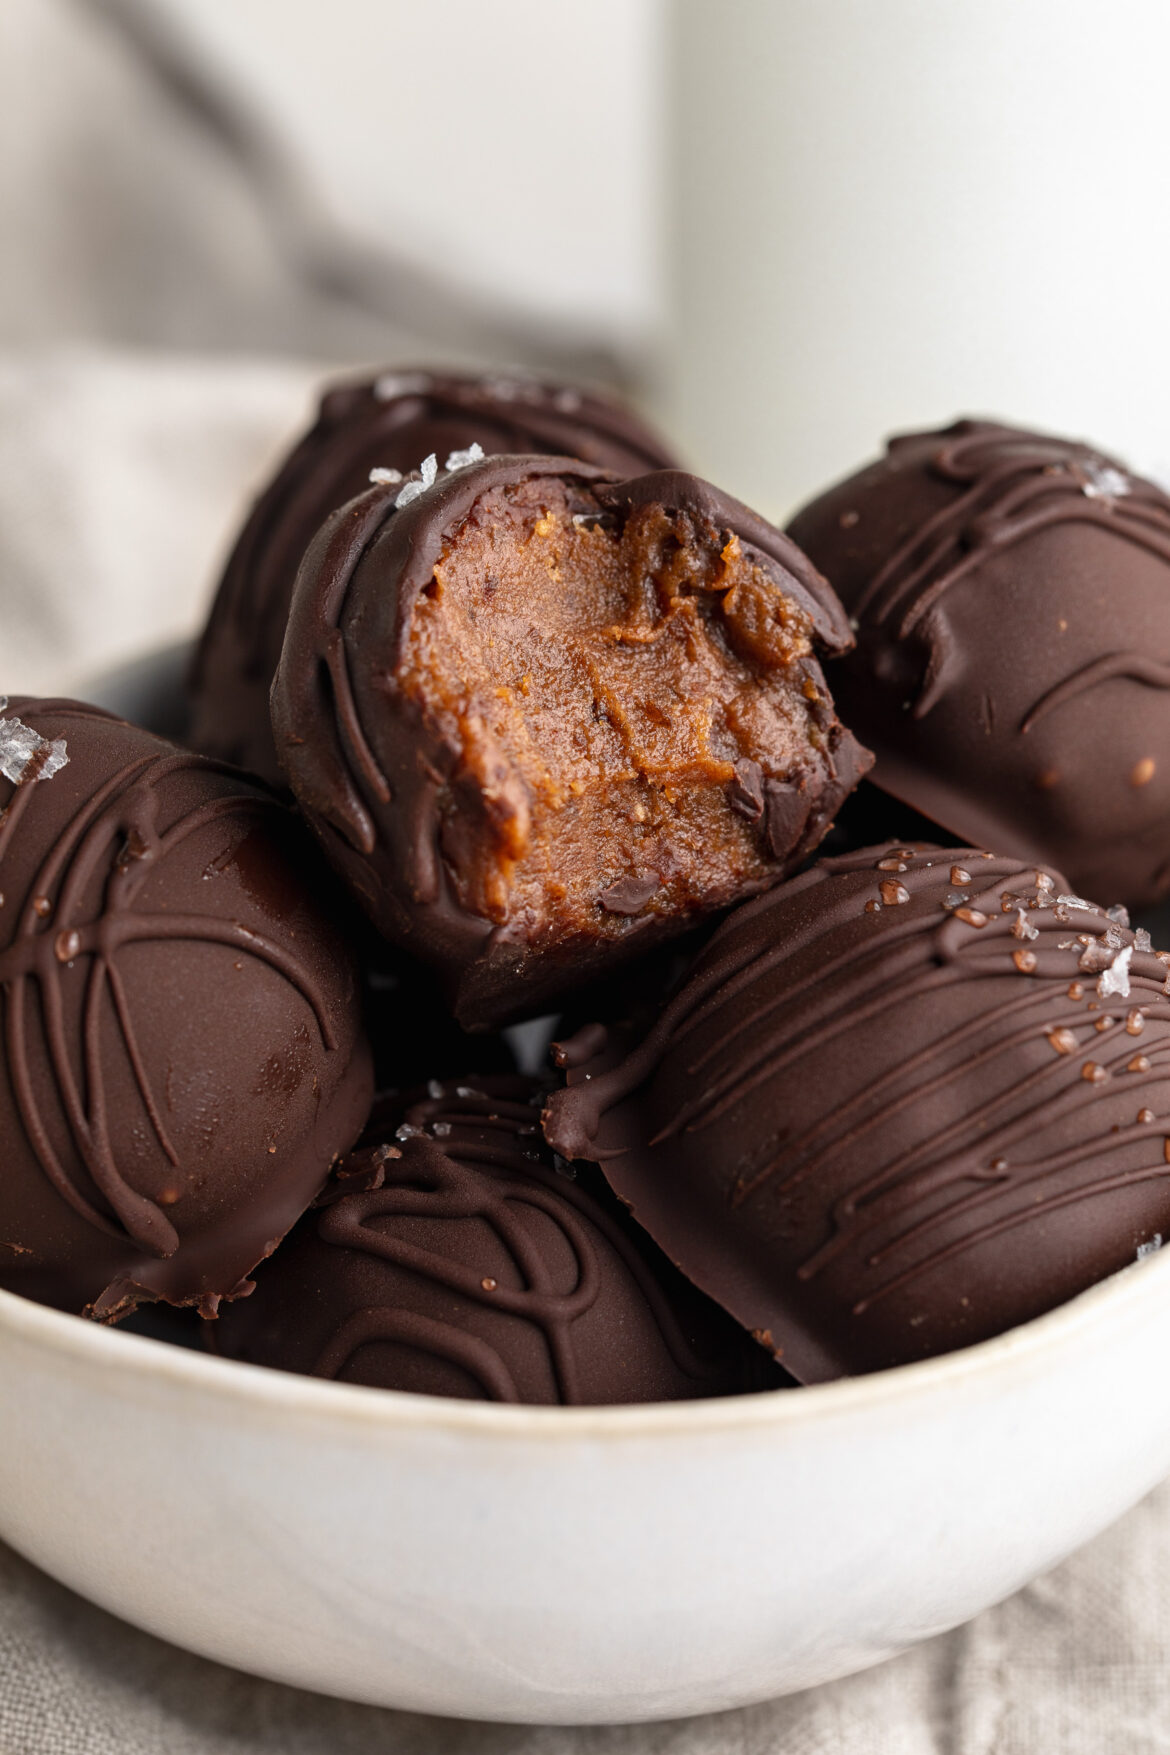
healthy no-bake brownie balls in a small bowl with flaky salt on top.

Why You’ll Love These Healthy Brownie Balls

These no-bake healthy brownie balls are the perfect healthy treat! Whether you’re craving something sweet post-workout or want a better-for-you treat during the day, these bites are loaded with flavor and come together in just minutes. Plus, they’re naturally sweetened with dates, made with wholesome plant-based ingredients, and dipped in chocolate for that irresistible finish!

What Makes This Recipe Healthy?

  • Naturally Sweetened – These brownie balls are sweetened entirely with medjool dates, offering fiber and natural sugars with zero refined sugar.
  • High in Plant-Based Protein – Thanks to chocolate protein powder and almond butter, these bites offer a nice protein boost to keep you satisfied.
  • No Bake + Easy Prep – Just toss the ingredients in a food processor, roll, dip, and chill. That’s it!
  • Allergy-Friendly – They’re gluten-free, dairy-free, and vegan-friendly, depending on your protein powder and chocolate chip choices.
healthy no-bake brownie balls in a small bow, one with a bite taken out.

Frequently Asked Questions

What can I use instead of almond flour?
You can use oat flour as a 1:1 substitute. It keeps the texture soft and fudgy and is also naturally gluten-free!

What kind of protein powder did you use?
I used Aloha Chocolate Plant-Based Protein Powder (use this link for 20% OFF Aloha!). It’s dairy-free, soy-free, and adds a rich chocolate flavor without any artificial ingredients.

How do I store these brownie balls?
Keep them stored in an airtight container in the fridge for up to 1 week, or freeze for longer storage—just let them thaw for a few minutes before enjoying!

Sam’s Recipe Tips

  • Soak your dates if they’re dry or firm. Just 10 minutes in hot water makes them easier to blend.
  • Chill the dough if it’s too soft to roll into balls. Even 10 minutes in the fridge can help.
  • Use parchment paper when dipping the balls in chocolate to avoid sticking and messy cleanup.
  • Add toppings like crushed nuts, flaky sea salt, or shredded coconut to the chocolate coating before it sets for a decorative (and delicious) twist.
close up image of healthy no-bake brownie balls in a bowl, one with a bite taken out.
5 from 1 vote

Healthy No-Bake Brownie Balls

These no-bake healthy brownie balls are rich, fudgy, and made with just 6 simple ingredients! They’re gluten-free, dairy-free, and naturally sweetened with dates. Keep a batch in the fridge for a delicious and healthy treat anytime!
Print Pin Rate
Prep Time: 10 minutes
Chilling Time: 30 minutes
Servings: 8 brownie balls

Equipment

  • 1 food processor or high speed blender
  • 1 small bowl

Ingredients

For the brownie balls:

  • 1 cup medjool dates pitted
  • 1/4 cup almond flour or oat flour
  • 1/4 cup chocolate protein powder or cocoa powder
  • 1/3 cup almond butter or any nut/seed butter
  • 1/2 teaspoon Vanilla Extract optional but recommended

For the chocolate coating:

  • 1 cup chocolate chips I used extra dark chocolate chips
  • 2 teaspoons coconut oil

Instructions

  • Add all brownie ball ingredients to a food processor and pulse until a dough form.
  • Use a cookie scoop to scoop the mixture, then roll it between palms into a ball. Place the balls on a parchment-lined plate and transfer to the freezer for a few minutes while you make the chocolate coating.
  • Make the chocolate coating by melting together the chocolate chips and coconut oil in either a microwave or over a double boiler until completely smooth.
  • Remove the brownie balls from the freezer, dip each ball into the chocolate until it’s evenly coated, then place them back on the parchment-lined plate. Transfer the chocolate coated brownie balls to the fridge for about 30 minutes, or until the chocolate has hardened. Either enjoy right away or store in the fridge for later.

Nutrition

Serving: 1brownie ball | Calories: 150kcal | Carbohydrates: 20g | Protein: 5g | Fat: 9g | Sugar: 14g