Tag

cookies

Browsing

Soft and perfectly sweet carrot cake cookies with a cream cheese icing! Gluten-free, dairy-free, and naturally sweetened with maple syrup. These healthy carrot cake cookies are the perfect springtime (or anytime) treat!

Healthy gluten-free carrot cake cookies on a baking sheet.

What You’ll Need to Make Carrot Cake Cookies

Oat Flour – Either homemade or store-bought oat flour will work in this cookie recipe! Oat flour replaces all purpose flour, making these cookies gluten-free.

Almond Butter – Smooth and unsweetened almond butter helps hold these cookies together. If you don’t have almond butter, you can use any other nut or seed butter you’d like. Cashew butter would make a great substitute here!

Maple Syrup – These healthy carrot cake cookies are naturally sweetened with maple syrup. The maple adds a touch of flavor, and the perfect amount of sweetness.

Shredded Carrots – Wash and peel about three large carrots, then run them down a box grater to make shredded carrots. Or, to make things even easier, simply buy pre-shredded carrots from the store for this dessert recipe!

Overhead image of healthy gluten-free carrot cake cookies on a baking sheet.

Tips and Tricks

  • Gently flatten each carrot cake cookie before baking. If you skip this step, they’ll bake up like round little balls. Therefore, for a more classic flat-looking cookie, give them a gentle press right before putting in the oven.
  • Allow your cookies to cool completely before icing! If the cookies are still too warm when iced, the cream cheese icing will melt and slide right off. (I’ve learned from my mistakes here – ha!)
  • These cookies are best stored in an airtight container at room temperature for up to 3 days. However, if you live in a warm client/are baking these in the summer – it’s best to store them in the fridge instead. If the cookies with cream cheese icing are left in too warm of an environment, the icing may melt and spoil.
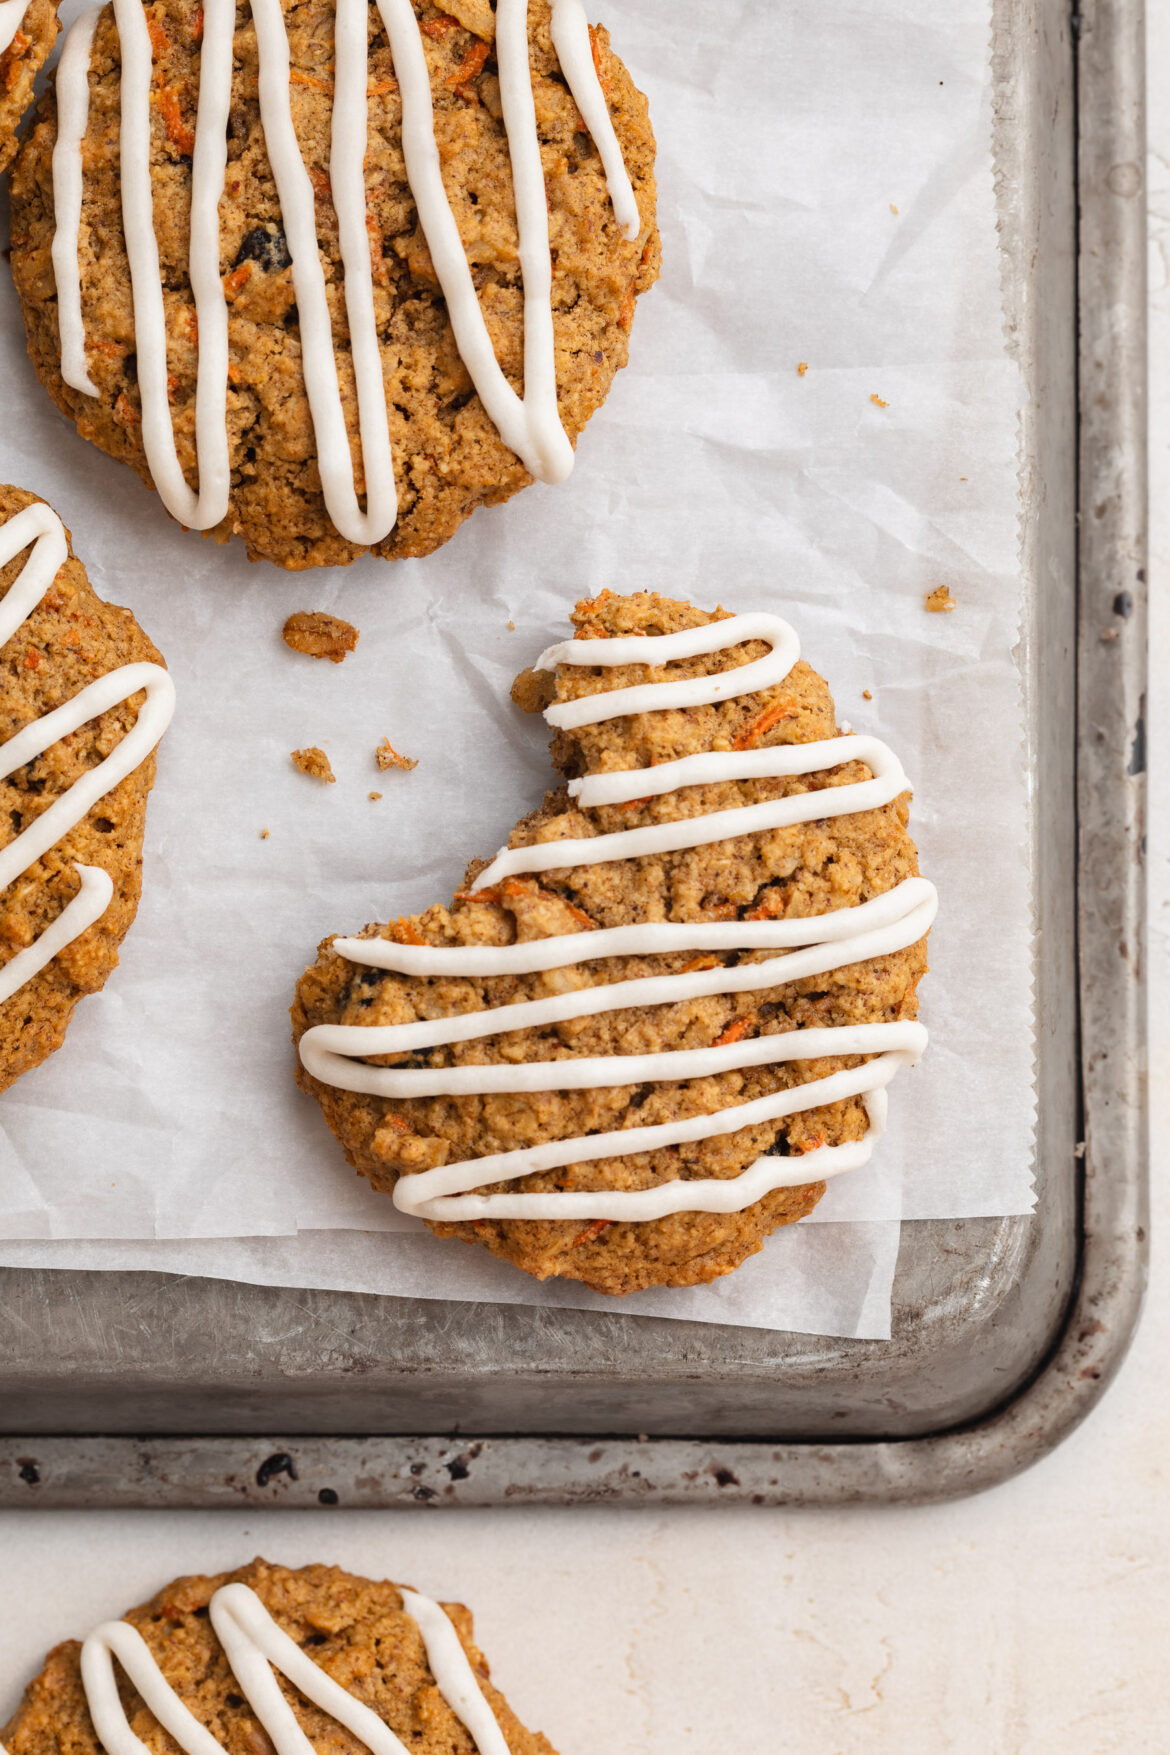
close up image of a healthy gluten-free carrot cake cookie with a bite taken out.

Adjust This Recipe to Your Dietary Needs

Make it Dairy-Free: While the cookies themselves are already dairy-free, make a dairy-free cream cheese icing by subbing your favorite non-dairy cream cheese, butter, and milk.

Make it Vegan: For vegan carrot cake cookies, replace the egg with a flax egg, and take the dairy-free icing option above!

Close-up overhead image of carrot cake cookies on a baking sheet.
5 from 3 votes

Carrot Cake Cookies

Soft and perfectly sweet carrot cake cookies with a cream cheese icing! Gluten-free, dairy-free, and naturally sweetened with maple syrup. These healthy carrot cake cookies are the perfect springtime (or anytime) treat!
Print Pin Rate
Prep Time: 15 minutes
Cook Time: 12 minutes
Total Time: 27 minutes
Servings: 24 cookies

Equipment

  • 1 large bowl
  • 1 medium bowl
  • 1 large baking sheet

Ingredients

For the dry ingredients:

  • 1 cup rolled oats
  • 1 cup oat flour made by pulsing rolled oats in a blender until ground into a flour
  • 1/2 cup almond flour
  • 1 teaspoon baking soda
  • 1 1/2 teaspoons cinnamon
  • 1/4 teaspoon nutmeg
  • 1/4 teaspoon salt

For the wet ingredients:

  • 1/2 cup almond butter unsweetened
  • 1/2 cup maple syrup
  • 1/4 cup coconut oil melted (or butter)
  • 1 teaspoon vanilla extract
  • 1 egg at room temperature
  • 1 cup shredded carrots
  • 1/4 cup chopped walnuts or pecans unsalted
  • 1/4 cup raisins

For the cream cheese icing:

  • 1/4 cup cream cheese softened (I used non-dairy cream cheese)
  • 3 tablespoons butter softened (I used non-dairy butter)
  • 1 1/2 cups powdered sugar
  • 2-3 tablespoons milk (I used non-dairy milk)
  • 1/4 teaspoon vanilla extract

Instructions

  • Preheat oven to 350° Fahrenheit and line a baking sheet with parchment paper.
  • Add all dry ingredients to a large bowl and whisk to combine.
  • Then, in a separate bowl, add all the wet ingredients except the carrots, walnuts, and raisins, and whisk to combine.
  • Pour the wet ingredients into the dry ingredients and use mix until fully combined. Then, fold in the carrots, walnuts, and raisins.
  • Scoop tablespoon-sized balls of cookie dough onto your prepared baking sheet and slightly flatten each ball with the palm of your hand.
  • Bake for 10-12 minutes, or until golden brown around the edges. Then, transfer to a wire cooling rack to cool completely.
  • While cookies cool, make the cream cheese icing by adding all ingredients to a bowl and whisking until smooth and well-combined. Then, spread or pipe cream cheese icing on top of each cooled cookie.

Notes

Nutrition info is for one cookie out of 24 cookies and does not include the cream cheese icing.
  • These cookies are best stored in an airtight container at room temperature for up to 3 days. However, if you live in a warm client/are baking these in the summer – it’s best to store them in the fridge instead.
Nutrition

Serving: 1serving | Calories: 119kcal | Carbohydrates: 12g | Protein: 3g | Fat: 6g | Sugar: 5g

The easiest Oreo mug cake, made with just 3 ingredients in 1 minute! This tiktok recipe went viral for a reason – because it’s so damn good. Whip up this fast and simple personal cake anytime you’re craving something sweet and delicious!

spoon scooping order mug cake out of a mug

What You’ll Need to Make Oreo Mug Cake

Oreos – I used gluten-free Oreos, but any Oreo will work! Have fun with this recipe, and use your favorite Oreo cookies. Double stuffed, golden, mint, etc. – all will taste delicious!

Milk – I used non-dairy milk, but just like the Oreos, any kind of milk will do!

Baking Powder – A little bit of baking powder gives this Oreo mug cake it’s cake-like texture. You can make the mug cake without it, but I wouldn’t recommend it. Just 1/4 teaspoon of this pantry-staple ingredient is all you’ll need.

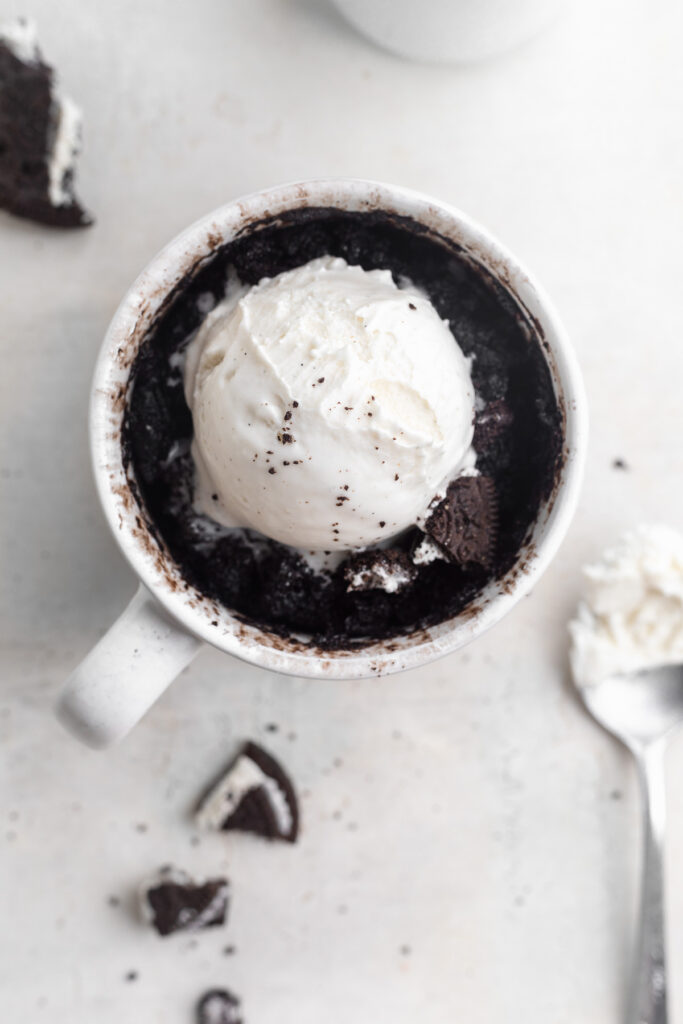
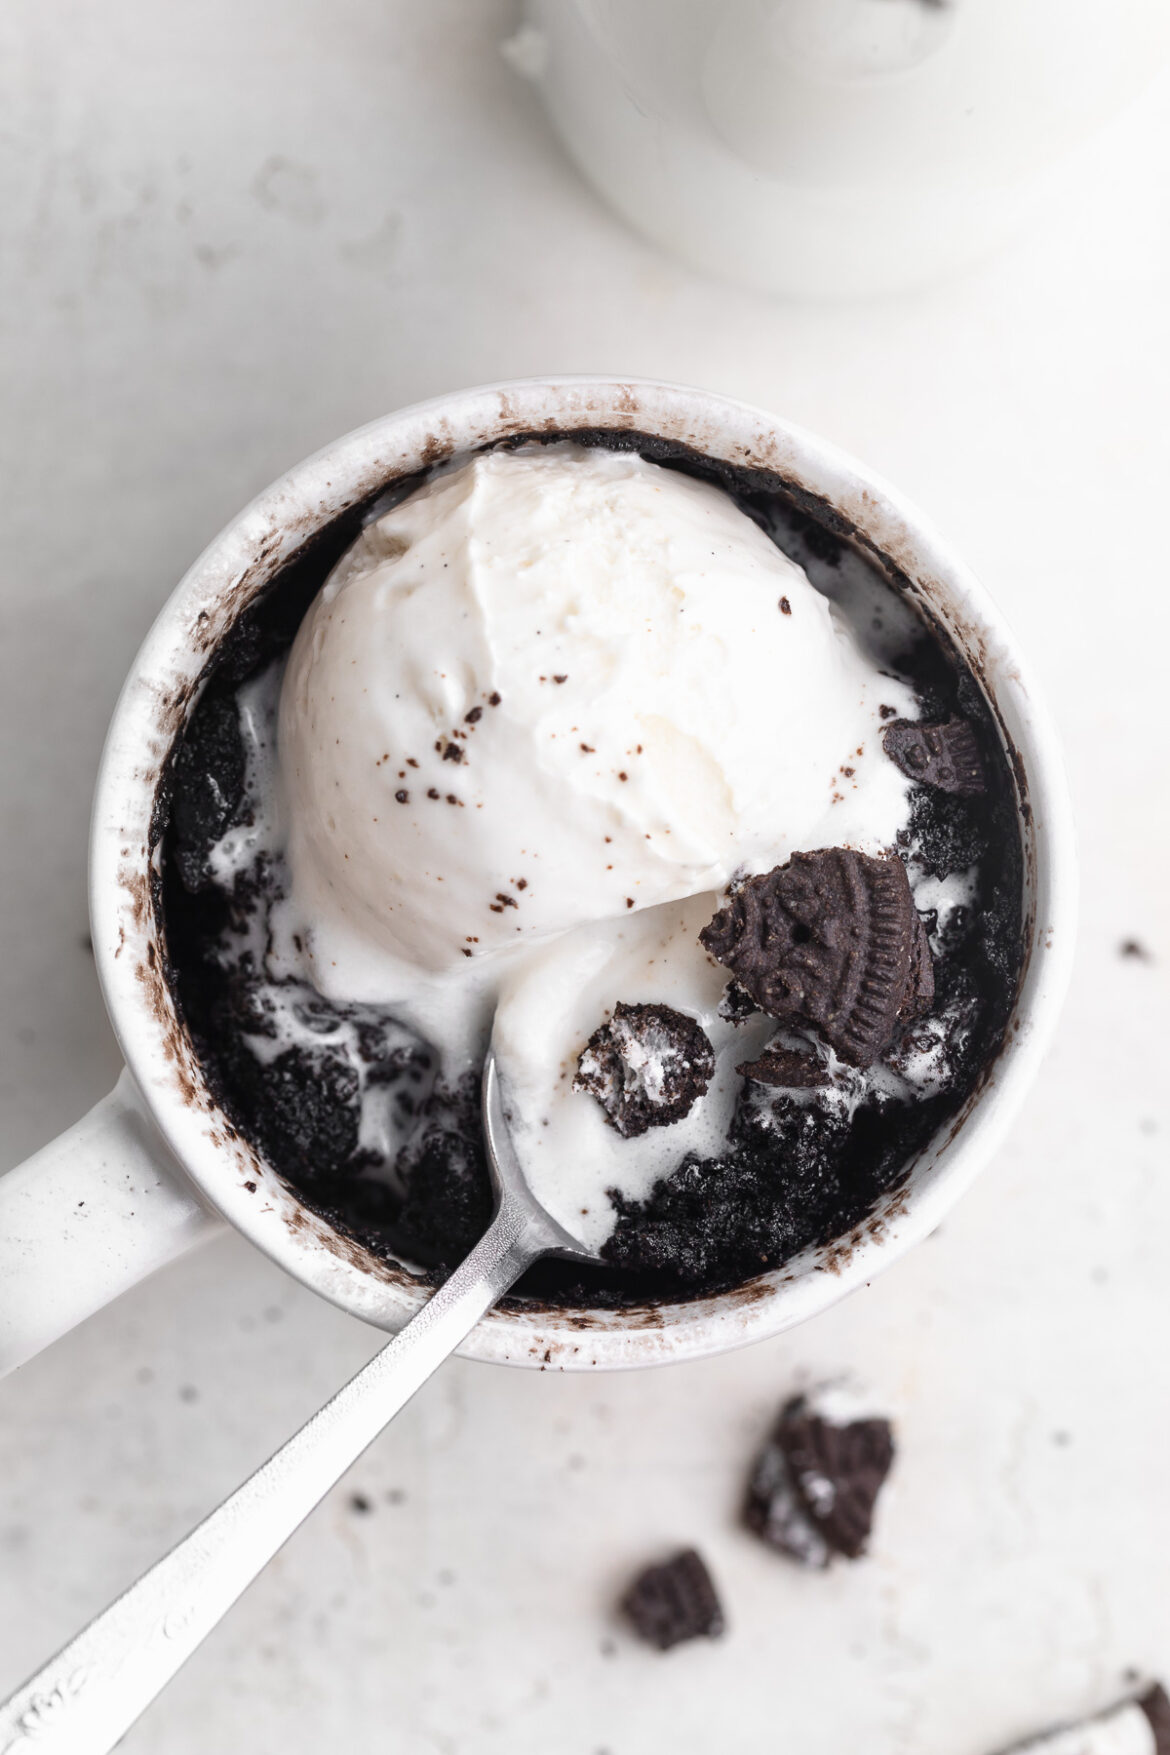
overhead image of oreo mug cake with vanilla ice cream on top and milk on the side.

Tips and Tricks

  • Throw in any mix-ins you’d like! For a double chocolate mug cake, add in a tablespoon of mini chocolate chips. Or, if you’re feeling celebratory, a small handful of rainbow sprinkles are always a fun addition.
  • Top this Oreo mug cake with whatever you’d like. A scoop of ice cream, a dollop of whipped cream, or an extra crushed Oreo all taste incredible atop this personal cake!
  • Make sure you use a microwave-safe mug for this recipe! Not all mugs can be heated in the microwave. To check if your mug is safe to use, flip it over and check the bottom for the words “microwave safe.” If it doesn’t state that it’s microwave safe, it’s probably best to avoid using it in this recipe.
oreo mug cake with milk on the side.

Adjust This Recipe to Your Dietary Needs

Make it Vegan: For a vegan Oreo mug cake, simply use non-dairy milk in this recipe. Also, just so you know, all Oreos are actually completely vegan!

Make it Gluten-Free: Use gluten-free Oreos for a gluten-free mug cake!

overhead image of oreo mug cake with a scoop of vanilla ice cream on top.
4.75 from 4 votes

3-Ingredient Oreo Mug Cake

The easiest Oreo mug cake, made with just 3 ingredients in 1 minute! This tiktok recipe went viral for a reason – because it’s so damn good. Whip up this fast and simple oreo mug cake anytime you’re craving something sweet and delicious!
Print Pin Rate
Prep Time: 1 minute
Cook Time: 1 minute
Total Time: 2 minutes
Servings: 1 serving

Ingredients

  • 5 Oreos
  • 3 tablespoons milk
  • 1/4 teaspoon baking powder

Instructions

  • In a large microwave-safe mug, mash together 4 of the Oreos and milk, until you achieve a cake batter-like texture.
  • Add in the baking powder and stir to combine.
  • Microwave on high for 1 minute, then break off large chunks from the extra Oreo and place those on top of your mug cake. Top with vanilla ice cream and/or whipped cream, then enjoy warm!

Nutrition

Calories: 300kcal

These gluten-free Christmas sugar cookies with baked-in sprinkles are so delicious that everyone will want a bite! With only a handful of pantry ingredients needed, baking these gluten-free Christmas cookies will surely get you into the holiday spirit. Perfect for gifts, parties, platters or all for yourself. Don’t forget to leave some for Santa!

Overhead image of a gluten-free Christmas cookie with red, green, and white sprinkles with a bite taken out.

What’s Christmas without festive sugar cookies to bring to parties, give as gifts, and leave out for Santa?! This homemade recipe is beyond any gluten-free Christmas cookie you’d find at the store. And baking them just really gets me into the holiday spirit! Bake these with your kids, friends, or partner while listening to Christmas music – it’s truly so much fun

Why You’ll Love This Gluten-Free Christmas Cookie Recipe

  • Fun For The Family: This is a great way to kick of your holiday season! Whether you’re measuring the sugar or your little ones are helping with the sprinkles, there’s room for everyone!
  • Easy and Quick: With a simple batter these cookies are ready for the oven and baked within 12 minutes.
  • Versatile and Customizable: Feel free to add chocolate chips, nuts, or crushed peppermint to the top of your cookies for a fun twist!

What You’ll Need To Make Gluten-Free Christmas Sugar Cookies

  • Butter: I used non-dairy butter to make these cookies dairy-free. Though whatever butter you use, make sure to soften it ahead of time!
  • Sugar: granulated sugar will work great for this recipe!
  • Eggs: These help bind the batter together, creating a soft classic christmas sugar cookie texture that will leave you wanting more!
  • Gluten-Free All Purpose Baking Flour: I use and love Bob’s Red Mill Gluten-Free Baking Flour for all my gluten-free baking recipes. Your gluten-free flour must contain xanthan gum. If it doesn’t, then add 1 teaspoon xanthan gum in with the dry ingredients.
  • Salt: This will help to bring the cookies together by providing a balance to the sweetness.
  • Christmas Sprinkles: If you don’t celebrate Christmas, feel free to use your favorite holiday sprinkles instead!
Close-up of a gluten-free Christmas cookie with a bite taken out.

How To Make The Best Gluten-Free Christmas Sugar Cookies

  • 1. Prepare Your Cookie Batter: Beat together your butter and sugar until light and creamy. Add your egg, and vanilla extract until well combined.
  • 2. Bake The Cookies: Scoop 2 tablespoons-sized balls of cookie dough and place them 2 inches apart on a baking sheet. Bake for 10-12 minutes.
  • 3. Remove and Cool: Remove cookies from the oven and let them cool on a cookie sheet for 5 minutes before transferring them to a wire rack to cool completely.

Tips, Tricks, and Storage

  • Making the Dough: It’s easier if you use a stand mixer or handheld mixer. But, if you want, I think it’s fun to do it by hand, just might take some extra elbow grease!
  • Make it Vegan: Okay, so usually I would swap the egg with a flax egg (1 tablespoon of ground flax meal mixed with warm water), but Bob’s Red Mill’s Egg Replacer might be the better option here. I haven’t tried this yet, but if you do, let me know in the comments!
  • Storage: Store the gluten-free Christmas cookies in an air tight container at room temperature for up to 5 days!

Additional Gluten- Free Holiday Favorites

overhead image of gluten-free christmas cookies
5 from 1 vote

Gluten-Free Christmas Sugar Cookies With Sprinkles

These gluten-free Christmas sugar cookies with baked-in sprinkles are soo delicious, everyone is going to want a bite! With only a handful of pantry ingredients needed, baking these Christmas cookies will surely get you into the holiday spirit. Perfect for gifts, parties, platters or all for yourself. Don't forget to leave some out for Santa!
Print Pin Rate
Prep Time: 10 minutes
Cook Time: 12 minutes
Total Time: 22 minutes
Servings: 16 cookies

Ingredients

  • 6 Tablespoons Softened Butter (Dairy or Non-Dairy)
  • 3/4 Cup Sugar
  • 1 Egg
  • 1 Teaspoon Vanilla Extract
  • 1 1/2 Cups Gluten-Free All Purpose Baking Flour, see Notes
  • 1 1/2 Teaspoons Baking Powder
  • 1/4 Teaspoon Salt
  • 1/2 Cup Sprinkles

Instructions

  • Preheat oven to 350° Fahrenheit and line a cookie sheet with parchment paper.
  • Beat the butter and sugar with either a hand or stand mixer until light and fluffy. Add in egg and vanilla extract, beat again to combine.
  • Add in the flour, baking powder, and salt. Beat together until a dough forms, then gently mix in the sprinkles until the sprinkles are evenly distributed throughout the dough.
  • Scoop 2 tablespoon-sized balls of cookie dough and place them about 2-inches apart on cookie sheet. Press down on each cookie to slightly flatten (they should be about 1-inch thick). Bake 10-12 minutes or until lightly golden around the edges.
  • Remove cookies from oven and let cool on cookie sheet for 5 minutes before transferring to a wire rack to cool completely.

Notes

Gluten-Free All Purpose Flour:Your gluten-free flour must contain xanthan gum. If it doesn’t, then add 1 teaspoon xanthan gum in with the dry ingredients.

Nutrition

Serving: 1cookie | Calories: 137kcal | Carbohydrates: 21g | Protein: 1.2g | Fat: 4.8g | Sugar: 12g

Crispy on the outside and soft on the inside almond flour chocolate chip cookies! A super easy one-bowl, gluten-free dessert recipe everyone will love. These cookies are perfectly sweet, and stuffed with plentyyyy of melty chocolate.

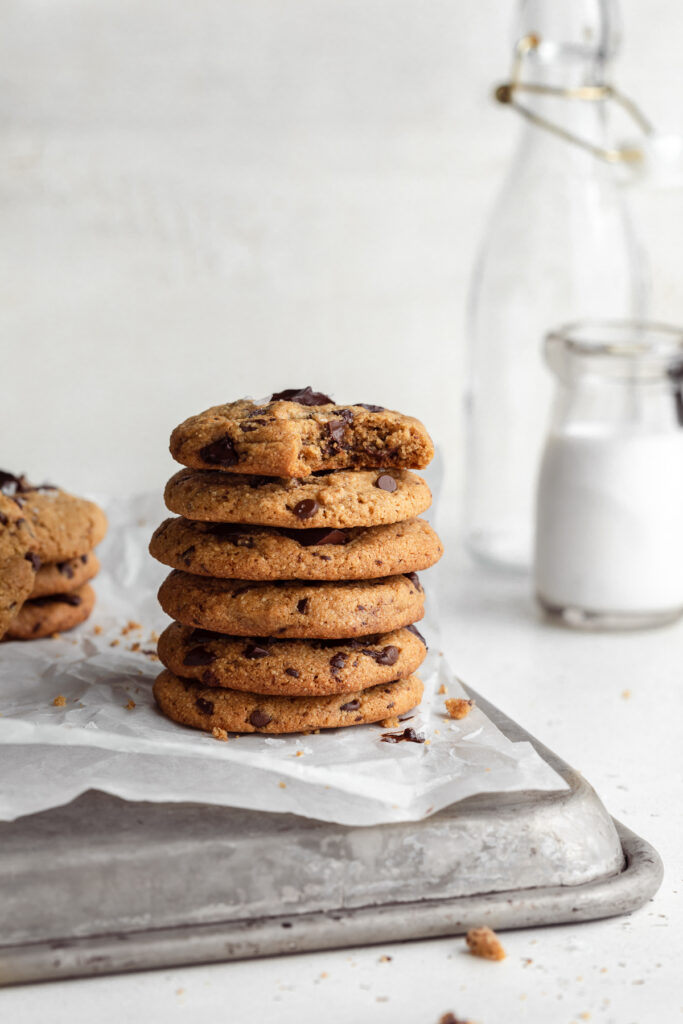
Close-up of a stack of gluten-free almond flour chocolate chip cookies with a bite taken out of the first cookie.

Who doesn’t love a classic chocolate chip cookie!? These gluten-free almond flour-based cookies are sure to be a family favorite. These are perfect not just for the holidays, but for any night that you’re looking for a simple one-bowl sweet treat with lots of chocolate!

Why You’ll Love This Recipe

  • Pantry Staples: This recipe’s ingredients are all items you may have right on hand in your pantry, which will make this a super easy gluten-free chocolate chip cookie recipe to put together!
  • Versatile & Customizable: Feel free to add your favorite chopped chocolate or even chopped nuts for additional flavor and melty goodness!
  • Easy & Quick: These chocolate chip cookies only take 10-12 minutes to bake in the oven!

What You’ll Need to Make Almond Flour Chocolate Chip Cookies

Butter: I used Myoko’s Vegan Butter to keep my cookies both gluten and dairy-free. However, you can certainly use any type of butter you’d like. Just be sure to let it come to room temperature before baking, this’ll help whip together the butter and sugar in the first step.

Brown Sugar or Coconut Sugar: Either one works! I used coconut sugar because it’s less processed than standard brown sugar. But I recommend you use whatever you have on-hand. Brown or coconut sugar give these almond flour chocolate chip cookies a deeper, more intense flavor!

Almond Flour: Of course, these wouldn’t be what they are without plenty of almond flour. With any recipe that calls for almond flour, be sure to use blanched almond flour – not almond meal. Almond meal will yield a more grainy and crumbly cookie, which is not what we’re looking for here.

Chocolate Chips: I can’t lie, I’ve got a pretty heavy hand when it comes to the chocolate chips. I used both chocolate chips AND chopped chocolate in my almond flour chocolate chip cookies. The end result was chocolate in every bite – yum! Though, again, feel free to use whichever you have on-hand when baking these cookies.

How To Make Gluten-Free Almond Flour Chocolate Chip Cookies

  1. Combine Your Wet Ingredients: Beat together the butter, coconut oil, and sugar in a large bowl with either a hand or stand mixer for 2-3 minutes. Add your egg and vanilla extract until well combined
  2. Assemble Your Batter: Add in almond flour, baking soda, and salt, stirring with a spatula or large spoon until combined then, fold in your chocolate.
  3. Bake & Cool: Bake at 350 degrees for 10-12 minutes or until golden brown.
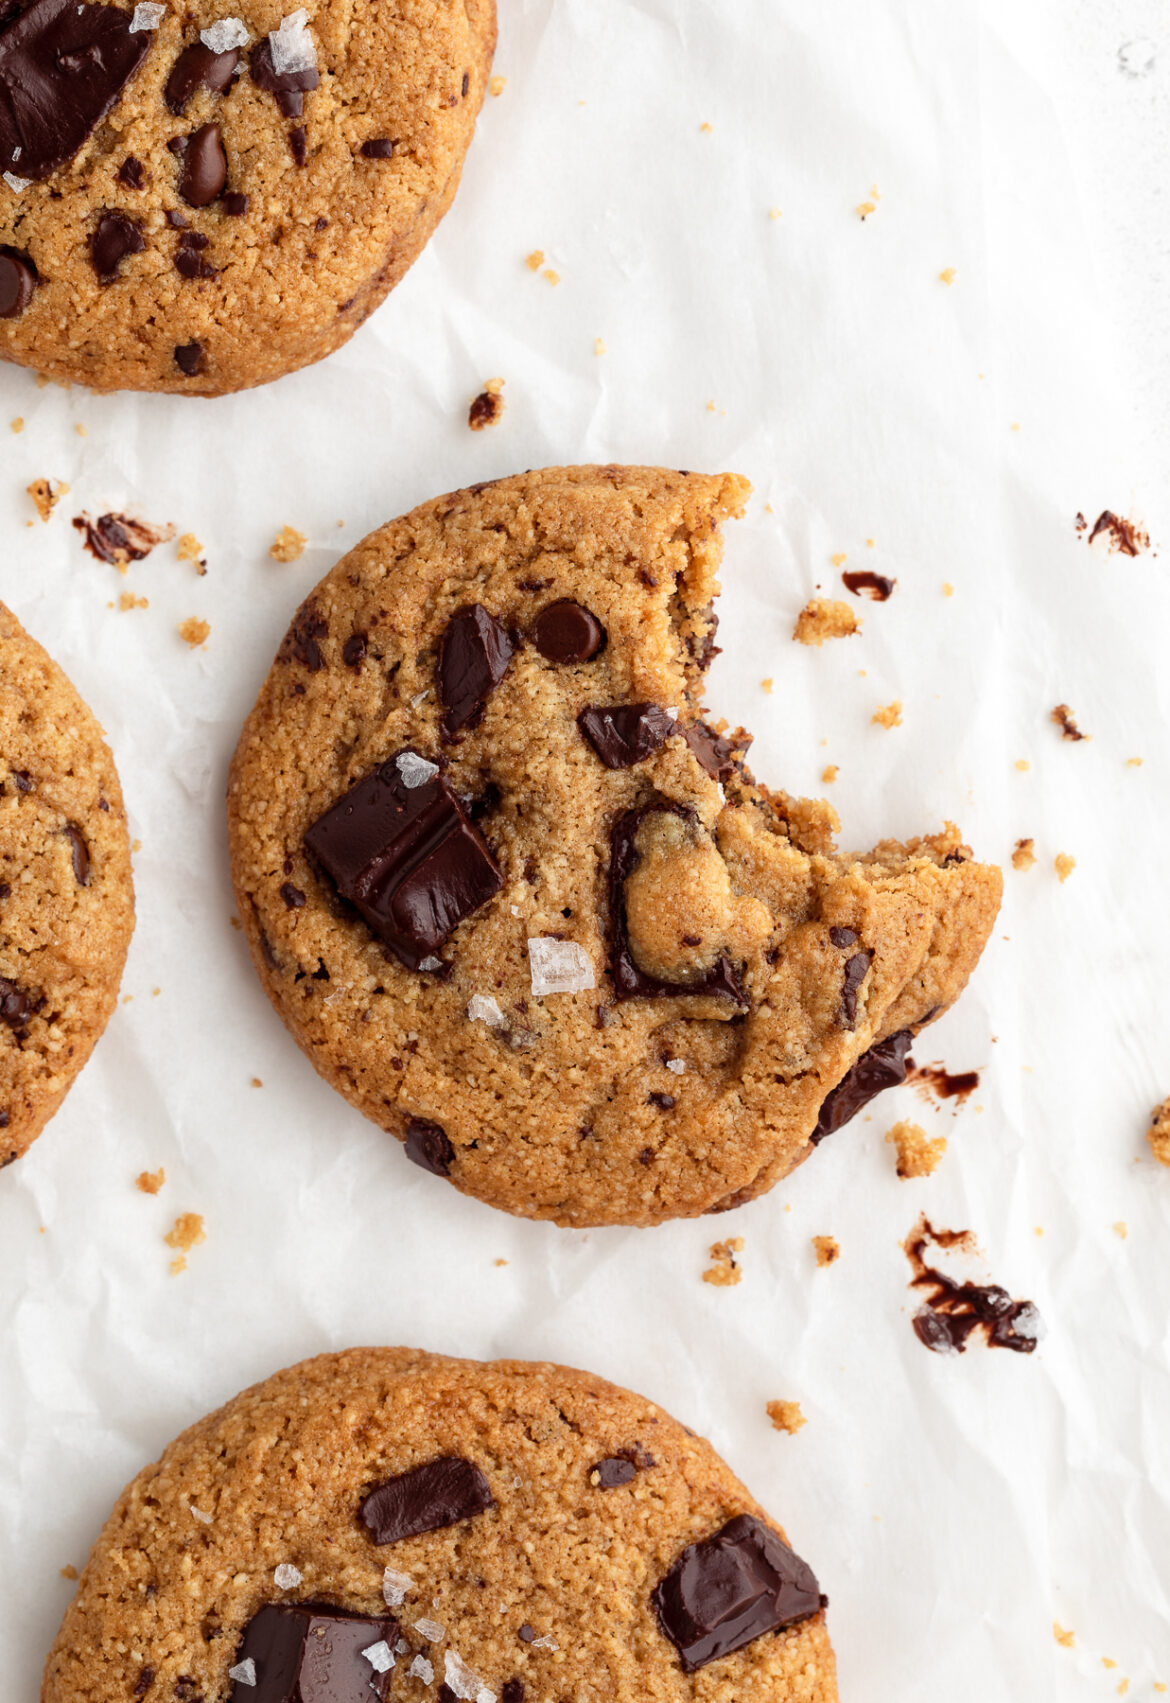
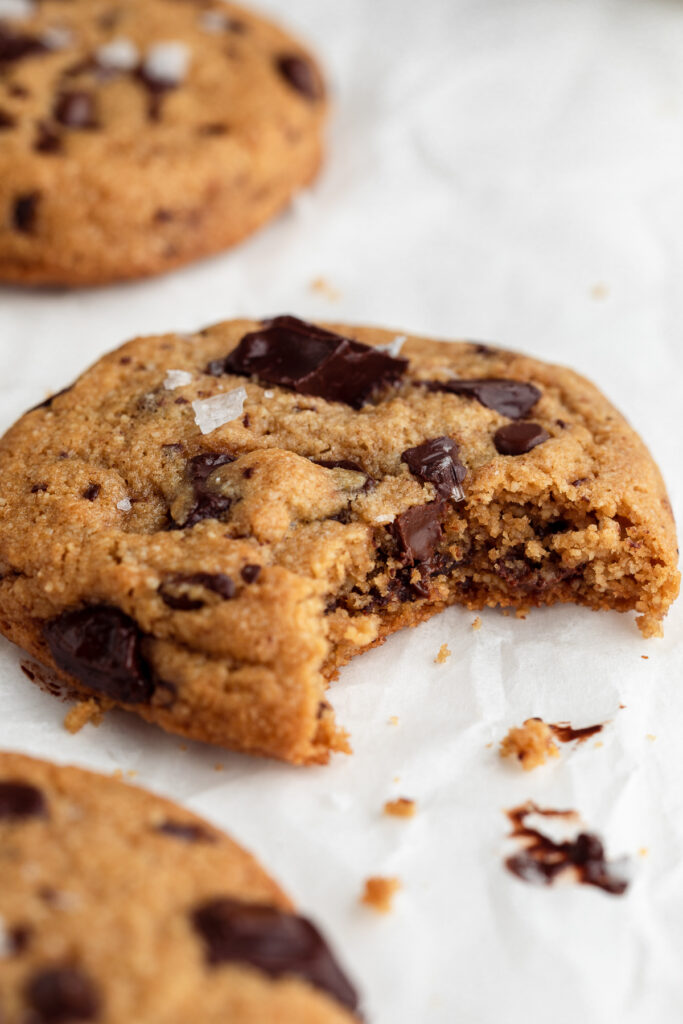
Close-up of a bite taken out of an gluten-free almond flour chocolate chip cookie topped with flaky sea salt.

Tips and Tricks

  • The cookie dough will appear more wet than standard cookie doughs, but this is ok! Simply scoop them onto a baking sheet, tidy up the edges of each cookies, then throw them in the oven to bake. They’ll still bake up beautifully, trust me!
  • For a softer cookie, bake them for only 10 minutes. Or, for a crispier, more well-done cookie, bake these cookies for a full 12 minutes. And always keep a close eye on them toward the end so they don’t burn!
A stack of six gluten-free almond flour chocolate chip cookies with milk on the side.

Adjust This Recipe to Your Dietary Needs

Make it Dairy-Free: Easily make these cookies dairy-free by swapping the butter for non-dairy butter. Also, make sure the chocolate chips you’re using are dairy-free (most aren’t).

Make it Vegan: For vegan almond flour chocolate chip cookies, take the dairy-free option above, as well as swap out the egg for your favorite vegan egg substitute. While I haven’t tried this version myself yet, I have high hopes it’ll work!

Make it Paleo: For a paleo cookie recipe, use coconut sugar instead of brown sugar, and softened coconut oil in place of the butter.

overhead image of almond flour chocolate chip cookies with flaky salt on top.
5 from 2 votes

Perfect Almond Flour Chocolate Chip Cookies

Crispy on the outside and soft on the inside almond flour chocolate chip cookies! A super easy one-bowl, gluten-free dessert recipe everyone will love. These cookies are perfectly sweet, and stuffed with plentyyyy of melty chocolate.
Print Pin Rate
Prep Time: 10 minutes
Cook Time: 10 minutes
Total Time: 20 minutes
Servings: 24 cookies

Ingredients

  • 1/2 cup butter, softened
  • 2 tablespoons coconut oil, melted (or 2 additional tablespoons of butter)
  • 1/2 cup brown sugar or coconut sugar
  • 1 teaspoon vanilla extract
  • 1 egg, at room temperature
  • 2 1/4 cups almond flour
  • 1/2 teaspoon baking soda
  • 1/4 teaspoon salt
  • 1 cup chocolate chips

Instructions

  • Preheat oven to 350° Fahrenheit and line a baking sheet with parchment paper.
  • Beat together the butter, coconut oil, and sugar in a large bowl with either a hand or stand mixer for 2-3 minutes.
  • Add in the vanilla extract and egg, beat until combined.
  • Add in almond flour, baking soda, and salt, this time stirring with a spatula or large spoon until just combine.
  • Fold in the chocolate chips, then scoop tablespoon-sized balls of cookie dough onto prepared baking sheet. Place each cookie about 2-3 inches apart, and lightly flatten with the palm of your hand.
  • Bake cookies 10-12 minutes or until golden brown, then transfer to a wire cooling rack to cool completely.

Nutrition

Serving: 1cookie | Calories: 140kcal | Carbohydrates: 8g | Protein: 2.6g | Fat: 11g | Sugar: 5g

Additional Gluten-Free Favorites

The healthiest raw cookie dough you’ll ever eat, made from chickpeas! Lightly sweetened with maple syrup, and loaded with extra chocolate chips. This chickpea cookie dough is vegan, gluten-free, super healthy, and totally delicious.

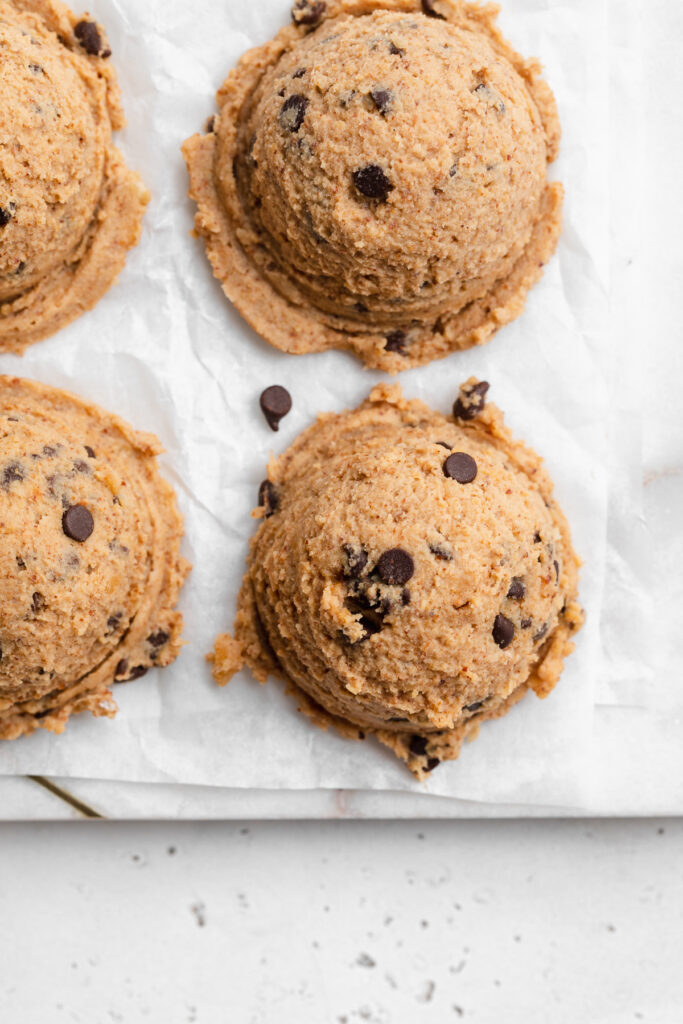
overhead image of scoops of chickpea cookie dough with extra chocolate chips

What You’ll Need To Make Chickpea Cookie Dough

Chickpeas – An entire can of chickpeas is the base to this healthy cookie dough recipe! Drain and rinse your chickpeas well before adding them to the blender. And for a smoother cookie dough, remove the skins off your chickpeas.

Nut or Seed Butter – I used almond butter, but any nut or seed butter will work in this recipe. Peanut butter, cashew butter, or even sunflower seed butter! Though whichever nut/seed butter you use, make sure it’s unsweetened.

Maple Syrup – This unrefined sweetener add sweetness, but keeps this vegan dessert recipe extra healthy. Though if you’d like, you can use honey, agave nectar, or even date syrup instead.

chickpea cookie dough inside a cookie scoop

Tips and Tricks

  • This chickpea cookie dough is high in plant-based protein! However, if you’d like to add even more protein, throw in a scoop of your favorite vanilla plant-based protein powder. I recommend the Aloha Vanilla Protein Powder, it’s not too sweet and won’t throw off the flavor of this healthy dessert recipe.
  • Enjoy it however you’d like! By the spoonful, over ice cream, as breakfast, a snack, or dessert.
  • Taste and adjust the flavor of this edible cookie dough however you’d like. For more sweetness, add in a touch more maple syrup. Or, for a thicker consistency, blend in an extra tablespoons of almond flour.
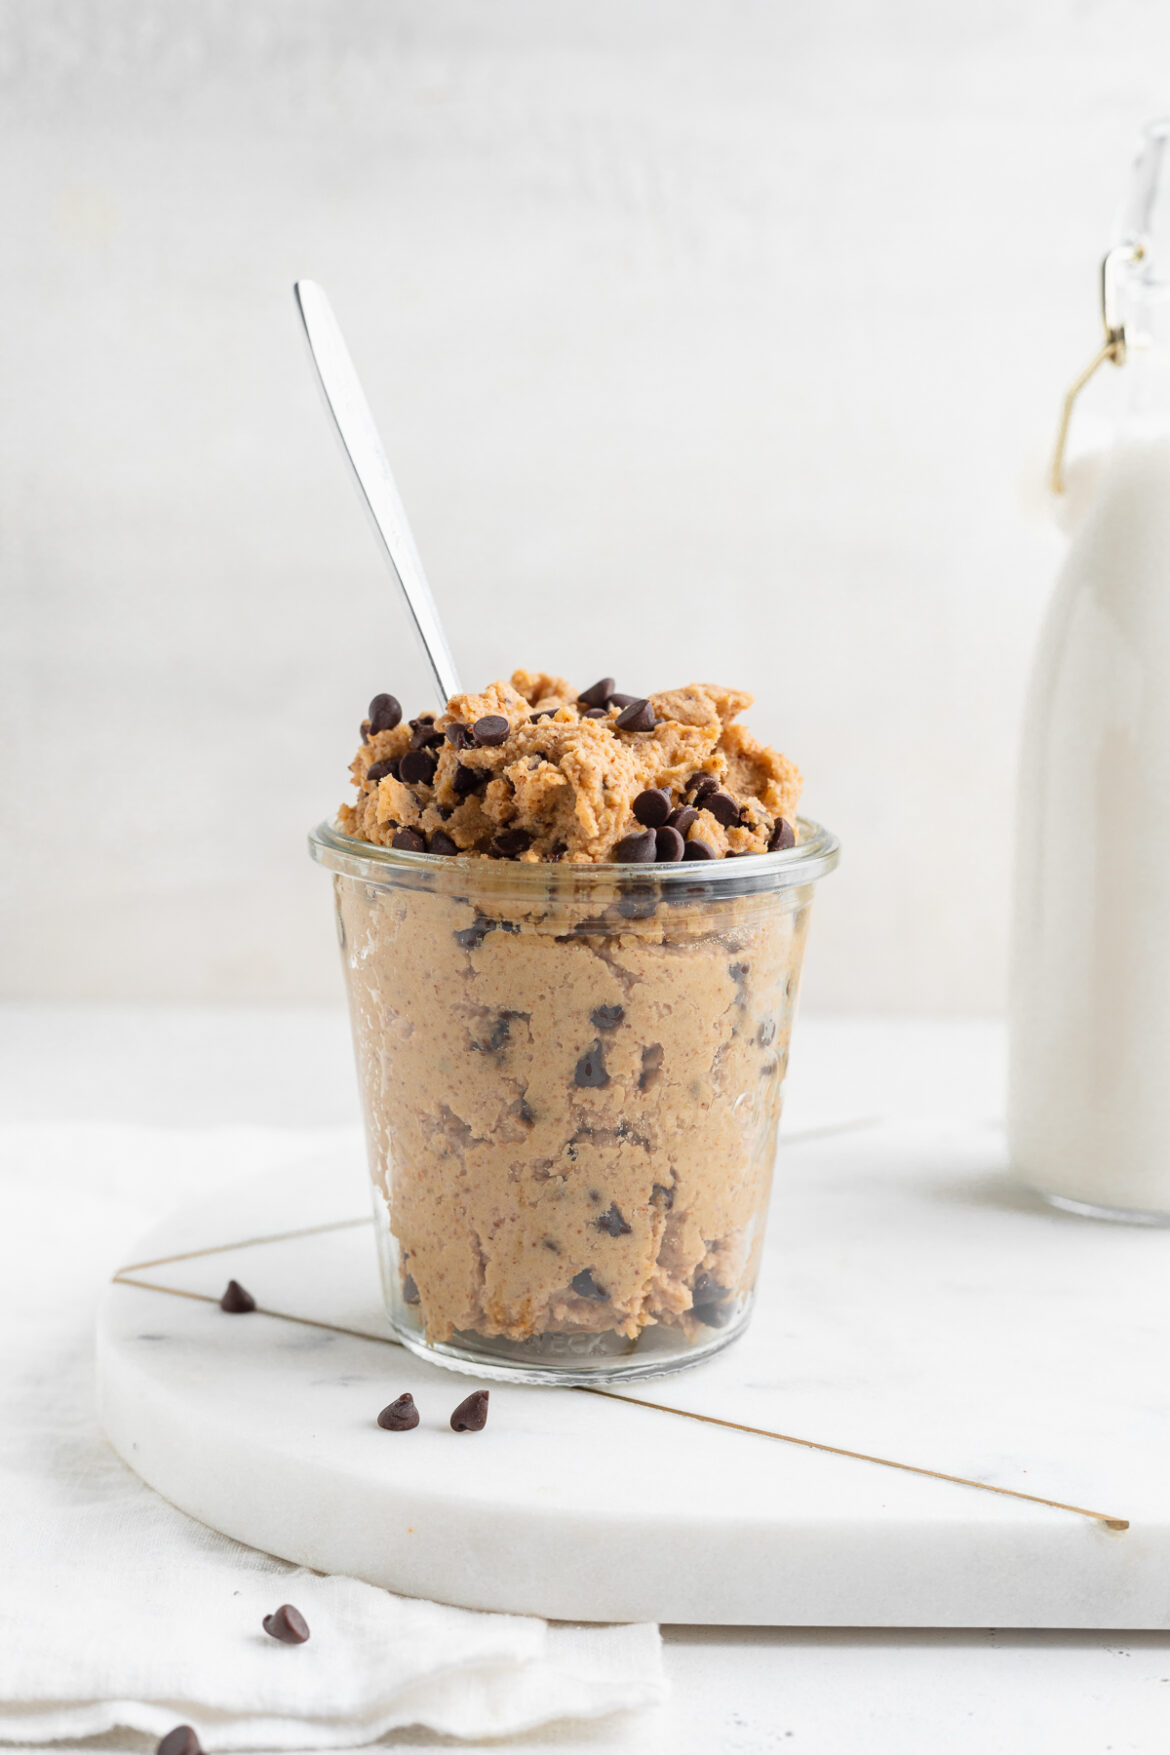
chickpea cookie dough in a jar with a spoon

Adjust This Recipe To Your Dietary Needs

Make it Nut-Free: For a nut-free version of this chickpea cookie dough, replace the almond flour with 3 tablespoons of coconut flour, and use sunflower seed butter.

Make it Sugar-Free: For an entirely sugar-free healthy dessert, use your favorite sugar-free liquid sweetener in place of the maple syrup. Also, replace the chocolate chips with cacao nibs!

No ratings yet

Chickpea Cookie Dough

The healthiest raw cookie dough you’ll ever eat, made from chickpeas! Lightly sweetened with maple syrup, and loaded with extra chocolate chips. This chickpea cookie dough is vegan, gluten-free, super healthy, and totally delicious.
Print Rate
Prep Time: 5 minutes
Total Time: 5 minutes
Servings: 4 servings

Ingredients

  • 1 (15-ounce) can chickpeas, drained and rinsed
  • 1/4 cup nut or seed butter, I used almond butter
  • 1/4 cup almond flour, see Notes for nut-free option
  • 3 tablespoons maple syrup
  • 1 tablespoon non-dairy milk, unsweetened
  • 1 teaspoon vanilla extract
  • pinch of salt
  • 1/4 cup chocolate chips

Instructions

  • Add all ingredients except chocolate chips to a food processor or high-speed blender, then pulse until super smooth.
  • Fold in chocolate chips and enjoy!

Video

Notes

  • Make it Nut-Free: Replace the almond flour with 3 tablespoons of coconut flour.
  • Nutrition

    Calories: 300kcal