")
Hey there, fellow dessert aficionados and Halloween enthusiasts! Are you ready to whip up a deliciously spooky treat that’ll add a touch of whimsy to your next Halloween party? Look no further because we’ve got a Mummy Brownies recipe that’s as cute as it is tasty. So, let’s get our mummy on and bake up some mummylicious brownies!

What You’ll Need to Make Mummy Brownies
A Batch of Almond Flour Brownies: You can use any brownie recipe you like – fudgy, cakey, or even my gluten-free almond flour brownies for a healthier twist. This recipe is all about the decoration!
Plain Icing: This is what you’ll use to create the mummy’s wrappings. You can buy pre-made icing or make your own with powdered sugar and a touch of milk.
Candy Eyes: These are the pièce de résistance! Candy eyes give your mummy brownies that adorable and slightly eerie look. You can find them at most baking supply stores or order them on Amazon.

Tips and Tricks
- Cool Before You Mummy-fy: Make sure your brownies are completely cool before you start the mummy decoration. You don’t want your icing to melt all over the place. We’re going for mummy precision, not mummy mess!
- Mummy Patterns: There’s no right or wrong way to create your mummy patterns. Some like neat, parallel lines, while others prefer a more chaotic mummy look. Be creative! And remember, mummies are meant to be a little imperfect.
- Save the Eyes for Last: When you’re putting on the candy eyes, do it as the final step. It’s like giving your mummy brownies their finishing touch. This way, you can place the eyes wherever you like and give each mummy its own unique personality.
Mummy Brownies
Ingredients
- a batch of brownies, I used this almond flour brownies recipe
- 1 cup powdered sugar
- 2-3 tablespoons milk
- candy eyes
Instructions
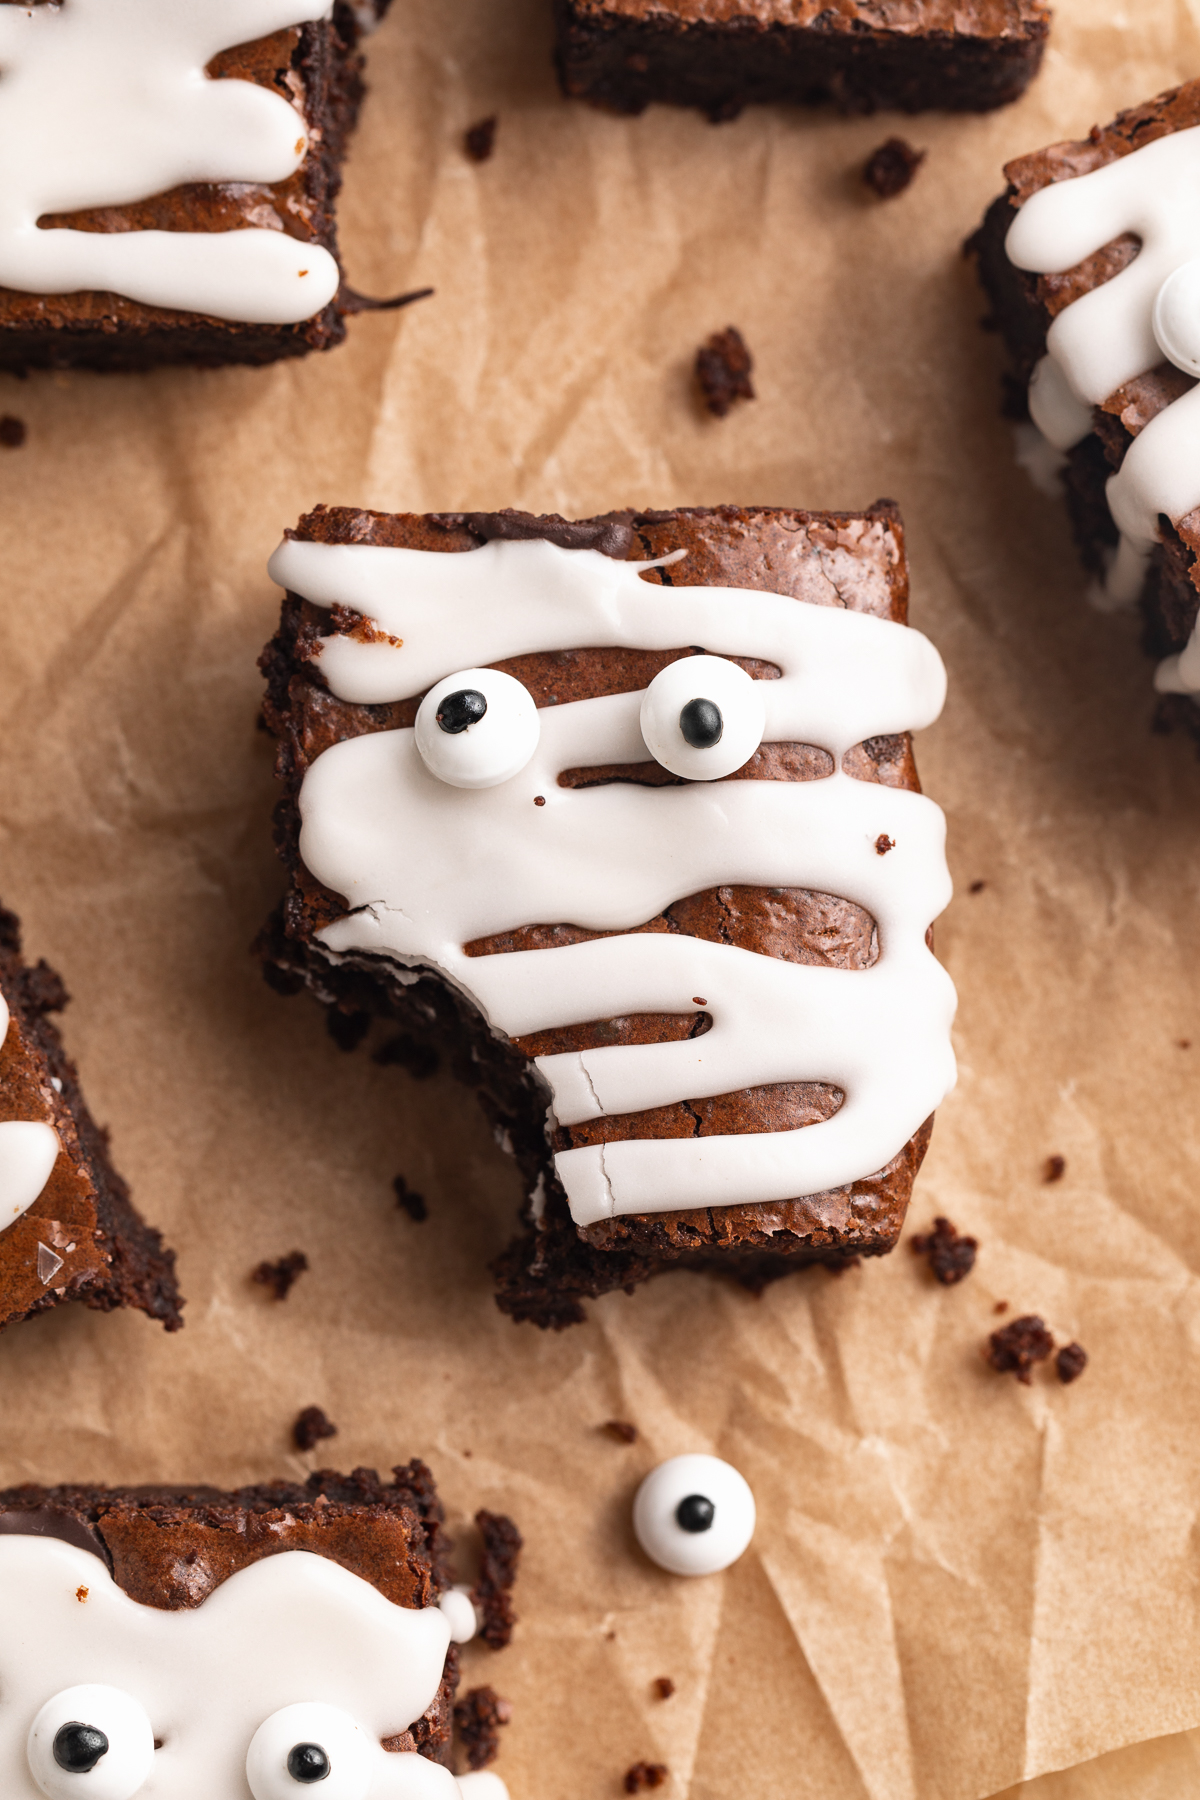
- Let your brownies cool completely, then cut into 12 rectangles.
- Make the icing by whisking together the powdered sugar and milk in a small bowl. Transfer the icing to a pastry bag or a ziploc bag and make a small cut at the tip of the bag where the icing can drizzle out.
- Drizzle icing across brownies in a zig-zag pattern, then place two eyes on each brownie.
- Leave icing to harden for about 10 minutes, then serve.
Video
Nutrition
Halloween just got a little sweeter with these Mummy Brownies. Whether you’re planning a spooky soirée or just want a fun, easy baking project to enjoy with the family, these little mummies are sure to bring a smile to your face.
So, pick your favorite brownie recipe, get your decorating skills ready, and make some mummylicious treats. It’s the perfect way to satisfy your sweet tooth and add a little Halloween magic to your dessert table. Happy mummy-making!
")