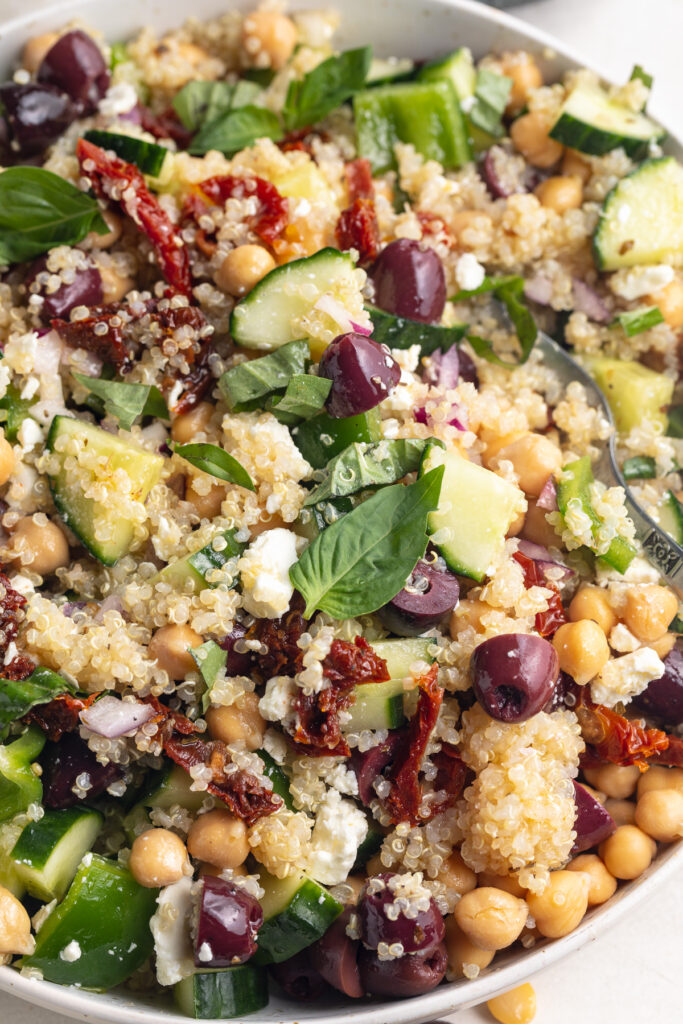
Fresh and flavorful mediterranean quinoa salad! This simple salad recipe is loaded with healthy veggies and tossed in a simple lemon dressing. Quinoa, chickpeas, olives, sundried tomatoes, basil, and feta – what’s not to love?!
What You’ll Need to Make Mediterranean Quinoa Salad
Quinoa – Start with 2 cups of cooked red or white quinoa (I used white quinoa) for this recipe. To cook quinoa, simply rinse 1 cup of dry quinoa, then add to a small saucepan with 2 cups of water and a pinch of salt. Bring the quinoa to a boil, then reduce to a simmer and cover with a lid. Simmer quinoa for about 15 minutes, or until all liquid has been absorbed. Once cooked, let cool to room temperature before adding to this salad!
Chickpeas – A can of chickpeas adds some extra protein to this grain salad. However, if you don’t like chickpeas, you can leave them out. Or, feel free to swap out the chickpeas with your favorite white bean – canneloni beans or navy beans would also taste great!
Kalamata Olives – This classic mediterranean ingredient adds tons of delicious flavor to this quinoa salad! Either buy pitted kalamata olives, or slice and pit them yourself for this recipe.
Feta – Another staple ingredient in many mediterranean recipes! Feta cheese is deliciously creamy and salty, and takes this salad recipe to the next level. Though if feta’s not your thing, you can leave it out or replace if with your favorite soft white cheese.

Tips and Tricks
- This salad is great for meal prep! You can fully prep and store this salad in the fridge for up to 4 days. The flavors will only intensify as it sits.
- Feel free to change up this salad however you’d like! Not a fan of one of the ingredients? Either leave it out or replace it with whatever you prefer. This mediterranean quinoa salad is super easy to customize and make your own.
- Love this recipe? Try this very similar Jennifer Aniston salad next!

Adjust This Recipe to Your Dietary Needs
Make it Gluten-Free: Surprise! This mediterranean quinoa salad is already gluten-free! Quinoa is a naturally gluten-free grain.
Make it Vegan/Dairy-Free: Simply leave out the feta, or swap it out for your favorite non-dairy feta – I love this Violife Vegan Feta.

Mediterranean Quinoa Salad
Ingredients
- 2 cups cooked quinoa
- 1 (15.5 ounce) can chickpeas, drained and rinsed
- 1/2 English cucumber, chopped
- 1 bell pepper, chopped
- 1/2 red onion, chopped
- 1/2 cup kalamata olives, pitted and sliced in half
- 1/2 cup sun-dried tomatoes, finely chopped
- 1/2 cup fresh basil, finely chopped
- 1/3 cup crumbled feta
For the lemon dressing:
- 1/2 cup olive oil
- 1/4 cup lemon juice
- 1 teaspoon dried oregano
- 1/2 teaspoon salt
- 1/4 teaspoon black pepper
Instructions
- Add the quinoa, chickpeas, cucumber, bell pepper, red onion, kalamata olive, sun-dried tomatoes, basil, and feta to a large bowl.

- In a separate small bowl, whisk together the olive oil, lemon juice, dried oregano, salt, and black pepper until combined.
- Pour the dressing over the salad and toss to combine. Enjoy immediately or store in an airtight container in the fridge for up to 4 days.