Tag

gluten-free

Browsing

All aboard the cottage cheese train! It’s no secret cottage cheese is trending, and I honestly never understood why until I finally decided to hop on the trend. I started with my cottage cheese cookie dough, then gave 3-ingredient cottage cheese pizza crust a try (*spoiler alert* it’s amazing!), and now here we are – my first every cottage cheese dip. And because I’m all about easy recipes, this cottage cheese buffalo dip is made with just 3 ingredients. I whipped it (literally) together in a food processor in just a few minutes for a high-protein appetizer or snack that’s perfect for game day or really… any day!

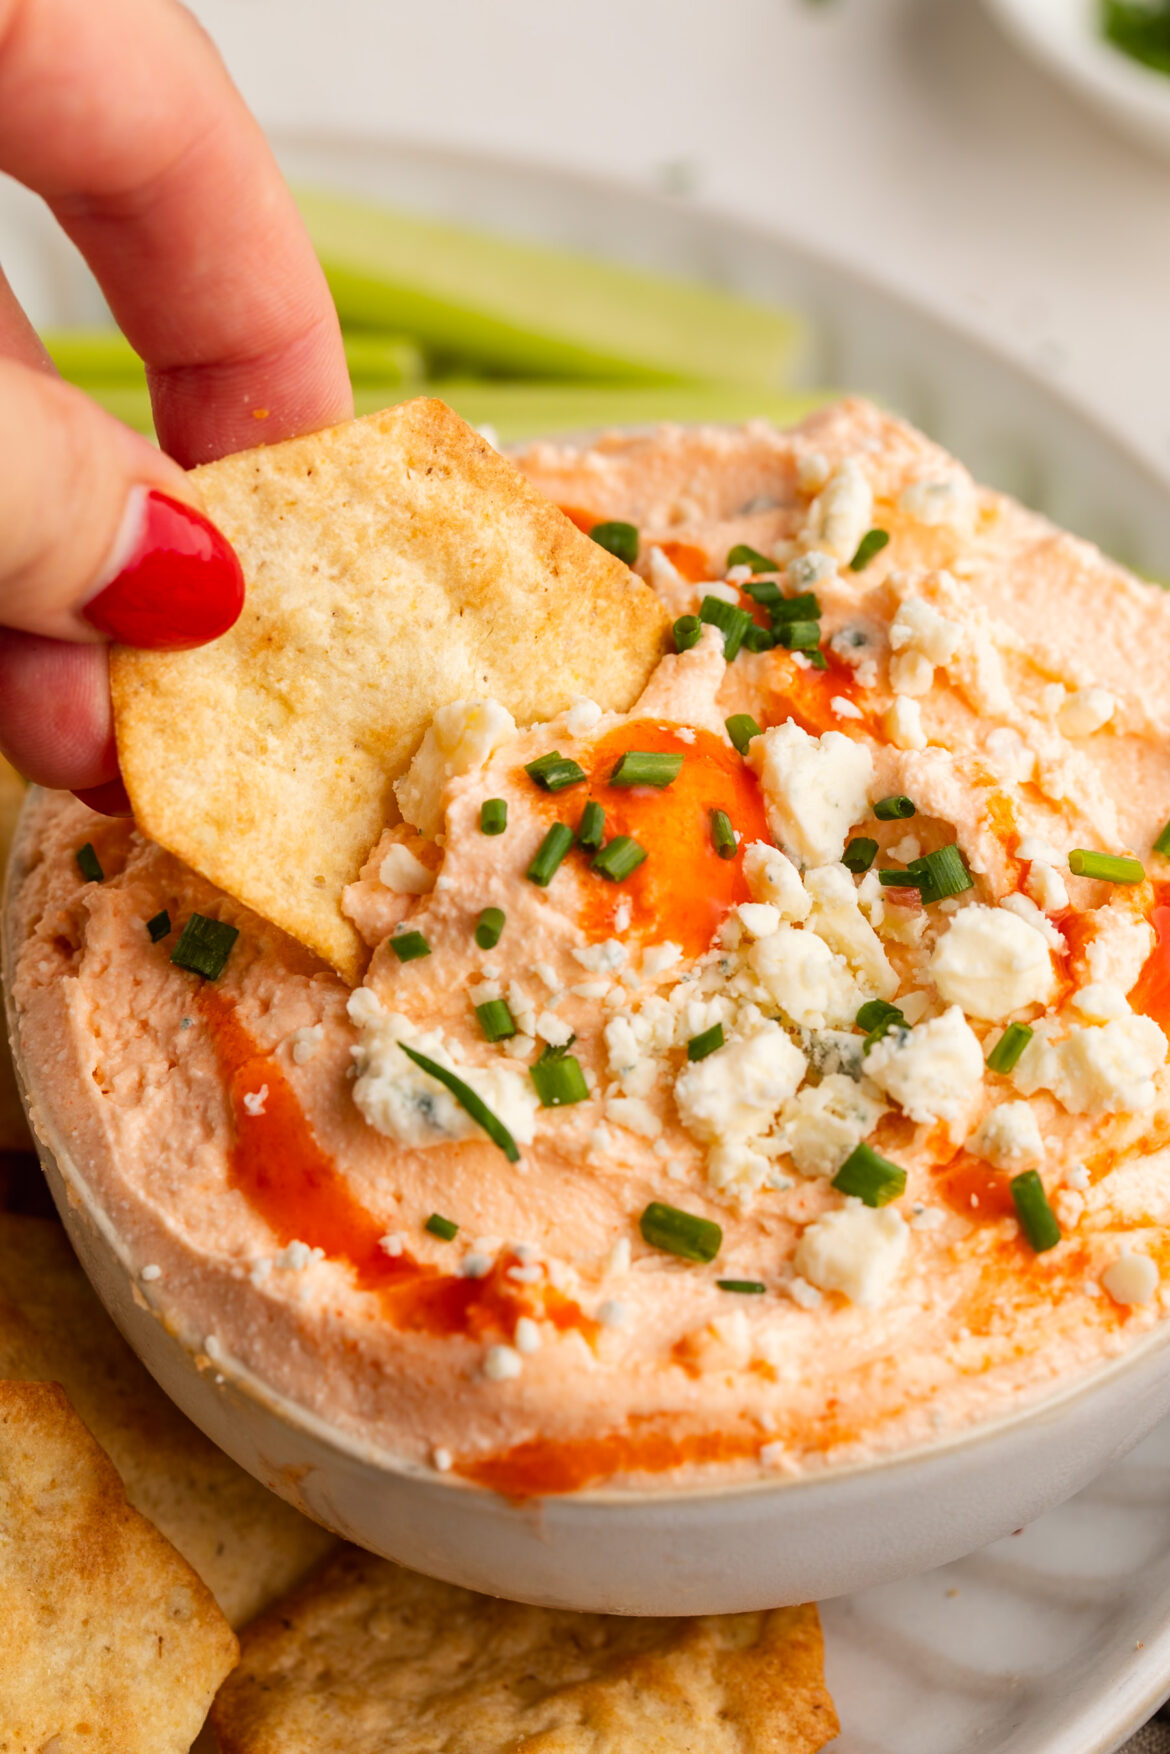
overhead image of buffalo cottage cheese dip with celery and crackers on the side.

Why You’ll Love This Recipe

  • Only 3 ingredients – no complicated steps, just blend and enjoy!
  • High protein & healthy – thanks to the cottage cheese, this dip has less calories and more protein than traditional buffalo dips.
  • Game day ready – perfect for football parties, holiday gatherings, or a quick snack.
  • Customizable – adjust the spice level by adding more or less hot sauce.

How Much Protein is in This Cottage Cheese Buffalo Dip?

This recipe makes about 2 cups of dip, and each ½ cup serving contains roughly 14 grams of protein. That means you can snack on this buffalo dip and get a solid protein boost. It’s a fun way to upgrade a party dip into something nourishing and satisfying!

buffalo cottage cheese dip in a bowl with blue cheese and hot sauce on top.

Frequently Asked Questions

Can I heat this dip?
Yes! You can warm it gently on the stove or in the microwave. Just stir occasionally so it stays smooth and creamy. You can even sprinkle it with shredded cheese before baking for extra cheesy goodness!

What can I use instead of cottage cheese?
Greek yogurt works as a substitute, though it won’t be quite as thick or creamy. Cream cheese can also be used, but it will reduce the protein content.

Can I add chicken to it?
Absolutely! For a more classic buffalo chicken dip vibe, stir in shredded cooked chicken before serving (or after blending).

Sam’s Recipe Tips

  • Use full-fat cottage cheese for the creamiest texture.
  • If you like extra heat, stir in a pinch of cayenne or crushed red pepper flakes.
  • For added flavor, top with chopped chives or a sprinkle of blue cheese crumbles.
cottage cheese buffalo dip being scooped with a cracker.
No ratings yet

Whipped Cottage Cheese Buffalo Dip (3 ingredients!)

This creamy, spicy, and protein-packed cottage cheese buffalo dip is made with just three simple ingredients and comes together in under 5 minutes. It’s the ultimate healthy snack or game day appetizer that pairs perfectly with crunchy veggies, chips, or crackers. With cottage cheese as the base, this dip is loaded with protein while still being light and creamy.
Print Pin Rate
Prep Time: 5 minutes
Total Time: 5 minutes
Servings: 4 servings

Equipment

  • 1 food processor or high speed blender

Ingredients

  • 16 ounces cottage cheese
  • 3 tablespoons hot sauce plus more to taste
  • 1/2 teaspoon garlic powder

Instructions

  • Add all ingredients to a food process or blender and blend until smooth, then serve with fresh veggies, chips, and/or crackers.
Nutrition

Serving: 1serving | Calories: 100kcal | Carbohydrates: 7g | Protein: 14g | Fat: 3g | Sugar: 3g

My husband swears these are the “BEST” dessert I’ve ever made! And, I mean… look around, I made a lot of dessert so that’s a bold statement. But he swears these frozen chocolate peanut butter s’mores bars are his favorite thing I’ve ever made.

While “best” might be a bit much for me, these s’mores bars are really REALLY good. I’d rank them up there with my protein chocolate chip cookies and healthier twix bars as one of the best recipes I’ve ever made. And the best part?? They’re made with just 5 simple ingredients, and there’s NO baking required. They’re incredibly delicious and indulgent!

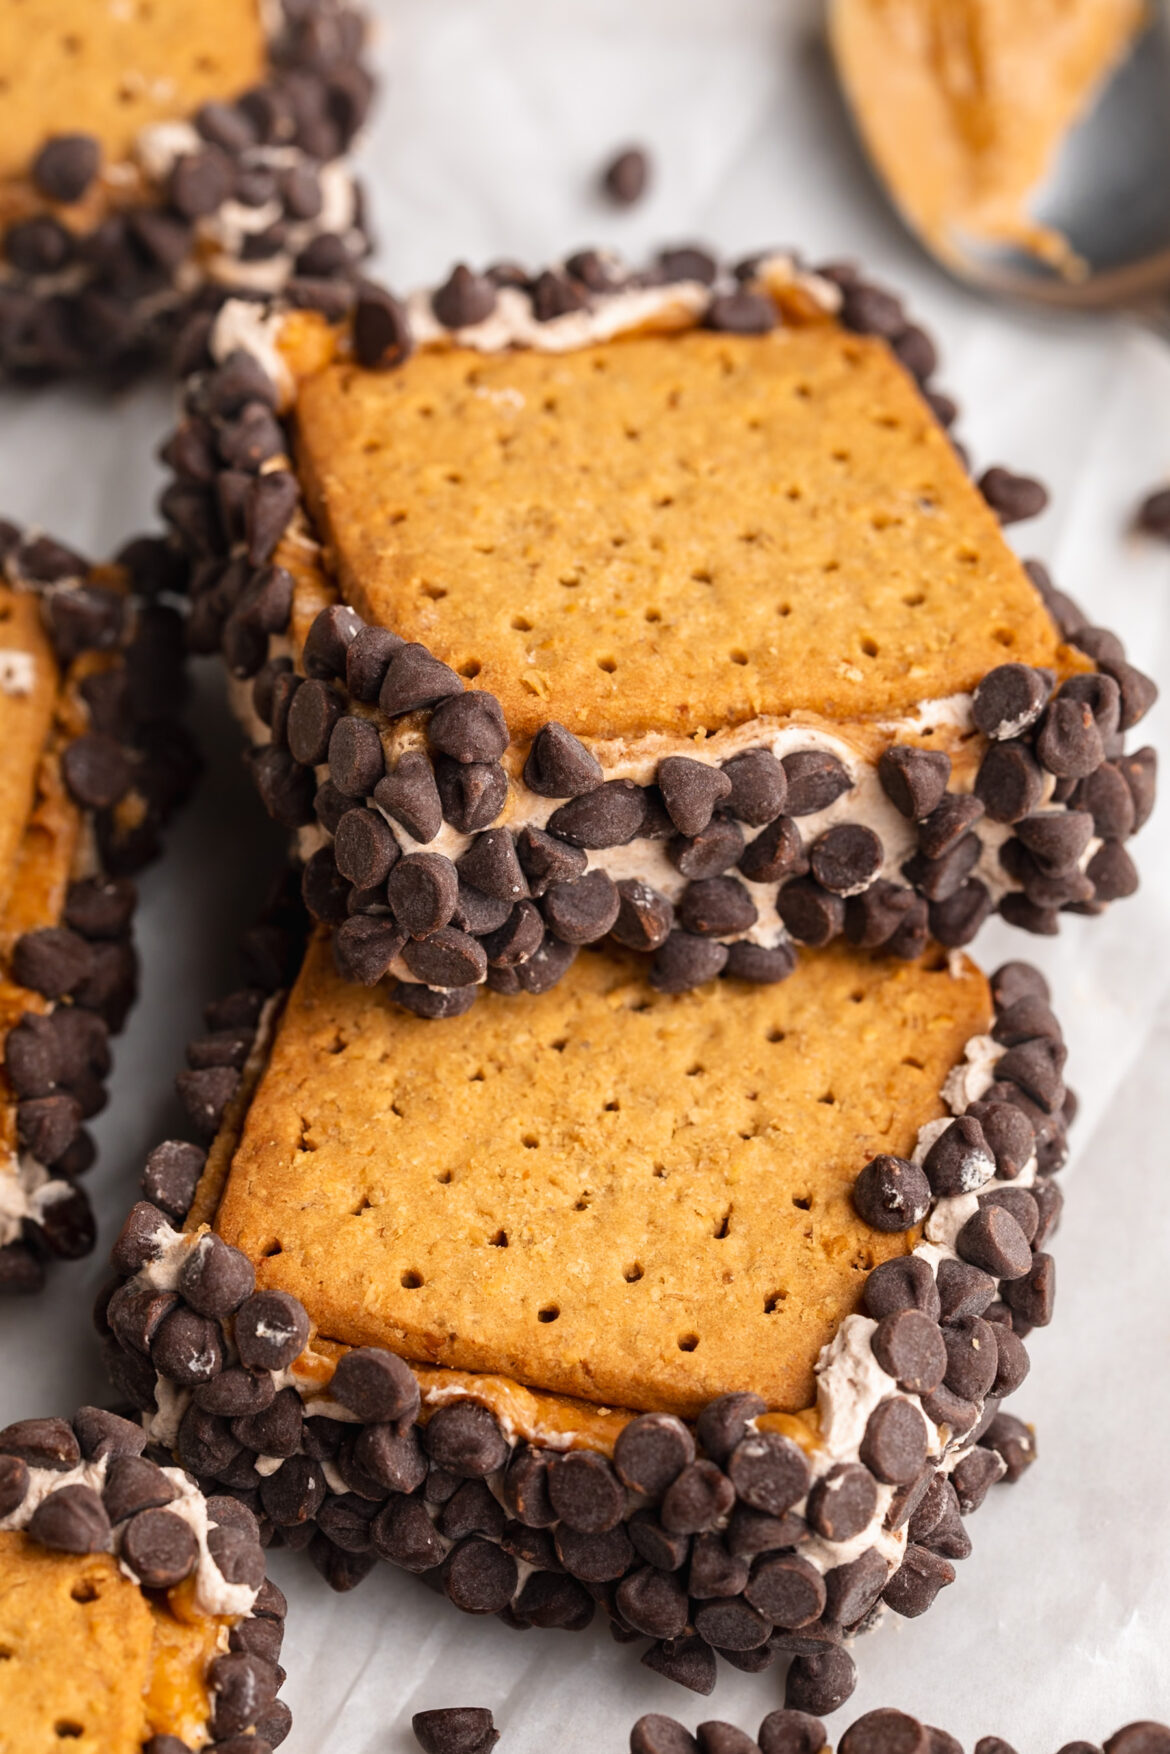
overhead image of frozen chocolate protein peanut butter s'mores bars

Why You’ll Love These Frozen S’mores Bars

  • No bake & easy to make – Just a handful of ingredients and simple assembly steps.
  • Protein-packed – With chocolate protein powder mixed into the creamy whipped topping, each bar has an extra boost of protein to keep you satisfied and/or help you meet your protein goals!
  • Make-ahead friendly – Store them in the freezer for quick grab-and-go treats.

Recipe Variations and Substitutions

  • Swap the protein powder – Use vanilla protein powder instead of chocolate for a lighter flavor.
  • Add layers – Mix crushed graham crackers into the whipped topping for extra texture.
  • Make them extra chocolatey – Add a drizzle of melted chocolate on top before freezing, or dip them in melted chocolate after freezing.
  • Skip the chocolate chips – Keep it simple or roll the frozen bars in chopped nuts instead!
frozen chocolate protein peanut butter s'mores bar with a bite taken out.

Adjust This Recipe to Your Dietary Needs

frozen chocolate protein peanut butter s'mores bars stacked on top of each other on a table.
5 from 1 vote

Frozen Chocolate Protein Peanut Butter S’mores Bars

These Frozen Chocolate Protein Peanut Butter S’mores Bars are a chocolate protein twist on the nostalgic campfire classic. With graham crackers, creamy peanut butter, chocolate protein whipped cream, and a chocolate chip coating, they’re indulgent and seriously delicious! This no bake recipe is easy to make, freezer-friendly, and the perfect treat when you want something sweet and satisfying.
Print Pin Rate
Prep Time: 10 minutes
Freezing Time: 1 hour
Total Time: 1 hour 10 minutes
Servings: 9 servings

Equipment

  • 1 9×9-inch baking pan
  • 1 large bowl

Ingredients

  • 18 graham cracker squares I used gluten-free graham crackers
  • 1 container non-dairy whipped topping
  • 4 scoops chocolate protein powder about 1/2 cup
  • 1/4 cup peanut butter
  • 1/2 cup mini chocolate chips optional, but recommended!

Instructions

  • Line a 9×9-inch baking dish with parchment paper, then line the bottom of the pan with an even layer of graham crackers.
  • In a large bowl, mix together the whipped topping and chocolate protein powder, then transfer the whipped topping mixture on top the graham crackers and spread it into an even layer.
  • Drizzle and spread the peanut butter on top of the whipped topping, then arrange the remaining graham crackers in an even layer on top of the peanut butter.
  • Transfer the baking dish to the freezer for at least one hour or until firm, then remove from the freezer and cut into bars.Once cut, dip the outside of each bar in mini chocolate chips for the perfect finishing touch!

Nutrition

Serving: 1serving | Calories: 280kcal | Carbohydrates: 31g | Protein: 12g | Fat: 14g | Fiber: 3g | Sugar: 14g

Did you know September has more birthdays than any other month of the year?? Which checks out for my because both me and my sister have birthdays this month! So when September rolls around every year, sure I’m all for a gluten-free apple crisp and healthy pumpkin spice latte, but I also can’t help but bring out the birthday recipes. I kicked things off last week with my 5 ingredient birthday cake banana bread (a must bake, wether it’s your birthday or not!), and now I’m keeping the celebrations going with these healthy birthday cake energy bites. They’re packed with protein, fiber, and healthy fats – yet perfectly sweet and excitingly festive! Meal prep a batch of these at the start of your week and enjoy a quick and easy no-bake sweet treat all week long. 🥳

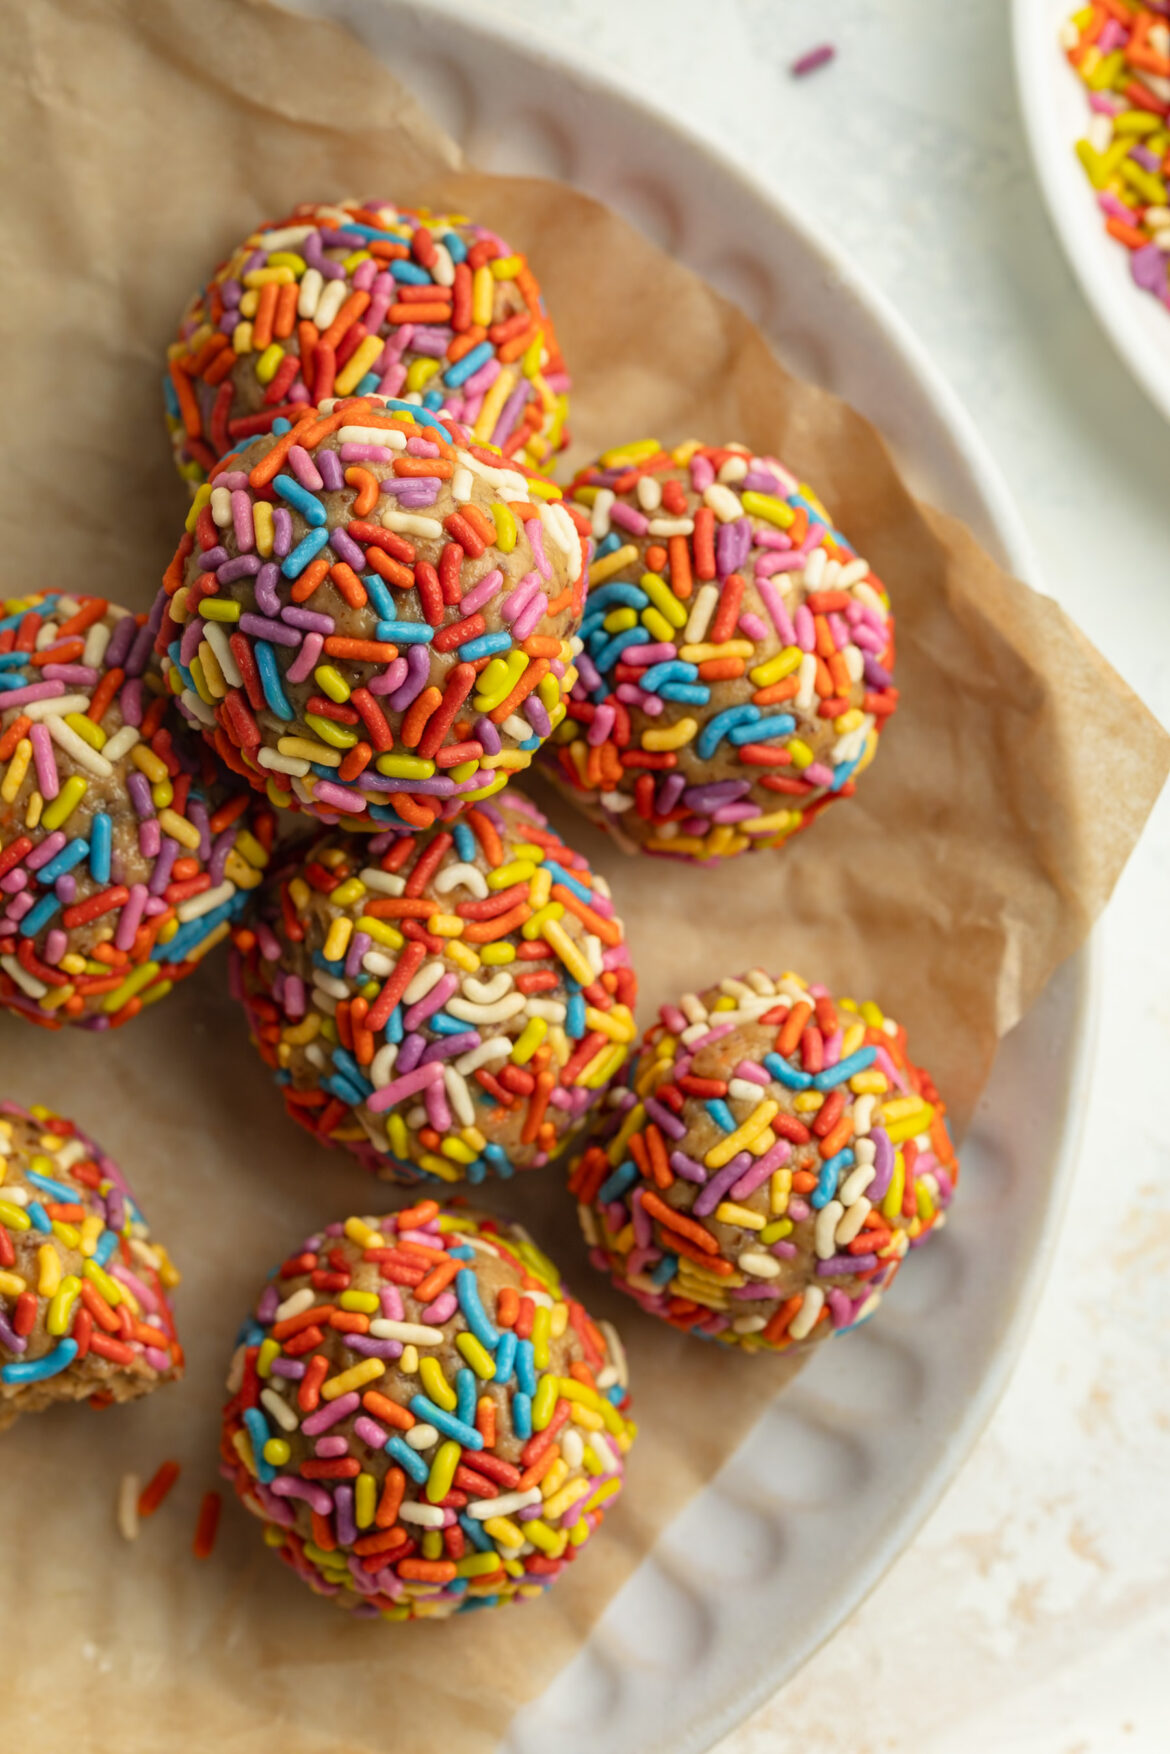
birthday cake energy bite with a bite taken out.

I use and love these dye-free rainbow sprinkles from Amazon!

Why You’ll Love These Birthday Cake Energy Bites

  • Effortless & Fun: These energy bites deliver nostalgic cake-batter flavor with zero baking—just simple mixing and rolling.
  • Balanced Nutrition: With nut butter, almond flour, flaxseed, and honey, each bite offers a nourishing blend of protein, fiber, and healthy fats.
  • Kid- (and inbox-ready) Approved: Sprinkles make them feel celebratory, while the wholesome ingredients keep parents happy.

What Makes This Recipe Healthy

  • Protein & Healthy Fats from almond flour and cashew butter (or any nut/seed butter) for lasting satiety.
  • Fiber Boost from ground flaxseed—your energy bites just got a fiber upgrade!
  • Natural Sweetness via honey (or maple syrup) keeps added sugar in check and skips the refined stuff.
overhead image of birthday cake energy bites being rolled in sprinkles.

Recipe Variations and Substitutions

  • Nut-Free: Use sunflower seed butter instead of cashew butter.
  • Low-Sugar: Swap honey for a stevia syrup or reduce to 3 tbsp.
  • Flavor Kicks: Add a pinch of cinnamon, a swirl of cocoa powder, or roll in toasted coconut.

Storage Tips

  • Store in an airtight container in the fridge for up to 2 weeks.
  • Freeze for up to 3 months; bite-sized and ready for anytime snacking.
overhead image of birthday cake energy bites on a plate.
5 from 2 votes

Birthday Cake Energy Bites

These birthday cake energy bites are the perfect no-bake snack that’s healthy, fun, and full of delicious flavor! Made with almond flour, cashew butter, flaxseed, honey, and rainbow sprinkles, each bite is packed with protein, fiber, and healthy fats. Ready in minutes with just one bowl, they’re a festive and nourishing treat you’ll LOVE!
Print Pin Rate
Prep Time: 5 minutes
Total Time: 5 minutes
Servings: 8 bites

Equipment

  • 1 medium bowl

Ingredients

  • 1 cup almond flour
  • 1/2 cup cashew butter or any nut/seed butter
  • 1/4 cup ground flaxseed
  • 1/4 cup honey or maple syrup
  • 1 teaspoon vanilla extract
  • 1/4 teaspoon almond extract
  • 1/4 cup rainbow sprinkles

Instructions

  • Add all ingredient to a large bowl and mix until thoroughly combined.
  • Roll the mixture into 1-inch balls, then either store in the fridge for up to 3 weeks or enjoy right away!

Nutrition

Serving: 1bite | Calories: 240kcal | Carbohydrates: 23g | Protein: 6.5g | Fat: 15g | Fiber: 3g | Sugar: 15g

September is my birthday month! So it’s also the month I add rainbow sprinkles to, well.. everything. And this 5 ingredient birthday cake banana bread is no exception. But also, who knew adding sprinkles to banana bread would make for the most delicious and fun addition ever?! Not sure if I’ll ever not add sprinkles to my banana bread from now on. It’s really THAT good!

This birthday cake banana bread is just one of the recipes I’ll be baking for myself this month. I’ve already made my healthy gluten-free mug cakes a few times – because why not?? they’re SO easy. And as part of a larger celebration I’ll be baking up this gluten-free and dairy-free carrot cake because it’s simply my all-time FAVE. It’s shaping up to be a delicious month, friends! Happy birthday to me. 🙂

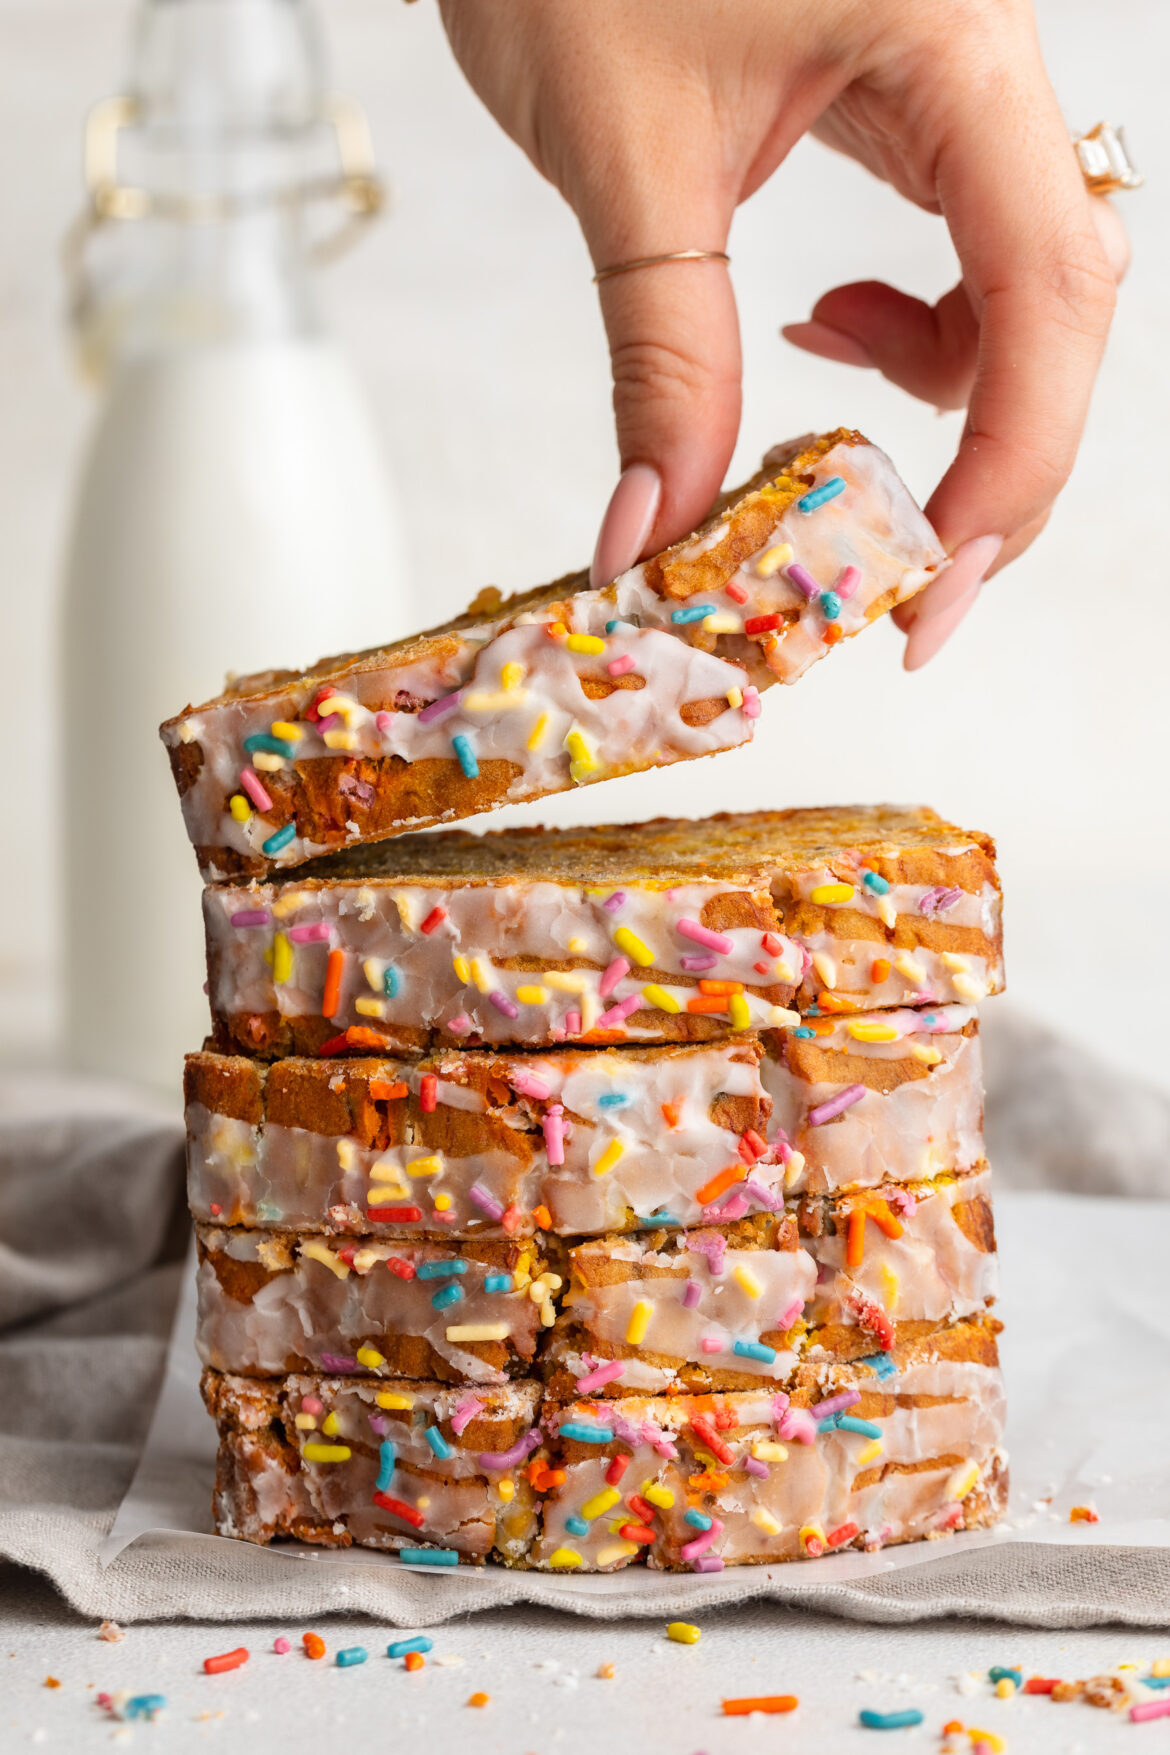
slices of birthday cake banana bread.

What You’ll Need to Make This Recipe

  • Bananas: Overripe bananas provide the natural sweetness and moisture for this recipe. The more ripe the bananas, the sweeter your banana bread will be, making them the key ingredient.
  • Eggs: Eggs act as a binder in this recipe, helping the banana bread rise and stay moist. They also contribute to the fluffy texture.
  • Vanilla Extract (Optional): Adding vanilla enhances the sweet, cake-like flavor, but it’s optional if you prefer a more banana-forward taste.
  • Brown Sugar: Adds sweetness and a slight caramel-y flavor to complement the bananas. It also keeps the bread moist while baking.
  • Self-Rising Flour: If you don’t have self-rising flour, use all-purpose flour with baking powder. This gives the bread structure and helps it rise properly. To make this recipe gluten-free like I did, use a gluten free self-rising flour, I recommend this one.
  • Rainbow Sprinkles: The fun part! Sprinkles give this banana bread a celebratory birthday cake vibe. Be sure to use rainbow sprinkles that hold up well during baking. I use and love these dye-free rainbow sprinkles from Amazon.
5 ingredient gluten-free birthday cake banana bread slices stacked on top of each other.

How to Make 5 Ingredient Birthday Cake Banana Bread

  1. Preheat and Prep: Start by preheating your oven to 350°F and greasing or lining a loaf pan. This ensures the bread doesn’t stick and bakes evenly.
  2. Mash the Bananas: In a large bowl, mash your overripe bananas until smooth. This will be the base for your bread, adding natural sweetness and moisture.
  3. Mix the Wet Ingredients: Add the eggs and vanilla extract (if using), and whisk everything together until fully combined.
  4. Combine Dry Ingredients: Add the brown sugar, flour, and rainbow sprinkles to the banana mixture, stirring until no flour pockets remain.
  5. Bake: Pour the batter into your prepared loaf pan and bake for 55-60 minutes. The loaf should be golden brown, and a toothpick inserted into the center should come out clean.
  6. Cool and Glaze: While the bread cools, mix powdered sugar and milk to make the glaze, then drizzle it over the cooled bread for extra sweetness.

How Can I Store the Leftovers?

This banana bread keeps well for 3-4 days at room temperature when covered tightly with plastic wrap or stored in an airtight container. If you want it to last longer, you can refrigerate it for up to a week, or freeze individual slices for up to 3 months!

overhead image of sliced birthday cake banana bread
5 from 1 vote

5 Ingredient Birthday Cake Banana bread

Author: Samantha Russo
This 5 ingredient birthday cake banana bread is not only super easy to make, but it’s also gluten-free and dairy-free! Whether you’re looking for a fun birthday-inspired dessert or just a unique spin on classic banana bread, this recipe delivers in taste and fun factor.
Print Pin Rate
Prep Time: 10 minutes
Cook Time: 1 hour
Total Time: 1 hour 10 minutes
Servings: 12 slices

Equipment

  • 1 large bowl
  • 1 9×4-inch loaf pan

Ingredients

  • 3 large and overripe bananas
  • 2 eggs
  • 2 teaspoons vanilla extract optional, but recommended
  • 1/2 cup brown sugar or coconut sugar
  • 1 1/2 cups self rising flour (I used gluten-free self-rising flour) or 1 1/2 cups all purpose flour PLUS 1 teaspoon baking powder
  • 1/2 cup rainbow sprinkles

For the optional glaze:

  • 1/2 cup powdered sugar
  • 1 tablespoon milk

Instructions

  • Preheat oven to 350° Fahrenheit and line a 9×4-inch loaf pan with parchment paper, then lightly coat the inside of the pan with oil.
  • Place the bananas in a large bowl and mash well with a fork, until mostly smooth.
    birthday cake banana bread step 1
  • Add the eggs and vanilla extract (if using) to the bowl the and whisk to combine. Then, add the brown sugar, flour, and sprinkles then mix again until fully combined and no pockets of flour remain.
    birthday cake banana bread step 2
  • Pour the batter into your prepared loaf pan and bake for 55-60 minutes, or until a toothpick inserted down the center of the bread comes out clean.
  • Remove the birthday cake banana bread from the oven and let it cool while you make the glaze.
  • Add the powdered sugar and milk to a small bowl, then whisk together until smooth. Pour glaze over the cooled banana bread.
    birthday cake banana bread step 3

Nutrition

Serving: 1slice

It’s finally fall! Well kinda. September 1st is the unofficial first day of fall in my book, and I’m celebrating with yet another apple recipe! I kicked things off last week with my healthy gluten-free apple crisp, and am eager to make my apple pie protein smoothie and gluten-free cinnamon sugar apple cake in the coming weeks. Today though, we’re focusing on the EASIEST of all the apple recipes – apple pie salad. And not just any apple pie salad, one with just 5 ingredients, that’s high in protein, and comes together in a few minutes. I absolutely LOVE this recipe when I’m short on time but craving fall flavors. Think fresh crisp apples, cinnamon, honey, and something crunchy like pecans, walnuts, or or granola. It’s the perfect afternoon snack or high-protein dessert!

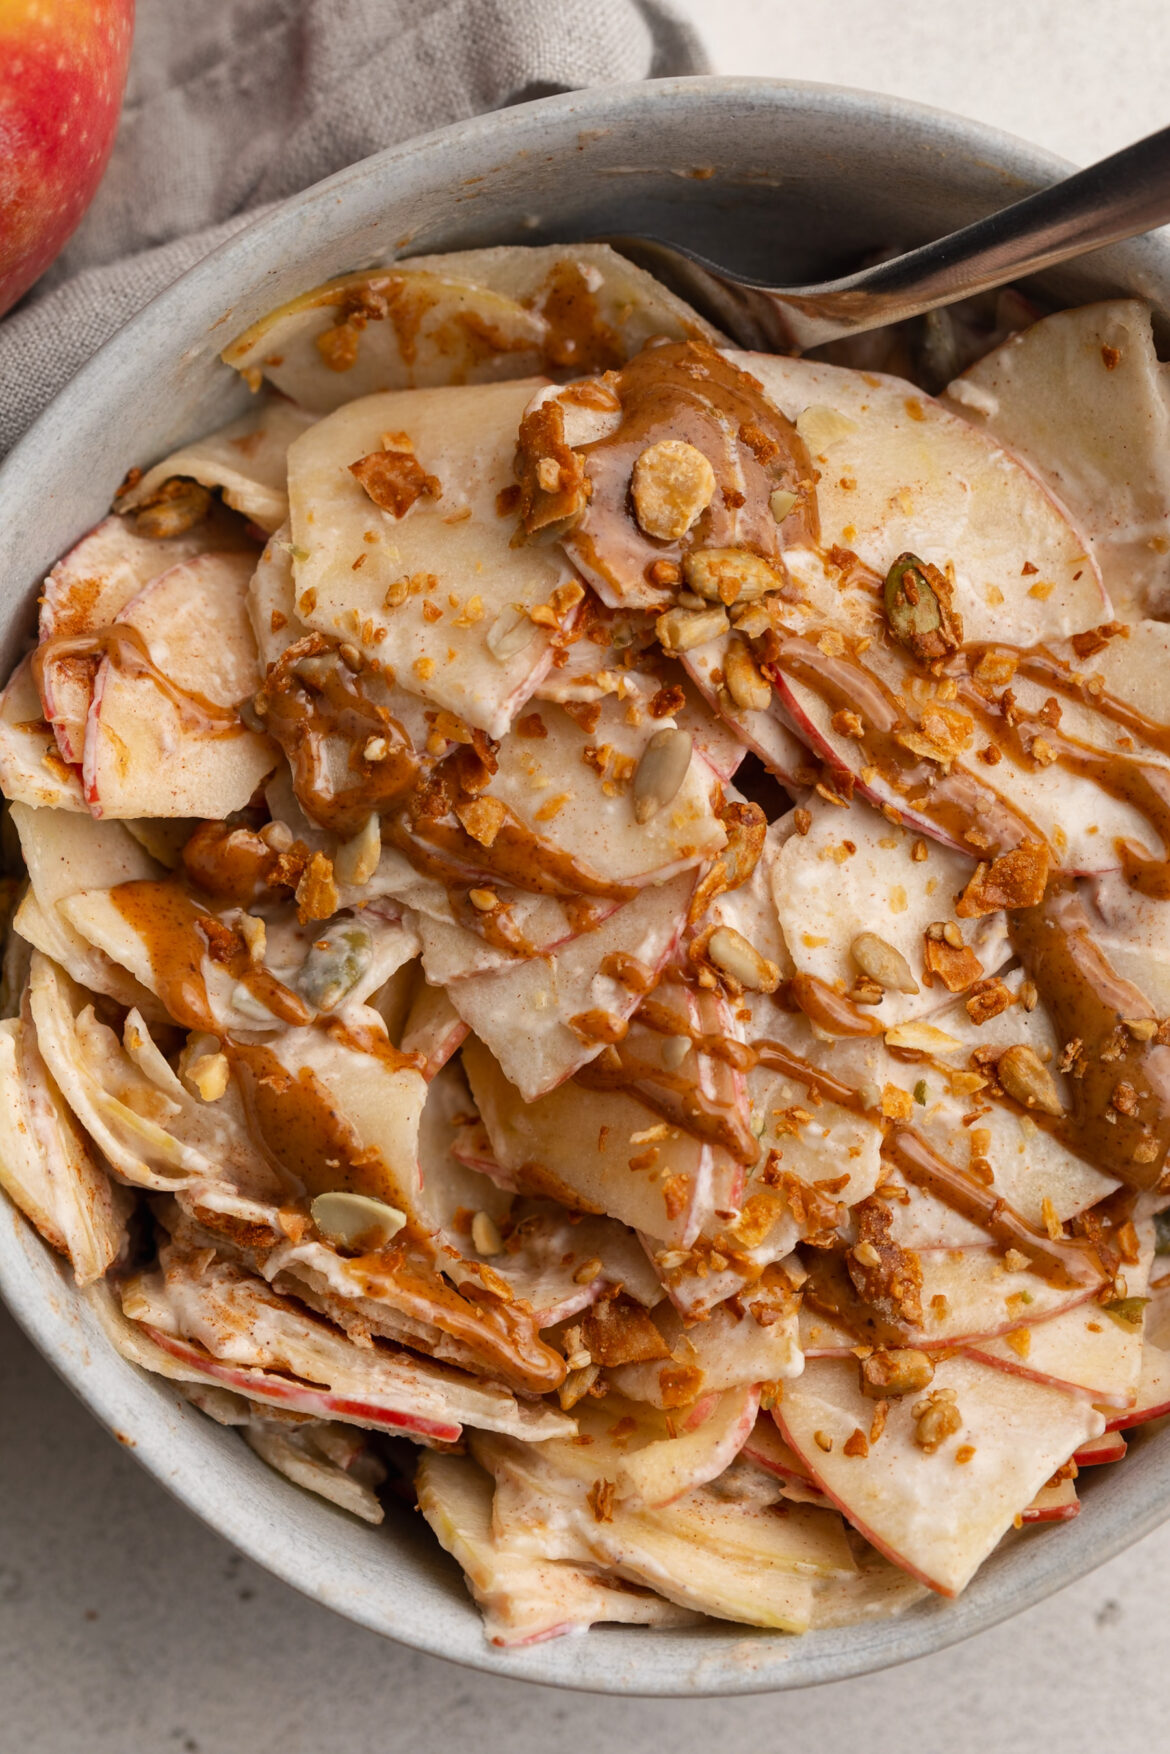
healthy high protein apple pie salad in a bowl with a fork.

Why You’ll Love This Apple Pie Salad

  • High-Protein, No-Bake Goodness: Just apples, yogurt, and a hint of sweetener – no oven needed!
  • Quick & Nourishing: Ready in under 5 minutes, with over 20 grams of protein to fuel your day.
  • Flavor Meets Function: Satisfy your pie cravings with warm spices and dippable (is that a word??) toppings!

What Makes This Recipe Healthy

  • The apple base adds fiber and antioxidants while keeping it naturally sweet and refreshing.
  • Greek yogurt (or plain coconut yogurt) provides a protein-packed, gut-friendly foundation.
  • A drizzle of honey or maple syrup gives balance without refined sugars.
  • Protein-boosting peanut butter and satisfying nuts round out the nutrition and texture!
overhead image of healthy apple pie salad in a bowl with an apple on the side.

Frequently Asked Questions

What kind of apples should I use?
Crisp, sweet varieties like Fuji or Honeycrisp work best – Granny Smith are a bit more tart so they may need extra sweetener to balance its tartness.

Can I make this dairy-free?
Yes! Swap in a thick, unsweetened coconut or almond-based yogurt to keep it plant-based and creamy.

How much protein is in this recipe?
Each serving delivers approximately 20 grams of protein, depending on your yogurt choice.

overhead image of healthy apple pie salad in a bowl with a drizzle of peanut butter and granola on top.
No ratings yet

Healthy High-Protein Apple Pie Salad

This high-protein apple pie salad is a creamy, crunchy, no-bake recipe that tastes just like dessert but fuels your body with 20 grams of protein. Made with fresh apples, Greek yogurt, cinnamon, and a drizzle of peanut butter, it’s a quick and healthy snack or post-workout treat. Perfect for when you’re craving apple pie flavor in a light, wholesome, and protein-packed treat!
Print Pin Rate
Prep Time: 5 minutes
Total Time: 5 minutes
Servings: 1 serving

Equipment

  • 1 medium bowl or container
  • 1 mandoline or use a knife to thinly slice the apples

Ingredients

  • 1 apple
  • 1 cup Greek yogurt or plain coconut yogurt
  • 1-2 teaspoons honey or maple syrup
  • 1/2 teaspoon cinnamon

Toppings:

  • Drizzle of peanut butter
  • Chopped walnuts, pecans, or granola

Instructions

  • Add all ingredients to a bowl and mix until apples are evenly coated in yogurt. Top with a drizzle of peanut butter and chopped nuts or granola.

Notes

Nutrition info is calculated using 1 cup of plain unsweetened Greek yogurt, 1 teaspoon of honey, and 1/2 tablespoon of unsweetened peanut butter. Also, keep in mind that this recipe may seem high in sugar, but that is natural sugar from the apple.

Nutrition

Serving: 1serving | Calories: 260kcal | Carbohydrates: 39g | Protein: 20g | Fat: 4g | Fiber: 5.5g | Sugar: 22g