Tag

lemon

Browsing

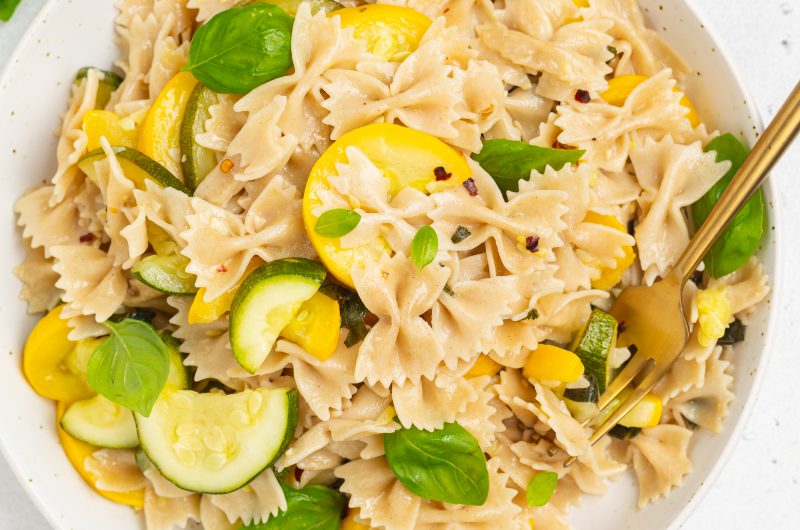
This summer squash pasta is the perfect way to enjoy one of this season’s BEST vegetables! Fresh summer squash is quickly sautéed until perfectly tender then tossed with your favorite pasta. This simple weeknight meal is light, healthy, and comes together in under 20 minutes!

summer squash pasta being lifted off a plate with a fork

‘Tis the season! If you (like me) feel like you’re drowning in squash this summer, then you NEED to make this recipe. Summer squash peaks in the ….you guessed it – summer! My parents garden is currently being taken over by summer squash and zucchini. They have so much squash at this point that they have no clue what to do with it all! One solution to their problem is sending me home with massive bags of it every time I visit them. And while I still have a few squash sitting in my fridge right now, I was able to use some of them in this delicious pasta recipe!

I don’t know about you, but lately I’ve been a big fan of anything quick and easy when it comes to time spent in the kitchen. Hovering over a hot stove for more than 20 minutes sounds like pure torture in this city heat and humidity. Therefore, I’m on a mission to develop as many no-bake/cook recipes or ready in under 30 minutes recipes as possible! This specific vegan and gluten-free pasta recipe falls into the latter category, and for that reason alone we love it so much.

What You Need To Make Summer Squash Pasta

Summer Squash and/or Zucchini– This recipe is the perfect way to use up any leftover summer squash and/or zucchini in your garden! Simply wash and then slice at least two of them, then throw them in this recipe. If you like your pasta extra squash-y (new word – squashy!) feel free to add an extra squash or two in there. The more, the merrier when it comes to this summer squash pasta!

Pasta – I used Jovial Brown Rice Gluten-Free Farfalle pasta in my dish, however you can use whatever kind of pasta you’d like in this recipe. Rigatoni, orecchiette, ziti, penne, or really any pasta shape would work here. If you’re gluten-free like me, I highly recommend the Jovial pasta as it tastes incredibly similar to the real thing.

Basil – Continuing on with the summer trend, this herb flourishes in the warm weather! Basil really helps pack on the freshness in this simple pasta dish. If you don’t have basil, you can use fresh parsley instead.

Adjust This Recipe To Your Diet

  • Add Dairy: Finish this summer squash pasta off with a sprinkling of freshly grated parmesan cheese for a delightful, savory bite!
  • Make it Paleo: You can easily make this dish paleo by doubling up on the squash and removing the pasta from this recipe. It’ll be more of a side dish than a main course, but will still taste totally delicious!
Summer Squash Pasta (Vegan, Gluten-Free)

5 from 1 vote
Recipe by Samantha Russo Course: MainCuisine: AmericanDifficulty: Easy
Servings

4

servings
Prep time

5

minutes
Cooking time

15

minutes
Total time

20

minutes

This summer squash pasta is the perfect way to enjoy one of this season’s BEST vegetables! Fresh summer squash is quickly sautéed until perfectly tender then tossed with your favorite pasta. This simple weeknight meal is light, healthy, and comes together in under 20 minutes!

Ingredients

  • 12 ounces pasta, see Notes

  • 1/4 cup olive oil

  • 5 garlic cloves, minced

  • 2 summer squash and/or zucchini, sliced into 1/4-inch thick slices

  • 1/2 teaspoon salt

  • 1/4 teaspoon red pepper flakes

  • 2 tablespoons lemon juice

  • 1/4 cup fresh basil

Directions

  • Cook pasta according to package instructions until al dente.
  • Heat olive oil in a large skillet over medium heat, add in the garlic and cook for 1-2 minutes or until fragrant.
  • Add in the squash and/or zucchini along with the salt, cook 10-15 minutes, tossing every few minutes.
  • Transfer cooked and drained pasta to the skillet along with red pepper flakes and lemon juice, toss everything together.
  • Remove from heat, add in basil, and serve immediately.

Recipe Video

Notes

  • Pasta: I used gluten-free farfalle pasta in this recipe, though you can use any kind of pasta you’d like!

Did you make this recipe?

Share it and tag @samdoesherbest on Instagram!

Like this recipe?

Follow us @samdoesherbest on Pinterest

More Quick and Easy Pasta Recipes

This arnold palmer recipe is the only one you’ll ever need! A simple lemonade meets a home-brewed iced tea for a beverage that is perfectly light and refreshing. Enjoy an arnold palmer on a hot summer day as a slightly sweet and cooling drink!

lemonade being poured into a glass of an arnold palmer drink with lemon slices on the side

Ask me what my favorite non-alcoholic beverage is and I’ll say an arnold palmer every time. I look forward to every summer when the only thing that will refresh and cool me off is one of these half ice tea, half lemonade drinks. While this arnold palmer recipe isn’t limited to just the summertime, it’s just something I’ve associated with very hot days over the years. Let me tell you, the combination of fresh brewed iced tea and a homemade lemonade simply hits different when it’s a billion degrees outside.

The funny thing is, for the longest time I thought of this drink like it was one of those things I could only order while out to eat. But what I didn’t realize for all those years is how freaking EASY it is to make at home. The lemonade for this arnold palmer recipe consists of just three ingredients (one being water) and the iced tea consists of just two ingredients (again, one being water)! I’m talking like stupid easy, ladies and gentleman. And because it’s me who created the recipe – this drink is refined sugar-free, too.

What You Need To Make This Arnold Palmer Drink Recipe

Lemons – Lots and lots of lemons! If you have a lemon juicer, go ahead and whip that baby out for this recipe. In the end, you’ll need an entire cup of lemon juice. Which may sound like a lot, but will actually only end up being about 6 to 8 juicy lemons. My trick for super juicy lemons is to roll them between my palm and the counter before slicing them in half. By rolling them, you’ll soften up the inside making it easier to squeeze as much lemon juice out of them as possible.

Honey – This natural sweetener is the only sweetener you’ll need for this arnold palmer drink recipe! I love honey for its high dose of antioxidants and strong anti-bacterial properties. It’s also perfectly sweet and makes a delicious addition to this refreshing beverage. If you don’t have honey, you can use either maple syrup or simple syrup instead.

Black Tea Bags – Any black tea bags will work! I’ve also used green tea instead of black tea and had great results. Brew your own tea by adding the tea bags to water and leaving it to steep in the fridge for at least 8 hours, or preferably overnight. Homemade iced tea couldn’t be easier to make, and is essential to this simple arnold palmer drink recipe!

Adjust This Recipe To Your Diet

  • Make it Vegan: Substitute maple syrup for the honey to make this a vegan arnold palmer drink recipe.

Arnold Palmer Drink Recipe (Iced Tea Lemonade)

4 from 6 votes
Recipe by Samantha Course: Better Than Takeout, Made Healthy
Servings

4

servings
Prep time

30

minutes
Cooking time

40

minutes
Calories

300

kcal
Total time

1

hour 

10

minutes

This arnold palmer recipe is the only one you’ll ever need! A simple lemonade meets a home-brewed iced tea for a beverage that is perfectly light and refreshing. Enjoy an arnold palmer on a hot summer day as a slightly sweet and cooling drink!

Ingredients

  • For the lemonade:
  • 1 cup lemon juice (about 6-7 lemons)

  • 1/2 cup honey, see Notes

  • 2 cups cold water

  • For the iced tea:
  • 4 black tea bags

  • 4 cups cold water

Directions

  • Make the iced tea by placing the tea bags in 4 cups of water then transfer to the fridge to steep for 8-12 hours.
  • Make the lemonade by adding all lemonade ingredients to a large jar or pitcher and stirring until honey dissolves completely.
  • Fill a cup with ice and fill halfway with iced tea, then the rest of the way with lemonade.

Recipe Video

Notes

  • Honey: Feel free to use maple syrup or simple syrup in place of the honey in this recipe!

Did you make this recipe?

Share it and tag @samdoesherbest on Instagram!

Like this recipe?

Follow us @samdoesherbest on Pinterest

Other Low-Sugar Drink Recipes

This cherry cordial is perfectly sweet and slightly sour! Drip this easy and delicious fruit syrup over ice cream or add some to a glass of sparkling water for a refreshing summer treat.

cherry cordial in a glass with sparkling water, ice, and a fresh cherry

Never heard of cherry cordial? Well you’re not alone, because neither had I! I’m a BIG fan of cherry season, and I was set on developing a recipe to honor this special time of year. Though I felt like the cherry cobblers, cherry pies, and cherry crumbles have all been sooOooOoOo overdone. So I did a little research for undiscovered cherry recipes and came across the cherry cordial. Now for those of you who don’t know, cherry cordial is a syrup that is most commonly added to sparkling water and served as a refreshing drink. It’s SUPER easy to make, and one of the only cherry recipes that doesn’t require you to painstakingly remove the stems and pits from each and every cherry.

As I learned more about cherry cordials, I noticed that most are loaded with sugar. And to me, that seemed unnecessary. So I set out to create a recipe that is low in sugar and allows as much of that delicious cherry flavor to shine through as possible! This cherry cordial is perfectly *chef’s kiss* sweet, insanely refreshing, and super easy to make.

What You Need To Make Cherry Cordial

Fresh Cherries – Pick up a big bag of whole sweet cherries the next time you’re at the grocery store! Cherry season spans from May through August, giving you plenty of time to enjoy this delicious fruit. I highly advise against using frozen cherries in this recipe as they release too much water when cooked. If you’d like to enjoy this cherry cordial in the winter time, I recommend making the recipe now and freezing it in an airtight container until you’re ready to use it.

Sugar – Any sugar will work, though I use coconut sugar to make this a tiny bit more nutritious! Coconut sugar is less processed and therefore contains more vitamins and mineral than white sugar. However, white sugar and cane sugar would both taste great in this cherry cordial recipe.

Fresh Ginger – You’ll just have to trust me on this one! Fresh ginger adds a slightly spicy bite that contrasts with the sweet cherries and takes this cordial to the next level. Feel free to add even more fresh ginger if you’d like!

Adjust This Recipe To Your Dietary Needs

  • Make it Paleo: Use coconut sugar to make this a paleo cherry cordial!
  • Lemon Substitution: Feel free to use fresh orange juice and zest in place of the lemon juice and zest in this recipe.

Cherry Cordial

0 from 0 votes
Recipe by Samantha Course: Uncategorized
Servings

4

servings
Prep time

30

minutes
Cooking time

40

minutes
Calories

300

kcal
Total time

1

hour 

10

minutes

This cherry cordial is perfectly sweet and slightly sour! Drip this easy and delicious fruit syrup over ice cream or add some to a glass of sparkling water for a refreshing summer treat.

Ingredients

  • 1 1/2 pounds fresh sweet cherries, see Notes

  • 1 cup sugar, I used coconut sugar

  • 1-inch knob fresh ginger, peeled and sliced

  • 2 teaspoons lemon zest

  • 1/4 cup lemon juice

Directions

  • Add all ingredients to a large saucepan over medium-low heat. Bring to a boil then reduce to a simmer for 20-25 minutes.
  • Strain cherry syrup through a fine mesh strainer, let cool at room temperature before storing in the fridge to cool completely.
  • Pour a few tablespoons into the bottom of a glass then fill with ice and top with sparkling water.

Recipe Video

Notes

  • Cherries: No need to remove the pits or stems from your cherries before using them in this recipe! Simply gives them a good rinse them add them to your saucepan.

Did you make this recipe?

Share it and tag @samdoesherbest on Instagram!

Like this recipe?

Follow us @samdoesherbest on Pinterest

Other Summertime Recipes You’ll Love

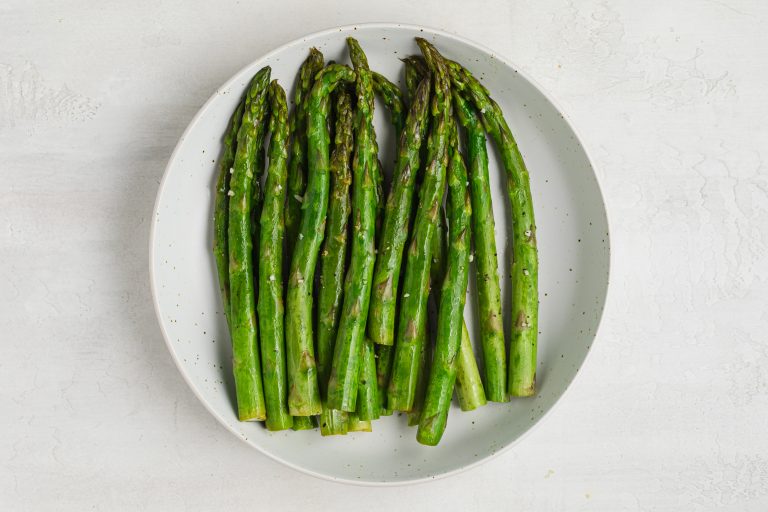
This sous vide asparagus is incredibly tender and delicious! This method yields perfectly cooked asparagus with minimal effort every time.

fresh lemon being squeezed over sous vide asparagus

If you own a sous vide throw ya hands in the aiiiiiir! I’m still pretty new on the sous-vide-scene, having only owned mine for a few months now. Though I gotta say, I already can’t stop using it! The sous vide is the new crockpot in my opinion. It gives you the magical ability to throw something in there, then return to a perfect meal or side dish without worry every time. This sous vide asparagus is no exception to that. Except, thanks to asparagus’ quick-cooking abilities, you’ll only need to leave it to cook for about 10 minutes. Once done, you’ll have the tastiest, most tender fool-proof asparagus of all time!

What You Need To Make Sous Vide Asparagus

Asparagus – This easy vegetable pairs well with most meals, making it a year-round favorite. Though when cooking asparagus, there is always one thing to cook in mind – it cooks quickly. Despite setting the sous vide to a pretty low temperature, you will still only need to set the time to 10 minutes. Your cook time may vary slightly, depending on the thickness or thinness of your asparagus. Though my recommendation is to start slowly, give your asparagus a quick check, then continue to cook if needed. I used pretty medium-sized asparagus and found that just 10 minutes left my asparagus tender with a slightly crunchy bite – yum!

Butter – The butter is used for flavor in this recipe, and just a tablespoon gives delicate asparagus that delicious savory taste. I used vegan butter since we like to keep things dairy-free around here, though any kind of butter will do! You can even leave the butter out altogether if you’d like.

Lemon Juice and Zest – A touch of lemon right before serving brings some freshness back into the sous vide asparagus. Lemon juice and zest is totally optional in this recipe, but highly recommended!

Why Sous Vide?

  • The sous vide does an incredible job at keeping the temperature consistent, giving you amazing results every time.
  • Cooks slower in seasoning, giving the flavors time to permeate and develop throughout the food.
  • The sous vide does all the work for you – just set it, then walk away and return to a perfectly cooked meal or side dish!

Sous Vide Asparagus

0 from 0 votes
Recipe by Samantha Russo Course: SidesDifficulty: Easy
Servings

4

servings
Prep time

5

minutes
Cooking time

10

minutes
Total time

15

minutes

This sous vide asparagus is incredibly tender and delicious! This method yields perfectly cooked asparagus with minimal effort every time.

Ingredients

  • 1 bunch asparagus

  • 1 tablespoon butter (I used dairy-free)

  • 1 garlic clove, minced

  • 1/2 teaspoon salt

  • 1/4 teaspoon black pepper

  • Fresh lemon juice and zest, optional

Directions

  • Toss all ingredients to a zip-top bag, toss asparagus in bag to coat in spices then remove air from bag.sous vide asparagus process photo 1
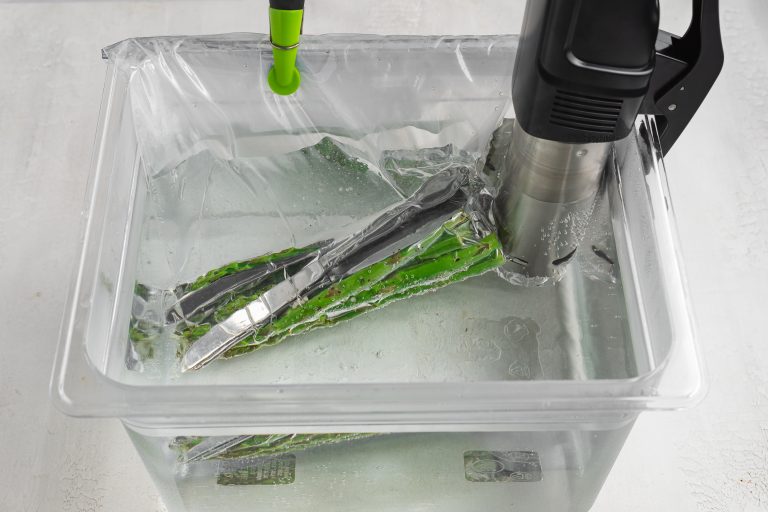
  • Drop in sous vide bath set to 180° Fahrenheit (or 82° Celsius) for 10 minutes. If the bag floats to the top, add a few metal utensils to help weigh it down.sous vide asparagus process photo 1
  • Remove bag from bath, then remove asparagus from bag and finish off with fresh lemon juice and zest.sous vide asparagus process photo 3

Notes

  • If you’re not vegan or dairy-free, finish this asparagus off with some shredded parmesan cheese for even more flavor!

Did you make this recipe?

Share it and tag @samdoesherbest on Instagram!

Like this recipe?

Follow us @samdoesherbest on Pinterest

More Easy Side Dish Recipes

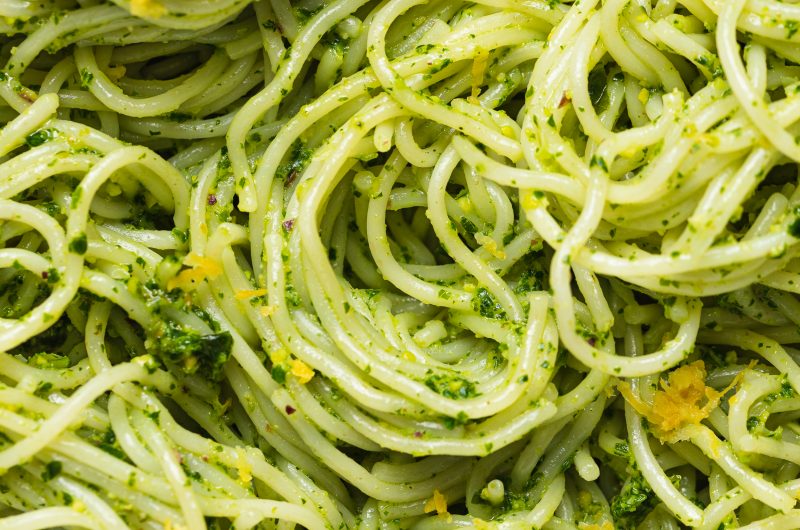
Pour this kale pesto over your favorite pasta for an easy, healthy meal! Loaded with fresh kale, this is the ultimate way to sneak extra veggies into your diet. With a few simple ingredients, you’ll have a fresh and delicious kale pesto in under 5 minutes!

Kale pesto in spaghetti being twirled with a fork.

The Story Behind This Recipe

We’re major pesto people around here. I make a killer basil pesto (be on the lookout for a recipe this summer!). There’s just something so fresh, yet satisfying about a good pesto. I was skeptical attempting a kale version of a favorite. But WOW, I had absolutely nothing to worry about. This kale pesto is savory, bright, almost refreshing and completely hides how healthy it is. As some of you know, most pestos are made with some type of cheese. But because we’re a cheese-free zone, I developed this recipe without cheese. And honestly – you won’t even know it’s missing anything!

What You Need To Make Kale Pesto

Kale – I used green curly kale, though any kale will work in this recipe. Be sure to remove as much of the stems from your kale leaves as possible before blending. And when I say “roughly chopped,” I mean it. Simply run your knife through the kale a couple of times and then it’s ready to use in this recipe!

Pistachios – Pistachios add a hearty almost sweet touch to this kale pesto. I’ve tried a few different nuts in this recipe and all work, though pistachios taste best. However, whatever nuts you use, it’s imperative that they are completely unsalted!

Lemon Juice – A touch of acidity brings out the brightness of this recipe! Lemon juice also helps to break down the tough fibers in the kale, making it easier to digest.

Ways To Enjoy This Kale Pesto

  • Perhaps the most obvious way is over pasta. This is how I enjoyed my kale pesto, with Jovial Brown Rice gluten-free pasta. I also added sautéed mushrooms and bell peppers for extra protein/nutrients – and it was delicious!
  • Don’t knock this one ’til you try it – with scrambled eggs! Stir a tablespoon or two of kale pesto in with your eggs right before they’re finished cooking. The end result is creamy scrambled eggs loaded with flavor and veggies.
  • On toast – slather a healthy helping of kale pesto on toasted bread for a quick and delicious snack!

Kale Pesto (Vegan, Gluten-Free)

0 from 0 votes
Recipe by Samantha Russo Course: MainCuisine: ItalianDifficulty: Easy
Servings

6

servings
Prep time

5

minutes
Total time

5

minutes

Pour this kale pesto over your favorite pasta for an easy, healthy meal! Loaded with fresh kale, this is the ultimate way to sneak extra veggies into your diet. With a few simple ingredients, you’ll have a fresh and delicious kale pesto in under 5 minutes!

Ingredients

  • 3 cups packed kale, stems removed and roughly chopped

  • 1/2 cup pistachios, raw and unsalted

  • 2 tablespoons lemon juice

  • 2 garlic cloves, see Notes

  • 1 teaspoon salt

  • 1/4-1/2 cup olive oil

Directions

  • Add all ingredients, except for the olive oil, to a food processor or blender. Pulse until finely chopped, then slowly stream in the olive oil while blending until combined.

Notes

  • Garlic: There’s no need to chop the garlic for this recipe, simply remove the skin then throw the cloves in with the other ingredients!

Did you make this recipe?

Share it and tag @samdoesherbest on Instagram!

Like this recipe?

Follow us @samdoesherbest on Pinterest

More Vegan Recipes You’ll Love