Tag

paleo

Browsing

These hummingbird cupcakes are the perfect spring-time sweet treat! They’re grain-free, dairy-free, and refined sugar-free, topped off with a delicious cream cheese frosting.
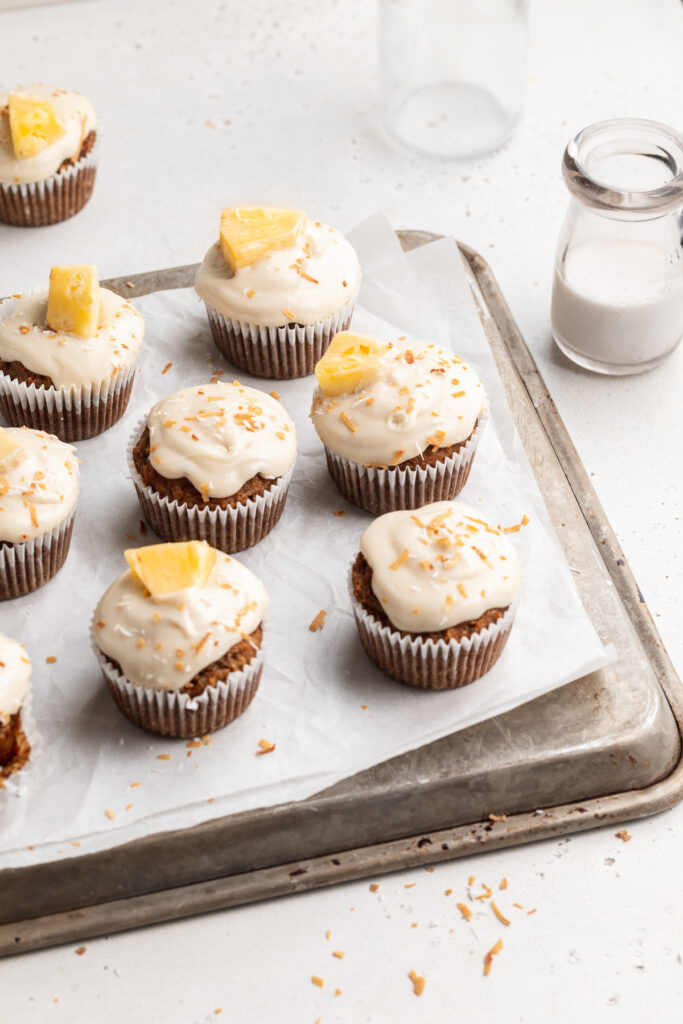
almond flour hummingbird cupcakes on a baking sheet with almond milk on the side.

It’s funny because I’m literally eating a hummingbird cupcake (and getting cream cheese frosting all over my keyboard) as I write this. I’m full-on addicted to the babies. They’re sweet, but not too sweet. Incredibly versatile – enjoy them as a snack, dessert, or heck you can even eat them for breakfast!

The first time I ever ate a hummingbird-anything was at this cute little muffin place by my parents house. My mom got me to try one of their hummingbird muffins and I’ve been hooked ever since. I then discovered hummingbird cake and was like – woahhhh, I didn’t know life could get EVEN better! And in case you’re like, Sam WTF is a hummingbird cupcake?! It’s similar to carrot cake, but has crushed pineapple and shredded coconut instead of carrots. It also features a cream cheese frosting, just like carrot cake. If you’re looking for a muffin instead of a cupcake, simply make these without the cream cheese frosting. My suggestion here is – take a plain cupcake, top it with a little crunchy almond butter, and enjoy it as a sweet afternoon snack!

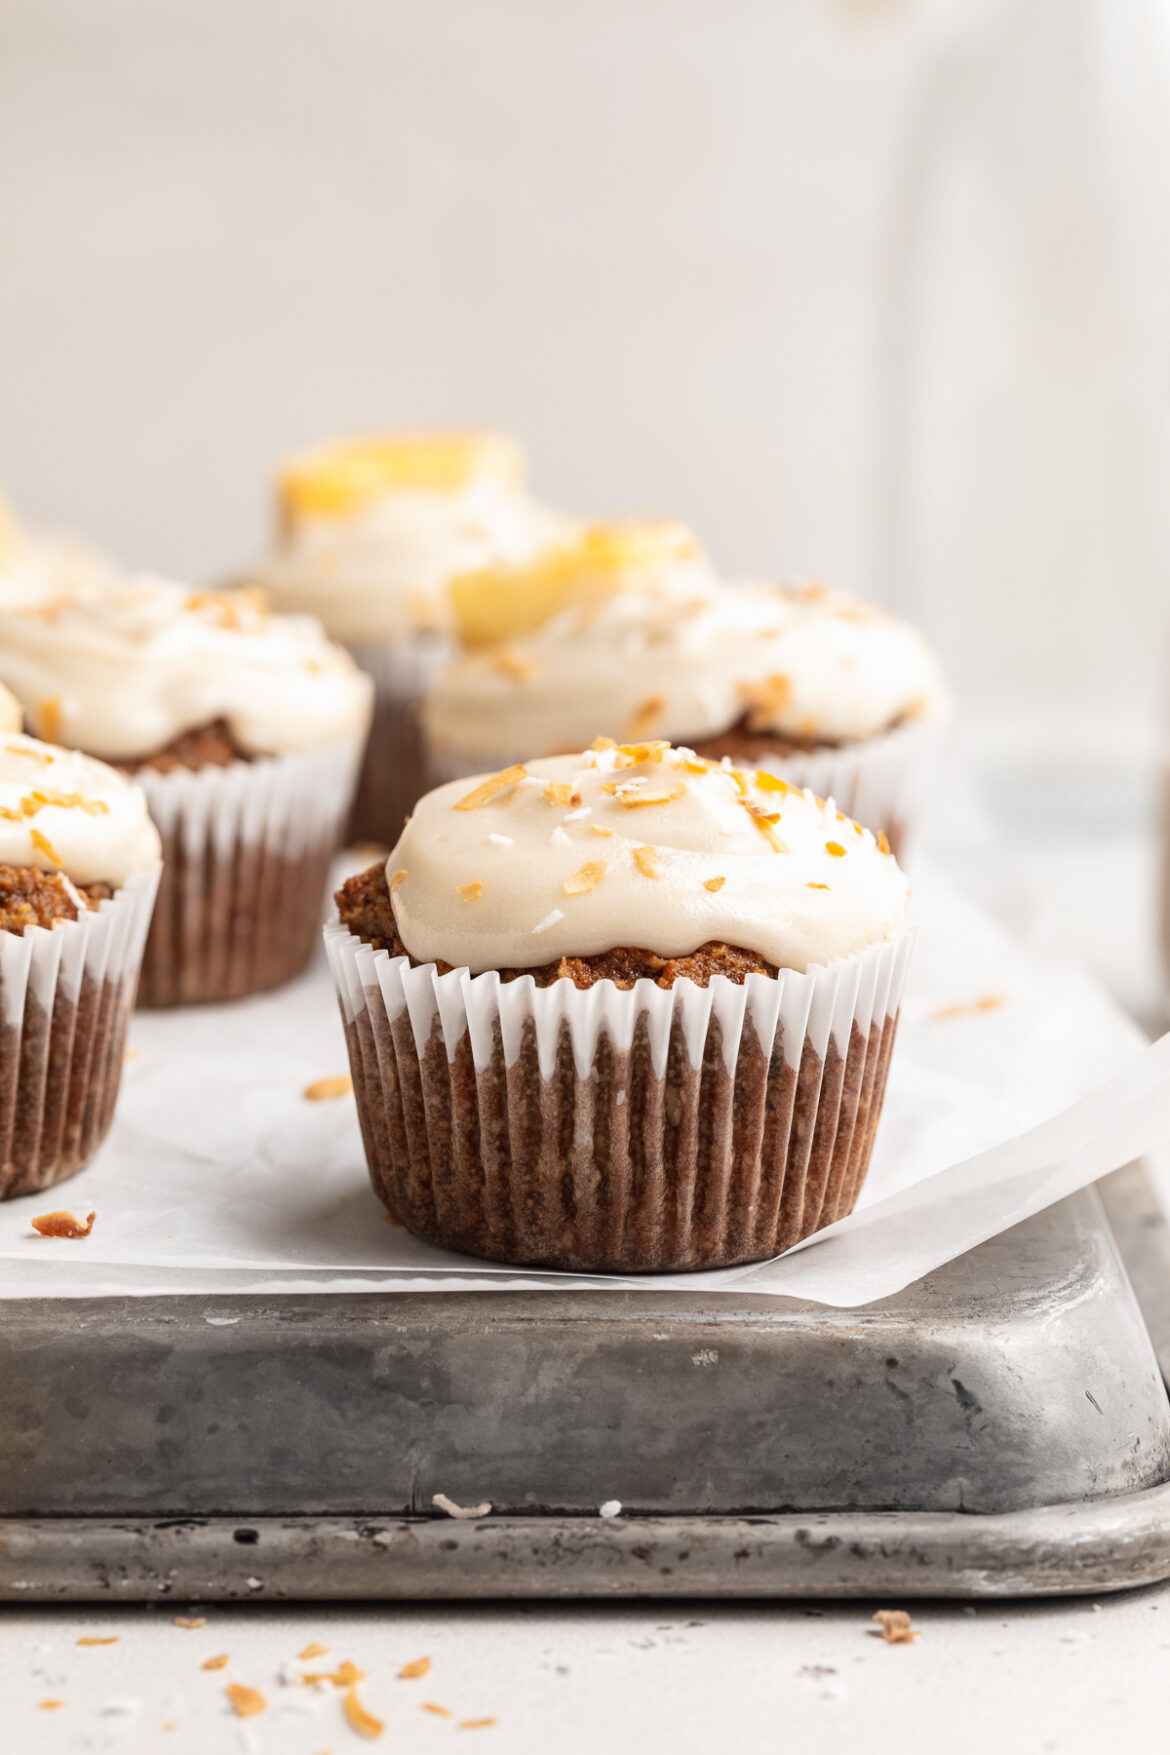
an almond flour hummingbird cupcake on a baking sheet.

What You’ll Need To Make Almond Flour Hummingbird Cupcakes

Almond Flour – I chose almond flour as the base of these cupcakes for two reasons. One – it’s grain-free, making these cupcakes so light and healthy that you could literally eat them for breakfast if you wanted to. And two – it yields a soft, crumbly cupcake that doesn’t fall apart when bitten into, but also isn’t at all dense. I specifically used this Anthony’s Organic Almond Flour, it’s fairly priced and bakes like a charm!

Coconut Sugar – Just half a cup of coconut sugar is all you need in these cupcakes! This is what I mean by they’re sweet, but not too sweet. Coconut sugar is lower on the glycemic index than usual white sugar. It also contains many more vitamins and minerals than most other sugars. If you don’t have coconut sugar, you can either use brown sugar, cane sugar, or white sugar instead.

Mashed Bananas – You won’t find a single hummingbird recipe without mashed bananas in it. In conjunction with the pineapple and coconut, a little banana is truly magnificent. It adds a touch of sweetness and incredible flavor. Though if you’re not a banana fan, you can use one cup of apple sauce instead.

Crushed Pineapple – Like I said earlier, crushed pineapple is a main ingredient in these hummingbird cupcakes. I buy canned crushed pineapple and rinse out the liquid before using in this recipe. Though you can use finely chopped fresh pineapple instead.

Shredded Coconut – Similar to the crushed pineapple, these wouldn’t be hummingbird cupcakes without a little coconut. My one thing when baking with coconut is to make sure it’s unsweetened. Our cupcakes are sweet enough!

overhead image of almond flour hummingbird cupcakes on a baking sheet

Adjust This Recipe To Your Dietary Needs

  • Make it Paleo: Leave out the dairy-free cream cheese frosting and you’ll have delicious little paleo hummingbird muffins!
  • Make it Vegan: Use your favorite egg-substitute in place of the eggs in this recipe. I have not tested this recipe using flax eggs, though I can image that it will yield slightly less-fluffy, but still delicious cupcakes.
  • Sugar-Free Option: Leave out the frosting and sub 1/2 cup of your favorite sugar-free sweetener for the coconut sugar. You can also leave out the coconut sugar altogether, if you’d like!
No ratings yet

Almond Flour Hummingbird Cupcakes

These hummingbird cupcakes are the perfect spring-time sweet treat! They’re grain-free, dairy-free, and refined sugar-free, topped off with a delicious cream cheese frosting.
Print Rate
Prep Time: 10 minutes
Cook Time: 20 minutes
Total Time: 30 minutes
Servings: 12 cupcakes

Ingredients

  • 2 cups almond flour, see Notes
  • 1/2 cup coconut sugar
  • 1 teaspoon baking soda
  • 1/2 teaspoon baking powder
  • 1 teaspoon cinnamon
  • 2 tablespoons coconut oil, melted
  • 1 cup mashed banana (about 2 very ripe bananas)
  • 2 eggs, see Notes
  • 1 teaspoon vanilla extract
  • 1/2 cup crushed pineapple, drained
  • 1/2 cup shredded coconut, unsweetened

For the cream cheese frosting:

  • 1/2 cup dairy-free cream cheese
  • 1/4 cup dairy-free butter, softened
  • 2 cups powdered sugar
  • 1 teaspoon vanilla extract

Instructions

  • Preheat oven to 350° Fahrenheit and line a cupcake tin with 12 cupcake liners.
    Hummingbird Cupcakes Process Photo 1
  • In a large bowl, mix together the almond flour, coconut sugar, baking soda, baking powder, and cinnamon.
    Hummingbird Cupcakes Process Photo 2
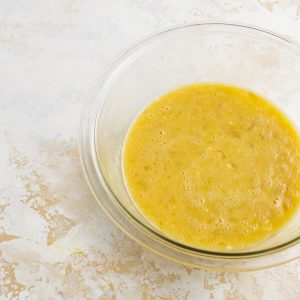
  • In a small bowl, mix together the coconut oil, mashed bananas, eggs, and vanilla extract.
    Hummingbird Cupcakes Process Photo 3
  • Add the wet ingredients, crushed pineapple, and shredded coconut into the dry ingredients and mix to combine.
    Hummingbird Cupcakes Process Photo 4
  • Fill each cupcake liner with 1/4 cup of batter and bake for 20-25 minutes or until a toothpick inserted into a cupcake comes out clean.
    Hummingbird Cupcakes Process Photo 5
  • Transfer cupcakes to a wire cooling rack to cool completely before frosting.
    Hummingbird Cupcakes Process Photo 6
  • Make the frosting by adding all ingredients to a bowl and beating with either a hand or stand mixer until combined. Dollop frosting onto cooled cupcakes and enjoy!
    Hummingbird Cupcakes Process Photo 7

Video

Notes

  • Almond Flour: Be sure to use almond flour, not almond meal.
  • Coconut Oil: You can use 2 tablespoons of vegetable oil or melted butter instead.
  • Eggs: I like to remove my eggs from the fridge a couple hours before baking. If your eggs are too cold when added to the batter, they might cause your coconut oil to re-harden.
  • Nutrition

    Calories: 300kcal

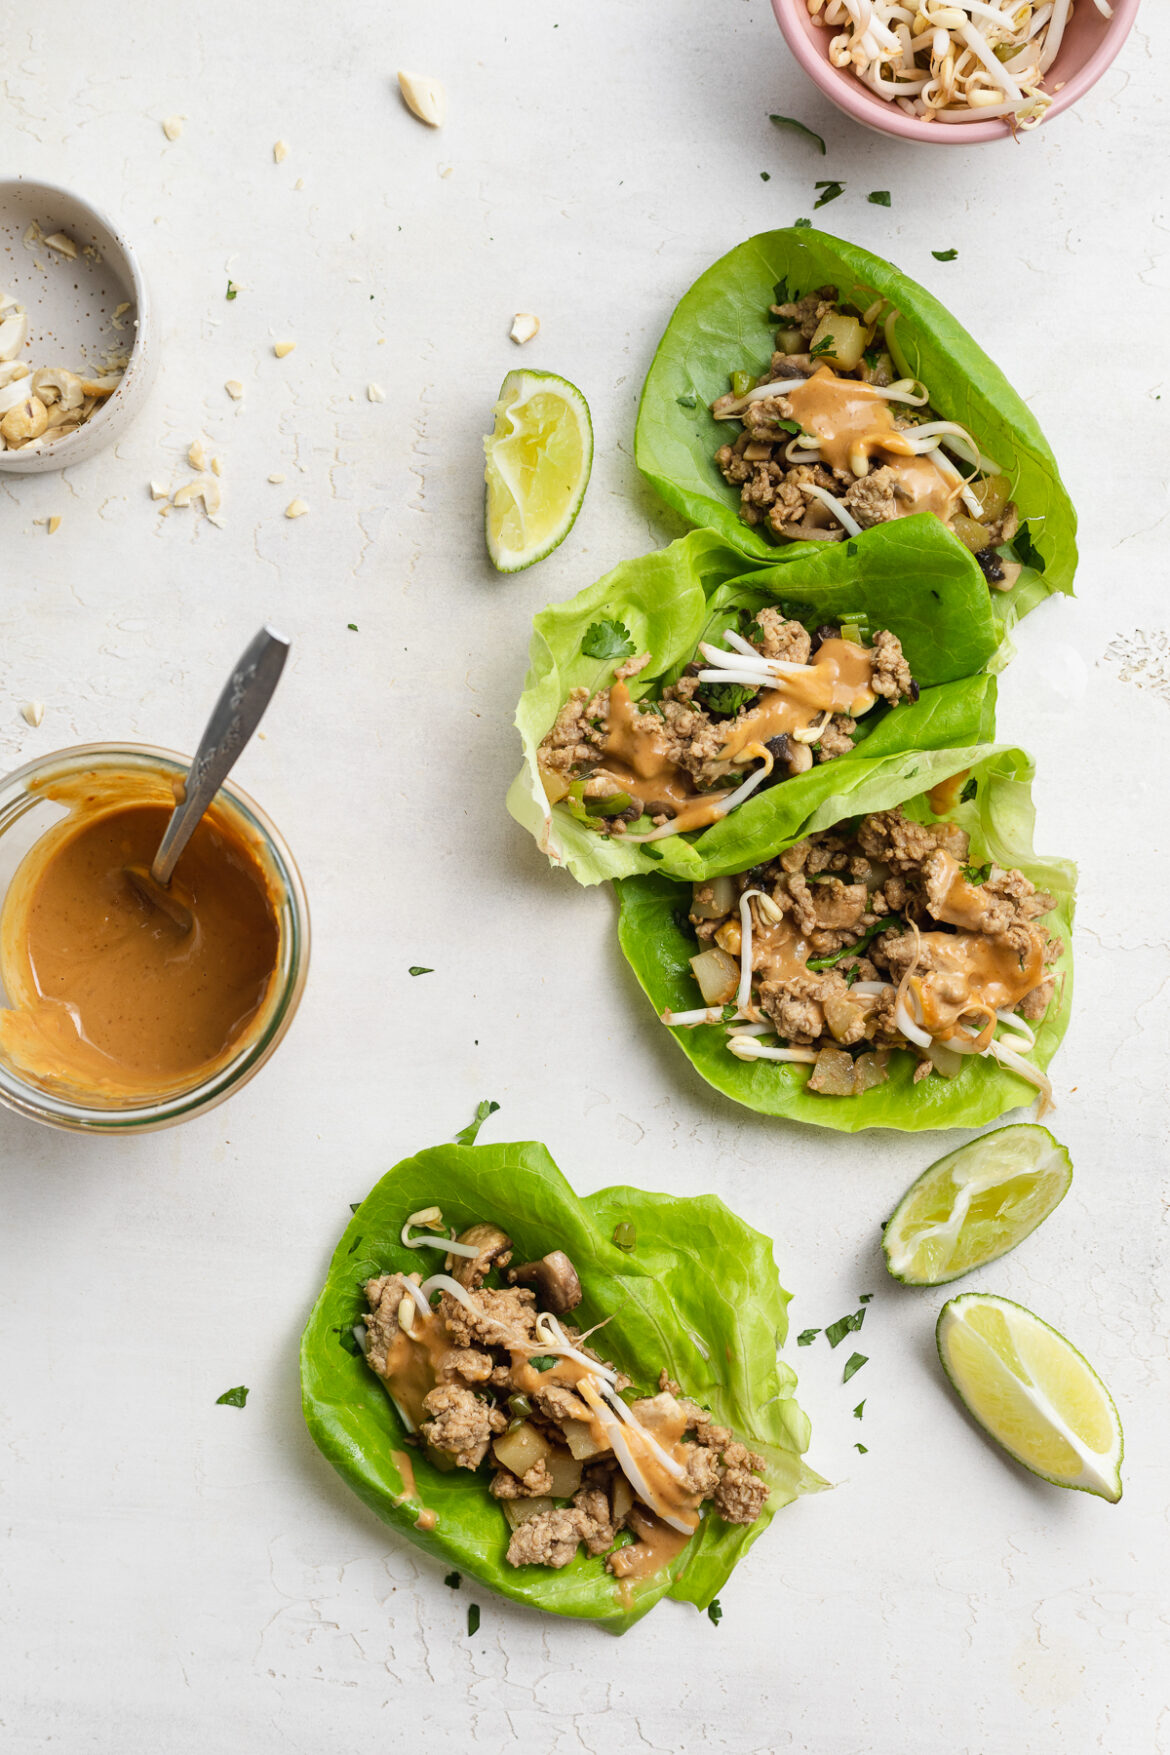
    Crisp, fresh, and flavorful Asian-inspired turkey lettuce wraps, topped off with a creamy, savory peanut sauce! Naturally gluten-free, grain-free, dairy-free, and super healthy. These turkey lettuce wraps are the perfect addition to your weekly meal prep, best enjoyed as a quick and easy grab-and-go lunch!

    four turkey lettuce wraps on a table, one being picked up.

    What You’ll Need To Make Turkey Lettuce Wraps with Peanut Sauce

    Ground Turkey – Like chicken, ground turkey is a great source of lean protein. It’s a blank canvas to however you season it, and will leave you feeling full until your next meal. Though if you can’t find ground turkey for this recipe, you can easily use ground chicken instead.

    Water Chestnuts – Don’t worry, I didn’t know what a water chestnut was until a few months ago. And while I’m still not exactly sure what it is, I do know that it’s some type of crunchy vegetable commonly sold in cans. You’re most likely to find these canned water chestnuts in either the canned produce aisle, or the ethnic food aisle of your local grocery store. However, if you can’t seem to track down any water chestnuts, don’t worry – this recipe will taste just as delicious without them!

    Peanut Butter – The two main things your peanut butter should be for this recipe are creamy and unsweetened. Most peanut butters on the market today unfortunately come sweetened, with some kind of sugar added to them. While I never recommend buying sweetened peanut butter (it doesn’t need the added sugar!), I definitely recommend against buying it for this recipe. Any sugar in your peanut butter will definitely throw off the savory balance of flavors in this peanut sauce.

    Butter Lettuce Leaves – This particular variety of leaf is perfect for filling, folding, then eating. They’re crisp, mild, and pretty much melt in your mouth. Though if you can’t find butter lettuce leaves, you can use either iceberg lettuce leaves or romaine lettuce leaves in their place. Really, any type of leaf that will cradle your filling will work here!

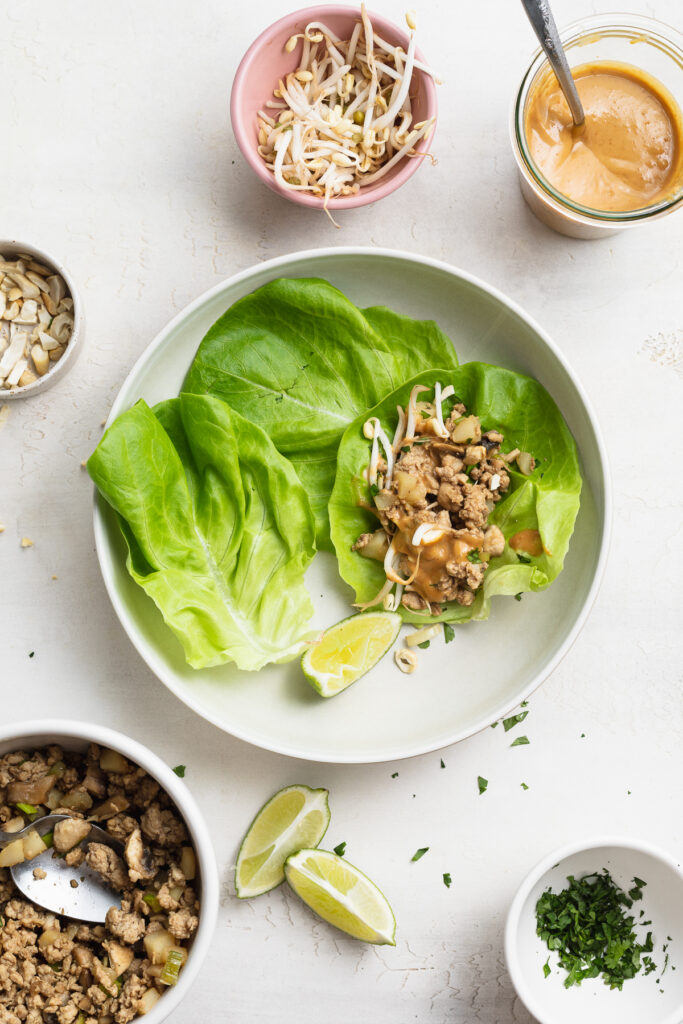
    turkey lettuce wraps being assembled

    Tips and Tricks

    • I highly recommend prepping a big batch of these turkey lettuce wraps ahead of a busy week! They’re my all-time favorite grab-and-go meal, requiring no time at all to heat up and assemble. If meal prepping, I recommend storing the turkey mixture separate from the peanut sauce, and keeping lettuce and any toppings separate as well. When ready to eat, simply reheat the turkey, then fill your lettuce wraps any way you’d like!
    • Feel free to top these wraps however you’d like! I’ve topped mine with everything from kimchi, to shredded carrots, to even simply eating them on their own. It truly doesn’t matter which way you serve these guys, they’re always going to taste delicious.
    • If you’re like me and like a little spice, go ahead and spice these babies up with a little sriracha! Add a couple teaspoons of sriracha to either the filling, as a topping, or both.

    Adjust This Recipe To Your Dietary Needs

    Make it Paleo: For an entirely paleo meal, use creamy almond butter instead of peanut butter in the savory sauce. Otherwise, these lettuce wraps are an entirely paleo recipe!

    Make it Nut-Free: Make this recipe nut-free by swapping out the peanut butter for an equal amount of creamy sunflower seed butter (just make sure it’s unsweetened!).

    5 from 2 votes

    Asian Turkey Lettuce Wraps with Savory Peanut Sauce

    Crisp, fresh, and flavorful Asian-inspired turkey lettuce wraps, topped off with a creamy, savory peanut sauce! Naturally gluten-free, grain-free, dairy-free, and super healthy. These turkey lettuce wraps are the perfect addition to your weekly meal prep, best enjoyed as a quick and easy grab-and-go lunch!
    Print Rate
    Prep Time: 5 minutes
    Cook Time: 10 minutes
    Total Time: 15 minutes
    Servings: 4 servings

    Ingredients

    For the turkey:

    • 1 tablespoon olive oil
    • 1 pound ground turkey
    • pinch of salt
    • 8 ounces mushrooms, chopped
    • 1 (8-ounce) can chopped water chestnuts, drained
    • 3 scallions, chopped
    • 2 garlic cloves, minced
    • 1 tablespoon fresh grated ginger
    • 1/4 cup coconut aminos, see Notes
    • 1 tablespoon rice vinegar

    For the peanut sauce:

    • 1/2 cup creamy peanut butter, unsweetened
    • 2 tablesoons coconut aminos
    • 2 tablespoons rice vinegar
    • 1 tablespoon toasted sesame oil, optional
    • 1 garlic clove, grated
    • 1 tablespoon fresh grated ginger
    • 2-3 tablespoons warm water, add more to thin sauce

    For the lettuce wraps:

    • 12 butter lettuce leaves
    • shredded carrots
    • bean sprouts
    • fresh cilantro

    Instructions

    • Heat olive oil in a large skillet over medium-high heat. Add in ground turkey and a pinch of salt, cook until no longer pink.
    • While turkey cooks, whisk together all peanut sauce ingredients in a bowl and set aside.
    • Once turkey is cooked through, add in mushrooms, scallions, garlic, ginger, and water chestnuts. Cook 2-3 minutes or until mushrooms are soft.
    • Add in coconut aminos and rice vinegar, stir and cook for about 1 minute then remove from heat.
    • Fill butter lettuce leaves with ground turkey mixture and top with peanut sauce, shredded carrots, bean sprouts, and fresh cilantro.

    Video

    Notes

  • Coconut Aminos: If you don’t have coconut aminos, you can use soy sauce instead!
  • Nutrition

    Calories: 300kcal

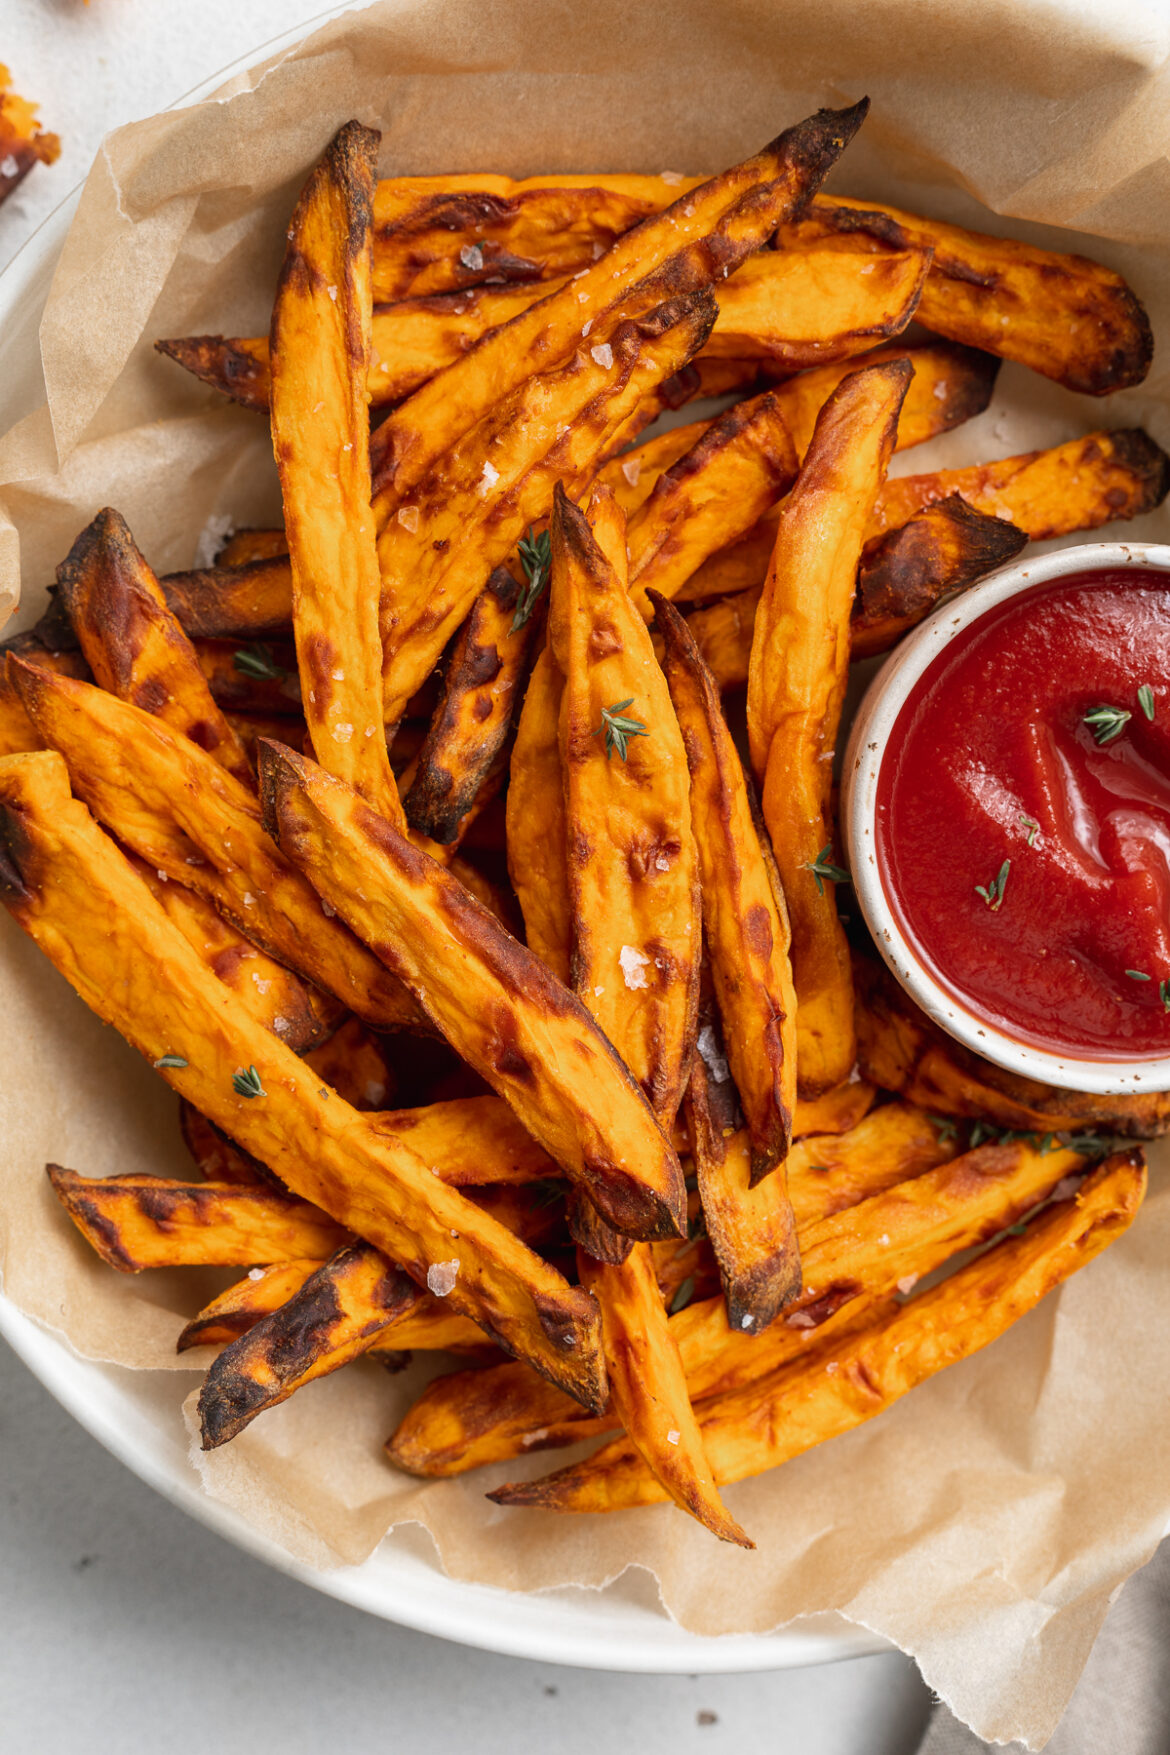
    Perfectly crispy, yet healthy sweet potato fries! Four ingredients and 15 minutes is all it takes for this addictive appetizer or side dish. Don’t have an air fryer? No worries, I’ve included an oven-baked option that still yields incredibly crispy fries!

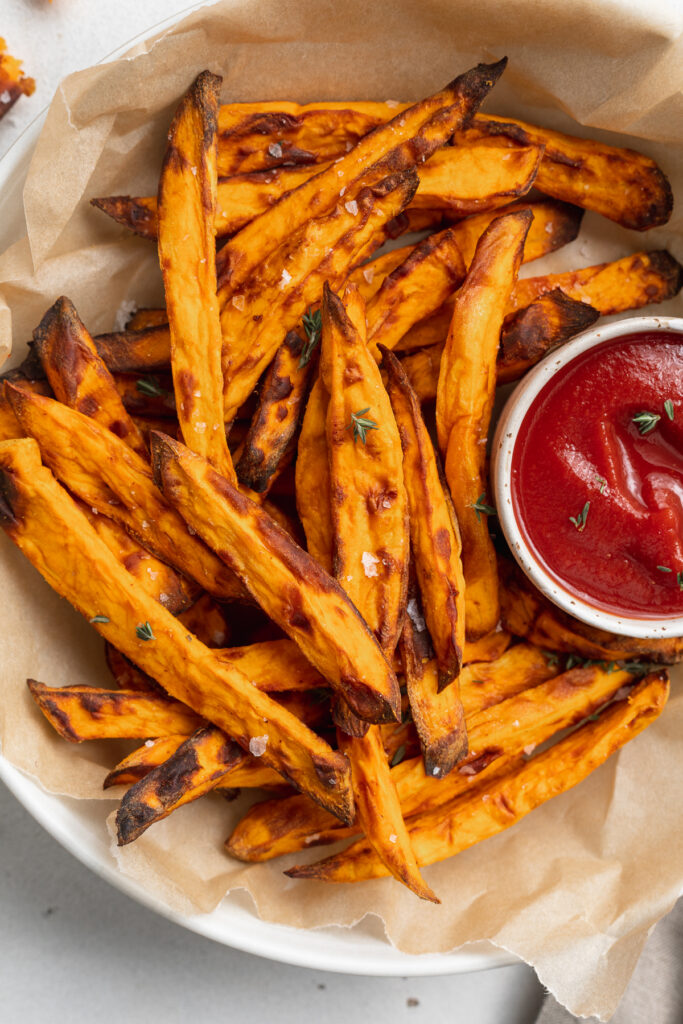
    close-up overhead image of air fryer sweet potato fries on a plate with ketchup on the side

    The air fryer is truly the kitchen device of the century (ok, well it’s right up there with the Instant Pot). I only just got my hands on about a year ago, and holy moly it changed the homemade fry game for me, forever. After quite a bit of research for the best air fryer out there, I eventually landed on the Cosori Pro Air Fryer. It’s fairly priced and works like a champ, can’t recommend it enough!

    What You Need To Make Air Fryer Sweet Potato Fries

    Sweet Potatoes – The star of our show! You can use any variety of sweet potatoes you’d like for this recipe. Just remember, peel them and then slice them into thin matchsticks. Thinner = crispier. And try your best to cut them as evenly as possible, so that they “fry” evenly.

    Avocado Oil – My oil of choice, but you can use any oil you’d like here. Just one tablespoon is all you’ll need, that’s A LOT less oil than if you deep-fried these!

    Salt – Duh! Salt is non-negotiable for fries of any kind. Though start small and add more salt once the fries are done. You can, of course, salt to your preference.

    Garlic Powder – This is my little special touch. I love the extra flavor garlic powder gives these fries, and I promise you will too. Though if you’re not a garlic fan (how?!), then you can leave this ingredient out.

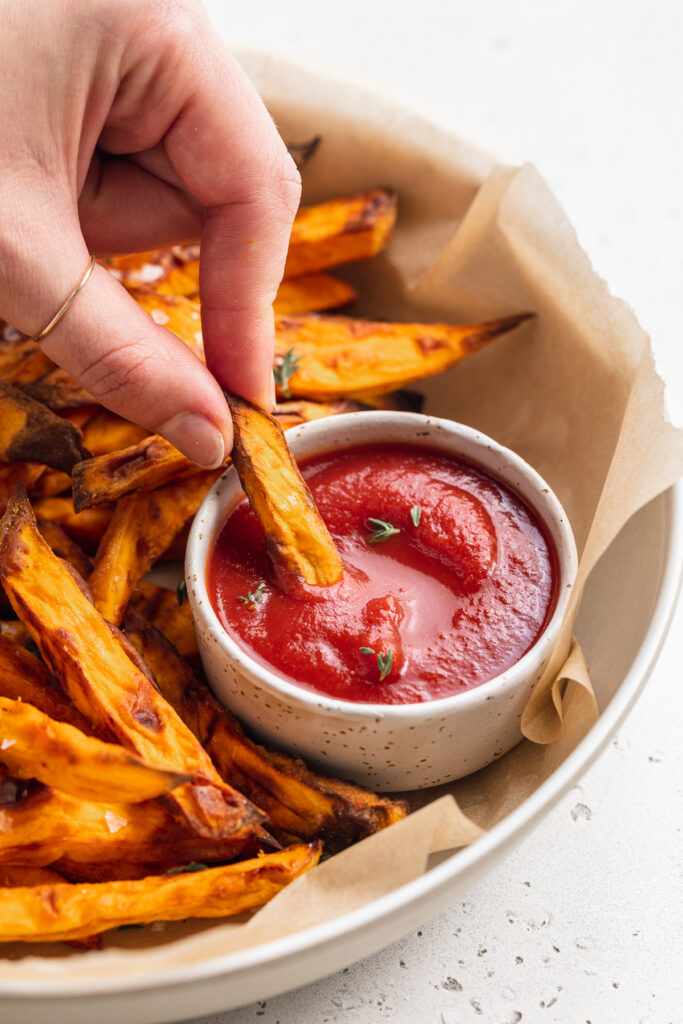
    air fryer sweet potato fries being dipped into ketchup

    Tips and Tricks

    • The secret to these crispy sweet potato fries is working in batches when you air fry them. Just a single layer at a time, avoiding cramming too many into the air fryer, will give you the crispiest non-deep-fried sweet potato fry of all time.
    • No air fryer? No problem! See below for an oven baked option.
    • If you’re looking for something to pair with these sweet potato fries, I can’t help but recommend these crispy air fryer buffalo chicken wings! The perfect healthy game-day, or any day, appetizer duo.
    No ratings yet

    Air Fryer Sweet Potato Fries

    Perfectly crispy, yet healthy sweet potato fries! Four ingredients and 15 minutes is all it takes for this addictive appetizer or side dish. Don’t have an air fryer? No worries, I’ve included an oven-baked option that still yields incredibly crispy fries!
    Print Rate
    Prep Time: 5 minutes
    Cook Time: 15 minutes
    Total Time: 20 minutes
    Servings: 4 servings

    Ingredients

    • 2 large sweet potatoes, see Notes
    • 1 tablespoon avocado oil
    • 1 teaspoon salt
    • 1/2 teaspoon garlic powder

    Instructions

    In the air fryer:

    • Preheat air fryer to 380° Fahrenheit. While the air fryer preheats, peel and slice sweet potatoes into 1/4-inch sticks.
    • Toss sweet potatoes in a bowl with olive oil, salt and garlic powder. Make sure each fry is evenly coated in oil and spices.
    • Transfer a third of the potatoes to the air fryer, then spread in an even layer and cook for 15 minutes. Pause air fryer to shake pan halfway through.
    • Remove fries and repeat for remaining batches.

    In the oven:

    • Preheat oven to 425° Fahrenheit. While the air fryer preheats, peel and slice sweet potatoes into 1/4-inch sticks.
    • Toss sweet potatoes in a bowl with olive oil, salt and garlic powder. Make sure each fry is evenly coated in oil and spices.
    • Spread potatoes in an even layer on a large baking sheet – space fries about 1/8-inch apart.
    • Bake for 20 minutes, flipping halfway through.

    Video

    Notes

  • Sweet Potatoes: Use any variety of sweet potatoes you’d like, white sweet potatoes are my favorite!
  • Nutrition

    Calories: 300kcal

    These almond flour pancakes are extra fluffy, delicious, and super easy to make! One bowl, a handful of ingredients, and 15 minutes is all you need to throw this simple gluten-free breakfast together. These almond flour pancakes are also the perfect blank canvas to any toppings you’d like (I went with blueberries – yum!).

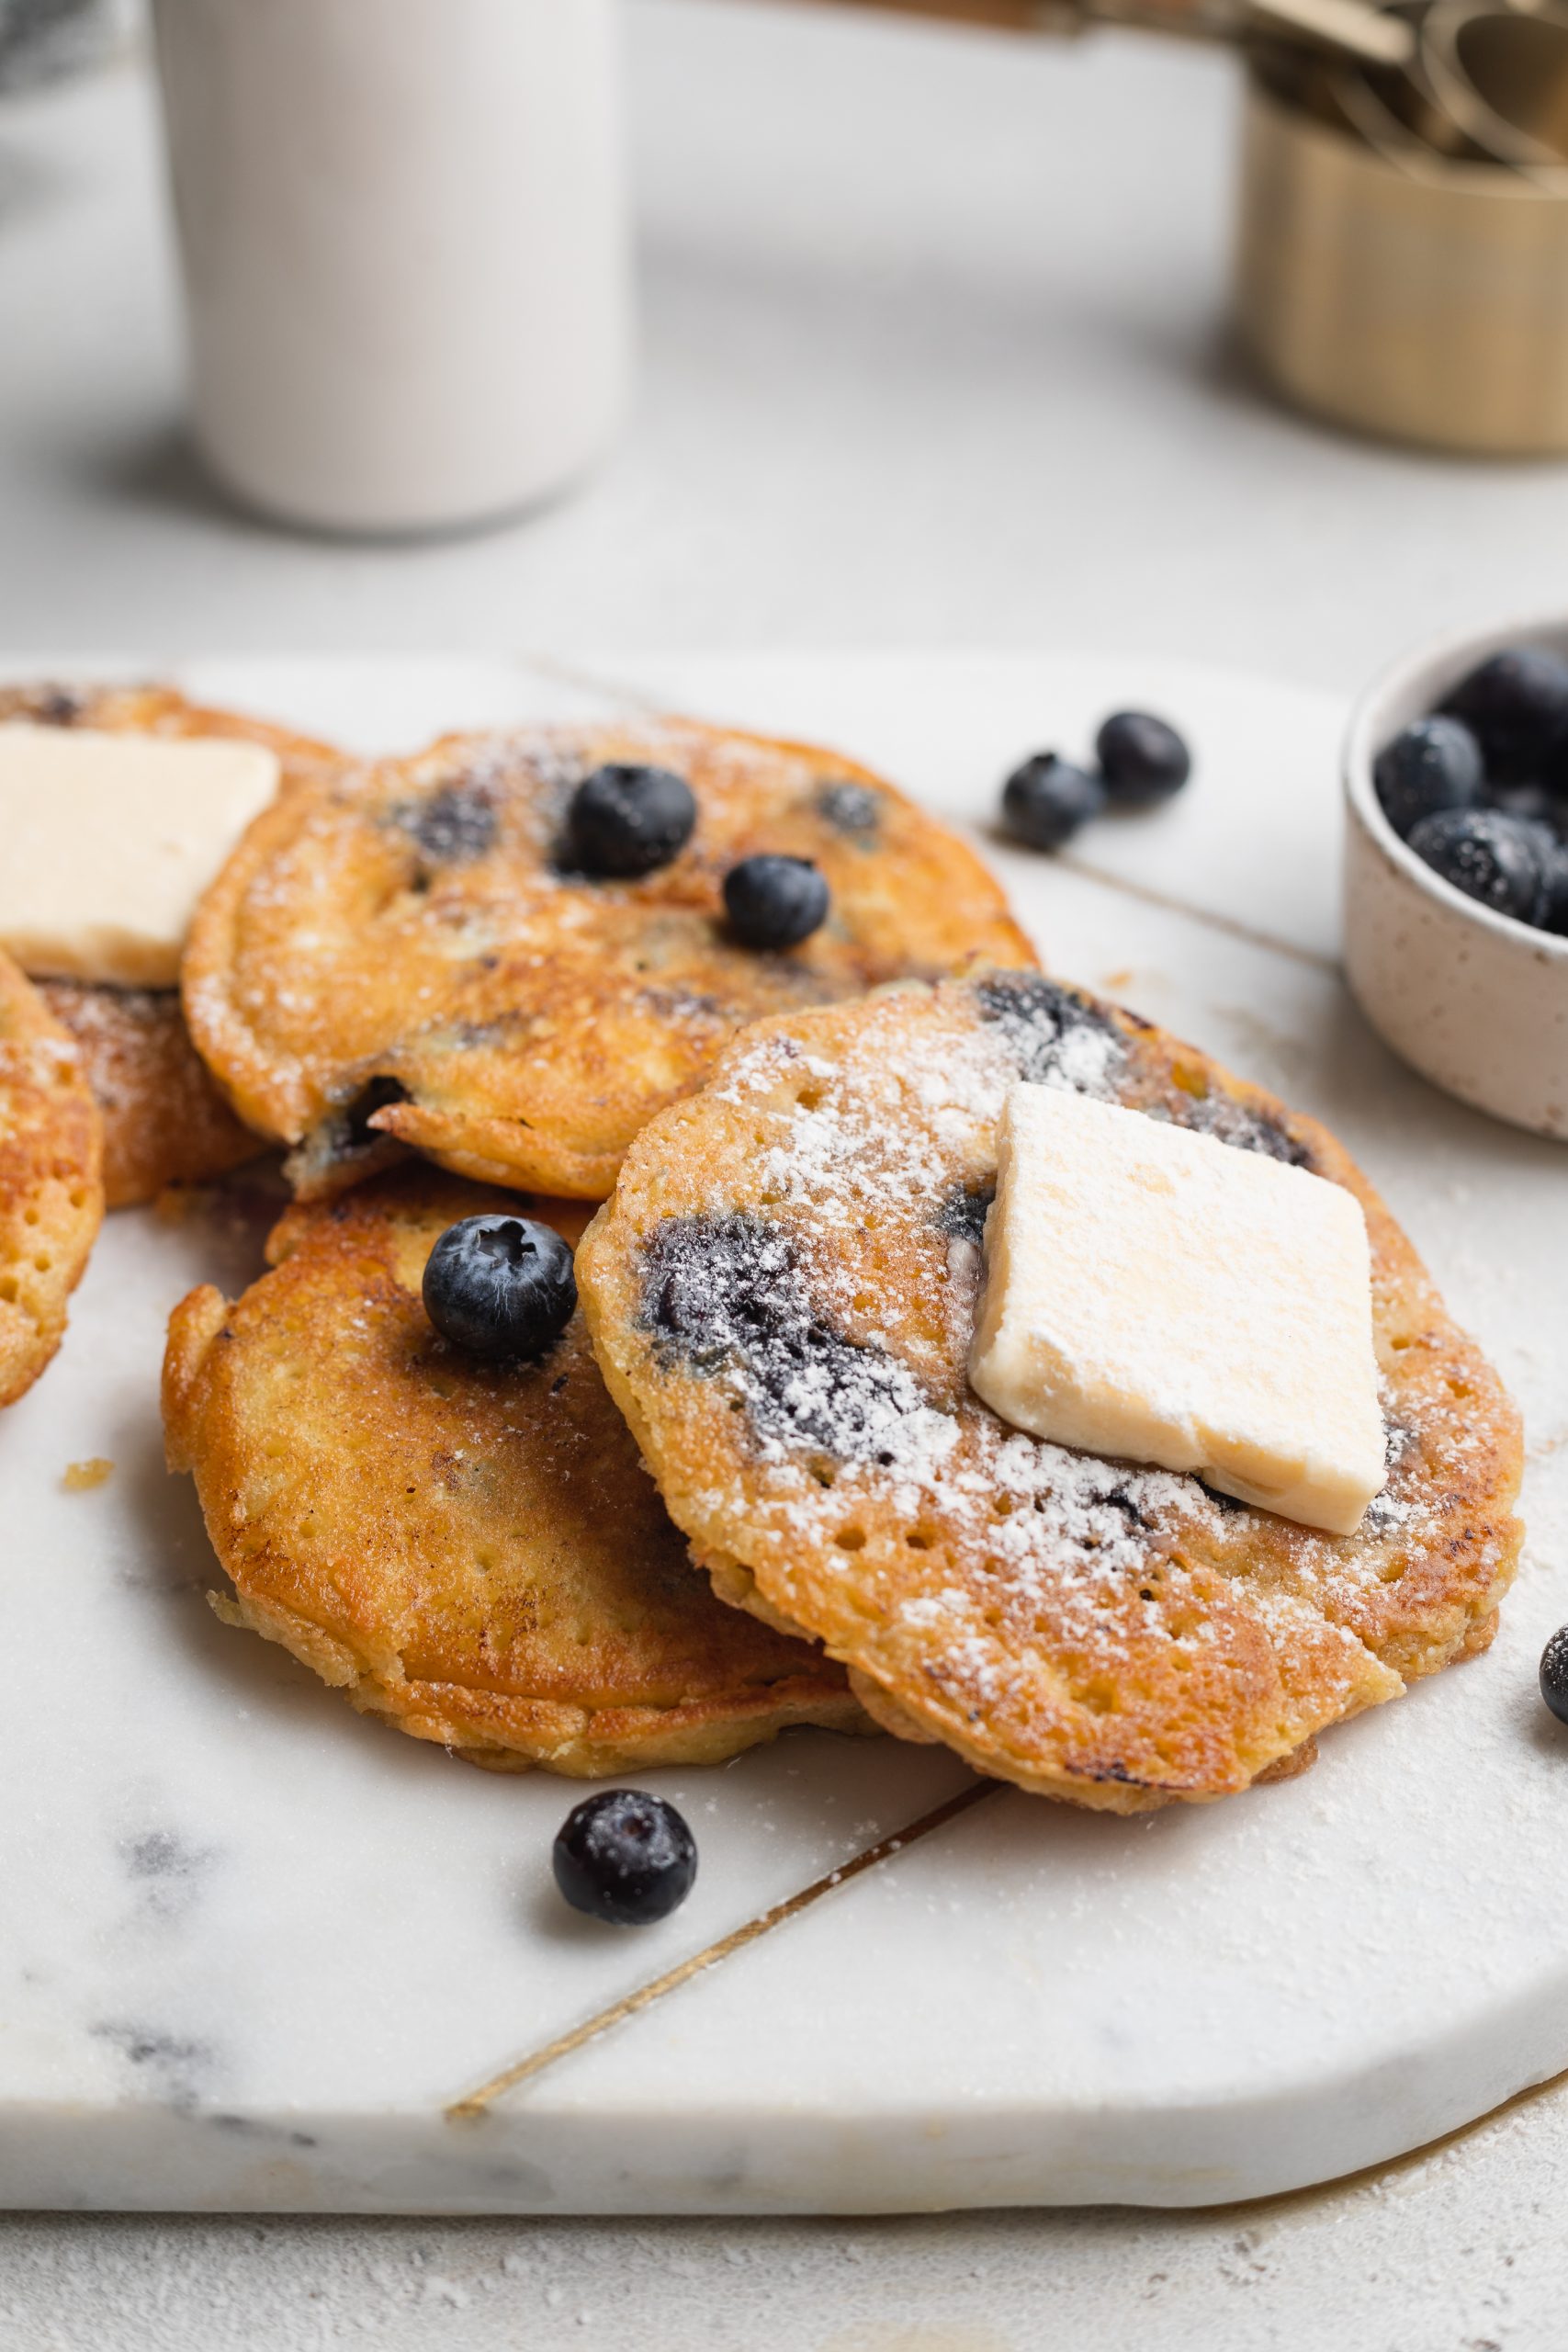
    stacked almond flour pancakes with blueberries, butter, and powdered sugar on top

    What You’ll Need

    Almond Flour – The star of our show – almond flour! It’s naturally gluten-free, grain-free, and paleo friendly. Almond flour is actually the only flour you’ll need for this healthy breakfast recipe. The most common misconception when it comes to almond flour is that it can be used as a 1:1 substitution for regular all purpose flour. However, that’s definitely not the case! Almond flour is much more dense and creates a heavier bake than regular flour. Though in this recipe we lighten the pancakes up with two whole eggs and a touch of milk.

    Eggs – Eggs are crucial to keeping these almond flour pancakes held together! They are our binding agent, and without them the pancakes would simply fall apart. I highly recommend using large or extra large eggs for this recipe, though really any size will work.

    Coconut Oil or Butter – Whether you’re using a non-stick pan or not, a touch or butter or oil is very useful to prevent sticking. For a non-stick pan, you may be able to get away with using less oil or butter than the recipe calls for. But for either a stainless steel or cast-iron pan, you’ll need the full tablespoon. And if you ever begin to notice sticking throughout the cooking process, then go ahead and add a bit more butter or oil to your pan!

    How to Make Almond Flour Pancakes

    Making homemade almond flour pancakes is super easy! Start by adding the almond flour and baking powder to a large bowl. Whisk those dry ingredients together before adding in the eggs, milk, maple syrup, and vanilla extract. Once your pancake batter is completely combined, then you can add in any fillings/toppings you’d like – fresh blueberries and chocolate chips are my personal favorite!

    Now that your batter is all prepped, heat a tablespoon of either butter, coconut oil, or any other neutral-tasting oil in a large skillet over medium heat. Once hot, scoop about 1/4 cup of batter into the skillet. The batter will disperse out and form that signature circular pancake shape.

    Cook each pancake in the skillet for about 3-5 minutes, or until the bottom is nicely golden brown. Then, use a spatula to carefully flip the pancake and cook the other side. Repeat this cooking process with your remaining better then serve your almond flour pancakes! I recommend finishing them off with a dusting of powdered sugar and a drizzle of maple syrup.

    Adjust This Recipe to Your Dietary Needs

    Make it Vegan – Make this a vegan almond flour pancake recipe by substituting the two eggs for one flax egg (1 tablespoon of ground flax meal + 3 tablespoons water) and one mashed banana. The flax egg and banana will work together to bind your pancakes and prevent them from falling apart. Also, use your favorite vegan milk in place of the regular milk this recipe calls for.

    Make it Dairy-Free – To make this a dairy-free breakfast, simply use almond milk or your favorite non-dairy milk in place of the regular milk in this recipe. Also, be sure to use coconut oil for cooking, instead of butter.

    almond flour pancakes with blueberries on a marble board
    No ratings yet

    Perfect Almond Flour Pancakes

    These almond flour pancakes are extra fluffy, delicious, and super easy to make! One bowl, a handful of ingredients, and 15 minutes is all you need to throw this simple gluten-free breakfast together. These almond flour pancakes are also the perfect blank canvas to any toppings you’d like (I went with blueberries – yum!).
    Print Pin Rate
    Prep Time: 5 minutes
    Cook Time: 10 minutes
    Total Time: 15 minutes
    Servings: 2 servings

    Ingredients

    • 1 cup almond flour, see Notes
    • 1 teaspoon baking powder
    • 2 eggs
    • 1/4 cup milk, I used non-dairy milk
    • 1 tablespoon maple syrup
    • 1 teaspoon vanilla extract
    • 1 tablespoon coconut oil or butter

    Instructions

    • Whisk together the almond flour and baking powder in a large bowl.
    • Add in eggs, milk, maple syrup, and vanilla extract, whisk to combine.
    • Melt coconut oil or butter in a large skillet over medium low-medium heat and spoon ¼ cup batter into skillet.
    • Cook pancakes for 2-3 minutes per side or until edges are slightly golden brown. Repeat until no more batter remains.

    Notes

  • Almond Flour: Be sure to use blanched almond flour, not almond meal in this recipe.
  • Nutrition

    Calories: 300kcal

    These paleo brownies are total perfection! Extra chocolatey and extremely indulgent, yet are entirely gluten-free, grain-free, dairy-free, and refined sugar-free.

    overhead image of paleo brownies with milk and cocoa powder on the side

    What You’ll Need

    Almond Flour – Be sure to use almond flour, and not almond meal in these paleo brownies! Almond flour is ground much finer than meal, resulting in a lighter and overall better brownie. I’ve tried many different brands of almond flour and truly loved them all. Trader Joe’s makes a great almond flour, as does Costco. Almond flour was once hard to come by, but thankfully, it’s sold in most grocery stores these days!

    Almond Butter – Almond butter makes these brownies exceptionally rich and delicious! Don’t worry though, your brownies won’t at all taste like almonds. Almond butter also gives these brownies structure, in the absence of gluten or grains.

    Coconut Sugar – This unrefined sugar is a paleo-friendly alternative to regular white sugar. Also, unflike white sugar, coconut sugar contains vitamins, minerals, and even fiber. The fiber in particular aids in slowing down the absorption of sugar in our body, placing it lower on the glycemic index. Basically, what this means is you’re less likely to experience that sugar spike and crash with coconut sugar, than with refined white sugar.

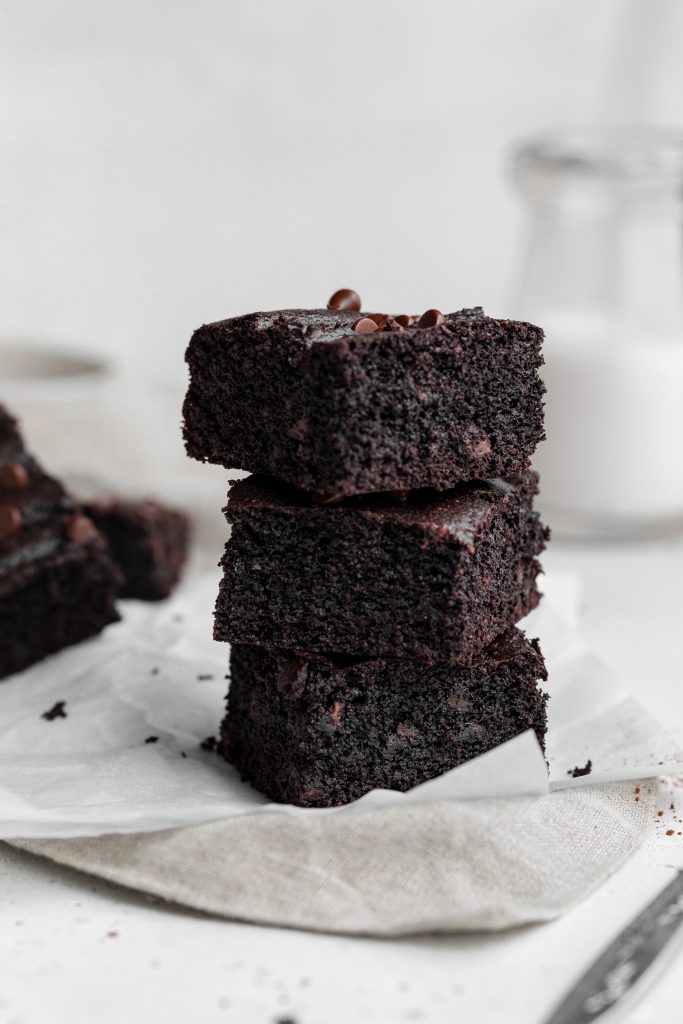
    three paleo brownies stacked on top of each other

    Top Tips

    • Let the brownies cool slightly before cutting! Trust me, I understand the temptation of wanting to dive straight into a pan of brownies as soon as they’re out of the oven. But try your best to fight those urges and let the paleo brownies cool for at least 10 minutes before slicing. This’ll help them hold their shape!
    • Bring any chilled ingredients to room temperature before getting started. If the eggs, for example, are too cold, they’ll cause the melted coconut oil to seize up and harden in the batter. Therefore, place all ingredients out on the counter about an hour before diving into this recipe!

    Adjust This Recipe To Your Dietary Needs

    Make it Vegan: Simply swap out the eggs for 2 flax eggs (1 flax egg = 1 tablespoon flaxseed meal + 3 tablespoons water) for vegan paleo brownies!

    Make it Nut-Free: I haven’t tested this version myself yet, but you can try using sunflower seed butter in place of the almond butter and 1/4 cup of coconut flour in place of the almond flour. If you give this nut-free version a try, please let me know how it is!

    close up image of the inside of paleo brownies
    5 from 1 vote

    Perfect Paleo Brownies

    These paleo brownies are total perfection! Extra chocolatey and extremely indulgent, yet are entirely gluten-free, grain-free, dairy-free, and refined sugar-free.
    Print Pin Rate
    Prep Time: 5 minutes
    Cook Time: 20 minutes
    Total Time: 25 minutes
    Servings: 16 servings

    Ingredients

    • 2 eggs, at room temperature
    • 1/2 cup almond butter
    • 1/2 cup coconut sugar
    • 1/4 cup maple syrup
    • 1/4 cup coconut oil, melted
    • 1 teaspoon vanilla extract
    • 1/2 cup almond flour
    • 3/4 cup cocoa powder
    • 1 teaspoon baking soda
    • 1/2 teaspoon salt
    • 1/2 cup chocolate chips, optional

    Instructions

    • Preheat oven to 350° Fahrenheit and line or grease a 9×9-inch baking dish.
    • Add eggs, almond butter, coconut sugar, maple syrup, coconut oil, and vanilla extract to a large bowl and beat together either by hand or with an electric mixer.
    • Add in almond flour, cocoa powder, baking soda, and salt and mix until completely smooth and combined. Fold chocolate chips into brownie batter.
    • Transfer batter to your prepared baking dish and bake for 20-25 minutes. Let cool slightly before slicing and serving.

    Notes

  • Leftover paleo brownies can be stored at room temperature in an airtight container for up to 5 days.
  • Nutrition

    Calories: 300kcal