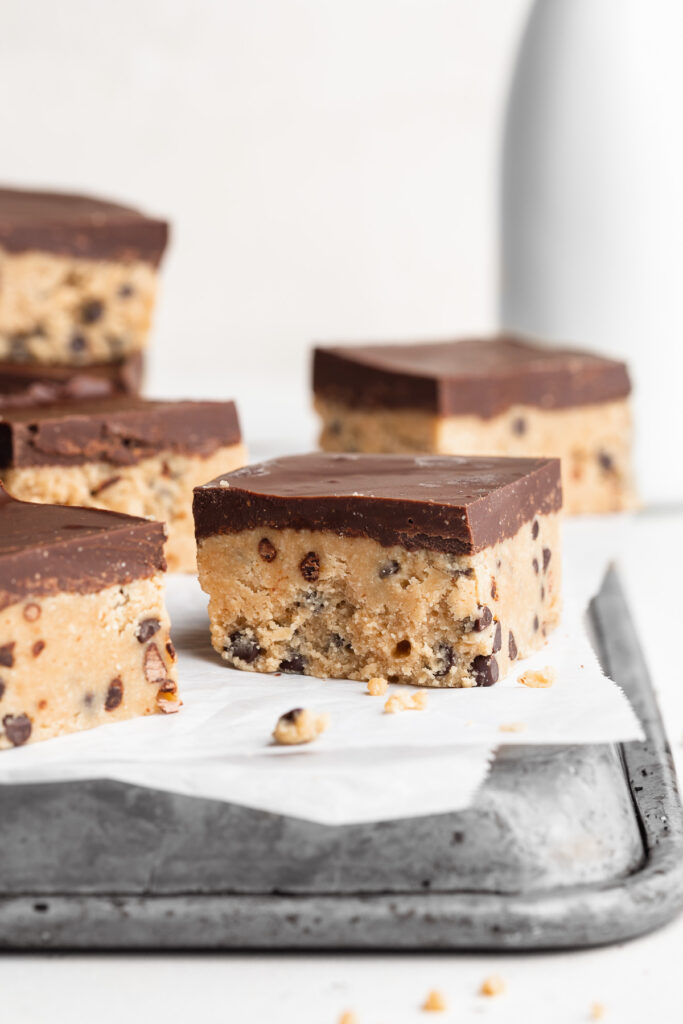
Seriously delicious healthy no-bake cookie dough bars! These bars are vegan, gluten-free, dairy-free, and refined sugar-free. Enjoy as a guilt-free dessert or sweet snack!

What You’ll Need to Make Healthy No-Bake Cookie Dough Bars
Almond Flour – Use blanched almond flour for these dessert bars, not almond meal. Blanched almond flour is ground finer and makes for a smoother cookie dough. Looking for more almond flour recipes? Try these!
Peanut or Cashew Butter – Either peanut or cashew butter will work! I used peanut butter because I love the taste. However, cashew butter yields little flavor and works perfectly to hold these no-bake bars together. But whichever you use, make sure it’s both creamy and unsweetened.
Maple Syrup – We use maple syrup in place of traditional refined sugar to keep these healthy cookie dough bars refined sugar-free. The maple syrup in these bars can easily be replaced with honey, or even your favorite sugar-free liquid sweetener for sugar-free cookie dough bars!
Chocolate Chips – I used the Enjoy Life Mini Chocolate Chips to keep these bars vegan/dairy-free, but really any chocolate chip will work! For refined sugar-free chocolate chips, try these date-sweetened Hu chocolate chips.

Tips and Tricks
- Chill these healthy no-bake cookie dough bars in the freezer for at least one hour before slicing! Don’t rush this step, otherwise the chocolate won’t be fully set.
- Store leftover bars in an airtight container in the fridge or freezer. Avoiding leaving them at room temperature for too long, because the chocolate may melt.
Adjust This Recipe to Your Dietary Needs
Make it Nut-Free: For a nut-free version of this recipe, replace the almond flour with oat flour. Also, replace the cashew or peanut butter with unsweetened sunflower seed butter!
Make it Paleo: Make paleo cookie dough bars by using unsweetened creamy almond butter in place of the cashew or peanut butter.

Healthy No-Bake Cookie Dough Bars
Ingredients
For the cookie dough layer:
- 1 1/2 cups almond flour
- 1/2 cup creamy peanut or cashew butter, unsweetened
- 1/4 cup maple syrup
- 1/4 cup coconut oil or butter, melted
- 1 teaspoon vanilla extract
- pinch of salt
- 1/2 cup chocolate chips
For the chocolate layer:
- 1 cup chocolate chips
- 1/4 cup creamy peanut or cashew butter, unsweetened
Instructions
- Line a 9×5-inch baking pan with parchment paper.
- Make the cookie dough layer by mixing together the almond flour, peanut or cashew butter, maple syrup, melted coconut oil, vanilla extract, and salt in a large bowl. Add in the chocolate chips and mix until evenly distributed throughout the dough.
- Transfer dough to prepared baking pan and press into an even layer.
- Make the chocolate layer by melting the chocolate chips and peanut or cashew butter in the microwave in 30 second increments. Stir together until smooth, then pour and spread into an even layer on top of the cookie dough.
- Chill in the freezer for one hour, then remove and slice into squares.


")