
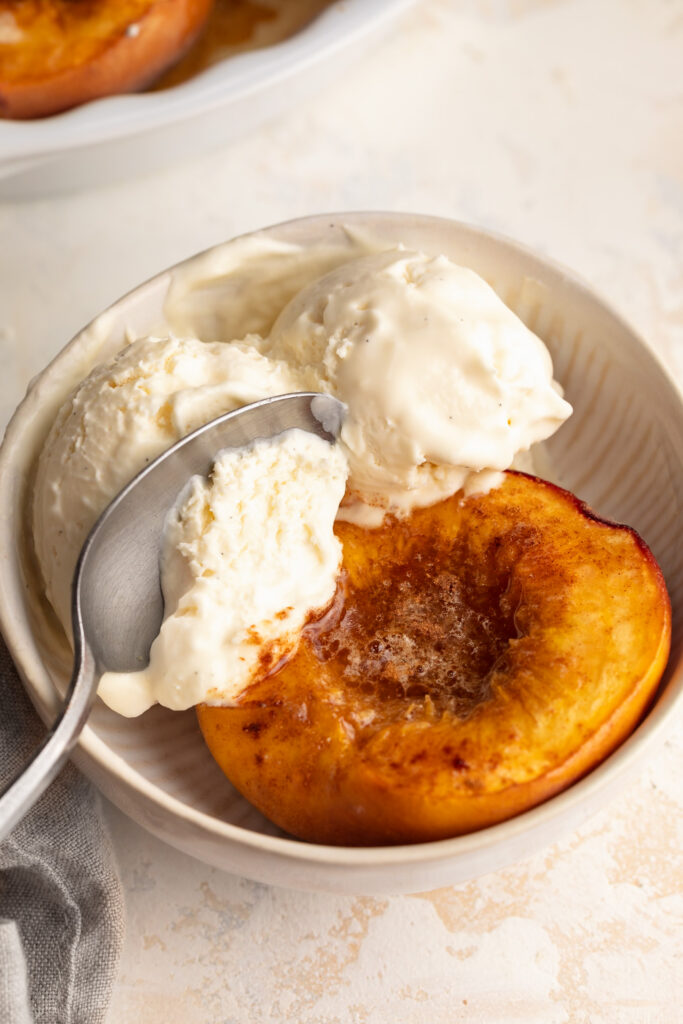
Peach season only comes around once a year, and these baked peaches are exactly how I think you should be spending it! Warm, tender, juicy peaches baked with butter, brown sugar, and cinnamon until they’re soft and bubbling – then topped with a scoop of homemade no-churn vanilla bean ice cream that takes ’em over the freaking top. It’s the kind of dessert that looks and tastes like you spent hours on it, but it’s really just 4 simple ingredients and about 25 minutes of oven time. This is the dessert I make every single summer when peaches are at their absolute best!
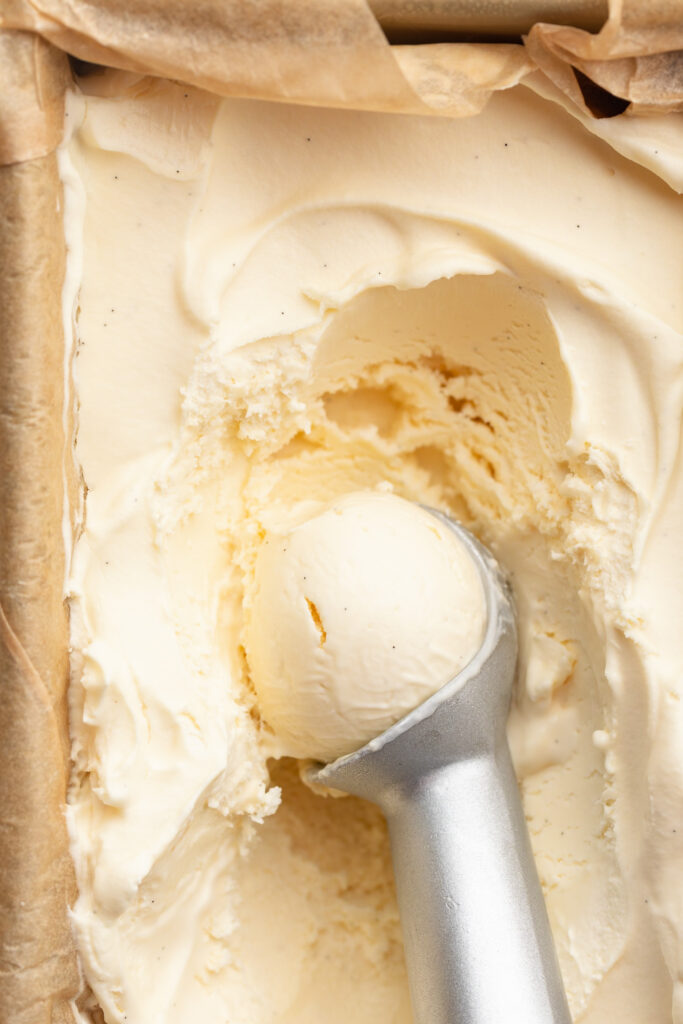
The homemade vanilla bean ice cream is the real showstopper here, and the best part is that you don’t need an ice cream maker to make it. Just whipped cream, sweetened condensed milk, and vanilla bean — that’s it. It’s rich, creamy, studded with real vanilla bean, and the perfect partner for warm baked peaches. If you love easy, no-fuss summer desserts, you’ll also want to try my 4-Ingredient Peach Cobbler for another way to enjoy those summer peaches!
Why You’ll Love This Baked Peaches Recipe
- Just 4 ingredients. Peaches, butter, brown sugar, and cinnamon. That’s the entire list for the peaches themselves – simple, classic, and absolutely delicious.
- Perfect for summer. This is peak peach season magic! Warm, juicy, caramelized fruit, and it makes the most of those perfectly ripe peaches sitting on your counter.
- Super easy to make. No special equipment, no complicated steps. If you can slice a peach in half, you can make this dessert. The oven does almost all of the work.
- Totally delicious. Tender, caramelized peaches with a buttery cinnamon-sugar filling, topped with rich homemade vanilla bean ice cream – this is the kind of dessert that feels fancy but is genuinely effortless!
- No ice cream maker needed. The homemade vanilla bean ice cream comes together with just 3 ingredients and a hand mixer. No churning, no special equipment – just whip, mix, and freeze!
Recipe Variations and Substitutions
- Make it dairy-free/vegan: Swap the butter for vegan butter or coconut oil in the peaches. For the ice cream, use a can of full-fat coconut cream in place of the heavy whipping cream (chill it well before whipping) and a dairy-free sweetened condensed milk alternative, such as coconut condensed milk.
- Brown Sugar: Coconut sugar makes a great natural substitute and adds a similar caramel-like depth. Maple syrup or honey also work – drizzle over the peaches instead of sprinkling.
- Cinnamon: Add a pinch of nutmeg or ginger alongside the cinnamon for extra warmth and spice.
- Add a Splash of Liquor: For an adults-only version, add a splash of bourbon, rum, or brandy to the butter and brown sugar mixture before baking for a deeper, more sophisticated flavor.
- No vanilla bean? No problem. Vanilla bean paste or even plain vanilla extract both work wonderfully in the ice cream if you don’t have a whole vanilla bean on hand.
- Skip the ice cream: If you’re short on time, these baked peaches are also delicious served with a dollop of Greek yogurt, whipped cream, or even on their own!
Sam’s Recipe Tips
- Use ripe but firm peaches. Peaches that are too soft will turn mushy and fall apart in the oven. Look for peaches that give just slightly when pressed and smell fragrant at the stem – that’s the sweet spot.
- Make the ice cream ahead of time. Since the ice cream needs at least 4 hours to freeze solid, make it the night before or earlier in the day so it’s ready to scoop the moment your peaches come out of the oven.
- Don’t overmix the ice cream base. When folding the sweetened condensed milk into the whipped cream, be gentle. Overmixing can deflate the whipped cream and result in a denser, less airy ice cream.
- Let the peaches cool slightly before serving. Straight out of the oven, the peaches will be very hot and the ice cream will melt almost instantly. A few minutes of cooling time lets you enjoy the perfect balance of warm peach and melty ice cream without it turning into a puddle.
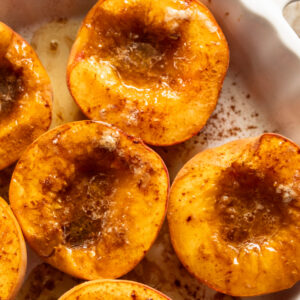
- Don’t skip the butter pat in each cavity. It melts down and mixes with the brown sugar and peach juices to create a rich, buttery sauce that pools in the bottom of the baking dish – make sure to spoon some of that sauce over the peaches when serving!

4-Ingredient Baked Peaches with Homemade No-Churn Vanilla Bean Ice Cream
Equipment
- 1 large bowl
- 1 hand or stand mixer
- 1 baking dish
Ingredients
- 4 fresh peaches halved and pitted
- 4 tablespoons butter
- 4 tablespoons brown sugar
- 1 teaspoon cinnamon
For the homemade vanilla bean ice cream:
- 2 cups heavy whipping cream
- 1 (14-ounce) can sweetened condensed milk
- 1 scraped vanilla bean or 1 teaspoon vanilla bean paste, or 1 teaspoon vanilla extract
Instructions
- Start by making the homemade vanilla bean ice cream (or skip to Step 4 to make the baked peaches) by pouring the heavy whipping cream into a clean bowl and beating with either a hand or stand mixer until stiff peaks form, about 5 minutes.
- Add the can of sweetened condensed milk and the scraped inside of a vanilla bean pod or vanilla bean paste, and gently mix until completely combined.
- Transfer the ice cream mixture to a container and place in the freezer for at least 4 hours, or until solid before scooping and serving with the baked peaches.
- For the baked peaches, preheat your oven to 350° Fahrenheit.
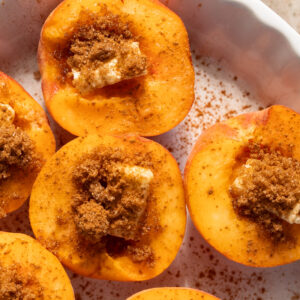
- Arrange the peach halves in a baking dish, cut-side facing up. Place a piece of butter on top of each peach.
- Then, sprinkle ½ tablespoon of brown sugar on each peach, before sprinkling the peaches evenly with cinnamon.

- Bake the peaches for about 20-25 minutes, or until they’re soft and easily pierced with a fork. Remove them from the oven and let them cool slightly before serving warm with a scoop of homemade vanilla bean ice cream!
Notes
- Use ripe but firm peaches so they hold their shape in the oven.
- Make the ice cream ahead of time — it needs at least 4 hours to fully freeze.
- For dairy-free, use coconut cream and a dairy-free condensed milk alternative.
- Store leftover baked peaches in the fridge for up to 3 days; reheat in the microwave or oven before serving.
- Store leftover ice cream in an airtight container in the freezer for up to 2 months.
")


