Tag

almond flour

Browsing

These mini vegan berry shortcakes are as cute as they are delicious! A few simple ingredients come together to create a soft shortcake base, which is then topped off with homemade coconut whipped cream. A sprinkling of fresh berries is the finishing touch to this easy and adorable dessert!

close-up image of mini vegan berry shortcakes

These Mini Vegan Berry Shortcakes Are…

  • Soft
  • Crumbly
  • Perfectly Sweet
  • Grain-Free
  • Fresh
  • Summery
  • & a total crowd-pleaser!

What You Need To Make Mini Vegan Berry Shortcakes

Almond Flour – This gluten and grain-free flour is a staple in my kitchen. Almond flour has a very mild taste and gives these shortcakes their irresistibly soft and crumbly texture! While almond flour used to be difficult to locate, you can easily find it either online or in most grocery stores these days.

Coconut Flour – This particular ingredient is vital to the construction of these mini vegan berry shortcakes. Coconut flour holds together these tiny treats, in the absence of eggs. It is very important that you do not skip or replace this it with any other type of flour (unless noted in the flour substitutions section below).

Coconut Cream – If you’re looking to make the vegan coconut whipped cream yourself, you’re going to need a can of coconut cream! I highly recommend the tiny cans of Native Forest Coconut Cream which can be found at Whole Foods. However, if you can’t find that particular brand then pick up any can of coconut cream and use just the solid coconut cream at the top of the can in this recipe. This step will ensure your cream whips up beautifully light and fluffy!

Adjust This Recipe To Your Dietary Needs

Make it Nut-Free: I have not tested this myself, but I can imagine that equal parts oat flour would work in place of the almond flour in this recipe. If you give this a try, let me know how it turns out! 🙂

Flour Substitutions: I get asked a lot if all purpose flour can be subbed in my gluten-free recipes and for this one in particular, you can try using 1 1/2 cups of all purpose flour in place of the almond and coconut flour. Though keep in mind that I have also not tested this myself and therefore cannot attest to its success! If you opt for all purpose flour in these mini vegan berry shortcakes, start with just one cup and the remaining half cup (or maybe even more flour) until a dough forms.
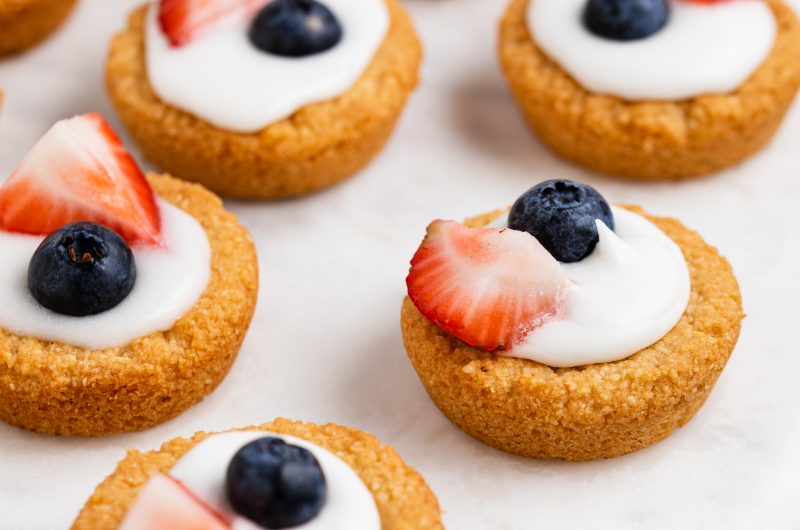
Mini Vegan Berry Shortcakes (Grain-Free)

5 from 1 vote
Recipe by Samantha Russo Course: DessertDifficulty: Easy
Servings

24

mini shortcakes
Prep time

30

minutes
Cooking time

15

minutes
Total time

45

minutes

These mini vegan berry shortcakes are as cute as they are delicious! A few simple ingredients come together to create a soft shortcake base, which is then topped off with homemade coconut whipped cream. A sprinkling of fresh berries is the finishing touch to this easy and adorable dessert!

Ingredients

  • For the vegan shortcakes:
  • 1/2 cup dairy-free butter, softened

  • 1/2 cup maple syrup

  • 1 teaspoon vanilla extract

  • 2 cups almond flour

  • 1/4 cup coconut flour

  • 1/2 teaspoon baking powder

  • For the coconut whipped cream:
  • 1 (13.5 ounce) can coconut cream

  • 1/4 – 1/2 cup powdered sugar

  • 1/2 teaspoon vanilla extract

  • For topping:
  • fresh berries

Directions

  • Preheat oven to 350° Fahrenheit and lightly grease a mini muffin pan.
  • Beat together the dairy-free butter and maple syrup, then add in the vanilla extract and mix until combined.
  • In a separate bowl, combine the almond flour, coconut flour, and baking soda.
  • Add the dry ingredients into the wet ingredients and mix until combined, then cover and let chill in the fridge for 20 minutes.
  • Scoop two tablespoons of dough into each mini muffin mold and press down then up the sides to form a cup shape.
  • Bake for 12-15 minutes, then let cookies cool in pan for 15 minutes before transferring to a wire cooling rack to cool completely.
  • While cookies cool, remove the top later of solid coconut cream from the can and discard any liquid. Beat coconut cream along with powdered sugar and vanilla extract until light and fluffy.
  • Top each mini shortcake with whipped cream and fresh berries – enjoy!

Recipe Video

Notes

  • Store these mini vegan berry shortcakes in an airtight container in either the fridge or freezer!

Did you make this recipe?

Share it and tag @samdoesherbest on Instagram!

Like this recipe?

Follow us @samdoesherbest on Pinterest

Other Delicious Vegan Dessert Recipes

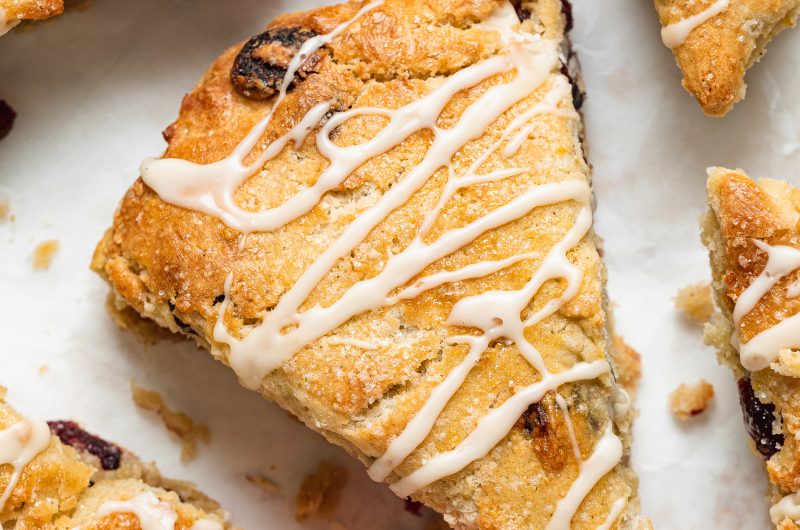
These cranberry orange scones are perfectly flaky and sweet! I took a traditional recipe and turned it gluten and dairy-free with just a few simple swaps. These scones taste incredible with a warm cup of coffee for breakfast or lightly toasted as an afternoon snack.

Cranberry orange scones stacked on top of eachother.

Breakfast in bed was the big thing on Mother’s Day in my house. And because my dad can barely boil an egg, the cooking of breakfast was always my job. I always loved to cook, so I had fun thinking up a breakfast menu for my mom on Mother’s Day. I don’t remember too many menu items from over the years, but I do remember making her cranberry orange scones one year. And the only reason I remember is because I truly couldn’t believe how INCREDIBLE they were! Ever since that Mother’s Day, I’ve thought about those scones frequently. And honestly, I have no good excuse as to why I haven’t remade them sooner?!

Though for this year’s cranberry orange scones, I added my Sam Does Her Best signature gluten-free and dairy-free twist. You know what it is. Not going to lie here either, I was pretty worried these just wouldn’t work sans gluten and dairy. But to my surprise, they definitely did. And not only did they work, but they taste even better than what I remember! So without further ado, I present to you gluten-free and dairy-free cranberry orange scones that will change your Mother’s Day game forever.

What You Need To Make Cranberry Orange Scones

Gluten-Free Flour – I use and recommend Bob’s Red Mill Gluten-Free 1:1 Baking Powder, it’s pretty much an exact dupe to regular all purpose flour. Though feel free to use any gluten-free flour you’d like, my only recommendation would be to make sure that it contains xantham gum. Xantham gum is a stabilizer and a key ingredient in holding your baked goods together.

Dairy-Free Butter – Make sure your butter is ice cold for this recipe! I’d even recommend dicing it into cubes and then sticking it in the freezer for 10 minutes or so. Cold butter is signature to any and all scones because when baked, it gives your scones that irresistible flaky texture.

Dairy-Free Milk – I used almond milk and had great results, but feel free to use whatever unsweetened dairy-free milk you’d like in these cranberry orange scones. You also want to make sure that the milk is cold, in order to ensure the butter in this recipe stays cold.

Tips and Tricks

  • Use a fork to combine the butter into the flour. When mixing, lightly mash the butter cubes with the back of the fork. You’re simply looking to break up the butter into the dry ingredients. You’ll know you’re done with this step when you have a crumbly mixture and your butter is the size of peas.
  • Lightly whisk the eggs before adding them into the cranberry orange scones dough. Crack them in a bowl and give them a quick whisk with a fork to break up the yolks before proceeding with the recipe.
  • Make sure your surface is well-floured before transferring the dough onto it. The dough will be quite sticky, but when introduced to flour on your work surface, will be much easier to handle! Continue sprinkling gluten-free flour on the surface, on your hands, or on the dough itself whenever it feels too sticky to work with.

Cranberry Orange Scones (Gluten-Free, Dairy-Free)

4 from 1 vote
Recipe by Samantha Russo Course: SnacksCuisine: ScottishDifficulty: Intermediate
Servings

8

scones
Prep time

10

minutes
Cooking time

20

minutes
Total time

30

minutes

These cranberry orange scones are perfectly flaky and sweet! I took a traditional recipe and turned it gluten and dairy-free with just a few simple swaps. These scones taste incredible with a warm cup of coffee for breakfast or lightly toasted as an afternoon snack.

Ingredients

  • 2 1/2 cups gluten-free flour

  • 1/4 cup almond flour

  • 1/4 cup sugar

  • 1 tablespoon baking powder

  • 1 tablespoon orange zest

  • 8 tablespoons cold dairy-free butter, cut into 1/4-inch cubes

  • 1 cup cold dairy-free milk

  • 2 large eggs, whisked

  • 1 cup dried cranberries

  • For the egg wash:
  • 1 egg, whisked

  • For the icing:
  • 1/2 cup powdered sugar

  • 3 teaspoons fresh orange juice

Directions

  • Preheat oven to 400° Fahrenheit.
  • Mix together the gluten-free flour, almond flour, sugar, baking powder, and orange zest in a large bowl.
  • Add in the cubed butter and mix with a fork until the butter is the size of peas, then fold in the cranberries.
  • Add in the cold milk and whisked eggs, mix until just combined.
  • Transfer dough to a floured sheet of parchment paper set on a work surface and gently press into a 1-inch thick circle.
  • Slice into six triangles and transfer to a baking sheet, then brush with egg wash and sprinkle with extra sugar.
  • Bake for 15-20 minutes or until golden brown, then remove from oven, gently separate scones, and transfer to a wire rack to cool.
  • Make the icing by whisking the powdered sugar and orange juice together in a small bowl, then drizzle over cooled scones.

Recipe Video

Notes

  • Ingredient Swaps: Feel free to use all purpose flour instead of gluten-free flour, and leave out the almond flour if you’d like. You can also swap regular butter for the dairy-free butter and cow’s milk for the dairy-free milk in this recipe.

Did you make this recipe?

Share it and tag @samdoesherbest on Instagram!

Like this recipe?

Follow us @samdoesherbest on Pinterest

More Delicious Gluten-Free and Dairy-Free Recipes

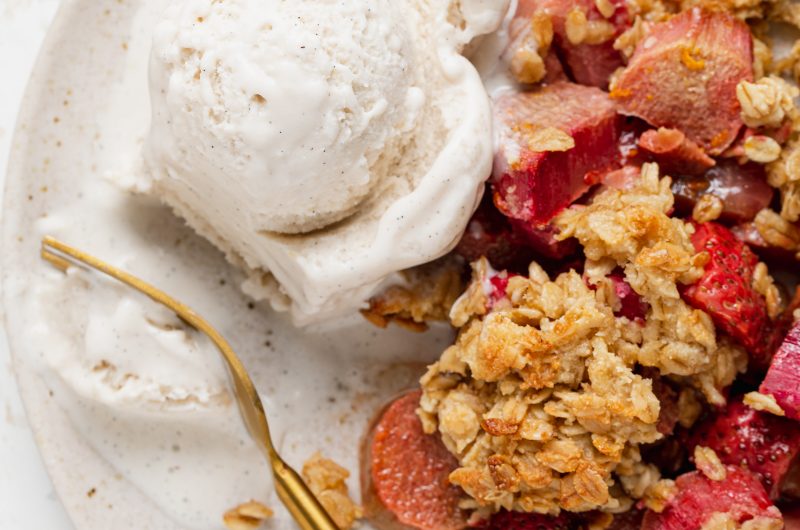
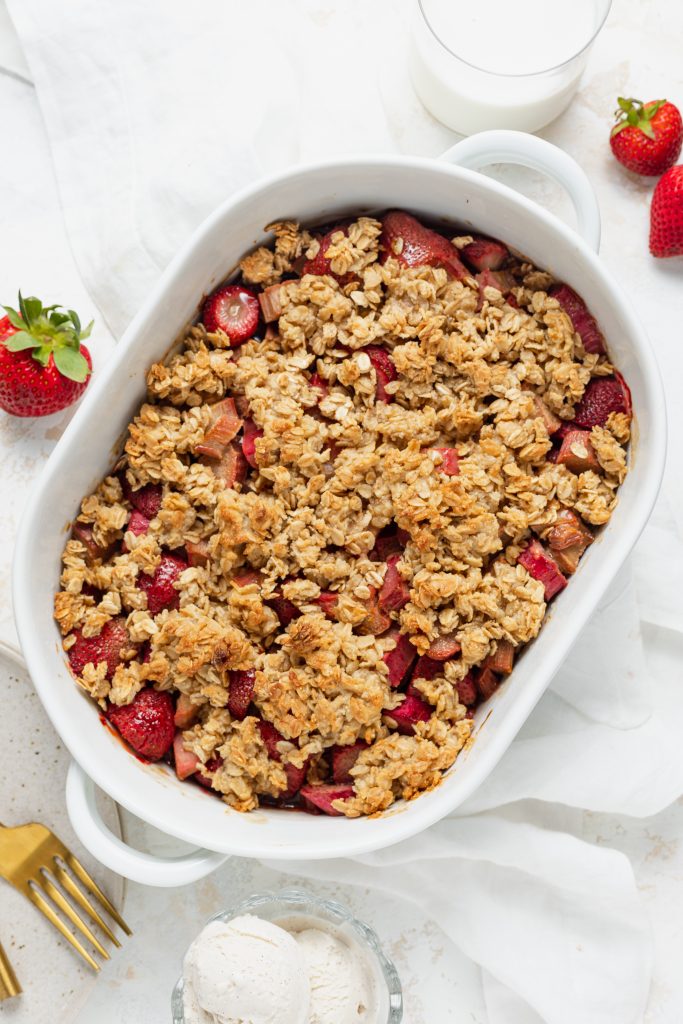
This strawberry rhubarb crisp is perfectly sweet, slightly tart, and finished off with a crumbly oat topping! This easy vegan, gluten-free, and refined sugar-free dessert is a total crowd-pleaser and is perfect for summer parties. Serve this strawberry rhubarb crisp warm with a scoop of vegan vanilla ice cream for a delicious, healthier dessert!

Strawberry Rhubarb crisp in a baking dish surrounded by fresh strawberries.

One of my mom’s signature desserts is a strawberry rhubarb pie. Now I was never much of a pie person (still am not), but I LOVED this particular pie. Aside from being totally freaking delicious, rhubarb is pretty intriguing. I just couldn’t get over how delightfully sour and tart it was. I’ve wanted to recreate my mom’s strawberry rhubarb pie for a while now, but to be completely honest, I just don’t have the energy these days to make a whole a** pie. And that’s where pie’s easygoing, more forgiving younger sister comes in – fruit crisp! This strawberry rhubarb crisp recipe couldn’t possibly get any simpler, but still houses all of the delicious flavors I remember from my childhood.

What You Need To Make Strawberry Rhubarb Crisp

Rhubarb – OK let’s chat about rhubarb for a second. I know rhubarb is known and loved in some parts of the world. Though in my part of the world, it’s barely ever talked about (which makes me sad, because it’s worthy of our attention). Therefore, if you’re not familiar with rhubarb it’s a tart-tasting fruit that kind of looks like a pinkish/red celery stalk. Rhubarb is always paired with some type of sweetener to balance out its extremely tart flavor. The result is this almost sour candy flavor that is just incredible!

Strawberries – Oh, happy strawberry season! Strawberries, unlike rhubarb, are an extremely common fruit and I think we all know what they taste like. And the key here is fresh strawberries, as they taste best. You have the option to either leave your strawberries whole or slice them in half.

Almond Flour – Almond flour replaces the all purpose flour in this recipe. Aside from aiding in making this crisp gluten-free, I especially love the nutty flavor this flour gives this crisp. If you don’t have almond flour, you can use almond meal instead. If you don’t have either of those, feel free to use all purpose flour instead!

Adjust This Recipe To Your Dietary Needs

  • Add dairy: If not vegan or dairy-free, use regular butter instead of dairy-free butter in this recipe.
  • Use different fruits: Feel free to use whatever berries you’d like in this recipe in place of both the strawberries and rhubarb. Whatever fruit you decide to use, just make sure it measured out to a total of 6 cups.

Strawberry Rhubarb Crisp (V/GF/RSF)

2 from 1 vote
Recipe by Samantha Russo Course: DessertCuisine: AmericanDifficulty: Easy
Servings

8

servings
Prep time

5

minutes
Cooking time

40

minutes
Total time

45

minutes

Ingredients

  • For the filling:
  • 3 cup rhubarb, chopped into 1-inch pieces

  • 3 cups strawberries, halved

  • 1/2 cup coconut sugar

  • 3 tablespoons cornstarch

  • 1 teaspoon vanilla extract

  • 1 1/2 teaspoons orange zest, optional

  • For the crisp:
  • 1 cup oats, see Notes

  • 1/2 cup almond flour, see Notes

  • pinch of salt

  • 1/4 cup dairy-free butter, see Notes

  • 1/4 cup maple syrup

Directions

  • Preheat oven to 350° Fahrenheit.
  • Add all filling ingredients to a bowl and toss to coat fruit, then transfer to a 9×13-inch baking dish.
  • Add all crisp ingredients to a bowl and mix together with a fork, then sprinkle over filling.
  • Bake for 35-40 minutes

Recipe Video

Notes

  • Almond Flour: You can use regular all-purpose flour instead of almond flour if you’d like.
  • Dairy-Free Butter: I used Earth Balance Vegan Buttery Sticks for this recipe, as they’re my favorite for baking. Though you should be able to get away with using any non-dairy butter you’d like. And if you’re not vegan or dairy-free, you can use regular butter instead!

Did you make this recipe?

Share it and tag @samdoesherbest on Instagram!

Like this recipe?

Follow us @samdoesherbest on Pinterest
More Easy Vegan and Gluten-Free Desserts

These hummingbird cupcakes are the perfect spring-time sweet treat! They taste incredibly decedent despite being grain, dairy, and refined sugar-free. These adorable cupcakes are chock-full of delicious crushed pineapple and shredded coconut. And in case you thought they couldn’t get any better, they’re also topped off with a dairy-free cream cheese frosting that is out-of-this-world good.

Hummingbird cupcake topped with pineapple and toasted coconut with a bite taken out.

It’s funny because I’m literally eating a hummingbird cupcake (and getting cream cheese frosting all over my keyboard) as I write this. I’m full-on addicted to the babies. They’re sweet, but not too sweet. Incredibly versatile – enjoy them as a snack, dessert, or heck you can even eat them for breakfast!

The first time I ever ate a hummingbird-anything was at this cute little muffin place by my parents house. My mom got me to try one of their hummingbird muffins and I’ve truly been hooked ever since. I then discovered hummingbird cake and was like – woahhhh, I didn’t know life could get EVEN better! And in case you’re like, Sam WTF is a hummingbird cupcake?! It’s similar to carrot cake, but has crushed pineapple and shredded coconut instead of carrots. It also features a cream cheese frosting, just like carrot cake. If you’re looking for a muffin instead of a cupcake, simply make these without the cream cheese frosting. My suggestion here is – take a plain cupcake, top it with a little crunchy almond butter, and enjoy it as a sweet afternoon snack!

What You Need To Make Hummingbird Cupcakes

Almond Flour – I chose almond flour as the base of these cupcakes for two reasons. One, it’s grain-free, making these cupcakes so light and healthy that you could literally eat them for breakfast if you wanted to. And two, it yields a soft, crumbly cupcake that doesn’t fall apart when bitten into, but also isn’t too dense.

Coconut Sugar – Just a 1/2 cup of coconut sugar is all you need in these cupcakes! This is what I mean by they’re sweet, but not too sweet. Coconut sugar is lower on the glycemic index than the usual white sugar. It also contains many more vitamins and minerals than most other sugars. If you don’t have coconut sugar, you can either use brown sugar, cane sugar, or white sugar instead.

Mashed Bananas – You won’t find a single hummingbird recipe without mashed bananas in it. In conjunction with the pineapple and coconut, a little banana is truly magnificent. It adds a touch of sweetness and incredible flavor. You can use 1 cup of apple sauce instead, if you’d like.

Crushed Pineapple – Like I said earlier, crushed pineapple is a main ingredient in these hummingbird cupcakes. I buy canned crushed pineapple and rinse out the liquid before using in this recipe. Though you can use finely chopped fresh pineapple instead.

Shredded Coconut – Similar to the crushed pineapple, these wouldn’t be hummingbird cupcakes without a little coconut. My one thing when baking with coconut is to make sure it is unsweetened. Our cupcakes are sweet enough, we don’t need the coconut adding to that.

Adjust This Recipe To Your Dietary Needs

  • Make it Paleo – Leave out the dairy-free cream cheese frosting and you’ll have yourself delicious little paleo hummingbird muffins!
  • Make it Vegan – Use your favorite egg-substitute in place of the eggs in this recipe. I have not tested this recipe using flax eggs, though I can image that it will yield less-fluffy but still tasty cupcakes.
  • Make it Sugar-Free – Leave out the frosting and sub 1/2 cup of your favorite sugar-free sweetener for the coconut sugar. You can also leave out the coconut sugar altogether, if you’d like!

Hummingbird Cupcakes (GF/DF)

4 from 3 votes
Recipe by Samantha Russo Course: DessertCuisine: AmericanDifficulty: Intermediate
Servings

12

cupcakes
Prep time

10

minutes
Cooking time

20

minutes
Total time

30

minutes

Ingredients

  • 2 Cups Almond Flour, see NOTES

  • 1/2 Cup Coconut Sugar

  • 1 Teaspoon Baking Soda

  • 1/2 Teaspoon Baking Powder

  • 1 Teaspoon Cinnamon

  • 2 Tablespoons Coconut Oil, melted, see NOTES

  • 1 Cup Mashed Banana, about 2 bananas

  • 2 Eggs, see NOTES

  • 1 Teaspoon Vanilla Extract

  • 1/2 Cup Crushed Pineapple, drained

  • 1/2 Cup Shredded Coconut, unsweetened

  • For the cream cheese frosting:
  • 1/2 Cup Dairy-Free Cream Cheese

  • 1/4 Cup Dairy-Free Butter, softened

  • 2 Cups Powdered Sugar

  • 1 Teaspoon Vanilla Extract

Directions

  • Preheat oven to 350° Fahrenheit and line a cupcake tin with 12 cupcake liners.Hummingbird Cupcakes Process Photo 1
  • In a large bowl, mix together the almond flour, coconut sugar, baking soda, baking powder, and cinnamon.Hummingbird Cupcakes Process Photo 2
  • In a small bowl, mix together the coconut oil, mashed bananas, eggs, and vanilla extract.Hummingbird Cupcakes Process Photo 3
  • Add the wet ingredients, crushed pineapple, and shredded coconut into the dry ingredients and mix to combine.Hummingbird Cupcakes Process Photo 4
  • Fill each cupcake liner with 1/4 cup of batter and bake for 20-25 minutes or until a toothpick inserted into a cupcake comes out clean.Hummingbird Cupcakes Process Photo 5
  • Transfer cupcakes to a wire cooling rack to cool completely before frosting.DSC_0118Hummingbird Cupcakes Process Photo 6
  • Make the frosting by adding all ingredients to a bowl and beating with either a hand or stand mixer until combined. Dollop frosting onto cooled cupcakes and enjoy!DSC_0118Hummingbird Cupcakes Process Photo 7

Notes

  • Almond Flour: Be sure to use almond flour, not almond meal.
  • Coconut Oil: You can use 2 tablespoons of vegetable oil or melted butter instead.
  • Eggs: I like to remove my eggs from the fridge a couple hours before baking. If your eggs are too cold when added to the batter, they might cause your coconut oil to re-harden.

Did you make this recipe?

Share it and tag @samdoesherbest on Instagram!

Like this recipe?

Follow us @samdoesherbest on Pinterest

More Healthier Dessert Recipes You’ll Love

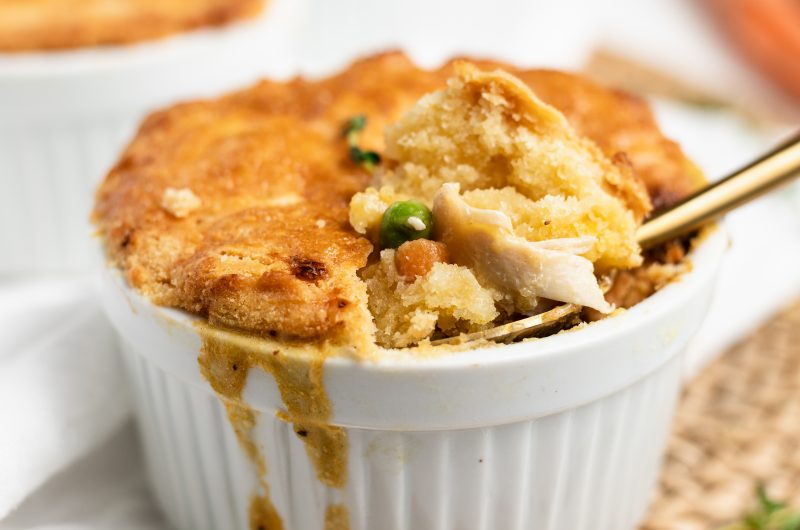
These paleo chicken pot pies are equal parts delicious and adorable! Extremely cozy, rich, and satisfying – this recipe will quickly become one of your favorites. These individual paleo chicken pot pies contain all of the flavor of traditional chicken pot pie, but are much lighter and healthier.

Overhead shot of three mini paleo chicken pot pies with a scoop taken out.

I was super worried about this recipe. It seemed like a bit of a stretch and I just wasn’t too confident that it would work. You guys, not only did it work, but it turned out INCREDIBLE! These paleo chicken pot pies quickly moved to my #1 favorite recipes I’ve ever made, knocking my healthy hot chocolate out of its spot. The crust on these pies is incredibly buttery, without actually containing any butter. The filling is super rich and creamy, without actually containing any cream. I honestly just can’t believe the sorcery of these paleo chicken pot pies! I had heard that miracles exist, but didn’t truly believe it until now.

What You Need To Make Paleo Chicken Pot Pies

Almond Flour – Almond flour creates the base of this paleo chicken pot pie crust. If you don’t already have almond flour and plan on doing more paleo baking, I definitely recommend you buy some. Though be sure to use almond flour, and not almond meal.

Palm Oil Shortening – This is the paleo equivalent to vegetable shortening. Therefore, if you’re not paleo you can use vegetable shortening instead. In my experience, shortening makes the BEST pie crusts – better than butter. Though if you’d like, you can use cold butter instead of shortening.

Arrowroot Starch – This is the paleo equivalent of corn starch! Since we don’t use heavy cream in this recipe, we rely on a thickener, such as arrowroot starch, to thicken up the filling. If you’re not paleo, you can use corn starch instead.

Coconut Milk – I promise your pot pies won’t taste like coconut! This is another ingredient that will help thicken the filling. Coconut milk also makes these paleo chicken pot pies taste super rich and comforting.

Adjust This Recipe To Your Dietary Needs

  • Add Dairy: Use 1/3 cup cold unsalted butter instead of palm shortening and 1/2 cup of whole milk instead of coconut milk.
  • Make it Vegetarian: Use vegetable broth instead of chicken broth and about 8 ounces of white button mushrooms in place of the chicken in this recipe. If using mushrooms, chop and then add them in with the vegetables in step 5.

Paleo Chicken Pot Pies

0 from 0 votes
Recipe by Samantha Russo Course: MainCuisine: AmericanDifficulty: Intermediate
Servings

4

servings
Prep time

10

minutes
Cooking time

30

minutes
Total time

40

minutes

These paleo chicken pot pies are equal parts delicious and adorable! Extremely cozy, rich, and satisfying – this recipe will quickly become one of your favorites. These individual paleo chicken pot pies contain all of the flavor of traditional chicken pot pie, but are much lighter and healthier.

Ingredients

  • For the pie crust:
  • 1 Cup Almond Flour

  • 1/2 Cup Tapioca Starch

  • 1/4 Teaspoon Baking Powder

  • 1 Teaspoon Salt

  • 1/3 Cup Palm Shortening, see Notes

  • 1 Egg

  • Cold Water, as needed

  • For the filling:
  • 1 Tablespoon Olive oil

  • 1/2 Yellow Onion, chopped

  • 3 Garlic Cloves, minced

  • 1/2 Cup Carrots, chopped

  • 1/2 Cup Celery, chopped

  • 1 Teaspoon Fresh Thyme, see Notes

  • 1 Teaspoon Salt

  • 1/2 Teaspoon Black Pepper

  • 2 Tablespoons Arrowroot Starch, see Notes

  • 1 Cup Chicken Broth

  • 1/2 Cup Full-Fat Coconut Milk, unsweetened

  • 2 Cups Cooked Chicken, cubed

  • 1/2 Cup Peas (fresh or frozen)

  • For the egg wash:
  • 1 Egg, whisked

Directions

  • Preheat your oven to 400° Fahrenheit.
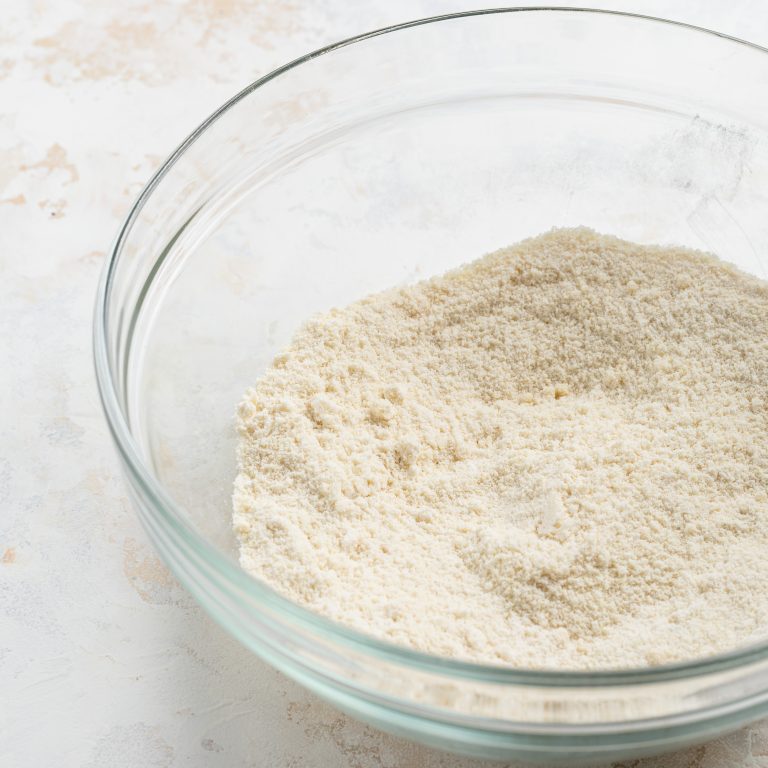
  • Mix together the almond flour, tapioca starch, baking powder, and salt in a bowl.Paleo-Pot-Pie-Process-Photo-Low-Res-01
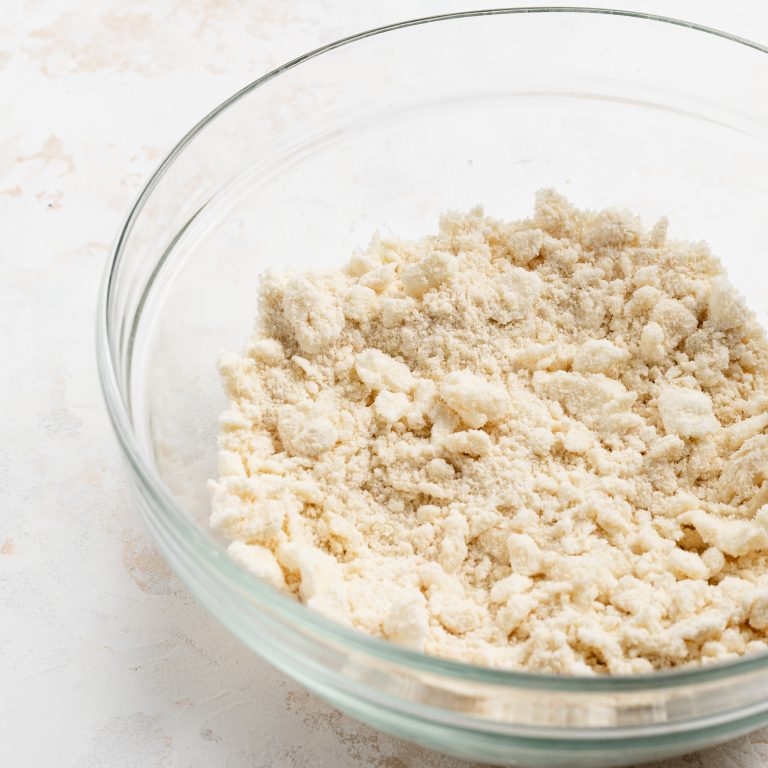
  • Add palm shortening and gently break apart with a fork until mixture is crumbly.Paleo-Pot-Pie-Process-Photo-Low-Res-02
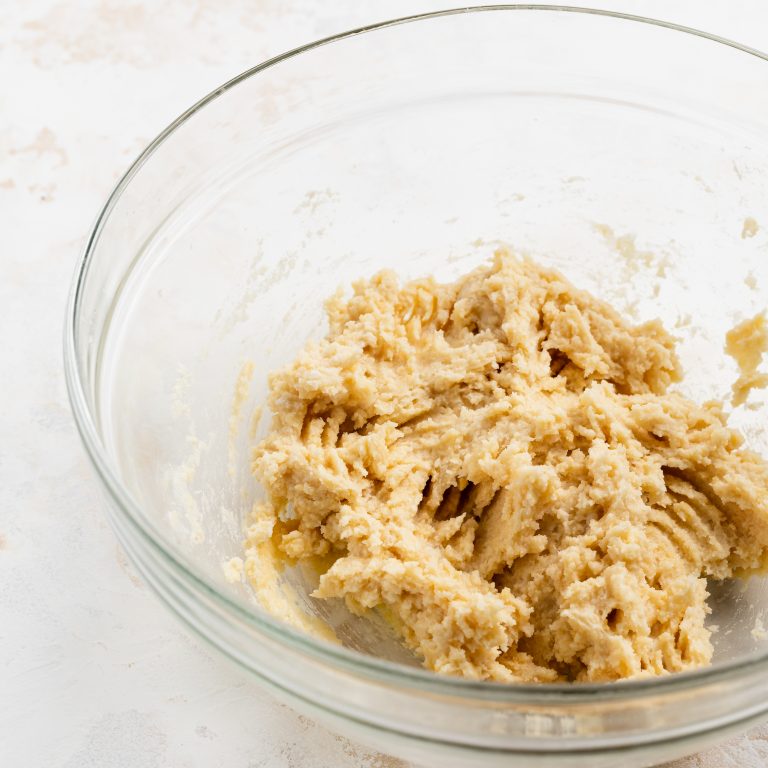
  • Fold in the egg and gently mix until a dough forms. If mixture is too dry, add 1 tablespoon of cold water at a time until it forms into a ball. Paleo-Pot-Pie-Process-Photo-Low-Res-03
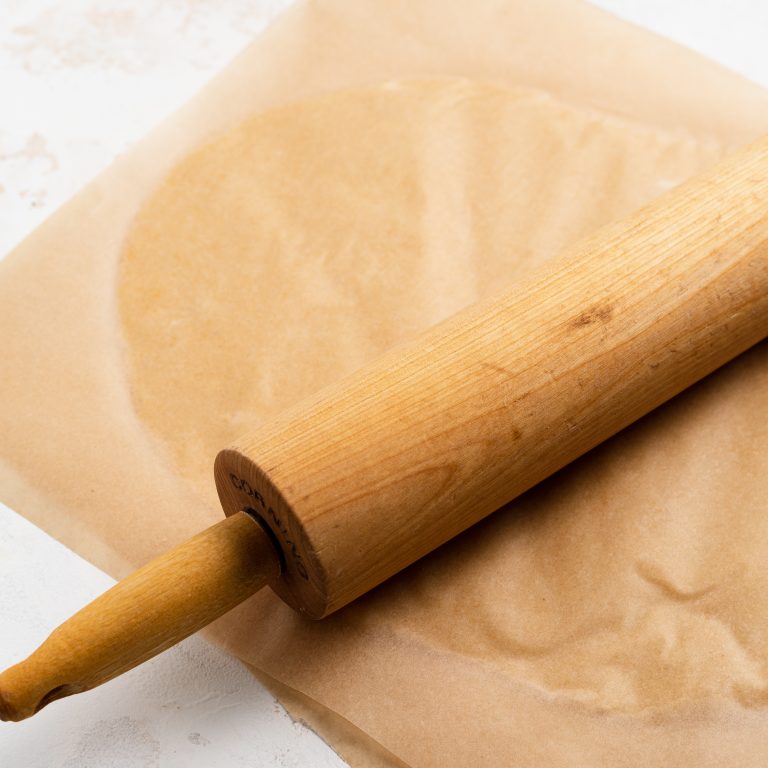
  • Roll dough between two sheets of parchment paper to about 1/4-inch thick, then place in the freezer.Paleo-Pot-Pie-Process-Photo-Low-Res-04
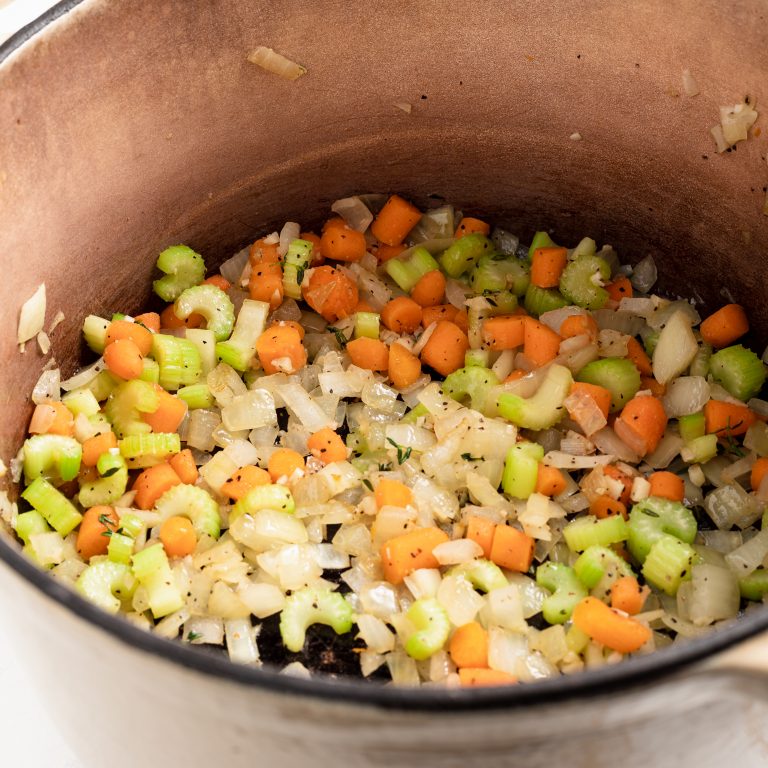
  • Heat the olive oil in a large pot or skillet over medium heat. Add the onion, garlic, carrots, celery, thyme, salt, and black pepper. Cook for 5-7 minutes or until vegetables are just barely tender.Paleo-Pot-Pie-Process-Photo-Low-Res-05
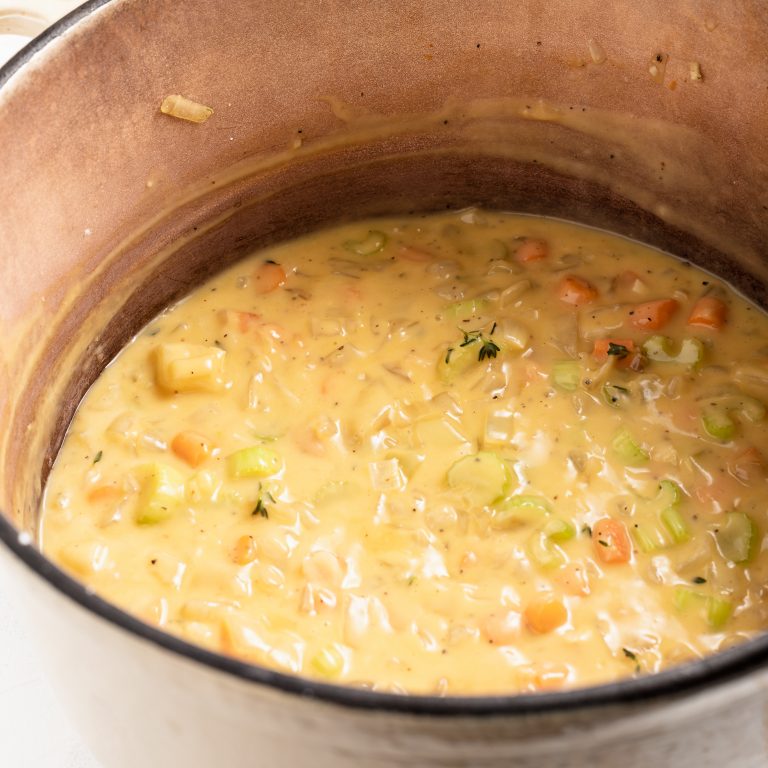
  • Add in arrowroot starch and cook for 1 minute before adding in the chicken broth and coconut milk. Simmer for 3-4 minutes or until sauce starts to thicken.Paleo-Pot-Pie-Process-Photo-Low-Res-06
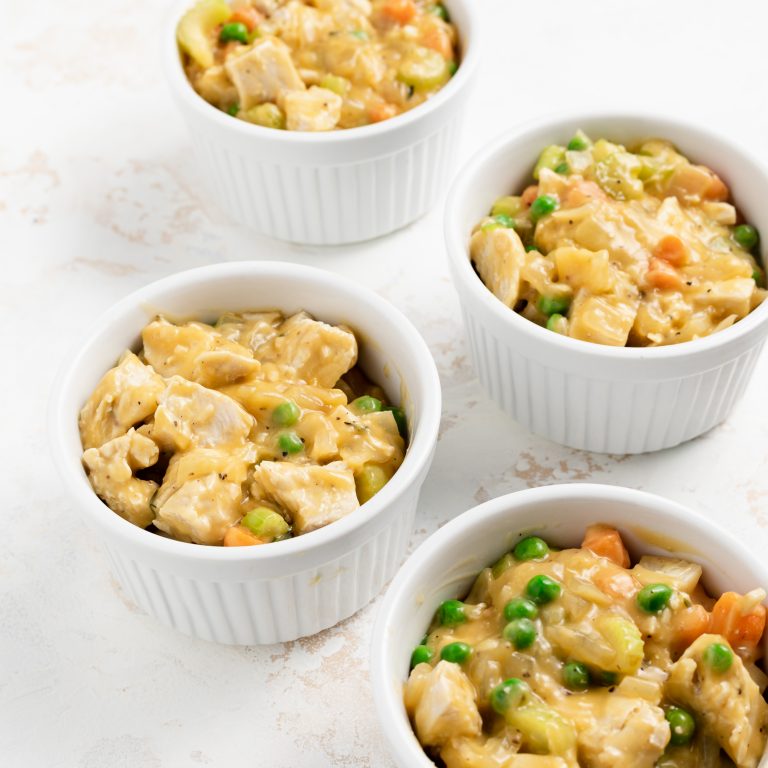
  • Add in the cooked chicken and frozen peas, mix to combine. Transfer filling to 4 ramekins.Paleo-Pot-Pie-Process-Photo-Low-Res-08
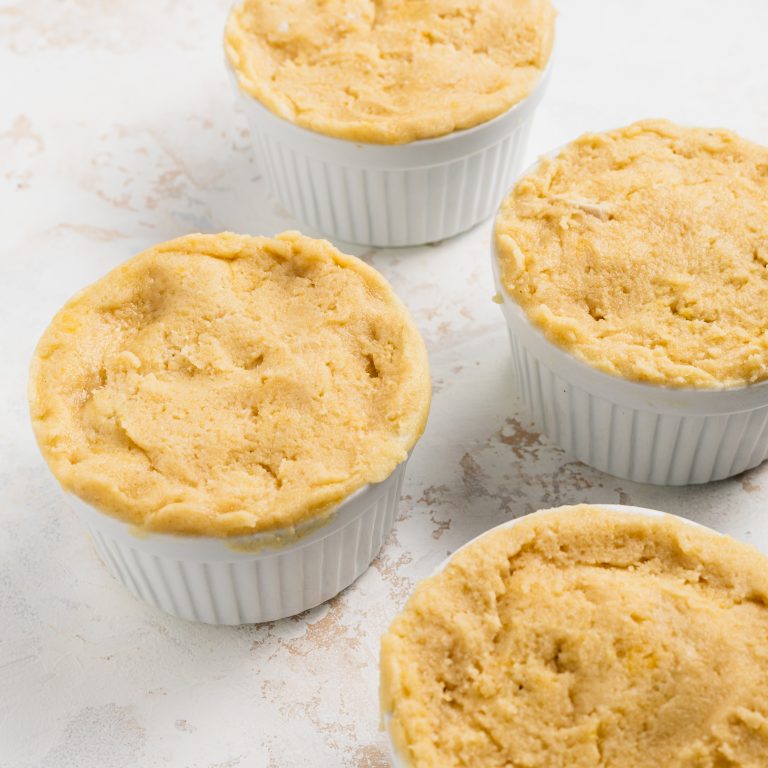
  • Remove pie crust from freezer and remove one side of parchment paper. Carefully cut into circles large enough to cover each ramekin. Gently transfer each circle to each ramekin, patching the dough as needed.Paleo-Pot-Pie-Process-Photo-Low-Res-09
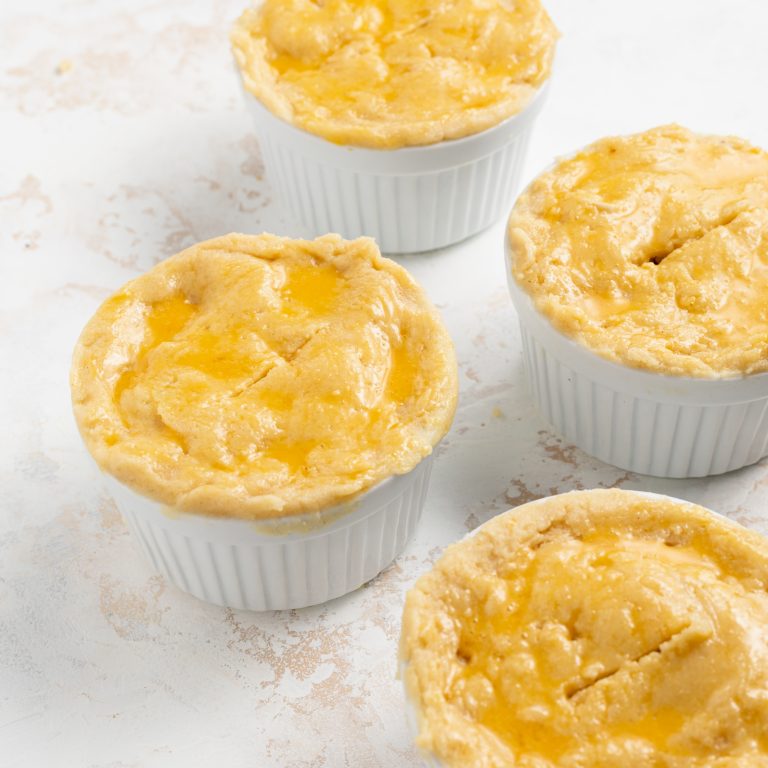
  • Brush each pot pie with egg wash and cut a 2-inch slit in the center of the crust.Paleo-Pot-Pie-Process-Photo-Low-Res-10
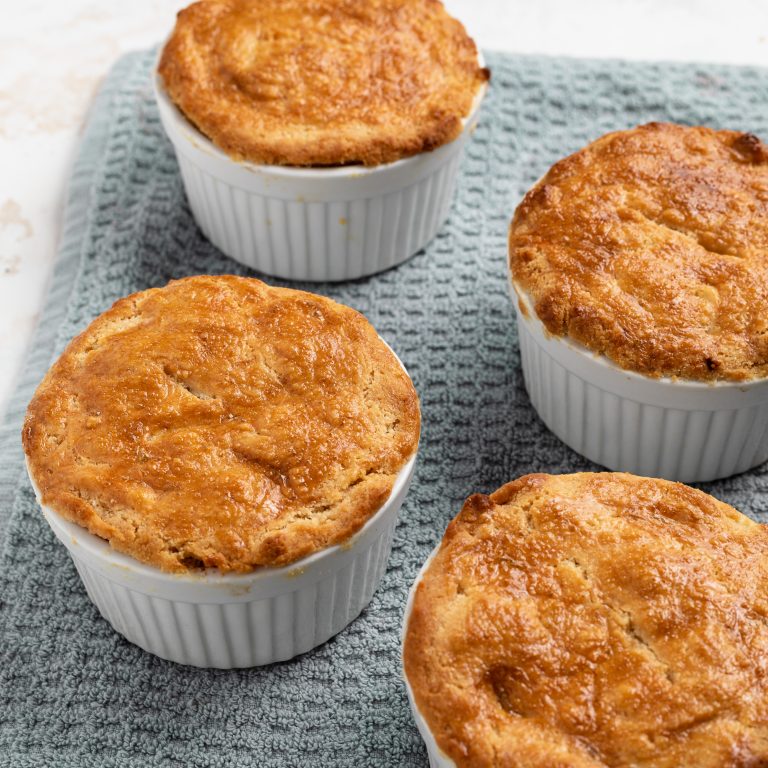
  • Place on a baking tray and bake for 20 minutes or until golden brown. Remove from oven and let cool slightly before serving.Paleo-Pot-Pie-Process-Photo-Low-Res-11

Notes

  • Palm Shortening: You can use vegetable shortening or cold unsalted butter in place of the palm shortening in this recipe.
  • Fresh Thyme: If you can’t get your hands on any fresh thyme, use 1 teaspoon of dried thyme instead.
  • Arrowroot Starch: You can use corn starch instead or arrowroot starch in this recipe.

Did you make this recipe?

Share it and tag @samdoesherbest on Instagram!

Like this recipe?

Follow us @samdoesherbest on Pinterest
More Incredible Paleo Recipes