Tag

coconut oil

Browsing

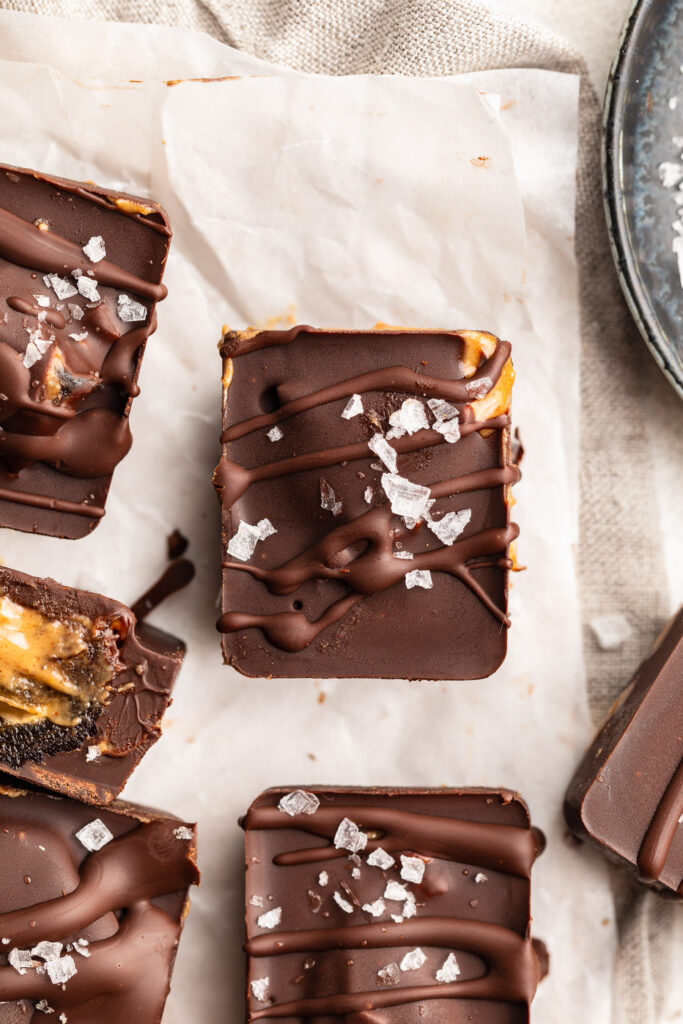
This healthy homemade butterfingers recipe is made with just 5 simple ingredients! They’re gluten-free, dairy-free, and naturally sweetened for a better-for-your treat. They join my healthy candy lineup, right alongside healthy snickers, 3 ingredient homemade crunch bars, and healthy date caramels. These homemade butterfingers are perfect for anyone looking for a healthier version of a favorite candy bar!

healthy homemade butterfingers on parchment paper.

Why You’ll Love This Recipe

These healthy homemade butterfingers are a delicious and satisfying treat with just 5 simple ingredients. They’re a guilt-free version of the classic candy bar, made gluten-free, dairy-free, and with natural sweeteners like honey or maple syrup. Plus, they’re easy to make and perfect for storing in the freezer for a quick snack or dessert.

What You Need to Make Healthy Butterfingers

  • Peanut Butter: The rich, creamy base that gives these bars their signature nutty flavor. Choose a natural variety with no added sugar for a healthier option.
  • Honey or Maple Syrup: These natural sweeteners bring the perfect touch of sweetness while keeping the recipe refined-sugar free.
  • Corn Flakes: Adds the necessary crunch to replicate the crispy texture found in classic butterfingers. Make sure to choose gluten-free corn flakes if needed. The Real Cereal Organic Corn Flakes are the best ones I’ve found, they’re unsweetened and made with just 2 ingredients!
  • Chocolate Chips: Melting the chocolate for coating gives that irresistible outer layer, while dark chocolate keeps the sugar content lower.
  • Coconut Oil: Helps melt the chocolate smoothly and adds a subtle flavor boost. I use and love Nutiva Organic Coconut Oil in many of my recipes!

How to Make Healthy Homemade Butterfingers

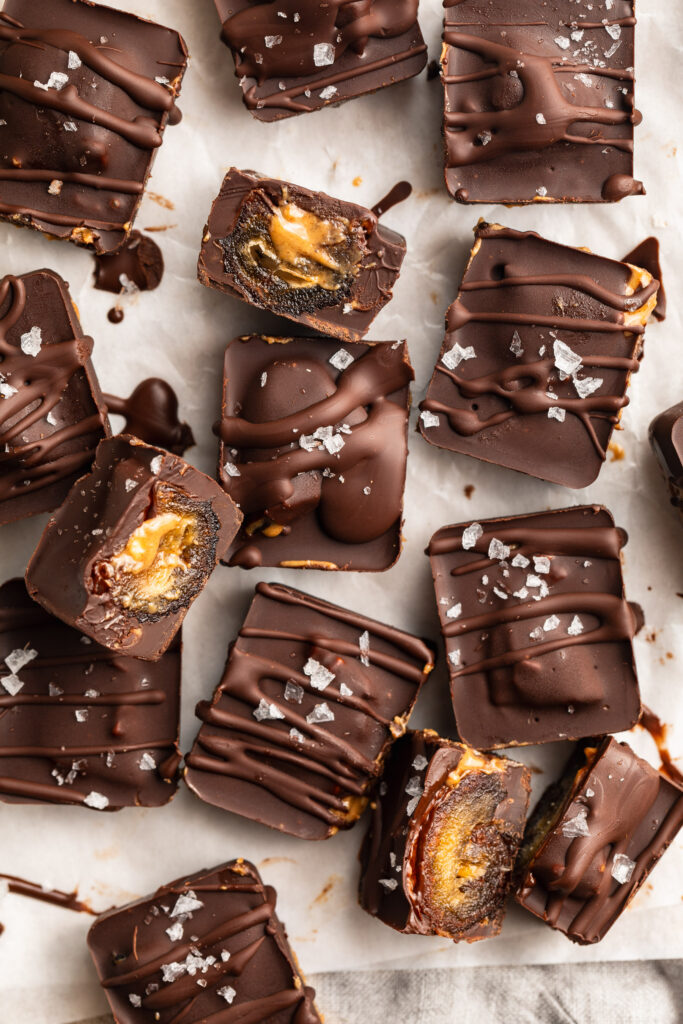
Start by crushing the corn flakes and mixing them with peanut butter and honey to form a crispy, sweet mixture. Press it into a loaf pan to set in the freezer before dipping each bar in melted chocolate. Freeze them again for a crunchy, chocolate-covered treat that’s perfect for a healthier snack or dessert.

healthy homemade butterfingers stacked on top of each other,

Storage Tips

Once made, store your homemade butterfingers in an airtight container in the freezer for up to 3 months. This way, they’ll stay fresh and ready for whenever you need a sweet treat.

Adjust This Recipe to Your Dietary Needs

  • Make it Vegan: Swap the honey for maple syrup and use dairy-free chocolate chips.
  • Low Carb: Choose a sugar-free chocolate alternative and use a low-carb cereal.
  • Make it Nut-Free: Substitute the peanut butter with sunflower seed butter for a nut-free version.
close up image of healthy butterfingers cut in half.
No ratings yet

Healthy Homemade Butterfingers

This healthy homemade butterfingers recipe is made with just 5 simple ingredients. They're gluten-free, dairy-free, and naturally sweetened for a better-for-your treat. These homemade butterfingers are perfect for anyone looking for a healthier version of a favorite candy bar!
Print Pin Rate
Prep Time: 5 minutes
Freezing Time: 1 hour
Total Time: 1 hour 5 minutes
Servings: 12 servings

Equipment

  • 1 large bowl
  • 1 9×4-inch loaf pan
  • 1 small bowl

Ingredients

  • 1 cup peanut butter
  • 1/3 cup maple syrup or honey
  • 2 cups corn flakes
  • 1 cup chocolate chips
  • 2 teaspoons coconut oil

Instructions

  • Add the corn flakes to a large zip-top bag, seal the bag and crush the cereal into small pieces.
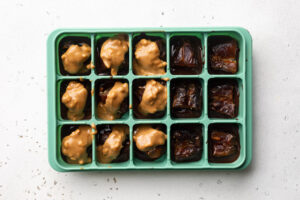
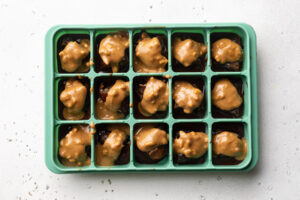
  • Add the peanut butter and honey or maple syrup to a large bowl and mix together to combine. Add the crushed corn flakes to the bowl and mix again to fully combine.
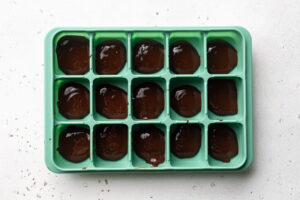
  • Transfer the mixture to a loaf pan lined with parchment paper, and press the cereal down into the pan to create an even layer. Place in the freezer to harden for at least 1 hour.
  • Remove the pan from the freezer and carefully lift the corn flake mixture out of the pan. Place on a cutting board and cut into 12 bars.
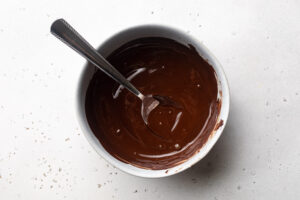
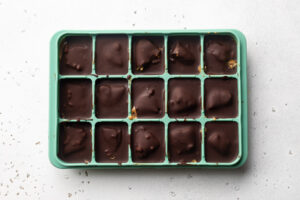
  • Melt the chocolate chips and coconut oil together, whisk to combine, and then dip each bar into the melted chocolate to completely coat. Remove the bar from the chocolate and set on a parchment-lined plate. Repeat this process with all 12 butterfingers until all are coated in chocolate.
  • Transfer the butterfingers to the freezer for about 10 minutes, or until the chocolate has hardened. Then, enjoy right away or store in an airtight container in the freezer for up to 3 months (if they last that long!).

Nutrition

Serving: 1serving | Calories: 241kcal | Carbohydrates: 22g | Protein: 6g | Fat: 15g | Sugar: 12g

Since my last cookie dough bark recipe went viral, I’m back with a protein version! This protein cookie dough bark is just as delicious, but with an additional 8 grams of protein per serving. I love making a batch at the beginning of the week to snack on all week long. But if you’re in need of a sweet treat with even more protein, give my single serve protein cookie a try (with 30 grams of protein). What can I say? I just really love a high-protein, gluten free, and low sugar snack!

protein cookie dough bark pieces stacked on top of each other.

What You’ll Need to Make This Recipe

  • Almond Flour: Acts as a gluten-free and low-carb base. I buy almond flour in bulk on Amazon, since I use it in so many of my healthy gluten-free recipes!
  • Vanilla Protein Powder: Boosts the protein content, making this a nutritious snack option. I used the Be Well By Kelly Vanilla Protein Powder, but your favorite vanilla or unflavored protein powder will work. Or, feel free to swap out the protein powder for unflavored collaged – I like this brand!
  • Coconut Oil: Helps bind the dough while adding healthy fats. If you don’t have coconut oil, you can use melted butter in its place.
  • Maple Syrup: Provides natural sweetness, complementing the protein powder and chocolate chips!
  • Chocolate Chips: Adds sweetness and richness—both mixed into the dough and melted on top for the bark. I use and love the Guittard Dairy-Free Extra Dark Chocolate Chips in all of my recipes!

Is This Cookie Dough Bark Safe to Eat?

Yes! Since it’s made without raw eggs or raw flour, this cookie dough bark is safe to eat right out of the freezer. The protein powder and almond flour create a safe, edible base.

Storage Tips

Keep the bark in an airtight container in the freezer. It stays fresh for up to two months… but there’s no way it’ll last that long! To enjoy, let it thaw for a minute or two at room temperature before serving.

protein cookie dough bark on a baking sheet.

Switch Up The Flavors of This Protein Cookie Dough Bark

Get creative by changing the flavor combinations:

  • Swap out the vanilla protein powder for chocolate or peanut butter protein.
  • Add chopped nuts, seeds, or dried fruit to the mixture for extra texture and nutrients.
  • Drizzle peanut butter or caramel over the bark before freezing.

Adjust This Recipe to Your Dietary Needs

  • Make it Vegan: Use a plant-based protein powder and dairy-free chocolate chips.
  • Make it Low Carb: Replace maple syrup with a sugar-free sweetener like monk fruit syrup, and opt for sugar-free chocolate chips.
  • Make it Nut-Free: Swap the almond flour for coconut flour to make this a nut-free cookie dough bark recipe.

Why You’ll Love This Recipe

This recipe is perfect for anyone looking for a high-protein, low-sugar, gluten-free treat. It’s made with just 5 simple ingredients and can easily be adjusted to meet various dietary needs. Plus, it’s a fun way to enjoy cookie dough in a healthier, grab-and-go type form!

a piece of protein cookie dough bark with flaky salt on top.
5 from 4 votes

Protein Cookie Dough Bark

This 5-ingredient protein cookie dough bark recipe is a quick and healthy snack that’s gluten-free and high in protein! It's easy to customize with different flavors and can easily be made vegan or low-carb. Store this protein cookie dough bark in the freezer for a quick, guilt-free snack anytime!
Print Pin Rate
Prep Time: 5 minutes
Freezing Time: 1 hour
Total Time: 1 hour 5 minutes
Servings: 8 servings

Ingredients

  • 1 cup almond flour
  • 1/2 cup vanilla or unflavored protein powder
  • 1/4 cup coconut oil, melted
  • 1/4 cup maple syrup or your favorite liquid sweetener
  • 1 1/2 cups chocolate chips, divided

Instructions

  • Mix together the almond flour, protein powder, coconut oil, and maple syrup in a bowl. Add in ½ cup of chocolate chips and mix again to combine.
  •  Line a small baking sheet or large plate with parchment paper, then place the cookie dough mixture on top of the parchment paper. Spread and flatten the mixture with your hands to form a large piece of cookie dough bark.
  • Melt the remaining 1 cup of chocolate chips, then pour the melted chocolate over the cookie dough bark. Spread the chocolate into an even layer, then place the bark in the freezer for at least one hour.
  • When ready to eat, remove the protein cookie dough bark from the freezer and either cut or break into large pieces. Enjoy right away and store leftover bark in the freezer for later!

Nutrition

Serving: 1piece | Calories: 357kcal | Carbohydrates: 32g | Protein: 8g | Fat: 23g

I LOVE dates. I almost always have a bag on-hand. They’re perfect for stuffing with peanut butter, like in my 4-ingredient healthy snickers, or blending with oats to make healthy cookie dough date bites. Or… if you’re like my husband, dates are delicious all on their own!

Dates are the main ingredient in these 4 ingredient date caramels. They’re softened with a little hot water, then blended with almond butter and coconut oil to make a lusciousssss healthy date caramel. And because everything tastes better dipped in chocolate (ok ok, MOST things taste better dipped in chocolate), each date caramel is dunked in melted chocolate, then placed in the freezer until firm. The end result is a perfectly sweet and healthier chocolate-covered caramel candy. YUM!

overhead image of date caramels lined up with flaky sea salt on top.

What You’ll Need to Make This Recipe

  • Medjool Dates: The star ingredient! Medjool dates are naturally sweet and sticky, making them the perfect base for these caramels. If your dates are a bit dry, soaking them in hot water helps soften them up for easy blending. Here’s a link to the medjool dates I purchase on Amazon!
  • Creamy Almond Butter: Adds creaminess and a subtle nutty flavor to the caramels. You can substitute with any nut or seed butter like peanut butter or sunflower seed butter to make the recipe nut-free.
  • Coconut Oil: This helps bind the ingredients together and adds a touch of richness. Use refined coconut oil to avoid any coconut flavor, especially if you want the dates’ natural sweetness to shine through.
  • Chocolate Chips or Bar: Choose a high-quality dark chocolate for a rich coating. If you’re keeping this treat refined sugar-free, look for a chocolate that’s sweetened with coconut sugar or another natural sweetener. The coconut oil added to the chocolate helps it melt smoothly and gives the caramels a beautiful glossy finish.

How to Make Date Caramels

  1. Soak the Dates: Start by soaking the dates in hot water for about 10 minutes to soften them, making them easier to blend.
  2. Blend: After soaking, drain the dates and add them to a food processor along with the almond butter and melted coconut oil. Blend until smooth and creamy.
  3. Shape & Freeze: Spread the date mixture into a parchment-lined loaf pan and freeze for 2-3 hours until firm.
  4. Cut into Squares: Once firm, remove from the freezer and cut into 12 small squares.
  5. Dip in Chocolate: Melt the chocolate with a bit of coconut oil, then dip each caramel square into the chocolate until fully coated. Place the coated caramels on a parchment-lined plate and refrigerate until the chocolate is set.
close up image of a date caramel candy with a bite taken out.

Make Them Nut-Free

If you’re catering to a nut-free crowd, simply swap out the almond butter for sunflower seed butter. The consistency and flavor are just as delicious, making this treat accessible for those with nut allergies!

Tips and Tricks

  • Use Fresh Dates: Fresh, soft dates blend more easily and give you a smoother caramel. If your dates are dry, don’t skip the soaking step.
  • Don’t Overheat the Chocolate: When melting the chocolate, keep the heat low to prevent burning. A double boiler works well, or microwave in short intervals, stirring in between.
  • Storage: These caramels keep best in the fridge or freezer, so you can always have a batch on hand for when the craving hits. They taste great straight from the freezer too!

These caramels are a healthier take on the classic candy, with no need for a candy thermometer or complicated techniques. Perfect for sharing—or keeping all to yourself!

date caramels on a plate with flaky sea salt on top.
4.50 from 6 votes

4 Ingredient Date Caramels

If you’re looking for a vegan, gluten-free, and refined sugar-free treat that’s perfect for gifting or snacking, these 4-ingredient date caramels are your answer! They’re rich, chewy, and coated in decadent chocolate—ideal for satisfying your sweet tooth while sticking to your dietary needs. Plus, they’re easy to make and great for parties!
Print Pin Rate

Ingredients

For the date caramel:

  • 1 cup packed medjool dates, pitted
  • 2 tablespoons creamy almond butter, or any nut/seed butter
  • 1 tablespoon coconut oil, melted

For the chocolate coating:

  • 1 cup chocolate chips, or an 8-ounce chocolate bar
  • 2 teaspoons coconut oil, melted

Instructions

  • Soak the dates in a bowl of very hot water for 10 minutes.
  • Once dates are very soft, drain them from the water and transfer the soaked dates to a food processor or high-speed blender. Add the almond butter and coconut oil to the dates, and pulse until completely smooth.
  • Transfer the date caramel to a 9×5-inch loaf pan lined with parchment paper, then place the pan in the freezer for 2-3 hours, or until date caramel is firm to the touch.
  • Remove the loaf pan from the freezer, and lift the date caramel out of the pan. Place the date caramel on a cutting board and slice into 12 small squares.
  • Melt the chocolate chips and 2 teaspoons coconut oil in a heat-safe bowl in either the microwave or over a double boiler on the stove. Once chocolate is completely smooth and melted, dip each caramel square in the chocolate to fully coat. Carefully lift the caramel out of the chocolate and transfer to a parchment-lined plate.
  • Repeat the dipping process with all caramels, then transfer to the fridge for 1 hour or until chocolate has hardened and is completely set. Once set, enjoy your chocolate covered date caramels, or keep stored in the fridge to enjoy later on!

Notes

  • These date caramels are best stored in the fridge or freezer! If left at room temperature, the chocolate will melt.
  • I’m here to give the people what they want, and it’s become very clear that the people want MORE COOKIE DOUGH! So here we go, vegan, gluten-free, no-bake chocolate chip cookie dough bark. I basically took my gluten-free edible cookie dough recipe and combined it with my no-bake healthy cookie cough bars to create this delicious sweet treat!

    This cookie dough bark is an indulgent yet healthier dessert that combines the classic taste of cookie dough with the ease of a no-bake treat. And like I said before, it’s gluten-free, vegan, low-carb, and low in sugar, making it perfect for anyone looking to satisfy their sweet tooth without compromising on dietary needs. Plus, it only requires four simple ingredients and a few minutes of preparation time, setting in the freezer instead of the oven!

    close-up image of 4 ingredient healthy cookie dough bark.

    What You’ll Need to Make This Recipe

    Almond Flour: Almond flour is a gluten-free, grain-free alternative to traditional flour. It adds a slightly nutty flavor and provides a sturdy base for the cookie dough, making it perfect for creating a delicious bark. I buy this bulk bag of almond flour on Amazon, it’s a pantry staple in my home!

    Melted Coconut Oil: Coconut oil acts as the binding agent and helps the ingredients meld together. It also keeps the cookie dough bark vegan and dairy-free. However, if you don’t have coconut oil, you can use melted butter instead (do not use vegetable oil!)

    Maple Syrup: Maple syrup is a natural sweetener that adds a rich, caramel-like flavor to the cookie dough. It’s a healthier alternative to refined sugar and blends seamlessly with the other ingredients.

    Chocolate Chips: Using dark chocolate chips keeps the sugar content low and ensures the bark remains vegan. The melted chocolate forms the layers that sandwich the cookie dough, creating a delightful crunch with each bite.

    Is This Cookie Dough Bark Safe to Eat?

    Yes, this cookie dough bark is safe to eat. The recipe uses almond flour instead of raw flour, eliminating the risk of contamination. Additionally, it’s egg-free, which means there’s no risk of salmonella from raw eggs. This makes it a worry-free indulgence for cookie dough lovers!

    Storage Tips

    Store the cookie dough bark in an airtight container in the freezer for up to three months.

    4 ingredient cookie dough bark on a baking sheet with milk on the side.

    Switch Up the Flavors of This Cookie Dough Bark

    Personalize your cookie dough bark by adding various mix-ins. You can stir in some chopped nuts, coconut flakes, or sprinkles for added texture and flavor. For a fun twist, sprinkle some crushed pretzels or M&M’s on top of the melted chocolate before it sets. If you prefer a different flavor profile, try adding a spoonful of peanut butter or a dash of cinnamon to the cookie dough mix.

    Adjust This Recipe to Your Dietary Needs

    • Vegan: Uses plant-based ingredients like coconut oil and almond flour.
    • Gluten-Free: Almond flour replaces traditional wheat flour.
    • Low-Carb: Almond flour and dark chocolate keep the carb content low.
    • Low Sugar: Naturally sweetened with maple syrup and uses dark chocolate chips.
    4 ingredient gluten free cookie dough bark piece with sea salt on top.
    3.81 from 216 votes

    4 Ingredient Cookie Dough Bark

    This 4 ingredient cookie dough bark is the ultimate no-bake sweet treat! It’s gluten-free, vegan, low sugar, and totally delicious.
    Print Pin Rate
    Prep Time: 5 minutes
    Cook Time: 1 hour
    Total Time: 1 hour 5 minutes
    Servings: 6 servings

    Ingredients

    • 1 cup almond flour
    • 2 tablespoons melted coconut oil
    • 1/4 cup maple syrup
    • 1 cup chocolate chips, divided

    Instructions

    • Mix together the almond flour, coconut oil, and maple syrup in a bowl. Add in 1/4 cup of chocolate chips and mix again to combine.
    • Line a small baking sheet or large plate with parchment paper, then place the cookie dough mixture on top of the parchment paper. Spread and flatten the mixture with your hands to form a large piece of cookie dough bark.
    • Melt the remaining 3/4 cups of chocolate chips, then pour the melted chocolate over the cookie dough bark. Spread the chocolate into an even layer, then place the bark in the freezer for at least one hour.
    • When ready to eat, remove the cookie dough bark from the freezer and either cut or break into large pieces. Enjoy right away and store leftover bark in the freezer for later!

    Think snickers can’t be healthy?? Think again! I’ve pretty much made it my life’s work to take unhealthy treats and make them healthy. Like my healthy gluten-free mug cake, and my healthy cookie dough bars (another no-bake dessert in constant rotation around here!). These 4-ingredient healthy snickers fit seamlessly into my healthier treats lineup. My recent nighttime routine has included getting my baby to bed, popping 3 or 4 of these healthy snickers out of the freezer, and cozying up on the couch while I savor every last bite. My husband’s also obsessed, so I’ve been doubling this recipe to make sure there’s plenty to go around!

    For this recipe, you’ll want to start with a silicone ice cube tray. I purchased these ones (they come in a 2-pack) and have loved them so far! They’re also great for making ice cubes too, as the silicone helps the cubes slide right out. From there, you’ll need just four simple ingredients – chocolate, coconut oil, dates, and peanut butter. All relatively healthy ingredients, but they come together to create a treat that tastes seriously indulgent, but won’t hurt your stomach… no matter how many you eat! *wink wink*

    overhead image of a healthy snicker with flaky sea salt on top.

    What You’ll Need To Make These Healthy Snickers

    Chocolate Chips: Opt for dairy-free or dark chocolate chips for a healthier option. These provide the rich, chocolatey coating for your snickers bites.

    Coconut Oil: Coconut oil helps melt the chocolate chips and creates a smooth, glossy texture for your healthy candy bars.

    Medjool Dates: These naturally sweet and chewy dates serve as the caramel-like layer in your snickers, providing natural sweetness and a satisfying texture.

    Crunchy Peanut Butter: Choose your favorite brand of crunchy peanut butter to add nutty flavor and crunch to your guilt-free treats!

    overhead image of healthy snickers bars with flaky sea salt on top.

    Tips and Tricks

    • If your dates are too firm, soak them in warm water for 10-15 minutes before using. This will help soften them and make them easier to work with.
    • Using a silicone ice cube tray makes it easier to remove the snickers bites once they’re frozen. If you don’t have one, you can line a regular ice cube tray with plastic wrap for easy removal.
    • To ensure even distribution of ingredients, use a layering technique when assembling your healthy snickers bites. Start with a layer of melted chocolate, followed by a date and a dollop of peanut butter, then top with another layer of melted chocolate.
    overhead image of healthy snickers cut in half with peanut butter inside.
    5 from 2 votes

    4-Ingredient Healthy Snickers

    This healthy snickers recipe is the perfect healthier treat to satisfy your sweet tooth! Made with just 4 wholesome ingredients; chocolate chips, coconut oil, medjool dates, and crunchy peanut butter. They taste just like a snickers, but with a fraction of the sugar!
    Print Pin Rate
    Prep Time: 5 minutes
    Total Time: 5 minutes
    Servings: 15 snickers

    Ingredients

    • 1 cup chocolate chips
    • 1 tablespoon coconut oil
    • 8 medjool dates, pits removed and cut in half
    • 1/4 cup crunchy peanut butter

    Instructions

    • Melt the chocolate chips and coconut oil together in a small bowl in the microwave.
      healthy-snickers-step-1
    • Take a silicone ice cube tray and fill 15 cavities of the tray with 1/2 tablespoon each of the melted chocolate.
      healthy-snickers-step-2
    • Place one pitted date half into each cavity on top of the chocolate.
      healthy-snickers-step-3
    • Then, add about ½ a tablespoon of crunchy peanut butter to each ice cube cavity, on top of each date.
      healthy-snickers-step-4
    • Pour the remaining melted chocolate into each ice cube cavity, covering the dates and peanut butter completely.
    • Place the ice cube tray in the freezer for about 20 minutes, or until the chocolate has completely hardened. Remove the tray from the freezer and pop out the healthy snickers. Store snickers in the fridge or freezer for up to 3 months!
      healthy-snickers-step-6

    Notes

  • Here’s a link to the silicone ice cube trays I used to make my healthy snickers! They worked wonders and were super easy to clean.