Tag

coconut sugar

Browsing

These lactation brownies single handedly got me through the newborn trenches. After a rocky breastfeeding journey with my first baby, I knew I needed to set myself up for success ahead of baby #2’s arrival. From my first experience I learned that quick and easy grab-and-go snacks are essential! So a month before my due date I prepped and froze a double batch of cookie dough date bites, then portioned the ingredients for my nourishing green lactation smoothie into individual bags, and of course baked then froze these lactation brownies. And yup, let me tell you – that little bit of prep made alllll the difference this second time around! I was able to fuel myself with key vitamins and nutrients needed to boost and maintain a steady milk supply for my new baby in the form of a seriously delicious treat.

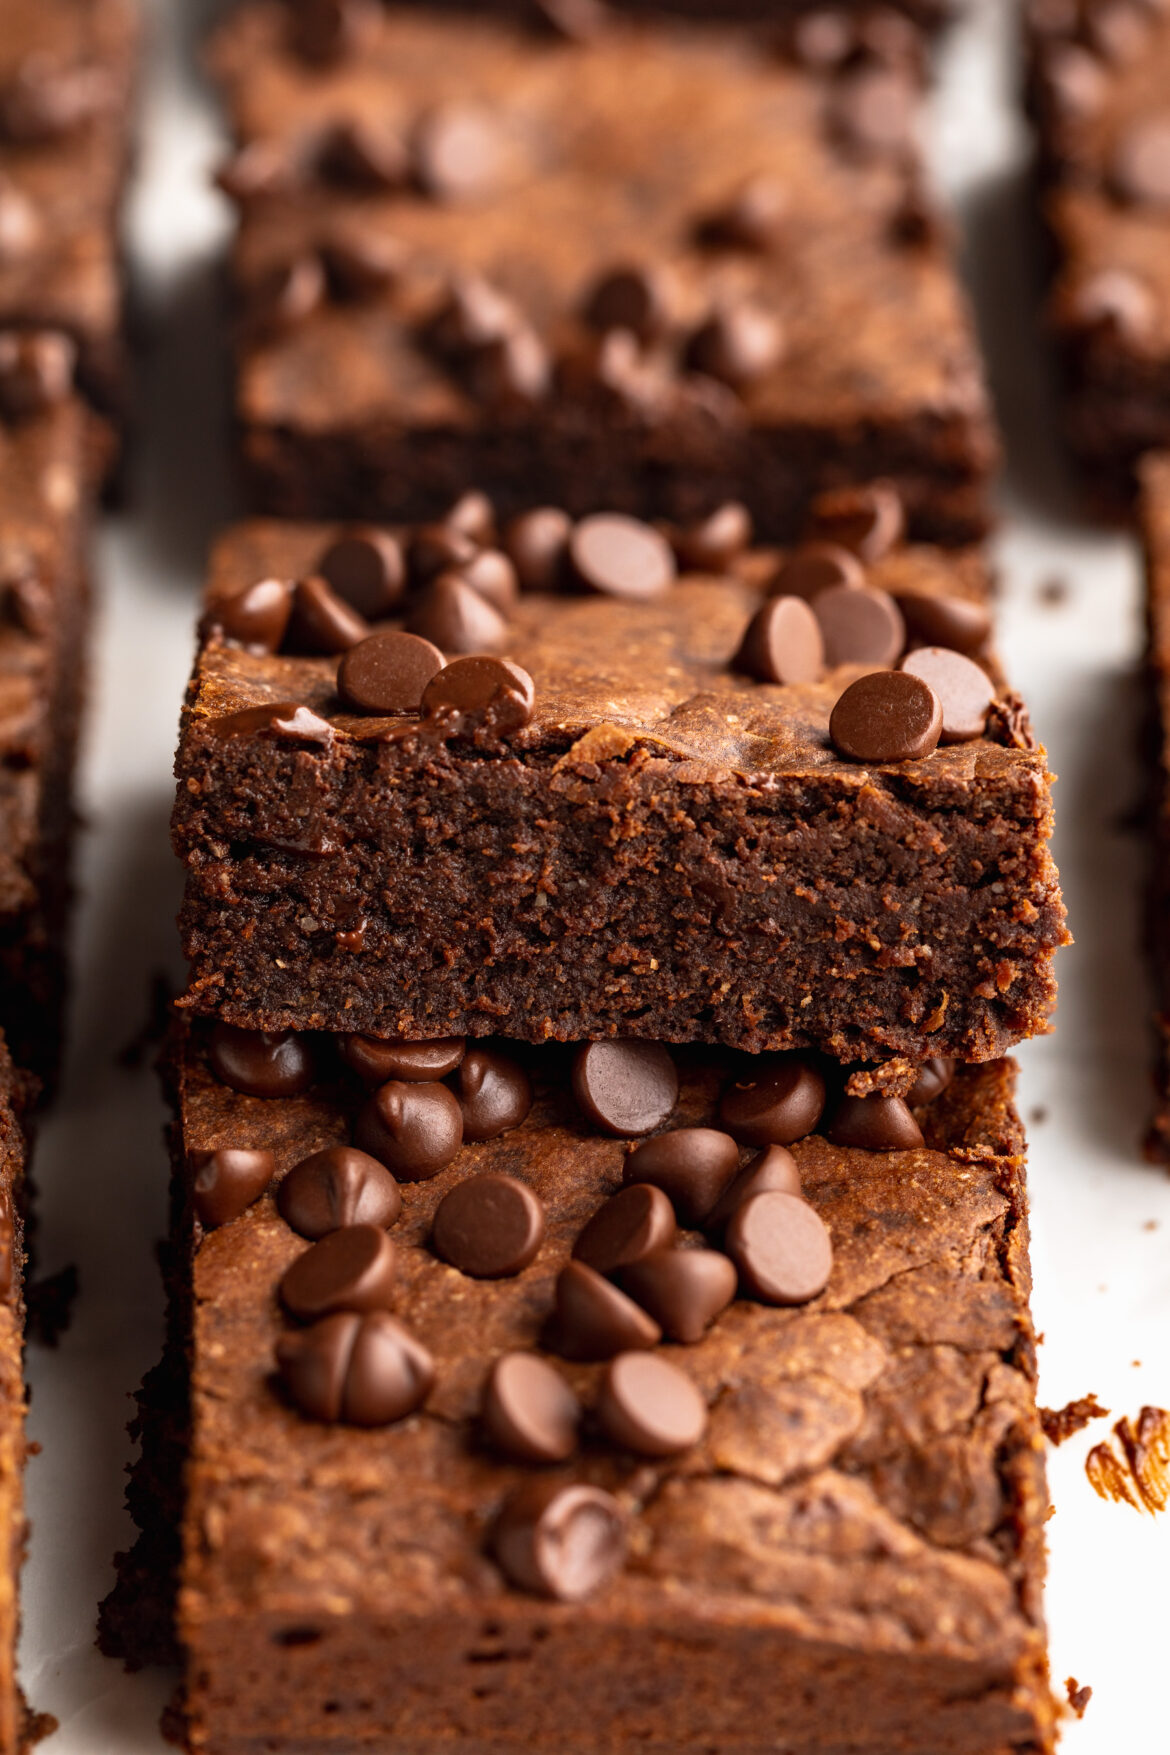
These lactation brownies are rich, fudgy, and truly taste like your favorite brownie recipe – just with added breastfeeding benefits! I even caught my husband eating one and he was shocked to learn they were lactation brownies. He was also a little concerned he’d start leaking milk… (LOL, I know) but once I reassured him that these brownies don’t cause you to lactate, they simply support the people that do, he went back to enjoying these delicious brownies!

Why You’ll Love This Recipe

  • Combines motherhood and indulgence: get your brownie fix and support milk production.
  • Uses galactagogue ingredients like brewer’s yeast and flaxseed, shown in lactation recipes by top bloggers.
  • Rich, fudgy texture even though it’s gluten-free and dairy-free – no compromise on taste.
  • Easy to bake, slice, share (or stash), and keep close for snack-time or mid-feed cravings.
overhead image of three lactation brownies on top of each other.

Do These Lactation Brownies Really Increase Milk Supply?

Yes – many breastfeeding bloggers and nutrition experts suggest that ingredients like brewer’s yeast, flaxseed, and healthy fats can provide micronutrients and B-vitamins supportive of lactation. While individual results may vary, pairing these brownies with good hydration, rest, and overall nutrition creates an environment more favorable for milk production! Think of these as supportive supplements – not substitutes for solid lactation practices.

Key Ingredients & How They Work

  • Brewer’s Yeast: often used in lactation recipes for B vitamins, chromium, and minerals linked to breast milk support. I recommend this brand on Amazon!
  • Ground Flaxseed (optional but recommended): adds omega-3s and fiber, and may help stabilize blood sugar while offering lactation benefits.
  • Coconut Oil + Oat Flour: for healthy fats and structure without dairy.
  • Chocolate Chips & Cocoa: deliver the rich chocolate flavor, making this recipe feel like a dessert rather than a supplement.
  • Coconut Sugar & Eggs: balance sweetness and structure while keeping it natural and whole-food based.
lactation brownies in a glass container ready to be frozen.

How Do I Freeze These Lactation Brownies?

Allow the brownies to cool completely. Slice into individual portions, then stash in a freezer-safe bag or container – layer parchment between pieces to prevent sticking. Frozen brownies can last 2-3 months; thaw at room temperature or warm slightly in the microwave when craving one.

overhead image of lactation brownies cut into squares
No ratings yet

The BEST Lactation Brownies (how to freeze!)

Rich, fudgy, and chocolatey, these lactation brownies are made with wholesome ingredients like oat flour, flaxseed, and brewer’s yeast to help support milk supply! This gluten-free and dairy-free recipe is packed with nutrients, yet still tastes like your favorite brownie. Perfect for nursing moms who want a delicious, nourishing treat that doubles as a milk-boosting snack!
Print Pin Rate
Prep Time: 10 minutes
Cook Time: 20 minutes
Total Time: 30 minutes
Servings: 16 servings

Equipment

  • 1 large bowl
  • 1 9×9-inch baking pan

Ingredients

  • 1/2 cup coconut oil
  • 1 1/2 cups chocolate chips divided
  • 2 eggs at room temperature (very important!)
  • 1 cup coconut sugar or cane sugar
  • 1 teaspoon vanilla extract
  • 1 cup oat flour
  • 1/4 cup brewer's yeast
  • 1/4 cup unsweetened cocoa powder
  • 2 tablespoons ground flax seed optional, but recommended for extra benefits

Instructions

  • Preheat oven to 350° Fahrenheit and line a 9×9-inch pan with parchment paper.
  • Melt the coconut oil in a large bowl in either the microwave or over the stove. Then, while the coconut oil is still hot, add in 1 cup of the chocolate chips and whisk until the chocolate has completely melted.
  • Add the eggs, coconut sugar, and vanilla extract to the melted chocolate mixture and whisk for 2-3 minutes until light and frothy.
  • Add in the oat flour, brewer’s yeast, cocoa powder, and ground flax seed then stir until the batter is completely smooth and combined. Fold in the additional ½ cup of chocolate chips.
  • Pour the brownie batter into your prepared baking pan and bake for 20-25 minutes or until the brownies are just set in the middle. Remove the brownies from the oven and let them cool completely before slicing.

Nutrition

Serving: 1serving | Calories: 240kcal | Carbohydrates: 27g | Protein: 4g | Fat: 15g | Fiber: 3g | Sugar: 18g

Single serve recipes really are the best. They make just the right amount, always hit the spot, and are always easier than making a whole batch of something. A few single serve recipes I find myself coming back to time and time again are my 5-ingredient single serve cinnamon roll, single serve protein cookie, healthy gluten-free mug cake, and now (& especially this time of year) this single serve apple crumble. It’s perfectly sweet, super easy to make, and just as delicious as your favorite apple crumble recipe. I even managed to make this recipe with just 5 ingredients. So the next time you’re craving a delicious fall treat, whip up this single serve apple crumble, cozy up on the couch, and enjoy! 🥰

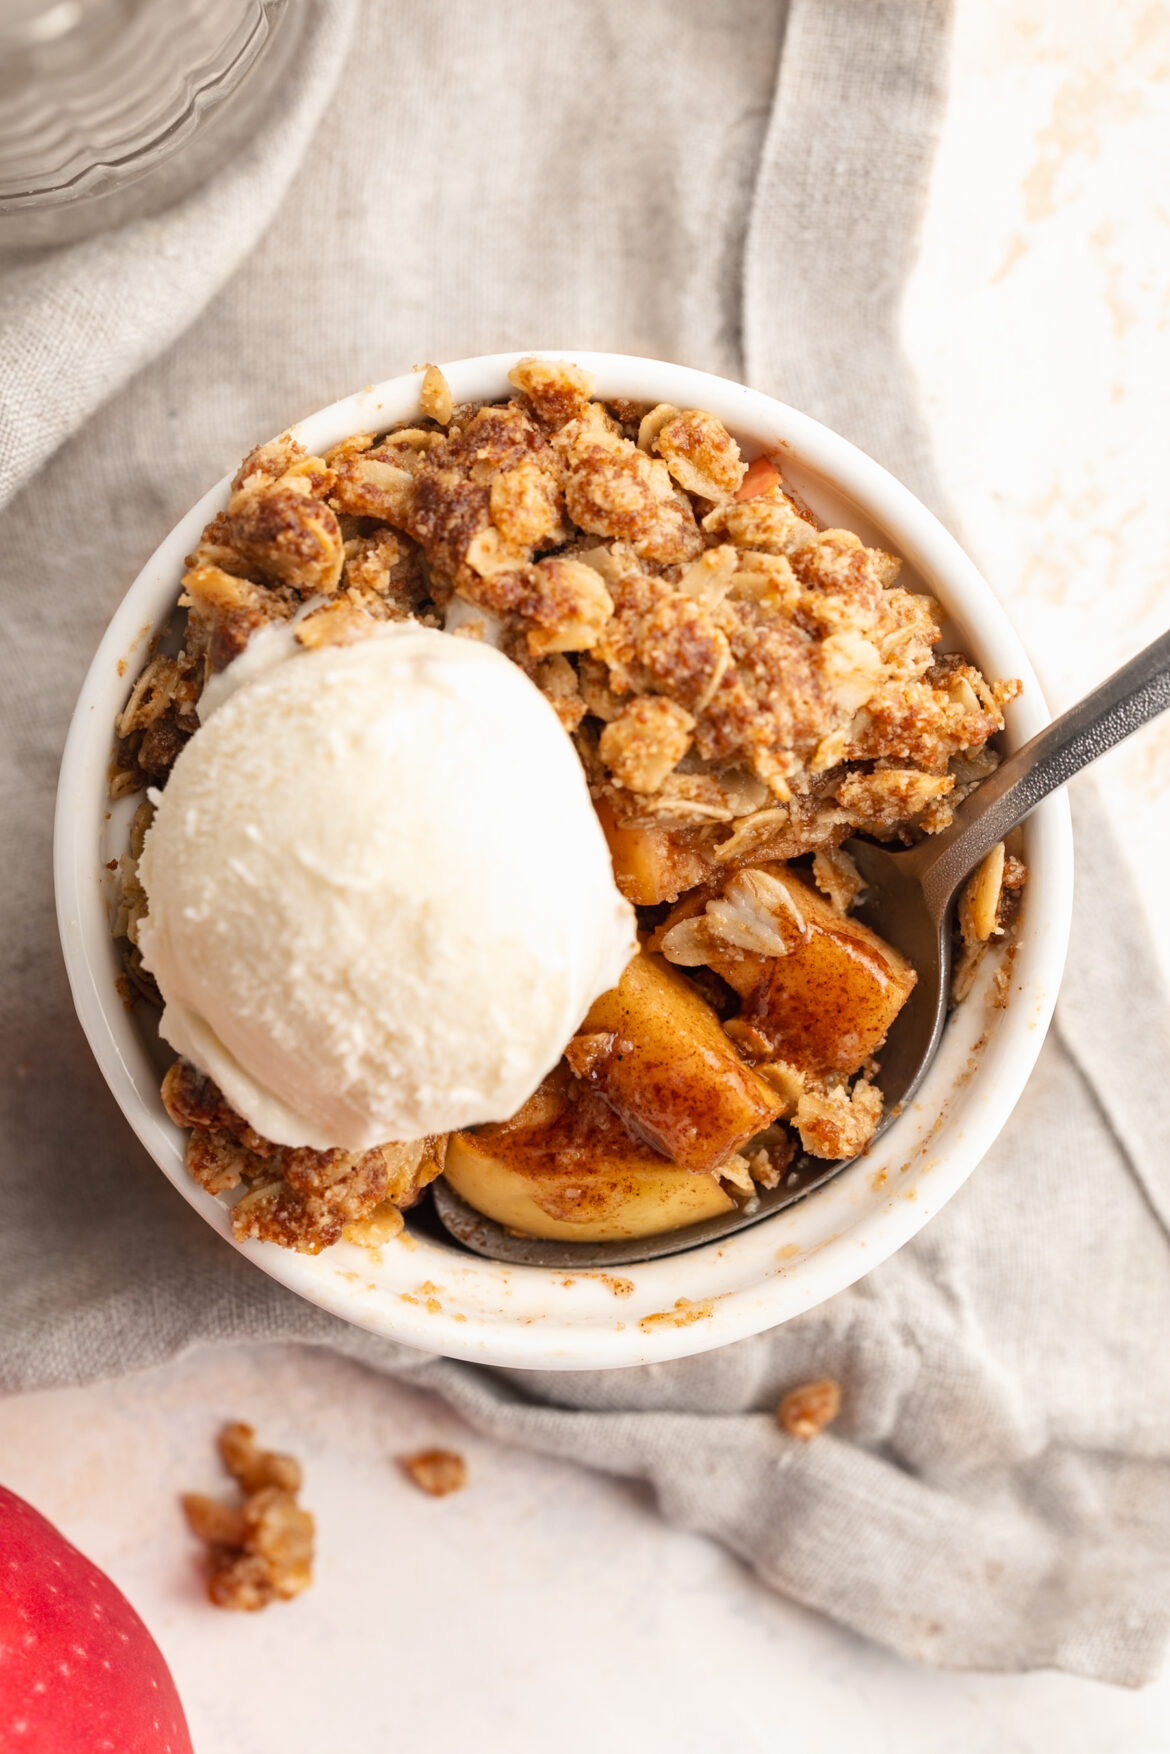
single serve apple crumble with ice cream.

Why You’ll Love This Single Serve Apple Crumble

  • Perfect for one – no sharing needed!
  • Minimal ingredients & fuss – only 5 components and one bowl for prep.
  • Customizable & comforting – cozy, fall flavor, and ready in under 30 minutes!
  • Gluten-Free – naturally gluten-free with rolled oats and almond flour.

Sam’s Recipe Tips

  • Use a firm but juicy apple (e.g. Honeycrisp, Pink Lady) so pieces soften but don’t disappear.
  • Ensure the topping is crumbly, not doughy – mix just until the oat/almond flour mix clumps slightly.
  • Let it cool for a few minutes before digging in – this helps juices settle.
  • For extra depth, stir a pinch of nutmeg or allspice into the apples before topping.
single serve apple crumble with a spoon.

Adjust This Recipe to Your Dietary Needs

  • Make it Vegan / Dairy-Free: Use coconut oil or vegan butter instead of regular butter.
  • Make it Nut-Free: Replace almond flour with extra oats or a seed-based flour (e.g. sunflower seed flour).
  • Optional Flavors: Add a splash of vanilla extract or a teaspoon of maple syrup for extra sweetness.
overhead image of single serve apple crumble with a scoop of ice cream on top.
No ratings yet

5-Ingredient Single Serve Apple Crumble

This single serve apple crumble is a cozy, 5-ingredient dessert that bakes up in just 30 minutes! Made with warm cinnamon apples and a golden oat topping, it’s the perfect healthier fall treat. Easy to make in one bowl, no sharing required!
Print Pin Rate
Prep Time: 5 minutes
Cook Time: 25 minutes
Total Time: 30 minutes
Servings: 1 serving

Equipment

  • 1 small bowl
  • 1 small ramekin

Ingredients

For the apples:

  • 1 apple peeled and chopped
  • 1 tablespoon brown sugar or coconut sugar
  • 1/2 teaspoon cinnamon optional

For the crumble:

  • 1/4 cup rolled oats
  • 2 tablespoons almond flour or all purpose flour
  • 1 tablespoon brown sugar or coconut sugar
  • 2 tablespoons melted butter or coconut oil

Instructions

  • Preheat oven to 350° Fahrenheit.
  • Add the chopped apples, coconut sugar, and cinnamon to a small ramekin and stir until the apples are evenly coated in sugar. Set that aside then make the crumble.
  • Mix together the rolled oats, almond flour, coconut sugar, and melted butter or coconut oil in a small bowl until a crumby mixture forms. Sprinkle the crumble evenly over the top of the apples.
  • Bake the apple crumble for 25-30 minutes, or until the apples are very soft. Let the apple crumble cool slightly before topping with ice cream, yogurt, or whipped cream.

Nutrition

Serving: 1serving | Calories: 400kcal | Carbohydrates: 60g | Protein: 6g | Fat: 20g | Fiber: 7g | Sugar: 40g

Why You’ll Love This Recipe

  • Sweet and Salty Perfection: The combination of salty pretzels, rich toffee, and creamy chocolate creates the ultimate flavor balance.
  • Simple Ingredients: With only 5 pantry staples, this recipe is both accessible and fuss-free.
  • Customizable: Switch up the toppings or pretzel shapes to match your preferences or dietary needs.
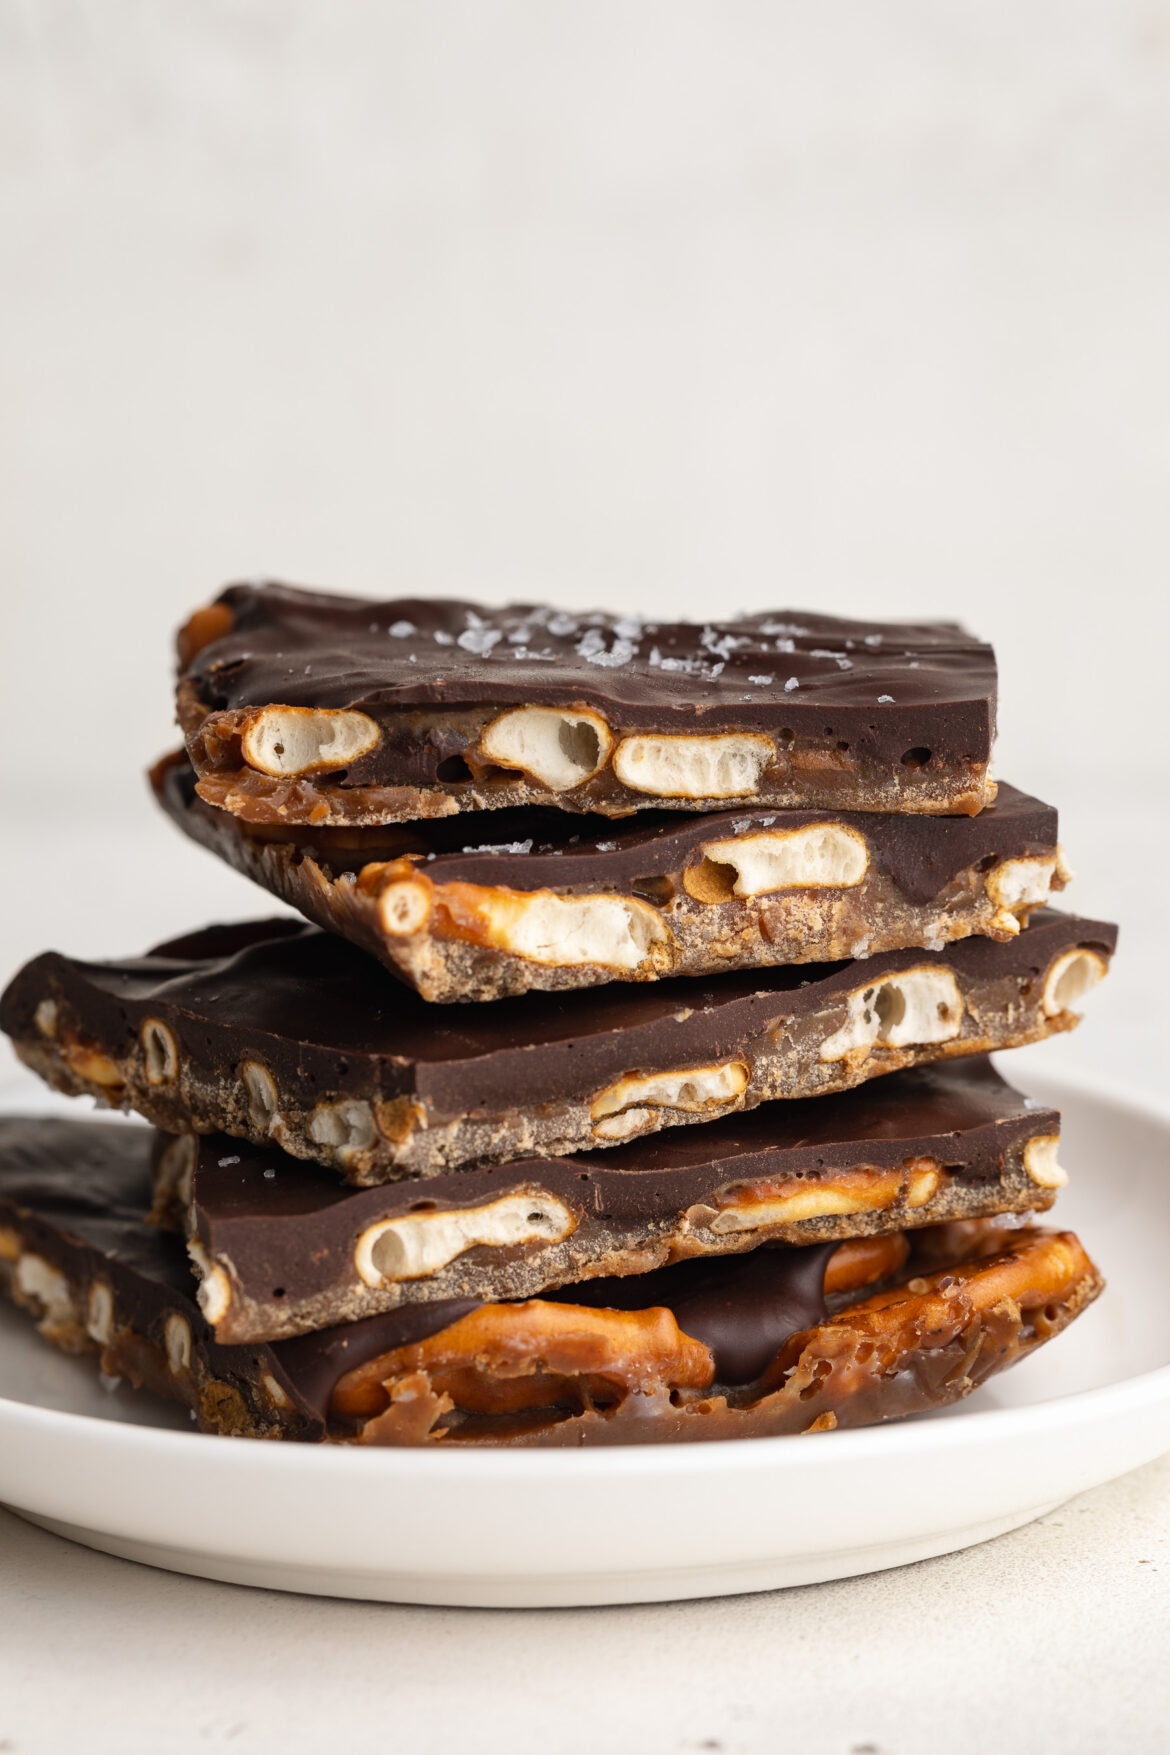
a piece of chocolate toffee pretzel bark with flaky sea salt on top.

What You’ll Need to Make Chocolate Toffee Pretzel Bark

Here’s a breakdown of the ingredients and why they shine in this recipe:

  • Mini Pretzels: Provide a salty, crunchy base for the bark. Use gluten-free pretzels to make the recipe gluten-free friendly. I used the Snyder’s Gluten-Free Mini Pretzels and they worked perfectly in this recipe!
  • Coconut Sugar: A natural sweetener that adds deep caramel notes to the toffee while being a healthier alternative to white sugar. I buy my coconut sugar in bulk on Amazon because I use it in so many of my recipes!
  • Butter (or Non-Dairy Butter): The fat needed to create the toffee layer. Use vegan butter for a dairy-free option. I recommend Miyoko’s vegan butter in this recipe.
  • Chocolate Chips: Melted chocolate ties everything together. Opt for dairy-free chocolate chips to keep the recipe vegan. I used Guittard’s Extra Dark Chocolate Chips for a more intense chocolate flavor. YUM!
  • Flaky Salt (optional): A sprinkle of flaky salt enhances the sweet-and-salty flavor profile and adds a touch of elegance.

How to Make Pretzel Bark

  1. Prepare the Base: Preheat your oven to 400°F and line a baking sheet with aluminum foil. Arrange pretzels in a single, even layer across the baking sheet.
  2. Make the Toffee: In a small saucepan, melt the butter and coconut sugar over medium heat, stirring often. Once melted, continue to cook for 4-5 minutes until the mixture is dark brown and bubbling. Remove from heat and whisk in vanilla extract.
  3. Pour Over Pretzels: Slowly pour the toffee over the pretzels, ensuring an even coating. Bake for 5 minutes until the toffee sets.
  4. Add Chocolate Layer: Melt the chocolate chips in the microwave or over a double boiler. Remove the pretzels from the oven, let cool for 1-2 minutes, then spread the melted chocolate over the toffee layer.
  5. Cool and Set: Allow the bark to cool at room temperature for 30 minutes, then transfer to the fridge for 6 hours or freezer for 3 hours. Once fully set, remove the bark from the pan, peel away the foil, and break into pieces.
chocolate toffee pretzel bark on a baking sheet.

Adjust This Recipe to Your Dietary Needs

Make it Vegan: Use dairy-free butter and vegan chocolate chips.

Make it Gluten-Free: Use gluten-free pretzels.

Make it Dairy-Free: Substitute non-dairy butter and chocolate chips.

Storage Tips

  • Store the bark in an airtight container in the fridge for up to 2 weeks or the freezer for up to 2 months.
  • Keep the pieces layered with parchment paper to prevent them from sticking together.
a stack of chocolate toffee pretzel bark on a plate.
No ratings yet

Chocolate Toffee Pretzel Bark (gluten-free & dairy-free!)

This chocolate toffee pretzel bark combines crunchy pretzels, rich caramelized toffee, and smooth chocolate for a sweet-and-salty treat that’s impossible to resist. This recipe is gluten-free, dairy-free, and vegan-friendly, sweetened with coconut sugar, and made with just five simple ingredients. Whether you’re making it for the holidays, gifting it to a friend, or enjoying it yourself, this quick and easy bark is sure to impress!
Print Pin Rate
Prep Time: 5 minutes
Cook Time: 10 minutes
Chilling Time: 4 hours
Total Time: 4 hours 15 minutes
Servings: 24 servings

Equipment

  • 1 9×13-inch baking sheet
  • 1 small saucepan

Ingredients

  • 3 cups mini pretzels I used gluten-free pretzels
  • 1 cup butter I used non-dairy butter
  • 1 cup coconut sugar or brown sugar
  • 1 teaspoon vanilla extract optional, but recommended
  • 2 cups chocolate chips
  • Flaky salt for topping

Instructions

  • Preheat oven to 400° Fahrenheit and line a large baking sheet with aluminum foil. Arrange the pretzels in an even layer on the baking sheet.
  • Melt butter and sugar in a small saucepan over medium heat, stirring frequently. Once the butter has melted, cook the toffee for another 4-5 minutes, stirring constantly until dark brown and bubbling.
  • Remove from the heat, whisk in the vanilla extract then immediately slowly and evenly pour the toffee over the pretzels. Place the pretzels and toffee in the oven and bake for 5 minutes.
  • While the bark bakes, melt the chocolate in the microwave or over a double boiler until completely smooth. Remove the pretzels and caramel from the oven, let them cool for 1-2 minutes or until no longer bubbling, then slowly pour the melted chocolate over top of the toffee and gently spread into an even layer.
  • Leave the chocolate toffee pretzels bark to cool at room temperature for about 30 minutes, then transfer to either the fridge for 6 hours or the freezer for 3 hours. Remove the bark from the pan, peel away the foil, and break into large chunks.

Notes

The nutritional info for this recipe was calculated using gluten-free pretzels, non-dairy butter, coconut sugar, and extra dark chocolate chips.

Nutrition

Serving: 1serving | Calories: 230kcal | Carbohydrates: 29g | Protein: 1.8g | Fat: 10.3g | Sugar: 17.3g

I have to be honest, I’m not the biggest fan of pie. Especially around thanksgiving and christmas – I feel like the dessert table is 90% pies and none are gluten-free. :/ For the last few years I’ve been baking and bringing my own gluten-free desserts, like my gluten-free almond flour brownies, or my almond flour chocolate chip cookies which are always such a hit! But this year, I wanted a dessert that better fit the holiday/pie category, so I came up with the idea for healthy gluten-free pecan pie bars.

These bars are wayyy less daunting than a pie and so much easier to make! They require just 6 simple ingredients, one bowl, and a baking dish. But trust me when I tell you, they’re just as good as any pie (yup, I said it!!!!) and no one will ever guess how much healthier they are!

Why You’ll Love This Recipe

  • Healthier Ingredients: This recipe skips traditional ingredients like refined sugar and flour, making it gluten-free, grain-free, and dairy-free while retaining the classic flavors.
  • Easy and Quick: With a simple crust and filling, these bars are ready for the oven in under 15 minutes.
  • Versatile and Customizable: Add a splash of bourbon or chocolate chips for a twist on traditional pecan pie flavors.
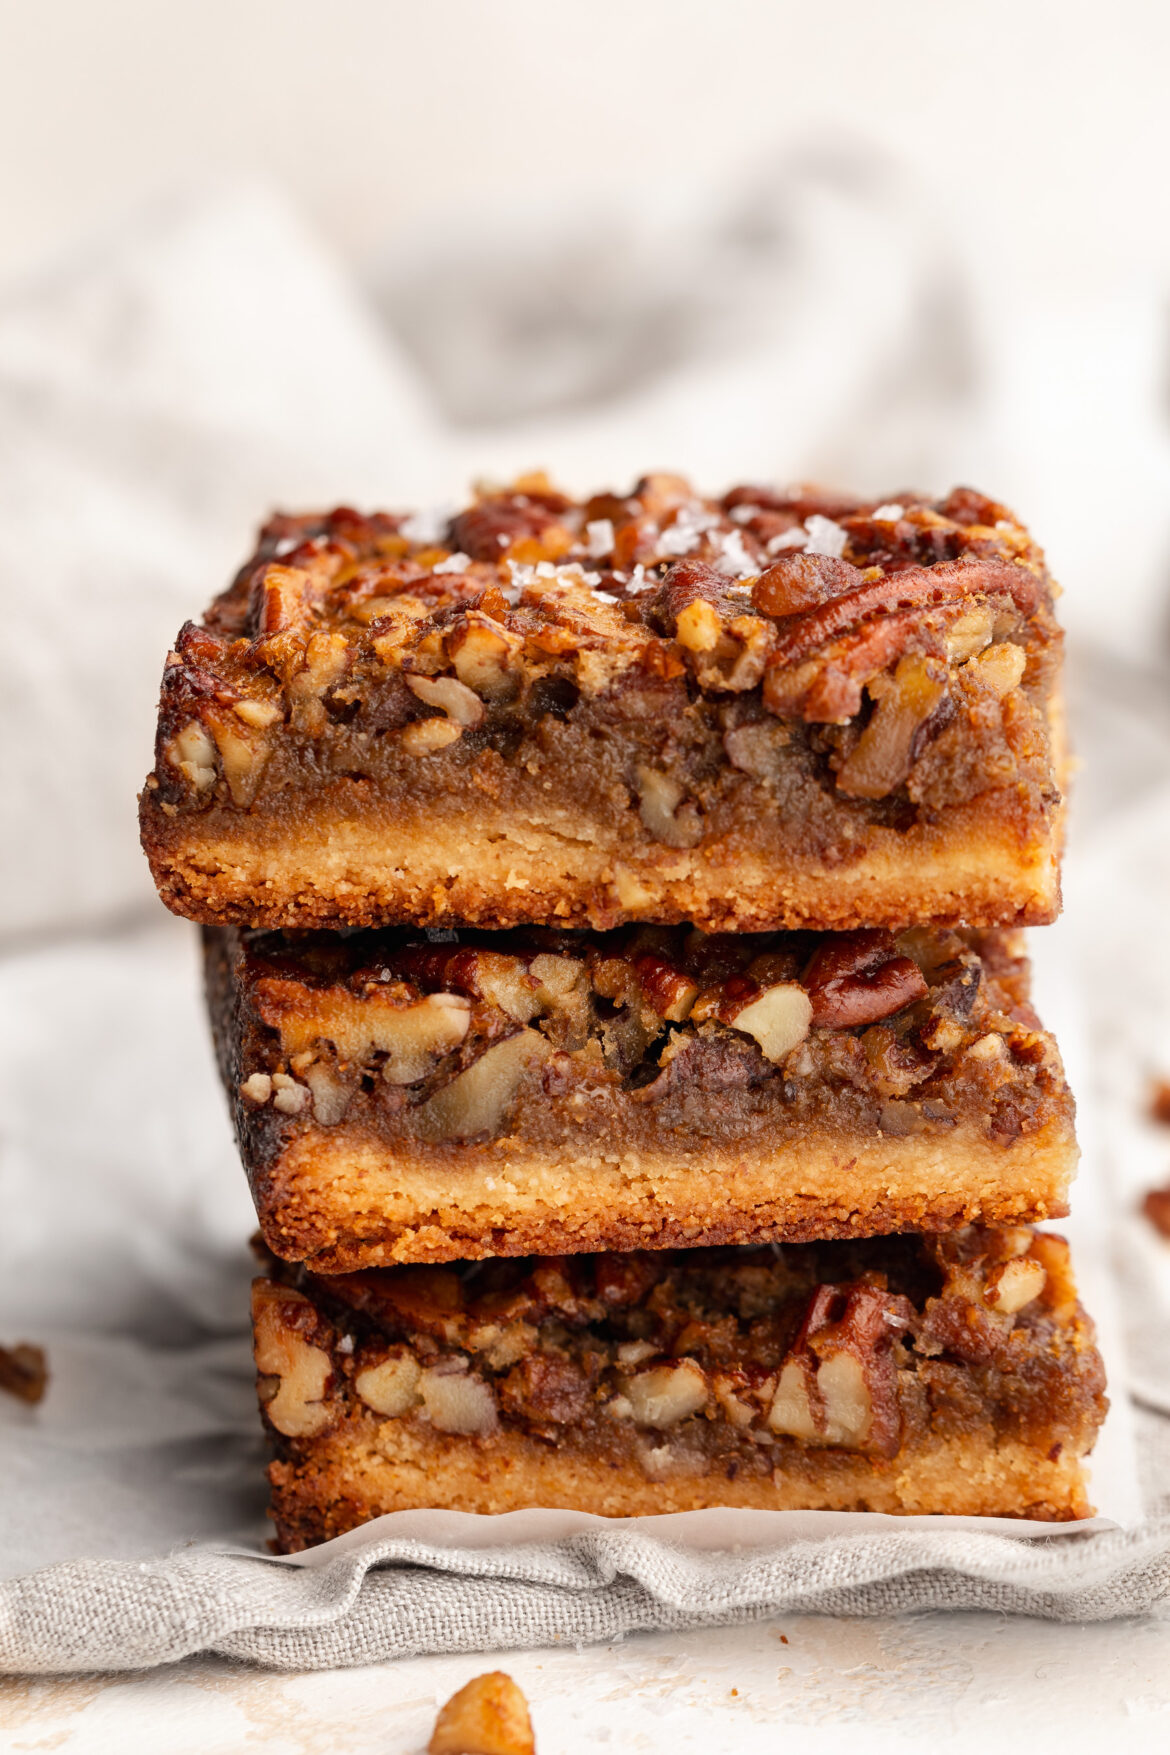
overhead image of a healthy gluten-free pecan pie bar.

What You’ll Need to Make These Gluten-Free Pecan Pie Bars

Almond Flour: The base of our shortbread crust, almond flour provides a rich, buttery flavor and keeps these bars gluten-free and grain-free.

Coconut Oil: Used in both the crust and filling, coconut oil brings moisture and healthy fats to each bite.

Maple Syrup: A natural sweetener that pairs beautifully with pecans, adding just the right amount of sweetness.

Coconut Sugar: Coconut sugar gives the filling a subtle caramel-like flavor, perfect for that traditional pecan pie taste.

Eggs: These help bind the filling, creating that signature pecan pie texture that holds up well as bars.

Pecans: The star ingredient! Chopped pecans add crunch and warmth to every bite.

How to Make Healthy Gluten-Free Pecan Pie Bars

  1. Prepare the Crust: Mix all crust ingredients and press into a lined baking pan. Bake until golden brown and set aside.
  2. Make the Filling: While the crust bakes, whisk together the filling ingredients, then fold in the chopped pecans.
  3. Assemble and Bake: Pour the filling over the baked crust and return to the oven until the filling is set. Let cool before slicing.
healthy gluten-free pecan pie bar with a bite taken out.

Can I Make These Vegan?

Yes! Substitute the eggs with a flax egg (2 tablespoons flaxseed meal mixed with 6 tablespoons water) and allow the mixture to sit for a few minutes until it thickens.

Switch Up the Flavor of Your Pecan Pie Bars

For a unique twist, try adding:

  • Bourbon: Add 1 tablespoon for a rich, warm flavor.
  • Chocolate Chips: Sprinkle ½ cup over the crust before adding the filling for a chocolatey surprise.

Storage Tips

Store these pecan pie bars in an airtight container in the fridge for up to 1 week or freeze for up to 3 months.

three healthy gluten free pecan pie bars stacked on top of each other.
4.63 from 8 votes

Healthy Gluten-Free Pecan Pie Bars

These gluten-free pecan pie bars are the perfect way to enjoy the classic flavors of pecan pie in an easy-to-make, healthier bar form. Made with an almond flour shortbread crust, naturally sweetened filling, and crunchy pecans, this recipe is gluten-free, grain-free, dairy-free, and made with just 6 main ingredients!
Print Pin Rate
Prep Time: 10 minutes
Cook Time: 35 minutes
Total Time: 45 minutes
Servings: 16 servings

Equipment

  • 1 large bowl
  • 1 9×9-inch baking pan

Ingredients

For the shortbread crust:

  • 2 cups almond flour
  • 1/4 cup melted coconut oil
  • 1/4 cup maple syrup
  • 1 teaspoon vanilla extract optional, but recommended

For the pecan pie filling:

  • 1/2 cup coconut sugar or brown sugar
  • 1/4 cup melted coconut oil
  • 1/4 cup maple syrup
  • 2 teaspoons vanilla extract optional, but recommended
  • 2 eggs at room temperature (very important!)
  • 1 1/2 cups chopped pecans raw and unsalted

Instructions

  • Preheat oven to 350° Fahrenheit and line a 9×9-inch baking pan with parchment paper.
  • Add all shortbread crust ingredients to a large bowl and mix to combine. Then, transfer the crust to your prepared baking pan and press the crust down into an even layer over the base of the dish. Bake for 10 minutes or until lightly golden brown around the edges.
  • While the crust bakes, make the filling by whisking together the coconut sugar, coconut oil, maple syrup, vanilla extract, and eggs. Once that’s combined, mix in the chopped pecans.
  • When the crust is finished baking, remove it from the oven and pour the pecan pie filling mixture over the crust. Bake again for 20-25 minutes, or until the filling is set. Remove the bars from the oven and let cool for at least 30 minutes in the pan.
  • Once the pan is cool, transfer the bars to the fridge to chill for about an hour. Then, remove the bars from the pan and cut into 16 squares. Serve immediately or store in the fridge for up to 1 week!

Nutrition

Serving: 1serving | Calories: 272kcal | Carbohydrates: 44g | Protein: 2.5g | Fat: 10g | Sugar: 26g

Sweet, tart, and warm – my caramelized apples recipe is an easy-to-make healthy Fall dessert, perfect to eat with a scoop of ice cream. It’s gluten-free, dairy-free, and even vegan too!

How to Make Caramelized Apples

Yay, more apple-based recipes! I have so many I need to use after all that apple picking I did in September, so hopefully this simple recipe can come in handy for you this Fall, too.

For this recipe, the apples are sautéed in butter, sugar, and cinnamon until tender and caramelized. They can then be added to sweet or savory dishes from pancakes to roasted pork loin, or be eaten directly with a scoop of vanilla ice cream on top.

What Does Caramelization Mean?

One thing to keep in mind that often gets confused is that caramelized apples are not caramel apples! Caramelization is actually the browning of sugar used in cooking for the resulting sweet nutty flavor and brown color. 

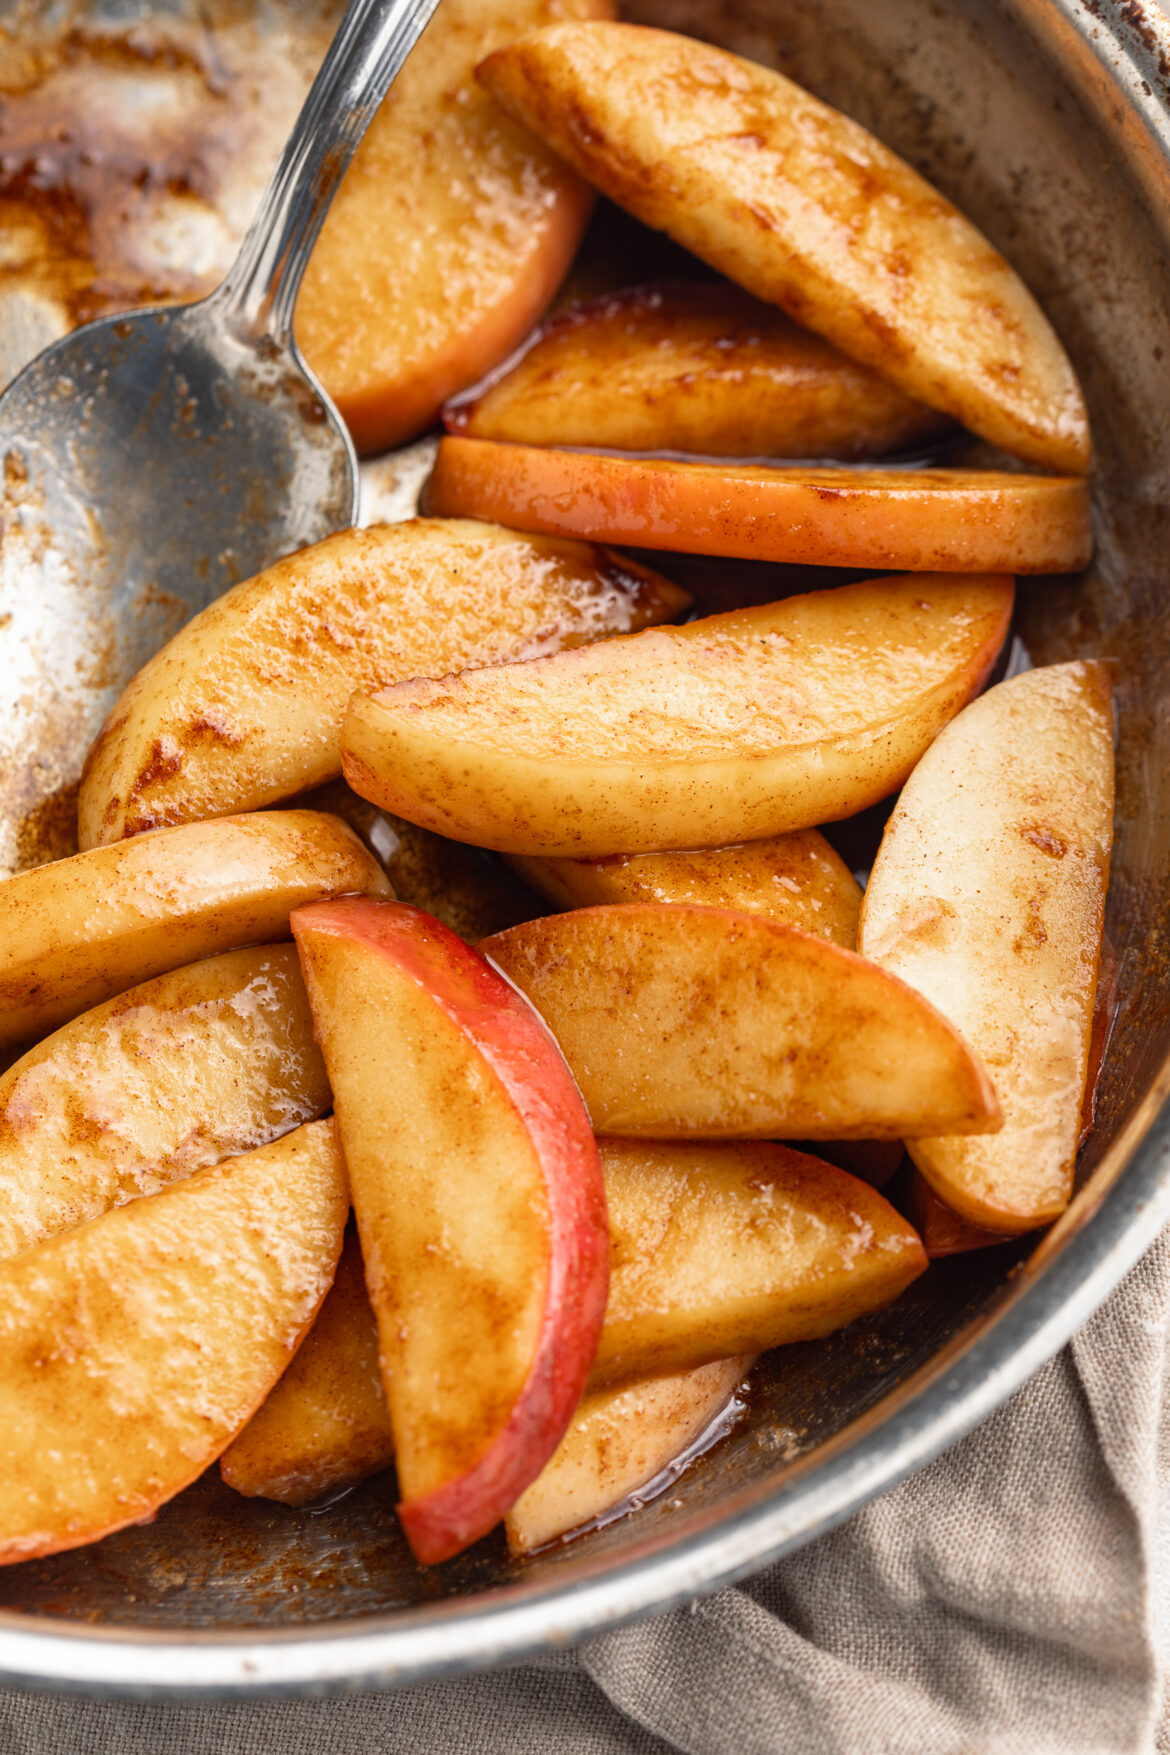
healthier caramelized apples in a skillet with a spoon.

What You’ll Need to Make Caramelized Apples

  • Apples – Use 2-3 gala, granny smith, or any other firm cooking apple.
  • Butter – I used non-dairy.
  • Sugar – I used coconut sugar, but white sugar or brown sugar would also taste great!
  • Cinnamon

Tips and Tricks

What Are The Best Apples to Use For Caramelization?

The best apples to use for this recipe are a firm apples such as Granny Smith, Fuji, Gala or Honeycrisp. Most people prefer Granny Smith because they are tart, which pairs perfectly with the sweet buttery caramelized sauce. It’s not a good idea to use a softer apple because they will fall apart while cooking.

What to make with caramelized apples?

Caramelized apples can be used on top of ice cream, on your pancakes, or as a pie filling. You can also use caramelized apples in savory dishes like chicken or turkey if you enjoy a sweeter taste to your meals. But honestly, you can use caramelized apples on almost anything you want!

How to Store Caramelized Apples?

Once cooled, place it in a jar with a tight fitting lid and refrigerate. It should keep for up to 1 week in the refrigerator.

5 from 4 votes

Healthier Caramelized Apples

Sweetly tart and thoroughly warming, my vegan and refined sugar free caramelized apples recipe is an easy-to-make healthy Fall dessert, perfect to eat with a scoop of icecream.
Print Pin Rate
Prep Time: 10 minutes
Cook Time: 5 minutes
Total Time: 15 minutes
Servings: 4 servings

Equipment

  • large saucepan

Ingredients

  • 2-3 whole apples
  • 1 tablespoon butter I used non-dairy butter
  • 2 tablespoons sugar I used coconut sugar
  • 1 teaspoon cinnamon

Instructions

  • Slice apples into even-sized pieces.
  • Melt butter in a large saucepan before adding in the sugar, apples, and cinnamon.
  • Cook for 4-5 minutes, tossing apples every minute or so until tender.

Nutrition

Serving: 1serving | Calories: 84kcal | Carbohydrates: 15g | Protein: 0.3g | Fat: 2.9g | Sugar: 11g