Tag

oat flour

Browsing

Soft and perfectly sweet carrot cake cookies with a cream cheese icing! Gluten-free, dairy-free, and naturally sweetened with maple syrup. These healthy carrot cake cookies are the perfect springtime (or anytime) treat!

Carrot cake cookies with cream cheese icing on a baking sheet.

What You’ll Need to Make Carrot Cake Cookies

Oat Flour – Either homemade or store-bought oat flour will work in this cookie recipe! Oat flour replaces all purpose flour, making these cookies gluten-free.

Almond Butter – Smooth and unsweetened almond butter helps hold these cookies together. If you don’t have almond butter, you can use any other nut or seed butter you’d like. Cashew butter would make a great substitute here!

Maple Syrup – These healthy carrot cake cookies are naturally sweetened with maple syrup. The maple adds a touch of flavor, and the perfect amount of sweetness.

Shredded Carrots – Wash and peel about three large carrots, then run them down a box grater to make shredded carrots. Or, to make things even easier, simply buy pre-shredded carrots from the store for this dessert recipe!

Overhead image of carrot cake cookies on a baking sheet.

Tips and Tricks

  • Gently flatten each carrot cake cookie before baking. If you skip this step, they’ll bake up like round little balls. Therefore, for a more classic flat-looking cookie, give them a gentle press right before putting in the oven.
  • Allow your cookies to cool completely before icing! If the cookies are still too warm when iced, the cream cheese icing will melt and slide right off. (I’ve learned from my mistakes here – ha!)
  • These cookies are best stored in an airtight container at room temperature for up to 3 days. However, if you live in a warm client/are baking these in the summer – it’s best to store them in the fridge instead. If the cookies with cream cheese icing are left in too warm of an environment, the icing may melt and spoil.
Close-up image of a carrot cake cookie with a bite taken out.

Adjust This Recipe to Your Dietary Needs

Make it Dairy-Free: While the cookies themselves are already dairy-free, make a dairy-free cream cheese icing by subbing your favorite non-dairy cream cheese, butter, and milk.

Make it Vegan: For vegan carrot cake cookies, replace the egg with a flax egg, and take the dairy-free icing option above!

Carrot Cake Cookies

5 from 1 vote
Recipe by Samantha Course: DessertDifficulty: Medium
Servings

24

cookies
Prep time

15

minutes
Cooking time

12

minutes
Total time

27

minutes

Soft and perfectly sweet carrot cake cookies with a cream cheese icing! Gluten-free, dairy-free, and naturally sweetened with maple syrup. These healthy carrot cake cookies are the perfect springtime (or anytime) treat!

Ingredients

  • For the dry ingredients:
  • 1 cup rolled oats

  • 1 cup oat flour, made by pulsing rolled oats in a blender until ground into a flour

  • 1/2 cup almond flour

  • 1 teaspoon baking soda

  • 1 1/2 teaspoons cinnamon

  • 1/4 teaspoon nutmeg

  • 1/4 teaspoon salt

  • For the wet ingredients:
  • 1/2 cup almond butter, unsweetened

  • 1/2 cup maple syrup

  • 1/4 cup coconut oil, melted (or butter)

  • 1 teaspoon vanilla extract

  • 1 egg, at room temperature

  • 1 cup shredded carrots

  • 1/4 cup chopped walnuts or pecans, unsalted

  • 1/4 cup raisins

  • For the cream cheese icing:
  • 1/4 cup cream cheese, softened (I used non-dairy cream cheese)

  • 3 tablespoons butter, softened (I used non-dairy butter)

  • 1 1/2 cups powdered sugar

  • 2-3 tablespoons milk (I used non-dairy milk)

  • 1/4 teaspoon vanilla extract

Directions

  • Preheat oven to 350° Fahrenheit and line a baking sheet with parchment paper.
  • Add all dry ingredients to a large bowl and whisk to combine.
  • Then, in a separate bowl, add all the wet ingredients except the carrots, walnuts, and raisins, and whisk to combine.
  • Pour the wet ingredients into the dry ingredients and use mix until fully combined. Then, fold in the carrots, walnuts, and raisins.
  • Scoop tablespoon-sized balls of cookie dough onto your prepared baking sheet and slightly flatten each ball with the palm of your hand.
  • Bake for 10-12 minutes, or until golden brown around the edges. Then, transfer to a wire cooling rack to cool completely.
  • While cookies cool, make the cream cheese icing by adding all ingredients to a bowl and whisking until smooth and well-combined. Then, spread or pipe cream cheese icing on top of each cooled cookie.

Recipe Video

Notes

  • These cookies are best stored in an airtight container at room temperature for up to 3 days. However, if you live in a warm client/are baking these in the summer – it’s best to store them in the fridge instead.

Did you make this recipe?

Share it and tag @samdoesherbest on Instagram!

Like this recipe?

Follow us @samdoesherbest on Pinterest

Perfect carrot cake muffins, made healthy! Gluten-free, dairy-free, and refined sugar-free, yet oh-SO delicious. These healthy carrot cake muffins come together in just one bowl, in about 30 minutes!

What You’ll Need to Make Healthy Carrot Cake Muffins

Oat Flour – You can either buy pre-ground oat flour, or simply grind oats into a flour yourself. I always make my oat flour myself because it’s cheaper, and super easy. To do this, place rolled oats into a blender and blend until a flour forms, and no large oats pieces remain.

Apple Sauce – If you don’t have any apple sauce, feel free to use 1/2 cup of mashed banana instead! Though if you do use apple sauce, please make sure it’s unflavored and unsweetened for this recipe.

Maple Syrup – These refined sugar-free carrot cake muffins are naturally sweetened with maple syrup. I love the flavor of maple syrup in these muffins, you won’t even miss the sugar. However, if you don’t have any maple syrup, you can use an equal amount of honey instead!

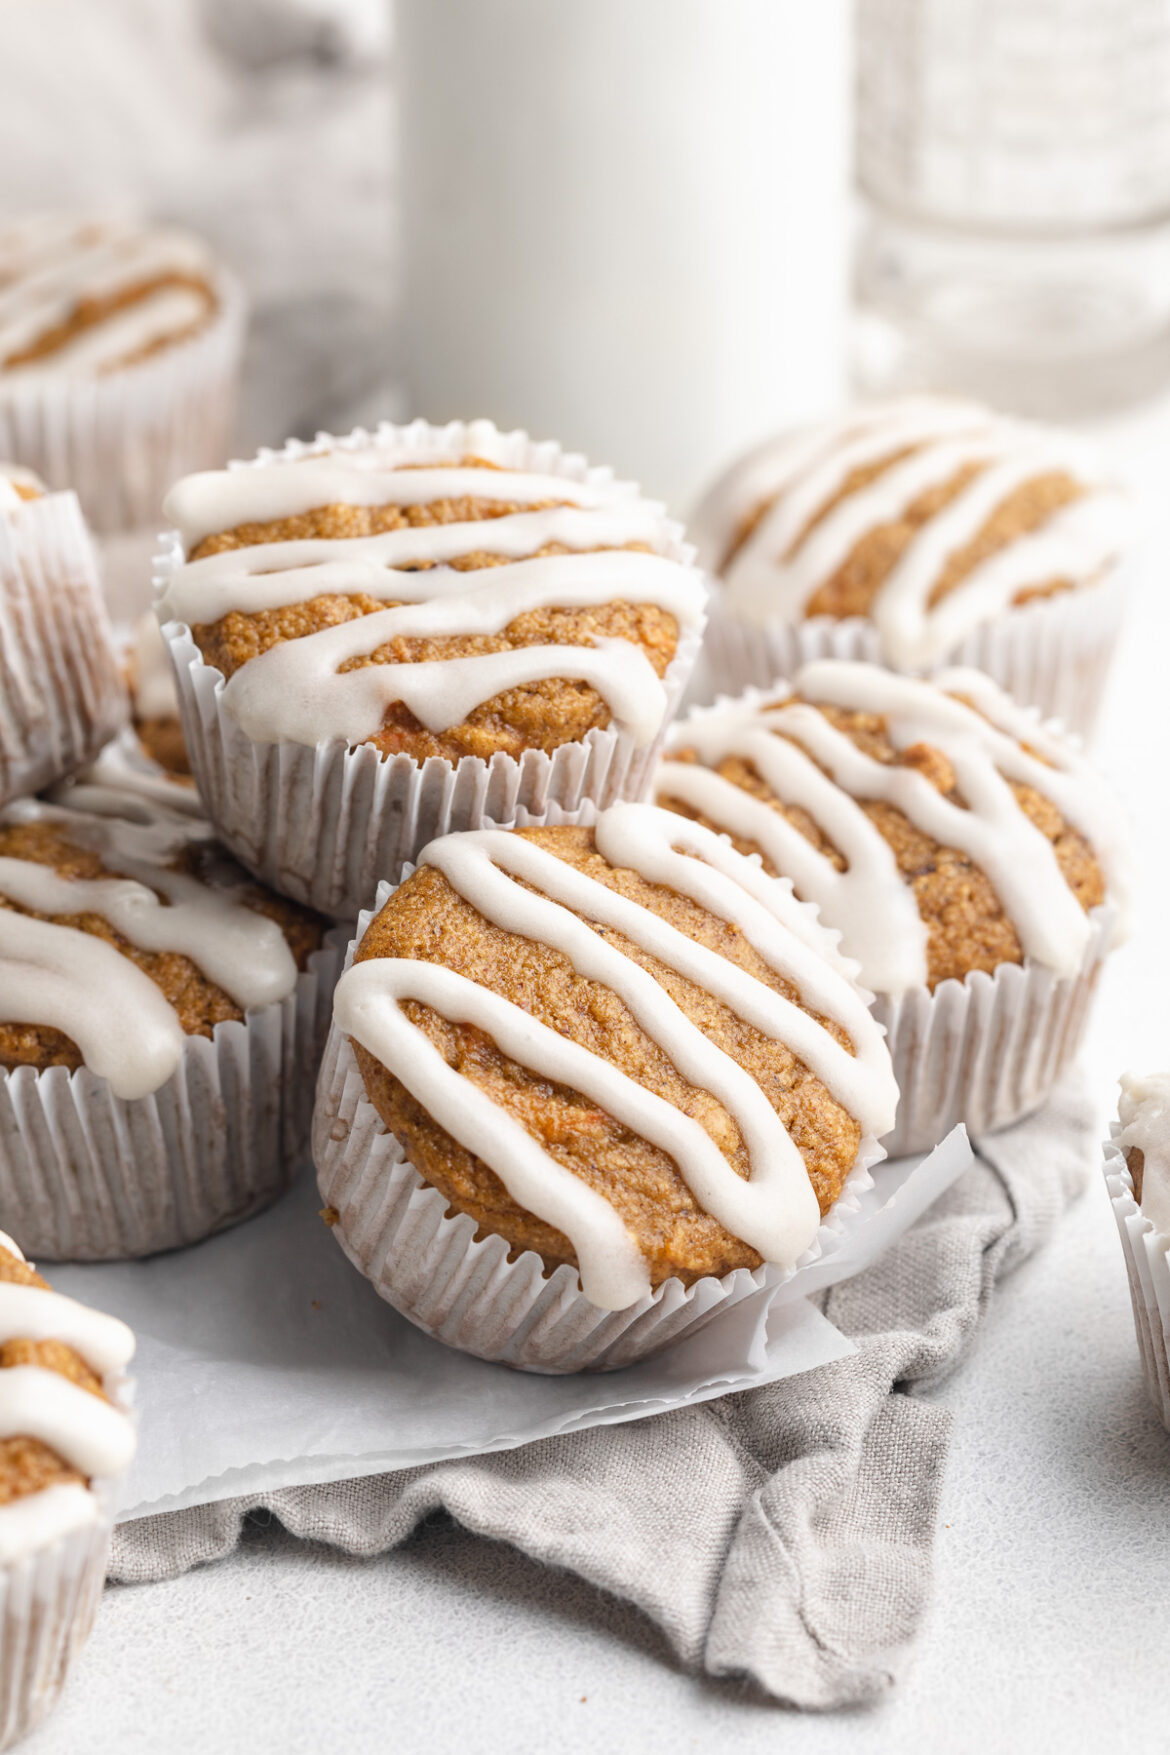
healthy carrot cake muffins with cream cheese icing on top and milk on the side.

Tips and Tricks

  • Avoid over-mixing the muffin batter! If you mix too much, your muffins will turn out tough, instead of soft and tender. Therefore, mix all ingredients until just combined, then stop.
  • Let these healthy carrot cake muffins cool completely before icing. I know it’s tempting to ice and eat these delicious little muffins right away. But if they’re too hot when iced, the icing will melt and slide right off. So practice some self-control, and leave them to cool for at least 20 minutes first!
  • These muffins are best stored at room temperature, in an airtight container, for up to three days. However, if you live in a warm climate (or are baking these in the summer), you may want to consider storing them in the fridge. If stored in a very warm place, the cream cheese icing may spoil.

Adjust This Recipe to Your Dietary Needs

Make it Vegan: While I haven’t tested this option myself just yet, you should be able to make these vegan carrot cake muffins by substituting the eggs for flax eggs! Or, use this Bob’s Red Mill Egg Replacer in place of the eggs in this recipe.

Healthy Carrot Cake Muffins with Cream Cheese Icing

5 from 1 vote
Recipe by Samantha Course: Snacks, DessertDifficulty: Medium
Servings

12

muffins
Prep time

10

minutes
Cooking time

20

minutes
Total time

30

minutes

Perfect carrot cake muffins, made healthy! Gluten-free, dairy-free, and refined sugar-free, yet oh-SO delicious. These healthy carrot cake muffins come together in just one bowl, in about 30 minutes!

Ingredients

  • 2 eggs

  • 1/2 cup apple sauce, unsweetened

  • 1/2 cup maple syrup

  • 1/4 cup milk, I used non-dairy milk

  • 1 teaspoon vanilla extract

  • 2 cups oat flour

  • 1 teaspoon cinnamon

  • 1 teaspoon baking powder

  • 1/2 teaspoon baking soda

  • 1/4 teaspoon nutmeg

  • 1/4 teaspoon salt

  • 1 cup shredded carrots

  • 1/4 cup chopped walnuts or pecans

  • 1/4 cup raisins

  • For the cream cheese icing:
  • 1/4 cup softened cream cheese, I used non-dairy cream cheese

  • 3 tablespoons softened butter, I used non-dairy butter

  • 2 cups powdered sugar

  • 2-3 tablespoons milk, I used non-dairy milk

  • 1/4 teaspoon vanilla extract

Directions

  • Preheat oven to 350° Fahrenheit and line a muffin tin with muffin liners.
  • In a large bowl, mix together the eggs, apple sauce, maple syrup, milk, and vanilla extract.
  • Add in the oat flour, cinnamon, baking powder, baking soda, nutmeg, and salt. Mix until everything is just combined.
  • Then, fold in the shredded carrots, chopped walnuts, and raisins until evenly distributed throughout the batter.
  • Bake muffins for 20-25 minutes, or until a toothpick inserted down the center of one muffin comes out clean. Remove muffins from oven and transfer to a wire cooling rack to cool completely.
  • While muffins cool, make the cream cheese icing by adding all ingredients to a bowl and whisking until smooth and well-combined. Then, spread or pipe cream cheese icing on top of each cooled muffin.

Recipe Video

Did you make this recipe?

Share it and tag @samdoesherbest on Instagram!

Like this recipe?

Follow us @samdoesherbest on Pinterest

Fluffy and perfectly spicy healthy gingerbread muffins! The perfect festive snack, that comes together in the blender. Oats, molasses, and ground ginger make these gingerbread muffins healthy AND delicious!

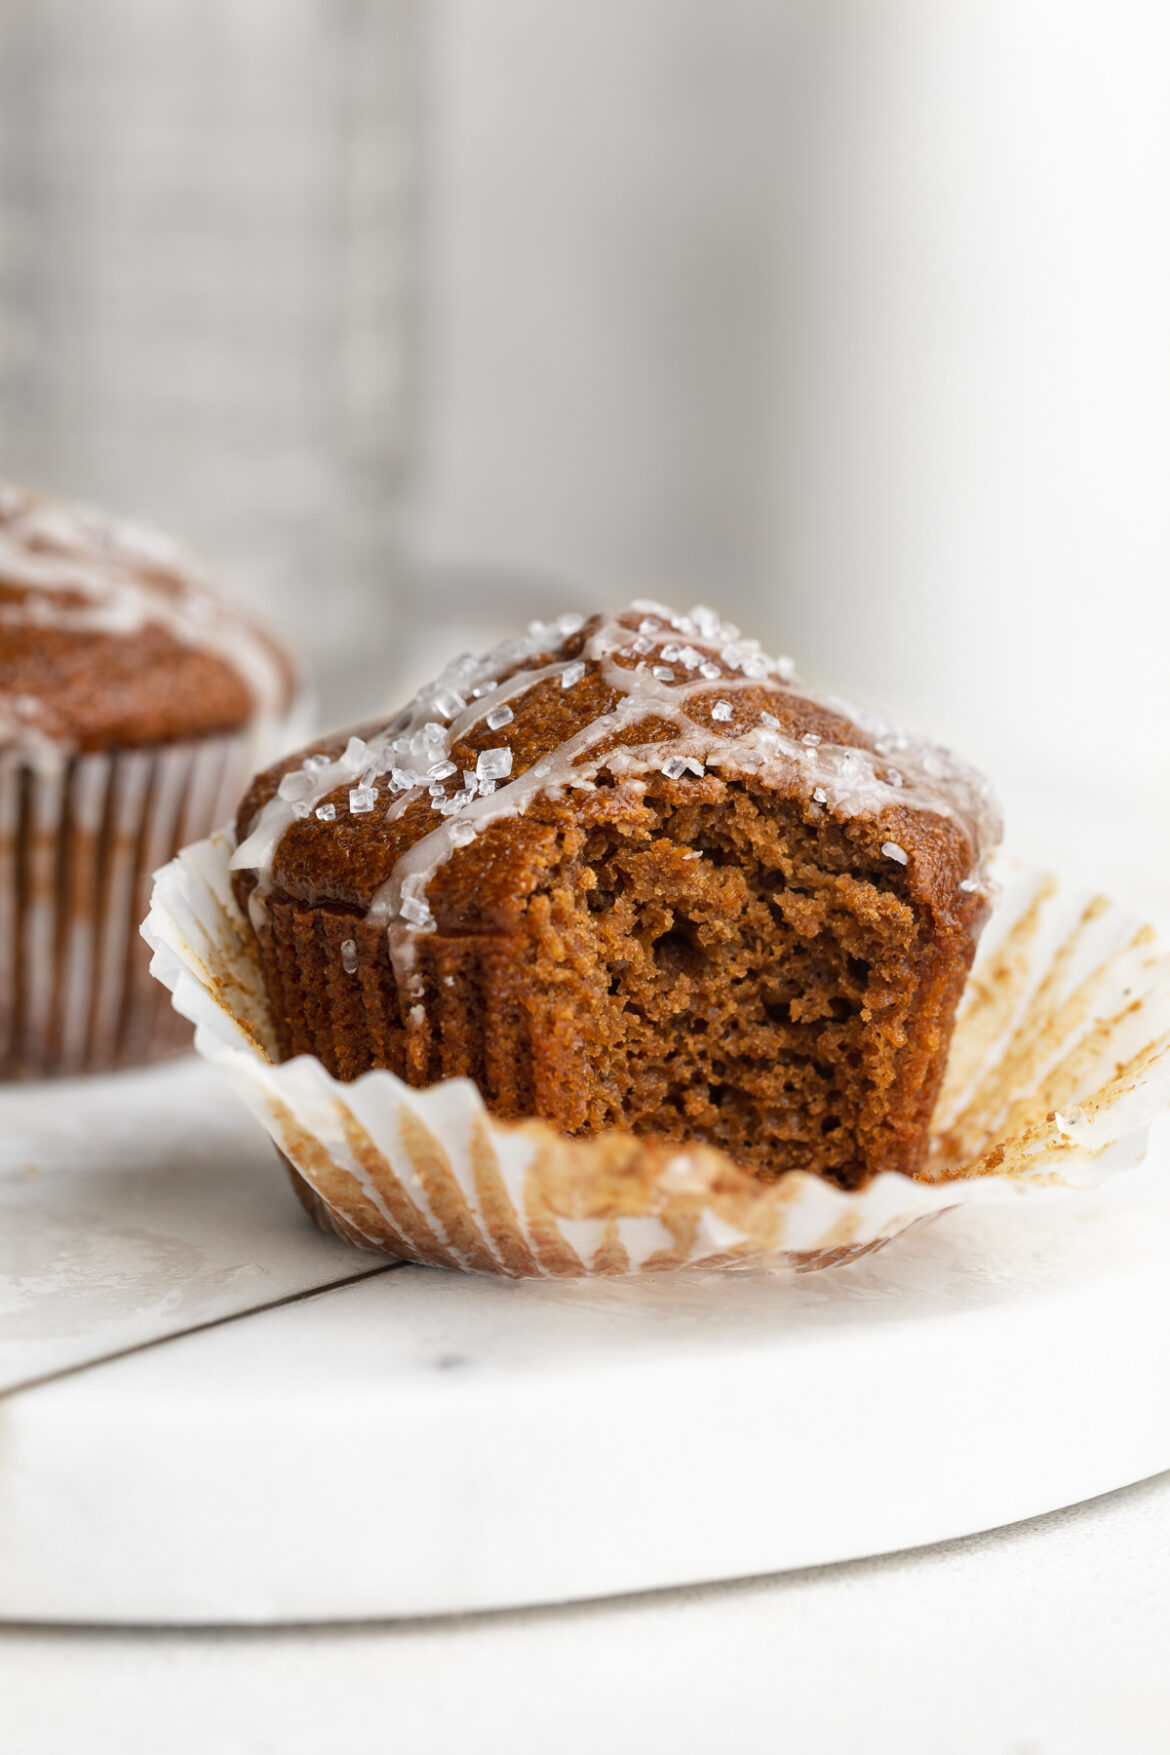
glunte-free gingerbread muffins piled on top of a marble board.

What You’ll Need to Make Gluten-Free Gingerbread Muffins

Old Fashioned Rolled Oats – It’s super important you use old fashioned/rolled oats in this recipe. Avoid instant, steel-cut, or Irish oats. The first step involves grinding these oats into a flour in your blender. When doing this, try to grind them as fine as possible. Finely ground oats will result in fluffier muffins!

Apple Sauce – I used apple sauce in these gingerbread muffins, because it yields little to no flavor. However, if you don’t have apple sauce, feel free to substitute it with 1/2 cup mashed banana. Mashed banana will give these muffins a slight banana flavor, which if you like banana, I’m sure you won’t mind.

Molasses – Any and all gingerbread recipes contain molasses, which is how they get their signature dark-brown color. Don’t skip the molasses, it’s super important for both the flavor and structure of these muffins.

Ground Ginger – Wouldn’t be gingerbread muffins without some ginger! This recipe packs in tons of that spicy ginger flavor, which I personally LOVE. However, if you want a more subtle ginger flavor, go ahead and use just 1/2 teaspoon ground ginger instead.

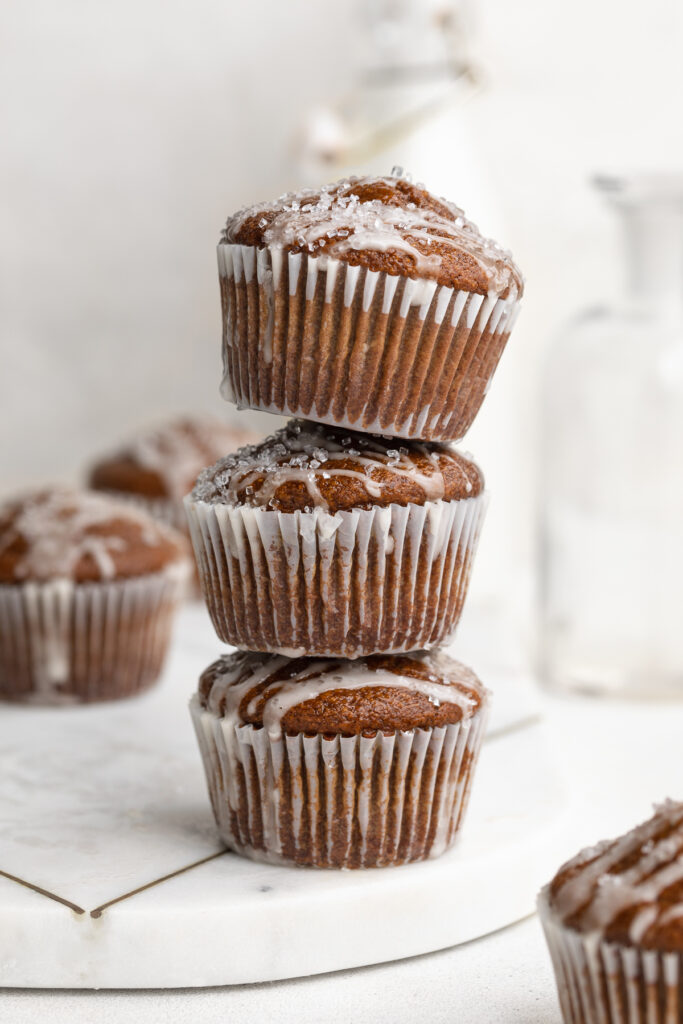
three gluten-free gingerbread muffins stacked on top of each other.

Tips and Tricks

  • Use a large cookie scoop or 1/4-cup measuring cup to fill your muffin tin. This’ll ensure even-sized muffins, with that beautiful dome on top!
  • For extra sweetness, top your muffins with a simple 2-ingredient powdered sugar glaze. To make it, whisk together 1/2 cup powdered sugar with 2-3 tablespoons milk. Once smooth, use a spoon to drizzle glaze over cooled gluten-free gingerbread muffins.
  • Store these muffins in an airtight container at room temperature for up to 3 days. Or, to make them last longer, pop them in the freezer for up to 3 months!

Adjust This Recipe to Your Dietary Needs

Make it Vegan: While I haven’t tested it myself, you can try replacing the eggs with either two flax eggs or by using your favorite vegan egg replacer. I’ve used this Bob’s Red Mill Egg Replacer in a number of other recipes and have always loved it!

Gluten-Free Gingerbread Muffins

4 from 18 votes
Recipe by Samantha Course: Snacks, DessertDifficulty: Easy
Servings

10

muffins
Prep time

5

minutes
Cooking time

20

minutes
Total time

25

minutes

Fluffy and perfectly spicy gluten-free gingerbread muffins! The perfect festive snack, that comes together in the blender. Oats, molasses, and ground ginger make these gluten-free gingerbread muffins healthy AND delicious!

Ingredients

  • 2 cups old fashioned rolled oats

  • 1/2 cup apple sauce, unsweetened

  • 1/2 cup maple syrup

  • 1/4 cup molasses

  • 2 eggs

  • 2 teaspoons vanilla extract

  • 2 teaspoons baking powder

  • 2 teaspoons cinnamon

  • 1 1/2 teaspoons ground ginger

  • 1/2 teaspoon nutmeg

  • 1/2 teaspoon salt

Directions

  • Preheat oven to 350° Fahrenheit and line a muffin tin with muffin liners.
  • Add oats to a blender and blend until it’s ground into a flour.
  • Add in remaining ingredients, then blend until a smooth batter forms.
  • Transfer ½ cup batter into each muffin mold, then bake for 20-25 minutes or until a toothpick inserted down the center of one muffin comes out clean. Remove from oven and transfer muffins to a wire cooling rack, let cool before eating.

Recipe Video

Did you make this recipe?

Share it and tag @samdoesherbest on Instagram!

Like this recipe?

Follow us @samdoesherbest on Pinterest

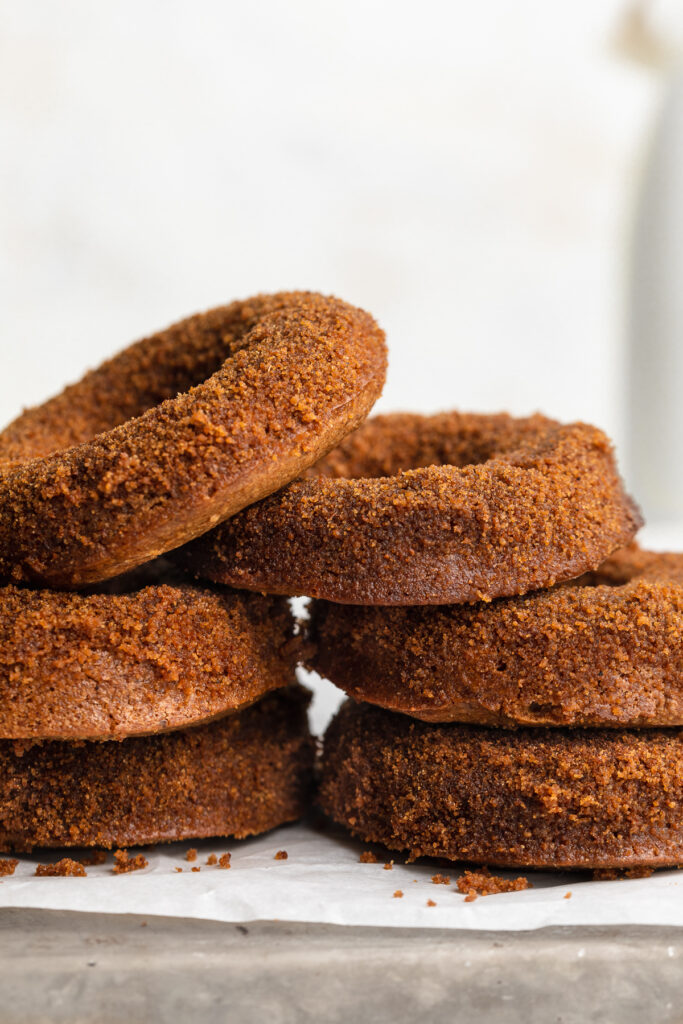
Is there anything that screams Fall more than apple cider donuts?! If you’ve never tried making homemade baked donuts before, these apple cider donuts are a must-make for this Fall season!

close-up image of healthy vegan apple cider donuts stacked on top of each other.

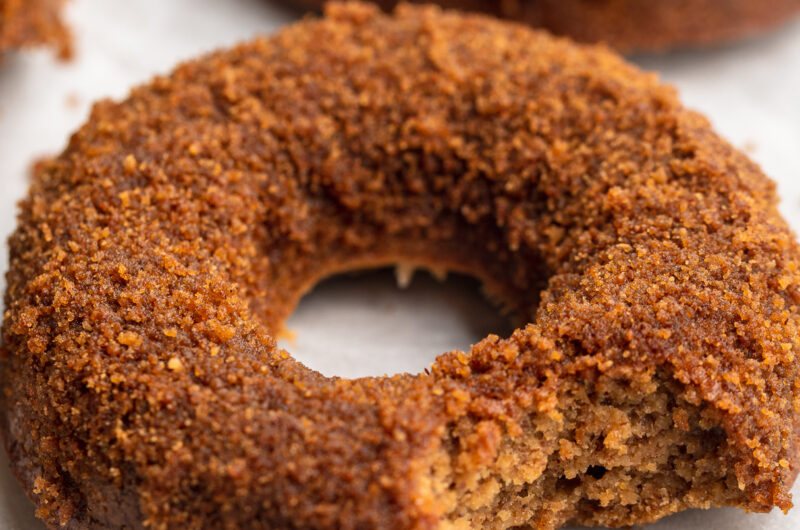
Not only are these apple cider donuts incredibly soft and fluffy, but it contains no dairy or eggs, is baked instead of fried, and is adorned with crunchy and sweet cinnamon sugar topping that is absolutely mouth-watering. Fall isn’t complete without apple picking and a batch of these vegan donuts!

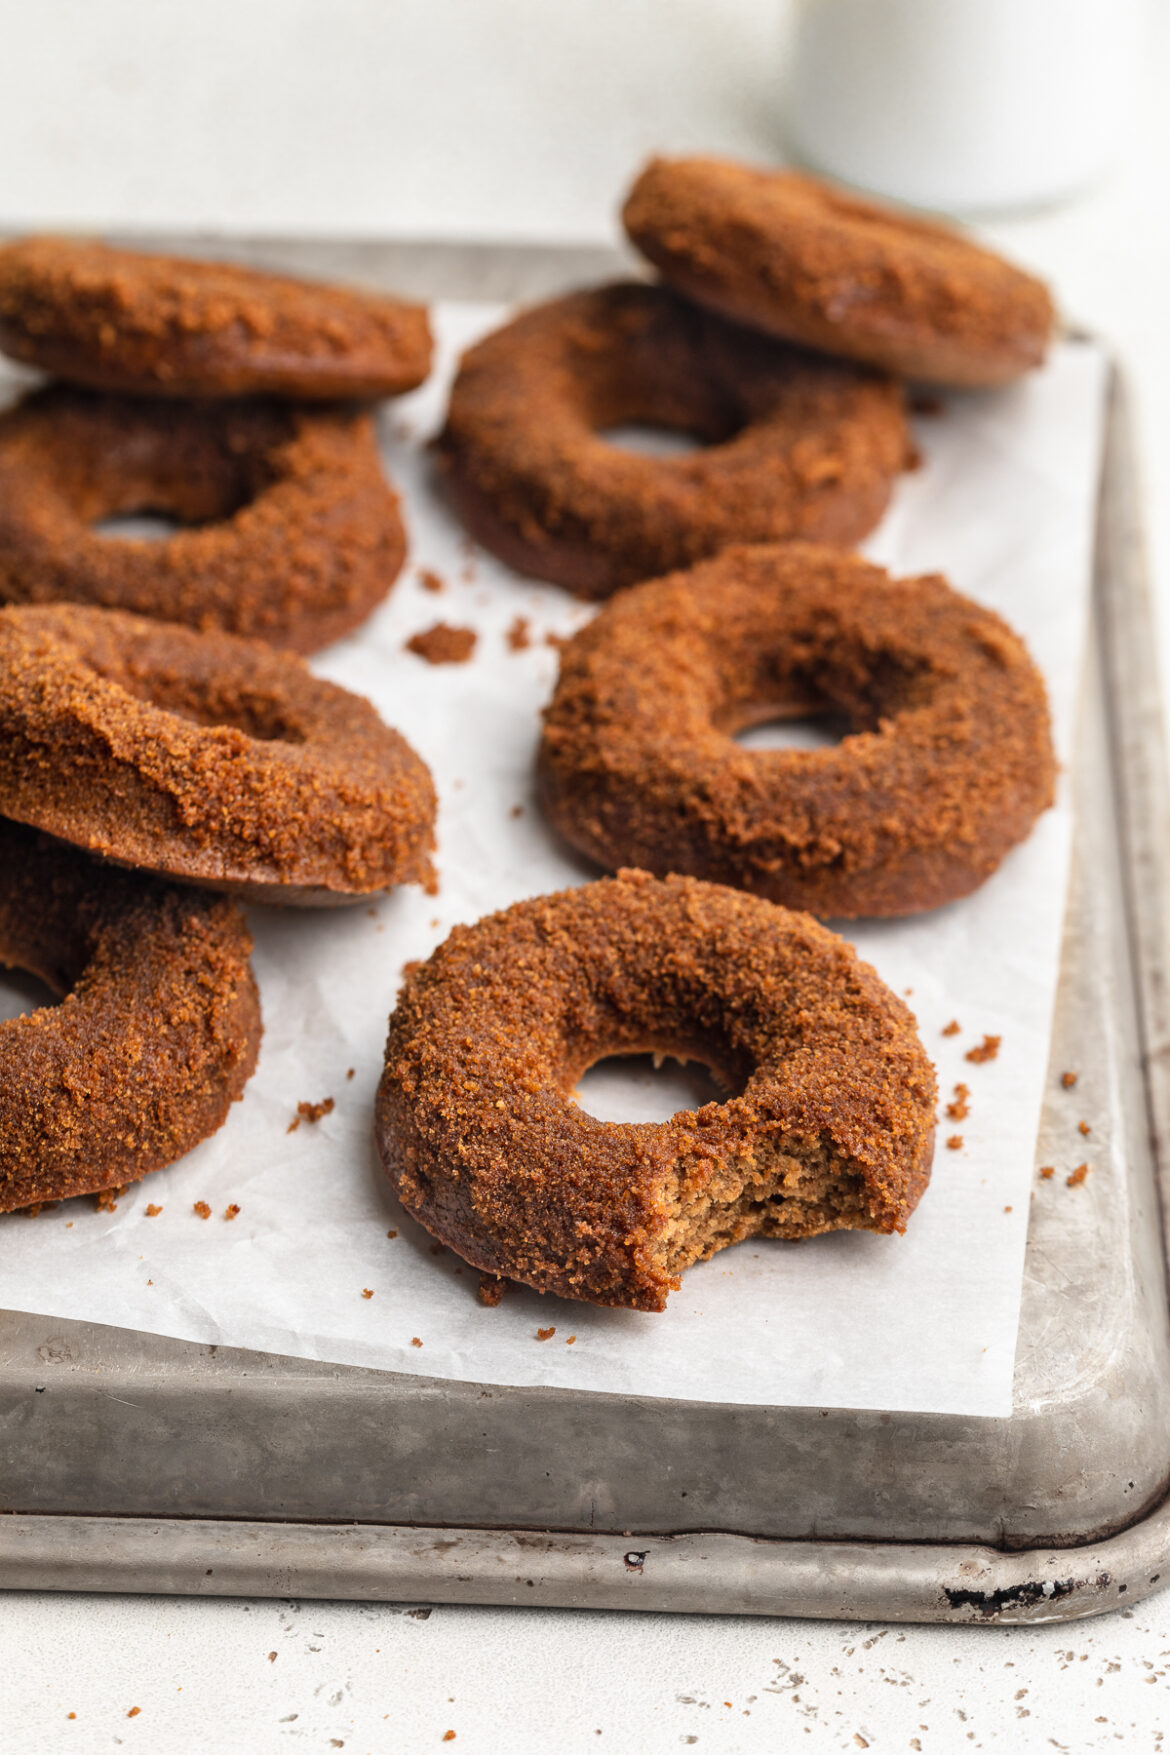
healthy vegan apple cider donuts on parchment paper with a bite taken out.

MAIN INGREDIENTS NEEDED TO MAKE VEGAN APPLE CIDER DONUTS

  • Apple Cider – Apple cider, whether store-bought or homemade, is going to create the delicious apple flavor we’re looking for in this recipe.
  • Rolled Oats – I love baking up my gluten-free treats with oats! Not only is it inexpensive, but they’re super easy to acquire. 
  • Flax Eggs – A flax egg is a vegan egg substitute and helps bind all the ingredients together!
  • Baking Soda & Powder – Baking soda and powder give the batter that quick inflation in the oven that creates the cake-like fluffy donuts we’re looking for.
  • Cinnamon – This ingredient will be used for making not only the donut, but of course, the cinnamon sugar!
  • Nutmeg – Known for its spicy, nutty flavor, nutmeg perfectly complements the sweet & warm cinnamon in this recipe.
  • Vegan Butter – I typically use the Earth Balance Vegan Buttery Sticks in my vegan/dairy-free baked goods. Though any vegan butter will work here, just be sure to melt it completely before adding it to this recipe. 
  • Coconut Sugar – I use coconut sugar when making the cinnamon sugar, but you can opt for organic cane sugar if you prefer.
healthy vegan apple cider donuts stacked on top of each other, with a bottle of milk on the side.

ADJUST THIS APPLE CIDER DONUTS RECIPE TO YOUR DIET

  • Add Dairy: Although I use dairy-free butter, you could substitute it for melted coconut oil or regular butter if you’d like! You can also use regular eggs instead of flax.
  • Add Gluten: You can try using 1 cup of all purpose flour instead of oat flour.

TIPS FOR MAKING BAKED VEGAN APPLE CIDER DONUTS

  • Bring the wet ingredients to room temperature before you combine them with the flour and other dry ingredients.
  • Don’t be alarmed if you see bubbles starting to form after mixing the wet and dry ingredients. It’s just the baking soda and powder reacting the way they’re supposed to. 

Baked Vegan Apple Cider Donuts (Gluten-Free)

0 from 0 votes
Recipe by Samantha Course: DessertsDifficulty: Medium
Servings

12

servings
Prep time

10

minutes
Cooking time

20

minutes
Total time

30

minutes

Is there anything that screams Fall more than apple cider donuts?! If you’ve never tried making homemade baked donuts before, these apple cider donuts are a must-make for this Fall season!

Ingredients

  • For the donuts:
  • 1 1/2 cups rolled oats

  • 1/2 teaspoon baking soda

  • 1/2 teaspoon baking powder

  • 2 teaspoons cinnamon

  • 1/2 teaspoon nutmeg

  • 1/4 teaspoon salt

  • 2 flax eggs, see Notes

  • 1 cup apple cider

  • 1/2 cup creamy almond or peanut butter

  • 1/2 cup coconut sugar

  • 1 tablespoon apple cider vinegar, optional but makes for fluffier donuts

  • 1 teaspoon vanilla extract

  • For the cinnamon sugar:
  • 1 cup coconut sugar

  • 1 tablespoon cinnamon

  • 6 tablespoons dairy-free butter, melted

Directions

  • Preheat your oven to 350° Fahrenheit and grease a donut pan.
  • Add the rolled oats, baking soda, baking powder, cinnamon, nutmeg, and salt to a blender. Blend until oats are ground into a flour.
  • Add in the flax eggs, apple cider, almond butter, coconut sugar, apple cider vinegar, and vanilla extract. Blend until a smooth batter forms.
  • Carefully fill your donut molds with the batter, I used a cookie scoop to keep things neat.
  • Bake for 20-25 minutes and pop out of the molds onto a cooling racks, allow to cool completely before proceeding to the next step.
  • Combine the coconut sugar and cinnamon in a small bowl – set up an assembly line with the donuts, bowl of melted butter, bowl of cinnamon sugar, and a cooling rack.
  • Gently dip each donut in the butter before transferring and coating in the cinnamon sugar, place on a cooling rack while you finish up the rest. Once all are coated, store in a sealed container on either the counter for two days or the fridge for up to one week .

Recipe Video

Notes

  • Flax Eggs: To make one flax egg, combine 1 tablespoon of ground flax meal with 3 tablespoons of water and let sit on the counter for five minutes to thicken.
  • Storage: store in a closed container at room temperature for 2-3 days, in the fridge for 1 week, or in the freezer for 1 month.

Did you make this recipe?

Share it and tag @samdoesherbest on Instagram!

Like this recipe?

Follow us @samdoesherbest on Pinterest

OTHER VEGAN AND GLUTEN-FREE DESSERTS

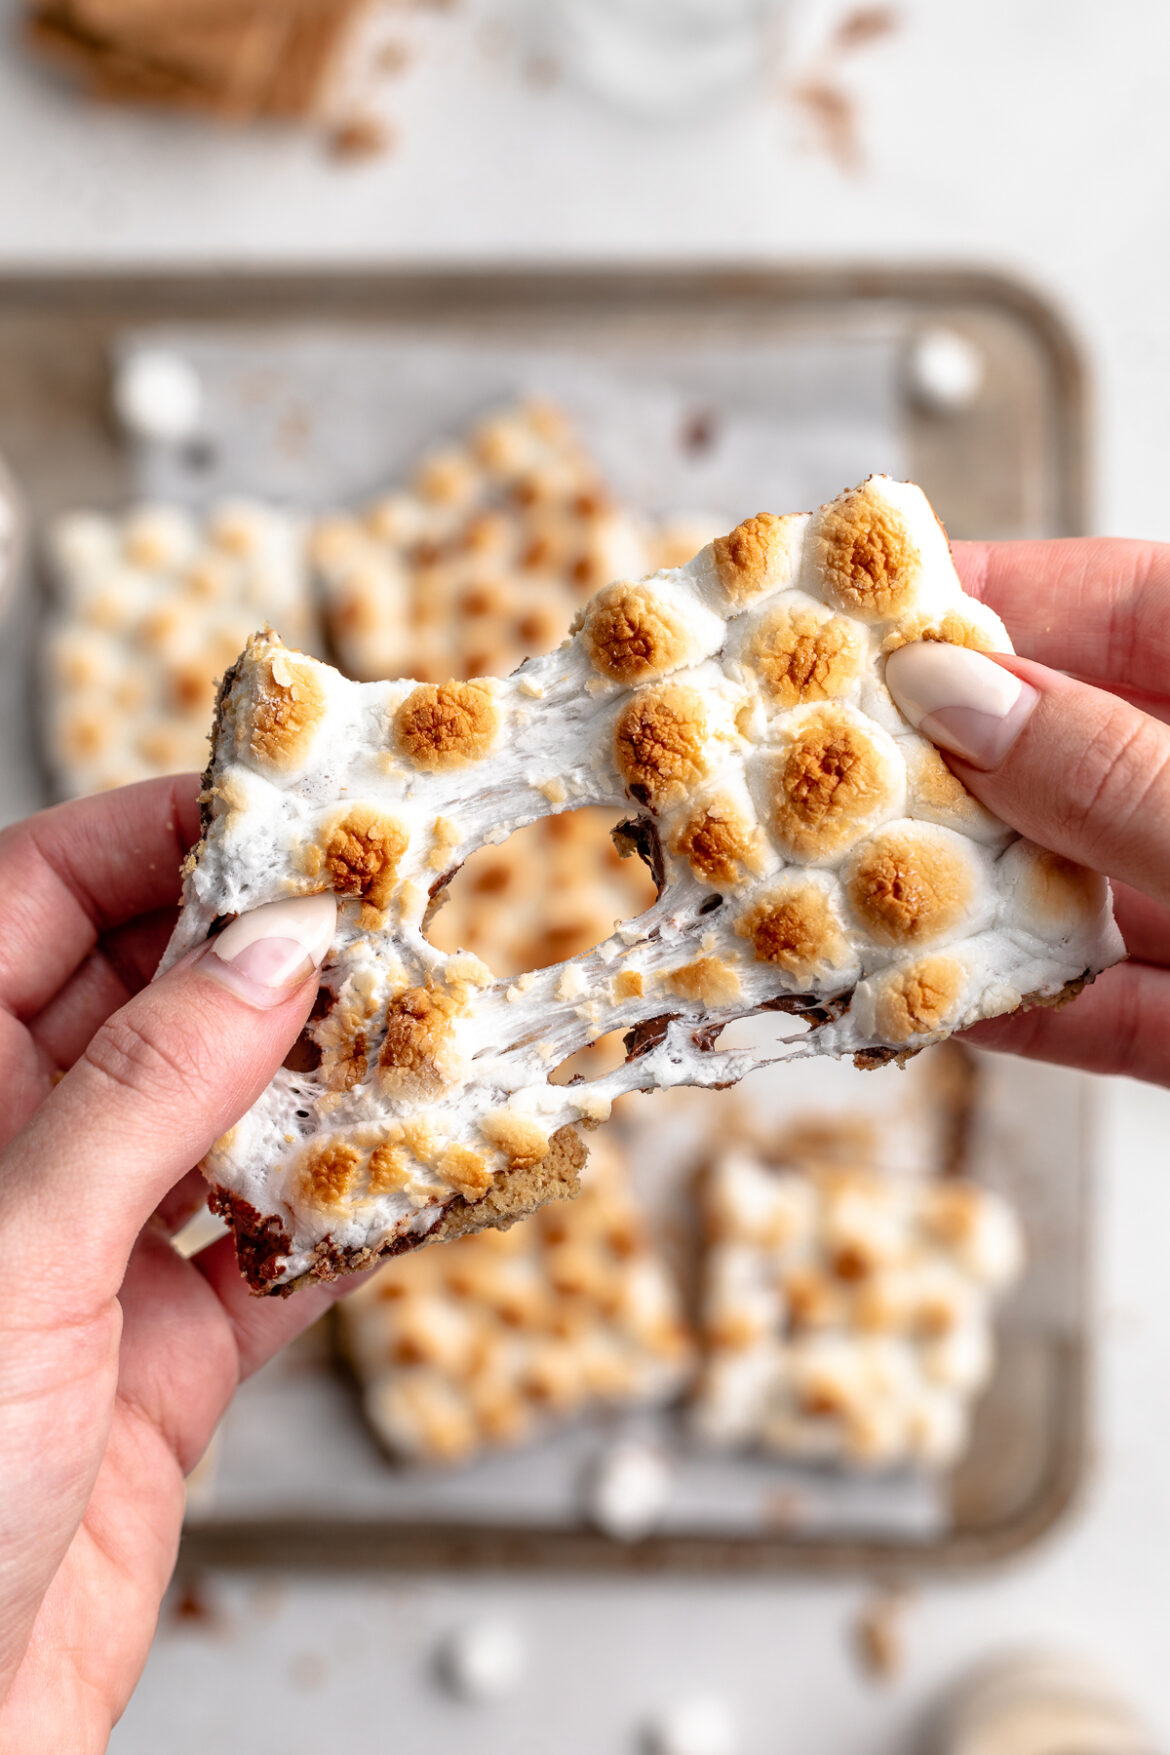
These s’mores bars are something else! A buttery graham cracker base followed by a lush layer of chocolate is topped off with toasty marshmallows. These s’mores bars will blow you away with how delicious and addictive they are – all while gluten-free!

gluten-free s'mores bars stacked on top of each other.

What You Need To Make S’mores Bars

Oat Flour – You can either purchase oat flour from the store or easily make it yourself at home. To make oat flour, start by adding 1 and 1/2 cups of rolled oats to a blender or food processor. Then, blend the oats for a few seconds or until ground into a powder. Once ground, you now have oat flour to use in this gluten-free recipe!

Chocolate Chips – Any chocolate chips or even a chopped chocolate bar will work in these s’mores bars. I used the Enjoy Life Mini Chips since they are vegan and nut-free, though you can use any vegan chocolate you’d like. And if you’re not vegan, feel free to use whatever chocolate you have on-hand! (P.S. you should always have chocolate on-hand.)

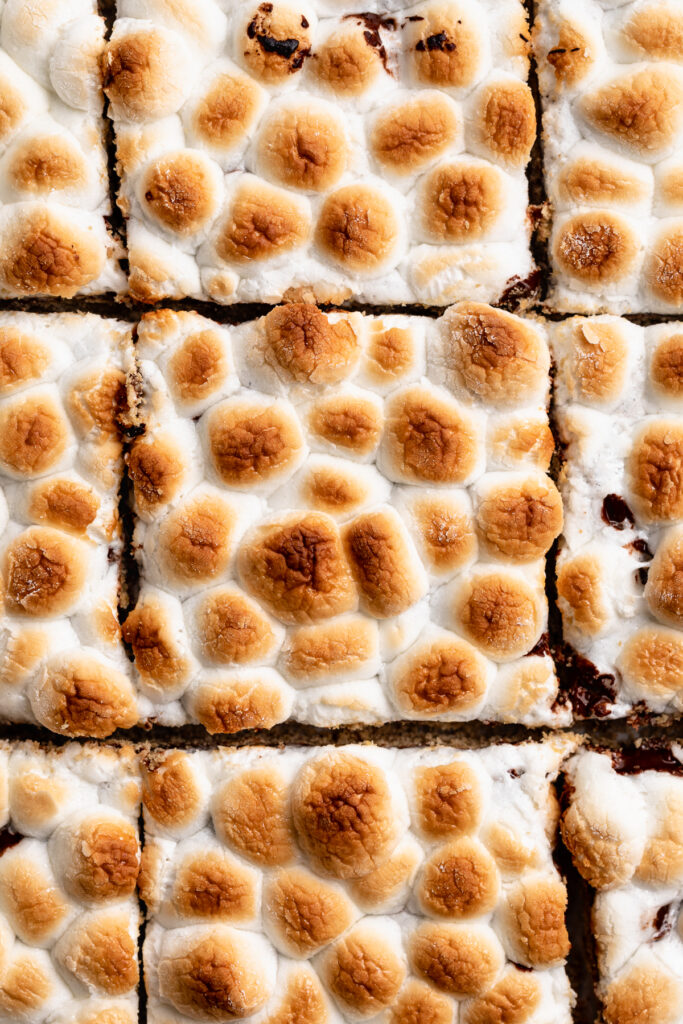
Marshmallows – I prefer mini marshmallows for simply how cute and satisfying they look all lined up on top of these s’mores bars. However, the standard size marshmallows will work just fine. The key to perfectly toasty and golden brown marshmallows is sticking them under the broiler for about 1 minute. It’s super important you keep an eye on the bars during this final trip in the oven, as the broiler has a tendency to burn things in literal seconds. Therefore, watch your vegan marshmallow-y treats and pull them out once they’ve achieved your desired level of toasty-ness!

close-up overhead image of s'mores bars.

Adjust This Recipe To Your Diet

Don’t Have Oat Flour? If you don’t have oats and/or oat flour, you can replace it with an equal amount of either brown rice flour or all purpose flour in this recipe.

Add Dairy: Use regular melted butter in place of the vegan butter in this recipe.

s'mores bars on a baking sheet with graham crackers on the side.

Tips For Making S’mores Bars

  • Be sure to leave the bars to cool on the baking sheet for at least 15 minutes after you take them out of the oven! These s’mores bars are surprisingly delicate, so leaving them to cool will ensure they stick together when handled.
  • Use a greased knife to quickly and easily slice the bars. To do this, take a sharp knife and either spray it with spray cooking oil or drizzle it with some coconut oil. Once greased, cut into the bars and wipe down the knife between each slice!
  • I highly recommend storing this vegan and gluten-free dessert in the fridge or freezer during the summer months. Due to the butter and chocolate, they are at risk of melting if left to sit out in too high of a temperate. Therefore, to avoid that risk, it’s best to just keep these babies in the fridge to enjoy them at your leisure!

S’mores Bars (Vegan, Gluten-Free)

5 from 1 vote
Recipe by Samantha Course: DessertDifficulty: Easy
Servings

12

bars
Prep time

10

minutes
Cooking time

20

minutes
Total time

30

minutes

These s’mores bars are something else! A buttery graham cracker base followed by a lush layer of chocolate is topped off with toasty marshmallows. These s’mores bars will blow you away with how delicious and addictive they are – all while being vegan and gluten-free!

Ingredients

  • 1 1/4 cups oat flour, see Notes

  • 1/4 cup tapioca flour, or corn starch

  • 1/2 teaspoon baking powder

  • 1/4 cup maple syrup

  • 2 1/2 tablespoons butter, melted (I used vegan butter)

  • 1/2 teaspoon vanilla extract

  • 1 cup chocolate chips

  • 2 cups marshmallows

Directions

  • Preheat oven to 350° Fahrenheit.
  • Mix together the oat flour, tapioca flour, and baking soda in a bowl.
  • Add in the maple syrup, melted vegan butter, and vanilla extract, mix everything to combine.
  • Transfer to a lined 9×9 baking sheet, press into an even layer, then bake for 12-15 minutes or until golden brown.
  • Remove from the oven and sprinkle evenly with chocolate chips, then place back into the oven for 1 minute or until chocolate has melted.
  • Remove from the oven once more, spread the chocolate into an even layer, then top with marshmallows. Place in the oven on broil for 1 minute (watch closely to make sure it doesn’t burn!) or until marshmallows are lightly toasted.
  • Let cool in the pan for 15-20 minutes before slicing.

Recipe Video

Notes

  • Oat Flour: You can easily make your own oat flour by blending rolled oats in a blender until a powder forms and no large oat chunks remain!

Did you make this recipe?

Share it and tag @samdoesherbest on Instagram!

Like this recipe?

Follow us @samdoesherbest on Pinterest

More Delicious Vegan and Gluten-Free Desserts