")
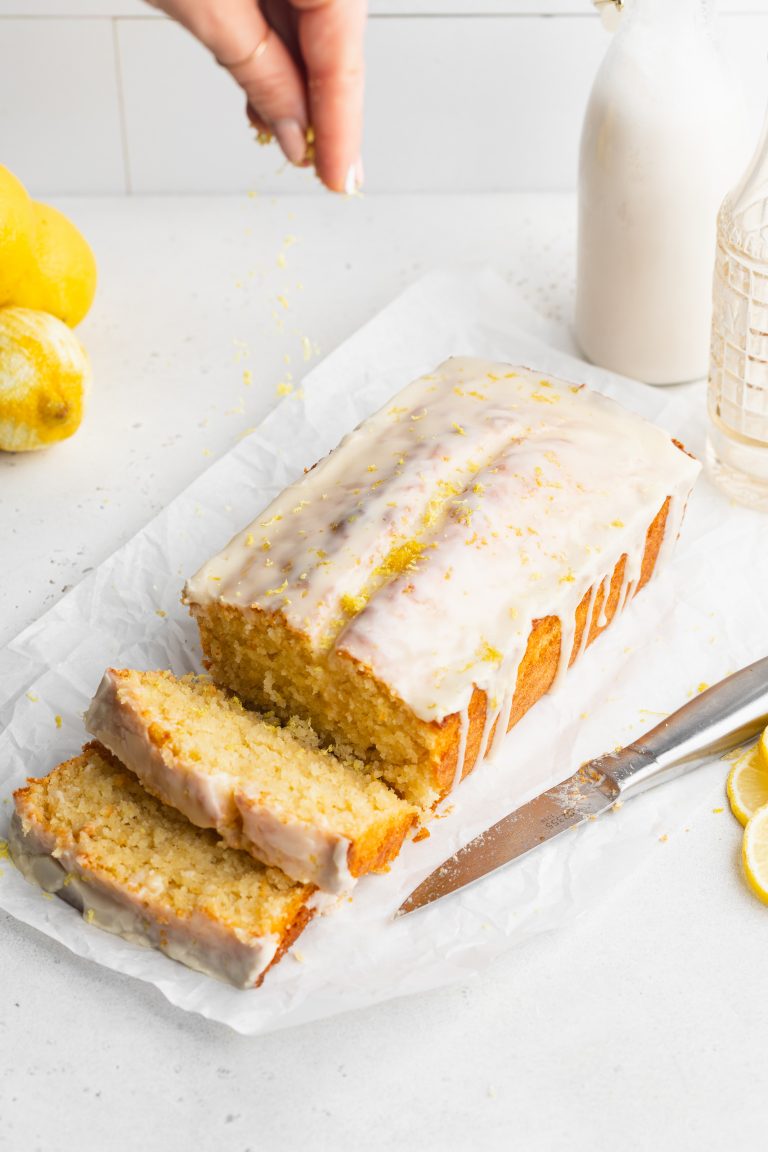
September is my birthday month! So it’s also the month I add rainbow sprinkles to, well.. everything. And this 5 ingredient birthday cake banana bread is no exception. But also, who knew adding sprinkles to banana bread would make for the most delicious and fun addition ever?! Not sure if I’ll ever not add sprinkles to my banana bread from now on. It’s really THAT good!
This birthday cake banana bread is just one of the recipes I’ll be baking for myself this month. I’ve already made my healthy gluten-free mug cakes a few times – because why not?? they’re SO easy. And as part of a larger celebration I’ll be baking up this gluten-free and dairy-free carrot cake because it’s simply my all-time FAVE. It’s shaping up to be a delicious month, friends! Happy birthday to me. 🙂

What You’ll Need to Make This Recipe
- Bananas: Overripe bananas provide the natural sweetness and moisture for this recipe. The more ripe the bananas, the sweeter your banana bread will be, making them the key ingredient.
- Eggs: Eggs act as a binder in this recipe, helping the banana bread rise and stay moist. They also contribute to the fluffy texture.
- Vanilla Extract (Optional): Adding vanilla enhances the sweet, cake-like flavor, but it’s optional if you prefer a more banana-forward taste.
- Brown Sugar: Adds sweetness and a slight caramel-y flavor to complement the bananas. It also keeps the bread moist while baking.
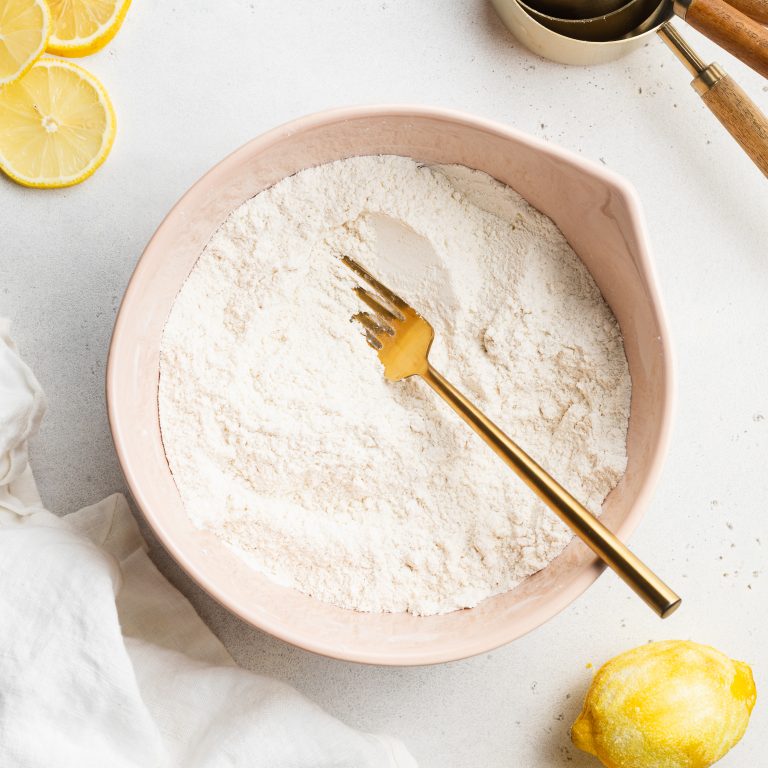
- Self-Rising Flour: If you don’t have self-rising flour, use all-purpose flour with baking powder. This gives the bread structure and helps it rise properly. To make this recipe gluten-free like I did, use a gluten free self-rising flour, I recommend this one.
- Rainbow Sprinkles: The fun part! Sprinkles give this banana bread a celebratory birthday cake vibe. Be sure to use rainbow sprinkles that hold up well during baking. I use and love these dye-free rainbow sprinkles from Amazon.

How to Make 5 Ingredient Birthday Cake Banana Bread
- Preheat and Prep: Start by preheating your oven to 350°F and greasing or lining a loaf pan. This ensures the bread doesn’t stick and bakes evenly.
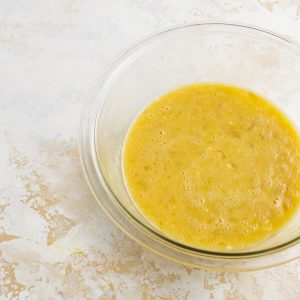
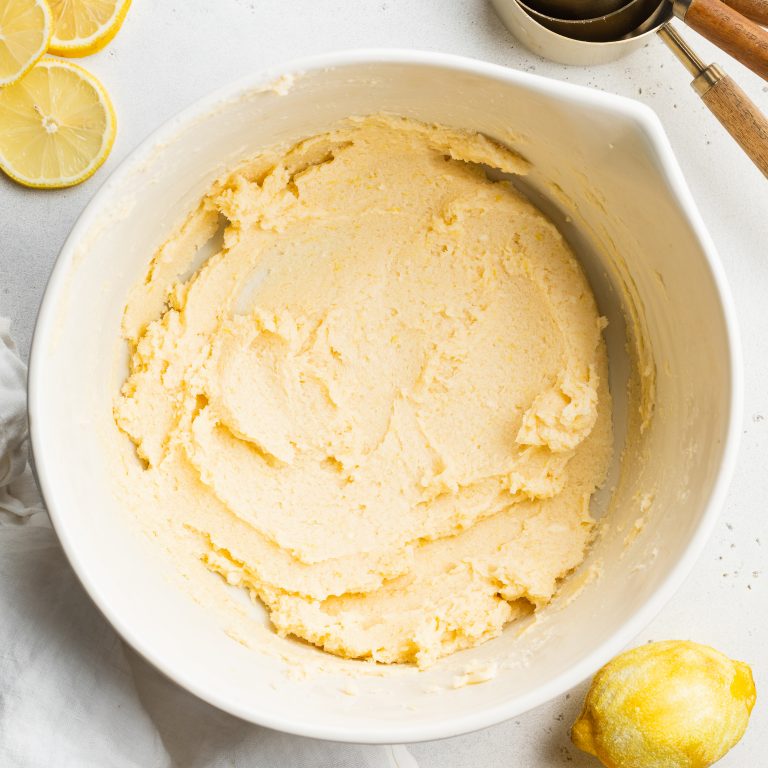
- Mash the Bananas: In a large bowl, mash your overripe bananas until smooth. This will be the base for your bread, adding natural sweetness and moisture.
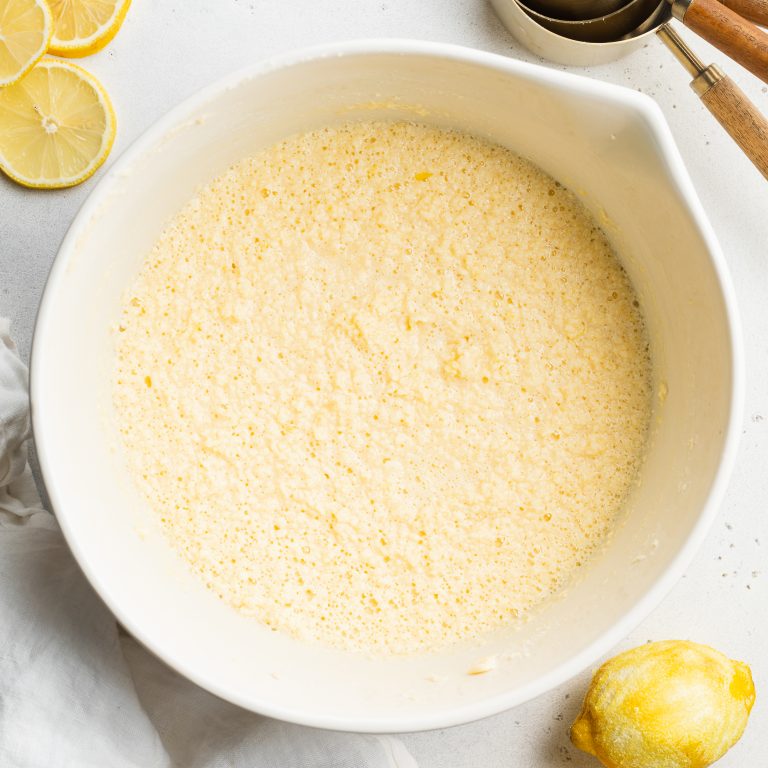
- Mix the Wet Ingredients: Add the eggs and vanilla extract (if using), and whisk everything together until fully combined.
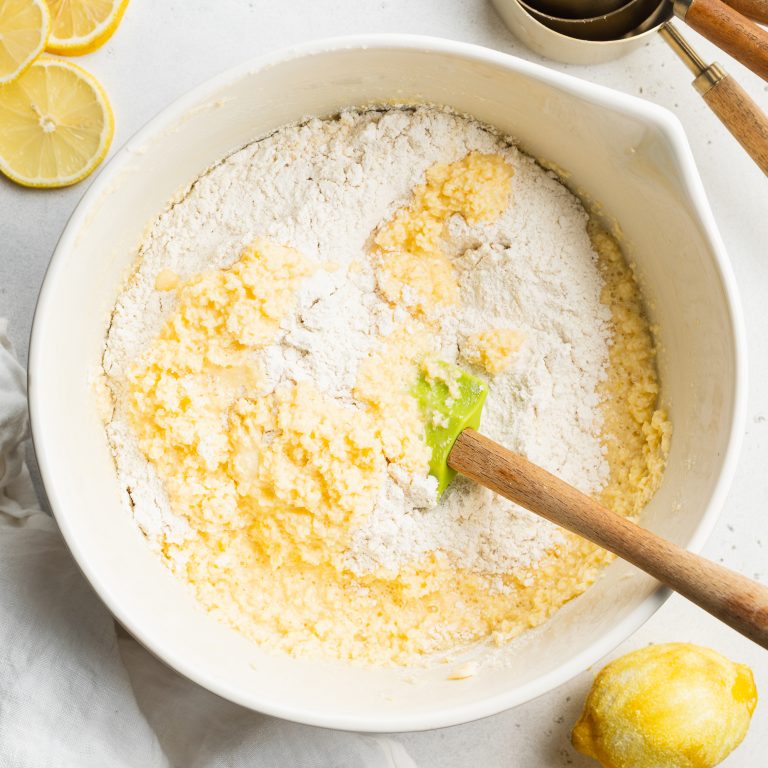
- Combine Dry Ingredients: Add the brown sugar, flour, and rainbow sprinkles to the banana mixture, stirring until no flour pockets remain.
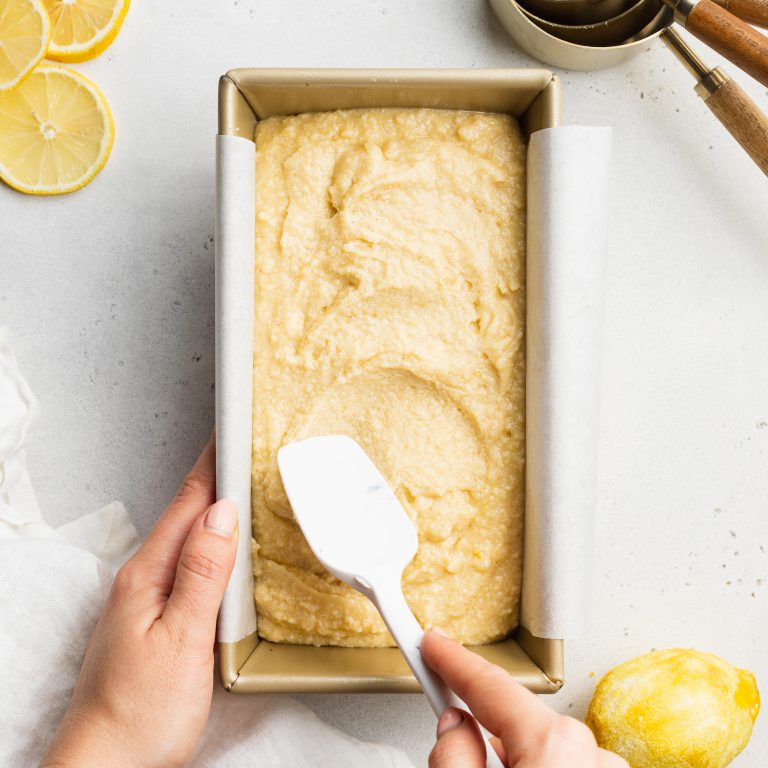
- Bake: Pour the batter into your prepared loaf pan and bake for 55-60 minutes. The loaf should be golden brown, and a toothpick inserted into the center should come out clean.
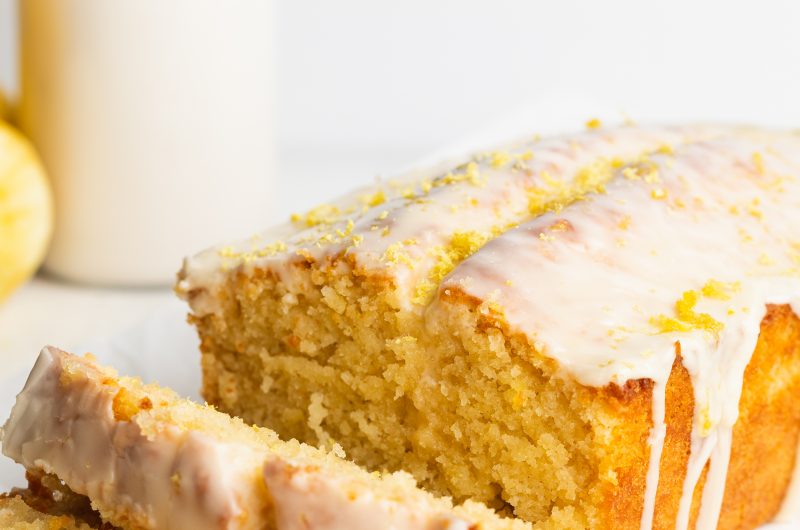
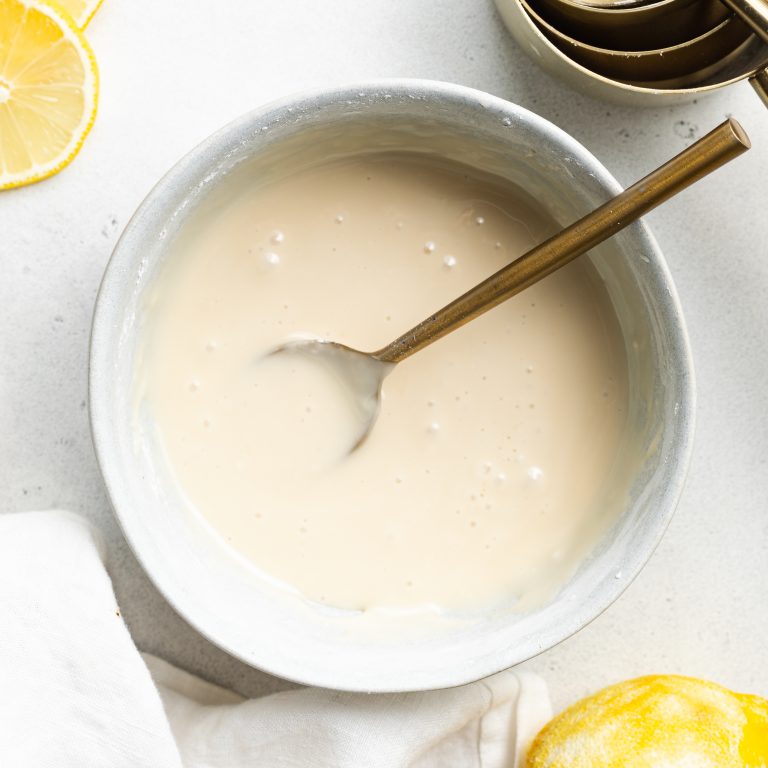
- Cool and Glaze: While the bread cools, mix powdered sugar and milk to make the glaze, then drizzle it over the cooled bread for extra sweetness.
How Can I Store the Leftovers?
This banana bread keeps well for 3-4 days at room temperature when covered tightly with plastic wrap or stored in an airtight container. If you want it to last longer, you can refrigerate it for up to a week, or freeze individual slices for up to 3 months!

5 Ingredient Birthday Cake Banana bread
Equipment
- 1 large bowl
- 1 9×4-inch loaf pan
Ingredients
- 3 large and overripe bananas
- 2 eggs
- 2 teaspoons vanilla extract optional, but recommended
- 1/2 cup brown sugar or coconut sugar
- 1 1/2 cups self rising flour (I used gluten-free self-rising flour) or 1 1/2 cups all purpose flour PLUS 1 teaspoon baking powder
- 1/2 cup rainbow sprinkles
For the optional glaze:
- 1/2 cup powdered sugar
- 1 tablespoon milk
Instructions
- Preheat oven to 350° Fahrenheit and line a 9×4-inch loaf pan with parchment paper, then lightly coat the inside of the pan with oil.
- Place the bananas in a large bowl and mash well with a fork, until mostly smooth.

- Add the eggs and vanilla extract (if using) to the bowl the and whisk to combine. Then, add the brown sugar, flour, and sprinkles then mix again until fully combined and no pockets of flour remain.
- Pour the batter into your prepared loaf pan and bake for 55-60 minutes, or until a toothpick inserted down the center of the bread comes out clean.
- Remove the birthday cake banana bread from the oven and let it cool while you make the glaze.
- Add the powdered sugar and milk to a small bowl, then whisk together until smooth. Pour glaze over the cooled banana bread.


")


