
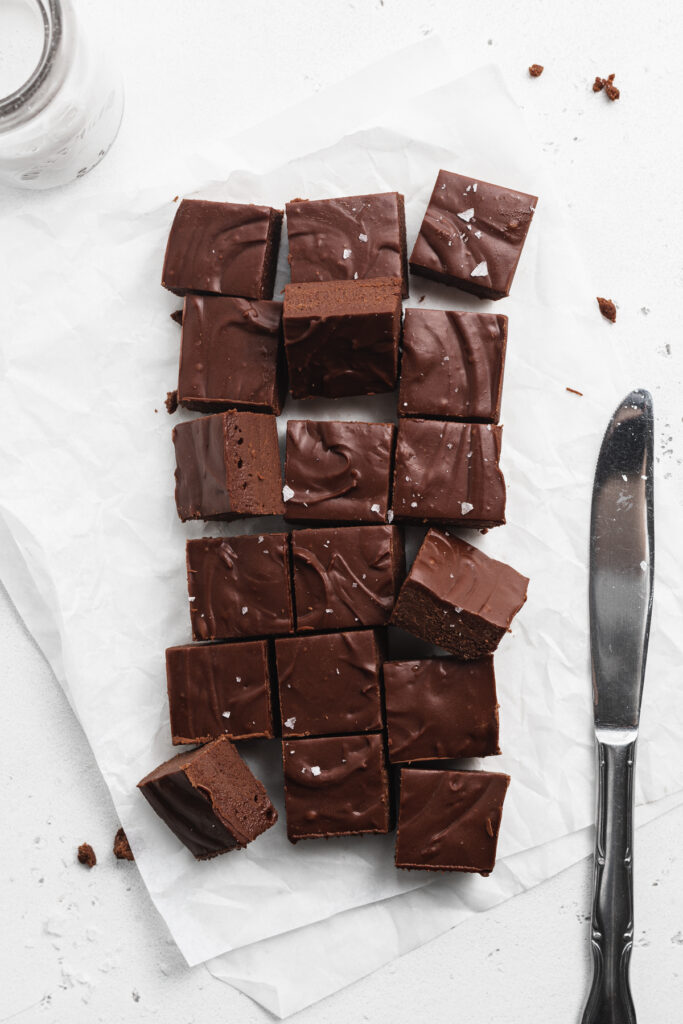
If you’re looking for a fudge snack that you can easily make at home, try my fudge recipe which only requires a few basic pantry ingredients. It doesn’t require sweetened condensed milk as many fudge recipes do, but it’s just as delicious!

What is Condensed Milk? How is the fudge made without it?
Condensed milk is cow’s milk from which water has been removed. It’s also sweetened with added sugar and is often used in traditional fudge recipes because it’s thick and sweet. However, not everyone has condensed milk in their pantry. So, if you want to make fudge on a whim, you need to improvise with some basic ingredients that you likely already have on hand. This is where my recipe comes in handy!
Melting the butter and chocolate in the microwave is the easiest way to create this fudge without condensed milk. But, this can also be done on a stovetop by melting and constantly stirring until combined.
However, keep in mind that evaporated milk is completely different and shouldn’t be used as a substitute.
Main Ingredients For Fudge Without Condensed Milk Recipe
- Chocolate – your choice of dark chocolate or chocolate chips!
- Butter – I used non-dairy.
- Milk – I used almond milk.
- Powdered Sugar
- Vanilla Extract
Tips When Making This Fudge Without Condensed Milk Recipe
- Chocolate: I recommend using semi-sweet chocolate or darker. I used 70% dark chocolate for this fudge recipe and had delicious results. The additional powdered sugar contributes quite a bit of sweetness to this recipe, therefore to avoid fudge that’s too sweet, use a dark chocolate which contains less sugar.
- Milk: I used almond milk but regular milk works fine too. Or if you’re feeling adventurous, you can try chocolate milk!
Storage
Store this fudge in the fridge for best results! If left at room temperature, the fudge runs the risk of melting (especially in warmer climates). I actually prefer to store my fudge in the freezer in the summertime, it’s still soft enough to sink my teeth into – but perfectly firm, cold, and just SO delicious!

Easy Fudge Recipe Without Condensed Milk
Course: DessertsCuisine: AmericanDifficulty: Easy4
servings30
minutes40
minutes0
minutesIf you’re looking for a fudge snack that you can easily make at home, try my fudge recipe which only requires a few basic pantry ingredients. It doesn’t require sweetened condensed milk as many fudge recipes do, but it’s just as delicious!
Ingredients
6 Ounces Dark Chocolate (or 3/4 cup chocolate chips)
1/4 Cup Butter (Dairy or Dairy-free)
1/4 Cup Milk (Dairy or Dairy-Free)
2 Cups Powdered Sugar
1 Teaspoon Vanilla Extract
Directions
- Line and grease a loaf pan.
- Microwave chocolate, butter, and milk in a bowl for 2 minutes or until melted – stir to combine.
- Add in powdered sugar and vanilla extract, beat with a hand or stand mixer until smooth.
- Transfer mixture to prepared pan, cover, and refrigerate for 1-2 hours or until firm. Use a greased knife to cut fudge into squares.
Recipe Video
Notes
- This fudge is best stored in the fridge or freezer.
Did you make this recipe?
Share it and tag @samdoesherbest on Instagram!
Like this recipe?
Follow us @samdoesherbest on Pinterest

")


")


")


