Tag

vegan

Browsing

Fall is in the air, and you know what that means – it’s pumpkin spice season! But don’t worry, we’ve got your back with a scrumptious Gluten-Free Pumpkin Coffee Cake recipe that’s not just gluten-free but also vegan and refined sugar-free. So, grab your apron, a pumpkin spice latte, and let’s dive right into this autumn treat.

gluten-free pumpkin coffee cake on a baking sheet with milk on the side

What You’ll Need to Make Gluten-Free Pumpkin Coffee Cake

Gluten-Free All-Purpose Flour: To keep it gluten-free, we’ll be using a gluten-free all-purpose flour blend. Make sure it’s labeled as such to avoid any unwanted gluten surprises. I use and recommend this Bob’s Red Mill Gluten-Free 1:1 Baking Flour.

Coconut Sugar or Brown Sugar: Sweeten things up with a touch of coconut sugar or brown sugar. These options add that wonderful caramel flavor we all crave in coffee cake.

Pumpkin Puree: Our star ingredient! Go for the canned pumpkin puree or whip up some homemade pumpkin puree for that authentic fall flavor.

Cinnamon: Spice things up with a generous pinch of cinnamon. It’s the secret ingredient that’ll make your kitchen smell like a cozy pumpkin spice haven.

overhead image of gluten-free pumpkin coffee cake on a baking sheet

Tips and Tricks

  • The Perfect Flour Mix: When using gluten-free flour, it’s crucial to get the right texture. Mix your gluten-free flour with a bit of xanthan gum to help with binding and structure. Typically, 1/2 teaspoon per cup of flour should do the trick.
  • Pumpkin Magic: If you want your coffee cake to be extra pumpkin-y, add a touch of pumpkin pie spice in addition to the cinnamon. Nutmeg, cloves, and allspice will give it that unmistakable autumn flavor.
  • Say No to Overbaking: One of the biggest gluten-free baking pitfalls is overbaking. Keep an eye on your coffee cake and use the toothpick test. Insert a toothpick into the center, and if it comes out with just a few moist crumbs, your cake is ready. Overbaking can make it dry.
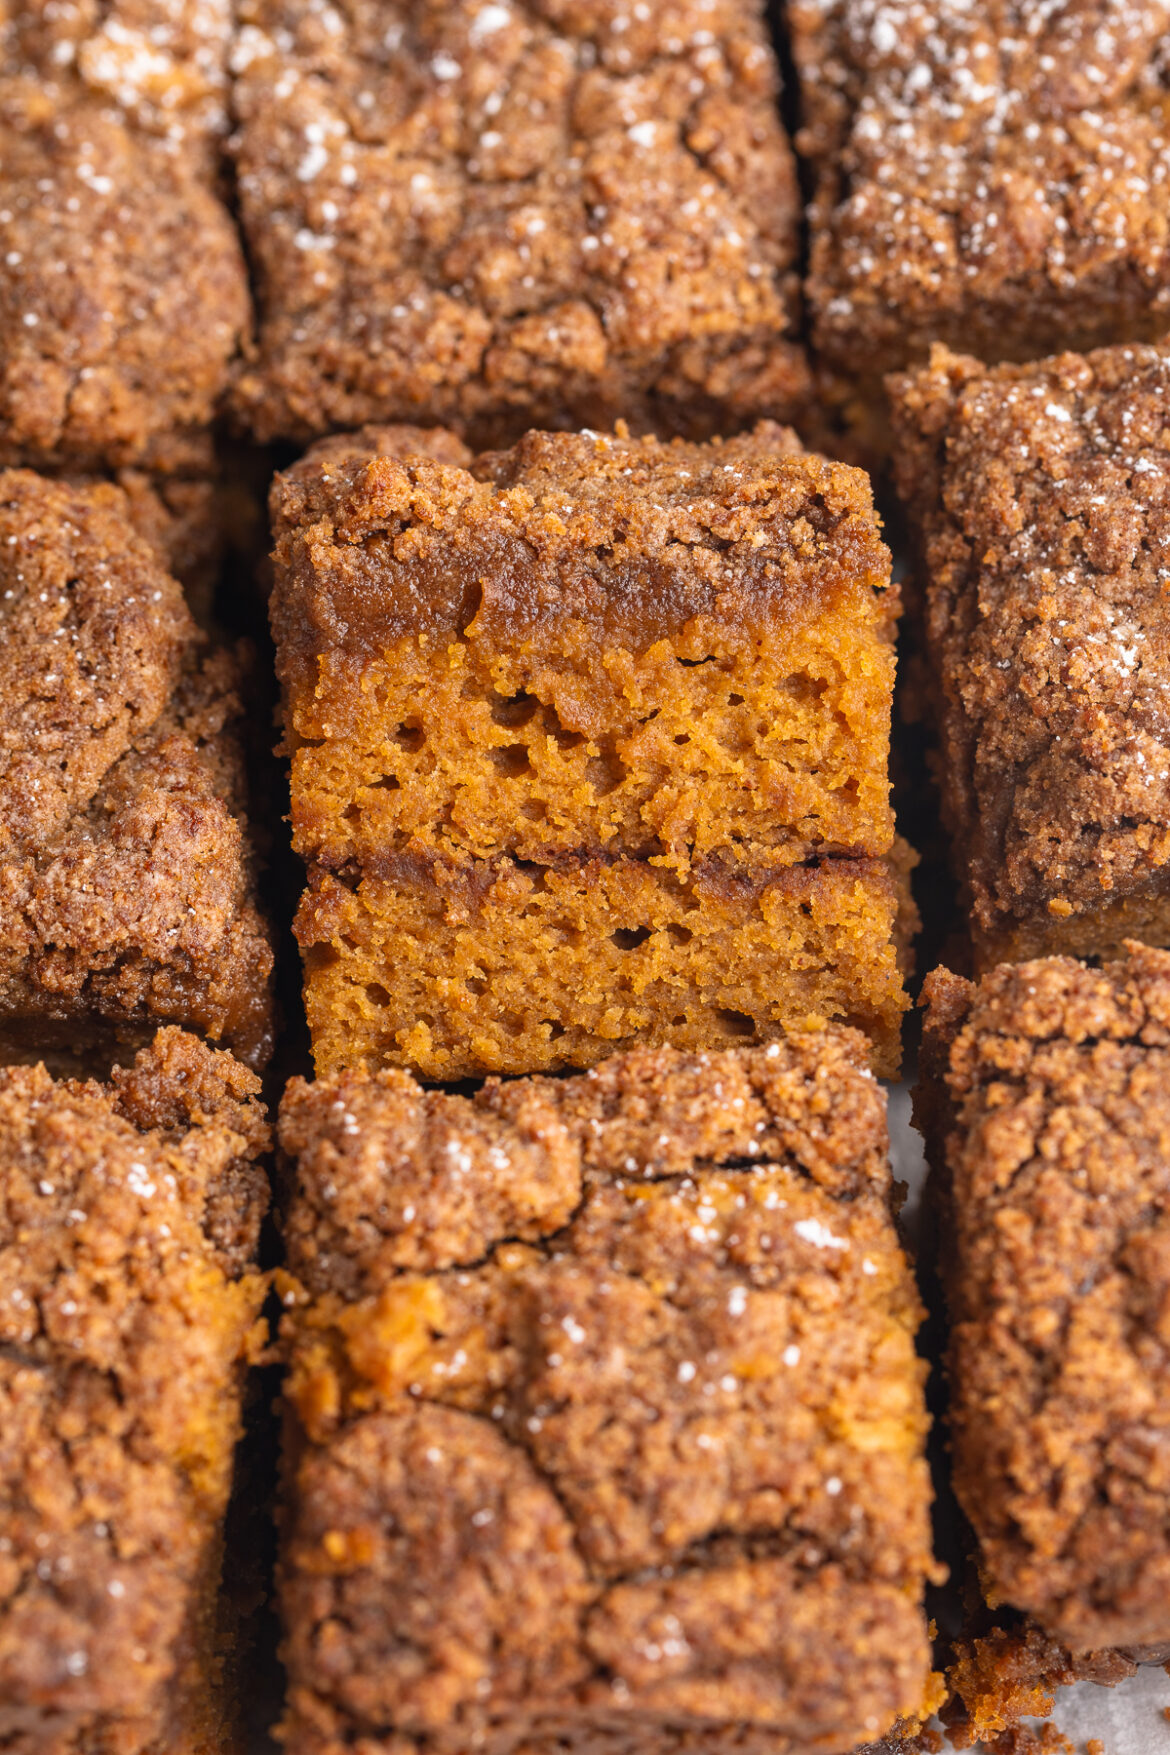
close-up image of gluten-free pumpkin coffee cake
4.34 from 6 votes

Gluten-Free Pumpkin Coffee Cake (vegan & refined sugar-free!)

Fall is in the air, and you know what that means – it’s pumpkin spice season! But don’t worry, we’ve got your back with a scrumptious Gluten-Free Pumpkin Coffee Cake recipe that’s not just gluten-free but also vegan and refined sugar-free. So, grab your apron, a pumpkin spice latte, and let’s dive right into this autumn treat.
Print Pin Rate
Prep Time: 15 minutes
Cook Time: 45 minutes
Total Time: 1 hour
Servings: 16 servings

Equipment

  • 1 large bowl
  • 1 medium bowl
  • 1 small bowl
  • 1 9×9-inch baking pan

Ingredients

  • 2 1/2 cups gluten-free all purpose flour see Notes
  • 2 teaspoons baking powder
  • 1/2 teaspoon baking soda
  • 1 tablespoon pumpkin pie spice
  • 1/2 teaspoon salt
  • 1 cup coconut sugar or brown sugar
  • 1 cup milk (I used almond milk)
  • 1/3 cup melted coconut oil or melted butter
  • 1 cup pumpkin puree
  • 1 tablespoon vanilla extract

For the filling:

  • 1/4 cup coconut sugar or brown sugar
  • 1 tablespoon gluten-free all purpose flour
  • 1 teaspoon cinnamon

For the streusel topping:

  • 1 cup gluten-free all purpose flour
  • 1 cup coconut sugar, or brown sugar
  • 1/2 cup softened butter (I used vegan butter)
  • 1 teaspoon cinnamon

Instructions

  • Preheat oven to 350° Fahrenheit and line an 8×8-inch baking pan with parchment paper.
  • In a large bowl, mix together the gluten-free all purpose flour, baking powder, baking soda, pumpkin pie spice, and salt.
  • In a separate medium bowl, whisk together the coconut sugar, milk, melted coconut oil, pumpkin puree, and vanilla extract.
  • Slowly pour the wet ingredients into the dry ingredients while stirring, then mix until just combined. Set the cake batter aside.
  • Add all filling ingredients to a small bowl and mix together.
  • Then, add all streusel topping ingredients to a bowl and mix together until it comes together. 
  • Transfer half of the batter to the 8×8-inch baking pan, then evenly pour the filling over the top of the batter.
  • Pour the remaining batter over the filling, then top the whole thing with an even layer on the streusel topping.
  • Bake for 45-50 minutes, or until a toothpick inserted down the center of the cake comes out mostly clean. Remove from pan and cool on a wire cooling rack before slicing and serving.

Notes

  • Gluten-Free All Purpose Flour: Make sure you’re gluten-free flour contains xanthan gum for this recipe! If it doesn’t, then add 1 1/2 teaspoons of xanthan gum in with the dry ingredients.
  • Nutrition

    Serving: 1serving | Calories: 272kcal | Carbohydrates: 44g | Protein: 2.5g | Fat: 10g | Sugar: 26g

    There you have it, folks! A delightful Gluten-Free Pumpkin Coffee Cake recipe that’s not only gluten-free but also vegan and refined sugar-free. With the warmth of cinnamon and the cozy embrace of pumpkin, this coffee cake will have your taste buds doing the autumn dance.

    So, whether you’re gluten-sensitive, vegan, or simply looking for a healthier treat, this coffee cake has got you covered. Happy baking, and enjoy the flavors of fall in every bite!
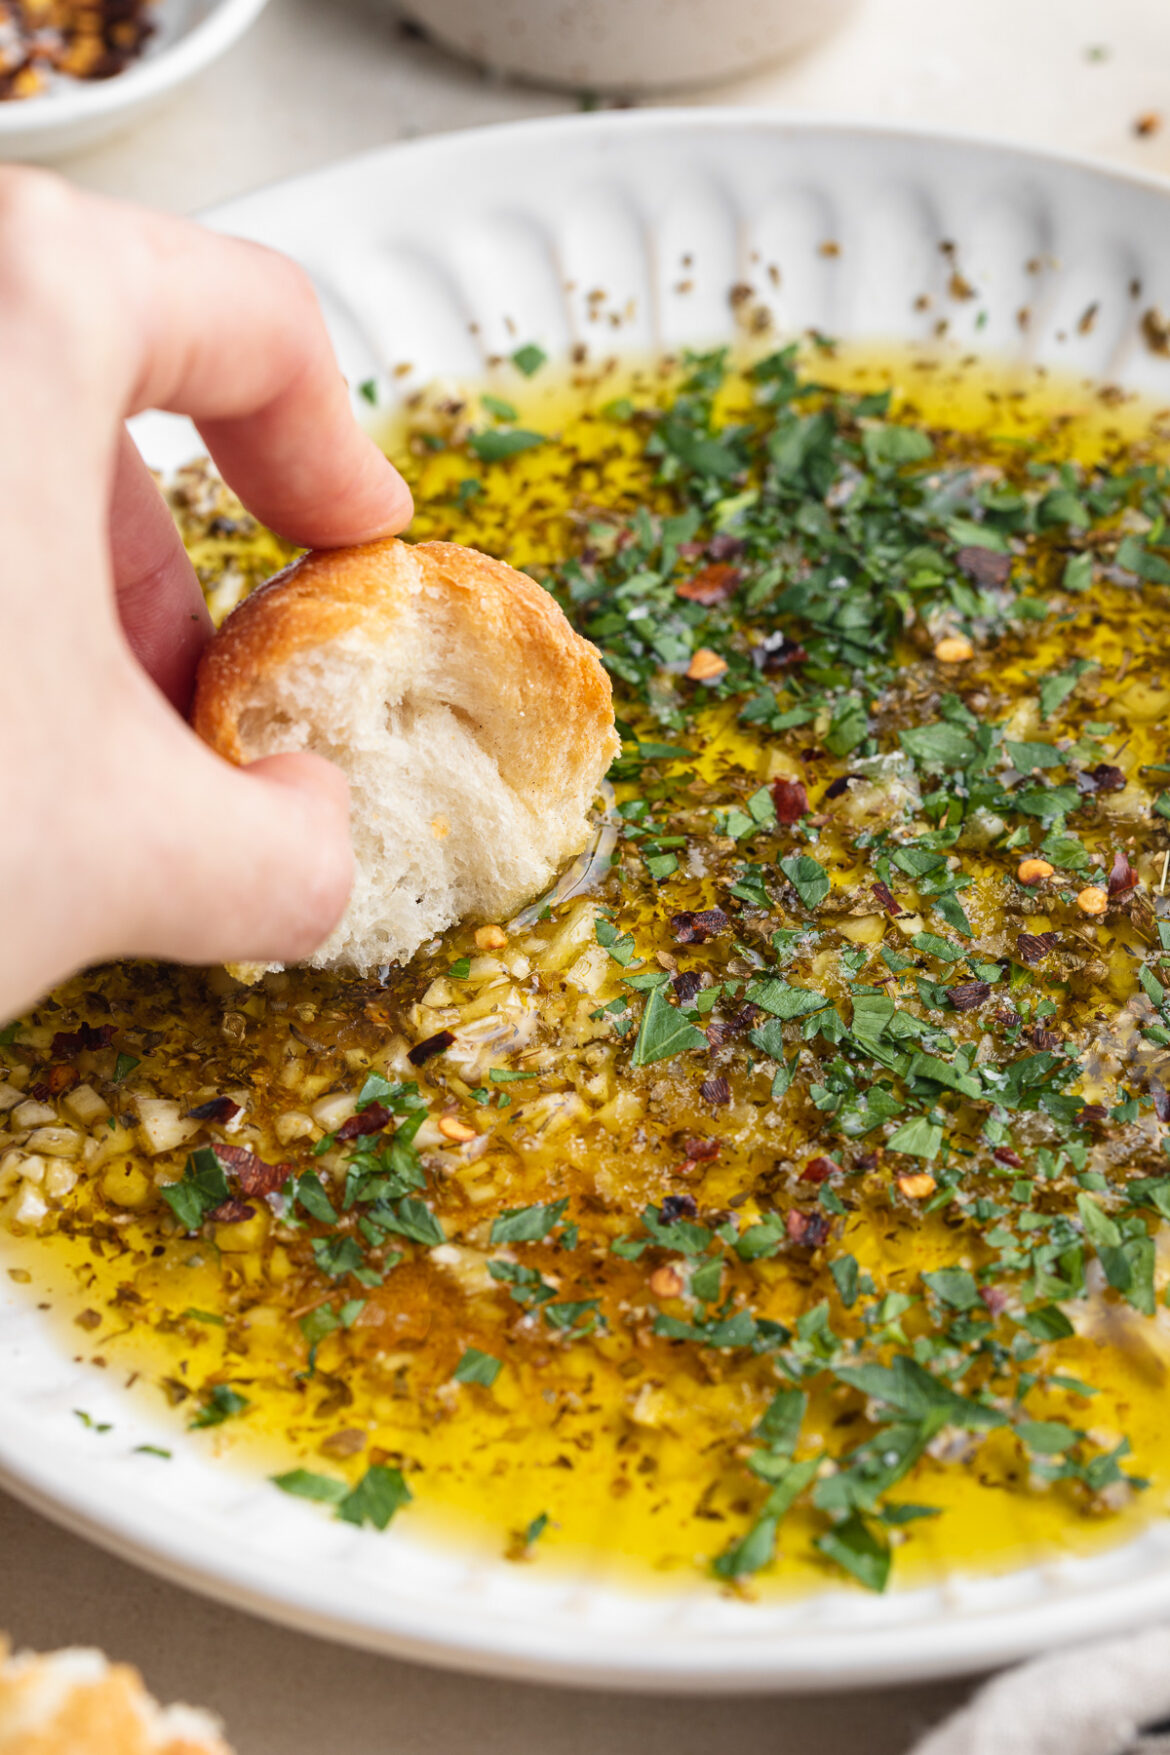
    A simple olive oil dip with garlic and herbs! It’s loaded with tons of flavor, and comes together in just a few minutes. Make this easy appetizer for your next party or potluck.

    overhead image of garlic and herb olive oil dip on a plate.

    What You’ll Need to Make Garlic and Herb Olive Oil Dip

    Garlic – Duh! Add plenty of fresh minced garlic to your dip. Heck, you can even add more than 3 cloves if you want. More garlic = more better …or at least I think so!

    Dried Oregano – Dried oregano is a pantry staple in my opinion. It freshens up any dish, but is dried so you don’t have to worry about it ever going bad. I used 2 teaspoons in this garlic and herb olive oil dip recipe, but feel free to use as much or as little as you’d like. OR, replace the dried oregano with your favorite dried herb or herb blend.

    Garlic Powder – Because there can truly never be too much garlic! A touch of garlic powder works to amp up that incredible fresh garlic flavor.

    Olive Oil – For an especially delicious olive oil dip, use good quality olive oil like this! I’m a firm believer that high-quality olive oil tastes better. And since we’re not cooking or heating the olive oil in this recipe, you’ll actually be able to taste it. So, skip the cheap stuff for this particular recipe.

    Parsley – Fresh chopped parsley is the cherry-on-top of this dip! While optional, I highly recommend you add some. It adds tons of fresh and delicious flavor.

    garlic and herb olive oil dip on a plate with bread on the side.

    Tips and Tricks

    • Have fun with this recipe! You can jazz up this garlic and herb olive oil dip however you’d like. Replace the dried oregano with dried Italian seasoning, use as much or as little garlic as you’d like, or throw in some fresh grated parmesan cheese for even more flavor!
    • Serve this dip with any kind of bread. I enjoyed mine with classic french bread – but focaccia, or even sourdough would make for a great pairing. Or, if you’re up for a little fun, drizzle this oil on a sandwich!
    • Prep it ahead of time! Making this olive oil dip for your next party? You can prep it up to one week in advance. Then, simply store in an airtight container at room temperature until ready to serve. Doing this actually amps up the flavor, since the garlic and herbs have more time to marinate in the olive oil!

    This Garlic and Herb Olive Oil Dip is….

    bread being dipped into garlic and herb olive oil dip.
    5 from 1 vote

    Garlic and Herb Olive Oil Dip

    A simple olive oil dip with garlic and herbs! It’s loaded with tons of flavor, and comes together in just a few minutes. Make this easy appetizer for your next party or potluck.
    Print Pin Rate
    Prep Time: 5 minutes
    Total Time: 5 minutes
    Servings: 8 servings

    Ingredients

    • 3 large garlic cloves, minced
    • 2 teaspoons dried oregano
    • 1 teaspoon garlic powder
    • 1/2 teaspoon salt
    • pinch of red pepper flakes
    • 1/2 cup good quality olive oil
    • bread, for dipping
    • fresh chopped parsley, optional

    Instructions

    • Add garlic, dried oregano, garlic powder, salt, and red pepper flakes to a medium shallow bowl or plate with high sides.
    • Pour in the olive oil, then stir to combine. Top with an optional sprinkle of fresh chopped parsley, and serve with bread for dipping!

    Nutrition

    Calories: 300kcal

    Seriously delicious healthy no-bake cookie dough bars! These bars are vegan, gluten-free, dairy-free, and refined sugar-free. Enjoy as a guilt-free dessert or sweet snack!

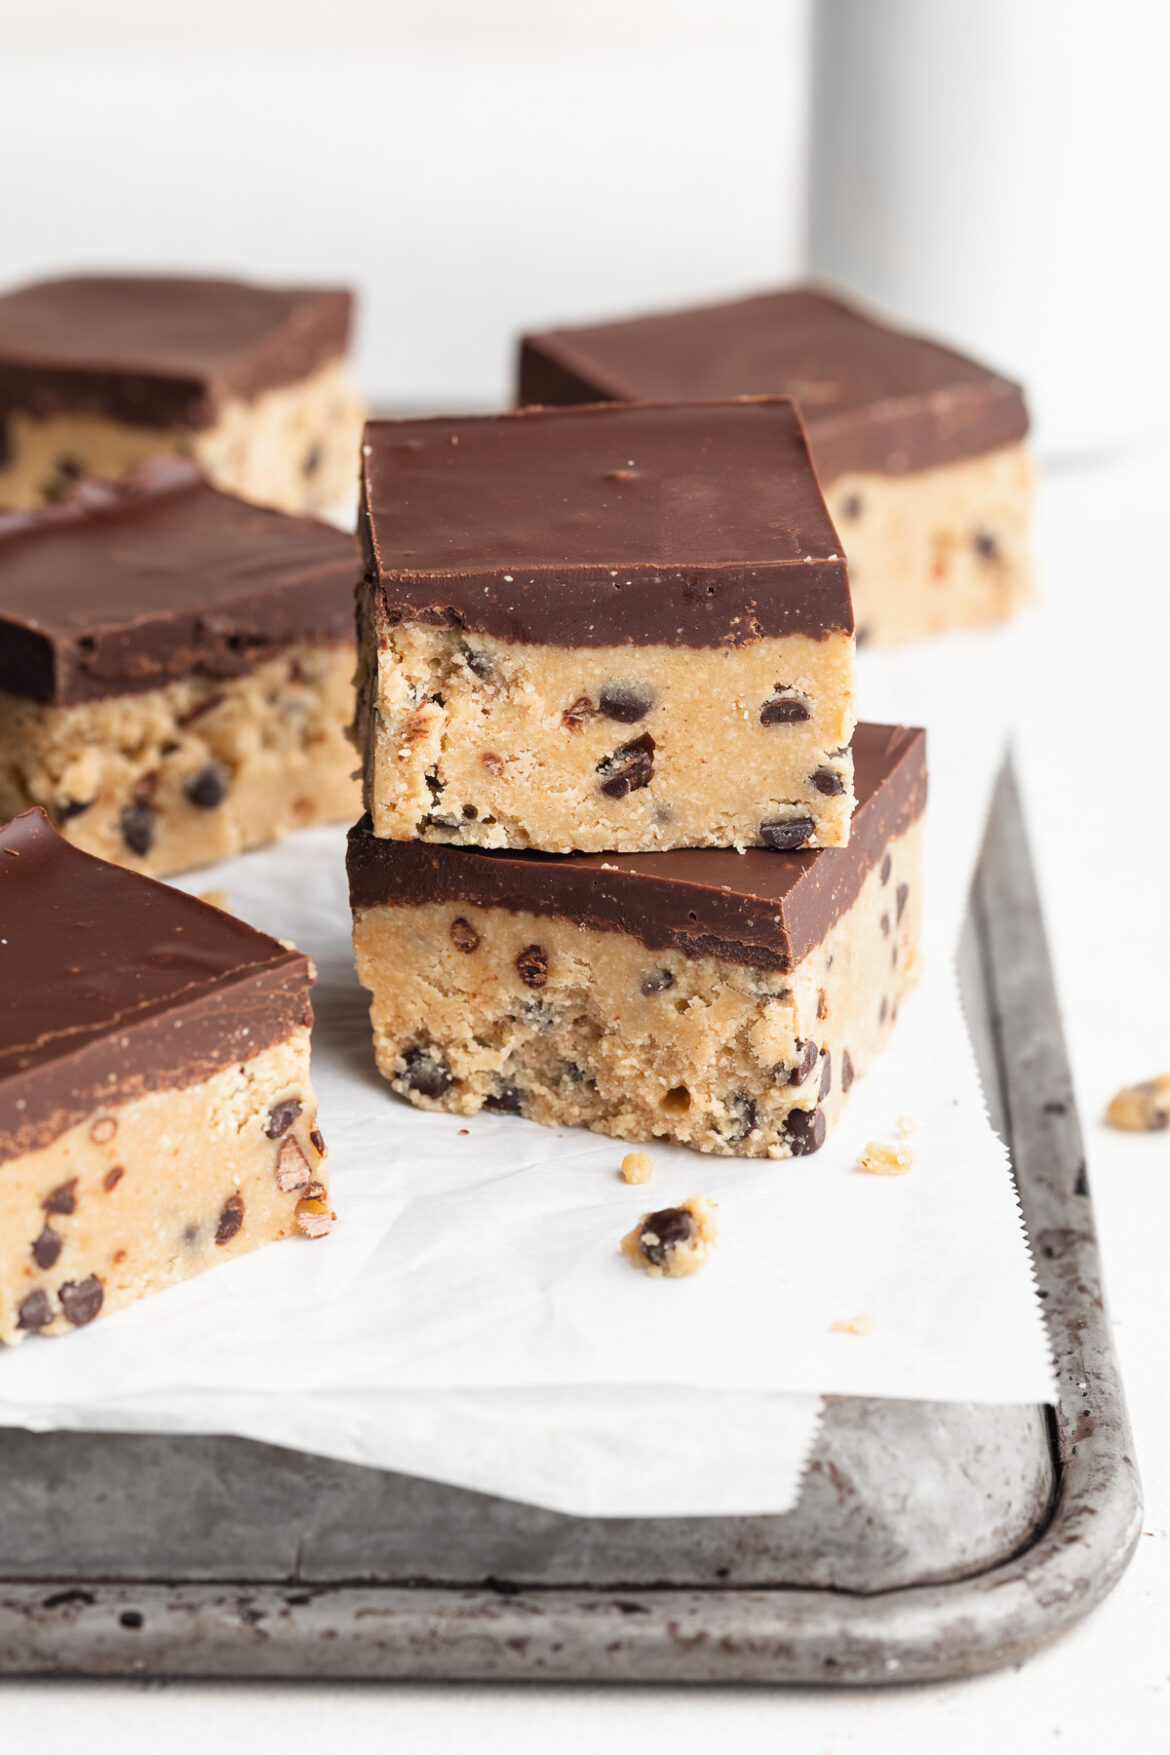
    healthy no bake cookie dough bars on a baking sheet.

    What You’ll Need to Make Healthy No-Bake Cookie Dough Bars

    Almond Flour – Use blanched almond flour for these dessert bars, not almond meal. Blanched almond flour is ground finer and makes for a smoother cookie dough. Looking for more almond flour recipes? Try these!

    Peanut or Cashew Butter – Either peanut or cashew butter will work! I used peanut butter because I love the taste. However, cashew butter yields little flavor and works perfectly to hold these no-bake bars together. But whichever you use, make sure it’s both creamy and unsweetened.

    Maple Syrup – We use maple syrup in place of traditional refined sugar to keep these healthy cookie dough bars refined sugar-free. The maple syrup in these bars can easily be replaced with honey, or even your favorite sugar-free liquid sweetener for sugar-free cookie dough bars!

    Chocolate Chips – I used the Enjoy Life Mini Chocolate Chips to keep these bars vegan/dairy-free, but really any chocolate chip will work! For refined sugar-free chocolate chips, try these date-sweetened Hu chocolate chips.

    three healthy no bake cookie dough bars stacked on top of each other.

    Tips and Tricks

    • Chill these healthy no-bake cookie dough bars in the freezer for at least one hour before slicing! Don’t rush this step, otherwise the chocolate won’t be fully set.
    • Store leftover bars in an airtight container in the fridge or freezer. Avoiding leaving them at room temperature for too long, because the chocolate may melt.
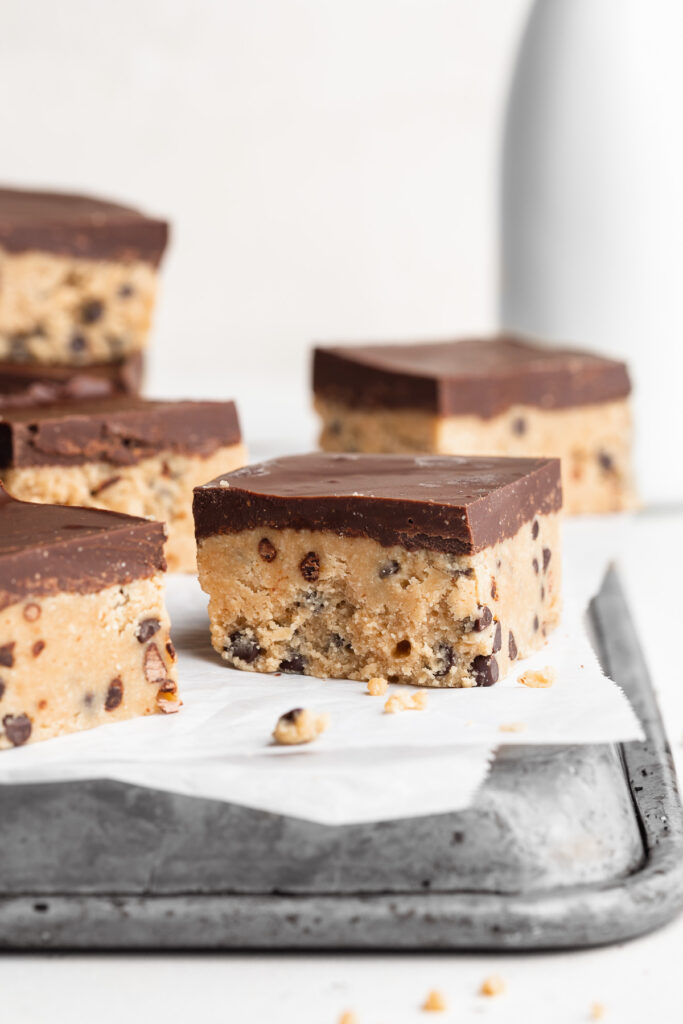
    close-up image of a healthy no bake cookie dough bar.

    Adjust This Recipe to Your Dietary Needs

    Make it Nut-Free: For a nut-free version of this recipe, replace the almond flour with oat flour. Also, replace the cashew or peanut butter with unsweetened sunflower seed butter!

    Make it Paleo: Make paleo cookie dough bars by using unsweetened creamy almond butter in place of the cashew or peanut butter.

    two healthy no-bake cookie dough bars stacked on top of each other on a baking sheet.
    4.24 from 59 votes

    Healthy No-Bake Cookie Dough Bars

    Seriously delicious healthy no-bake cookie dough bars! These bars are vegan, gluten-free, dairy-free, and refined sugar-free. Enjoy as a guilt-free dessert or sweet snack!
    Print Pin Rate
    Prep Time: 5 minutes
    Cook Time: 1 hour
    Total Time: 1 hour 5 minutes
    Servings: 8 servings

    Ingredients

    For the cookie dough layer:

    • 1 1/2 cups almond flour
    • 1/2 cup creamy peanut or cashew butter, unsweetened
    • 1/4 cup maple syrup
    • 1/4 cup coconut oil or butter, melted
    • 1 teaspoon vanilla extract
    • pinch of salt
    • 1/2 cup chocolate chips

    For the chocolate layer:

    • 1 cup chocolate chips
    • 1/4 cup creamy peanut or cashew butter, unsweetened

    Instructions

    • Line a 9×5-inch baking pan with parchment paper.
    • Make the cookie dough layer by mixing together the almond flour, peanut or cashew butter, maple syrup, melted coconut oil, vanilla extract, and salt in a large bowl. Add in the chocolate chips and mix until evenly distributed throughout the dough.
    • Transfer dough to prepared baking pan and press into an even layer.
    • Make the chocolate layer by melting the chocolate chips and peanut or cashew butter in the microwave in 30 second increments. Stir together until smooth, then pour and spread into an even layer on top of the cookie dough.
    • Chill in the freezer for one hour, then remove and slice into squares.

    Nutrition

    Calories: 300kcal

    A healthy fruit crisp loaded with fresh summer fruits! The perfect warm-weather dessert, best served with a scoop of vanilla ice cream. Super easy to make with just one bowl, in 30 minutes.

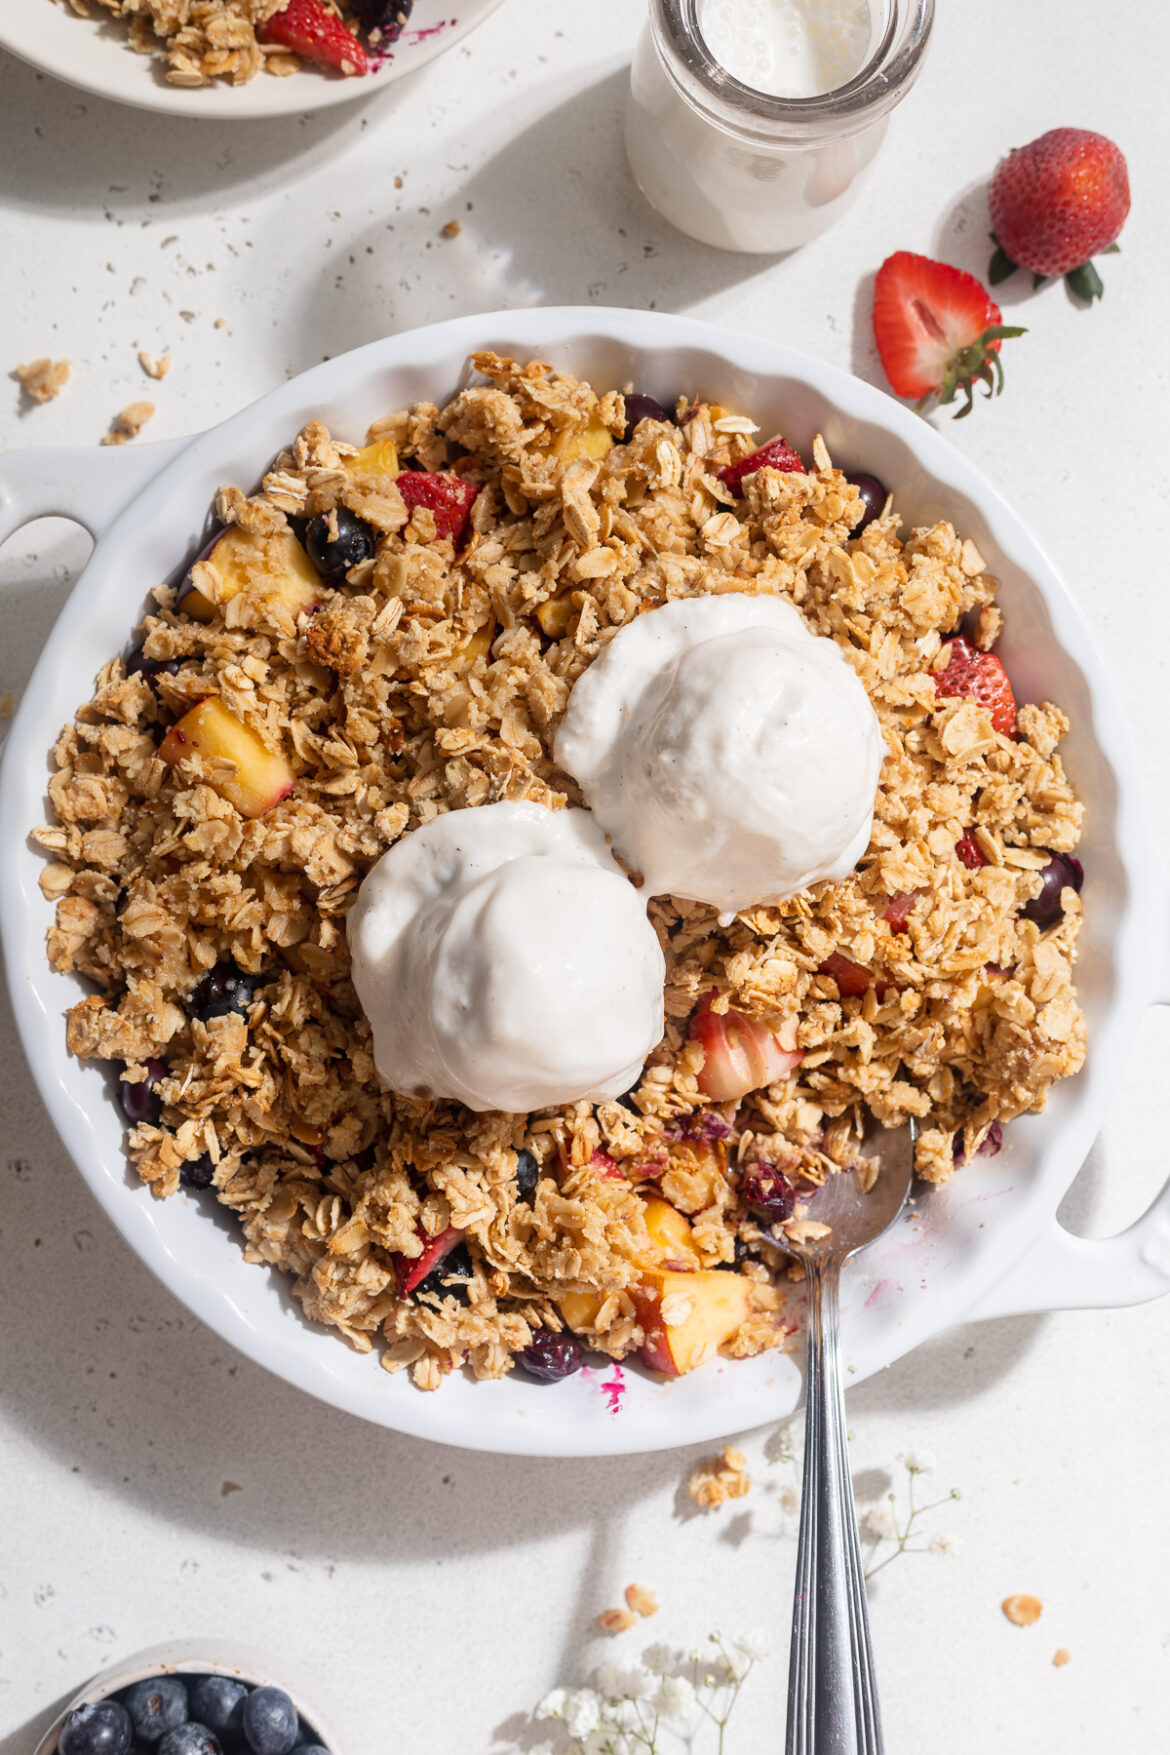
    Close-up overhead image of summer fruit crisp in a baking dish with vanilla ice cream on top.

    What You’ll Need to Make Summer Fruit Crisp

    Summer Fruit – I used fresh blueberries, strawberries, and peaches in my summer fruit crisp, but any fruit will work! Feel free to use whatever you have on-hand, or whatever’s on sale at the grocery store that week. The only thing to note is, whichever fruit you use, make sure it totals to about 5-6 cups for this recipe.

    Maple Syrup – This healthy dessert recipe is sweetened with maple syrup! It’s refined sugar-free and honestly so healthy you could get away with eating it for breakfast.

    Rolled Oats – Any type of rolled oats will do – old-fashioned, quick cook, etc. The only type of oats you’ll want to avoid for your fruit crisp topping are whole oats, steel-cut, or Irish oats.

    Almond Flour – The almond flour keeps this recipe gluten-free! However, if you don’t have almond flour, or want to make this nut-free, you can replace the almond flour with all purpose flour.

    Butter or Coconut Oil – Use whichever you prefer in your crisp! I typically just use whichever I have on-hand. Coconut oil is obviously the healthier option, but butter adds a bit more flavor, which I love.

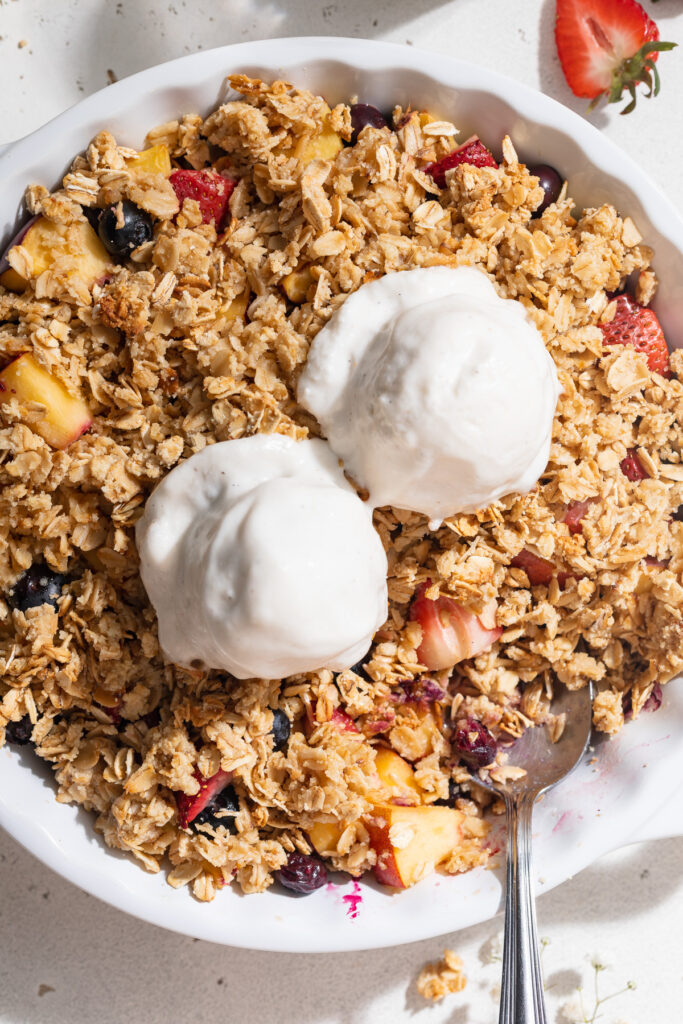
    Overhead image of summer fruit crisp in a baking dish with vanilla ice cream on top.

    Tips and Tricks

    • Keep this recipe simple! You’ll only need one bowl, which is used to first mix together the filling, then the crisp. There’s no need to dirty any extra dishes for this healthy dessert recipe.
    • This summer fruit crisp is best served warm with a scoop of cold vanilla ice cream on top. Though feel free to serve it however you’d like. On its own is delicious, or with a dollop of fresh whipped cream – yum!
    • Store leftover fruit crisp in an airtight container in the fridge for up to 4 days. If enjoying leftovers, I recommend reheating in the microwave for just about 30 seconds before eating.

    Adjust This Recipe to Your Dietary Needs

    Make it Dairy-Free: Use either non-dairy butter, or take the coconut oil option in the crisp.

    Make it Nut-Free: For a nut-free dessert, replace the almond flour with 1/2 cup of all purpose flour.

    Overhead image of summer fruit crisp in a baking dish with vanilla ice cream on top.
    5 from 1 vote

    Healthy Summer Fruit Crisp

    A healthy fruit crisp loaded with fresh summer fruits! The perfect warm-weather dessert, best served with a scoop of vanilla ice cream. Super easy to make with just one bowl, in 30 minutes.
    Print Pin Rate
    Prep Time: 10 minutes
    Cook Time: 20 minutes
    Total Time: 30 minutes
    Servings: 8 servings

    Ingredients

    For the filling:

    • 2 cups blueberries
    • 2 cups sliced strawberries, or raspberries
    • 2-3 peaches, pitted and sliced
    • 2 tablespoons maple syrup
    • 1 tablespoon lemon juice
    • 1 teaspoon vanilla extract

    For the crisp:

    • 1 1/2 cups rolled oats
    • 1/2 cup almond flour
    • pinch of salt
    • 1/4 cup butter or coconut oil, solid
    • 1/4 cup maple syrup

    Instructions

    • Preheat oven to 350° Fahrenheit.
    • Mix together all filling ingredients in a large bowl, then transfer to a 9-inch baking dish.
    • Mix together all crisp ingredients in a large bowl (you can use the same bowl you used to make the filling), then evenly sprinkle crisp over top of the filling.
    • Bake for 20-25 minutes or until fruit is soft, then let cool slightly before serving.

    Nutrition

    Calories: 300kcal

    These summer rolls are loaded with fresh, crunchy vegetables and served with a savory peanut sauce! In just 20 minutes you’ll have a fun and healthy lunch or snack.

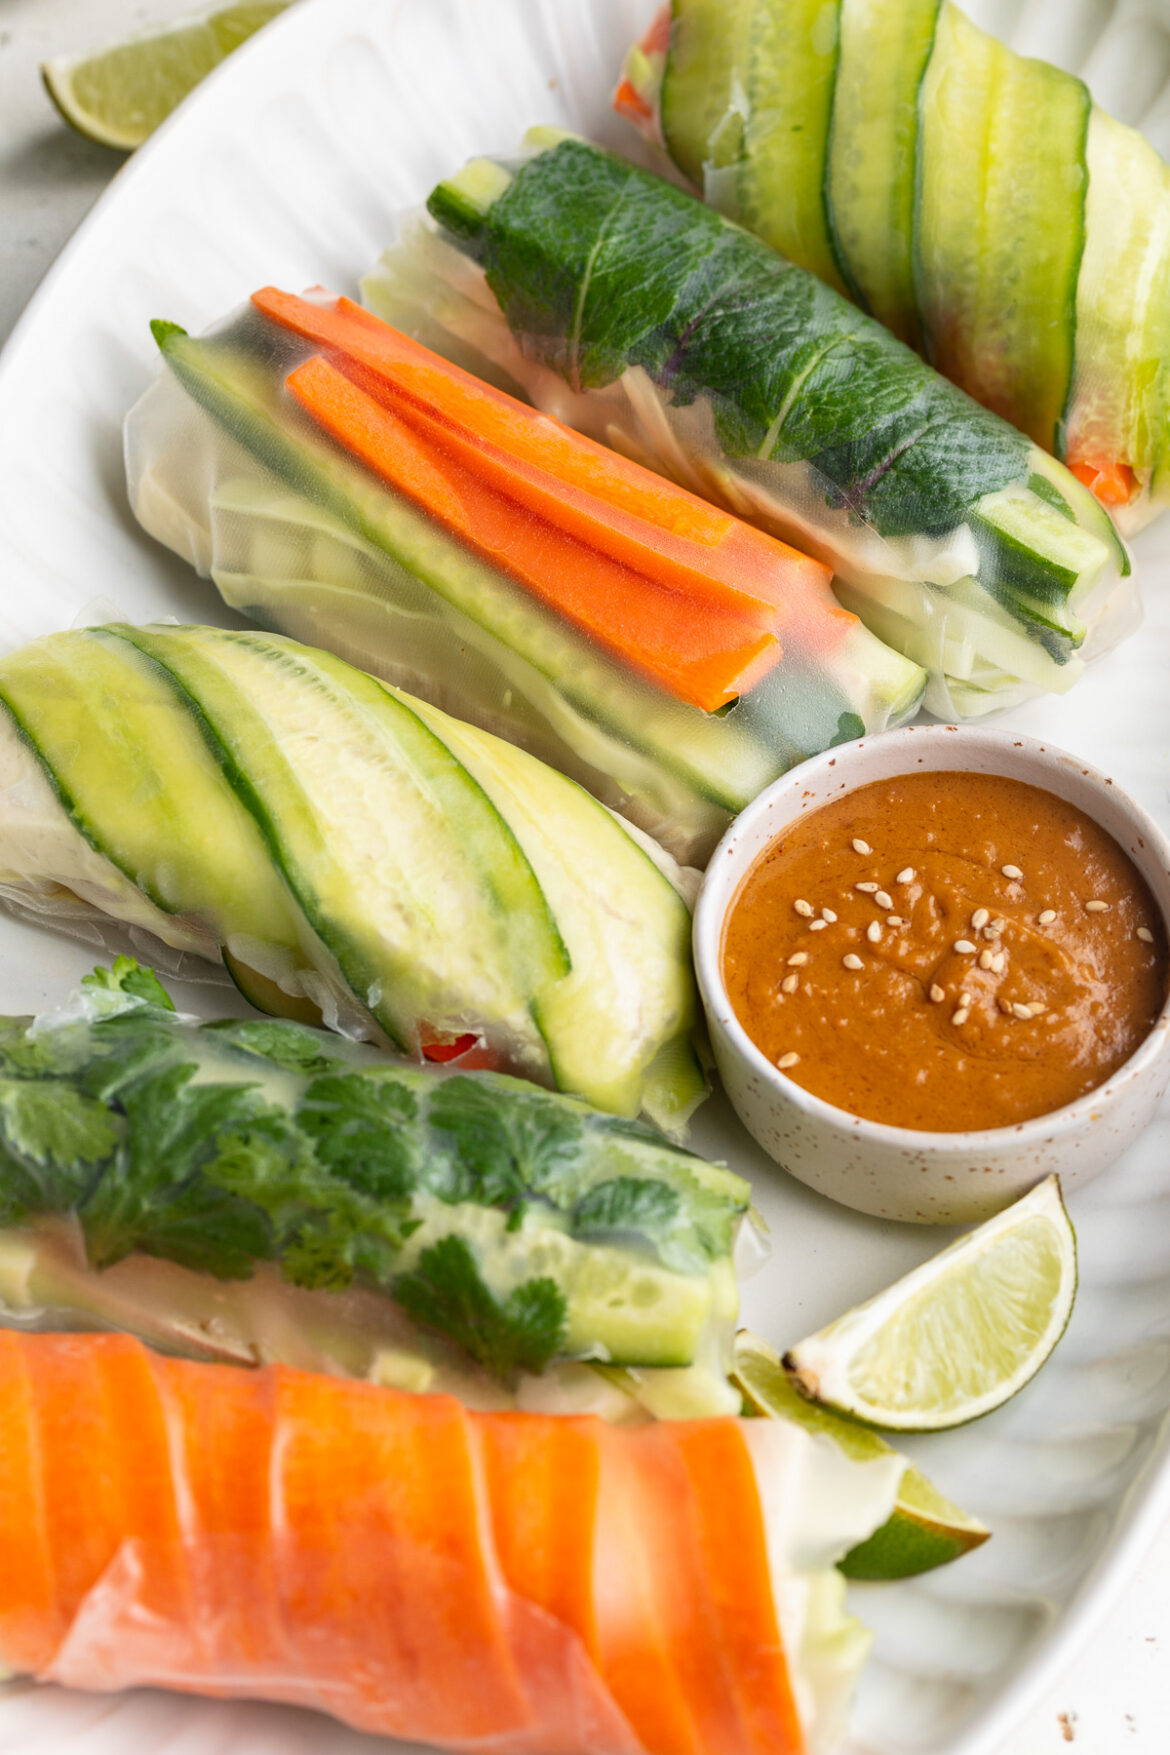
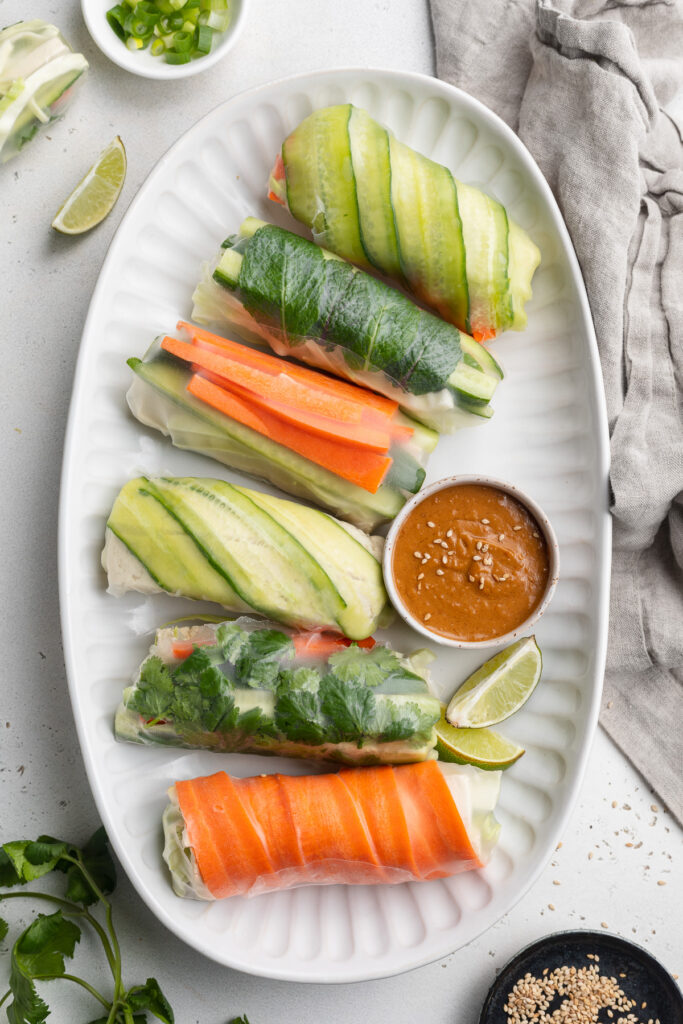
    overhead image of peanut dipping sauce on a serving platter with sesame seeds on the side.

    What are Summer Rolls?

    Summer rolls are a traditional Vietnamese side dish. They’re an assortment of vegetables wrapped in rice paper. Think of them like a sushi roll, but instead of rice and seaweed, you just wrap everything up in a thin sheet of rice paper.

    Summer rolls are most commonly served (and best served) with a side of savory peanut dipping sauce. The peanut sauce is honestly my favorite part. I could drink that stuff straight up. Creamy peanut putter, soy sauce, and fresh ginger come together in the most incredible, flavorful way possible! Dipping these summer rolls loaded with crisp, fresh veggies into luscious peanut sauce is nothing short of a dream come true. Guys, you gotta give this recipe a try. They’re vegan, gluten-free, and dairy-free!

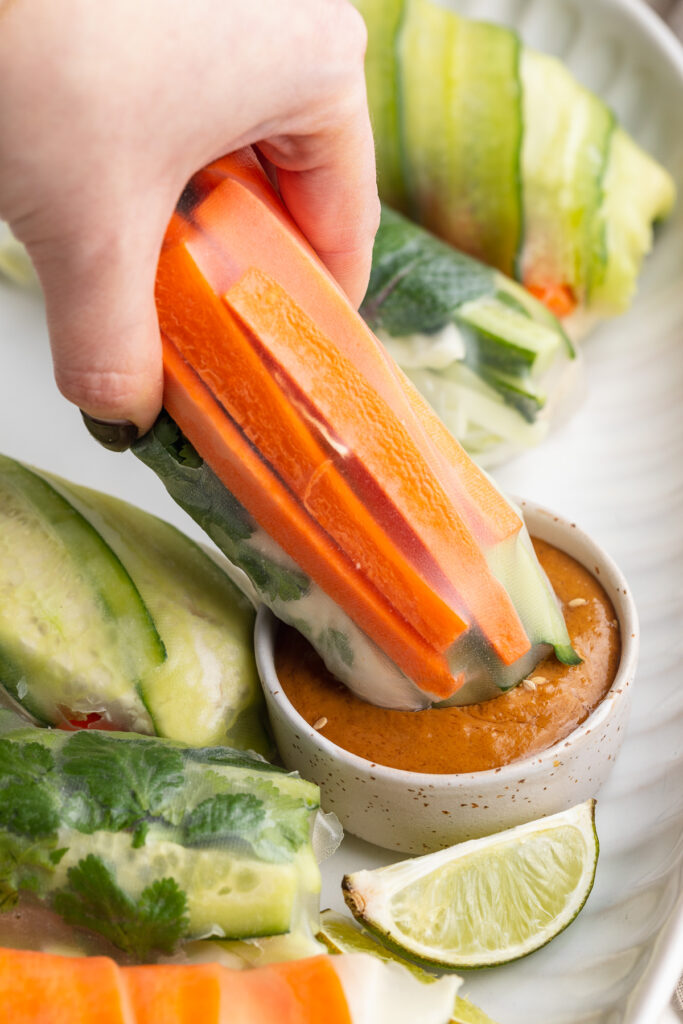
    summer rolls being dipped into peanut sauce.

    What You Need To Make Summer Rolls with Peanut Sauce

    Rice Wrappers – You’d be surprised by how easy rice wrappers are to find! I often locate them in the ethnic/asian aisle of my grocery store. And if all else fails, I can always find them at my local asian markets. If you’re not familiar with rice wrappers, they look sort of like a thinner tortilla. When you remove them from their packaging you’ll find that they’re dry and stiff. Though they simply need a bit of water to help rehydrate them for this recipe. Try not to overthink the process, follow the steps in the recipe below to prepare your rice wrappers.

    Tofu – Tofu is an incredible source of protein and contains all nine essential amino acids! It also just sort of takes on the taste of whatever else you’re eating it with. In this case, the tofu soaks up the peanut sauce, which is DELICIOUS. Not only is tofu super easy to come by these days, but it’s super cheap too.

    Peanut Butter – To me, peanut butter is typically only ever associated with sweet recipes. Though we turn the tables here by adding savory ingredients such as soy sauce and rice vinegar to create this peanut butter-based sauce. I prefer creamy peanut butter for a smoother sauce, though chunky works too. Just please, whatever you do, make sure the peanut butter you use has NO added sugar! Any sugar in the peanut butter would completely throw off the balance of flavors in this delicious sauce.

    summer roll sliced in half on a plate, with cucumber, carrots, and tofu inside.

    Adjust This Recipe

    • Make it Nut-Free: For a nut-free sauce, replace the peanut butter with tahini.
    • Add Shrimp: Make my shrimp spring rolls recipe instead!
    • The types and amounts of vegetables and herbs are simply suggestions – you can swap or remove anything you like!
    summer rolls with peanut dipping sauce on a plate.
    5 from 1 vote

    Summer Rolls with Peanut Dipping Sauce

    These summer rolls are loaded with fresh, crunchy vegetables and served with a savory peanut sauce! In just 20 minutes you’ll have a fun and healthy lunch or snack.
    Print Pin Rate
    Prep Time: 20 minutes
    Total Time: 20 minutes
    Servings: 6 servings

    Ingredients

    • 12 spring roll rice wrappers
    • 14 ounces extra firm tofu, sliced into about 12 sticks
    • 1 cup julienned carrots
    • 2 cups julienned cucumber
    • 1 cup napa cabbage, thinly sliced
    • 1/4 cup fresh mint, chopped
    • 1/4 cup fresh cilantro, chopped
    • 1/4 cup green onion, sliced

    For the peanut sauce:

    • 1/2 cup creamy peanut butter
    • 2 tablespoons soy sauce
    • 2 tablespoons rice vinegar
    • 1 tablespoon toasted sesame oil, optional
    • 1 garlic clove, grated
    • 1 tablespoon fresh ginger, grated
    • 2-3 tablespoons warm water

    Instructions

    • Fill a shallow bowl with warm water, submerge one sheet of rice wrapper in water for about 5 seconds then transfer to a clean, damp dish towel.
    • Place filling in the center of wrapper and fold the end closest to you over the filling, then tuck sides in and towards the center, finish rolling to create a sealed summer roll. Repeat with remaining rice wrappers.
    • Make the sauce by adding all ingredients to a bowl and whisking until completely smooth.
    • Serve summer rolls with peanut dipping sauce and enjoy!

    Notes

  • Change up the filling ingredients however you’d like, use up whatever leftover fresh veggies you have on-hand!
  • Nutrition

    Calories: 300kcal

    More Healthy Vegan Recipes You’ll Love