Tag

black pepper

Browsing

As I enter my first cold and flu season as a mom, I’m doing everything I can to boost my family’s immune system! While my son (currently 9 months old) can’t have these immunity shots quite yet, my husband and I each take a shot a day to… keep the doctor away. Sorry, I had to!

These immunity shots are jam-packed with antioxidants to help strengthen your immune system. A combination of fresh ginger, turmeric, and citrus create a powerhouse to help ward off colds. Also, the addition of black pepper helps to activate the turmeric, leading to even more anti-inflammatory benefits.

They’re tangy, spicy, incredibly potent, but work some serious magic to keep my family healthy. If you also want to avoid getting sick this cold and flu season, I highly recommend you whip up a batch too!

homemade immunity shot being poured into a glass.

What You’ll Need to Make this Immunity Shots Recipe

Fresh Ginger: Ginger is renowned for its anti-inflammatory and antioxidant properties. It aids digestion, soothes sore throats, and provides a zesty kick to our immunity shots. And in case you have leftover fresh ginger after making this recipe, use it to make these healthy teriyaki chicken bowls. Eating an overall healthy diet also works wonders for building a strong immune system!

Fresh Turmeric Root: Curcumin, the active compound in turmeric, is a superhero in the anti-inflammatory world! It’s a natural immune booster, assisting the body in fighting off infections and promoting overall well-being.

Lemons: Packed with vitamin C, lemons contribute to collagen production, which is crucial for skin health. They also support the immune system and add a refreshing citrusy flavor to the shots.

Oranges: Another vitamin C powerhouse, oranges help stimulate the production of white blood cells, enhancing the immune system’s defense mechanism against illnesses. Because of its cold-fighthing benefits, I aim to eat as much vitamin C as possible this time of year. One of my favorite ways to enjoy citrus fruits is in this citrus salad recipe – seriously so good!

Black Pepper: Piperine, found in black pepper, enhances the absorption of curcumin from turmeric. This dynamic duo ensures you get the most out of the turmeric’s immune-boosting properties.

homemade immunity shots with lemon, orange, fresh ginger, and fresh turmeric on the side.

What are the Health Benefits of Immunity Shots?

  • The combination of fresh ginger, turmeric, lemons, and oranges provides a powerful boost to the immune system! These ingredients are rich in antioxidants and vitamins, supporting the body’s defense against infections and illnesses.
  • Ginger and turmeric, with their anti-inflammatory properties, help reduce inflammation in the body. Chronic inflammation is linked to various health issues, and incorporating these shots into your daily routine may contribute to overall well-being.
  • Lemons and oranges are excellent sources of vitamin C, essential for collagen production, skin health, and a robust immune response. Regular consumption of these immunity shots ensures a steady intake of this vital nutrient, promoting optimal health!

Tips and Tricks

Play with Ratios: Adjust the quantities of ginger, turmeric, and citrus to suit your taste preferences. If you enjoy a more zesty kick, add an extra squeeze of lemon or orange.

Storage Savvy: To ensure your shots stay fresh, store the juice in an airtight container in the fridge. Use dark glass containers to protect the ingredients from light, maintaining their potency.

Prep Ahead: Consider prepping larger batches and freezing the juice in ice cube trays. Pop out a cube whenever you need a quick immunity boost – it’s a time-saving trick for those hectic days.

Homemade immunity shots with fresh lemon, orange, ginger, and turmeric on the side.
5 from 3 votes

Homemade Ginger and Turmeric Immunity Shots

These immunity shots are packed with antioxidants to help strengthen your immune system! They’re the easiest, most natural way to help prevent getting sick during cold and flu season. Fresh ginger and turmeric, plenty of citrus, and black pepper make for a tangy, spicy, and potent immunity shot. Enjoy once a day for optimal results!
Print Pin Rate
Prep Time: 5 minutes
Total Time: 5 minutes
Servings: 10 servings

Ingredients

  • 1/4 cup fresh ginger, chopped
  • 1/4 cup fresh turmeric root, chopped
  • 2 lemons, peeled and chopped
  • 2 oranges, peeled and chopped
  • 1 teaspoon black pepper
  • 2 cups water

Instructions

  • Add all ingredients to a blender and blend on high for 1-2 minutes.
  • Place a fine mesh strainer over a bowl or pitcher and pour the liquid through the strainer, and use a spoon to stir the liquid around in the strainer to separate the pulp from the juice.
  • Discard the pulp in the strainer, then pour the juice into an airtight container and store it in the fridge for up to 2 weeks.
  • When ready to drink, pour 2 ounces into a glass and drink quickly (like a shot!).

Nutrition

Calories: 300kcal

Crispy on the outside, soft and fluffy on the inside – PERFECT air fryer baked potato! Three ingredients, a few simple steps, and 30 minutes is all this easy air fryer recipe requires. This foolproof method yields flawless baked potatoes every time.

close-up overhead image of an air fryer baked potato with butter and chives on top.

What You’ll Need to Make an Air Fryer Baked Potato

Russet Potato – Four medium russet potatoes fit comfortably in most air fryer baskets. Start by scrubbing and rinsing each potato well before cooking. Potatoes grow literally IN the dirt, so they’re pretty filthy and should be washed thoroughly!

Oil – Olive or avocado oil work best, but really any kind of oil will cook your air fryer baked potato to perfection! The only rule here is to really lather up each potato in oil, this’ll guarantee an ultra-crispy skin.

Salt – Plenty (and I meant plenty) of salt! Cover each potato in a large pinch of salt before cooking. Since salt is the only seasoning here, it’s important to use it liberally.

overhead image of a loaded air fryer baked potato with chives on the side.

Tips and Tricks

  • Pierce each potato all over with a fork before cooking! This’ll create vent holes in your potato, ensuring it cooks perfectly and evenly all the way through.
  • Enjoy your air fryer baked potato however you’d like. For a loaded baked potato, check out the section below!
  • Store leftover baked potatoes in an airtight container in the fridge for up to 5 days. To reheat, simply pop in the microwave for 1 minute, or back into the air fryer for 5 minutes at 400° Fahrenheit.
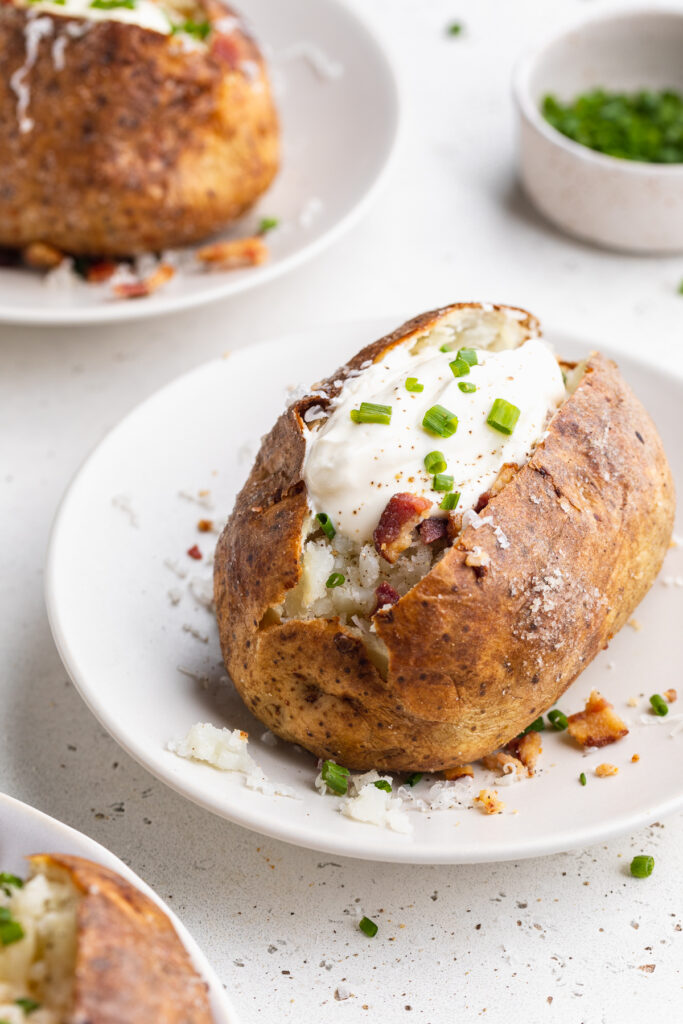
a loaded air fryer baked potato with sour cream, bacon, and chives on top.

Make a Loaded Air Fryer Baked Potato

For a loaded air fryer baked potato, add…

  • Butter
  • Shredded Cheese
  • Chives
  • Sour Cream
  • Black Pepper
  • Crispy Bacon
  • & anything else your heart desires!

Adjust This Recipe to Your Dietary Needs

Make it Vegan: If you’re looking to jazz up this recipe the vegan way, top your baked potato with vegan butter, vegan sour cream, and a sprinkling of nutritional yeast – YUM!

Make it Dairy-Free: For a dairy-free air fryer baked potato, top it with a drizzle of olive oil instead of butter, the result is just as creamy and delicious.

Perfect Air Fryer Baked Potato

5 from 1 vote
Recipe by Samantha Course: SidesDifficulty: Easy
Servings

4

servings
Prep time

5

minutes
Cooking time

35

minutes
Total time

40

minutes

Crispy on the outside, soft and fluffy on the inside – PERFECT air fryer baked potato! Three ingredients, a few simple steps, and 30 minutes is all this easy air fryer recipe requires. This foolproof method yields flawless baked potatoes every time.

Ingredients

  • 4 medium russet potatoes, washed well then dried

  • 2 tablespoons olive oil, or avocado oil

  • salt, to taste

Directions

  • Pierce each potato with a fork all over its surface.
  • Rub each potato with oil, then sprinkle all over with a generous pinch of salt.
  • Place potatoes in air fryer basket, then cook at 400° Fahrenheit for 35 minutes, flipping potatoes halfway through cooking.
  • Remove potatoes from air fryer basket, slice down the center and split each potato open exposing the inside flesh. Top with butter, shredded cheese, sour cream, chives, crispy bacon, additional salt, and black pepper.

Recipe Video

Did you make this recipe?

Share it and tag @samdoesherbest on Instagram!

Like this recipe?

Follow us @samdoesherbest on Pinterest

More Easy Air Fryer Recipes

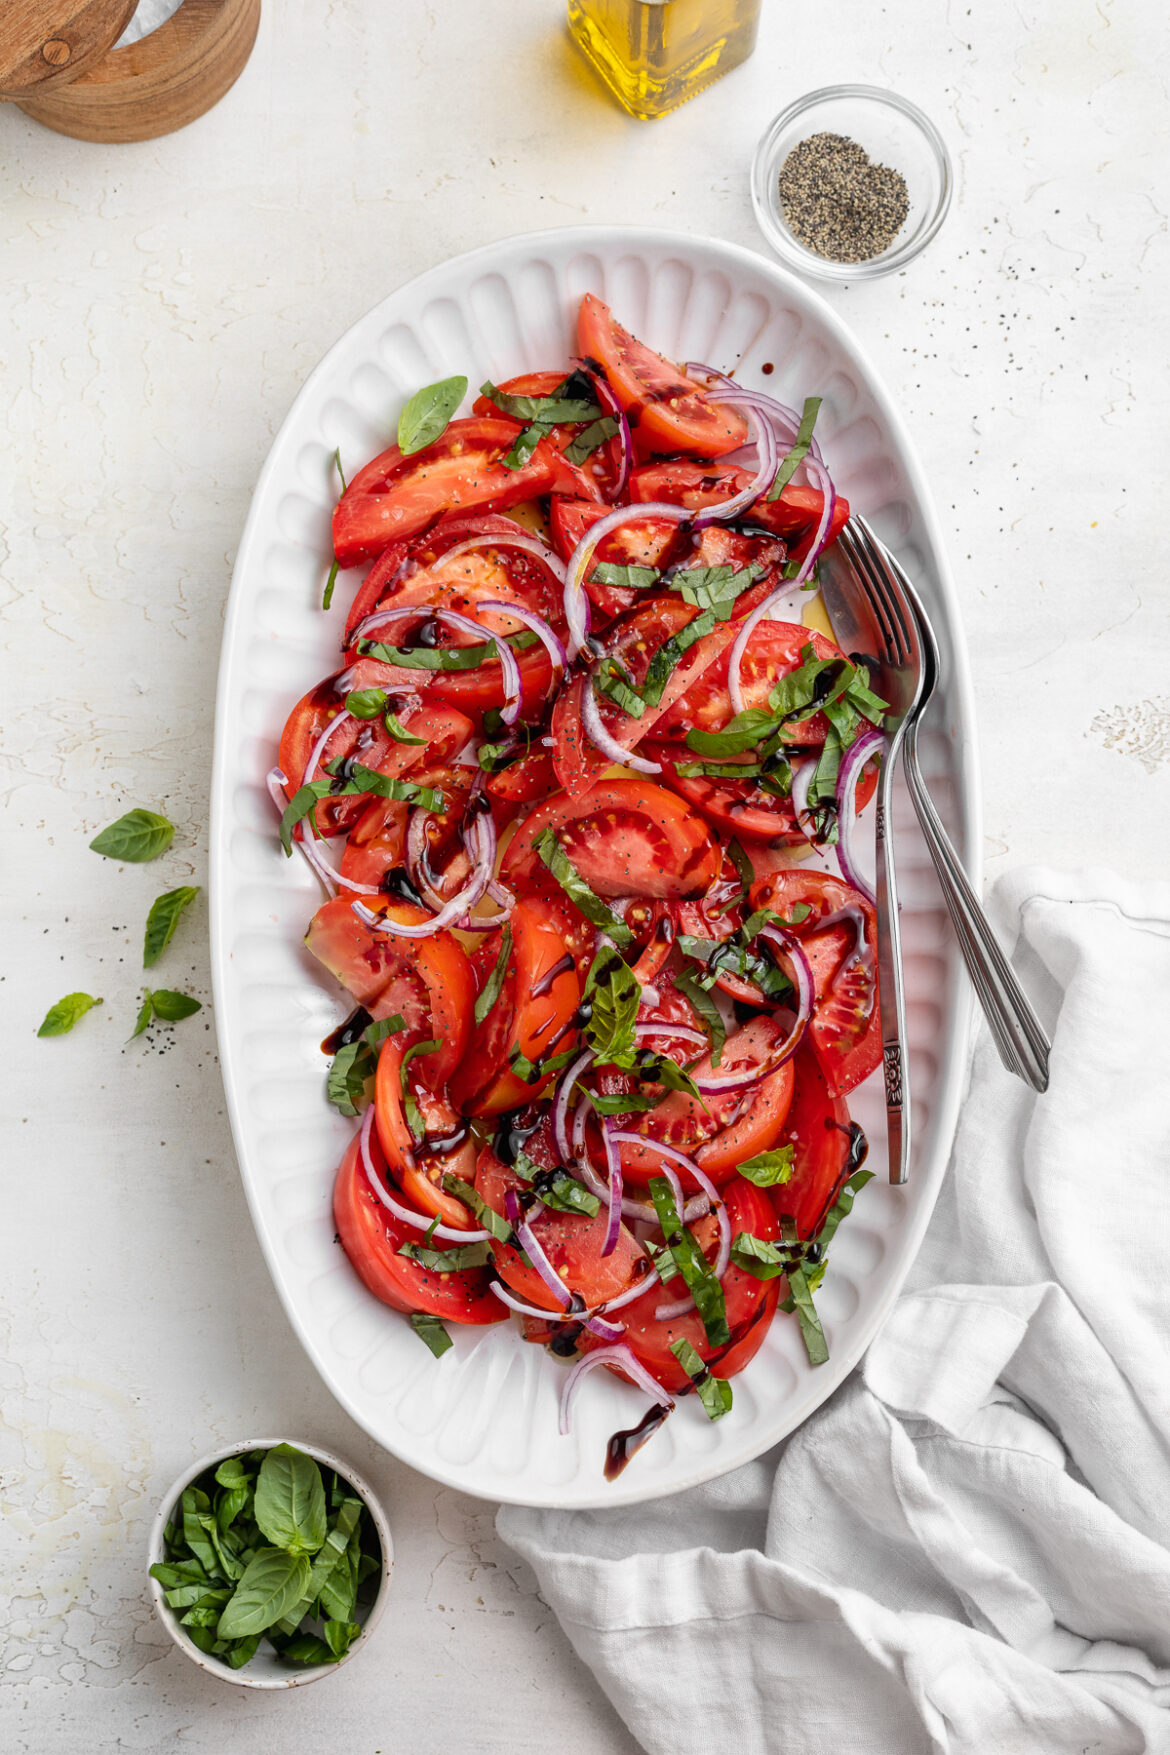
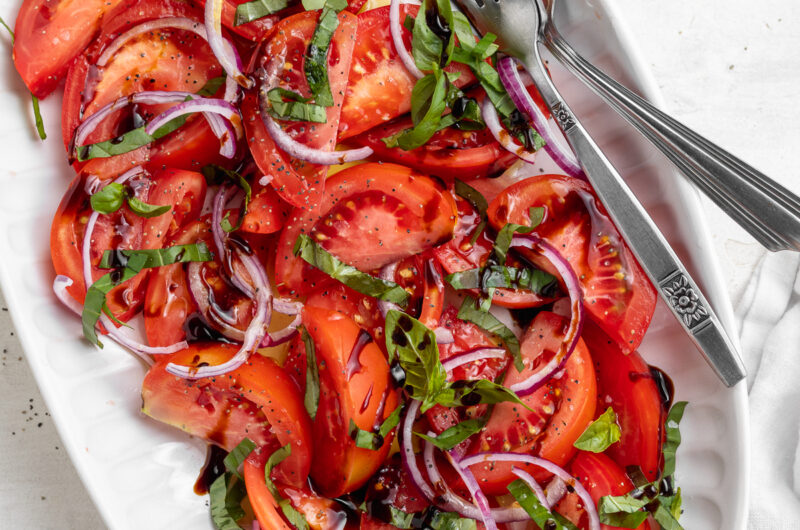
Fresh, easy, and totally delicious tomato salad! Made with a handful of simple ingredients, this summer salad comes together in just 5 minutes. Fresh tomatoes, basil, and red onion finished off with a sweet balsamic glaze – YUM!

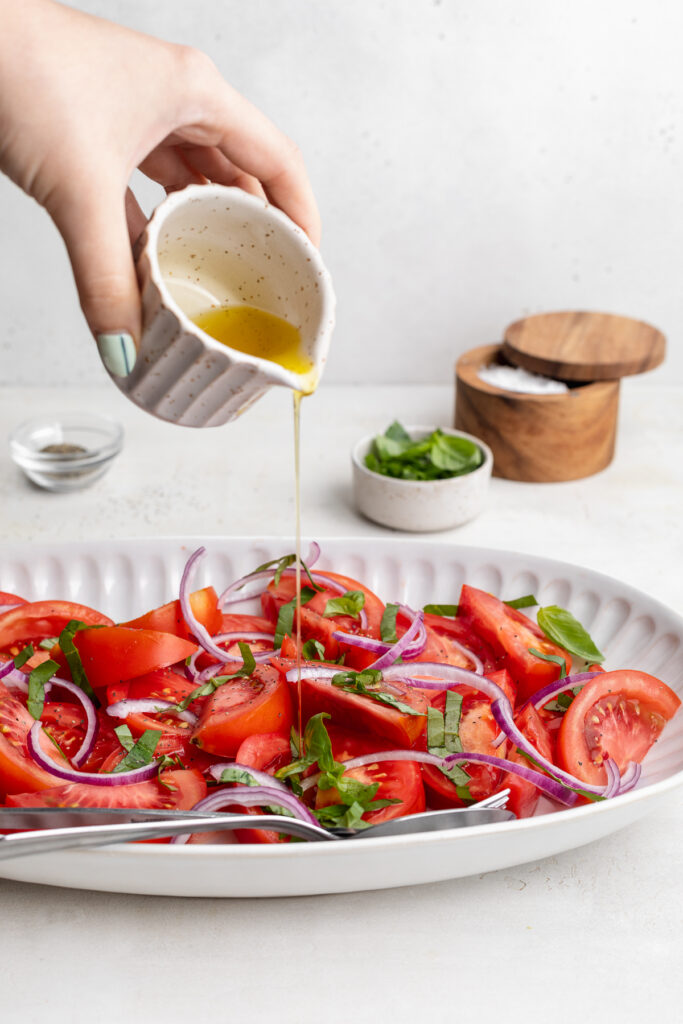
olive oil being poured over tomato salad.

What You’ll Need to Make Tomato Salad

Tomatoes – Use any variety of tomato you’d like in this recipe! I used heirloom tomatoes, cut into wedges. However, I’ve also made this salad with cherry tomatoes and it was just as incredible.

Fresh Basil – Tomatoes and fresh basil are the perfect pair! Grab a small handful of fresh basil leaves, and stack them on top of each other. Then, gently roll the leaves (like you would a cigar), and run a knife through the basil creating thin basil “ribbons.” Or, if that’s too much work for you, simply grab a handful of basil and gently tear it, then toss into your salad!

Red Onion – Or really any kind of onion! A sweet yellow onion would also taste delicious, it’s totally up to you.

Balsamic – A touch of acidity brings out the fresh flavors in this easy plant-based salad recipe. I LOVE a sweet, yet savory balsamic glaze, but a drizzle of regular balsamic vinegar will also do the trick!

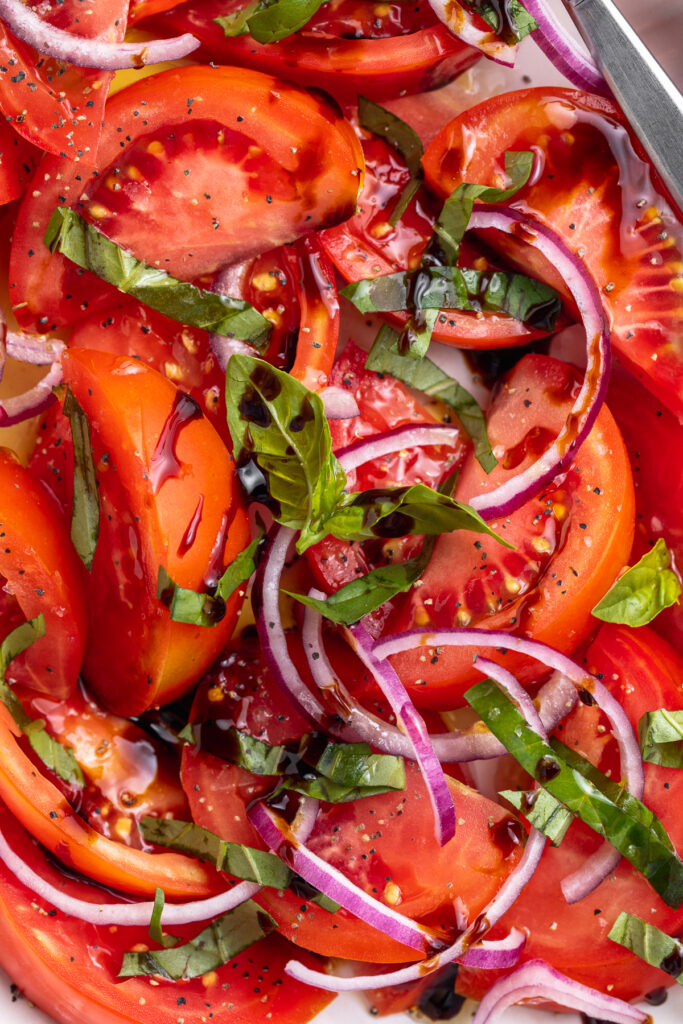
super close-up image of tomato salad with fresh basil on top.

Tips and Tricks

  • Toss your tomato salad together, then refrigerate for at least 15 minutes before serving. This rest time will allow the tomatoes to marinate in all of their delicious flavor. And remember, the longer your salad sits, the more flavorful it’ll be!
  • Have fun with this recipe, and don’t be afraid to make it your own! Add or remove anything you’d like. This salad is super simple, and should remain uncomplicated.
close-up image of tomato salad on a serving platter.

Delicious Additions

Any or all of the following would make delicious additions to your tomato salad!

  • Fresh Cucumber
  • Chickpeas
  • Grilled Chicken
  • Mozzarella Cheese

This side dish is vegan, plant-based, gluten-free, and dairy-free!

Simple Tomato Salad

0 from 0 votes
Recipe by Samantha Course: SidesDifficulty: Easy
Servings

6

servings
Prep time

5

minutes
Cooking time

0

minutes
Total time

5

minutes

Fresh, easy, and totally delicious tomato salad! Made with a handful of simple ingredients, this summer salad comes together in just 5 minutes. Fresh tomatoes, basil, and red onion finished off with a sweet balsamic glaze – YUM!

Ingredients

  • 1 pound tomatoes (I recommend cherry, grape, and/or heirloom tomatoes), sliced

  • 1/4 cup fresh basil, sliced

  • 1/2 red onion, thinly sliced

  • 2 tablespoons olive oil

  • 1 tablespoon balsamic vinegar, or balsamic glaze

  • 1/2 teaspoon salt

  • 1/4 teaspoon black pepper

Directions

  • Arrange the sliced tomatoes, fresh basil, and red onion on a large platter or in a large bowl.
  • Top with olive oil, balsamic vinegar, salt, and black pepper then cover and refrigerate for at least 15 minutes before serving. 

Did you make this recipe?

Share it and tag @samdoesherbest on Instagram!

Like this recipe?

Follow us @samdoesherbest on Pinterest

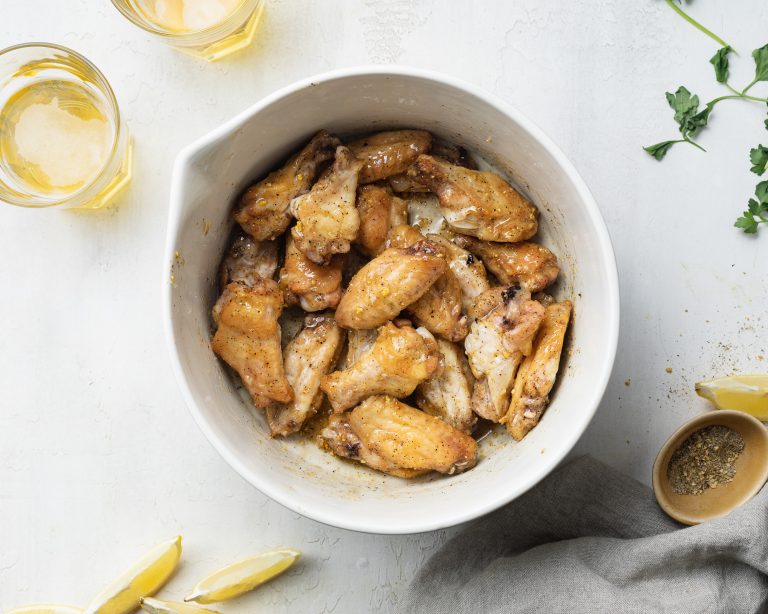
Incredibly zesty lemon pepper chicken wings are super quick and easy to make in the comfort of your own home! Bake ’em in the oven or air fryer, then finish off with a simple 4-ingredient lemon pepper sauce. These wings are irresistibly crispy and loaded with delicious flavor!

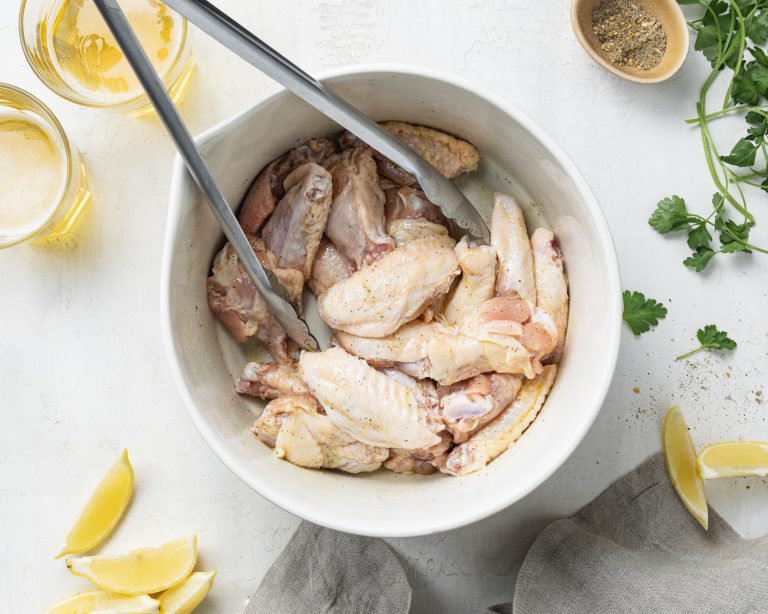
lemon pepper chicken wings in a bowl with beer and lemon slices on the side

What You’ll Need

Chicken Wings – Pick up 3 pounds of either drums, flats, or a combination of both for this chicken wing recipe. I typically reach for the “party pack” of wings at the grocery store, but honestly anything you can find/prefer will work. Once you unwrap your chicken wings, make sure you pat each wing dry with a paper towel before cooking. Getting the wings as dry as possible will ensure they bake up super crispy in the oven (or air fryer!).

Lemon Pepper Seasoning – You can either purchase a jar of lemon pepper seasoning, or simply make it yourself! I couldn’t find any pre-made seasoning near me, so I quickly threw together a homemade batch of my own. To do this, I cooked lemon peels in the oven at 170° Fahrenheit for 1 hour until super dried out. Then, I added the peels to a blender along with some whole black peppercorns and a pinch of salt. There are plenty of lemon pepper seasoning recipes out their on the internet, so do a little research and follow one that’s easiest for you! Or, of course, just buy lemon pepper seasoning from the store if you’d like.

Top Tips

  • Don’t crowd your baking sheet/rack with chicken wings before baking. Place each wing at least an inch apart to ensure that all sides crisp up evenly!
  • Switch up this lemon pepper chicken wings recipe however you’d like! For a little more spice, add in an extra pinch of freshly cracked black pepper. For extra tang, finish off with an extra squeeze of lemon juice. And for a bit more sweetness, use an additional teaspoon or two of honey!
  • Avoid using frozen chicken wings! If your wings are frozen, thaw them completely in the fridge before baking.

Adjust This Recipe to Your Dietary Needs

  • Make it Dairy-Free: Sub the melted butter in this recipe for non-dairy butter to have a completely dairy-free and delicious appetizer!
  • Make it Paleo: For paleo lemon pepper chicken wings, simply use ghee instead of butter and make your own seasoning by drying out lemon peels in the oven and grinding them with black peppercorns and salt.

How to Cook Chicken Wings in the Air Fryer

  1. Pat chicken wings dry with a paper towel, then add to a bowl along with olive oil, salt and black pepper. Toss to coat wings in oil and seasoning.
  2. Transfer chicken wings to air fryer tray or basket in an even layer (work in batches if necessary), cook at 360° Fahrenheit for 12 minutes. After 12 minutes, flip the wings over then cook for another 12 minutes.
  3. Once all wings are cooked and crispy, toss in your homemade lemon pepper sauce and enjoy!

The Best Baked Lemon Pepper Chicken Wings

5 from 2 votes
Recipe by Samantha Course: AppetizersDifficulty: Easy
Servings

6

servings
Prep time

10

minutes
Cooking time

40

minutes
Total time

50

minutes

Incredibly zesty lemon pepper chicken wings are super quick and easy to make in the comfort of your own home! Bake ’em in the oven or air fryer, then finish off with a simple 4-ingredient lemon pepper sauce. These wings are irresistibly crispy and loaded with delicious flavor!

Ingredients

  • For the wings:
  • 3 pounds chicken wings

  • 2 tablespoons olive oil

  • 1 teaspoon salt

  • 1/2 teaspoon black pepper

  • For the lemon pepper sauce:
  • 1/4 cup melted butter, I used non-dairy

  • 1 1/2 tablespoons lemon pepper seasoning

  • 1 tablespoon honey

  • 2 teaspoons lemon juice

  • chopped parsley, for serving

  • lemons, sliced

Directions

  • Preheat oven to 400° Fahrenheit and line a baking sheet with foil, and top with a wire baking rack.
  • Pat chicken wings dry with a paper towel, then add to a bowl along with olive oil, salt and black pepper. Toss to coat wings in oil and seasoning.
  • Transfer wings to an even layer on the prepared baking sheet with baking rack and bake for 35-40 minutes or until golden brown and crispy.
  • Mix together all lemon pepper sauce ingredients in a large bowl, then once wings are cooked toss them in the sauce until evenly coated.

Did you make this recipe?

Share it and tag @samdoesherbest on Instagram!

Like this recipe?

Follow us @samdoesherbest on Pinterest

Other Easy Apps You’ll Love

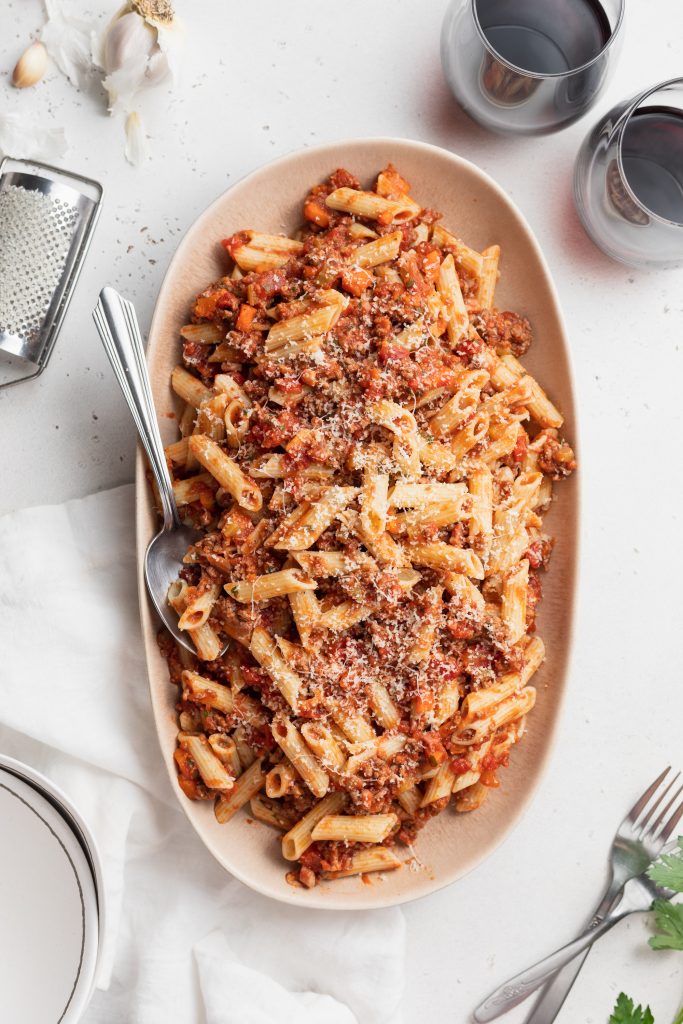
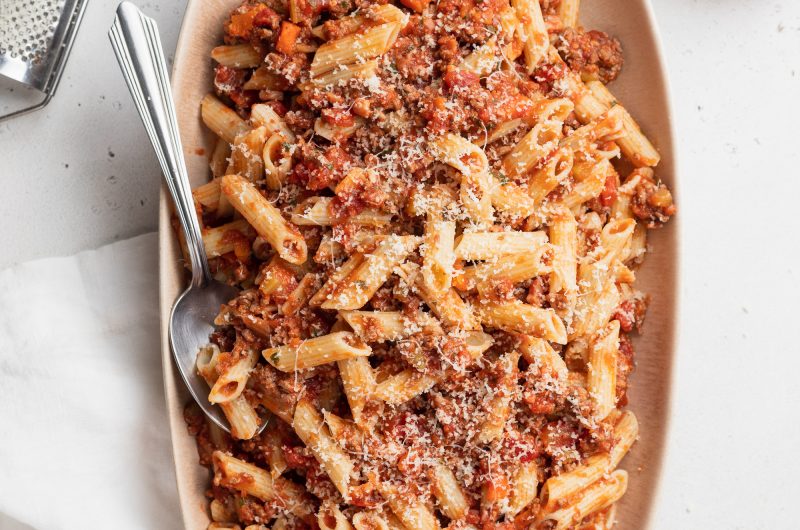
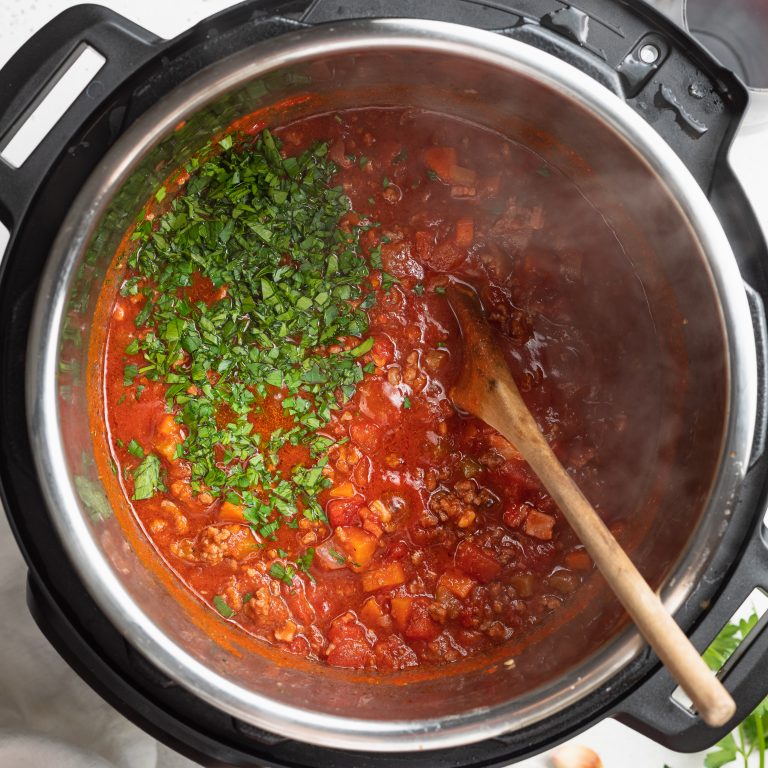
This delicious Instant Pot Bolognese sauce is made with red wine and served over penne, spaghetti or your favorite pasta. It takes less than an hour to make this sauce in a pressure cooker, so it’s great for meal prepping.

Instant Pot Bolognese

This Instant Pot Bolognese Sauce is one of my most favorite recipes that I love to serve with penne or other type of pasta. Thanks to the pressure cooker, the cooking time is cut in half and tastes absolutely delicious. Also, this is a super great recipe for meal prepping. You can easily double the recipe and freeze. So, when you don’t feel like cooking, you can easily defrost it, cook up some pasta, and voila! You have your dinner or lunch for the week.

Main Ingredients Needed For Instant Pot Bolognese

  • Ground Beef – Swap with ground turkey for an even leaner dish, or ground tofu.

  • Pancetta – seasoned Italian salt-cured meat made from pork belly. It really brings a lot of flavor to this sauce, so I highly recommend, but totally optional!

  • Celery/Carrot –  I recommend including the carrots & celery, but feel free to swap with peppers or other veggies. Or, remove the veggies altogether.

  • (Dry) Red Wine – You can use white wine instead, which will alter the flavor. You can also skip the alcohol and just use water.

  • Pasta – Choose whatever pasta you’d like to serve. I used penne, but you could try tagliatelle noodles.

  • Jar-Crushed Tomatoes

  • Spices – Oregano, salt, black pepper, fresh parsley

Instant Pot Bolognese Sauce

0 from 0 votes
Recipe by Samantha Course: MainCuisine: ItalianDifficulty: Easy
Servings

4

servings
Prep time

10

minutes
Cooking time

30

minutes
Calories

300

kcal
Total time

40

minutes

This delicious Instant Pot Bolognese sauce is made with red wine and served over penne, spaghetti or your favorite pasta. It takes less than an hour to make this sauce in a pressure cooker, so it’s great for meal prepping.

Ingredients

  • 1 Tablespoon Olive Oil

  • 1 Onion (chopped)

  • 1 Celery Stalk (chopped)

  • 1 Carrot (chopped)

  • 3 Garlic Cloves (minced)

  • 1 LB Ground Beef

  • 4 Ounces Diced Pancetta

  • 1 Teaspoon Dried Oregano

  • 1 Teaspoon Salt

  • 1/2 Teaspoon Black Pepper

  • 1 28-Ounce Jar Crushed Tomatoes

  • 1/2 Cup Dry Red Wine

  • 1/4 Cup Fresh Parsley (chopped)

Directions

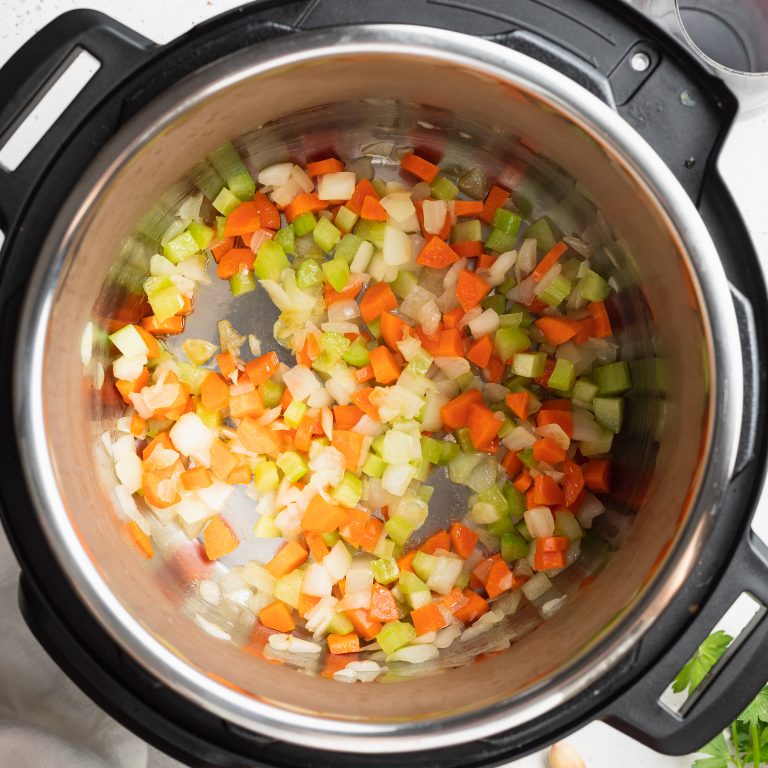
  • Set Instant Pot to sauté setting, add in olive oil. Once hot, sauté onion, celery, and carrots until soft, about 4 minutes.
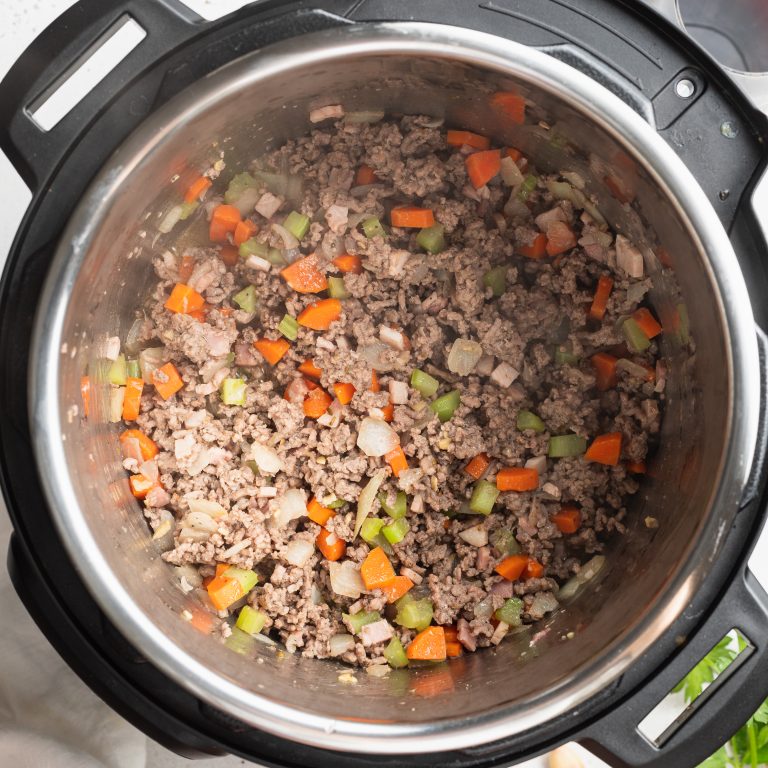
  • Add in garlic, ground beef, pancetta, dried oregano, salt, and black pepper. Cook, stirring frequently, until meat is no longer pink. 
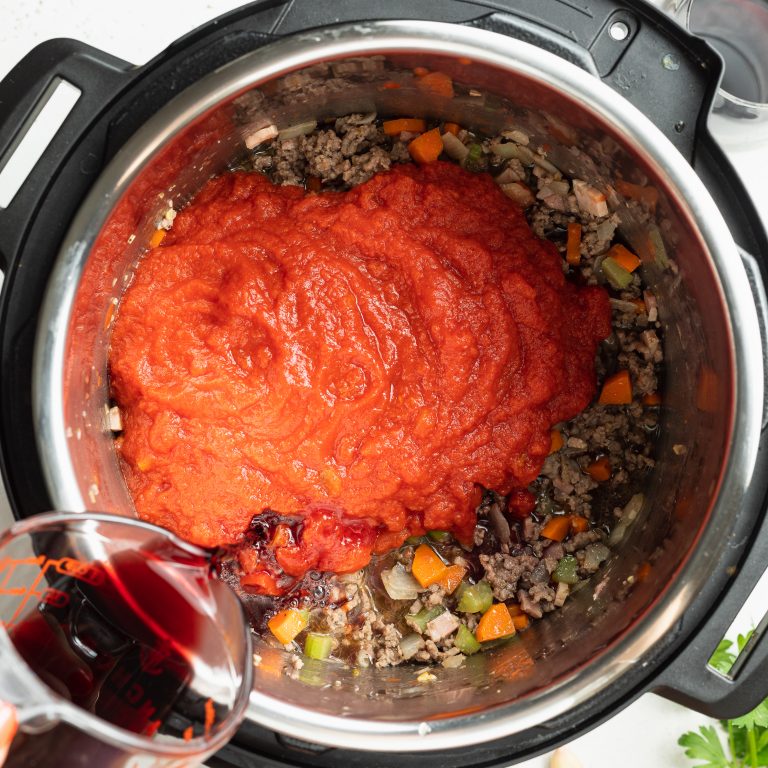
  • Pour in crushed tomatoes and red wine. Stir to combine before securing lid and setting Instant Pot to manual high pressure for 20 minutes.
  • Quick release steam, remove lid, and set back to the sauté setting for 3-5 minutes or until liquid has reduced slightly. Add parsley, then taste and adjust any seasoning as desired.

Notes

  • To store: You’ll want to store the pasta and sauce separately. Once cool, transfer the Bolognese to an air-tight container and refrigerate for up to 5 days.
  • To freeze: Freeze this Bolognese for up to 3 months in a freezer-friendly container or freezer bag.

Did you make this recipe?

Share it and tag @samdoesherbest on Instagram!

Like this recipe?

Follow us @samdoesherbest on Pinterest

More Healthy Recipes