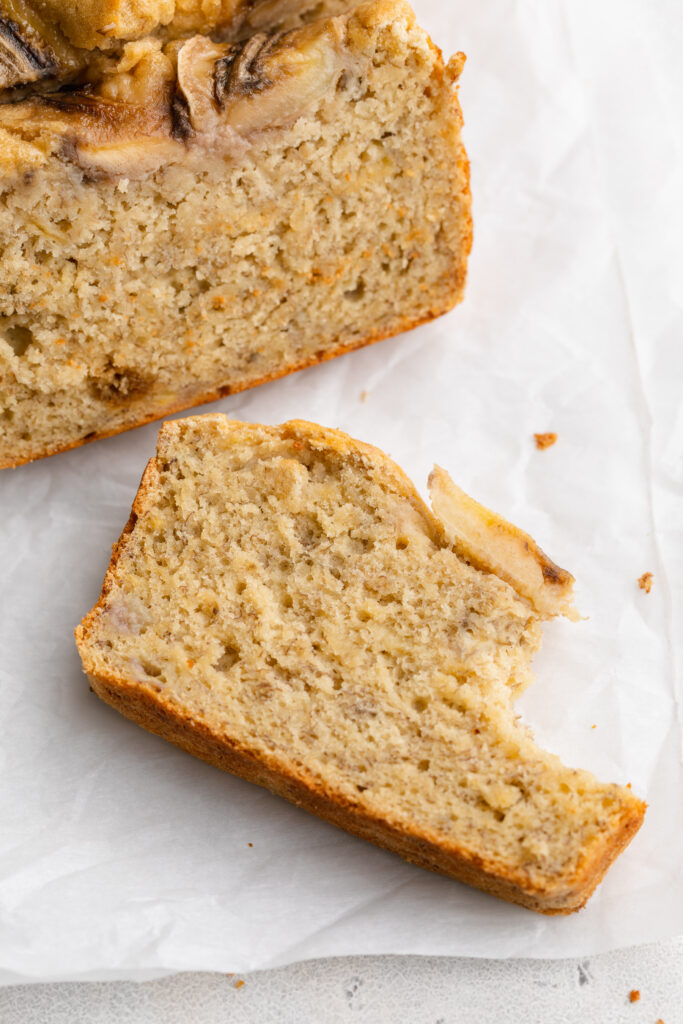
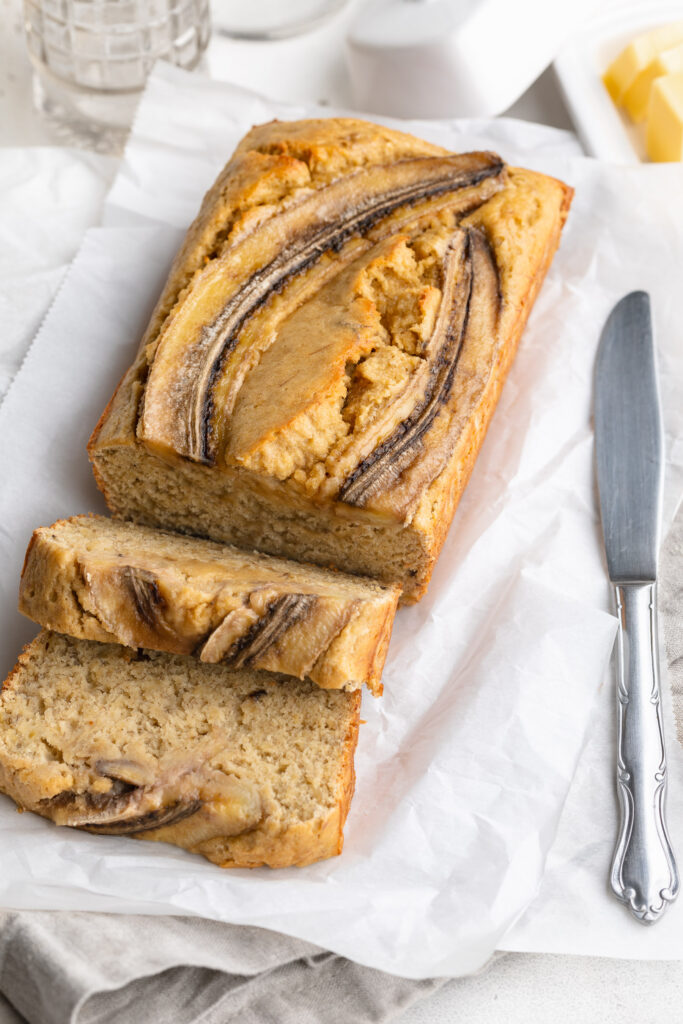
Tag

dairy-free

Browsing

My family and I are creatures of habit. When we find a meal we love, we stick to it. Our current favorites are my one-pan hunan chicken recipe and Instant Pot white chicken chili with gluten-free cornbread. We seriously eat those at least once a week!

However, as soon as this honey teriyaki salmon recipe came along, I instantly added it to our weekly rotation. My husband went crazy for this perfectly flaky and incredibly flavorful salmon! Served with rice and steamed veggies for a healthy, balanced, and satisfying meal.

honey teryaki salmon on a plate with rice, broccoli, green onion, and a lime.

What You’ll Need to Make Honey Teriyaki Salmon

Salmon: The star of our show – salmon brings a rich, flaky texture and a dose of omega-3 fatty acids to the dish. Opt for fresh, quality fillets for the best results.

Honey: A natural sweet touch – honey brings a luscious sweetness to the teriyaki sauce, balancing the savory elements.

Tamari or Soy Sauce: Tamari adds a gluten-free option for our sauce, while soy sauce brings that classic umami flavor. Choose based on your dietary preferences.

Fresh Ginger: Opt for fresh, not powdered ginger in this recipe! I like to buy my fresh ginger in bulk, then store it in the freezer until I need some. Then, I cut off a hunk of fresh ginger, peel off the skin, and grate it into the honey teriyaki sauce.

Tips and Tricks

  • Allow the salmon to marinate for at least 1 hour for optimal flavor infusion. For an extra boost, marinate it up to 8 hours for an even more succulent result.
  • While baking, spoon the sauce from the bottom of the dish over the salmon. This basting ensures that the fillets are coated in the delectable teriyaki goodness.
  • Use a meat thermometer to check the salmon’s internal temperature. Aim for 125°F for a perfectly cooked, moist fillet.
Honey teriyaki salmon flaked apart on a plate.

Adjust This Recipe to Your Dietary Needs

Make it Gluten-Free: Opt for tamari instead of soy sauce to make this dish gluten-free while maintaining that savory teriyaki taste.

Make it Grain-Free: Serve the honey teriyaki salmon over cauliflower rice for a grain-free option, keeping it light and satisfying.

close-up overhead image of honey teriyaki salmon on a plate with rice.
5 from 1 vote

5-Ingredient Baked Honey Teriyaki Salmon Recipe

This honey teriyaki salmon recipe is my new favorite quick and easy weeknight meal! It comes together with just 5 ingredients, is packed with flavor, and super healthy too. The salmon is marinated then baked until perfectly flaky and tender every time!
Print Pin Rate
Prep Time: 1 hour
Cook Time: 10 minutes
Total Time: 1 hour 10 minutes
Servings: 4 servings

Ingredients

  • 4 6-8 ounce salmon fillets
  • salt, to taste
  • 1/4 cup tamari
  • 3 tablespoons honey
  • 2 garlic cloves, grated
  • 1-inch piece fresh ginger, peeled and grated

For serving:

  • 2 cups cooked rice
  • 1 crown broccoli, steamed
  • sliced green onion
  • sesame seeds

Instructions

  • Place the salmon skin side down in a large baking dish. Pat salmon fillets dry with a paper towel and lightly season with salt.
    honey teriyaki salmon step 1
  • In a small bowl, whisk together the tamari or soy sauce, honey, garlic, and ginger.
  • Pour the sauce over the salmon fillets, then cover the baking dish and refrigerate for at least 1 hour or up to 8 hours.
  • Preheat oven to 400° Fahrenheit and remove then uncover baking dish with salmon from the fridge.
  • Spoon the sauce from the bottom of the baking dish over the salmon, then bake for 10-12 minutes or until a thermometer inserted into the thickest part of the salmon reads 125° Fahrenheit.
  • Assemble four bowls with rice and steamed broccoli, then place one salmon fillet into each bowl. Pour they honey teriyaki sauce over top of each fillet, then finish off the bowls with sliced green onion and sesame seeds.

We’ve been on a big banana bread kick in my house. But the problem was… every time I make a new loaf, it’s gone in a couple days! So I needed a quick, easy, and SIMPLE recipe to get in our banana bread fix without spending too much time in the kitchen. *enter 4 ingredient banana bread.*

And if you’ve been around here a while, you know I’m all about the easy sweet treats! This time last year I went through a huge 5-ingredient edible gluten-free cookie dough phase (major pregancy craving!) and over the summer, I couldn’t stop making my 6-ingredient healthy gluten-free mug cake. There’s just something about having a healthier sweet treat on-hand that leads to happier days and a happier life.

Something else I always have on-hand? Bananas. I pretty much buy a bunch of bananas every week because, again, we just love them in this house. However, we often find ourselves with a few overly ripe bananas by the end of the week. But thanks to this 4 ingredient banana bread recipe, I always have a way to put them to good use!

I made my banana bread gluten-free, but you totally don’t have to! This recipe is also naturally dairy-free which I LOVE. And I should mention, it’s easily made refined sugar-free as well. For all dietary swaps, check out the “adjust this recipe to your dietary needs” section below. Happy 4-ingredient baking, friends!

a slice of 4 ingredient banana bread with a bite taken out.

What You’ll Need to Make 4 Ingredient Banana Bread

Bananas: The star of the show! These bananas bring natural sweetness and moisture to the bread. The riper, the better – those speckles on the peel are a sign of maximum flavor.

Eggs: Eggs play a crucial role in binding the ingredients together, providing structure to the bread. They contribute to the moist and tender texture we all love.

Brown Sugar: Brown sugar adds a rich caramel flavor and sweetness to the banana bread. It complements the bananas perfectly, creating a delightful depth of taste.

Self-Rising Flour: The key to keeping it simple! Self-rising flour contains baking powder and salt, eliminating the need for additional leavening agents. It ensures your banana bread rises beautifully. But if you don’t have self-rising flour, feel free to use regular flour instead, then add 1 1/2 teaspoons of baking powder and 1/2 teaspoon baking soda to the recipe!

Tips and Tricks

  • The riper your bananas, the sweeter and more flavorful your banana bread will be. Don’t shy away from those brown speckles!
  • Mix the ingredients until just combined. Overmixing can affect the texture, so keep it simple and stir until everything is blended.
  • Allow your banana bread to cool slightly in the pan before transferring it to a wire rack. This patience ensures a neater slice and preserves the bread’s texture.
sliced 4 ingredient banana bread with a knife on the side.

Adjust This Recipe to Your Dietary Needs

Make it Gluten-Free: Swap out the self-rising flour for a gluten-free alternative to make this banana bread gluten-free. I used Beth Blends Grain-Free Flour Blend in my 4 ingredient banana bread and it worked great!

Make it Refined Sugar-Free: Opt for coconut sugar as a substitute for brown sugar for a refined sugar-free option.

Stacked slices of 4 ingredient banana bread, with a hand lifting the top slice.
4.25 from 20 votes

Incredible 4 Ingredient Banana Bread (gluten-free!)

Baking doesn’t have to be complicated, and this 4 ingredient banana bread proves just that! With one bowl and a handful of simple ingredients, you can whip up a loaf of incredibly moist and delicious banana bread. Best enjoyed as a breakfast, snack, or dessert!
Print Pin Rate
Prep Time: 10 minutes
Cook Time: 50 minutes
Total Time: 1 hour
Servings: 10 servings

Equipment

  • 1 large bowl
  • 1 9×4-inch loaf pan

Ingredients

  • 3 large and overripe bananas
  • 2 large eggs
  • 1/2 cup brown sugar
  • 1 1/2 cups self-rising flour see Notes

Optional Add-Ins

  • 2 teaspoons ground cinnamon
  • 1 teaspoon vanilla extract
  • 1/2 cup chocolate chips

Instructions

  • Preheat oven to 350° Fahrenheit and grease or line a 9×4-inch loaf pan.
  • Place the bananas in a large bowl and mash well with a fork, until mostly smooth.
  • Add the eggs to the bowl and whisk to combine. Then, add the brown sugar and flour, then mix again until fully combined and no pockets of flour remain.
  • Pour the batter into your prepared loaf pan and bake for 50-55 minutes, or until a toothpick inserted down the center of the bread comes out clean.
  • Remove the banana bread from the oven, then let it cool completely before slicing.

Notes

If you don’t have self-rising flour, you can use all purpose flour instead. But, if you use all purpose flour, make sure to add 1 1/2 teaspoons of baking powder and 1/2 teaspoon of baking soda to this recipe.

Nutrition

Serving: 1slice | Calories: 135kcal | Carbohydrates: 28g | Protein: 3.5g | Fat: 1g | Sugar: 10g

With valentine’s day right around the corner, I was craving something extra chocolate-y! I’ve been drinking my healthy hot chocolate pretty much daily and gathered the ingredients for my 3-ingredient oreo mug cake, but I wanted something new …something a little more special. After all, this is my baby’s first Valentine’s day, and I plan on going ALL out!

So what did I do? I took my almond flour brownies, threw in some freeze dried strawberries, and topped with a chocolate drizzle – and voilà, these chocolate covered strawberry almond flour brownies were born! They’re rich, fudgy, and extra indulgent but totally grain-free, dairy-free, and sweetened with coconut sugar. So whether you’re also craving something special this month, or looking to treat that someone special, you gotta give these chocolate covered strawberry almond flour brownies a try. It’s love at first bite!

bite shot of chocolate covered strawberry almond flour brownies.

What You’ll Need to Make Chocolate Covered Strawberry Almond Flour Brownies

Sugar: I used coconut sugar in my brownies, but cane sugar works great too! Use whatever you prefer, even granulated monk fruit sweetener will do the trick.

Almond Flour: Almond flour is the secret ingredient in these chocolate covered strawberry *almond flour* brownies, making them gluten-free and grain-free. Don’t mess with it though, the almond flavor can’t be subbed without compromising this recipe!

Olive Oil: This is the secret to extra fudgy brownies! Olive oil is the magic touch for that perfect consistency and rich flavor. Embrace it – your taste buds will thank you.

Freeze Dried Strawberries: I used the Natierra freeze-dried strawberries and they were delicious. But I know Trader Joe’s sells them too! No freeze-dried strawberries? No problem. Fresh chopped strawberries work just as well.

close-up overhead image of chocolate covered strawberry almond flour brownies with chocolate drizzle and freeze dried strawberries on top.

Can I use store bought brownie mix instead?

You sure can! To make these chocolate covered strawberry brownies with store bought brownie mix, start by preparing the mix according to the package instructions. Then, add in 1 cup of freeze dried strawberries to the batter and stir to combine. Transfer the batter to a lined and/or greased brownie pan and bake according to package instructions. Once brownies are baked, remove them from the oven and let them cool completely before topping with the chocolate drizzle. Just as delicious with half the effort!

Tips and Tricks

  • Whip the sugar and eggs until they’re super light and fluffy – a key step for that melt-in-your-mouth brownie texture.
  • When bringing together the dry ingredients, give them a gentle stir. Over-mixing can impact the texture of your brownies, so keep it light and just right.
  • For that pro finish, hold off on the chocolate drizzle until your brownies are entirely cooled. Patience pays off for that beautiful, glossy topping!
overhead image of chocolate covered strawberry almond flour brownies with a chocolate drizzle and freeze dried strawberries on top.
3 from 3 votes

Chocolate Covered Strawberry Almond Flour Brownies

These chocolate covered strawberry brownies are rich, fudgy, and totally delicious! They’re made with almond flour and coconut sugar for a healthier twist, but are still just as indulgent. These are the perfect Valentine’s Day recipe, or any day treat!
Print Pin Rate
Prep Time: 30 minutes
Cook Time: 40 minutes
Servings: 4 servings

Ingredients

  • 1 cup sugar, I used coconut sugar
  • 3 large eggs
  • 1 1/2 cups almond flour
  • 3 tablespoons unsweetened cocoa powder
  • 1 teaspoon vanilla extract
  • 1/4 teaspoon salt
  • 1 1/2 cups chocolate chips, divided
  • 1/2 cup olive oil, or any vegetable oil
  • 1 cup freeze-dried strawberries, or 1 cup fresh chopped strawberries

For the chocolate drizzle:

  • 1/2 cup chocolate chips
  • 1 teaspoon coconut oil

Instructions

  • Preheat oven to 350° Fahrenheit and line an 8×8-inch pan with parchment paper.
  • In a large bowl, beat together the sugar and eggs with either a hand or stand mixer, or a whisk (hello arm workout!). Continue beating for 3-5 minutes, until light and fluffy.
  • Add the almond flour, cocoa powder, vanilla extract, and salt. Stir until everything is just combined, careful not to over-mix.
  • In a separate small bowl, add the coconut oil and 1 cup of chocolate chips. Microwave in 30-second intervals, stirring between each interval, until chocolate chips are fully melted.
  • Pour melted chocolate chips and olive oil into the brownie batter, and stir to combine. Then, add in the remaining chocolate chip and freeze dried strawberries and fold to combine.
  • Pour brownie batter into prepared pan and bake for 30-35 minutes, or until the center is just barely set. Remove from oven and let cool completely.
  • Once brownies are cool, make the chocolate drizzle by melting the chocolate chips and coconut oil together in the microwave in 30 seconds increments. Stir the chocolate between each increment until completely smooth.
  • Cut the brownies into squares, then top the brownies with the melted chocolate drizzle and additional freeze dried strawberries if you’d like.

Nutrition

Calories: 300kcal

This Thanksgiving salad is the perfect potluck side dish! It’s packed with flavor and freshness. This salad is also super hearty and satisfying, but super healthy! Meal prep this salad ahead of your next holiday party, then wow your friends and family with how delicious it is.

Thanksgiving salad meal prepped and stacked into a large jar.

The large glass jar I used to store my Thanksgiving salad is linked HERE.

What You’ll Need to Make Thanksgiving Salad

Farro: The hearty base that brings a chewy texture and nutty flavor. It’s like a Thanksgiving hug for your taste buds.

Roasted Butternut Squash: Because it wouldn’t be Thanksgiving without a bit of squash magic. Roasted to perfection, it adds sweetness and a touch of autumn warmth. Or, if you’d like, you can roast sweet potato instead.

Maple Dijon Dressing: A blend of sweet and tangy, this dressing is the secret sauce that ties all the flavors together. Say goodbye to boring salads!

Soft White Cheese (like Feta): Creamy, crumbly, and just the right amount of decadent. The cheese brings that perfect savory balance to the dish.

close-up image of Thanksgiving salad in a bowl with a fork.

Tips and Tricks

  • Make It Ahead: Thanksgiving can be a whirlwind, so make life easier by prepping this salad ahead of time. Stack the ingredients in a large jar starting with the farro and kale at the bottom, then all other ingredients on top. When it’s time to serve, just empty the jar into a large bowl, and toss to combine – it’s that easy!
  • Don’t Forget the Crunch: Toss in some toasted nuts or seeds for that satisfying crunch. Pecans or pumpkin seeds are particularly Thanksgiving-worthy additions that elevate the texture and taste.
  • Mix Up Your Greens: While we love the classic mix of greens, feel free to experiment! Arugula adds a peppery kick, spinach brings a delicate texture, or even kale for a heartier feel. Mix and match to suit your taste.
Thanksgiving salad in a bowl with a fork and spoon.

Adjust This Recipe To Your Dietary Needs

Make it Gluten-Free: Farro contains gluten, so to make this recipe gluten-free, use either brown rice or quinoa instead.

Make it Vegan: Either leave out the cheese, or use your favorite vegan feta in this Thanksgiving salad recipe!

overhead image of thanksgiving salad in a bowl with water on the side.
5 from 1 vote

Perfect Potluck Thanksgiving Salad

This Thanksgiving salad is the perfect potluck side dish! It’s packed with flavor and freshness. This salad is also super hearty and satisfying, but still super healthy! Meal prep this salad ahead of your next holiday party, then wow your friends and family with how delicious it is.
Print Pin Rate
Prep Time: 15 minutes
Cook Time: 30 minutes
Total Time: 45 minutes
Servings: 10 servings

Ingredients

For the salad:

  • 3 cups cooked farro, or barley, wild rice, or quinoa
  • 1 butternut squash or 2 sweet potatoes, peeled and cubed
  • 1 tablespoon olive oil
  • salt and black pepper, to taste
  • 1 shallot, peeled and thinly sliced
  • 1 head kale, thinly sliced or shredded
  • 1 cup soft cheese, such as feta or goat cheese
  • 2 apples, chopped
  • 1/2 cup dried cranberries
  • 1/2 cup unsalted pumpkin seeds, or chopped pecans

For the maple Dijon dressing:

  • 1/2 cup olive oil
  • 1/4 cup apple cider vinegar
  • 2 tablespoons Dijon mustard
  • 1 tablespoon maple syrup
  • 1 garlic clove, minced
  • 1 teaspoon salt

Instructions

  • Preheat oven to 400° Fahrenheit.
  • Place the cubed butternut squash on a large baking sheet and drizzle with olive oil, then season with salt and black pepper.
  • Toss squash to coat in oil then bake for 25-30 minutes, tossing halfway through.
  • While squash is roasting, make the maple Dijon dressing by adding all dressing ingredients to a small bowl and whisking to combine.
  • Once squash is tender, remove from the oven and set aside to cool slightly.
  • If making salad ahead of time, stack in large jar with the farro at the bottom and the chopped kale on top of the farro.
  • Pour maple Dijon dressing over the kale and farro, then stack in the roasted butternut squash, shallots, soft cheese (such as feta), apples, pumpkin seeds, and dried cranberries.
  • If preparing the salad to eat immediately, then simply add all ingredients to a large bowl and toss to combine.

Nutrition

Calories: 300kcal

There you have it – a Thanksgiving Salad that’s as easy to prepare as it is delightful to eat. Whether it’s a colorful side or a standalone star at your Thanksgiving table, this salad is ready to impress. So, gather your ingredients, stack that jar, and let the Thanksgiving feast begin!

Hey, pasta lovers! If you’re on the hunt for a cozy, creamy, and utterly delightful vegan pasta recipe, you’re in the right place. Our Butternut Squash Pasta is here to dazzle your taste buds and provide that warm hug you crave during chilly evenings. No dairy, no problem – let’s dive into the comforting world of plant-based pasta magic!

fork lifting butternut squash pasta out of a bowl.

What You’ll Need to Make Butternut Squash Pasta

Butternut Squash (with Skin): That’s right, no need to peel off the skin! It’s not only a time-saver but also adds a lovely nutty flavor and extra nutrients. Slice, roast, and blend.

A Whole Head of Garlic: Roasting garlic adds a caramelized, almost sweet flavor to the sauce. Plus, the aroma while it’s roasting is heavenly.

Shallots: These little gems provide a delicate oniony flavor that complements the butternut squash beautifully.

Raw Cashews: Creamy, dreamy, and oh-so-healthy. Cashews are the secret to that luscious, dairy-free creaminess.

Pasta of Your Choice: Feel free to pick your favorite pasta shape. Whether you’re into the classic spaghetti or something quirky like fusilli, it’s all about what makes you smile. I used this gluten-free spaghetti, and it was delicious!

close-up image of butternut squash pasta in a bowl.

Tips and Tricks

  • Roast ‘n’ Toast: Roasting the butternut squash and garlic is the superstar move here. The caramelization adds a depth of flavor that’s hard to resist. Drizzle with olive oil, sprinkle with salt and red pepper flakes , and pop ’em in the oven.
  • Add a Splash of Lemon: For an extra layer of flavor and a touch of freshness, consider adding a squeeze of fresh lemon juice to your creamy butternut squash sauce. The hint of citrus can brighten up the dish and provide a delightful contrast to the richness of the sauce. Just a little goes a long way, so start with a modest amount and adjust to your taste. It’s a simple twist that can elevate your pasta to a whole new level of deliciousness!
  • Season to Perfection: Don’t forget to season well with salt, pepper, and maybe a pinch of nutmeg for that extra warmth. Taste as you go to get it just right.
Placing down a bowl of vegan creamy butternut squash pasta.
No ratings yet

Easy and Creamy Butternut Squash Pasta

If you’re on the hunt for a cozy, creamy, and utterly delightful vegan pasta recipe, you’re in the right place. Our Butternut Squash Pasta is here to dazzle your taste buds and provide that warm hug you crave during chilly evenings. No dairy, no problem – let’s dive into the comforting world of plant-based pasta magic!
Print Pin Rate
Prep Time: 15 minutes
Cook Time: 45 minutes
Total Time: 1 hour
Servings: 4 servings

Ingredients

  • 2-3 cups cubed butternut squash, skin left on or peeled off
  • 1 whole head garlic, peeled
  • 2 shallots, peeled and cut in half
  • 1 tablespoon fresh thyme leaves
  • 2 tablespoons olive oil
  • 1 teaspoon salt
  • 1/4 teaspoon red pepper flakes
  • 1 pound pasta
  • 1 cup vegetable broth, or water
  • 1/2 cup raw cashews, unsalted
  • 2-3 fresh sage leaves

Instructions

  • Preheat oven to 400° Fahrenheit.
  • On a large baking sheet, toss together the cubed butternut squash, peeled garlic cloves from one whole head of garlic, peeled and cut shallots, fresh thyme leaves, olive oil, salt, and red pepper flakes. Bake for 30 minutes, or until butternut squash is very soft.
  • Remove baking sheet from oven and let cool slightly. While the squash cools, bring a large pot of water to a boil. Once boiling, add in a big pinch of salt and the pasta. Cook pasta according to package instructions.
  • Once butternut squash is slightly cool, add to a blender along with the vegetable broth, raw cashews, and sage. Blend until completely smooth.
  • Right before draining the pasta, reserve 1 cup of pasta water. Then, drain the pasta and return to the pot along with the butternut squash sauce. Add ¼ cup of pasta water at a time to the pasta to thin out the sauce, as needed.
  • Serve immediately with additional fresh herbs.

Nutrition

Calories: 300kcal

Interested In More Gluten-Free and Dairy-Free Pasta Recipes? Try These!