
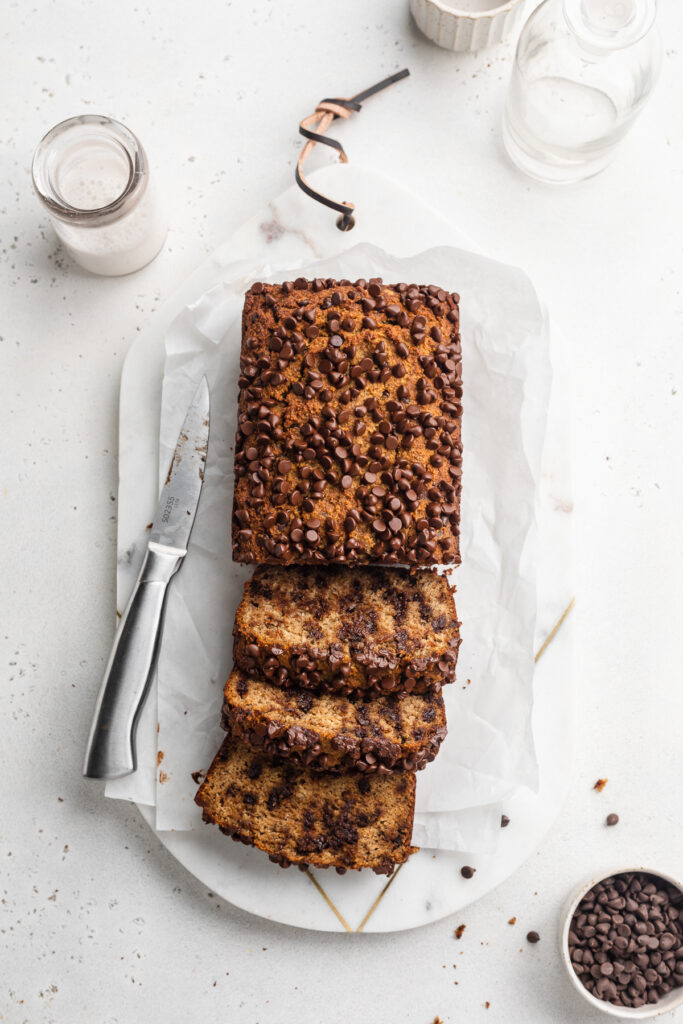
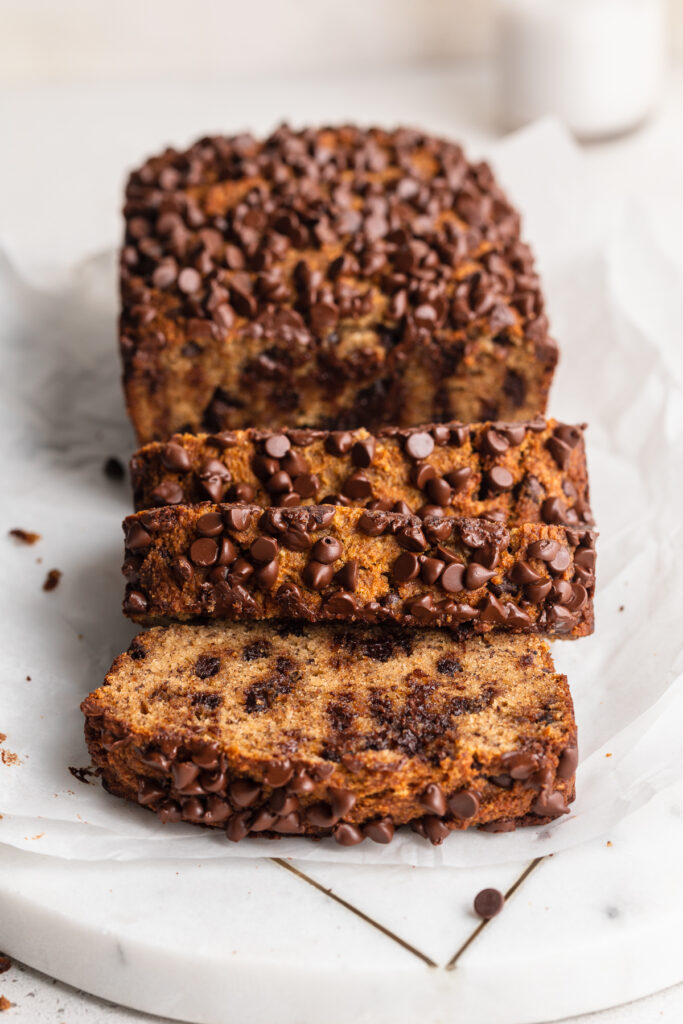
Super healthy and delicious almond flour banana bread! Made with whole, good-for-you ingredients, perfectly sweet, and totally irresistible. Toast up a slice of this grain-free, dairy-free, and refined sugar-free banana bread as a comforting, yet nutritious breakfast, snack, or dessert.
What You’ll Need To Make Almond Flour Banana Bread
Almond Flour – The one and only flour we use in this grain-free recipe is almond flour. Almond flour is a favorite among low-carb, gluten-free, and paleo recipes. It yields little-to-no flavor and, when done right, bakes up beautifully soft and tender. If you don’t already have a bag of almond flour in your pantry, I highly recommend you go pick some up. I’ve tried pretty much every brand of almond flour out there, and my favorite so far is this Anthony’s Almond Flour. Though whichever brand of almond flour you decide to use in this recipe, make sure it’s blanched almond flour, and not almond meal.
Coconut Sugar – A quarter cup of coconut sugar is all you’ll need to sweeten up this healthy dessert recipe! The bananas yield some natural sweetness of their own, and a touch of coconut sugar helps bring that out. If you don’t have coconut sugar, you can use brown sugar in its place.
Bananas – About two very ripe bananas should do the trick here! Or, however many mashed bananas you need to equal one cup. And while I feel like this goes without saying, make sure your bananas are super ripe for this recipe. You can tell a banana is ripe when it’s beginning to form large brown spots all around the outside peel.
Chocolate Chips – While optional, chocolate chips make this almond flour banana bread extra indulgent and delicious! If you don’t have chocolate chips, you can easily use one cup of chopped chocolate instead. I recommend semi-sweet chocolate or dark chocolate for this recipe. And if you’re looking to keep your entire loaf paleo, use your favorite paleo chocolate chips, such as these Hu Kitchen Chocolate Gems.
Tips and Tricks
- Instead of greasing your loaf pan, line it with parchment paper. Also, cut your parchment paper larger than the loaf pan, leaving its edges sticking out from the sides of your banana bread. This’ll make it easier to lift and remove your bread from its baking pan!
- Leave the almond flour banana bread to cool completely (about an hour) before slicing. Then, once cool, I recommend slicing the bread all at once, before storing. Lastly, store the slices in an airtight container at either room temperature for 3 days, in the fridge for 7 days, or in the freezer for up to 3 months!
- For the ultimate slice of banana bread that’ll leave your tastebuds singing, toast it before eating! Then, once toasted, top that baby off with some vegan butter, ghee, peanut butter, and/or almond butter. Let me tell ya, toasted almond flour banana bread makes for the perfect afternoon snack or nightcap.

Adjust This Recipe To Your Dietary Needs
Make it Vegan: For a vegan grain-free banana bread, try replacing the eggs with three flax eggs. One flax egg equals one tablespoon of ground flax seed meal mixed into three tablespoons of water. While I haven’t tried this vegan option myself yet, I’m sure it’d work just fine!
Make it Added Sugar-Free: Because the bananas are so naturally sweet, you can totally leave the coconut sugar out of this healthier dessert recipe.
Almond Flour Banana Bread
Ingredients
- 2 1/2 cups almond flour
- 1/4 cup coconut sugar
- 1 teaspoon baking soda
- 1/2 teaspoon baking powder
- 1 teaspoon cinnamon
- 2 tablespoons coconut oil, melted
- 1 cup mashed banana (about 2 very ripe bananas)
- 3 eggs
- 1 teaspoon vanilla extract
- 1 cup chocolate chips, optional
Instructions
- Preheat oven to 350° Fahrenheit and line a 9×5-inch loaf pan with parchment paper.
- Whisk together the almond flour, coconut sugar, baking soda, baking powder, and cinnamon in a large bowl.
- Add in the melted coconut oil, mashed banana, eggs, and vanilla extract – mix until fully combined. Fold in chocolate chips if using, until evenly dispersed throughout batter.
- Transfer batter to prepared loaf pan and bake for 40-50 minutes or until a toothpick inserted down the center of the bread comes out clean. Remove from the oven and transfer to a wire cooling rack, cool bread completely (about 1 hour) before slicing.


