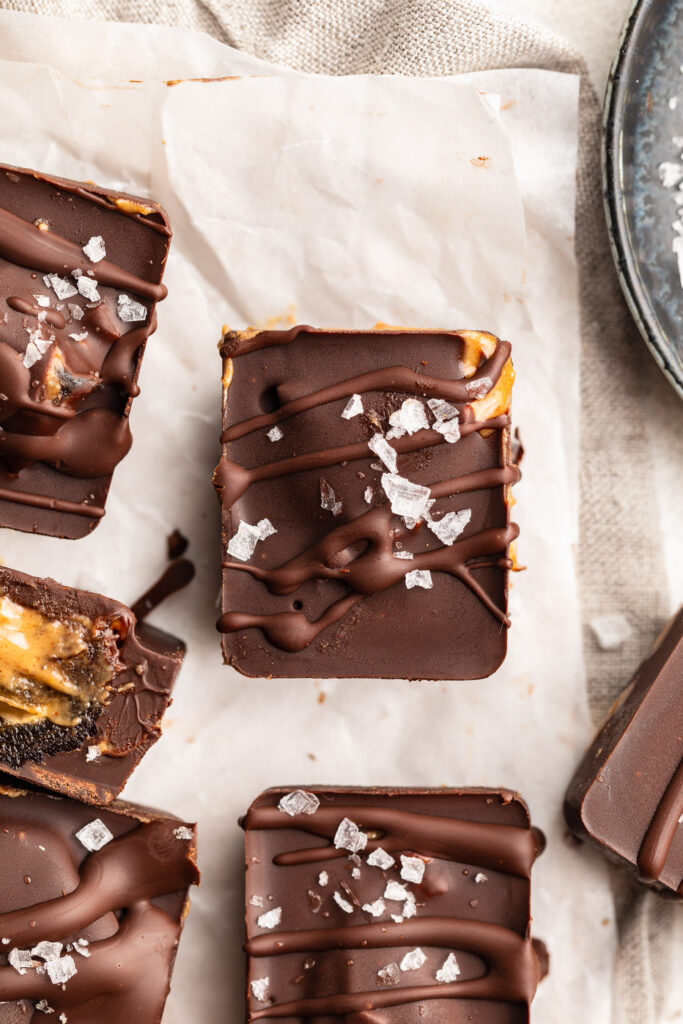
Think snickers can’t be healthy?? Think again! I’ve pretty much made it my life’s work to take unhealthy treats and make them healthy. Like my healthy gluten-free mug cake, and my healthy cookie dough bars (another no-bake dessert in constant rotation around here!). These 4-ingredient healthy snickers fit seamlessly into my healthier treats lineup. My recent nighttime routine has included getting my baby to bed, popping 3 or 4 of these healthy snickers out of the freezer, and cozying up on the couch while I savor every last bite. My husband’s also obsessed, so I’ve been doubling this recipe to make sure there’s plenty to go around!
For this recipe, you’ll want to start with a silicone ice cube tray. I purchased these ones (they come in a 2-pack) and have loved them so far! They’re also great for making ice cubes too, as the silicone helps the cubes slide right out. From there, you’ll need just four simple ingredients – chocolate, coconut oil, dates, and peanut butter. All relatively healthy ingredients, but they come together to create a treat that tastes seriously indulgent, but won’t hurt your stomach… no matter how many you eat! *wink wink*
What You’ll Need To Make These Healthy Snickers
Chocolate Chips: Opt for dairy-free or dark chocolate chips for a healthier option. These provide the rich, chocolatey coating for your snickers bites.
Coconut Oil: Coconut oil helps melt the chocolate chips and creates a smooth, glossy texture for your healthy candy bars.
Medjool Dates: These naturally sweet and chewy dates serve as the caramel-like layer in your snickers, providing natural sweetness and a satisfying texture.
Crunchy Peanut Butter: Choose your favorite brand of crunchy peanut butter to add nutty flavor and crunch to your guilt-free treats!

Tips and Tricks
- If your dates are too firm, soak them in warm water for 10-15 minutes before using. This will help soften them and make them easier to work with.
- Using a silicone ice cube tray makes it easier to remove the snickers bites once they’re frozen. If you don’t have one, you can line a regular ice cube tray with plastic wrap for easy removal.
- To ensure even distribution of ingredients, use a layering technique when assembling your healthy snickers bites. Start with a layer of melted chocolate, followed by a date and a dollop of peanut butter, then top with another layer of melted chocolate.

4-Ingredient Healthy Snickers
Ingredients
- 1 cup chocolate chips
- 1 tablespoon coconut oil
- 8 medjool dates, pits removed and cut in half
- 1/4 cup crunchy peanut butter
Instructions
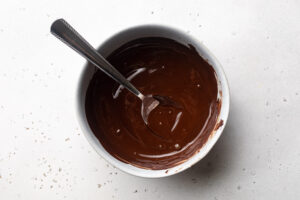
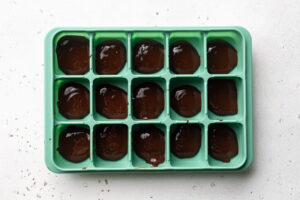
- Melt the chocolate chips and coconut oil together in a small bowl in the microwave.

- Take a silicone ice cube tray and fill 15 cavities of the tray with 1/2 tablespoon each of the melted chocolate.
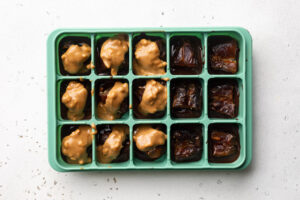
- Place one pitted date half into each cavity on top of the chocolate.
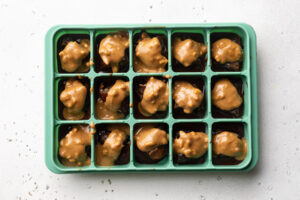
- Then, add about ½ a tablespoon of crunchy peanut butter to each ice cube cavity, on top of each date.
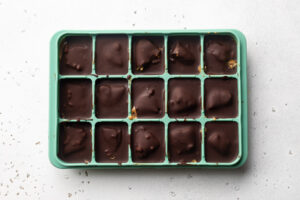
- Pour the remaining melted chocolate into each ice cube cavity, covering the dates and peanut butter completely.
- Place the ice cube tray in the freezer for about 20 minutes, or until the chocolate has completely hardened. Remove the tray from the freezer and pop out the healthy snickers. Store snickers in the fridge or freezer for up to 3 months!

")