Tag

healthy

Browsing

I’ve seriously struggled to stay hydrated this summer! I spent the first half of the summer very pregnant, not the second half newly postpartum. So when water alone doesn’t do the trick, I love to whip up this homemade gatorade. I make a huge glass of it in the morning, then blend together one of my favorite healthy smoothies – and I head into the day feeling fueled and hydrated (despite a total lack of sleep thanks to my newborn – ha!).

What Makes This Homemade Gatorade Better Than Store-Bought

  • It cuts out artificial colors, high fructose corn syrup, and preservatives, giving you a refreshing drink made from wholesome ingredients while providing essential electrolytes.
  • Coconut water acts as a natural base, offering potassium and hydration without added sugars. I like to buy my coconut water in bulk – this is the case I buy on Amazon, totally organic for a great price.
  • You control the sodium with a pinch of high-mineral salt (linking to the one I buy on Amazon HERE) – crucial for electrolyte balance – but can easily tailor it to your health needs!
homemade gatorade in a large mason jar with ice and lime slices

I love sipping my homemade gatorade out of this 32 ounce mason jar (available on amazon!) and always use the Redmond’s Real Salt in this recipe – also available on amazon!

The Importance of Electrolytes

  • Sodium, potassium, magnesium, and calcium are vital for hydration, muscle function, and fluid balance – especially after sweating or exercise.
  • Dietitians note that homemade versions help you stay hydrated and replenish lost electrolytes without the added sugars found in commercial sports drinks.

Switch Up The Flavors of This Homemade Gatorade

Looking for variety? Swap in different flavor profiles with these easy twists:

  • Fruit Boosts: Add fresh watermelon juice, unsweetened cranberry, or tart cherry juice for natural sweetness and flavor.
  • Herbal Infusions: Stir in mint, cucumber, or a slice of ginger for added freshness and digestive support.
  • Sweetener Options: Use maple syrup, agave, or even stevia to control sweetness without compromising taste.
homemade gatorade in a large mason jar with lemons and limes on the side.
5 from 1 vote

Homemade Lemon-Lime Gatorade

Stay hydrated the healthy way with this refreshing homemade lemon-lime gatorade recipe. Made with coconut water, fresh citrus juice, raw honey, and mineral-rich salt, it’s a clean alternative to store-bought sports drinks. Perfect for post-workout recovery, hot summer days, or anytime you need a natural electrolyte boost!
Print Pin Rate
Prep Time: 1 minute
Total Time: 1 minute
Servings: 1 serving

Equipment

  • 1 large glass

Ingredients

  • 1 cup coconut water
  • 1 cup plain filtered water
  • juice of 1 lemon
  • juice of 1/2 lime
  • 1 tablespoon raw honey or agave
  • 1/4 teaspoon high mineral salt I used Redmond's Real Salt

Instructions

  • Add all ingredients to a large glass and stir to combine, then add in ice and enjoy!

Every summer my dad grows the most incredible garden, and every summer he has a massive amount of zucchini! So while I love using his homegrown blueberries in my blueberry muddy buddies (don’t knock it ’til ya try it!) and strawberries in my gluten-free strawberry shortcake, I needed to figure out a way to use up the giant zucchinis he sends me home with every time I visit. A few summers ago I started making gluten-free zucchini bread, which is totally delicious, but this year I was craving BROWNIES!

My criteria for these healthy zucchini brownies was they had to be rich, fudgy, and just as delicious as any other brownie despite the hidden veggies. They also needed to be easy to make – one bowl, just a few ingredients, and simple steps. After a few tests this spring, I finally nailed the PERFECT healthy zucchini brownies recipe that’s totally gluten-free, dairy-free, and even refined sugar-free! So if you’re drowning in zucchini like I am, or just looking for a healthier dessert recipe this summer, you gotta give these brownies a try. Trust me, everyone (even my toddler!) loves ’em!

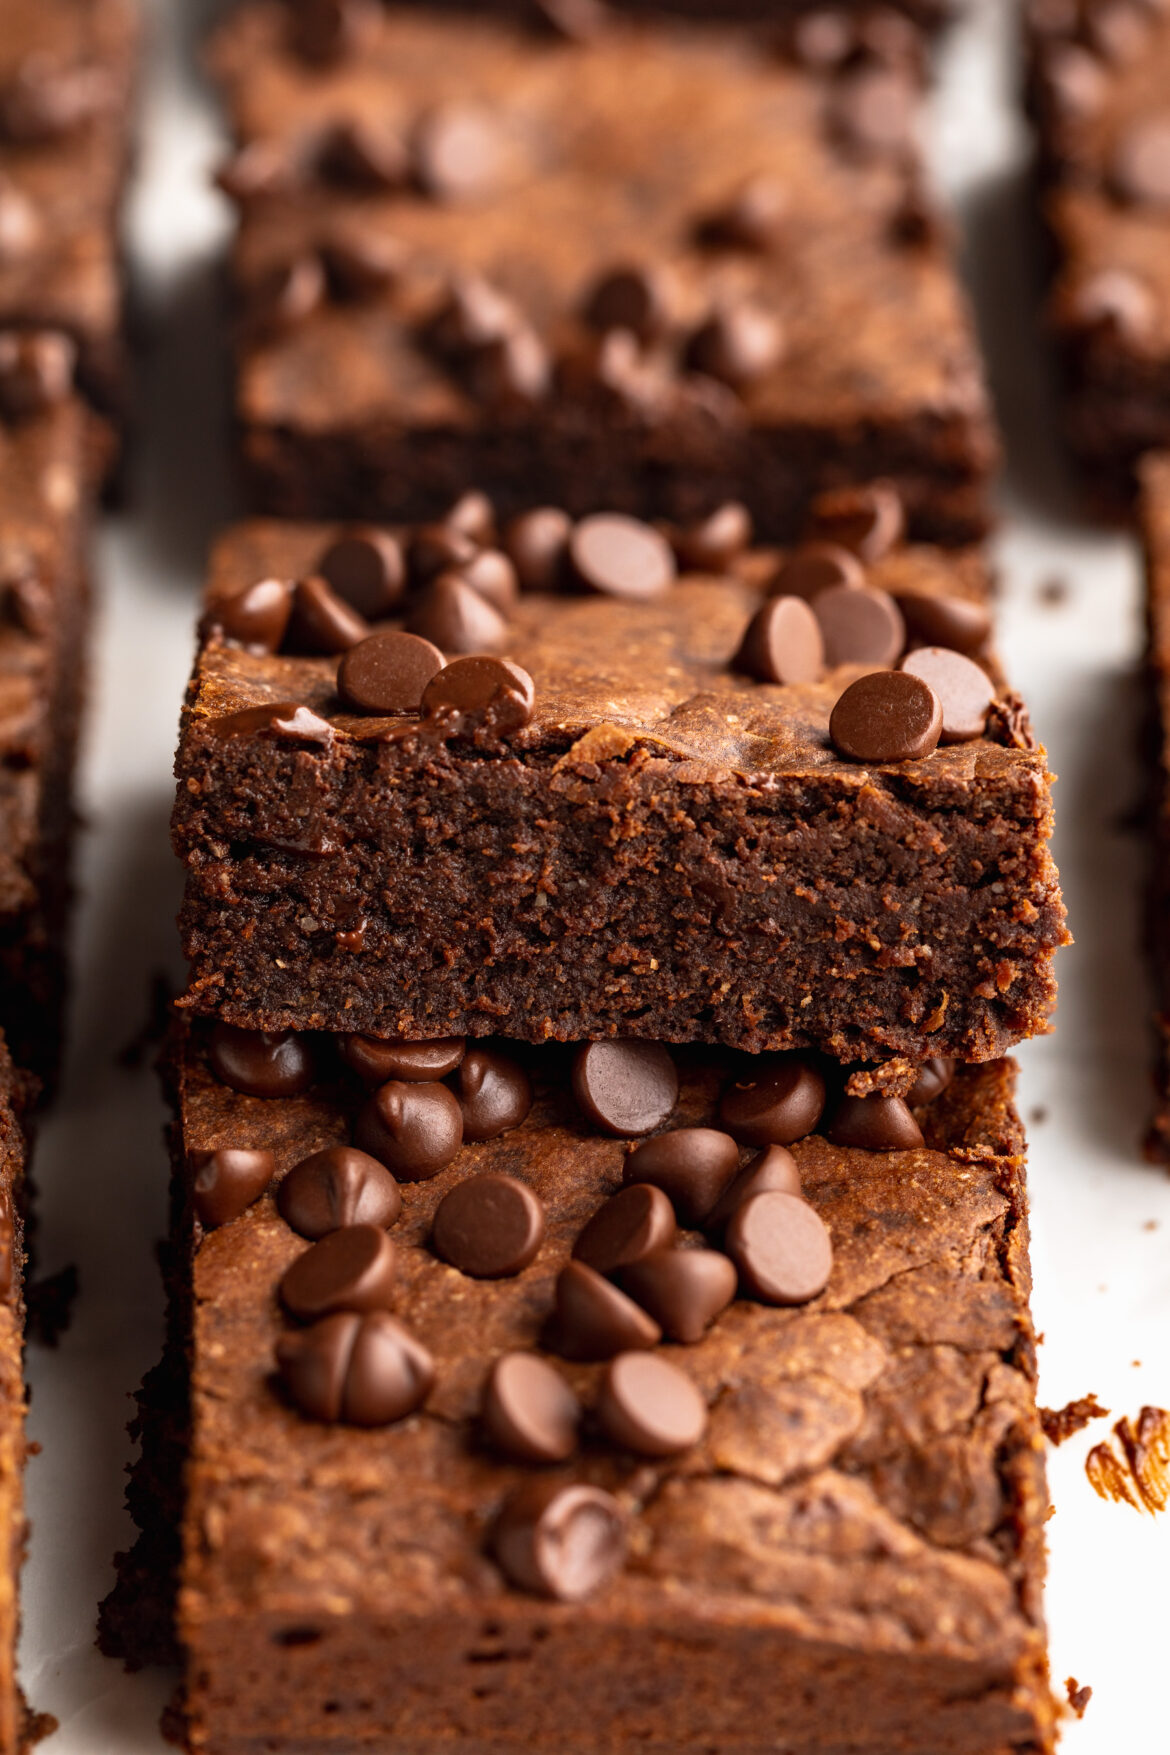
one healthy zucchini brownie stacked on top of another.

Why You’ll Love These Healthy Zucchini Brownies

  • Secretly mighty: Shredded zucchini brings irresistible moisture and a veggie boost – no one will guess!
  • One-bowl wonder: Mix, bake, and enjoy with minimal cleanup and zero fuss.
  • Healthier indulgence: Naturally sweetened, gluten-free, dairy-free, and packed with wholesome fat and fiber!

What Makes This Recipe Healthy

  • Hidden nutrition: Loads of zucchini add moisture, plus essential vitamins and nutrients.
  • Smarter sweeteners: Maple syrup replaces refined sugars, offering a lower glycemic profile!
  • Gluten-free: Use oat flour or a high-quality gluten-free blend for a naturally inclusive dessert.
3 healthy gluten-free zucchini brownies staked on top of each other.

Frequently Asked Questions

  • Can I use almond flour instead of oat flour?
    Yes! Almond flour works beautifully, though the texture may change slightly.
  • How do I store these brownies?
    Keep in an airtight container at room temperature for 3–4 days, or refrigerate for up to one week.
  • Can I make this recipe vegan?
    Absolutely! Swap the egg with a flax egg (1 Tbsp flaxseed meal + 3 Tbsp water) and use dairy-free chocolate chips.

Sam’s Recipe Tips

  • Dry it right: Wrap shredded zucchini in a towel to remove excess moisture – this keeps the brownies from turning out mushy.
  • Oven finesse: The brownies are best pulled when the edges are set and the center still jiggles slightly. They’ll continue to set as they cool.
  • Flavor fun: Sprinkle flaky sea salt on top or stir in chopped walnuts for a textured twist.
5 from 1 vote

Healthy Gluten-Free Zucchini Brownies

These healthy gluten-free zucchini brownies are rich, fudgy, and secretly packed with shredded zucchini for a boost of hidden veggies! Naturally sweetened with maple syrup and made in just one bowl, they’re a deliciously easy dessert that’s gluten-free, dairy-free, and refined sugar-free.
Print Pin Rate
Prep Time: 10 minutes
Servings: 16 servings

Equipment

  • 1 large bowl
  • 1 9×9-inch baking pan

Ingredients

  • 2 cups shredded zucchini
  • 1/2 cup maple syrup
  • 1/4 cup olive oil or any vegetable oil
  • 1 large egg
  • 1 teaspoon vanilla extract
  • 1 cup oat flour or all purpose flour
  • 1/2 cup unsweetened cocoa powder
  • 1/2 teaspoon baking soda
  • 1/2 cup chocolate chips

Instructions

  • Preheat oven to 350° Fahrenheit and line an 9×9-inch baking pan with parchment paper.
  • Wrap the zucchini in a dish cloth and squeeze to release as much excess moisture from the zucchini as possible, then transfer the shredded zucchini to a large bowl.
  • Add in the maple syrup, olive oil, large egg, and vanilla extract, then mix until everything is fully combined.
  • Next, add in the oat flour or all purpose flour, unsweetened cocoa powder, and baking soda. Mix again until the dry ingredients are fully incorporated into the brownie batter.
  • Fold the chocolate chips into the batter, then transfer the batter to your prepared baking pan. Bake for 30-35 minutes, or until the brownies are just set in the middle them remove from the oven and let cool completely before slicing into squares.

Nutrition

Serving: 1serving | Calories: 120kcal | Carbohydrates: 16g | Protein: 2.5g | Fat: 6g | Fiber: 2g | Sugar: 9g

I take my snacks very seriously… arguable a little too seriously. I typically rotate between my protein cookies, healthy snickers rice cakes, and 6-ingredient protein muffins – and now I’ll add these chocolate shell yogurt cups to the lineup! What it comes down to for me is needing just a little something delicious to look forward to when that daily afternoon slump hits. A fun and delicious treat is usually just what I need to boost my mood and energy, and to get me through the rest of the day. These chocolate shell yogurt cups pack in a ton of nutrients from chia seeds, flax seeds, and fresh strawberries! They’re also insanely delicious and pretty much taste like dessert.

Why You’ll Love These Chocolate Shell Yogurt Cups

These chocolate shell yogurt cups are the perfect balance of creamy, crunchy, and healthy! Made with wholesome ingredients like yogurt, chia seeds, peanut butter, and a crisp dark chocolate shell, they’re great for breakfast, a midday snack, or a healthy dessert. With no baking required and only a few minutes of prep, this is an easy treat you’ll want to make on repeat!

overhead image of three chocolate shell yogurt cups.

What Makes This Recipe Healthy?

These yogurt cups are packed with nutritious ingredients! Greek yogurt (or a dairy-free alternative) offers protein and gut-friendly probiotics, while chia seeds and flaxseed meal provide a boost of fiber and omega-3s. The chocolate shell is made with just two ingredients and gives the perfect sweet crunch without a ton of sugar.

Recipe Variations and Substitutions

  • Yogurt Options: Use any yogurt you love – plain, vanilla, Greek, or dairy-free options like almond or coconut yogurt all work well.
  • Nut-Free Version: Swap peanut butter for sunflower seed butter or tahini to make this completely nut-free.
  • Berry Swap: No strawberries? Try blueberries, raspberries, or sliced banana for a twist.
  • Add a Crunch: Sprinkle in crushed nuts or granola before pouring the chocolate shell on top for extra texture.
chocolate shell yogurt cups with peanuts and flaky salt on top.

Frequently Asked Questions

What kind of yogurt can I use?
You can use any yogurt you like! Greek yogurt adds extra protein, but dairy-free options like coconut or almond yogurt work great, too. I used Siggi’s plant-based protein yogurt cups and the texture is spot-on!

How long can I keep these yogurt cups in the fridge?
These are best enjoyed right after the chocolate sets, but you can store them in the fridge for up to 24 hours. The texture may soften slightly over time.

Can I make these nut-free?
Yes! Just swap the peanut butter for a nut-free alternative like sunflower seed butter or tahini.

overhead image of chocolate shell yogurt cup with chopped peanuts on top.
No ratings yet

Chocolate Shell Yogurt Cups (with protein + fiber!)

These chocolate shell yogurt cups are a healthy and delicious no-bake treat made with just 7 simple ingredients! Packed with protein, fiber, and healthy fats, they’re perfect for breakfast, a snack, or dessert. With a creamy yogurt base and crisp chocolate shell, this easy recipe is dairy-free optional and ready in minutes!
Print Pin Rate
Prep Time: 5 minutes
Chilling Time: 15 minutes
Total Time: 20 minutes
Servings: 1 serving

Ingredients

  • 1 5-ounce container yogurt
  • 1 tablespoon chia seeds
  • 1 teaspoon flaxseed meal
  • 1 strawberry chopped into small pieces
  • 1 tablespoon peanut butter
  • 2 tablespoons chocolate chips
  • 1/2 teaspoon coconut oil

Instructions

  • Remove the lid from the yogurt cup and mix the chia seeds and flaxseed meal into the yogurt.
  • Top the yogurt with the chopped strawberry pieces and peanut butter.
  • Melt together the chocolate chips and coconut oil until completely smooth, then pour the melted chocolate over the yogurt. Transfer the yogurt to the freezer for about 15 minutes or until the chocolate has hardened, then remove and enjoy!

Notes

Nutrition info was calculated using whole milk unsweetened Greek yogurt.

Nutrition

Serving: 1serving | Calories: 400kcal | Carbohydrates: 30g | Protein: 23.5g | Fat: 34g | Fiber: 11g | Sugar: 17g

Why You’ll Love These Cookie Dough Date Bites

  • They taste like your favorite cookie dough but are healthy and made with better-for-you ingredients!
  • Made in under 10 minutes with minimal prep – perfect for meal prep.
  • Naturally gluten-free, dairy-free, vegan, and refined-sugar-free!
  • Ideal for lunchbox treats, post-workout energy, or whenever you’re craving a little something sweet.
Cookie dough date bites in a bowl with milk and chocolate chips on the side.

What Makes This Recipe Healthy?

  • Medjool dates provide natural sweetness, fiber, and potassium without added sugar!
  • Rolled oats and peanut butter add sustained energy through complex carbs, healthy fats, and protein.
  • This recipe is naturally gluten-free, dairy-free, and refined sugar-free – yet taste like dessert!

Recipe Variations and Substitutions

  • Nut-Free: Swap in unsweetened sunflower or tahini instead of peanut butter.
  • Lower-Sugar: Use dark or sugar-free mini chocolate chips, or omit them entirely.
  • Flavor Swaps: Stir in cinnamon, cocoa powder, or shredded coconut for added depth.
One cookie dough date bite with a bite taken out.

Frequently Asked Questions

Can I use almond flour instead of oats?
Yes! Almond flour—or any nut flour—works for a richer, low-carb version.

Will these hold together without rolling?
They’ll firm up in the fridge or freezer, but rolling helps ensure they stay bite-sized.

How long do they last?
Keep them refrigerated up to 2 weeks or freeze for up to 3 months for easy snacking!

Two cookie dough dates bites stacked on top of each other.
5 from 2 votes

5-Ingredient Healthy Cookie Dough Date Bites

Healthy 5-ingredient cookie dough date bites! They’re vegan, gluten-free, sugar-free, and totally delicious. Whip up a batch of these healthy snacks in just a few minutes!
Print Pin Rate
Prep Time: 5 minutes
Total Time: 5 minutes
Servings: 12 bites

Ingredients

  • 1 cup medjool dates, pitted
  • 1/2 cup rolled oats
  • 1/2 cup peanut butter, unsweetened
  • 1 teaspoon vanilla extract
  • pinch of salt
  • 1/4 cup chocolate chips (I recommend mini chocolate chips!)

Instructions

  • Add all ingredients except chocolate chips to a food processor and pulse until a dough forms. All ingredients should be very finely chopped, and mixture will appear crumbly but should stick together when pressed between your fingers.
  • Add in chocolate chips and give just 2 or 3 pulses to incorporate.
  • Use a cookie scoop to scoop mixture, then roll between your palms into balls. Place on a parchment-lined plate and refrigerate for 2 weeks or freeze for up to 3 months.

Nutrition

Serving: 1bite | Calories: 100kcal | Carbohydrates: 11g | Protein: 3g | Fat: 6g | Fiber: 2g | Sugar: 6g

It’s no secret I love s’mores. S’mores rice crispy treats were one of the first recipes I ever published, followed shortly by my healthier gluten-free s’mores bars. So when I was deciding on the flavor for this high protein dip recipe, I immediately knew I wanted to make it s’mores flavor! A chocolatey Greek yogurt protein dip with mini marshmallows and chocolate chips swirled in. Great for dipping or. if you’re like me, eating by the spoonful!

overhead image of high protein s'mores dip in a bowl.

Why You’ll Love This High Protein S’mores Dip

This high protein s’mores dip is a nostalgic, sweet treat with a nutritious twist. Made with just 4 simple ingredients, it packs over 30 grams of protein per serving thanks to creamy Greek yogurt and rich chocolate protein powder. It’s perfect as a post-workout snack, healthy dessert, or fun dip for fruit, crackers, or cookies.

Key Ingredients

  • Greek Yogurt: Thick, creamy, and protein-packed, Greek yogurt is the base of this dip. It adds richness and tang while delivering gut-friendly probiotics and muscle-building protein.
  • Chocolate Protein Powder: For that classic chocolatey s’mores flavor and a major protein boost. Use your favorite whey or plant-based chocolate protein—just make sure it blends smoothly.
  • Mini Marshmallows: The essential s’mores element! A small amount goes a long way, adding sweetness and fun texture. Swap in sugar-free marshmallows to reduce added sugar.
  • Mini Chocolate Chips: Extra chocolatey goodness in every bite. Use extra dark or sugar-free chips for an even healthier version.
high protein s'mores dip in a bowl with graham crackers and strawberries on the side.

Sam’s Recipe Tips

  • Chill before serving: Let the dip sit in the fridge for 20–30 minutes for the best flavor and texture.
  • Use sugar-free or low-sugar swaps: Opt for sugar-free marshmallows and stevia-sweetened chocolate chips to reduce total sugar without sacrificing taste.
  • Serve with dippers: Apple slices, graham crackers, strawberries, or pretzels make this dip even more fun and satisfying.

More High Protein Recipes You’ll LOVE

graham cracker being dipped into high protein s'mores dip.
No ratings yet

High Protein S’mores Dip (30g protein!)

This high protein s’mores dip is a quick and easy 4-ingredient recipe with over 30 grams of protein per serving! Made with Greek yogurt, chocolate protein powder, mini marshmallows, and chocolate chips – it’s a healthier way to satisfy your sweet tooth. Perfect as a post-workout snack, party dip, or high protein dessert!
Print Pin Rate
Prep Time: 5 minutes
Total Time: 5 minutes
Servings: 2 servings

Equipment

  • 1 small bowl

Ingredients

  • 1 cup Greek yogurt
  • 2 scoops chocolate protein powder
  • 1/4 cup mini marshmallows
  • 1/4 cup chocolate chips

Instructions

  • Mix together the Greek yogurt and chocolate protein powder in a bowl, then stir in the mini marshmallows and chocolate chips. Enjoy right away or store in the fridge for up to 2 days!

Nutrition

Serving: 1serving | Calories: 310kcal | Carbohydrates: 24g | Protein: 31g | Fat: 8g | Sugar: 18g