Tag

healthy

Browsing

With valentine’s day right around the corner, I was craving something extra chocolate-y! I’ve been drinking my healthy hot chocolate pretty much daily and gathered the ingredients for my 3-ingredient oreo mug cake, but I wanted something new …something a little more special. After all, this is my baby’s first Valentine’s day, and I plan on going ALL out!

So what did I do? I took my almond flour brownies, threw in some freeze dried strawberries, and topped with a chocolate drizzle – and voilà, these chocolate covered strawberry almond flour brownies were born! They’re rich, fudgy, and extra indulgent but totally grain-free, dairy-free, and sweetened with coconut sugar. So whether you’re also craving something special this month, or looking to treat that someone special, you gotta give these chocolate covered strawberry almond flour brownies a try. It’s love at first bite!

bite shot of chocolate covered strawberry almond flour brownies.

What You’ll Need to Make Chocolate Covered Strawberry Almond Flour Brownies

Sugar: I used coconut sugar in my brownies, but cane sugar works great too! Use whatever you prefer, even granulated monk fruit sweetener will do the trick.

Almond Flour: Almond flour is the secret ingredient in these chocolate covered strawberry *almond flour* brownies, making them gluten-free and grain-free. Don’t mess with it though, the almond flavor can’t be subbed without compromising this recipe!

Olive Oil: This is the secret to extra fudgy brownies! Olive oil is the magic touch for that perfect consistency and rich flavor. Embrace it – your taste buds will thank you.

Freeze Dried Strawberries: I used the Natierra freeze-dried strawberries and they were delicious. But I know Trader Joe’s sells them too! No freeze-dried strawberries? No problem. Fresh chopped strawberries work just as well.

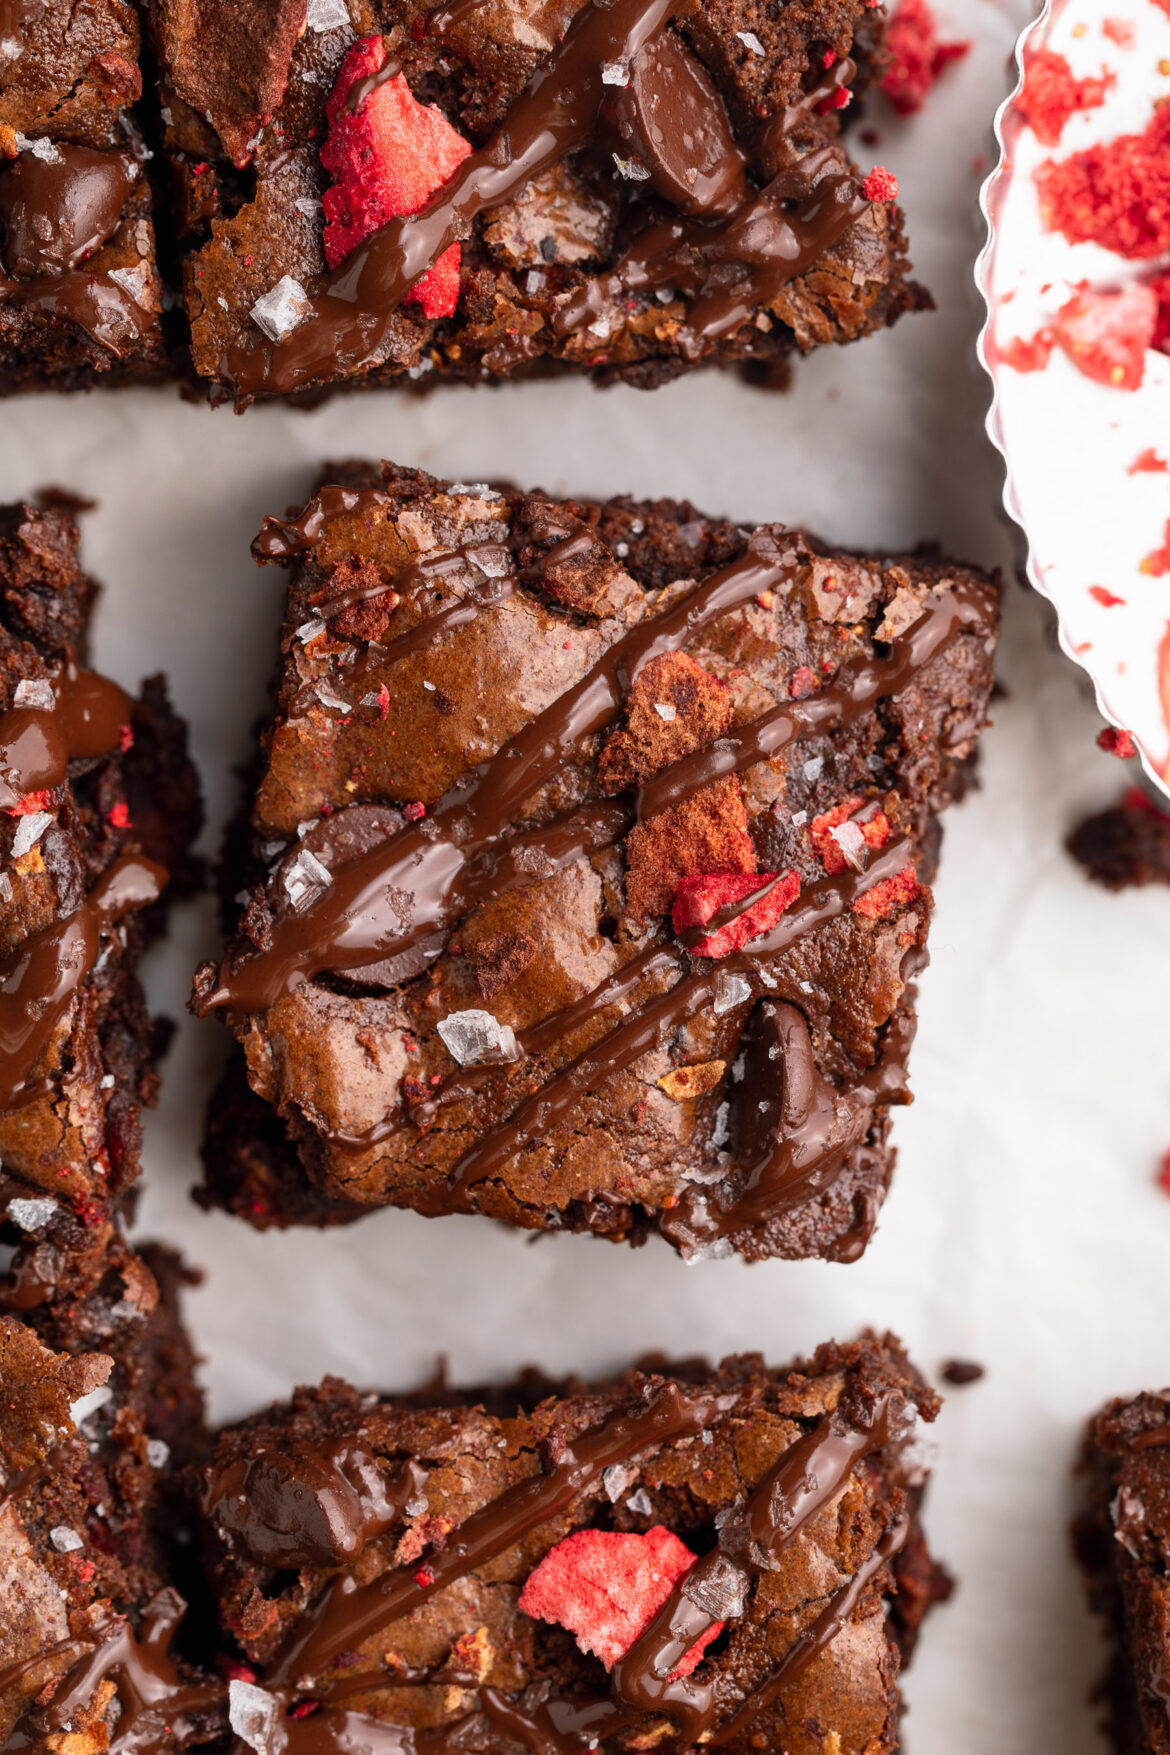
close-up overhead image of chocolate covered strawberry almond flour brownies with chocolate drizzle and freeze dried strawberries on top.

Can I use store bought brownie mix instead?

You sure can! To make these chocolate covered strawberry brownies with store bought brownie mix, start by preparing the mix according to the package instructions. Then, add in 1 cup of freeze dried strawberries to the batter and stir to combine. Transfer the batter to a lined and/or greased brownie pan and bake according to package instructions. Once brownies are baked, remove them from the oven and let them cool completely before topping with the chocolate drizzle. Just as delicious with half the effort!

Tips and Tricks

  • Whip the sugar and eggs until they’re super light and fluffy – a key step for that melt-in-your-mouth brownie texture.
  • When bringing together the dry ingredients, give them a gentle stir. Over-mixing can impact the texture of your brownies, so keep it light and just right.
  • For that pro finish, hold off on the chocolate drizzle until your brownies are entirely cooled. Patience pays off for that beautiful, glossy topping!
overhead image of chocolate covered strawberry almond flour brownies with a chocolate drizzle and freeze dried strawberries on top.
3 from 3 votes

Chocolate Covered Strawberry Almond Flour Brownies

These chocolate covered strawberry brownies are rich, fudgy, and totally delicious! They’re made with almond flour and coconut sugar for a healthier twist, but are still just as indulgent. These are the perfect Valentine’s Day recipe, or any day treat!
Print Pin Rate
Prep Time: 30 minutes
Cook Time: 40 minutes
Servings: 4 servings

Ingredients

  • 1 cup sugar, I used coconut sugar
  • 3 large eggs
  • 1 1/2 cups almond flour
  • 3 tablespoons unsweetened cocoa powder
  • 1 teaspoon vanilla extract
  • 1/4 teaspoon salt
  • 1 1/2 cups chocolate chips, divided
  • 1/2 cup olive oil, or any vegetable oil
  • 1 cup freeze-dried strawberries, or 1 cup fresh chopped strawberries

For the chocolate drizzle:

  • 1/2 cup chocolate chips
  • 1 teaspoon coconut oil

Instructions

  • Preheat oven to 350° Fahrenheit and line an 8×8-inch pan with parchment paper.
  • In a large bowl, beat together the sugar and eggs with either a hand or stand mixer, or a whisk (hello arm workout!). Continue beating for 3-5 minutes, until light and fluffy.
  • Add the almond flour, cocoa powder, vanilla extract, and salt. Stir until everything is just combined, careful not to over-mix.
  • In a separate small bowl, add the coconut oil and 1 cup of chocolate chips. Microwave in 30-second intervals, stirring between each interval, until chocolate chips are fully melted.
  • Pour melted chocolate chips and olive oil into the brownie batter, and stir to combine. Then, add in the remaining chocolate chip and freeze dried strawberries and fold to combine.
  • Pour brownie batter into prepared pan and bake for 30-35 minutes, or until the center is just barely set. Remove from oven and let cool completely.
  • Once brownies are cool, make the chocolate drizzle by melting the chocolate chips and coconut oil together in the microwave in 30 seconds increments. Stir the chocolate between each increment until completely smooth.
  • Cut the brownies into squares, then top the brownies with the melted chocolate drizzle and additional freeze dried strawberries if you’d like.

Nutrition

Calories: 300kcal

As I enter my first cold and flu season as a mom, I’m doing everything I can to boost my family’s immune system! While my son (currently 9 months old) can’t have these immunity shots quite yet, my husband and I each take a shot a day to… keep the doctor away. Sorry, I had to!

These immunity shots are jam-packed with antioxidants to help strengthen your immune system. A combination of fresh ginger, turmeric, and citrus create a powerhouse to help ward off colds. Also, the addition of black pepper helps to activate the turmeric, leading to even more anti-inflammatory benefits.

They’re tangy, spicy, incredibly potent, but work some serious magic to keep my family healthy. If you also want to avoid getting sick this cold and flu season, I highly recommend you whip up a batch too!

homemade immunity shot being poured into a glass.

What You’ll Need to Make this Immunity Shots Recipe

Fresh Ginger: Ginger is renowned for its anti-inflammatory and antioxidant properties. It aids digestion, soothes sore throats, and provides a zesty kick to our immunity shots. And in case you have leftover fresh ginger after making this recipe, use it to make these healthy teriyaki chicken bowls. Eating an overall healthy diet also works wonders for building a strong immune system!

Fresh Turmeric Root: Curcumin, the active compound in turmeric, is a superhero in the anti-inflammatory world! It’s a natural immune booster, assisting the body in fighting off infections and promoting overall well-being.

Lemons: Packed with vitamin C, lemons contribute to collagen production, which is crucial for skin health. They also support the immune system and add a refreshing citrusy flavor to the shots.

Oranges: Another vitamin C powerhouse, oranges help stimulate the production of white blood cells, enhancing the immune system’s defense mechanism against illnesses. Because of its cold-fighthing benefits, I aim to eat as much vitamin C as possible this time of year. One of my favorite ways to enjoy citrus fruits is in this citrus salad recipe – seriously so good!

Black Pepper: Piperine, found in black pepper, enhances the absorption of curcumin from turmeric. This dynamic duo ensures you get the most out of the turmeric’s immune-boosting properties.

homemade immunity shots with lemon, orange, fresh ginger, and fresh turmeric on the side.

What are the Health Benefits of Immunity Shots?

  • The combination of fresh ginger, turmeric, lemons, and oranges provides a powerful boost to the immune system! These ingredients are rich in antioxidants and vitamins, supporting the body’s defense against infections and illnesses.
  • Ginger and turmeric, with their anti-inflammatory properties, help reduce inflammation in the body. Chronic inflammation is linked to various health issues, and incorporating these shots into your daily routine may contribute to overall well-being.
  • Lemons and oranges are excellent sources of vitamin C, essential for collagen production, skin health, and a robust immune response. Regular consumption of these immunity shots ensures a steady intake of this vital nutrient, promoting optimal health!

Tips and Tricks

Play with Ratios: Adjust the quantities of ginger, turmeric, and citrus to suit your taste preferences. If you enjoy a more zesty kick, add an extra squeeze of lemon or orange.

Storage Savvy: To ensure your shots stay fresh, store the juice in an airtight container in the fridge. Use dark glass containers to protect the ingredients from light, maintaining their potency.

Prep Ahead: Consider prepping larger batches and freezing the juice in ice cube trays. Pop out a cube whenever you need a quick immunity boost – it’s a time-saving trick for those hectic days.

Homemade immunity shots with fresh lemon, orange, ginger, and turmeric on the side.
5 from 3 votes

Homemade Ginger and Turmeric Immunity Shots

These immunity shots are packed with antioxidants to help strengthen your immune system! They’re the easiest, most natural way to help prevent getting sick during cold and flu season. Fresh ginger and turmeric, plenty of citrus, and black pepper make for a tangy, spicy, and potent immunity shot. Enjoy once a day for optimal results!
Print Pin Rate
Prep Time: 5 minutes
Total Time: 5 minutes
Servings: 10 servings

Ingredients

  • 1/4 cup fresh ginger, chopped
  • 1/4 cup fresh turmeric root, chopped
  • 2 lemons, peeled and chopped
  • 2 oranges, peeled and chopped
  • 1 teaspoon black pepper
  • 2 cups water

Instructions

  • Add all ingredients to a blender and blend on high for 1-2 minutes.
  • Place a fine mesh strainer over a bowl or pitcher and pour the liquid through the strainer, and use a spoon to stir the liquid around in the strainer to separate the pulp from the juice.
  • Discard the pulp in the strainer, then pour the juice into an airtight container and store it in the fridge for up to 2 weeks.
  • When ready to drink, pour 2 ounces into a glass and drink quickly (like a shot!).

Nutrition

Calories: 300kcal

On the lookout for a super easy Christmas appetizer? Look no further than this antipasto wreath! It’s as fun to make as it is to eat. Just a handful of ingredients, 15 minutes, and a little creativity is all you’ll need to make this holiday recipe.

close-up image of skewers on antipasto wreath.

What You’ll Need to Make an Antipasto Wreath

Small Skewers: The secret to the wreath’s charm! Opt for small skewers around 6-inches long to easily thread the delectable antipasto elements. I’ll link to the skewers I purchased on Amazon HERE.

Grape Tomatoes: These little bursts of freshness add a pop of color and flavor to each bite.

Mini Mozzarella Balls (Ciliegine): The cuteness factor is off the charts! These tiny mozzarella balls are the perfect size for our wreath.

Pitted Olives: A mix of green and black olives not only brings variety but also that signature antipasto briny-ness.

Salami: Roll up some savory slices of salami to add a hint of smokiness and a meaty touch.

antipasto wreath on a large plate with extra tomatoes, olives, and salami on the side.

Tips and Tricks

  • Mix and Match: Don’t be afraid to get creative with your antipasto selections. Add marinated artichoke hearts, roasted red peppers, or even pickled veggies to your wreath for extra variety.
  • Wreath Building 101: Start by threading grape tomatoes onto your skewers, then alternating between mozzarella balls, olives, and salami rolls. Continue until you’ve formed a wreath shape. You’re the artist – feel free to customize!
  • Make It Ahead: The beauty of the Antipasto Wreath lies in its simplicity and make-ahead magic. Prepare it a few hours before your gathering and store it in the fridge. When it’s time to impress, bring it out and watch your guests’ eyes light up.
overhead image of antipasto wreath with fresh rosemary on a large plate.
5 from 1 vote

Christmas Antipasto Wreath

On the lookout for a super easy Christmas appetizer? Look no further than this antipasto wreath! It’s as fun to make as it is to eat. Just a handful of ingredients, 15 minutes, and a little creativity is all you’ll need to make this holiday recipe.
Print Pin Rate
Prep Time: 15 minutes
Total Time: 15 minutes
Servings: 12 servings

Ingredients

  • 1 pint grape tomatoes
  • 4 ounces sliced salami
  • 8 ounces mini mozzarella balls (ciliegine)
  • 1 cup pitted black and/or green olives
  • 6-inch skewers
  • fresh rosemary sprigs, for garnish

Instructions

  • Thread the small skewers with a mix of grape tomatoes, mini mozzarella balls, pitted olives, and folded salami slices.
  • Arrange the skewers in a circle around a large plate, creating the wreath shape. Play with the placement to make it visually appealing.
  • Slide a couple sprigs of fresh rosemary between the skewers for extra garnish.
  • If making ahead of time, cover antipasto wreath tightly with plastic wrap and store in the fridge for up to 4 hours before serving.

Nutrition

Calories: 300kcal

There you have it – an Antipasto Wreath that’s not just a Christmas appetizer; it’s a work of art. Whether you’re hosting a festive gathering or looking to add a touch of holiday magic to your table, this wreath is ready to steal the show. So, gather your ingredients, channel your inner wreath artist, and let the holiday feasting begin!

More Holiday Recipes You’ll Love!

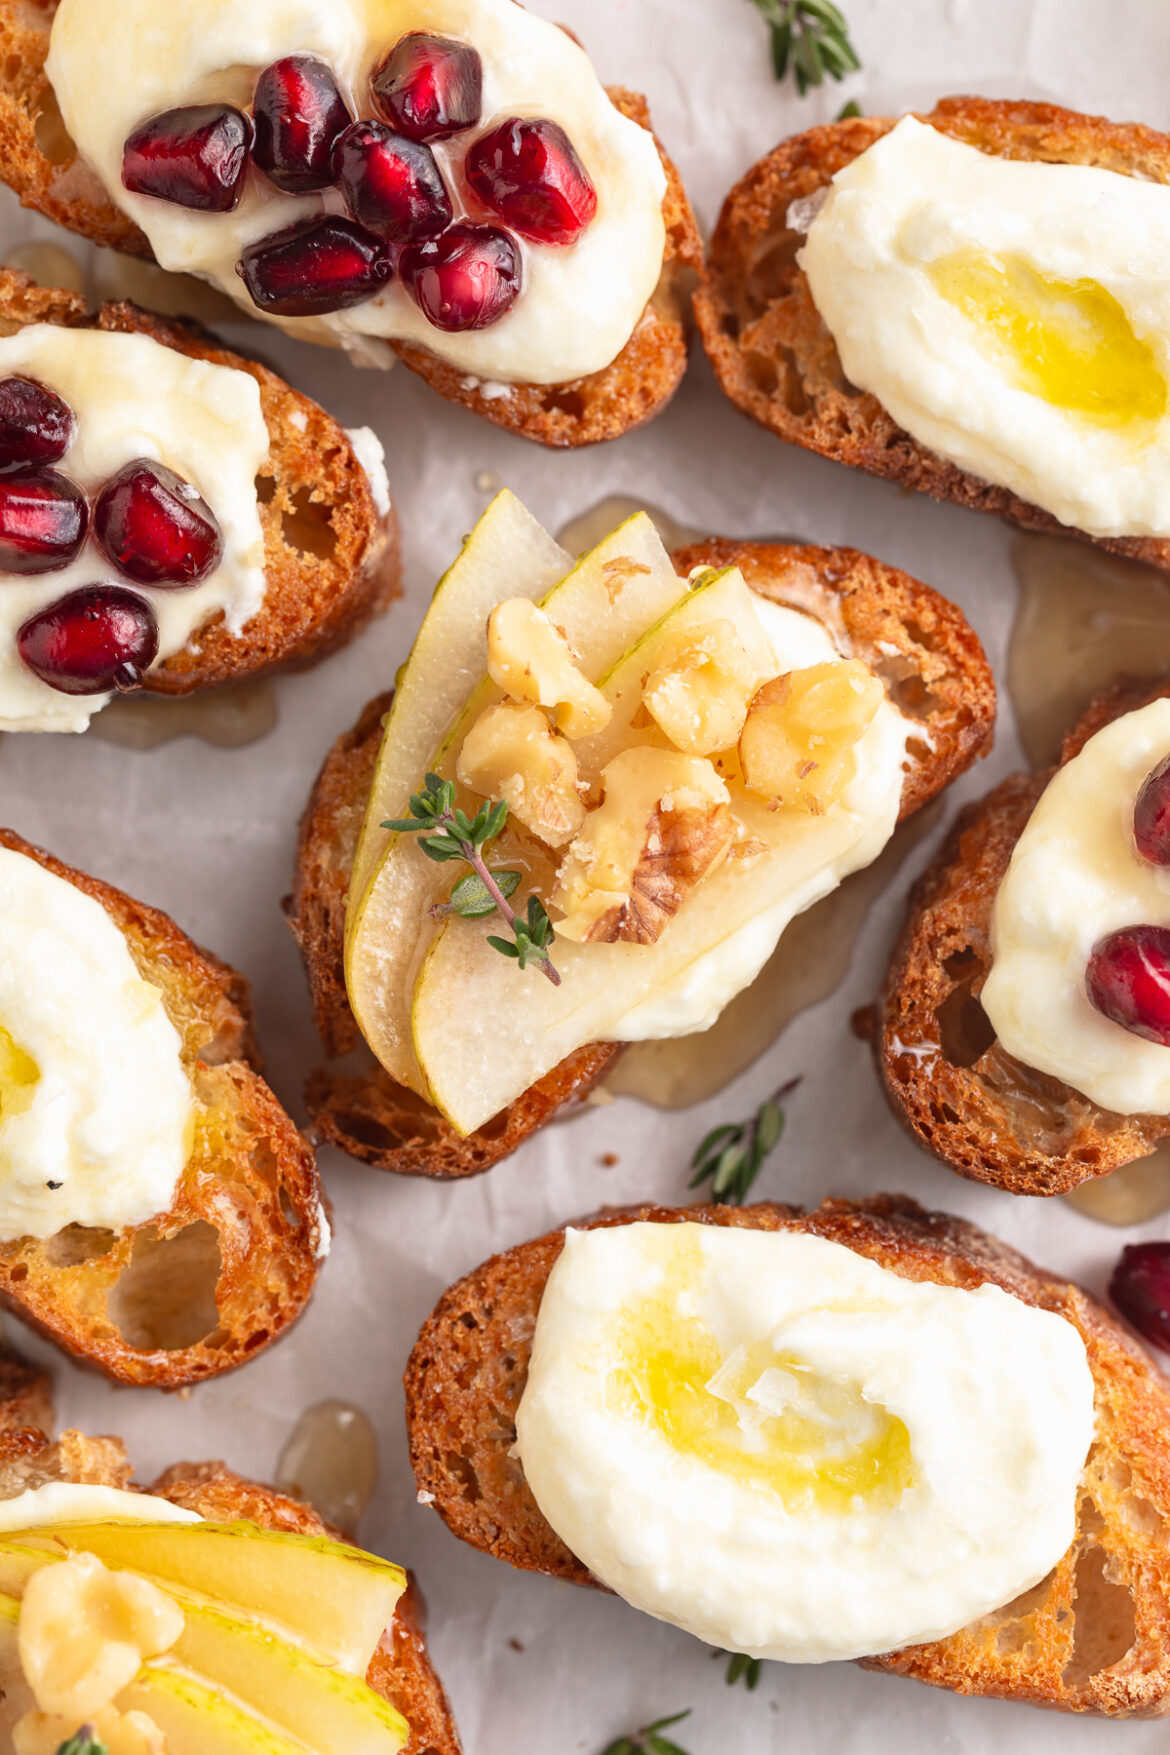
This whipped feta crostini recipe is a flavor-packed, bite-sized wonder that’ll steal the spotlight at your next holiday party! Perfectly toasted crostini and a tangy whipped feta, topped three different ways. This easy appetizer recipe is a total crowd-pleaser!

whipped feta crostini 3 ways on a plate with wine and fresh thyme on the side.

What You’ll Need to Make Whipped Feta Crostini

Baguette (1-inch slices): The crunchy canvas for your culinary masterpiece. Go for a good-quality baguette that will hold up to the whipped feta goodness. Or use a gluten-free baguette for an entirely gluten-free appetizer.

Feta: The star of the show! Opt for a high-quality feta for that perfect blend of creaminess and tanginess. I use and recommend this barrel-aged feta.

Yogurt: A dollop of yogurt adds a touch of smoothness to the whipped feta. It’s the secret ingredient for that irresistible texture.

Good Quality Olive Oil: A drizzle of liquid gold to tie it all together. Don’t skimp on the olive oil; it’s the finishing touch that elevates this crostini recipe. I use and love this Graza Olive Oil in my whipped feta!

close-up image of whipped feta crostini.

Tips and Tricks

  • Whip It Good: When blending the feta and yogurt, let the mixer work its magic. Whip until the texture is smooth and creamy. You want that dreamy consistency that spreads like a cloud on your crostini.
  • Get Ahead of the Game: This recipe is a winner for planning ahead. Whip the feta mixture in advance and store it in the fridge. Toast the baguette slices separately. When it’s party time, assemble the crostini with a dollop of whipped feta right before serving.
  • Top it Off Creatively: Let your creativity shine by trying different toppings. Pomegranate seeds and honey add a burst of sweetness, while sliced pears, walnuts, and honey provide a perfect blend of textures. For a classic touch, go with a drizzle of olive oil and a sprinkle of flaky salt – my favorite!
overhead close up image of whipped feta crostini.
5 from 1 vote

Whipped Feta Crostini – 3 ways!

This whipped feta crostini is a flavor-packed, bite-sized wonder that’ll steal the spotlight at your next holiday party! Perfectly toasted crostini and a tangy whipped feta, topped three different ways. This easy appetizer recipe is a total crowd-pleaser!
Print Pin Rate
Prep Time: 10 minutes
Cook Time: 10 minutes
Total Time: 20 minutes
Servings: 12 servings

Ingredients

For the crostini:

  • 1 baguette, cut into 1-inch slices
  • 2 tablespoons olive oil

For the whipped feta:

  • 5 ounce block feta
  • 1/4 cup plain unsweetened yogurt
  • 1/4 cup olive oil
  • pinch of salt

For topping:

  • pomegranate seeds
  • sliced pears
  • chopped walnuts
  • honey
  • olive oil
  • flaky salt

Instructions

  • Preheat oven to 400° Fahrenheit and line a large baking sheet with parchment paper.
  • Arrange the baguette slices on the baking sheet and brush both sides of each slice with olive oil.
  • Bake for 10 minutes, or until golden brown and toasted. Remove from oven and let cool while you make the whipped feta.
  • Add the feta, yogurt, olive oil, and salt to a large bowl. Use either a hand or stand mixer to whip the feta until mostly smooth and combined (some lumps of feta may remain).
  • Top each crostini with about a tablespoon of whipped feta, then top however you’d like. I recommend either pomegranate and honey, sliced pears, walnuts, and honey, or olive oil and flaky salt.

Nutrition

Calories: 300kcal

This Thanksgiving salad is the perfect potluck side dish! It’s packed with flavor and freshness. This salad is also super hearty and satisfying, but super healthy! Meal prep this salad ahead of your next holiday party, then wow your friends and family with how delicious it is.

Thanksgiving salad meal prepped and stacked into a large jar.

The large glass jar I used to store my Thanksgiving salad is linked HERE.

What You’ll Need to Make Thanksgiving Salad

Farro: The hearty base that brings a chewy texture and nutty flavor. It’s like a Thanksgiving hug for your taste buds.

Roasted Butternut Squash: Because it wouldn’t be Thanksgiving without a bit of squash magic. Roasted to perfection, it adds sweetness and a touch of autumn warmth. Or, if you’d like, you can roast sweet potato instead.

Maple Dijon Dressing: A blend of sweet and tangy, this dressing is the secret sauce that ties all the flavors together. Say goodbye to boring salads!

Soft White Cheese (like Feta): Creamy, crumbly, and just the right amount of decadent. The cheese brings that perfect savory balance to the dish.

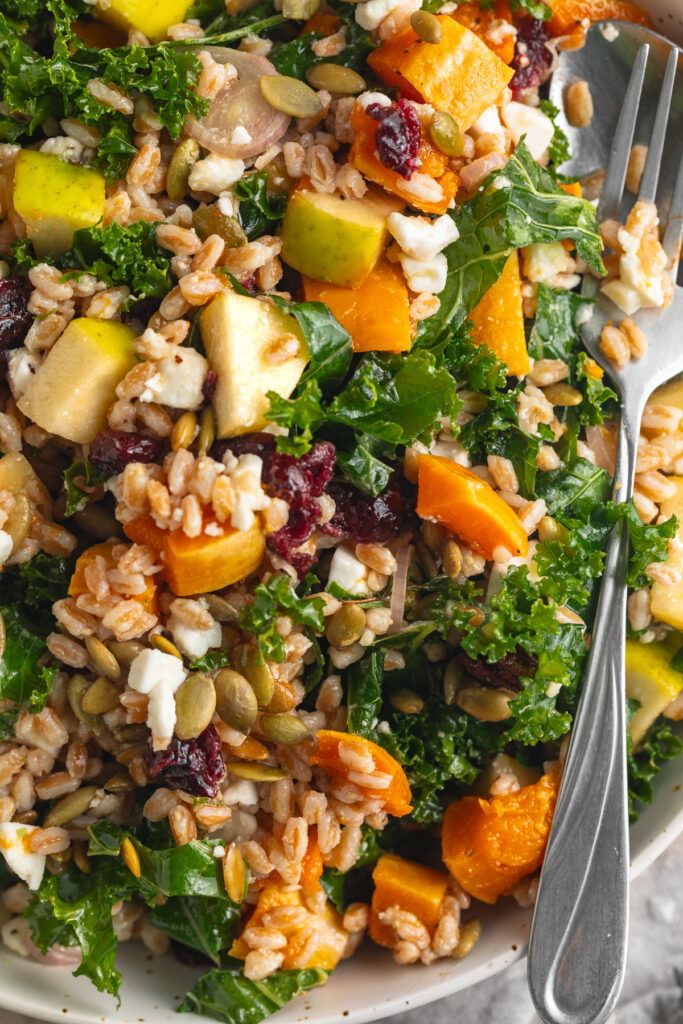
close-up image of Thanksgiving salad in a bowl with a fork.

Tips and Tricks

  • Make It Ahead: Thanksgiving can be a whirlwind, so make life easier by prepping this salad ahead of time. Stack the ingredients in a large jar starting with the farro and kale at the bottom, then all other ingredients on top. When it’s time to serve, just empty the jar into a large bowl, and toss to combine – it’s that easy!
  • Don’t Forget the Crunch: Toss in some toasted nuts or seeds for that satisfying crunch. Pecans or pumpkin seeds are particularly Thanksgiving-worthy additions that elevate the texture and taste.
  • Mix Up Your Greens: While we love the classic mix of greens, feel free to experiment! Arugula adds a peppery kick, spinach brings a delicate texture, or even kale for a heartier feel. Mix and match to suit your taste.
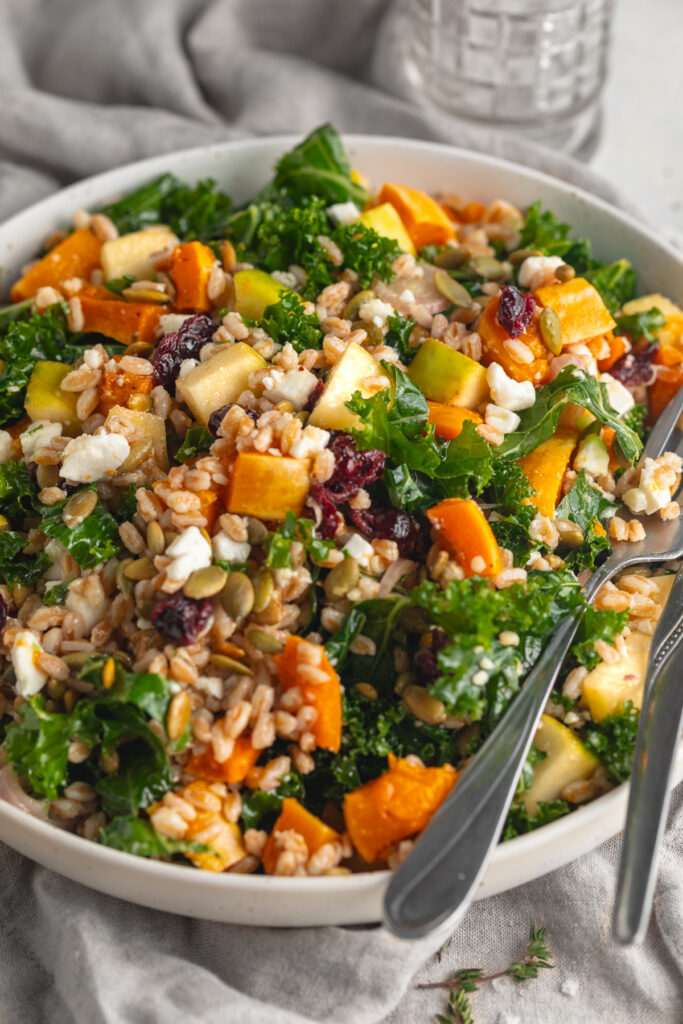
Thanksgiving salad in a bowl with a fork and spoon.

Adjust This Recipe To Your Dietary Needs

Make it Gluten-Free: Farro contains gluten, so to make this recipe gluten-free, use either brown rice or quinoa instead.

Make it Vegan: Either leave out the cheese, or use your favorite vegan feta in this Thanksgiving salad recipe!

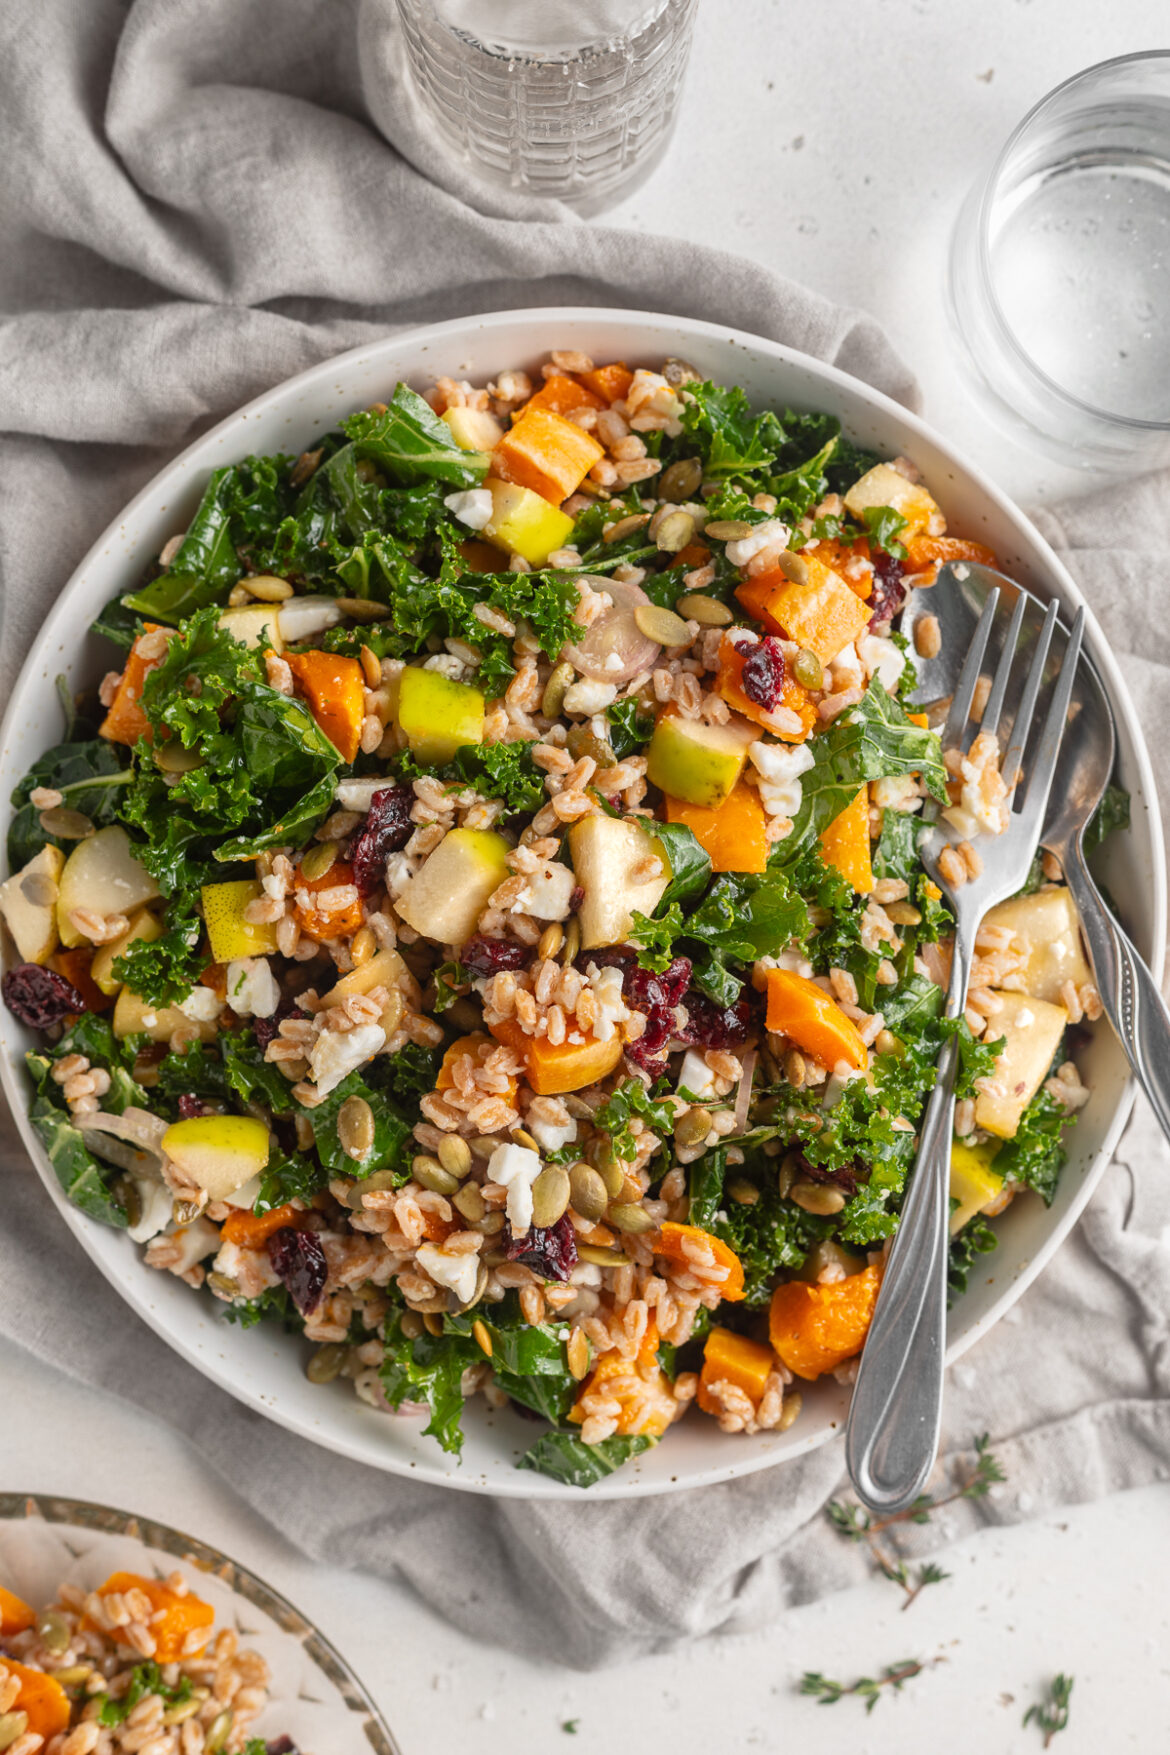
overhead image of thanksgiving salad in a bowl with water on the side.
5 from 1 vote

Perfect Potluck Thanksgiving Salad

This Thanksgiving salad is the perfect potluck side dish! It’s packed with flavor and freshness. This salad is also super hearty and satisfying, but still super healthy! Meal prep this salad ahead of your next holiday party, then wow your friends and family with how delicious it is.
Print Pin Rate
Prep Time: 15 minutes
Cook Time: 30 minutes
Total Time: 45 minutes
Servings: 10 servings

Ingredients

For the salad:

  • 3 cups cooked farro, or barley, wild rice, or quinoa
  • 1 butternut squash or 2 sweet potatoes, peeled and cubed
  • 1 tablespoon olive oil
  • salt and black pepper, to taste
  • 1 shallot, peeled and thinly sliced
  • 1 head kale, thinly sliced or shredded
  • 1 cup soft cheese, such as feta or goat cheese
  • 2 apples, chopped
  • 1/2 cup dried cranberries
  • 1/2 cup unsalted pumpkin seeds, or chopped pecans

For the maple Dijon dressing:

  • 1/2 cup olive oil
  • 1/4 cup apple cider vinegar
  • 2 tablespoons Dijon mustard
  • 1 tablespoon maple syrup
  • 1 garlic clove, minced
  • 1 teaspoon salt

Instructions

  • Preheat oven to 400° Fahrenheit.
  • Place the cubed butternut squash on a large baking sheet and drizzle with olive oil, then season with salt and black pepper.
  • Toss squash to coat in oil then bake for 25-30 minutes, tossing halfway through.
  • While squash is roasting, make the maple Dijon dressing by adding all dressing ingredients to a small bowl and whisking to combine.
  • Once squash is tender, remove from the oven and set aside to cool slightly.
  • If making salad ahead of time, stack in large jar with the farro at the bottom and the chopped kale on top of the farro.
  • Pour maple Dijon dressing over the kale and farro, then stack in the roasted butternut squash, shallots, soft cheese (such as feta), apples, pumpkin seeds, and dried cranberries.
  • If preparing the salad to eat immediately, then simply add all ingredients to a large bowl and toss to combine.

Nutrition

Calories: 300kcal

There you have it – a Thanksgiving Salad that’s as easy to prepare as it is delightful to eat. Whether it’s a colorful side or a standalone star at your Thanksgiving table, this salad is ready to impress. So, gather your ingredients, stack that jar, and let the Thanksgiving feast begin!