Tag

plant based

Browsing

A stunningly vibrant, simple, and healthy beet hummus recipe, made in under 5 minutes! The perfect plant-based snack, appetizer, or side dish. This roasted beet recipe will quickly become one of your favorite ways to sneak more veggies into your diet.

overhead image of roasted beet hummus in a bowl with crackers on the side

I had the BEST roasted beet hummus a few weeks ago while visiting Salt Lake City, Utah. It was perfectly smooth, tangy, and all-around delicious. We ordered it as an appetizer ahead of our meal, but I quickly (…like ate the whole bowl in under a minute) filled up on it. So as I was sitting there, belly fuller than full on the most incredible beet hummus, I took out my phone and made a note to recreate that out-of-this-world appetizer recipe as soon as I got home!

Fast forward a few days, I’m home and stocked up on everything I’ll need for this recipe. Roasted beets, cans upon cans of chickpeas, tahini, olive oil, plenty of garlic, lemons, and of course salt. I quickly began experimenting and I can’t lie, it took a few tries, but I eventually achieved that same flawless, stunningly pink beet hummus as I had in SLC!

What You’ll Need

Roasted Beets – Use as many or as few roasted beets in this recipe as you’d like! I bought pre-roasted beets to save myself a bit of time, but you can definitely roast the beets yourself instead. For instructions on how to cook beets, check out this post I wrote for 40 Aprons.

Chickpeas – Chickpeas are the base to every single hummus recipe out there! They’re high in protein, and blend up super smooth, creamy, and delicious. You can of course cook your own chickpeas for this recipe, but I almost always opt for the pre-cooked canned chickpeas in my recipes. They’re easier, just as good, and will save you a bunch of time. Regardless of what kind of chickpeas you’re using for this recipe (canned or homemade), be sure to drain and rinse them well ahead of placing them in a food processor or blender.

Tahini – Here’s another ingredient you’ll find in all hummus recipes. Tahini is ground sesame seeds, it has a nutty flavor with a slightly bitter finish. This nut-free spread is delicious on its own, slathered on toast, and of course, in this easy beet hummus recipe.

roasted beet hummus being scooped out of a bowl with a cracker

Top Tips

  • Use either a food processor or high-speed blender to blend all ingredients together! I’ve tested both appliances for this recipe, and they honestly both work great. The food processor achieved an ever-so-slightly smoother beet hummus, but the difference was negligible.
  • Homemade hummus can be stored in an airtight container in the fridge for up to 4 days. Yes, the store-bought kind lasts longer, but doesn’t even come close in flavor and freshness to this homemade recipe!
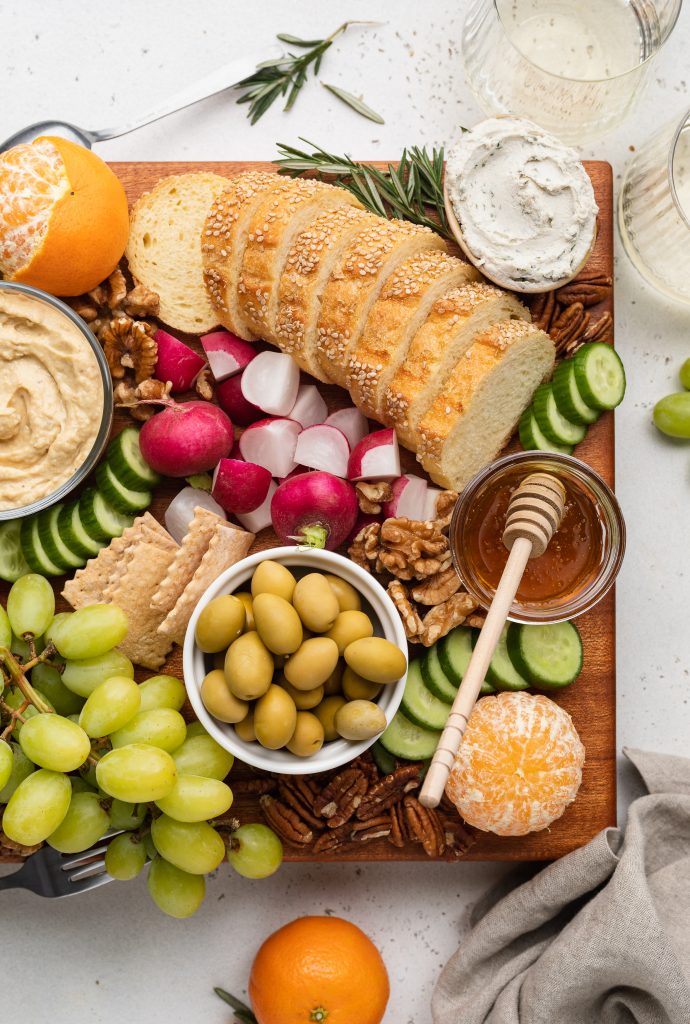
  • Serve this easy snack or appetizer however you’d like! I went with gluten-free crackers, but pita bread, or even a sliced baguette would pair beautifully with this recipe. Also, for an even healthier option, serve your beet hummus with fresh cut veggies such as cucumber, carrots, and bell peppers!

This Roasted Beet Hummus Is…

  • Plant-Based
  • Vegan
  • Gluten-Free
  • Nut-Free
  • Super Healthy
  • & Delicious!
No ratings yet

Roasted Beet Hummus

A stunningly vibrant, simple, and healthy beet hummus recipe, made in under 5 minutes! The perfect plant-based snack, appetizer, or side dish. This roasted beet recipe will quickly become one of your favorite ways to sneak more veggies into your diet.
Print Rate
Prep Time: 5 minutes
Total Time: 5 minutes
Servings: 8 servings

Ingredients

  • 1-2 roasted beets
  • 1 (15-ounce) can chickpeas, drained and rinsed
  • 1/3 cup tahini
  • 1/3 cup olive oil
  • 1-2 garlic cloves
  • juice and zest from 1/2 lemon
  • 1/2 teaspoon salt, plus more to taste

Instructions

  • Add all ingredients to a blender or food processor and blend until completely smooth.

Video

Notes

  • This roasted beet hummus would also make a great addition to my vegan charcuterie board!
  • Nutrition

    Calories: 300kcal

    This homemade vegan caramel sauce is perfectly sweet and super easy to make! It comes together in one saucepan, with just 3 ingredients, and in under 5 minutes. This vegan caramel is delicious drizzled over ice cream, apples, cake, or cookies! Try it over my no-churn vegan vanilla ice cream recipe, or even on top of my healthy apple crisp. YUM!

    3 ingredient vegan caramel sauce being poured over a green apple.

    What You’ll Need

    Coconut Cream – Coconut cream is the thick, white cream found at the top of a can of full-fat coconut milk. It’s important to note that coconut cream can only be obtained by a can of full-fat coconut milk, not low-fat or boxed coconut milk. Native Organics also sells a great canned coconut cream, which is what I used in this recipe. Also, remember to only use the coconut cream and not any of the liquid found at the bottom of the can. To do this, open your can of full-fat coconut milk or cream, then scrape and remove the cream from the top. Fill a one-cup measurer with this coconut cream, then save the liquid for use in smoothies later on!

    Maple Syrup – This natural sweetener is the only sweetener in this vegan dessert recipe! Our vegan caramel is so much healthier than your standard caramel because it contains only natural ingredients, and has a lot less sugar. However, healthier doesn’t mean any less delicious. Maple syrup gives this sauce an irresistibly rich flavor.

    Peanut Butter – Peanut butter is the finishing touch to this recipe, adding the perfect texture and flavor. Though if you’re not a fan of peanut butter, you can use almond butter, cashew butter, pecan butter, or sunflower seed butter in its place!

    vegan caramel sauce being whisked in a saucepan

    This Vegan Caramel Is….

    • Healthy
    • Plant-Based
    • Gluten-Free
    • Refined Sugar-Free
    • Paleo
    • & Delicious!

    Adjust This Recipe to Your Dietary Needs

    Make it Nut-Free: Replace the peanut butter in this recipe with 1/4 cup of sunflower seed butter!

    Make it Paleo: Use almond butter instead of peanut butter for a delicious paleo caramel recipe.

    3 ingredient vegan caramel sauce in a small jar with a spoon
    5 from 1 vote

    3-Ingredient Vegan Caramel Sauce

    This homemade vegan caramel sauce is perfectly sweet and super easy to make! It comes together in one saucepan, with just 3 ingredients, and in under 5 minutes. This vegan caramel is delicious drizzled over ice cream, apples, cake, or cookies!
    Print Pin Rate
    Prep Time: 2 minutes
    Cook Time: 3 minutes
    Total Time: 5 minutes
    Servings: 8 servings

    Ingredients

    • 1 cup coconut cream, see Notes
    • 1/2 cup maple syrup
    • 1/4 cup almond butter or peanut butter

    Instructions

    • Add coconut cream and maple syrup to a small saucepan over medium-high heat. Stir constantly until bubbling, then reduce to low heat and continue stirring for 3 minutes.
    • Remove pan from heat and stir in almond or peanut butter. Let cool, it’ll continue to thicken as it cools.

    Notes

  • Coconut Cream: Coconut cream is the thick, white creamy part at the top of a can of full-fat coconut milk. You can only obtain coconut cream from either a can of full-fat coconut milk, or a can of coconut cream.
  • A flawless vegan charcuterie board, perfect for any occasion! An assortment of fresh fruits, veggies, crackers, bread, and vegan cheeses create the perfect spread. Have fun with this vegan charcuterie board, feel free to switch things up and make it your own!

    half a vegan charcuterie board with glasses of white wine on the side

    What You’ll Need

    • Hummus – Either homemade or store bought hummus will work on your charcuterie board! As much as I love a homemade hummus, I usually prefer to save myself a bit of time by buying pre-packaged hummus from the store. Whole Foods make a delicious hummus, as does Trader Joe’s and Hope Hummus!

    • Crackers – Any and all crackers are welcome on this snack board! I typically use gluten-free crackers to keep my spread gluten-free friendly. Though feel free to use whatever crackers you like best.

    • Nuts – Nuts are always an exciting, crunchy addition! You can get fancy here and purchase marcona almonds or flavored nuts for your board. Though I kept things simple with raw walnuts and pecans. I love using nuts on any charcuterie board, as they’re the perfect item to fill any empty space. Nuts are especially amazing on this vegan charcuterie board thanks to their high protein content and nutritional value, keeping things hearty yet healthy!

    • Vegan Cheese – This is a totally optional addition, but I have a few vegan cheese brands I love featuring on my charcuterie board! I’m pretty picky when it comes to non-dairy cheese though, and avoid any that taste too fake and/or are overly processed. Spero Foods make some of my all-time favorite vegan soft cheeses. Their herb cream cheese and goat cheese are perfect for this recipe! They’re all deliciously tangy, smooth, and incredible on crackers or toast. Though my runner-ups for this charcuterie board are Kite Hill vegan cheeses, and a handful of Myoko vegan cheese flavors.

    How to Make a Vegan Charcuterie Board

    1. Begin every charcuterie board by prepping the ingredients you’ll be placing on your board. This includes washing fresh fruit, cutting bread, slicing cheese, etc. Once prepped, you’ll be able to see every element of your board and decide in which order you’d like to place them.


    2. Pick a large board or surface to lay everything on, then place small bowls around the board. These bowls don’t have to be in any particular pattern or order, so simply evenly space them around your board.


    3. Fill those small bowl with things like hummus, soft cheese, dips, olives, or really anything that would make a mess if placed directly on your board/surface.


    4. Now that your bowls are all filled, go in with remaining larger items such as crackers, sliced bread, and fruit – working with one ingredient at a time.


    5. Once the vegan charcuterie board looks mostly complete, then fill in any gaps with your small items (in this case, I used nuts). Continue doing this until your board is fully loaded and ready to be served!

    Optional Add-Ons

    There really is no wrong way to jazz up a charcuterie board, so any of the following would make delicious additions to your vegan board:

    • Pickles
    • Strawberries
    • Chocolate Squares
    • Dried Fruit
    • Jelly/Jam
    • Mustard
    • Sweet Peppers
    • Cherry Tomatoes
    • Apple Slices
    • Carrots
    close-up image of vegan charcuterie board
    5 from 1 vote

    Vegan Charcuterie Board

    A flawless vegan charcuterie board, perfect for any occasion! An assortment of fresh fruits, veggies, crackers, bread, and vegan cheeses create the perfect spread. Have fun with this vegan charcuterie board, feel free to switch things up and make it your own!
    Print Pin Rate
    Prep Time: 10 minutes
    Total Time: 10 minutes
    Servings: 12 servings

    Ingredients

    • cucumber, sliced
    • olives
    • hummus
    • baguette, sliced
    • grapes
    • mandarin oranges, partially peeled
    • nuts (almonds, cashews, pecans, or walnuts)
    • radishes, sliced
    • vegan cheese, see Notes

    Instructions

    • Prep all ingredients – wash fruits and veggies, slice or chop items, etc.
    • Lay down the surface you’ll be arranging your items on, then start by placing small bowls evenly throughout the surface. You’ll need about 3-4 bowls for your olives, hummus, and vegan cheese.
    • Fill the bowls, then begin arranging items on your surface, leaving smaller items like nuts for the end. Finish by filling any gaps on your charcuterie boards with nuts or any other ingredients that may fit.

    Notes

  • Vegan Cheese: Vegan cheese brands I love are Spero Foods, Myoko, and Kite Hill!
  • Nutrition

    Calories: 300kcal

    More Vegan Recipes

    Super fresh and addictive guacamole salsa is the perfect game day, party, or potluck appetizer! Simple, yet delicious ingredients are blended into a smooth and creamy dip. Enjoy this guacamole salsa with crispy tortilla chips, or sliced carrots and celery for a healthy snack!

    guacamole salsa in a bowl with chips on the side along with tomatillos and a sliced avocado

    What You’ll Need To Make This Recipe

    Tomatillos – These little green Mexican tomatoes are sold in most grocery stores. They’re wrapped in a papery green husk, that’s easily peeled away to reveal a beautiful, bright green tomato. To prepare your tomatillos for this dish, simply peel away the husk. Then, give each tomatillo a good rinse before using them in this recipe!

    Jalapeño – A whole jalapeño may seem like a lot, but trust me, it yields very little spice in this guacamole salsa! One jalapeño is perfect for a mild salsa, while two is ideal for a medium salsa, and three for a full-blown spicy salsa. So pick your poison and add as many jalapeños as you’d like!

    Avocados – Select three medium to large avocados for this recipe. The key to any avocado is making sure it’s ripe, but not overly ripe, before eating. The best way to tell whether an avocado is ripe is by giving it a gentle squeeze. If the skin feels firm, but gives just a little bit, then the avocado is perfect! Though if it’s hard (feels like you’re squeezing a rock), then it’s not yet ripe – store at room temperature for another day or two before it’s ready.

    Cilantro – A large handful of cilantro gives this guacamole salsa its delicious, fresh flavor! Cilantro also has a number of great health benefits. It’s high in antioxidants, is a proven antibacterial, and has even been studied to reduce the risk of heart disease. You’ll want to wash your cilantro well under cold water before using in this, or any recipe. Once clean, gently pat it dry with a dish towel before slicing and removing the stems. Then, toss the cilantro leaves into a food processor along with the rest of the ingredients.

    Top Tips

    • Boil the tomatillos and jalapeño until they’re soft and are easily pierced with a fork. Not boiling enough will make them tough to blend, and boiling too much will cook off some of their delicious flavor. Therefore, just about 10 minutes in boiling water is all they’ll need.
    • After you’ve blended your guacamole salsa, give it a taste! At this point, you can adjust the flavors in this recipe based on your preferences. Sometimes an extra pinch of salt or squeeze of lemon juice is all your dip needs!
    • Serve this easy app any way you’d like! I love enjoying mine with a big ole’ bowl of grain-free tortilla chips for a healthy, yet delicious snack. Though for an even healthier option, serve your salsa with some fresh cut veggies such as carrots, celery, and/or bell peppers!

    How To Store It

    To keep this guacamole salsa looking bright green and fresh, follow the storage steps below:

    1. Place in an airtight container, but do not secure the lid just yet.
    2. Take a sheet of plastic wrap and place it over the container, gently pressing down until it comes in contact with the top of the salsa. Ensure that all of the exposed salsa is in contact with and covered by the plastic wrap.
    3. Then, secure lid on top of the container before storing it in the fridge for up to three days!

    When ready to serve, simply remove the lid and plastic wrap, then give everything a gentle stir before enjoying.

    close-up image of guacamole salsa with chips on the side
    5 from 1 vote

    Fresh and Easy Guacamole Salsa

    Super fresh and addictive guacamole salsa is the perfect game day, party, or potluck appetizer! Simple, yet delicious ingredients are blended into a smooth and creamy dip. Enjoy this guacamole salsa with crispy tortilla chips, or sliced carrots and celery for a healthy snack!
    Print Pin Rate
    Prep Time: 5 minutes
    Cook Time: 10 minutes
    Total Time: 15 minutes
    Servings: 12 servings

    Ingredients

    • 10 tomatillos, husked and washed
    • 1 jalapeño, seeded and deveined
    • 3 avocados, peeled and pitted
    • 1 garlic clove, smashed and peeled
    • 1/2 cup fresh cilantro
    • 1 tablespoon lime juice
    • 1 teaspoon salt

    Instructions

    • Bring a pot of water to a boil over medium-high heat. Boil tomatillos and jalapeño until soft, about 10 minutes.
    • Strain tomatillos and jalapeño from water, then add to a high-speed blender or food processor with remaining ingredients.
    • Blend until smooth, then serve immediately or store in an airtight container in the fridge for up to 3 days.

    Nutrition

    Calories: 300kcal

    More Easy and Delicious Appetizers