Tag

vegan

Browsing

These carrot cake baked oats taste just like eating carrot cake for breakfast! This recipe includes a vegan cream cheese icing and is entirely refined sugar-free. Add a scoop of almond butter and a handful of chopped walnuts for a healthy, well-balanced breakfast.

Close-up image of carrot cake baked oats with cream cheese icing and carrots on top.

What You Need To Make Carrot Cake Baked Oats

Rolled Oats – You can use either rolled oats or quick oats in this recipe. I like to stock up on oats whenever I’m at the store, they’re so versatile and super satisfying. Oats are one of the best gluten-free grains, loaded with vitamins, minerals, and plenty of health benefits.

Apple Sauce – You can swap mashed banana for the apple sauce in this recipe – use whichever you prefer!

Maple Syrup – I love using maple syrup in place of refined sugar in my recipes. Maple syrup not only tastes delicious, but is full of antioxidants and less likely to spike your blood sugar.

Walnuts – Add a much-needed crunch to these carrot cake baked oats. I used raw, unsalted walnuts in my recipe and gave them a quick chop before mixing them in. If you don’t like walnuts, feel free to either swap them with another nut or leave them out!

Non-Dairy Cream Cheese – No carrot cake is complete without the cream cheese frosting. Therefore, I developed a two-ingredient cream cheese icing for these baked oats. My preferred non-dairy cream cheese is Kite Hill’s plain flavor. If you’re not dairy-free, you can definitely use regular cream cheese instead. Just make sure, whatever cream cheese you use, is plain and doesn’t have any added flavors.

Carrot cake baked oats being scooped out of a mug.

Adjust This Recipe To Your Dietary Needs

  • Add Protein: Throw one tablespoon of your favorite vanilla protein powder in with the oats and make the rest of the recipe as directed.
  • Make it Nut-Free: Use soy or coconut milk instead of almond milk and leave out the walnuts. If you’re also making the cream cheese icing, make sure your dairy-free cream cheese is nut-free as well!
  • Add Dairy: Swap out the almond milk for cow’s milk and the dairy-free cream cheese for regular cream cheese.
5 from 1 vote

Carrot Cake Baked Oats

These carrot cake baked oats taste just like eating carrot cake for breakfast! This recipe includes a vegan cream cheese icing and is entirely refined sugar-free. Add a scoop of almond butter and a handful of chopped walnuts for a healthy, well-balanced breakfast.
Print Rate
Prep Time: 5 minutes
Cook Time: 20 minutes
Total Time: 25 minutes
Servings: 1 serving

Ingredients

For the baked oats:

  • 1/2 cup rolled oats, see Notes
  • 1/2 cup apple sauce, see Notes
  • 1/4 cup non-dairy milk, see Notes
  • 1 tablespoon maple syrup
  • 1/2 teaspoon baking powder
  • 1/2 teaspoon cinnamon
  • 1/8 teaspoon ground ginger
  • 1/8 teaspoon nutmeg
  • 1/4 teaspoon vanilla extract
  • 2 tablespoons grated carrots
  • 1 tablespoon raisins, optional
  • 1 tablespoon walnuts, optional

For the cream cheese icing:

  • 1 tablespoon non-dairy cream cheese
  • 1/2 tablespoon maple syrup

Instructions

  • Preheat your oven to 350° Fahrenheit and lightly grease a oven-safe ramekin.
  • Add the oats, apple sauce, almond milk, maple syrup, baking powder, cinnamon, ground ginger, nutmeg, and vanilla extract to a blender and blend until smooth.
  • Pour into ramekin and mix in the raisins, carrots, and walnuts. Bake for 20-25 minutes.
  • Whisk together the dairy-free cream cheese and maple syrup in a small bowl. Pour icing over your oats and enjoy!

Video

Notes

  • Rolled Oats: You can also use quick oats, if you’d like.
  • Apple Sauce: You can swap the apple sauce for 1/2 cup of mashed banana.
  • Almond Milk: Use any non-dairy milk you’d like!
  • Walnuts: Pecans would also taste great, but use whatever nuts you’d like.
  • Nutrition

    Calories: 300kcal

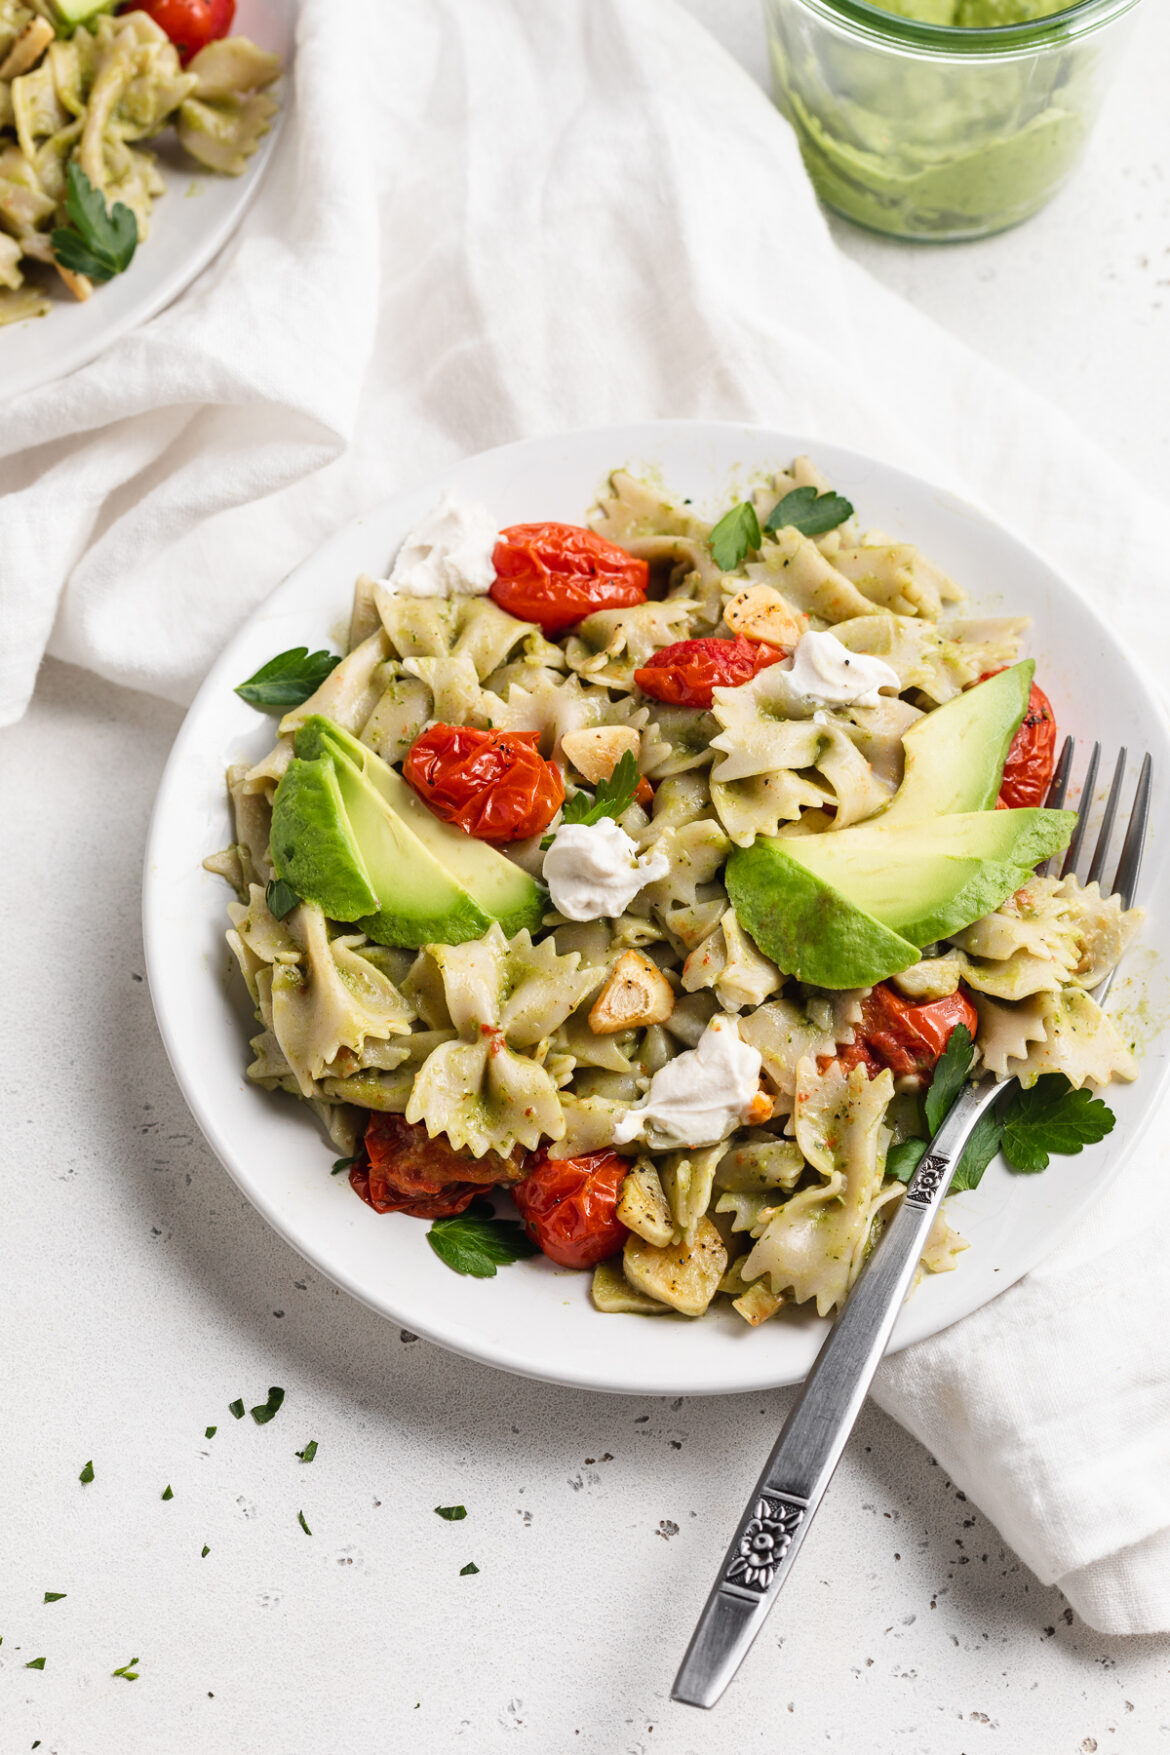
    Vibrantly green and irresistibly creamy avocado pasta, finished off with roasted garlic and tomatoes! Whip up this quick, easy, and healthy dinner recipe in under 20 minutes. Perfect when you’re short on time and/or craving something comforting and delicious.

    close-up image of avocado pasta with roasted garlic and tomatoes on a plate

    What You’ll Need To Make Avocado Pasta

    Avocado – LOL, duh! Pick up two perfectly ripe avocados for this plant-based recipe. To know whether your avocados are ripe or not, give them a gentle squeeze. If the skin gives a tiny bit then they’re ready to eat! Though if your avocados feel hard as rocks, leave them out at room temperature for another day or two until ripe. I almost always buy a big bag of avocados while at the store, and use leftovers to make avocado toast in the morning – yum!

    Fresh Herbs – Feel free to use any fresh herbs you’d like, or have on-hand! I used a combo of fresh basil and fresh parsley, which made for a perfectly fresh-tasting sauce. However, a bunch of fresh cilantro would taste equally as delicious.

    Garlic – Plenty of garlic is necessary for this avocado pasta recipe! We pretty much use an entire garlic bulb between the roasted garlic and tomatoes, and the avocado sauce. When roasted, garlic releases intense flavor which is straight up heavenly. I could eat roasted garlic all by itself, it’s that good! Together with the tomatoes, olive oil, and a little bit of salt and pepper – the roasted garlic in this recipe is to-die-for.

    overhead image of avocado pasta on two plate

    Tips and Tricks

    • Use any pasta shape you’d like! I used bow-ties since they’re what I had, but shape truly makes no difference here. I can imagine this avocado pasta tastes just as delicious with spaghetti, penne, fusilli, elbows, etc.
    • Remember to reserve half a cup of pasta water! This pasta water will be added back into the pasta, after you’ve strained it, and added the avocado sauce in. The starches from the reserved water help your sauce latch onto the pasta.
    • Typically served hot, this pasta can also be served cold as an avocado pasta salad. For a cold pasta dish, cook up everything the same. Then, cover and leave to chill for about an hour before serving.

    Adjust This Recipe To Your Dietary Needs

    Make it Gluten-Free: This pasta is easily made gluten-free with the use of your favorite gluten-free pasta. Now my personal favorite gluten-free pasta is Jovial’s Brown Rice pasta, and is actually exactly what I used in the photos here!

    Make it Paleo/Grain-Free: For a paleo pasta, simply use zucchini noodles or spaghetti squash in place of the pasta in this dinner recipe.

    No ratings yet

    Avocado Pasta with Roasted Garlic and Tomatoes

    Vibrantly green and irresistibly creamy avocado pasta, finished off with roasted garlic and tomatoes! Whip up this quick, easy, and healthy dinner recipe in under 20 minutes. Perfect when you’re short on time and/or craving something comforting and delicious.
    Print Rate
    Prep Time: 5 minutes
    Cook Time: 15 minutes
    Total Time: 20 minutes
    Servings: 4 servings

    Ingredients

    • 1 pound pasta, uncooked

    For the roasted garlic and tomatoes:

    • 1 pint grape tomatoes
    • 6-8 garlic cloves, sliced
    • 2 tablespoons olive oil
    • salt and black pepper, to taste

    For the avocado sauce:

    • 2 ripe avocados, peeled and pits removed
    • 1/2 cup fresh basil, parsley, and/or cilantro
    • 1/4 cup olive oil
    • 2 garlic cloves
    • 1 lemon, juiced
    • 1/2 teaspoon salt
    • 1/4 teaspoon black pepper

    Instructions

    • Preheat oven to 400° Fahrenheit. Make the roasted garlic and tomatoes by placing tomatoes and sliced garlic on a baking sheet, then drizzling with olive oil and seasoning with salt and pepper. Roast for 15 minutes or until soft and very fragrant.
    • While garlic and tomatoes roast, cook pasta in a large pot of salted water until al dente and reserve ½ cup pasta water.
    • While pasta cooks, add all avocado sauce ingredients to a blender and blend until smooth.
    • Once pasta is cooked, strain then add back into pot along with avocado sauce and reserved pasta water. Toss pasta in sauce before adding in roasted garlic and tomatoes, serve immediately.

    Nutrition

    Calories: 300kcal

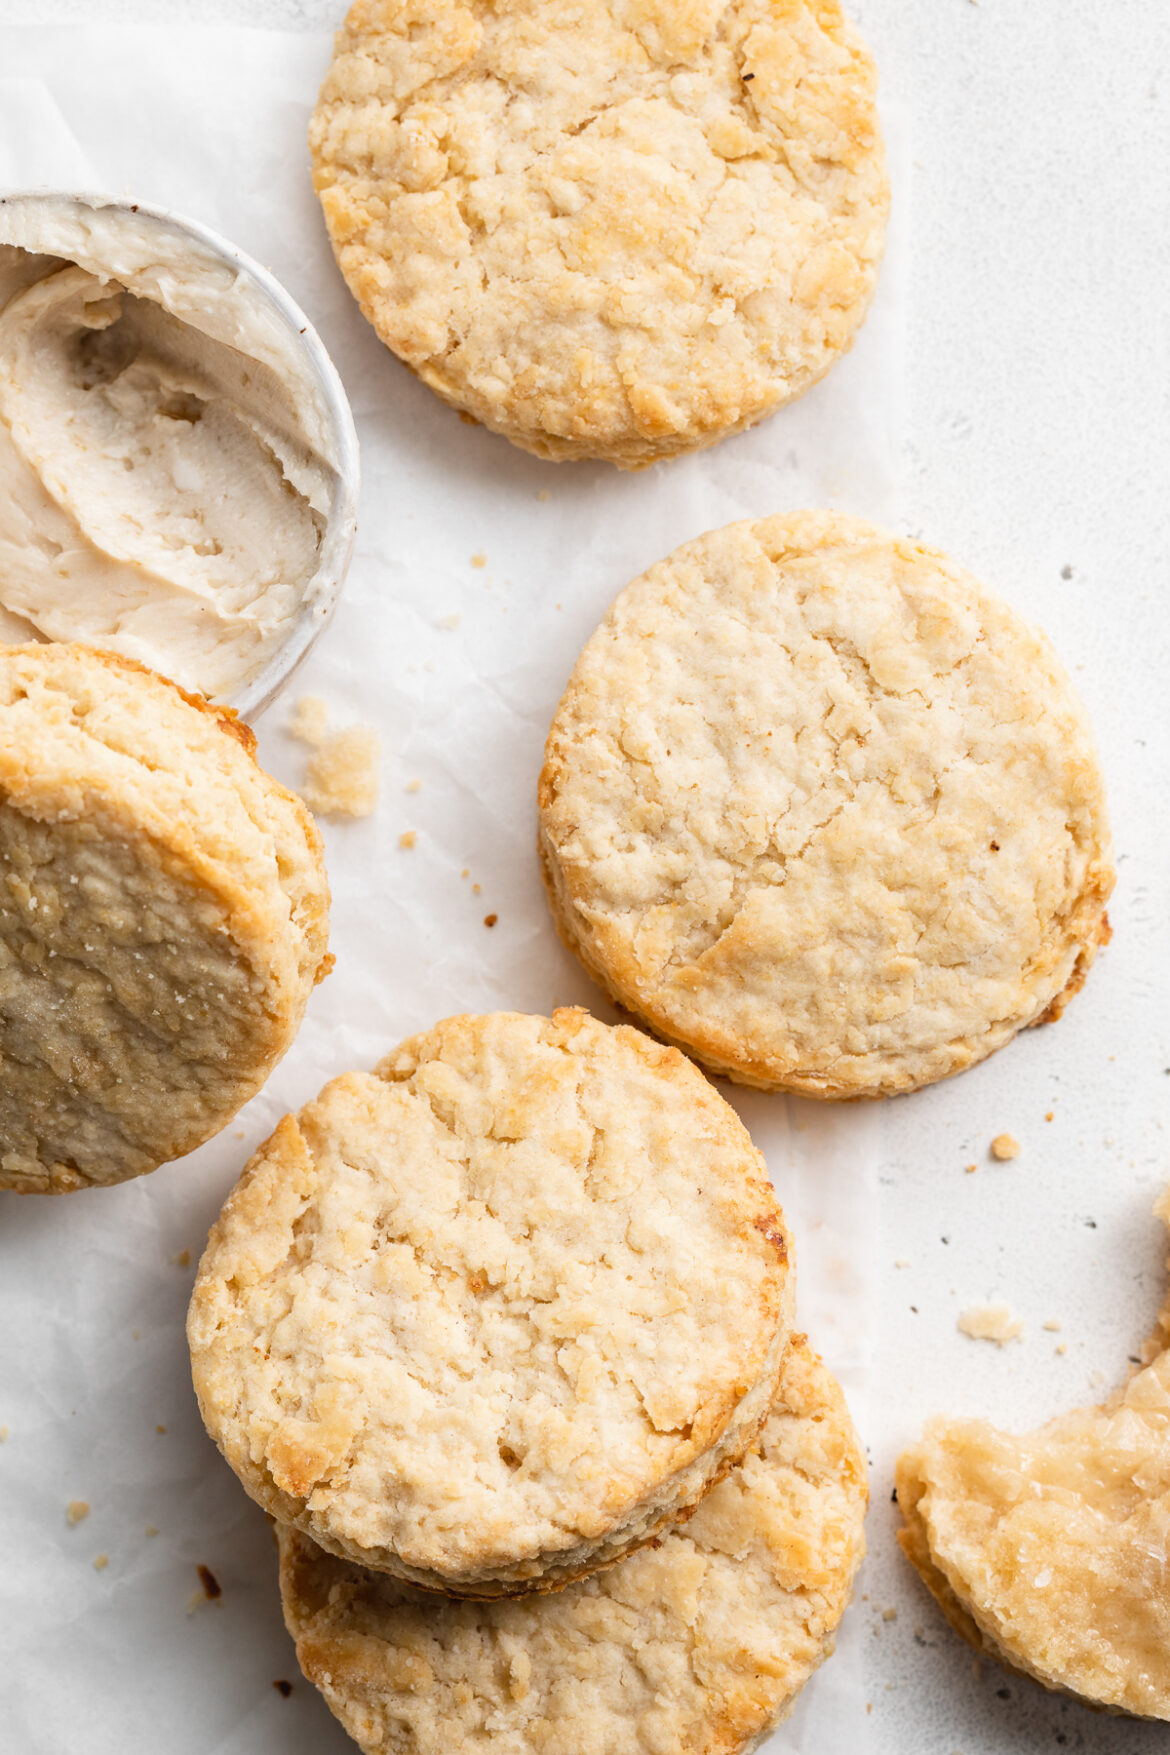
    Irresistibly soft and flaky vegan biscuits! They’re chock-full of gorgeous layers and surprisingly easy to make in under 30 minutes. Top these flawless vegan biscuits off with a simple two-ingredient vegan maple butter for a perfectly sweet touch.

    vegan biscuits on parchment paper with maple butter on the side

    What You’ll Need To Make Vegan Biscuits

    Non-Dairy Milk – Any non-dairy milk will work in this plant-based bread recipe! I used almond milk, but you can definitely use soy, hemp, cashew, or even coconut milk if you’d like.

    Apple Cider Vinegar – Ever notice that tiny bit of tanginess found in most biscuits? Well, that’s the buttermilk speaking. And since we obviously can’t use regular ole’ buttermilk in these vegan biscuits, we make our own vegan version instead. By mixing apple cider vinegar into cold non-dairy milk, then leaving it to sit for a few minutes, we make vegan buttermilk – yup, it’s that easy!

    All Purpose Flour – We wouldn’t have biscuits without flour. Specifically, all purpose flour, which bakes up the best biscuits. I’ve pretty much grown up on the King Arthur Organic Unbleached All Purpose Flour. It’s been a staple in my kitchen for years and has seriously never ever failed me. However, you can definitely replace the all purpose flour for gluten-free 1:1 baking flour if you’d like.

    Vegan Butter – I use and love the Earth Balance Vegan Buttery Sticks for all my vegan baking needs. Unlike most baking recipes which call for softened butter, we actually want super cold butter for these biscuits. Therefore, leave your vegan butter in the fridge until the second you need to use it. You can even pop it in the freezer for a couple minutes to get it extra cold!

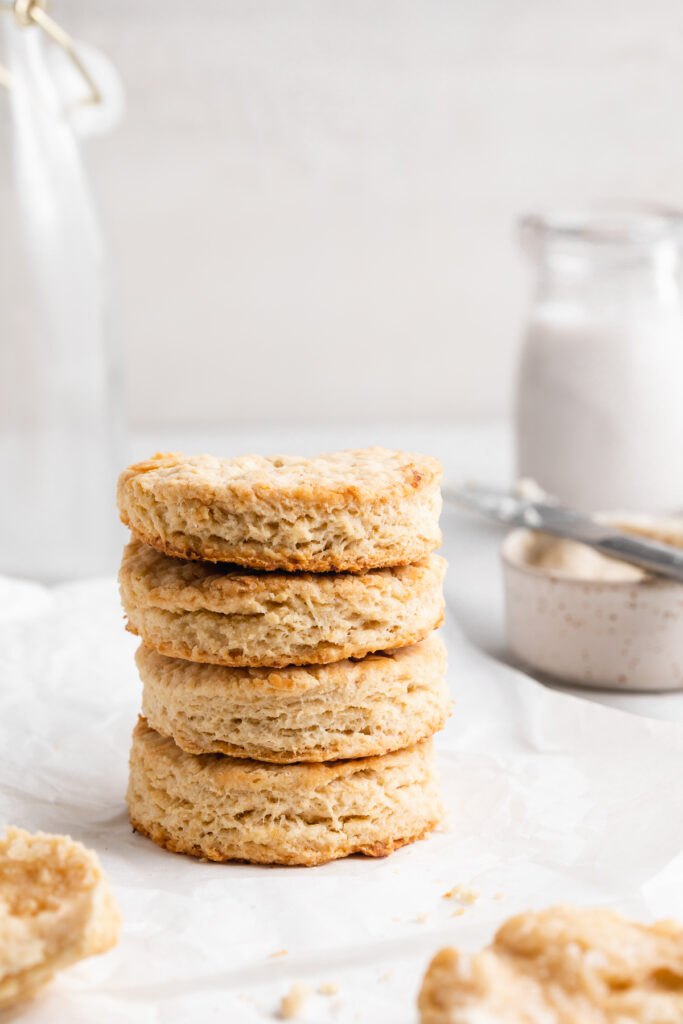
    a stack of vegan biscuits on a table

    Tips and Tricks

    • Don’t overmix the dough! An overmixed dough will bake up tough and chewy, instead of soft and flaky. So once all ingredients are incorporated, stop mixing and move on to shaping.
    • No biscuit cutter? No problem! I used a metal cocktail shaker in place of a biscuit cutter for this bakery-style recipe. Really any round object will work to cut biscuits.
    • If not a maple butter fan, top these vegan biscuits with any spread you’d like. Some homemade jam, vegan butter, and/or vegan cream cheese would all taste just as delicious!
    vegan biscuits with maple butter on top and a butter knife

    Adjust This Recipe To Your Dietary Needs

    Make it Gluten-Free: For gluten-free vegan biscuits, replace the all purpose flour with 1:1 gluten-free baking flour. I swear by the Bob’s Red Mill Gluten-Free Baking Flour for all my gluten-free baking needs!

    Make it Nut-Free: To ensure these biscuits are completely nut-free, use a nut-free non-dairy milk such as soy or oat milk, and a non-dairy butter without any nuts in it.

    No ratings yet

    Flawless Vegan Biscuits with Maple Butter

    Irresistibly soft and flaky vegan biscuits! They’re chock-full of gorgeous layers and surprisingly easy to make in under 30 minutes. Top these flawless vegan biscuits off with a simple two-ingredient vegan maple butter for a perfectly sweet touch.
    Print Rate
    Prep Time: 10 minutes
    Cook Time: 15 minutes
    Total Time: 25 minutes
    Servings: 10 biscuits

    Ingredients

    • 1/2 cup non-dairy milk
    • 1 tablespoon apple cider vinegar
    • 2 cups all purpose flour
    • 1 tablespoon baking powder
    • 1 tablespoon sugar
    • 1 teaspoon salt
    • 1/2 cup vegan butter, very cold

    For the maple butter:

    • 1/4 cup vegan butter, softened
    • 1 tablespoon maple syrup

    Instructions

    • Preheat oven to 425° Fahrenheit.
    • Whisk together the non-dairy milk and apple cider vinegar in a small bowl, set aside.
    • In a large bowl, mix together the all purpose flour, baking powder, sugar, and salt.
    • Add butter into flour mixture and use either a pastry cutter or fork to “cut” butter into flour until crumbly. (The mixture should resemble coarse sand)
    • Make a well in the center of the flour and slowly pour in the milk and vinegar. Gently stir until a sticky dough forms.
    • Transfer biscuit dough to a floured surface and roll into a 1-inch thick disc. Use a biscuit cutter or something similar to cut biscuits out of dough.
    • Place biscuits on a baking sheet then bake for 12-15 minutes or until slightly golden.
    • White the biscuits bake, make the maple butter by whisking both ingredients together in a small bowl until combined. Spread maple butter over warm vegan biscuits.

    Video

    Nutrition

    Calories: 300kcal

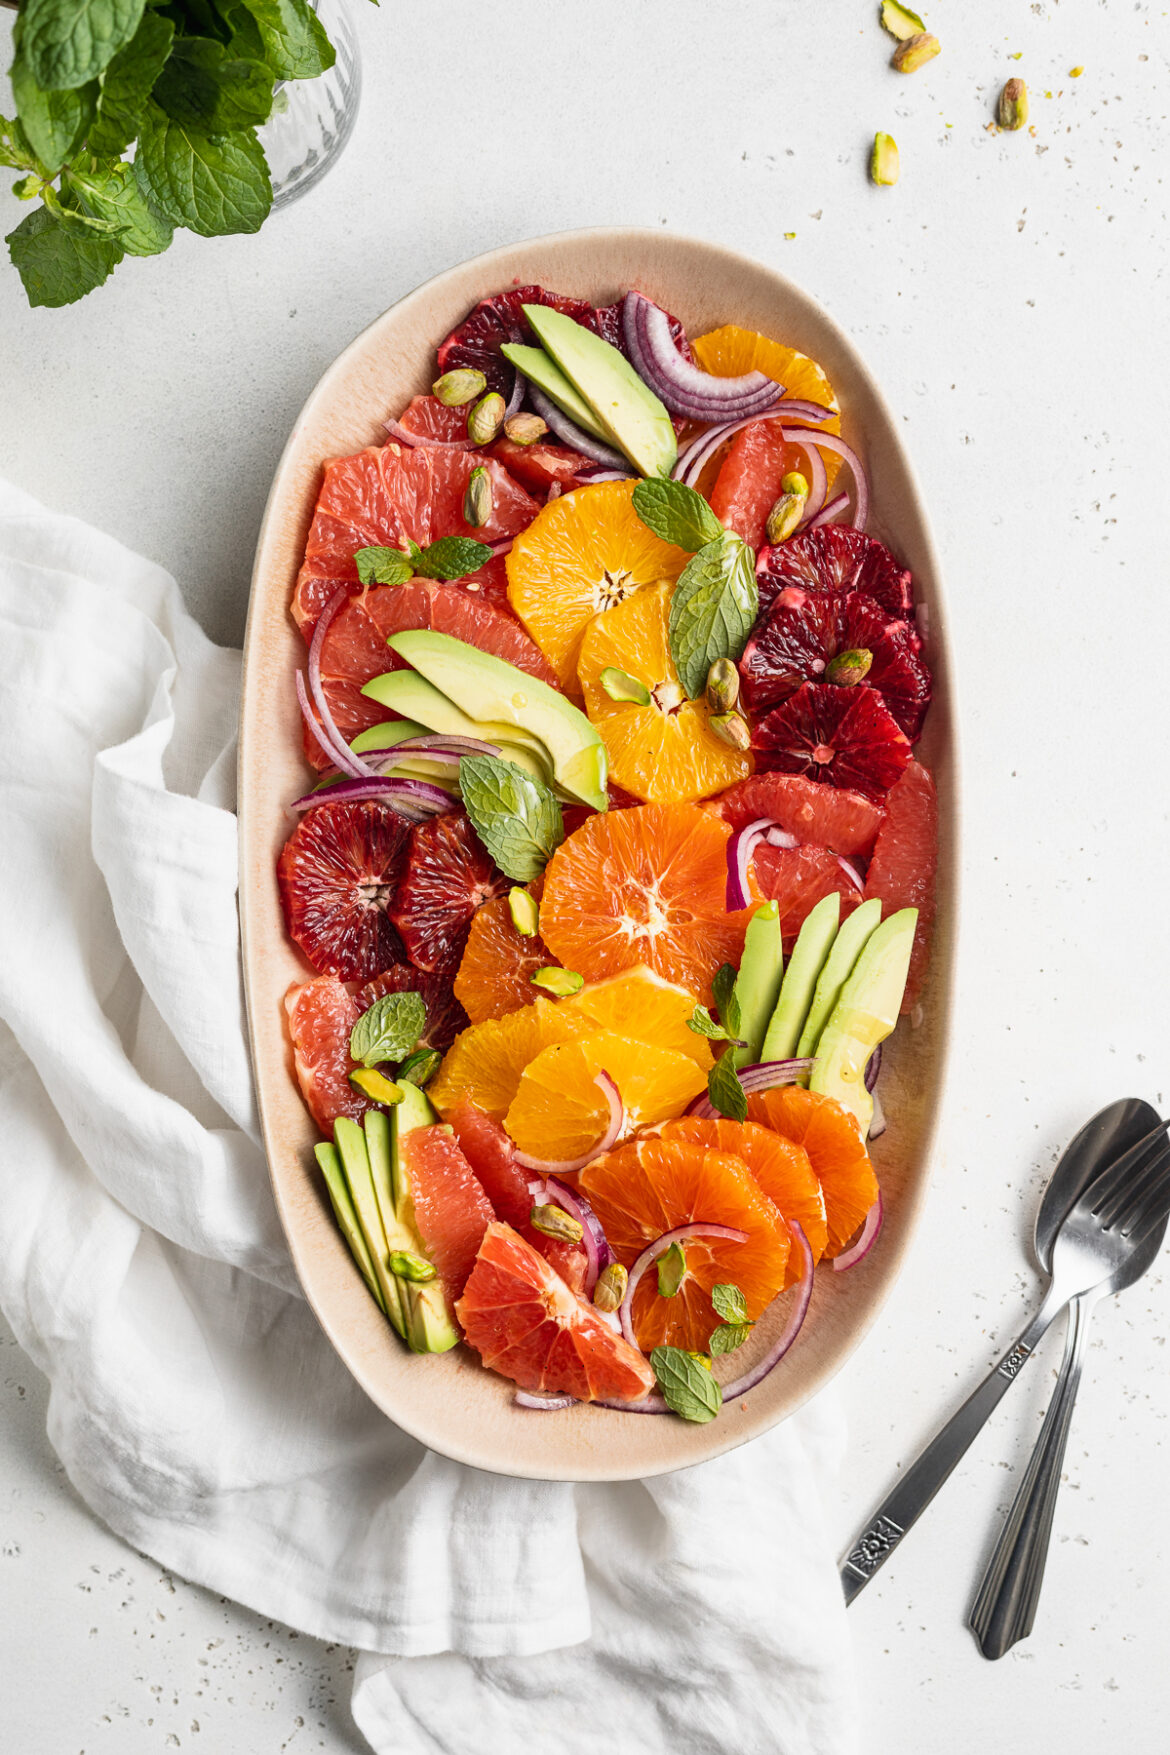
    Deliciously bright and zesty citrus salad with avocado and pistachios! Put this season’s best produce to good use in a fresh and healthy salad. Quick and easy to make in just three steps, and under 10 minutes!

    overhead image of citrus salad on a platter with fresh mint on the side

    What You’ll Need To Make Citrus Salad

    Blood Oranges – While they most certainly add flavor, they just as importantly add a stunning deep red color to this side dish. Less tangy and more tart than most other oranges, blood oranges diversify the overall recipe. However, if you can’t find blood oranges or they’re simply not your thing, feel free to replace them with any other type of orange you’d like.

    Cara Cara or Navel Oranges – I know many people rave about cara cara oranges this time of year, and for obvious reasons – they’re freaking delicious! Though for this citrus salad recipe I used navel oranges, due to the simple fact that they were on sale. And let me tell ya, there wasn’t a thing I’d change about how this plant-based dish turned out.

    Avocado – Peak avocado season is January through March, which coincidentally is also peak citrus season. So I figured, since we’re on a seasonal produce kick over here, why not use as much winter produce in this salad as possible?! And that’s exactly what I did. While not necessary, avocado does add in some healthy fats and mild flavor.

    Pistachios – Every salad needs a good crunch, and this citrus salad is no exception! Unsalted pistachios play perfectly with the other textures in this dish.

    Sherry Vinegar – Either sherry vinegar, apple cider vinegar, or lemon juice would taste delicious in this citrus salad dressing. Feel free to use whichever you have on-hand and/or like the most!

    dressing being poured over citrus salad

    Tips and Tricks

    • Avoid serving this citrus salad right away, and instead leave it to sit for at least 10 minutes before eating. This time will allow the flavors to develop and marinate, making for an even more delicious salad!
    • If not gluten-free, serve this citrus salad with a side of toasted crusty bread! Bread is the perfect pairing to this fresh and bright recipe, and ideal for soaking up that orange and grapefruit juice.
    • You can either peel then segment your citrus fruit, or peel then slice it for this dish. For instructions on how to segment and slice oranges, check out this video I posted!
    close-up image of citrus salad with avocado and pistachios

    Adjust This Recipe To Your Dietary Needs

    Make it Nut-Free: Replace the pistachios with either unsalted sunflower seeds or pumpkin seeds for a nice, nut-free crunch!

    Make it Vegan: This recipe is already almost completely vegan! The only thing that’s not is the honey in the dressing, so to make it 100% vegan, simply replace the honey with maple syrup.

    1 from 1 vote

    Citrus Salad with Avocado and Pistachios

    Deliciously bright and zesty citrus salad with avocado and pistachios! Put this season’s best produce to good use in a fresh and healthy salad. Quick and easy to make in just three steps, and under 10 minutes!
    Print Rate
    Prep Time: 10 minutes
    Total Time: 10 minutes
    Servings: 6 servings

    Ingredients

    • 2 blood oranges, peeled and sliced
    • 2 cara cara or navel oranges, peeled and sliced
    • 1 pink grapefruit, peeled and sliced
    • 1 avocado, sliced
    • 1/2 small red onion, thinly sliced
    • 1/4 cup pistachios, unsalted

    For the citrus salad dressing:

    • 3 tablespoons olive oil
    • 1 tablespoon sherry vinegar, see Notes
    • 1 teaspoon honey, or maple syrup
    • squeeze of fresh lime juice
    • salt and black pepper, to taste

    For serving:

    • fresh mint leaves

    Instructions

    • Assemble all salad ingredients on a large platter.
    • Whisk together all dressing ingredients in a small bowl.
    • Drizzle dressing over salad, garnish with fresh mint leaves and serve immediately or let sit for 10-20 minutes to let flavors marinate.

    Notes

  • Sherry Vinegar: You can use apple cider vinegar or lemon juice in place of sherry vinegar.
  • Nutrition

    Calories: 300kcal

    Perfectly crispy, yet healthy sweet potato fries! Four ingredients and 15 minutes is all it takes for this addictive appetizer or side dish. Don’t have an air fryer? No worries, I’ve included an oven-baked option that still yields incredibly crispy fries!

    close-up overhead image of air fryer sweet potato fries on a plate with ketchup on the side

    The air fryer is truly the kitchen device of the century (ok, well it’s right up there with the Instant Pot). I only just got my hands on about a year ago, and holy moly it changed the homemade fry game for me, forever. After quite a bit of research for the best air fryer out there, I eventually landed on the Cosori Pro Air Fryer. It’s fairly priced and works like a champ, can’t recommend it enough!

    What You Need To Make Air Fryer Sweet Potato Fries

    Sweet Potatoes – The star of our show! You can use any variety of sweet potatoes you’d like for this recipe. Just remember, peel them and then slice them into thin matchsticks. Thinner = crispier. And try your best to cut them as evenly as possible, so that they “fry” evenly.

    Avocado Oil – My oil of choice, but you can use any oil you’d like here. Just one tablespoon is all you’ll need, that’s A LOT less oil than if you deep-fried these!

    Salt – Duh! Salt is non-negotiable for fries of any kind. Though start small and add more salt once the fries are done. You can, of course, salt to your preference.

    Garlic Powder – This is my little special touch. I love the extra flavor garlic powder gives these fries, and I promise you will too. Though if you’re not a garlic fan (how?!), then you can leave this ingredient out.

    air fryer sweet potato fries being dipped into ketchup

    Tips and Tricks

    • The secret to these crispy sweet potato fries is working in batches when you air fry them. Just a single layer at a time, avoiding cramming too many into the air fryer, will give you the crispiest non-deep-fried sweet potato fry of all time.
    • No air fryer? No problem! See below for an oven baked option.
    • If you’re looking for something to pair with these sweet potato fries, I can’t help but recommend these crispy air fryer buffalo chicken wings! The perfect healthy game-day, or any day, appetizer duo.
    No ratings yet

    Air Fryer Sweet Potato Fries

    Perfectly crispy, yet healthy sweet potato fries! Four ingredients and 15 minutes is all it takes for this addictive appetizer or side dish. Don’t have an air fryer? No worries, I’ve included an oven-baked option that still yields incredibly crispy fries!
    Print Rate
    Prep Time: 5 minutes
    Cook Time: 15 minutes
    Total Time: 20 minutes
    Servings: 4 servings

    Ingredients

    • 2 large sweet potatoes, see Notes
    • 1 tablespoon avocado oil
    • 1 teaspoon salt
    • 1/2 teaspoon garlic powder

    Instructions

    In the air fryer:

    • Preheat air fryer to 380° Fahrenheit. While the air fryer preheats, peel and slice sweet potatoes into 1/4-inch sticks.
    • Toss sweet potatoes in a bowl with olive oil, salt and garlic powder. Make sure each fry is evenly coated in oil and spices.
    • Transfer a third of the potatoes to the air fryer, then spread in an even layer and cook for 15 minutes. Pause air fryer to shake pan halfway through.
    • Remove fries and repeat for remaining batches.

    In the oven:

    • Preheat oven to 425° Fahrenheit. While the air fryer preheats, peel and slice sweet potatoes into 1/4-inch sticks.
    • Toss sweet potatoes in a bowl with olive oil, salt and garlic powder. Make sure each fry is evenly coated in oil and spices.
    • Spread potatoes in an even layer on a large baking sheet – space fries about 1/8-inch apart.
    • Bake for 20 minutes, flipping halfway through.

    Video

    Notes

  • Sweet Potatoes: Use any variety of sweet potatoes you’d like, white sweet potatoes are my favorite!
  • Nutrition

    Calories: 300kcal