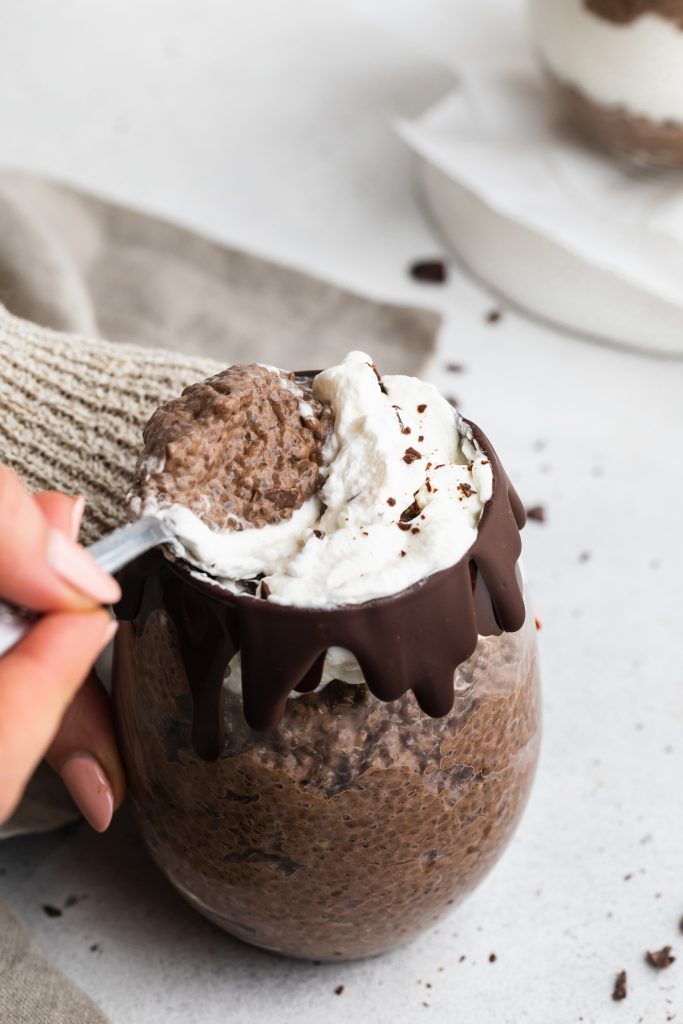
Ultra decadent, yet healthy double chocolate chia pudding! Whip together this easy breakfast or snack in no time at all. Top this rich and extra chocolatey treat off with fresh berries, whipped cream, or what the heck – even more chocolate!

What You’ll Need To Make This Double Chocolate Chia Pudding
- Non-Dairy Milk – Use any non-dairy milk you’d like! I used the Elmhurst Almond Milk since it’s what I had on-hand, and I love their simple ingredients (literally just almonds and water). Though whichever non-dairy milk you use, make sure it’s completely unsweetened. The maple syrup in this plant-based recipe yields all the sweetness we need.
- Maple Syrup – This unrefined sweetener is slightly lower on the glycemic index than white sugar, meaning it’s less likely to cause that awful sugar spike, then crash. I absolutely love maple syrup, and use it whenever possible! It’s super versatile, perfectly sweet, and has this caramel-y flavor that is to-die-for. However, if you don’t have maple syrup, you can use honey or date syrup in its place.
- Cocoa Powder – Unsweetened cocoa powder, that is! While most cocoa powders are unsweetened, there are a select few on grocery store shelves that have sugar in them. So learn from my mistakes here, and don’t accidentally throw the sweetened kind into your cart. Ghirardelli and Hershey both make very good unsweetened cocoa powders. And if you want to make this vegan recipe even healthier, then use cacao powder instead. Cacao is less processed than cocoa, and is chock-full of vitamins and minerals.
- Chia Seeds – These tiny black seeds are the star of our double chocolate chia pudding recipe! Chia seeds are a superfood (for reasons I’ll get into in the next section), are gluten-free, and can be found at most grocery stores. Though if you can’t find chia seeds at your local grocery store, try a health store or vitamin shop instead. Also, Amazon sells pounds of them!
Are Chia Seeds Healthy?
Yes, chia seeds are super duper healthy! They’re loaded with all sorts of nutrients, such as:
- Iron – increases energy and focus.
- Manganese – essential for bone health and development.
- Phosphorus – repairs damaged muscle and bones.
- Selenium – protects against cell damage and infection.
- Magnesium – boosts heart health and helps regulate blood pressure.
- Calcium – vital to building and maintaining strong bones.
They’re also a great source of plant-based protein, fiber, and healthy fats!
Toppings/Add-Ins
- Protein Powder
- Chocolate Chips
- Fresh Berries
- Sliced Banana
- Peanut Butter
- Hemp Seeds
- Chopped Nuts
- Granola
Double Chocolate Chia Pudding
Ultra decadent, yet healthy double chocolate chia pudding! Whip together this easy breakfast or snack in no time at all. Top this rich and extra chocolatey treat off with fresh berries, whipped cream, or what the heck – even more chocolate!
Print
Rate
Servings: 4 servings
Ingredients
- 2 cups non-dairy milk
- 1/4 cup maple syrup
- 1/4 cup cocoa powder
- 1 teaspoon vanilla extract
- pinch of salt
- 1/2 cup chia seeds
- 1/4 cup chocolate chips or chopped chocolate
Instructions
- Whisk together the milk, maple syrup, cocoa powder, vanilla extract, and salt in a bowl.
- Add in chia seeds and chocolate chips, stir once to combine, then cover and refrigerate for at least 4 hours and up to overnight.
- Once thick, remove from the fridge and give chia pudding a stir before serving.
Notes
Nutrition
Calories: 300kcal