Tag

almond flour

Browsing

Why You’ll Love This Recipe

This gluten-free apple cake is a delicious, simple treat that’s also healthier than traditional cakes. It’s naturally sweetened with maple syrup, making it refined sugar-free, and packed with apples, providing a warm and comforting flavor. This one-bowl recipe is quick to mix up and even easier to enjoy!

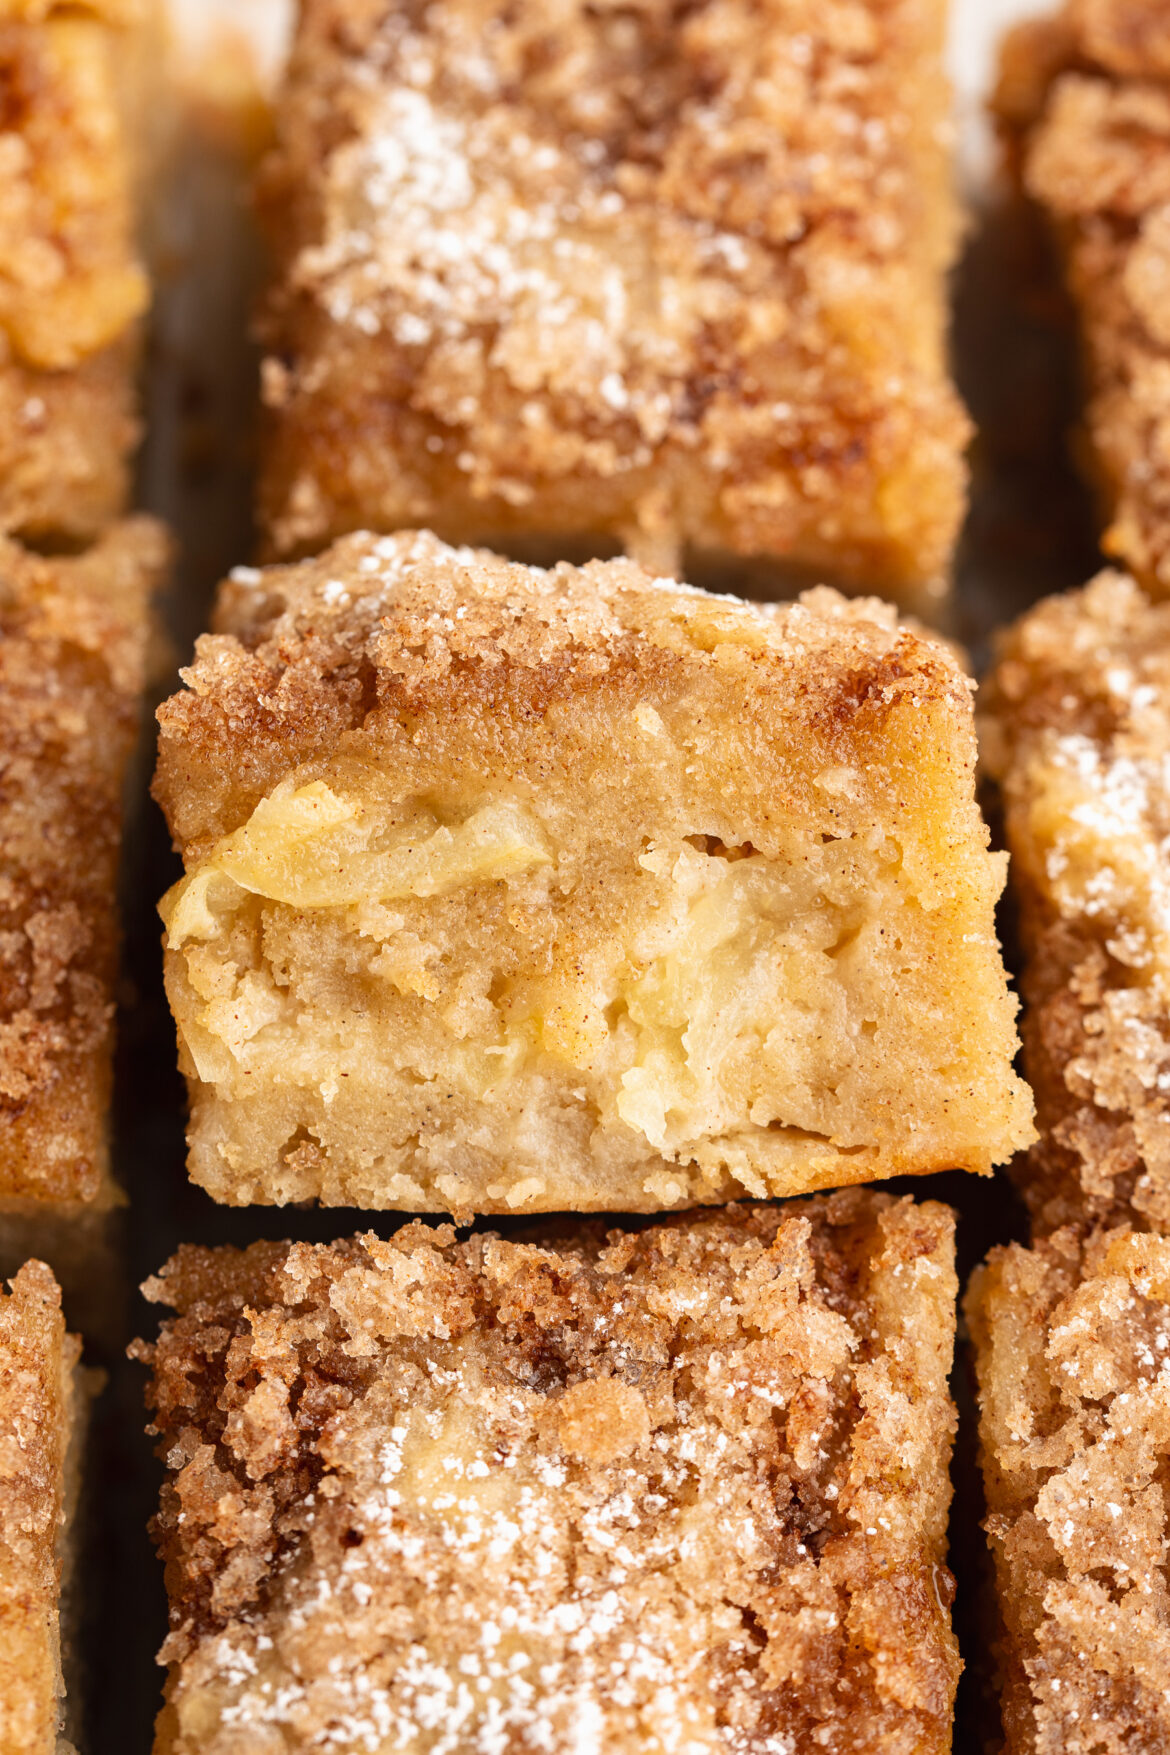
gluten-free cinnamon sugar apple cake sliced into squares on a baking sheet.

What You’ll Need to Make This Gluten-Free Apple Cake

  • Milk (I used almond milk): Adds moisture to the cake, keeping it soft. Almond milk makes it dairy-free, but any milk will work.
  • Maple Syrup or Honey: A natural sweetener that brings sweetness without refined sugar. Maple syrup keeps it vegan-friendly.
  • Unsweetened Applesauce: Adds a touch of natural sweetness and moisture while reducing the need for additional fats.
  • Melted Coconut Oil: This healthy fat keeps the cake moist and tender. It also adds a subtle coconut flavor, enhancing the cake’s richness.
  • Large Eggs: Bind the cake ingredients together, providing structure and moisture.
  • Vanilla Extract: Enhances the flavor with a subtle sweetness that pairs well with the apples and cinnamon.
  • Gluten-Free All-Purpose Flour: Provides the base of the cake while keeping it gluten-free. Any 1:1 gluten-free blend should work. I use and love Bob’s Red Mill Gluten-Free 1:1 Baking Flour in my gluten-free recipes!
  • Almond Flour: Adds moisture and a slightly nutty flavor, while also making the cake nice and tender!
  • Baking Powder: Helps the cake rise, resulting in a light and fluffy texture.
  • Cinnamon: Brings warmth and coziness to the cake, pairing perfectly with the apple slices.
  • Apple, Thinly Sliced: Provides sweet, tart bites throughout the cake, enhancing flavor and texture.

For the Cinnamon Sugar Topping:

  • Sugar: Adds sweetness and creates a caramelized crust on top of the cake.
  • Cinnamon: Adds a warm, comforting spice that pairs well with apples.
  • Melted Butter or Coconut Oil: Helps the topping adhere to the cake and caramelize in the oven, creating a golden, crunchy layer.
gluten-free cinnamon sugar apple cake slice on a small dish with a fork.

How to Make Gluten-Free Apple Cake

  1. Preheat the Oven and Prepare the Pan: Preheat your oven to 350°F, and line and grease a 9×9-inch cake pan for easy release.
  2. Mix Wet Ingredients: In a large bowl, whisk together the milk, maple syrup, applesauce, melted coconut oil, eggs, and vanilla extract until well combined.
  3. Add Dry Ingredients: Add the gluten-free all-purpose flour, almond flour, baking powder, and cinnamon to the bowl, mixing gently until just combined.
  4. Fold in Apples: Gently fold in the thinly sliced apples to distribute them evenly throughout the batter.
  5. Add Cinnamon Sugar Topping: In a small bowl, combine sugar, cinnamon, and melted butter or coconut oil, then sprinkle the mixture evenly over the cake batter.
  6. Bake: Bake for 30 minutes or until a toothpick inserted into the center comes out clean. Allow the cake to cool completely on a wire rack.
  7. Optional Topping: Just before serving, sprinkle with powdered sugar or drizzle with a simple powdered sugar icing for a little extra sweetness.

Storage Tips

Store any leftovers in an airtight container in the fridge for up to 5 days. You can also freeze individual slices for up to 2 months. Just thaw in the fridge before serving.

What Type of Apples Are Best for Apple Cake?

Opt for tart, firm apples like Granny Smith or Honeycrisp. These hold their shape well during baking and balance the sweetness of the cake!

Adjust This Recipe to Your Dietary Needs

  • Dairy-Free: Use almond milk and coconut oil as written for a dairy-free version.
  • Vegan: Replace eggs with flax eggs (1 tablespoon ground flax + 3 tablespoons water per egg) and choose maple syrup as the sweetener.
  • Low Sugar: Reduce or omit the maple syrup for a naturally less-sweet cake, and use less sugar in the topping if desired.
gluten-free cinnamon sugar apple cake slice on a small dish with a fork.
5 from 4 votes

Gluten-Free Cinnamon Sugar Apple Cake

This gluten-free cinnamon sugar apple cake is perfect for fall and cozy gatherings! Made with wholesome ingredients like almond flour, applesauce, and maple syrup, it’s moist, flavorful, and has a sweet, spiced topping for an extra treat. It’s healthy, gluten-free, and can easily be made dairy-free with just ONE bowl!
Print Pin Rate
Prep Time: 15 minutes
Cook Time: 30 minutes
Total Time: 45 minutes
Servings: 16 servings

Equipment

  • 1 large bowl
  • 1 9×9-inch baking pan

Ingredients

  • 1/2 cup milk (I used almond milk) at room temperature
  • 1/2 cup maple syrup
  • 1/4 cup unsweetened apple sauce
  • 1/3 cup melted coconut oil or melted butter
  • 2 large eggs at room temperature
  • 1 teaspoon vanilla extract
  • 2 cups gluten-free all purpose flour see Notes
  • 1 cup almond flour
  • 1 teaspoon baking powder
  • 1/2 teaspoon baking soda
  • 1 teaspoon cinnamon
  • 1 apple cored and very thinly sliced

For the cinnamon sugar topping:

  • 1/2 cup sugar
  • 1 teaspoon cinnamon
  • 1 tablespoon melted butter or melted coconut oil

Instructions

  • Preheat oven to 350° Fahrenheit then line and lightly grease a 9×9-inch cake pan (round or square).
  • Add the milk, maple syrup, apple sauce, melted coconut oil, eggs, and vanilla extract to a large bowl then whisk to combine.
  • Then, add in the gluten-free all purpose flour, almond flour, baking powder, baking soda, and cinnamon and gently mix until just combined.
  • Fold the thinly sliced apples into the cake batter until evenly distributed throughout the batter, then transfer the batter to the prepared cake pan.
  • In a small bowl, mix together all ingredients for the cinnamon sugar topping, then sprinkle the topping evenly over top of the cake.
  • Bake the cake for 30 minutes, or until a toothpick inserted down the center of the cake comes out clean. Remove the cake from the oven, then remove the cake from the pan and transfer to a wire cooling rack to cool completely before serving. Just before serving, sprinkle with powdered sugar or drizzle with powdered sugar icing!

Notes

Gluten-Free All Purpose Flour: I use and love Bob’s Red Mill 1:1 Gluten-Free All Purpose Baking Flour.

Nutrition

Serving: 1serving | Calories: 148kcal | Carbohydrates: 18.5g | Protein: 2.8g | Fat: 7.9g | Sugar: 8.8g
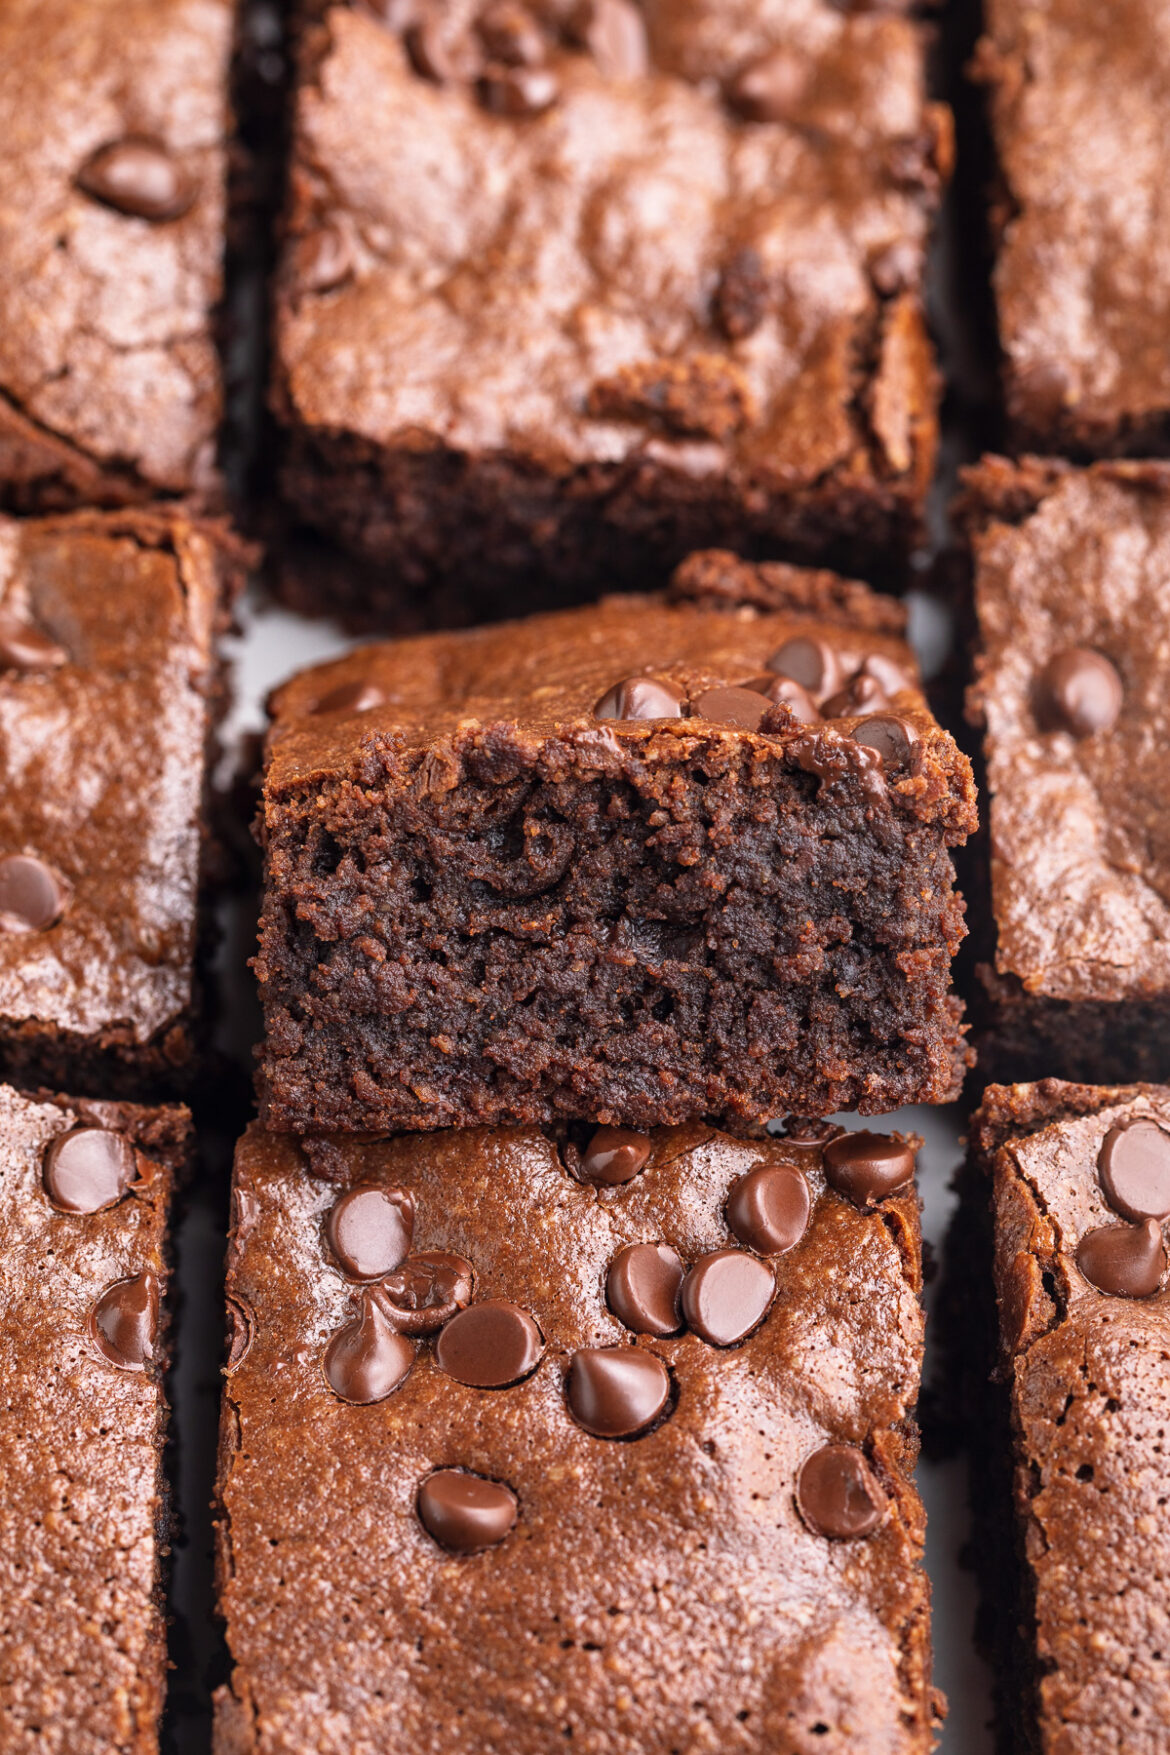
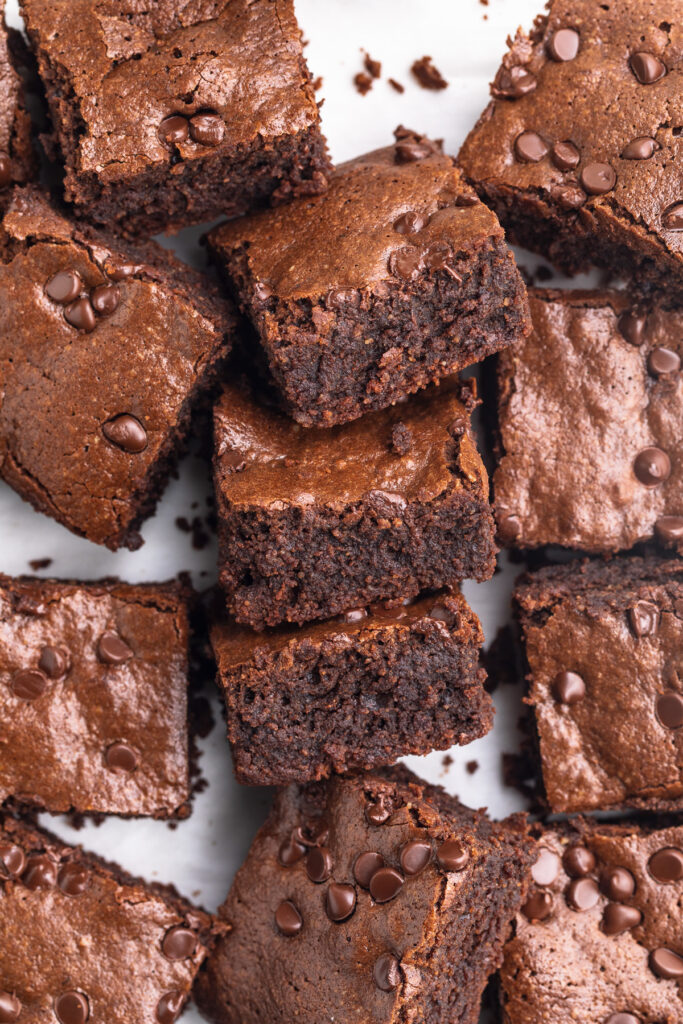
Perfectly rich and chocolatey almond flour brownies! Super easy to make with just one bowl and 8 ingredients. These brownies are my all-time favorite grain-free, dairy-free, and healthy dessert recipe!

overhead image of almond flour brownies.

What You’ll Need to Make Almond Flour Brownies

Almond Flour – Duh! Almond flour is the star of this show. I highly recommend blanched super-fine almond flour for these gluten-free brownies. I use and love this Bob’s Red Mill Almond Flour in all of my almond flour recipes!

Sugar – I used coconut sugar in my almond flour brownies to make them refined sugar-free. Coconut sugar is just as sweet and tasty as regular sugar, but less processed! However, you can totally use whatever kind of sugar you have on-hand.

Chocolate Chips – Plenty of chocolate chips for these double chocolate brownies! You’ll melt one cup and beat them into the batter, then add 1/2 cup of whole chocolate chips in at the very end. The result is ultra rich and chocolatey brownies, YUM!

three almond flour brownies stacked on top of each other.

Tips and Tricks

  • Beat the eggs and sugar together until super light and fluffy. This is what gives us that crisp, crackly brownie top!
  • Serve these almond flour brownies warm with a scoop of cold vanilla ice cream! I just LOVE turning this dessert into brownie sundaes, such a delicious and decadent treat.
  • Go ahead, add a handful of chopped walnuts to these brownies if you’d like! I personally don’t see anything wrong with walnuts in brownies, so have fun and make these your own.
close-up overhead image of almond flour brownies.

Adjust This Recipe to Your Dietary Needs

Make it Vegan: Simply swap the eggs for your favorite vegan egg substitute. I haven’t tested this option myself just yet, so if you do let me know how it works in the comments!

Make it Paleo: For paleo brownies, use coconut sugar in this recipe, and use either paleo chocolate chips or a chopped paleo chocolate bar. I recommend Hu Kitchen Chocolate Baking Gems!

Don’t Forget to Try These Almond Flour Recipes!

close-up overhead image of almond flour brownies.
4.72 from 14 votes

Almond Flour Brownies

Perfectly rich and chocolatey almond flour brownies! Super easy to make with just one bowl and 8 ingredients. These brownies are my all-time favorite grain-free, dairy-free, and healthy dessert recipe!
Print Pin Rate
Prep Time: 5 minutes
Cook Time: 30 minutes
Total Time: 35 minutes
Servings: 16 brownies

Ingredients

  • 1 cup sugar, I used coconut sugar
  • 3 large eggs
  • 1 1/2 cups almond flour
  • 3 tablespoons unsweetened cocoa powder
  • 1 teaspoon vanilla extract
  • 1/4 teaspoon salt
  • 1 1/2 cups chocolate chips, divided
  • 1/2 cup olive oil, avocado oil or vegetable oil

Instructions

  • Preheat oven to 350° Fahrenheit and line an 8×8-inch pan with parchment paper.
  • In a large bowl, beat together the sugar and eggs with either a hand or stand mixer. Continue beating for 3-5 minutes, until super light and fluffy.
  • Add the almond flour, cocoa powder, vanilla extract, and salt. Stir until everything is just combined, careful not to over-mix.
  • In a separate small bowl, add the olive oil and 1 cup of chocolate chips. Microwave in 30-second intervals, stirring between each interval, until chocolate chips are fully melted.
  • Pour melted chocolate chips and olive oil into the brownie batter, and stir to combine. Then, fold in the remaining chocolate chips.
  • Pour brownie batter into prepared pan and bake for 30-35 minutes, or until the center is just barely set. Remove from oven and let cool completely before slicing into squares.

Notes

  • These almond flour brownies will stay fresh in an airtight container, at room temperature, for up to 1 week. That is… if they last that long!
  • Nutrition

    Serving: 1brownie | Calories: 264kcal | Carbohydrates: 28g | Protein: 4.5g | Fat: 16g | Sugar: 20g

    If we’re being completely honest, I’m not sure the last day I went without eating any chocolate. I always manage to have at least a little chocolate throughout my day, and then of course, to end my day. My chocolate of choice is usually something I can quick and easy, that I can just grab-and-go. Recently I’ve had a batch of my 3-ingredient healthy crunch bars stored in my freezer which have been fabulous! And next to those, are my last batch of healthy homemade date caramels – SO GOOD.

    To keep my daily chocolate streak going, I decided to add yet another chocolatey treat to the mix. *Enter healthy edible brownie batter, made with just 5 ingredients!* This edible brownie checks all of my boxes. One, it’s chocolate. Two, it’s super easy to make. Three, there’s no baking require. And four, it’s entirely gluten-free, dairy-free, and low sugar! SO if you’re anything like me and just can’t live without at least a bite of chocolate to get you through the day, then you’re going to love this edible brownie batter. Enjoy, friends! And if you try this recipe, please leave a star rating and review. I always appreciate your support so so much!

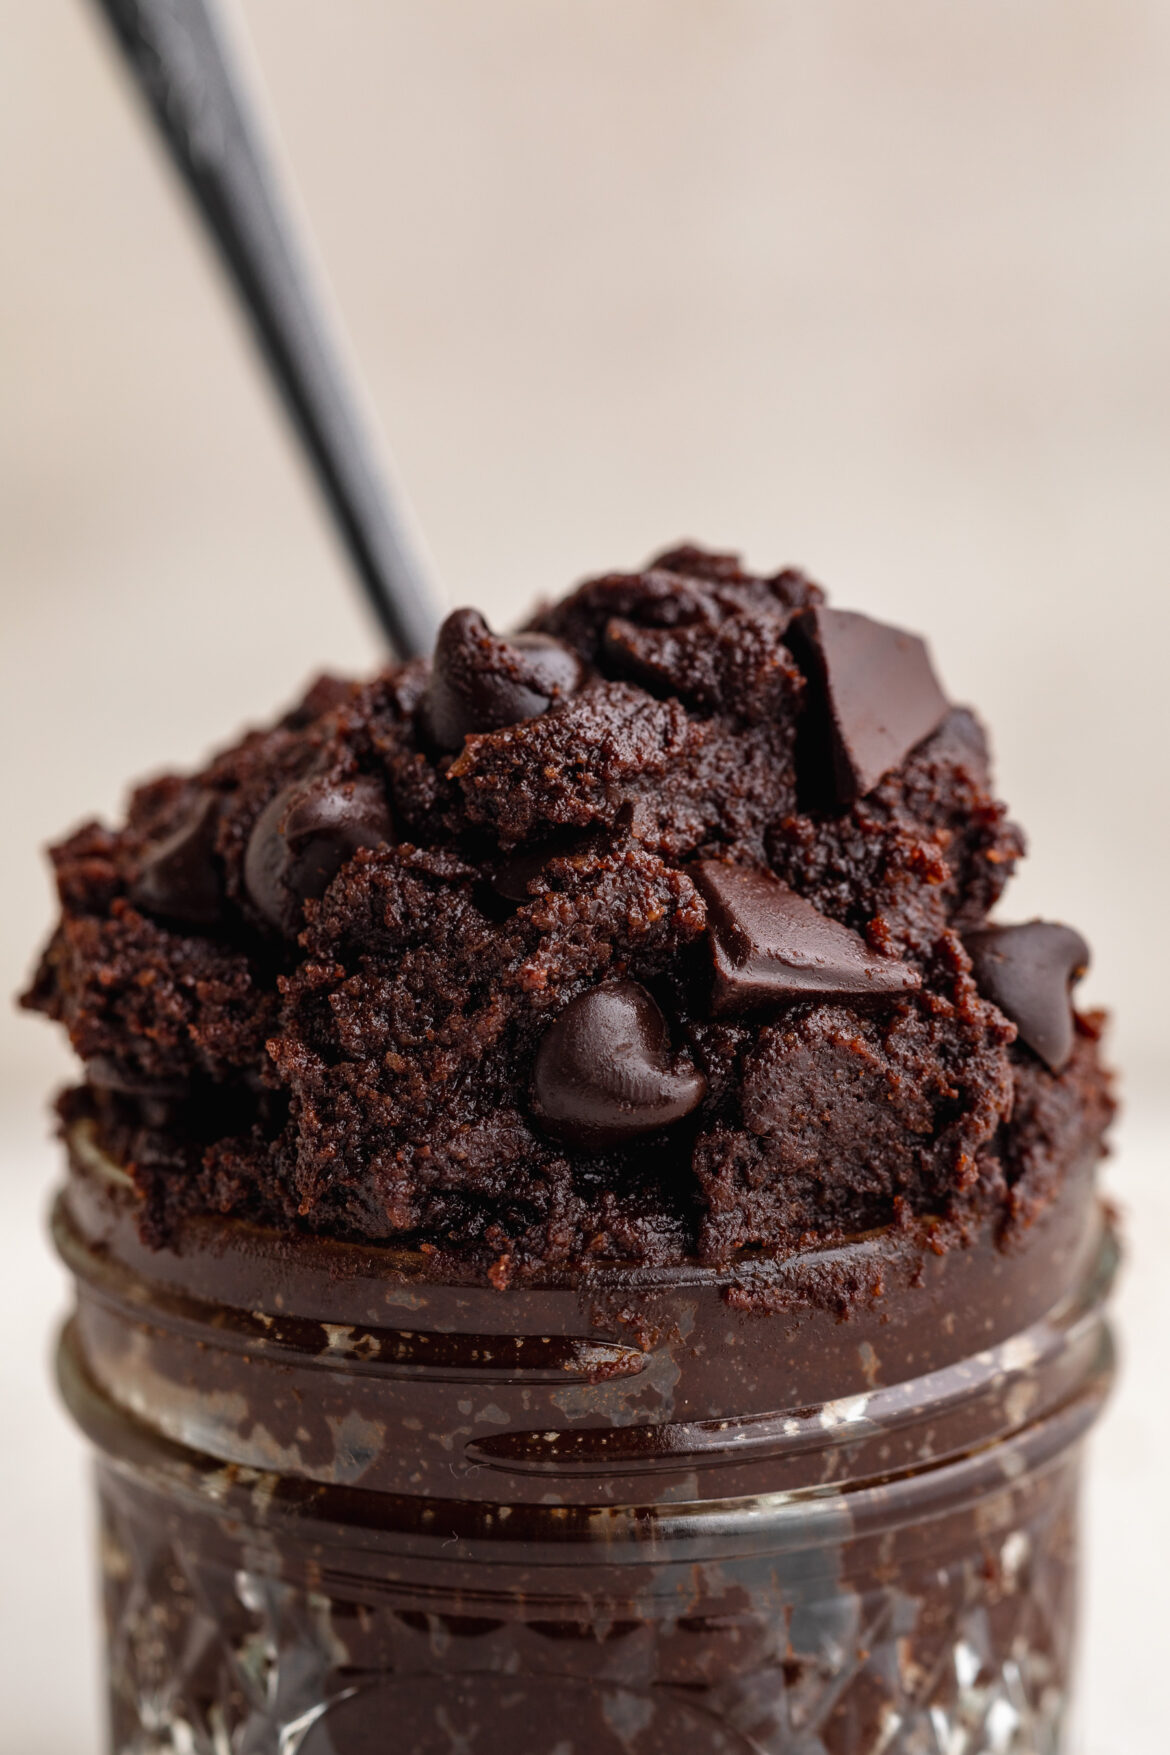
    healthy edible brownie batter in a jar on a tea towel.

    Why You’ll Love This Recipe

    This recipe is incredibly easy to make and comes together in just minutes! It’s perfect for when you want a quick, indulgent treat that’s also healthier than traditional brownie batter. Plus, it’s gluten-free, dairy-free, and can be adjusted for vegan or low-carb diets.

    What You Need to Make Edible Brownie Batter

    • Butter or Coconut Oil: Adds richness and a creamy texture to the batter. Coconut oil keeps the recipe dairy-free and adds a subtle tropical flavor, while butter offers a more classic taste.
    • Milk (Non-Dairy or Dairy): Helps create a smooth, spreadable consistency. You can use any milk, but non-dairy versions like almond or oat milk work great for a plant-based option.
    • Coconut Sugar or Brown Sugar: Sweetens the batter naturally, with coconut sugar providing a lower-glycemic option than regular sugar, while brown sugar brings a caramel-like sweetness.
    • Almond Flour or All-Purpose Flour: Almond flour keeps this recipe gluten-free and adds a slightly nutty flavor. If you plan on doing a lot of healthy, gluten-free baking, I recommend buying your almond flour in bulk on Amazon to save money! But If you’re not gluten-sensitive, regular all-purpose flour works too. But if you’re going to use all-purpose flour, make sure you heat-treat it first to ensure it’s safe to eat in this brownie batter.
    • Unsweetened Cocoa Powder: Adds that rich, deep chocolate flavor to give the batter its brownie taste.
    • Chocolate Chips: The final touch for a bit of texture and extra chocolatey goodness. I use and love the Guittard extra dark chocolate chips in all of my chocolate recipes (they’re dairy-free btw!).

    Is it Safe to Eat?

    Yes, this recipe is completely safe to eat! There are no raw eggs involved, and if you use almond flour, you avoid any potential issues with uncooked all-purpose flour. If using regular flour, be sure to heat-treat it first by microwaving or baking it to ensure it’s safe to consume.

    healthy edible brownie batter in a small jar with a spoon.

    How to Make Edible Brownie Batter

    Making this brownie batter couldn’t be easier! Simply mix together all the ingredients, fold in your chocolate chips, and enjoy right away. There’s no need for baking or any fancy equipment.

    Storage Tips

    Store your edible brownie batter in an airtight container in the refrigerator for up to 5 days. When you’re ready to enjoy it again, let it come to room temperature for a few minutes for a softer texture. You can also freeze it for up to 3 months.

    Switch Up The Flavors of This Edible Brownie Batter

    This edible brownie batter is delicious as-is, but you can easily switch up the flavors to keep things exciting! Try adding a pinch of sea salt, a splash of vanilla extract, or even some crushed nuts for extra crunch. For a minty twist, mix in a drop of peppermint extract!

    Adjust This Recipe to Your Dietary Needs

    • Vegan: Use coconut oil and non-dairy milk, and opt for dairy-free chocolate chips.
    • Low Carb: Swap out the coconut sugar for a low-carb sweetener like erythritol or monk fruit sweetener.
    • Nut-Free: Use all-purpose flour instead of almond flour and replace any nut-based ingredients with allergy-friendly alternatives.

    Healthy, Gluten-Free, and Low-Sugar!

    This edible brownie batter is a healthier alternative to traditional recipes, with just 5 ingredients and no refined sugar. It’s gluten-free, dairy-free, and can easily be made vegan, making it a great guilt-free treat you can whip up anytime.

    close up image of healthy edible brownie batter in a jar with a spoon.
    4.45 from 9 votes

    Healthy Edible Brownie Batter

    This simple and healthy edible brownie batter recipe is made with just 5 ingredients, is gluten-free, and can easily be adjusted to fit various dietary needs. It’s the perfect way to satisfy your brownie cravings without any baking required!
    Print Pin Rate
    Prep Time: 5 minutes
    Total Time: 5 minutes
    Servings: 4 servings

    Ingredients

    • 2 tablespoons softened coconut oil or butter
    • 3-4 tablespoons milk (I used non-dairy milk)
    • 1/4 cup coconut sugar or brown sugar
    • 3/4 cup almond flour or heat-treated all purpose flour
    • 1/4 cup unsweetened cocoa powder
    • 1/4 cup chocolate chips (I used extra dark chocolate chips)

    Instructions

    • Add all ingredient except chocolate chips to a large bowl and mix to combine.
    • Then, fold in the chocolate chips and enjoy!

    Notes

    The nutrition facts have been calculated for 4 servings, and without the chocolate chips. 

    Nutrition

    Serving: 1serving | Calories: 240kcal | Carbohydrates: 20g | Protein: 5.6g | Fat: 18g | Sugar: 13g

    These pumpkin protein balls were made pretty much just for my pumpkin-loving husband. I have never ever met anyone so obsessed with pumpkin pie than him. And after just one bite of these protein balls he said, “WOW these taste like PUMPKIN PIE!!!” and continued to eat the entire batch in two days… good thing they’re healthy, high in protein, and packed with collagen!

    Also, lucky for my husband, his birthday is coming up! SO fitting that the man obsessed with pumpkin has a birthday in October. This year, he’s getting another batch (ehhh maybe a double bath) or these pumpkin protein balls, my gluten-free pumpkin coffee cake, and maybe even a healthy pumpkin spice latte if I’m feeling really generous. Happy almost birthday, my love!

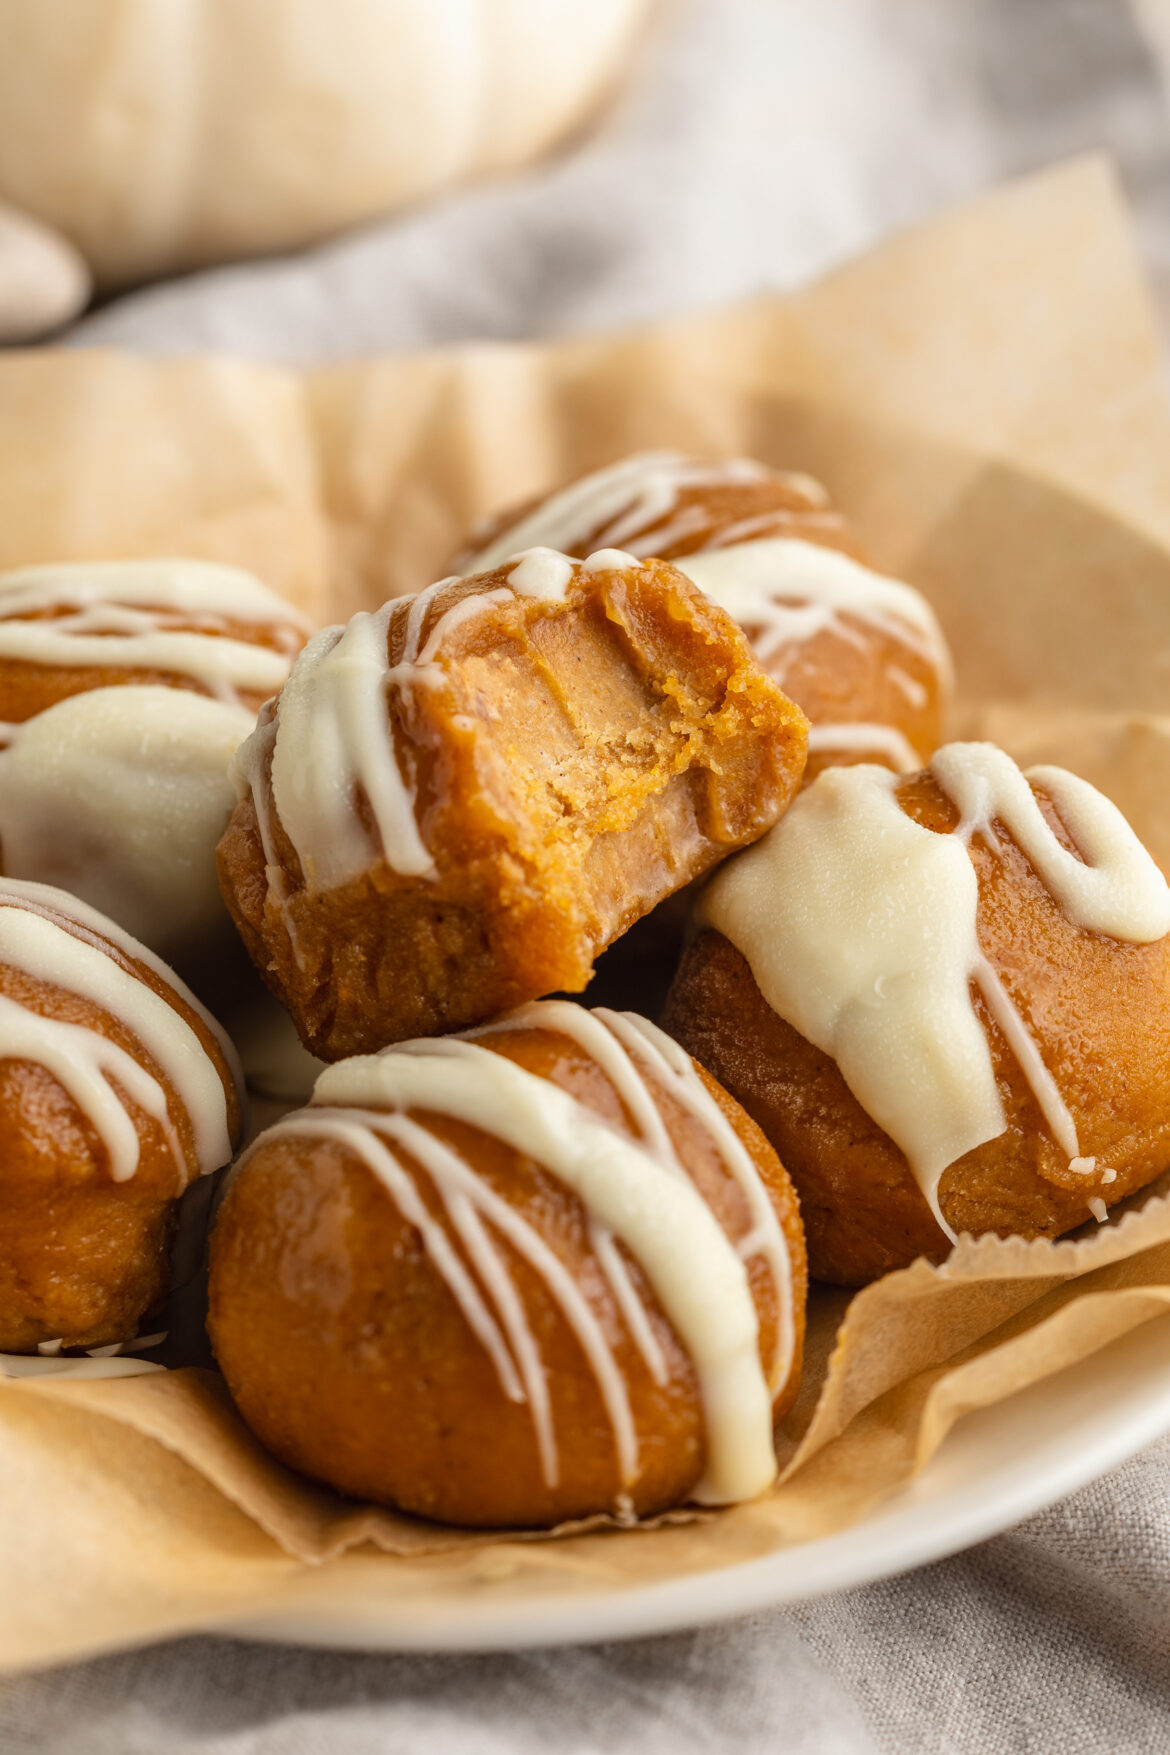
    overhead image of pumpkin protein balls on a plate with pumpkin spice on the side.

    Why You’ll Love This Recipe

    These pumpkin protein balls are an easy, healthy snack packed with protein, perfect for on-the-go fuel or a post-workout boost. They’re made with just six simple ingredients, are naturally gluten-free, and can easily be adapted to fit various dietary needs, like being vegan or low carb.

    What You Need to Make Pumpkin Protein Balls

    • Cashew Butter (or any nut/seed butter): Acts as the base of the recipe, adding creaminess, richness, and healthy fats.
    • Pumpkin Purée: Brings moisture and that classic fall flavor, while adding a dose of fiber and vitamins.
    • Almond Flour: Provides structure while keeping the recipe gluten-free and low in carbs.
    • Collagen Powder or Protein Powder: Boosts the protein content, but can be replaced with almond flour if you prefer. I use and love this collagen powder in my recipes!
    • Maple Syrup: Naturally sweetens the mixture without refined sugars.
    • Pumpkin Pie Spice: Adds the warm, cozy flavors of fall, making these protein balls irresistible.

    Does Any Nut Butter Work?

    Yes! While cashew butter is recommended for its creamy texture, any nut or seed butter—like almond, peanut, or sunflower seed butter—can be used as a substitute, making this recipe highly customizable.

    What Collagen or Protein Powder Do You Use?

    You can use unflavored collagen powder, any vanilla protein powder, or even extra almond flour for a protein powder-free option. Choose a protein powder that fits your dietary needs and flavor preferences.

    pumpkin protein balls with white chocolate drizzle on a plate.

    Storage Tips

    Store these pumpkin protein balls in an airtight container in the fridge for up to a week, or in the freezer for up to a month. Simply grab one from the freezer and enjoy!

    Switch Up The Flavors of These Pumpkin Protein Balls

    You can switch out the pumpkin puree for mashed banana or add mix-ins like chocolate chips, dried cranberries, or chia seeds for extra texture and flavor.

    Adjust This Recipe to Your Dietary Needs

    • Vegan: Use a plant-based protein powder and ensure your nut butter is dairy-free.
    • Nut-Free: Replace the almond flour with coconut flour or oat flour, and use sunflower seed butter in place of the cashew butter.
    • Low Sugar: Opt for a low-sugar protein powder or reduce the amount of maple syrup.
    pumpkin protein balls on a plate with white chocolate drizzled on top.
    No ratings yet

    Pumpkin Protein Balls

    These pumpkin protein balls are made with only six wholesome ingredients, gluten-free, dairy-free, and packed with protein for a healthy, and delicious snack! They're basically pumpkin pie in healthier, small bite form. I just know you're going to LOVE them!
    Print Pin Rate
    Prep Time: 5 minutes
    Chilling Time: 20 minutes
    Total Time: 25 minutes
    Servings: 12 servings

    Ingredients

    • 1/2 cup cashew butter or any nut/seed butter
    • 1/4 cup pumpkin puree
    • 1 cup almond flour
    • 2 scoops unflavored collagen powder or protein powder, or an additional 1/4 cup of almond flour
    • 3 tablespoons maple syrup
    • 1 teaspoon pumpkin pie spice

    Instructions

    • Add all ingredients to a bowl and mix well until fully combined.
    • Scoop energy bites with a medium sized cookie scoop and arrange the scoops onto a plate. Transfer the plate to the freezer for at least 20 minutes, or until they firm up a bit.
    • Remove the plate from the freezer and rolls the scoops into balls with your hands. Drizzle with melted white chocolate, enjoy right away, or store in the freezer for later on!

    Nutrition

    Serving: 1ball | Calories: 144kcal | Carbohydrates: 8.5g | Protein: 7g | Fat: 10g | Sugar: 4.25g

    Since my last cookie dough bark recipe went viral, I’m back with a protein version! This protein cookie dough bark is just as delicious, but with an additional 8 grams of protein per serving. I love making a batch at the beginning of the week to snack on all week long. But if you’re in need of a sweet treat with even more protein, give my single serve protein cookie a try (with 30 grams of protein). What can I say? I just really love a high-protein, gluten free, and low sugar snack!

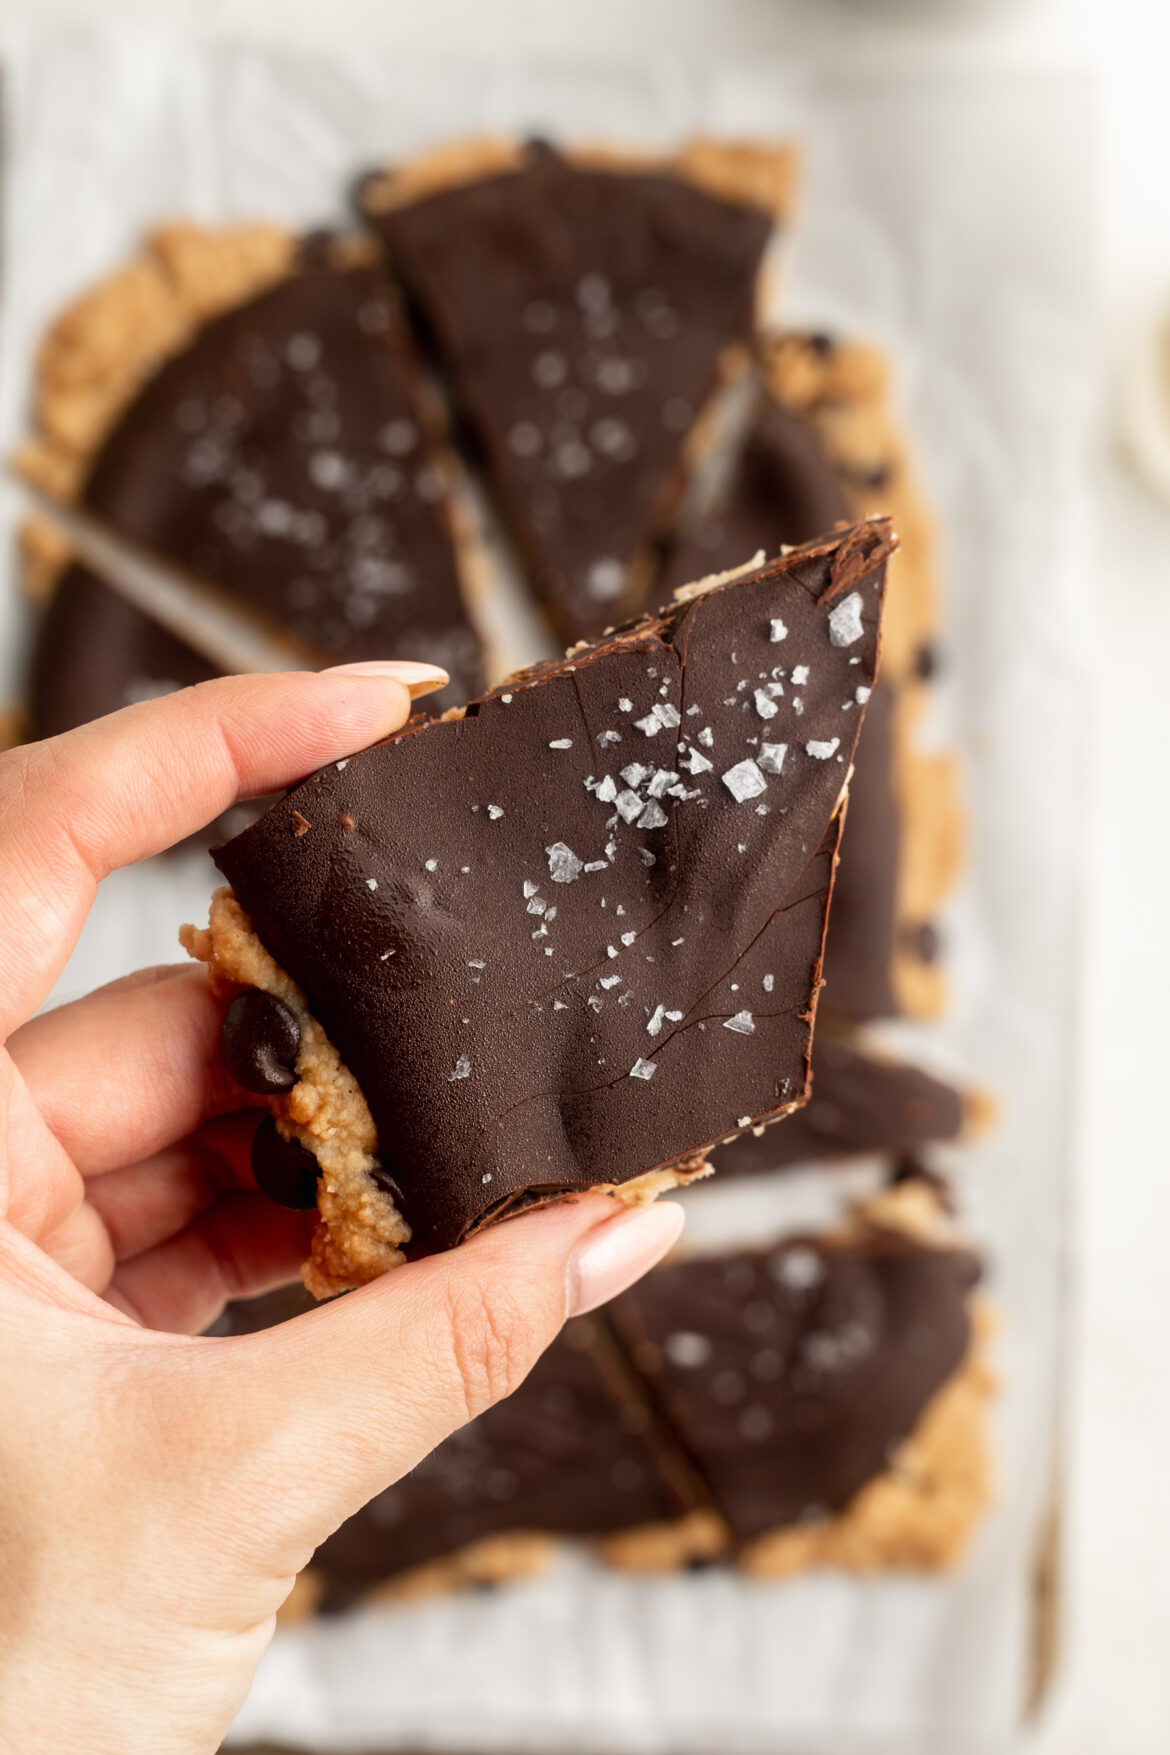
    protein cookie dough bark pieces stacked on top of each other.

    What You’ll Need to Make This Recipe

    • Almond Flour: Acts as a gluten-free and low-carb base. I buy almond flour in bulk on Amazon, since I use it in so many of my healthy gluten-free recipes!
    • Vanilla Protein Powder: Boosts the protein content, making this a nutritious snack option. I used the Be Well By Kelly Vanilla Protein Powder, but your favorite vanilla or unflavored protein powder will work. Or, feel free to swap out the protein powder for unflavored collaged – I like this brand!
    • Coconut Oil: Helps bind the dough while adding healthy fats. If you don’t have coconut oil, you can use melted butter in its place.
    • Maple Syrup: Provides natural sweetness, complementing the protein powder and chocolate chips!
    • Chocolate Chips: Adds sweetness and richness—both mixed into the dough and melted on top for the bark. I use and love the Guittard Dairy-Free Extra Dark Chocolate Chips in all of my recipes!

    Is This Cookie Dough Bark Safe to Eat?

    Yes! Since it’s made without raw eggs or raw flour, this cookie dough bark is safe to eat right out of the freezer. The protein powder and almond flour create a safe, edible base.

    Storage Tips

    Keep the bark in an airtight container in the freezer. It stays fresh for up to two months… but there’s no way it’ll last that long! To enjoy, let it thaw for a minute or two at room temperature before serving.

    protein cookie dough bark on a baking sheet.

    Switch Up The Flavors of This Protein Cookie Dough Bark

    Get creative by changing the flavor combinations:

    • Swap out the vanilla protein powder for chocolate or peanut butter protein.
    • Add chopped nuts, seeds, or dried fruit to the mixture for extra texture and nutrients.
    • Drizzle peanut butter or caramel over the bark before freezing.

    Adjust This Recipe to Your Dietary Needs

    • Make it Vegan: Use a plant-based protein powder and dairy-free chocolate chips.
    • Make it Low Carb: Replace maple syrup with a sugar-free sweetener like monk fruit syrup, and opt for sugar-free chocolate chips.
    • Make it Nut-Free: Swap the almond flour for coconut flour to make this a nut-free cookie dough bark recipe.

    Why You’ll Love This Recipe

    This recipe is perfect for anyone looking for a high-protein, low-sugar, gluten-free treat. It’s made with just 5 simple ingredients and can easily be adjusted to meet various dietary needs. Plus, it’s a fun way to enjoy cookie dough in a healthier, grab-and-go type form!

    a piece of protein cookie dough bark with flaky salt on top.
    5 from 6 votes

    Protein Cookie Dough Bark

    This 5-ingredient protein cookie dough bark recipe is a quick and healthy snack that’s gluten-free and high in protein! It's easy to customize with different flavors and can easily be made vegan or low-carb. Store this protein cookie dough bark in the freezer for a quick, guilt-free snack anytime!
    Print Pin Rate
    Prep Time: 5 minutes
    Freezing Time: 1 hour
    Total Time: 1 hour 5 minutes
    Servings: 8 servings

    Ingredients

    • 1 cup almond flour
    • 1/2 cup vanilla or unflavored protein powder
    • 1/4 cup coconut oil, melted
    • 1/4 cup maple syrup or your favorite liquid sweetener
    • 1 1/2 cups chocolate chips, divided

    Instructions

    • Mix together the almond flour, protein powder, coconut oil, and maple syrup in a bowl. Add in ½ cup of chocolate chips and mix again to combine.
    •  Line a small baking sheet or large plate with parchment paper, then place the cookie dough mixture on top of the parchment paper. Spread and flatten the mixture with your hands to form a large piece of cookie dough bark.
    • Melt the remaining 1 cup of chocolate chips, then pour the melted chocolate over the cookie dough bark. Spread the chocolate into an even layer, then place the bark in the freezer for at least one hour.
    • When ready to eat, remove the protein cookie dough bark from the freezer and either cut or break into large pieces. Enjoy right away and store leftover bark in the freezer for later!

    Nutrition

    Serving: 1piece | Calories: 357kcal | Carbohydrates: 32g | Protein: 8g | Fat: 23g