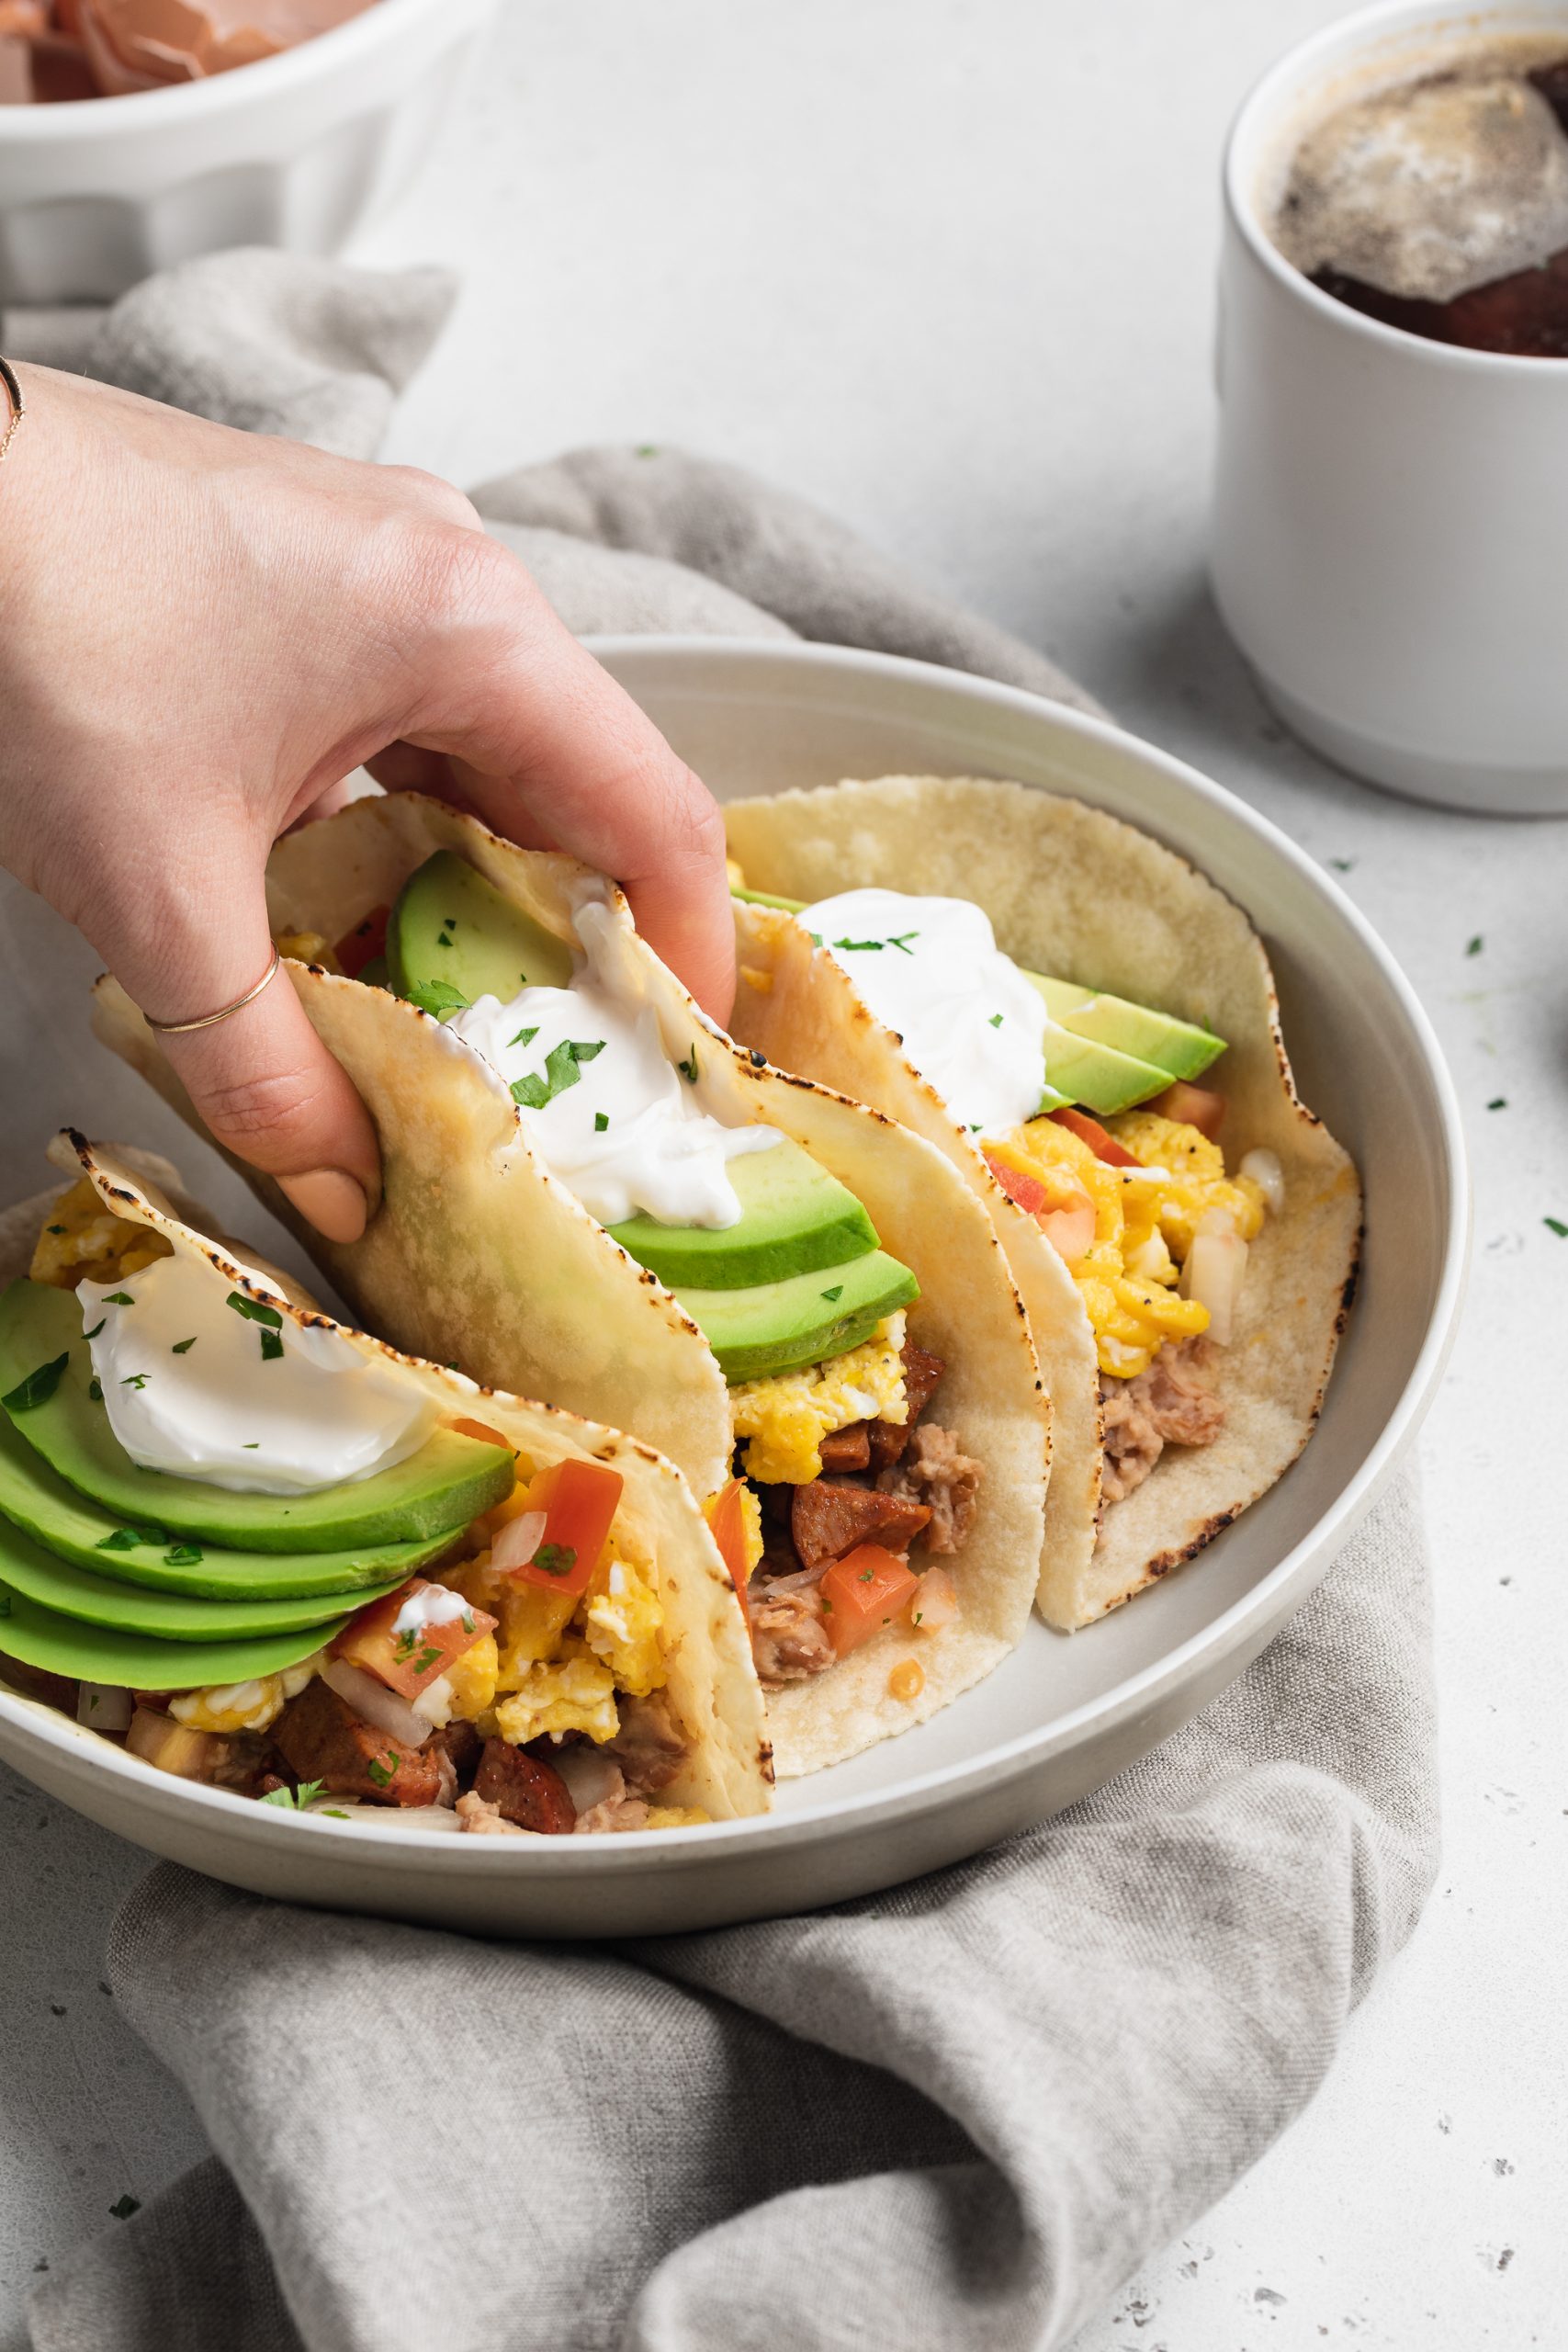
Tag

breakfast

Browsing

Perfectly fluffy and delicious coffee cake muffins made gluten-free, with a dairy-free option as well! They’re irresistibly soft, sweet, and complete with a cinnamon streusel topping. I especially love enjoying a warm gluten-free muffin with my coffee in the morning – there’s no better way to start the day!

three gluten-free coffee cake muffins stacked on top of each other

What You’ll Need For This Recipe

Gluten-Free All Purpose Baking Flour – I use Bob’s Red Mill Gluten Free 1-1 Baking Flour in most of my gluten-free baking recipes. It bakes up beautifully and can pretty much be used as a 1:1 swap for regular all purpose flour! However, you can use any gluten-free all purpose baking flour you’d like. Though when it comes to gluten-free flours, it’s super important to the integrity of your bake that your flour contains xanthan gum. Xanthan gum creates structure and will essentially hold these muffins together. Therefore, if your gluten-free flour doesn’t have xanthan gum, supplement it with 1 teaspoon of xanthan gum in this gluten-free coffee cake muffins recipe.

Butter – Any butter you’d like will work here! Salted, unsalted, and non-dairy butter all bake perfectly in this recipe. When it comes to salted butter, I truly don’t believe any butter has enough salt in it to make any difference in a recipe. So, feel free to use whatever butter you have on hand!

Eggs – Bring your eggs to room temperature before getting started on this delicious breakfast or snack recipe. By doing this, we reduce the risk of the cold eggs re-solidifying the melted butter. It’s also always a great rule-of-thumb to have all ingredients at room temperature before starting on any baked goods recipe!

Top Tips

  • You can freeze leftover gluten-free muffins for up to 3 months! I currently have half my batch in the freezer right now, ensuring they don’t go bad before I have a chance to eat them. Though for muffins you plan on eating right away, simple store them in an airtight container at room temperature for up to 1 week.
  • Avoid over-mixing the batter, as this could result in tough and chewy muffins! Therefore, when folding the wet ingredients into the dry, simply mix until no more flour pockets remain. Once just combined, put down the spatula and head straight into the next step!
  • These muffins are best enjoyed warm! So to warm them up after baking, I recommend either popping them in the microwave for 10-15 seconds, or into the toaster for a couple of minutes. Once warm, they’re irresistibly soft and flufy!

Adjust This Recipe To Your Dietary Needs

Make it Vegan – While I haven’t tried this variation myself yet, you may be able to get away with replacing the eggs in these muffins with a vegan egg substitute. I’ve used the Bob’s Red Mill Vegan Egg Substitute in other recipes, and have almost always found it successful. Flax eggs might work here as well, though expect a slightly more dense gluten-free muffin if going that route.

Cut the Recipe in Half – This recipe makes 24 gluten-free coffee cake muffins, but if that sounds like too much for you, you can easily cut this recipe in half! That’s right, use half of all ingredients listed for just 12 perfect muffins.

Use Regular Flour – Feel free to simply swap the gluten free all purpose flour for regular all purpose flour in this recipe.

Other Delicious Mix-Ins

Instead of the cinnamon and streusel topping, feel free to add one of the following to your gluten-free muffins:

  • Blueberries
  • Sliced Bananas
  • Chocolate Chips
  • Cranberries and Orange Zest
  • Lemon Juice and Poppyseeds
  • Strawberries
  • Raspberries
  • or simply leave them plain!

Perfect Gluten-Free Coffee Cake Muffins

3 from 160 votes
Recipe by Samantha Course: BreakfastDifficulty: Easy
Servings

24

servings
Prep time

10

minutes
Cooking time

20

minutes
Total time

30

minutes

Perfectly fluffy and delicious coffee cake muffins made gluten-free, with a dairy-free option as well! They’re irresistibly soft, fluffy, sweet, and complete with a cinnamon streusel topping. I especially love enjoying a warm gluten-free muffin with my coffee in the morning – there’s no better way to start the day!

Ingredients

  • For the gluten-free muffins:
  • 3 cups gluten-free all purpose baking flour

  • 2 teaspoons baking powder

  • 1 teaspoon cinnamon

  • 1/2 teaspoon salt

  • 1 cup sugar

  • 1 cup butter, melted (I used non-dairy butter)

  • 3/4 cup milk (I used non-dairy almond milk)

  • 3 eggs, at room temperature

  • 1 teaspoon vanilla extract

  • For the crumb topping:
  • 1 cup gluten-free all purpose baking flour

  • 1 cup brown sugar

  • 1/2 cup butter, softened

  • 1 teaspoon cinnamon

Directions

  • Preheat oven to 350° Fahrenheit and line a muffin tin with cupcake liners.
  • Mix together the flour, baking powder, cinnamon, and salt in a large bowl.
  • In a separate bowl, whisk together the sugar, melted butter, milk, eggs, and vanilla extract.
  • Slowly pour the wet ingredients into the dry ingredients, mix until just combined. Fill each muffin mold with about ¼ cup of batter.
  • Mix together all crumb topping ingredients in a bowl, then sprinkle over each muffin.
  • Bake for 20-25 minutes or until a toothpick inserted down the center of a muffin comes out clean. Let cool in tin for 10 minutes before transferring to a wire cooling rack to cool completely.

Notes

  • Gluten-Free All Purpose Flour: I used Bob’s Red Mill Gluten Free 1:1 Baking Flour.
  • Butter: I used Earth Balance Vegan Buttery Sticks to make this recipe dairy-free.

Did you make this recipe?

Share it and tag @samdoesherbest on Instagram!

Like this recipe?

Follow us @samdoesherbest on Pinterest

Other Delicious Gluten-Free Recipes You Must Try!

These zucchini hash browns are perfectly seasoned, easy to make, and incredibly delicious! Serve alongside a fried egg and some fresh herbs for a quick and easy breakfast.

two zucchini hash browns on a plate with a fried egg on top

Hash browns have always been and always will be my favorite part of a breakfast plate. I love my hash browns extra crispy, with just the right amount of flavor. These zucchini hash browns hit the spot while being low-carb and super healthy. And the best part? They require a whopping four ingredients to make! You can catch me throwing together these super easy zucchini hash browns all zucchini-season long. I also plan on prepping a big batch for my freezer to reheat and enjoy in the winter months.

If you’re like me and have difficulty finding time to throw together a complete breakfast for yourself in the morning, then you need this recipe in your life. I highly recommend doubling or even tripling it ahead of a long week and keeping them in the fridge or freezer as a quick grab-and-go breakfast all week or month long.

What You Need To Make Zucchini Hash Browns

Zucchini – Peak zucchini season runs from May through August, but can usually be found at grocery stores year round. If you own a zucchini plant, you know how fruitful these plants are (like zucchini for daysssss). To prepare zucchini for this recipe, start by trimming off one end of the zucchini and running that same end down a medium box grater. Immediately transfer the shredded zucchini to a dish cloth and get started with this recipe!

Egg – The egg not only adds protein to these zucchini hash browns, but holds them together while they cook. Most zucchini hash browns call for all purpose flour or cheese to help bind them together. Though I found that in order to keep them gluten-free and dairy-free you’ll just need one egg to hold these babies together.

Garlic Powder – I kept the seasoning light in this recipe as to not overwhelm this mild veggie. Feel free to add whatever other seasoning you’d like or even leave the garlic powder out altogether!

How To Freeze

  • Let the zucchini hash browns cool completely before transferring to a freezer-safe bag or container.
  • When ready to eat, remove from the freezer and heat in a 400° Fahrenheit oven for 5-8 minutes or until warmed through. Or you can pop them in the microwave for 1 minute – they won’t be as crispy but will still be delicious.
  • Either wrap them in a napkin to take with you and enjoy during your morning commute or top with a fried egg and fresh herbs for a complete breakfast!

Zucchini Hash Browns (Gluten-Free, Dairy-Free)

0 from 0 votes
Recipe by Samantha Russo Course: BreakfastDifficulty: Easy
Servings

3

hash browns
Prep time

30

minutes
Cooking time

25

minutes
Total time

55

minutes

These zucchini hash browns are perfectly seasoned, easy to make, and incredibly delicious! Serve alongside a fried egg and some fresh herbs for a quick and easy breakfast.

Ingredients

  • 2 zucchini, shredded

  • 1 egg

  • 1/2 teaspoon salt, divided

  • 1/2 teaspoon garlic powder

Directions

  • Preheat oven to 400° Fahrenheit and line a baking sheet with parchment paper.
  • Place shredded zucchini on a dish towel in a single layer, then sprinkle with 1/4 teaspoon salt. let sit for 30 minutes to draw out as much moisture as possible.
  • Wrap zucchini in towel and squeeze out as much liquid as possible, then transfer zucchini to a bowl.
  • Add in the remaining ingredients then mix until well combined.
  • Divide into 3 hash browns and transfer to the baking sheet.
  • Bake for 25-30 minutes or until golden brown, remove and let cool slightly before serving.

Recipe Video

Notes

  • Feel free to add or remove any seasoning you’d like, don’t be scared to make this recipe your own!

Did you make this recipe?

Share it and tag @samdoesherbest on Instagram!

Like this recipe?

Follow us @samdoesherbest on Pinterest

More Healthy Recipes You’ll Love

These peanut butter and jelly baked oats are the most delicious way to start your morning! Creamy peanut butter, your favorite jelly, and just a touch of maple syrup are what make this recipe special. Whip up these peanut butter and jelly baked oats on mornings when you want something that’s perfectly sweet, comforting, and oh-so-satisfying.

overhead image of peanut butter and jelly baked oats with milk and blueberries on the side.

The baked oats life chose me. The carrot cake baked oats recipe I shared a few months back literally blew UP! Everyone was going crazy over that recipe, and tbh I don’t totally blame them. Though while the carrot cake version is delicious, I wanted to give you guys options. So I brainstormed some classic favorite flavor combos and ultimately landed on peanut butter and jelly. There is nothing more iconically wholesome than peanut butter and jelly. And when added to baked oats, the results is truly comfort food made HEALTHY.

What You Need To Make Peanut Butter and Jelly Baked Oats

Rolled Oats – Oats are an ideal breakfast, with plenty of vitamins, mineral, and health benefits! Feel free to use either rolled oats or quick oats in this recipe – both will work. I almost always have a bag of rolled oats in my house as an easy and versatile gluten-free grain.

Banana – You can use either a mashed banana or half a cup of apple sauce in this recipe. The mashed fruit act as a fort of egg-replacer in this vegan breakfast recipe.

Peanut Butter – I’d recommend opting for smooth peanut butter if you have it, but if not crunchy will work too. Though keep in mind that the peanut butter will be blended with all ingredients in the second step. Therefore, if you use crunchy, there’s a good chance it will be no longer crunchy by the end of this recipe.

Jam – Go crazy with this one! Literally use whatever jam or jelly your heart desires. I had some homemade blueberry jam lying around, so I used that. But i’m sure any jam or jelly flavor will taste incredible in these peanut butter and jelly baked oats!

Adjust This Recipe To Your Dietary Needs

Add Protein: Feel free to add a tablespoon of your favorite protein powder to increase the protein in these baked oats. If you end up adding protein powder, I’d recommend increasing the almond milk amount to 1/2 cup instead of 1/3 cup.

Make it Grain-Free: To make these peanut butter and jelly baked oats grain-free, use coconut flour in place of the rolled oats.

Peanut Butter and Jelly Baked Oats (Vegan, Gluten-Free)

0 from 0 votes
Recipe by Samantha Russo Course: BreakfastCuisine: AmericanDifficulty: Easy
Servings

1

serving
Prep time

5

minutes
Cooking time

20

minutes
Total time

25

minutes

These peanut butter and jelly baked oats are the most delicious way to start your morning! Creamy peanut butter, your favorite jelly, and just a touch of maple syrup are what make this recipe special. Whip up these peanut butter and jelly baked oats on mornings when you want something that’s perfectly sweet, comforting, and oh-so-satisfying.

Ingredients

  • 1/2 cup rolled oats

  • 1 banana, mashed

  • 1/3 cup almond milk, see Notes

  • 1 tablespoon maple syrup

  • 1 tablespoon peanut butter

  • 1/2 teaspoon baking powder

  • pinch of salt

  • 1/2 teaspoon cinnamon

  • 1/4 teaspoon vanilla extract

  • 1 tablespoon jam of choice

Directions

  • Preheat your oven to 350° Fahrenheit and lightly grease a ramekin.
  • Add all ingredients except the jam to a blender and blend until smooth.
  • Pour into ramekin, then swirl in the jam. Bake for 20-25 minutes.

Recipe Video

Notes

  • Almond Milk: Feel free to use any dairy-free milk you’d like instead of almond milk.

Did you make this recipe?

Share it and tag @samdoesherbest on Instagram!

Like this recipe?

Follow us @samdoesherbest on Pinterest

Other Delicious Breakfast Recipes

These cranberry orange scones are perfectly flaky and sweet! I took a traditional recipe and turned it gluten and dairy-free with just a few simple swaps. These scones taste incredible with a warm cup of coffee for breakfast or lightly toasted as an afternoon snack.

Cranberry orange scones stacked on top of eachother.

Breakfast in bed was the big thing on Mother’s Day in my house. And because my dad can barely boil an egg, the cooking of breakfast was always my job. I always loved to cook, so I had fun thinking up a breakfast menu for my mom on Mother’s Day. I don’t remember too many menu items from over the years, but I do remember making her cranberry orange scones one year. And the only reason I remember is because I truly couldn’t believe how INCREDIBLE they were! Ever since that Mother’s Day, I’ve thought about those scones frequently. And honestly, I have no good excuse as to why I haven’t remade them sooner?!

Though for this year’s cranberry orange scones, I added my Sam Does Her Best signature gluten-free and dairy-free twist. You know what it is. Not going to lie here either, I was pretty worried these just wouldn’t work sans gluten and dairy. But to my surprise, they definitely did. And not only did they work, but they taste even better than what I remember! So without further ado, I present to you gluten-free and dairy-free cranberry orange scones that will change your Mother’s Day game forever.

What You Need To Make Cranberry Orange Scones

Gluten-Free Flour – I use and recommend Bob’s Red Mill Gluten-Free 1:1 Baking Powder, it’s pretty much an exact dupe to regular all purpose flour. Though feel free to use any gluten-free flour you’d like, my only recommendation would be to make sure that it contains xantham gum. Xantham gum is a stabilizer and a key ingredient in holding your baked goods together.

Dairy-Free Butter – Make sure your butter is ice cold for this recipe! I’d even recommend dicing it into cubes and then sticking it in the freezer for 10 minutes or so. Cold butter is signature to any and all scones because when baked, it gives your scones that irresistible flaky texture.

Dairy-Free Milk – I used almond milk and had great results, but feel free to use whatever unsweetened dairy-free milk you’d like in these cranberry orange scones. You also want to make sure that the milk is cold, in order to ensure the butter in this recipe stays cold.

Tips and Tricks

  • Use a fork to combine the butter into the flour. When mixing, lightly mash the butter cubes with the back of the fork. You’re simply looking to break up the butter into the dry ingredients. You’ll know you’re done with this step when you have a crumbly mixture and your butter is the size of peas.
  • Lightly whisk the eggs before adding them into the cranberry orange scones dough. Crack them in a bowl and give them a quick whisk with a fork to break up the yolks before proceeding with the recipe.
  • Make sure your surface is well-floured before transferring the dough onto it. The dough will be quite sticky, but when introduced to flour on your work surface, will be much easier to handle! Continue sprinkling gluten-free flour on the surface, on your hands, or on the dough itself whenever it feels too sticky to work with.

Cranberry Orange Scones (Gluten-Free, Dairy-Free)

0 from 0 votes
Recipe by Samantha Russo Course: SnacksCuisine: ScottishDifficulty: Intermediate
Servings

8

scones
Prep time

10

minutes
Cooking time

20

minutes
Total time

30

minutes

These cranberry orange scones are perfectly flaky and sweet! I took a traditional recipe and turned it gluten and dairy-free with just a few simple swaps. These scones taste incredible with a warm cup of coffee for breakfast or lightly toasted as an afternoon snack.

Ingredients

  • 2 1/2 cups gluten-free flour

  • 1/4 cup almond flour

  • 1/4 cup sugar

  • 1 tablespoon baking powder

  • 1 tablespoon orange zest

  • 8 tablespoons cold dairy-free butter, cut into 1/4-inch cubes

  • 1 cup cold dairy-free milk

  • 2 large eggs, whisked

  • 1 cup dried cranberries

  • For the egg wash:
  • 1 egg, whisked

  • For the icing:
  • 1/2 cup powdered sugar

  • 3 teaspoons fresh orange juice

Directions

  • Preheat oven to 400° Fahrenheit.
  • Mix together the gluten-free flour, almond flour, sugar, baking powder, and orange zest in a large bowl.
  • Add in the cubed butter and mix with a fork until the butter is the size of peas, then fold in the cranberries.
  • Add in the cold milk and whisked eggs, mix until just combined.
  • Transfer dough to a floured sheet of parchment paper set on a work surface and gently press into a 1-inch thick circle.
  • Slice into six triangles and transfer to a baking sheet, then brush with egg wash and sprinkle with extra sugar.
  • Bake for 15-20 minutes or until golden brown, then remove from oven, gently separate scones, and transfer to a wire rack to cool.
  • Make the icing by whisking the powdered sugar and orange juice together in a small bowl, then drizzle over cooled scones.

Recipe Video

Notes

  • Ingredient Swaps: Feel free to use all purpose flour instead of gluten-free flour, and leave out the almond flour if you’d like. You can also swap regular butter for the dairy-free butter and cow’s milk for the dairy-free milk in this recipe.

Did you make this recipe?

Share it and tag @samdoesherbest on Instagram!

Like this recipe?

Follow us @samdoesherbest on Pinterest

More Delicious Gluten-Free and Dairy-Free Recipes