This homemade granola recipe has been a staple in my home for over 3 years! In fact, it’s one of the first recipes I ever developed as a food blogger, along with my almond flour brownies and gluten-free blueberry muffins. I also can’t stress enough how incredibly EASY this recipe is to make. I was on TikTok last week and I watched a fellow food blogger make a homemade granola with like 12 ingredients and I was like… NO no, no need for that. So I finally carved out the time to share this 5-ingredient granola recipe with you!
I should also note that this is one of those recipes that is super easy to customize. Need to make it nut-free? Replace the chopped nuts with additional oats and unsalted pumpkin seeds or sunflower seeds (also, check out the nut-free section on my blog for more nut-free recipes!). Craving something more chocolate-y? Toss in some dark chocolate chunks once the granola has cooled. Or, if you need a sugar-free granola recipe, replace the maple syrup with your favorite sugar-free liquid sweetener – it’s that simple!
Happy homemade granola making, friends! And if you give this recipe a try, I’d really love it if you left a comment and a 5 STAR review on this post. Your support means the world to me!
What You’ll Need to Make this Homemade Granola Recipe
Peanut Butter: For a personalized touch, opt for almond butter, sunflower seed butter, or any nut or seed butter of your choice. To keep it health-conscious, go for a natural, unsweetened variety.
Melted Coconut Oil: Customize your granola with melted butter, olive oil, or any vegetable oil as alternatives to coconut oil.
Maple Syrup or Honey: Tailor the sweetness to your liking by choosing between agave nectar, brown rice syrup, or a sugar-free syrup for a low-sugar twist. The decision between maple syrup and honey is entirely based on your flavor preference.
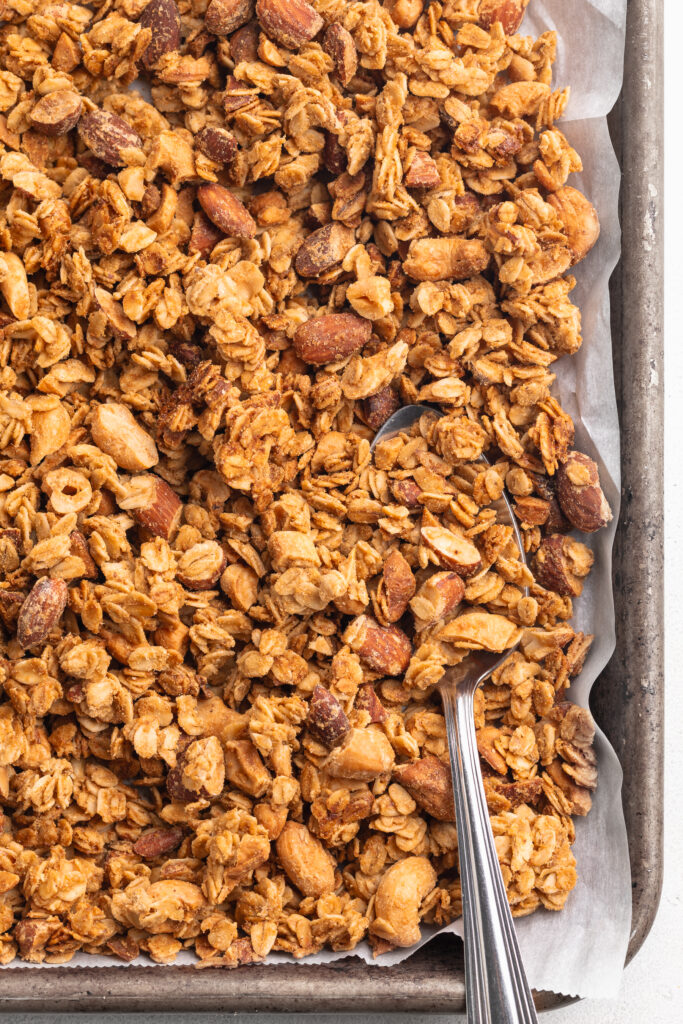
Rolled Oats: For a gluten-free recipe, ensure the oats you buy are entirely gluten-free, like these ones from Bob’s Red Mill! Opt for old-fashioned oats to achieve a hearty and satisfying texture in your granola.
Chopped Unsalted Nuts: Make your granola uniquely yours by selecting nuts that align with your taste or dietary preferences. I used almonds and cashews in my granola, but really any unsalted nuts will do! For a nut-free alternative, consider using seeds such as pumpkin or sunflower seeds.
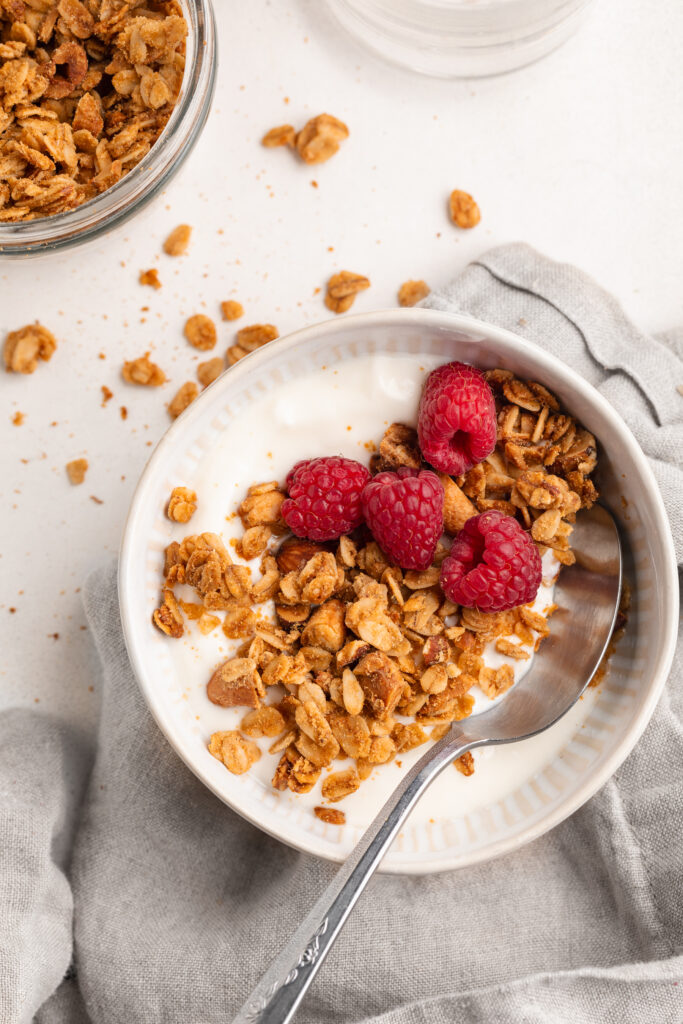
Is this Homemade Granola Recipe Healthy?
Yes, this homemade granola recipe is relatively healthy. It incorporates nutrient-rich ingredients like oats, nuts, and coconut oil, providing a good balance of essential fats, fiber, and protein. Additionally, the recipe allows for customization, making it adaptable to various dietary preferences and ensuring a wholesome breakfast or snack!

Sam’s Recipe Tips
- Mix It Up: Experiment with different nut and seed combinations to tailor the granola to your taste buds.
- Watch Closely: Keep a close eye on the granola during the last few minutes of baking to prevent over-browning.
- More Clusters: For delightfully big granola chunks, press the mixture firmly onto the baking sheet before baking.

5-Ingredient Healthy Homemade Granola Recipe
Ingredients
- 1/4 cup peanut butter or any nut/seed butter
- 1/4 cup melted coconut oil
- 1/4 cup maple syrup or honey
- 2 cups rolled oats
- 1 cup chopped unsalted nuts (almonds, walnuts, pecans, and/or cashews)
Instructions
- Preheat oven to 350° Fahrenheit and line a large baking sheet with parchment paper.
- In a large bowl, mix together the peanut butter, melted coconut oil, and maple syrup or honey.
- Add in the rolled oats and chopped nuts, then mix to combine.
- Transfer the granola mixture to your prepared baking sheet and spread the granola into an even layer across the baking sheet.
- Bake the granola for 15 minutes, then remove it from the oven and use a spatula to flip and toss the granola. Put it back in the oven for an additional 5 minutes, then turn off the oven and leave the granola in the turned-off oven for 30 minutes.
- Remove granola from the oven and let it cool completely before serving or storing.


")